Want to know how to distress furniture with chalk paint? It’s one of the more popular looks these days and I’m going to tell you everything you need to know about distressing furniture with chalk paint! A little bit of background if we haven’t met yet… I was a BB Frosch chalk paint rep years ago and have been sharing crafts and home projects on my blog for over 10 years! Have a look around.
What Is Distressing?
You’ve probably seen online articles and episodes of home design TV shows that talk about methods for “distressing” furniture, or about the popularity of the “distressed” look in the home. But what exactly is “distressing”?
Simply put, distressing is a way to take an ordinary piece of furniture and give it the appearance of being a well-used cherished antique. Why would you want to do that? Well, I think there’s something sweet and nostalgic about the appearance of furniture that looks like it’s been around a while. It looks like a piece that is well-loved and has a lot of fond memories associated with it. It’s humble, but somehow also a bit elegant.
There are several ways to achieve this look, but the most common is to give any piece of wood furniture a distressed look by painting and then lightly sanding away some of the paint. This is usually done with chalk paint. The matte finish of chalk paint is perfect to give your furniture an antique appearance, and it sands easily to create a distressed finish.
You can also create an aged distressed look by applying tinted wax finishes over painted wood furniture, or by painting your furniture with a light color stain so the paint looks old and faded.
Is There A Chalk Distressing Paint?
There isn’t really chalk-distressing paint. Chalk paint will give you a distressed look. I see a lot of people online mentioning distressing paint but it’s really just referring to the finished look. You can make the paint look distressed but there’s no specific brand or type of paint called distressed paint.
What Is The Chalk Paint Distressed Look?
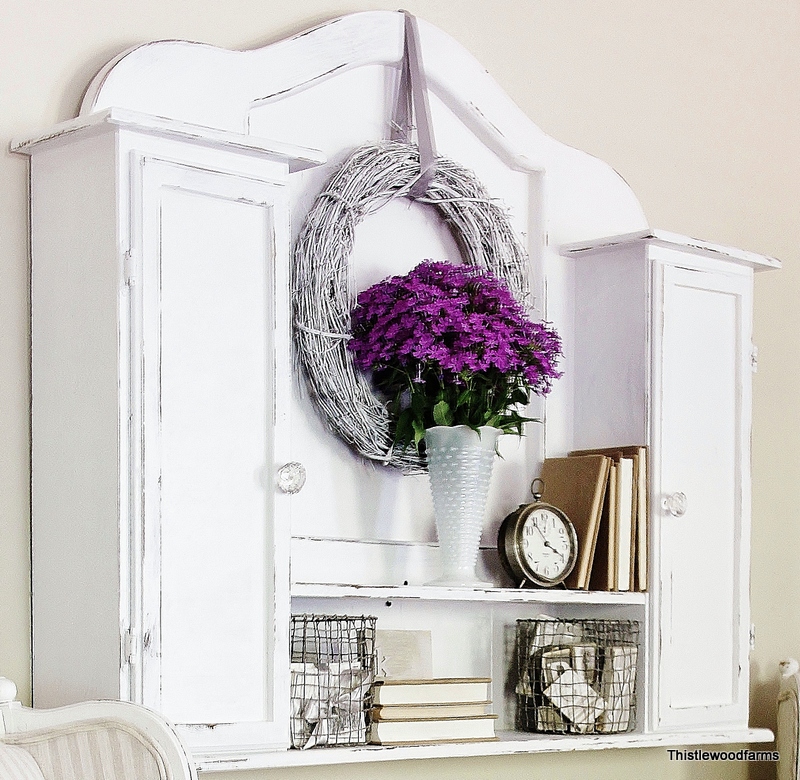
The chalk paint distressed look is utilized to give furniture the appearance of having some wear and tear, or of being aged to look like an antique. This is most commonly achieved by painting the wood furniture with chalk paint for a velvety matte finish, then lightly sanding away some of the paint to reveal the wood or even a contrasting painted layer underneath.
This look is also described as being part of the “shabby chic”, “farmhouse”, or “cottage core” home decorating styles. It can bring a cozy, nostalgic vibe to your home, and is a relatively easy and affordable DIY project.
The distressed look is great for furniture, but it’s also a fun way to change the look of other home accent pieces such as wooden picture frames, trays, signs, and even accent pieces like wood baskets and candle holders.
Why Use Chalk Paint for Distresses?
Technically, you can distress wood furniture after painting with almost any kind of paint. Some paints will be more challenging to control the distressing, and some will be quite difficult to remove the paint once it’s dried. Chalk paint is the best choice for a distressed look for a few reasons, not the least is that is it very easy to distress.
Chalk paint is a water-based, non-toxic paint that contains mineral additives for an absolutely matte finish. It is easy to use and provides nice smooth coverage, but also chips and scuffs easily, which makes it perfect for distressed and “antique” DIY projects.
Once the chalk paint dries, all you really have to do for a basic distressed look is lightly sand it with light to medium grit sandpaper. The chalk paint will remove very easily without having to use a lot of effort. It’s easy to control where you want the distressing to appear.
The other reason that chalk paint is a great choice for distressing has to do with the unique appearance of chalk paint. It has a smooth, velvety matte finish with absolutely no shine at all. This helps to give the appearance of your painted furniture being an older piece. While many chalk paints are available in modern paint colors, the matte finish still evokes the illusion of your painted furniture piece being a cherished heirloom with color that has mellowed with time.
How To Distress Wood With Chalk Paint
There are several methods to distress wood furniture with chalk paint. The most common method is also one of the easiest. It’s done simply by sanding the areas you want to distress after your chalk paint has dried. Here are the basic steps:
- First, clean your furniture with mild soap and water. You don’t want to paint over any dust or built-up grime. To protect any hardware on your furniture, either cover it with painter’s tape or remove it before painting. Put a dropcloth on the floor, and keep a bucket with soapy water handy to clean up any paint drips. Since chalk paint is water-soluble, you can use soap and water to clean your brushes when you’re done with your project.
- If the furniture has any type of shiny finish, you’ll need to do some sanding. You don’t have to completely strip the finish down to all the bare wood. What you’re trying to accomplish is simply to scuff up the surface thoroughly so the paint will adhere better. If you don’t do this, your chalk paint (and primer if using) won’t cling to the furniture and it will look streaky; probably peeling right off once it dries.
- After sanding, you’ll need to clean again. Using a damp cloth, just wipe off the furniture so there is no sanding dust anywhere.
- If you have any deep scratches or holes, now is the time to take a little bit of wood putty and fill those in. Allow enough time for the wood putty to completely dry before painting.
- It’s time to apply the first coat of paint, or primer if you’ve decided to prime. Even though many brands of chalk paint say they don’t require a primer, it’s never a bad idea to use one. Primer will help the chalk paint apply smoothly, and it’s going to help your paint job last longer. If you’re using white, cream, pale yellow, or other neutral colors of chalk paint, priming first will definitely give you better results, especially if you’re painting over dark-colored wood.
- Allow enough time to dry between coats of paint. For the best results, apply two to three coats of paint, using very thin layers. You can use a dense foam roller on broad flat surfaces, and brushes on smaller or more intricate areas. You can find a full post about the best chalk paint brushes to use here.
- Once your final coat of paint is dry, it’s time to distress! Use a medium grit sandpaper and lightly sand over the areas you want to look distressed. It’s up to you where you want your paint to look distressed, but sanding along corners or over carved areas looks great. A little bit of distressing around knobs or handles is also a nice look. Once you’re satisfied with the amount of distressing, brush or wipe away any sanding dust.
- At this point, you need to decide if you want to seal your painted furniture or not. If it’s a piece that will be frequently touched or moved, a sealant is recommended so your carefully distressed chalk paint won’t chip or scratch any further. You don’t want to use a sealant with a glossy or even semi-glossy finish to preserve the beautiful matte finish of chalk paint. Instead, you can use a top coat sealant with a matte or satin finish. I wrote another blog post detailing how to seal chalk paint here.
There are a few options of sealant that work great over chalk paint, but I recommend using a polycrylic sealant. Polycrylic will have less odor than polyurethane, won’t “yellow” over time, and dries a little bit faster than other sealants.
Another method of sealing your chalk paint furniture is with a chalk paint wax. A wax finish will leave a very subtle sheen. Wax sealant should be applied in very thin layers, allowing plenty of time for the wax to dry between coats. There are even tinted wax sealants that will give your wood furniture a lovely aged appearance. It’s important to note that wax sealants will probably need a light touch-up application every few years.
How To Lightly Distress Chalk Paint
If you only want a bit of distressing on your furniture, or you want it to look very lightly distressed, it’s easy to do. Use a fine-grit sandpaper so you have better control over how much chalk paint you want to sand away. Don’t use much pressure at first, so you can get a feel for how much paint will be removed.
For a lightly distressed look, you might want to sand only along the edges of your furniture, or maybe just along the legs of a table. You can always remove more if you like the way it’s going. If you do find yourself wishing you hadn’t removed quite so much paint, it’s easy to touch up chalk paint with a small brush. Just be sure to do any touch-ups before you apply a sealant coat.
How To Distress Chalk Paint And Make It Look Rustic
Rustic generally means something that looks a little bit rough or unrefined, that would be found in a country home or farmhouse. This look is easy to achieve with chalk paint and a little patience.
If you want to achieve a rustic look with larger areas of paint removed, you can do this on your chalk-painted furniture with nothing more than a damp rag. This method is called “wet distressing”. It will remove larger areas of paint, making your chalk-painted furniture look like its been worn over many years.
Here’s the basic way to achieve a rustic, time-worn look by wet distressing: Once you’ve finished painting your final coat of chalk paint, immediately dip a cloth rag in water, ring out the excess, and start wiping away the areas that you want to look distressed. It’s important to do this before your final chalk paint coat is dry. Since chalk paint dries so quickly, you probably want to do this as soon as you’ve finished painting. You might have to dip the rag in the water a couple of times, depending on how much of the wood you want to show through.
This method takes a little more practice than using sandpaper. It might be a good idea to try practicing this method by painting a piece of scrap wood or an old pallet before trying it on furniture. Chalk paint is pretty forgiving, though. Even if you unintentionally remove more of the paint than you meant to, you can easily touch it up before applying any top coat.
If you want your furniture to appear even more rustic, don’t bother to fill in any holes or scratches with wood putty. Slight imperfections only add to the rustic charm you’re trying to achieve. If you want, you can even add some “imperfections” yourself! Before priming and painting, you can take pieces of chain, wood screws, or even small stones and lay them out on the surface of your wood furniture. Then, using a rubber mallet or small hammer, hit the items into the wood just enough for them to make indentations. You’re not trying to embed these items into the wood, just using them to make interesting dents and scratches.
Depending on how hard the wood is, you might have to hit them several times. There are home interior designers that are doing this to wood pieces and charging a lot of money for it. It’s something you can do for little to no cost, and it can be a bit cathartic as well!
Hammering in some intentional “imperfections” does take a little practice, though. Again, try this out on some scrap wood before bashing into the furniture you’re transforming.
How To Distress Chalk Paint With Stain
You can apply wood stain over top of your chalk paint to create the appearance of an aged patina on your painted furniture. This technique is called glazing. If you’re going to try this, be sure to wear gloves and clothes that you don’t mind getting messy; it’s called “stain” for good reason! Be sure to work in a well-ventilated area, and put a drop cloth or tarp underneath the furniture you’re working on.
Glazing with wood stain works best if your furniture is painted with a lighter color of chalk paint. Darker colors won’t provide enough contrast to achieve a nice patina look.
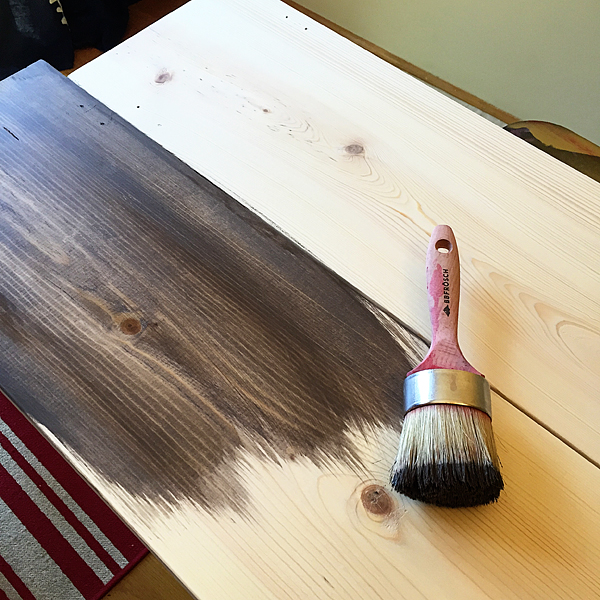
Once your final coat of chalk paint is dry, brush a very light coat of wood stain over top of the area(s) you want to glaze. You don’t want to apply too much; this is definitely a time where “less is more” should be your thoughts. You can always brush on a little more if you don’t think it’s dark enough.
You’ll have to work quickly here, working before the stain dries too much! As soon as you’ve got the stain brushed over the area you’re working on, take a soft, lint-free rag and begin wiping off as much of the stain as you can. For large areas, be sure to wipe in one direction, with the wood grain, to avoid a streaky finish. This will take some elbow grease to get the stain wiped enough for it to become somewhat translucent.
For an interesting look, you can apply the wood stain/glaze on only part of your painted furniture. It might look nice to leave the tabletop showing the chalk paint, but with a darker glaze only on the table legs.
Once the glaze is completely dry, you can apply a sealant coat just as you would over chalk paint. You’ll need mineral spirits or a solvent of some kind to clean your brushes.
Distressing White Chalk Paint
I love the look of white or cream-colored chalk paint. I think it transforms an ordinary piece of furniture into something elegant. However, distressing a piece of furniture that is painted in any shade of white or a light neutral tone can be a little bit challenging.
The biggest challenge with distressing something painted with white chalk paint is that sometimes the wood underneath the paint doesn’t show through very well. If the original wood is very dark, it will probably look great once you sand the white paint in a few areas. But your carefully distressed areas might not show up as well if the underlying wood is light or medium in tone.
A fun way to bring some attention to white-painted furniture is to paint a layer of contrasting color underneath the white. You can paint it a dark brown, to simulate wood, or paint it in a dark or jewel-toned color to match the room where it will be displayed.
For instance, paint one or two layers of navy blue chalk paint, then apply one or two coats of white chalk paint over the top of the blue. When you’re ready to distress, sand away the white chalk paint to reveal the striking navy blue underneath. It’s a fun and striking way to highlight distressed areas.
What About Distressing Cabinets With Chalk Paint?
There is a lot of information online about painting cabinets with chalk paint, and whether you should distress them or not. Honestly, it’s a matter of personal preference. However, there are some things you should keep in mind before deciding to transform any cabinets with distressed chalk paint.
If you’re thinking about painting and distressing all of your kitchen cabinets, keep in mind that even with a sealant coat over the paint, distressing might not be the best idea. Distressing means that you’re chipping paint away, and even with a sealant, chalk paint might eventually chip further on something that is touched or moved frequently (like cabinet doors). You don’t want tiny bits of paint chipping in your kitchen! If you really want to distress your kitchen cabinets, maybe only do so lightly and on areas that won’t be touched frequently.
If you’re thinking of creating a distressed look on a freestanding cabinet, or on something like a china cabinet, you’ll probably have better luck preventing too much-unintended chipping of your paint. These pieces probably won’t be opened on a daily basis, several times a day. Try not to sand away too much of the paint near hinges or door hardware, so that the paint won’t be weakened too much. Some light distressing on the edges or along textured areas can look great on a wood cabinet. You should still seal your paint with a polyacrylic or wax sealant.


Leave a Reply