
Hi Whipperberrians!I am so excited to be back for month #2 on the Creative Team here at Whipperberry. What an amazing bunch of girls they are!! You can find me and my sis-in-law Jen posting over at Eat.Sleep.Make.
Today I'm sharing with you how to make a scented beeswax candle and as the container, I'm using a wooden salad bowl that I bought at an estate sale for 25 cents.
What you will need:
A wooden bowl
Wood burner
Block of beeswax (got mine at Hobby Lobby)
Wooden wick (Hobby Lobby)
Pasta Pot
Pyrex 4 cup measuring cup (or something similar)

Start by customizing your bowl by burning a design into it. If you don't have a wood burner, you could always paint a design.
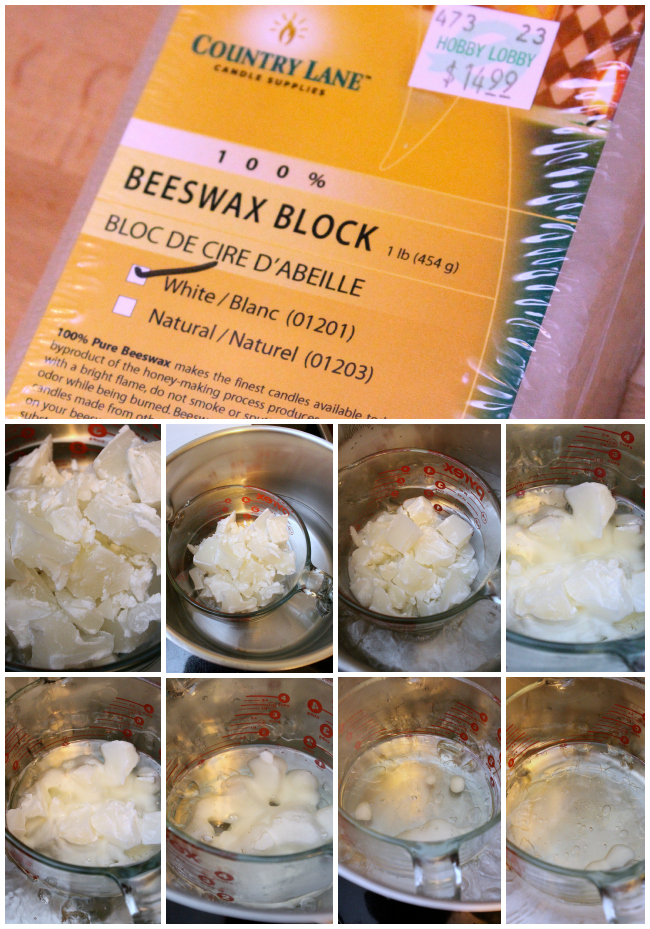
Next is the hardest part. You need to guesstimate how much wax you will need to fill your bowl. You want this to be in smaller chunks so it will melt properly. I just stabbed the block with a knife and plied chunks off of it.
You need to use a double boiler to get the wax to melt without burning. I kept my stove set on medium. I found that if I turned it up higher than that the boiling water would jump into the wax (which, like I discovered, causes issues in the drying process).
Use a cooking thermometer to monitor the heat of the wax. It should get up to about 160-165 degrees and never go over 185 degrees.
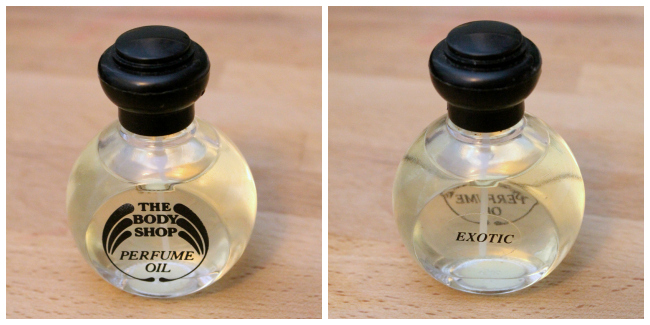
Once the wax was completely melted, I used some perfume oil I had from The Body Shop to scent the wax. Essential oils can be used as well. (If you want a candle that will relax you, use Eucalyptus Essential Oil and burn it while you are taking a bath.. so relaxing!)
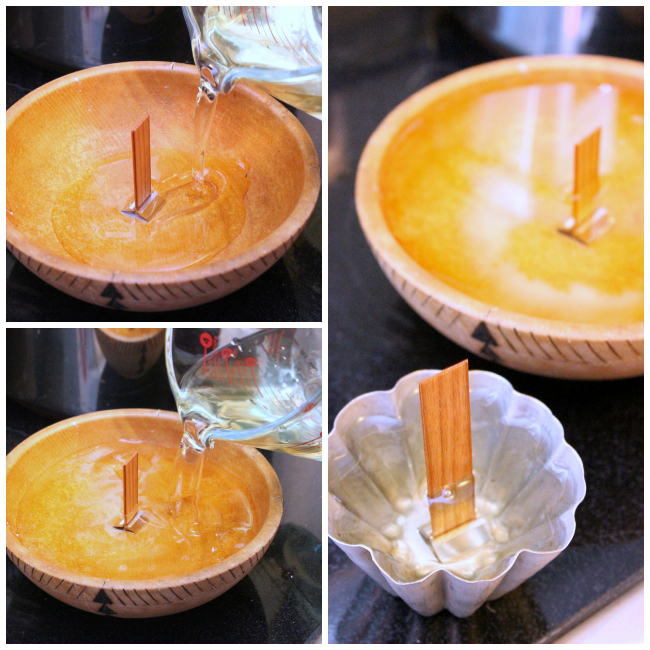
Now, pour the wax in your container! You can place the wick in first or after it is poured. It doesn't really matter. I had some wax leftover, so I used a vintage baking tin for the rest.
The drying part can be quite tricky. If it dries too fast, you will have cracking (like you can see in the photos of mine below). Upon doing some research, it is best to place the containers on a cookie cooling stand so that the wax can dry from the bottom up. This will also help prevent cracking.
Once my wax was completely cooled and hardened, I saw some separation from the side of the bowl and discovered all the water that had jumped into the melting wax had caused the wax to pull away from the container. The water all dumped out, but it's definitely good to try and avoid this.
Fortunately, after burning for a little while, the crack will fill itself in, so no worries!


I'm definitely over-the-moon pleased with how this turned out! This was my first run at making candles and I think I'm hooked. Would this not be an awesome house-warming gift, too?
I'll see you all next month!

Check out some of our favorite projects!
9
LOVE this! You could find super cheap bowls at a thrift store and make these for Christmas gifts! Going to Pin so I remember to DIY during the holidays!
Thank you for sharing!
Julie
Thanks, Julie!! I'm planning on gifting a bunch of these, too! xoxo – Shannon
I keep meaning to try this but never seem to get around to it. I like the crack. It looks very rustic and that goes with the wood wick and bowl.
You kitty is adorable as well.
Manda Wolf @ Our Wolf Den
Thank you, Manda! That's Skilo.. he's such a mama's boy! (I kinda liked the crack, too… it's the imperfections that make handmade so wonderful!)
xoxo – Shannon
Okay. This.is.gorgeous! So in love with this! Can we say Christmas in July?!! Thanks for sharing! 😉
Thank you, Monica!! xoxo – Shannon
This is a fantastic project! Who knew making candles was so easy and SO gorgeous!!
Thanks, Jo-Anna! I was surprised, as well, at how simple it was to make a quality candle! xoxo – Shannon
Just wondering if you coated the wood with anything fire retardant or if the wood already had a finish on it or if you just left it and if the bowl catching fire or charring it was a concern?