• Skip to primary navigation
  • Skip to main content
  • Skip to primary sidebar
  • Skip to footer

Whipperberry

WhipperBerry • Your Home For Creative Inspiration

  • Home
  • About
    • Terms
  • Recipes
    • ZipList
    • Starters
    • Easy Weeknight Dinners
    • Main Dish
    • Salads
    • Side Dish
    • Soups & Stews
    • Desserts
    • Breakfast
    • Miscellaneous
  • Tutorials
    • Creative Crafts
    • DYI Decor
    • Fabric Crafts
    • Food How-To
    • Jewlery
    • Paint Projects
    • Paper Art
    • Party Styling
    • Photography and Graphic Design
    • Silhouette
  • Holidays
    • St. Patrick’s Day
    • Easter
    • Mother’s Day
    • Father’s Day
    • 4th of July
    • Halloween
    • Thanksgiving
    • Christmas
    • New Years
    • Valentine’s Day
  • Gift Ideas
    • Gifts For Everyone
    • Gifts for Dad
    • Mother’s day
    • For The Girls
    • For The Kids
    • Teacher Gift Ideas
    • Christmas
  • Printables
    • Holiday
    • Gift Idea
    • LDS Primary
  • Travel
  • Contact
  • Nav Social Menu

    • Facebook
    • Instagram
    • Pinterest
    • RSS
    • Twitter

Dairy Free

Roasted Garlic and Roma Tomato Sauce + an Easy Shakshuka Recipe

31 · Aug 22, 2018 · Leave a Comment

This post is brought to you by Ball® Fresh Preserving Products by Newell Brands

Ahhhhh, tomato season… You’re finally here! When I was a little girl, tacos were not tacos if they weren’t topped with diced tomatoes, a sandwich simply could not be a true sandwich without a slice of tomato inside and don’t even get me started on burgers. You either love them or hate them but, I’m firmly in the LOVE those beautiful tomatoes camp. I was recently introduced to a simple Roasted Garlic and Roma tomato sauce recipe from Ball® Fresh Preserving that I have been dying to try. I knew it was going to be a GREAT base for my favorite Israeli Shakshuka dish and boy was I right. Come to learn how to make this fabulous sauce for your family. I was recently introduced to a simple Roasted Garlic and Roma tomato sauce recipe from Ball® Fresh Preserving that I have been dying to try. I knew it was going to be a GREAT base for my favorite Israeli Shakshuka dish and boy was I right. Come learn how to make this fabulous sauce for your family.

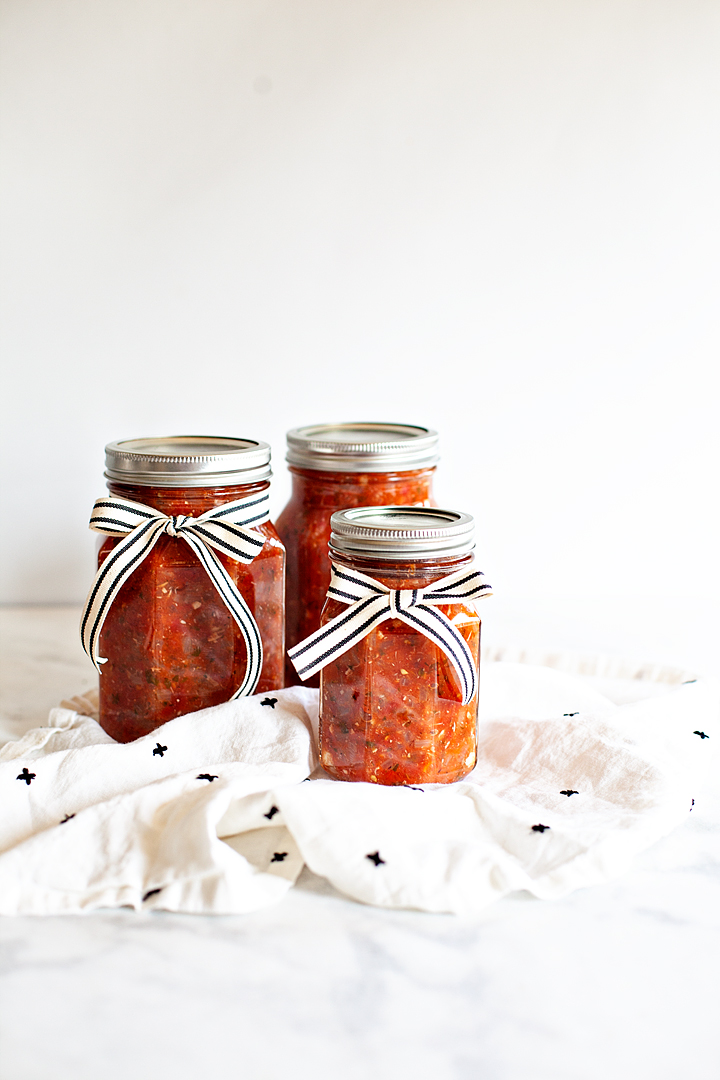
How to Know if Your Recipe is Safe for Preserving

You know what excites me about this sauce? I know exactly what has been added to it because I made it myself. I’ve cut sugar out of my diet and I’ve been blown away about how much sugar is added to most commercially prepared tomato sauces. It really gives me peace of mind when I make things from scratch using tested recipes from Ball® Canning.  When you use official recipes from Ball® you know that they have the highest standards for food safety and if followed to the “T”,  you will have a great end product. You can find all kinds of recipes on their website plus, they have several books that cover the ins & outs of preserving available on their site, Amazon, and other book retailers.  When it comes to things like preserving, you don’t want to take chances with recipes that have not been tested and approved. They can make your family terribly sick. Stay safe, and stick with the leaders in the preserving industry, Ball® Fresh Preserving.

Sauce Making Day

To me, canning is a social activity. When we would can as kids the whole family would gather in the kitchen with the music turned up and we would spend the entire day canning batch after batch of peaches, pears, elderberry jam & crabapple jelly. Sometimes, my Mom’s friends would come over and spend the day working the fruit and enjoying some girl talk.

I knew that when I was going to make this sauce, I wanted to invite a friend over so that we could work together and enjoy some idle chit-chat. That’s the real secret ingredient to anything preserved. Not only are you preserving the food but, you are also preserving precious memories!

Funny enough, my friend’s name is also Heather and together we make quite the crew. Heather and I grabbed our supplies and prepared to start, “Sauce Day!” Here is what you will need to have a successful sauce day yourself.

  • A nice clean kitchen – this is a must when canning. Because of the nature of preserving and the fact that the food will be stored unrefrigerated for up to a year, you must have a good clean working space sat you don’t risk introducing unwanted bacteria into your sauce.
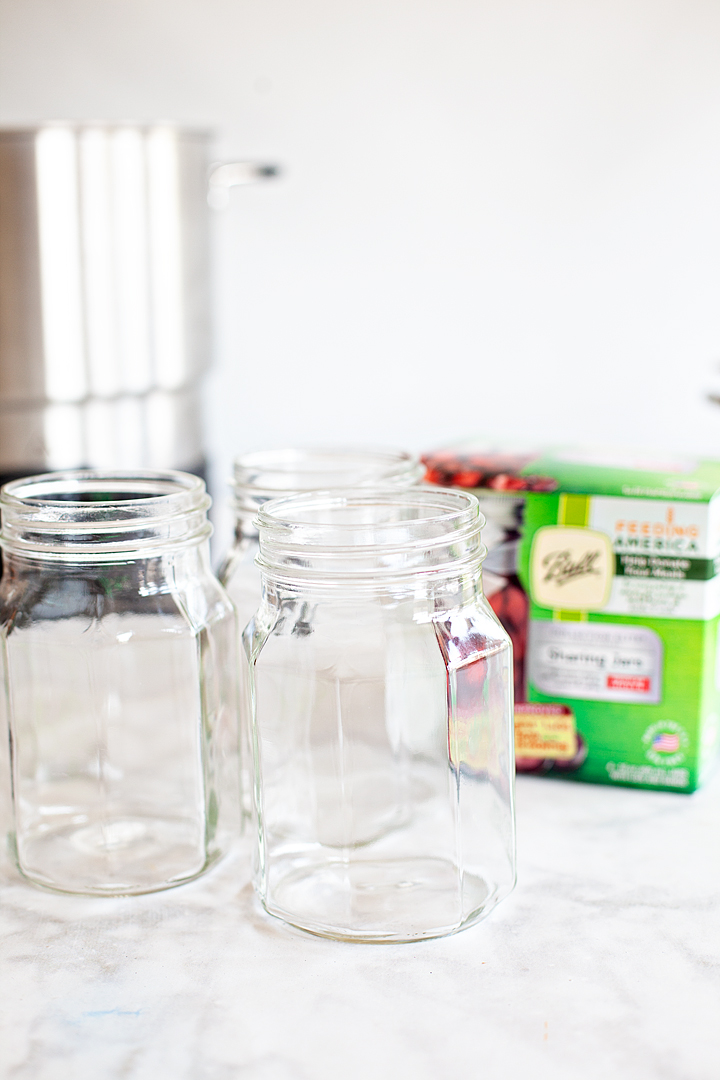
  • Ball® canning jars – This recipe calls for quart jars and I opted for my new favorite quart sized Sharing Jars. 
  • Water Bath Canner – This sauce uses the type of canning method called water bath canning. Therefore you will need some type of water bath to process your jars of sauce.  If you have a gas stove top or an electric stove stop that has the electric coils, you will be able to use a large pot with a rack and a lid to process your jars of sauce. 
  • Important: If you have a glass top electric range, 
        • First check with the manufacture of the stove.

i.      If it’s safe for home canning then,

        1. Ensure that your canner has a completely flat bottom that comes in contact with the heating element.
        2. Ensure that the canner does not exceed the burner by more than one inch around.
        3. https://www.youtube.com/watch?v=KFUyaBFrcYU

ii.      If not, then you will need to use the Electric Water Bath Canner.

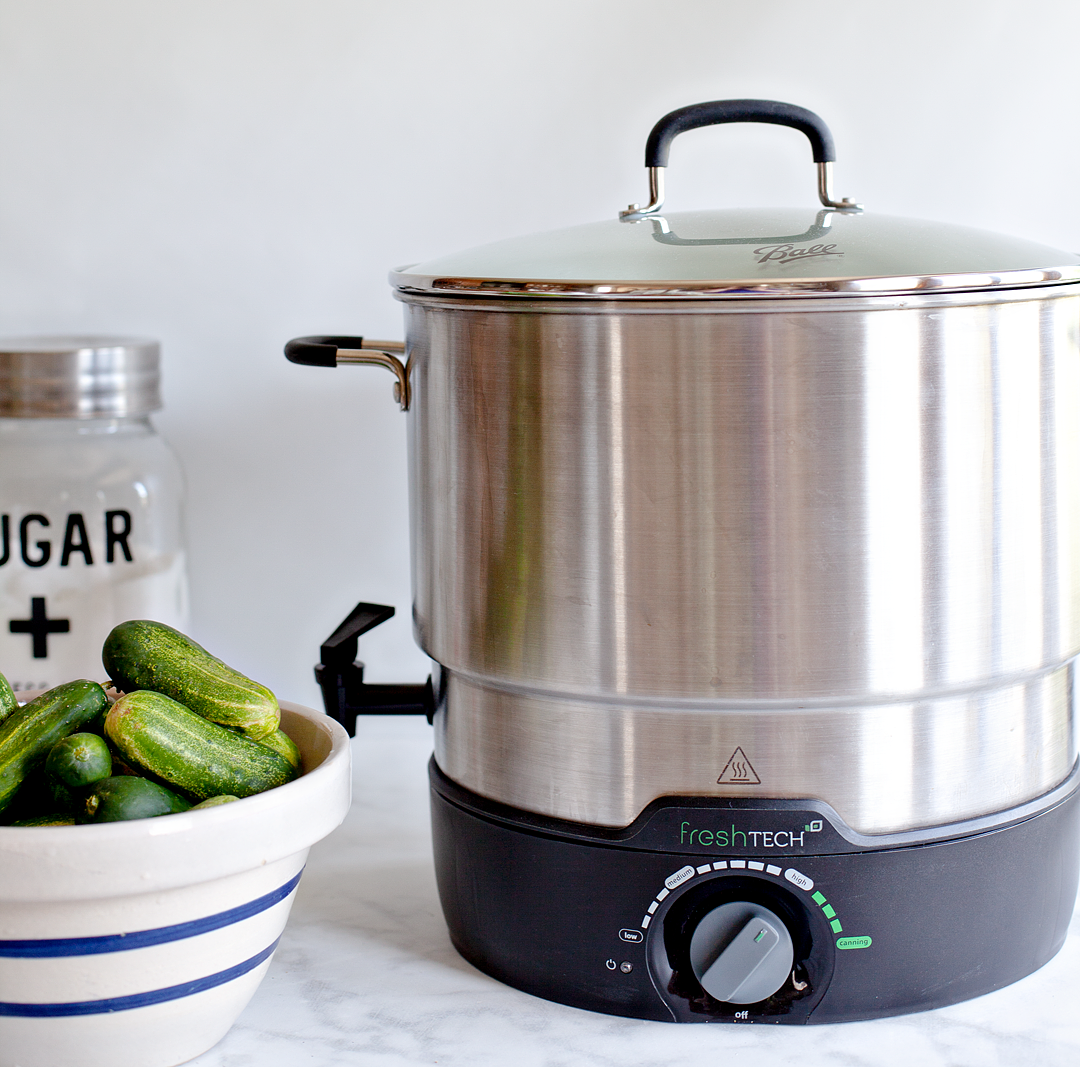
  • Clean towels – This is a must when canning. You will be using towels to set your processed jars on and for wiping the rims of your jars. Not to mention keeping your hands tidy during the prep process. Have a good supply of clean cotton and terry cloth kitchen towels on hand for sauce day.
  • Canning tools – These are the must-have tools when canning,
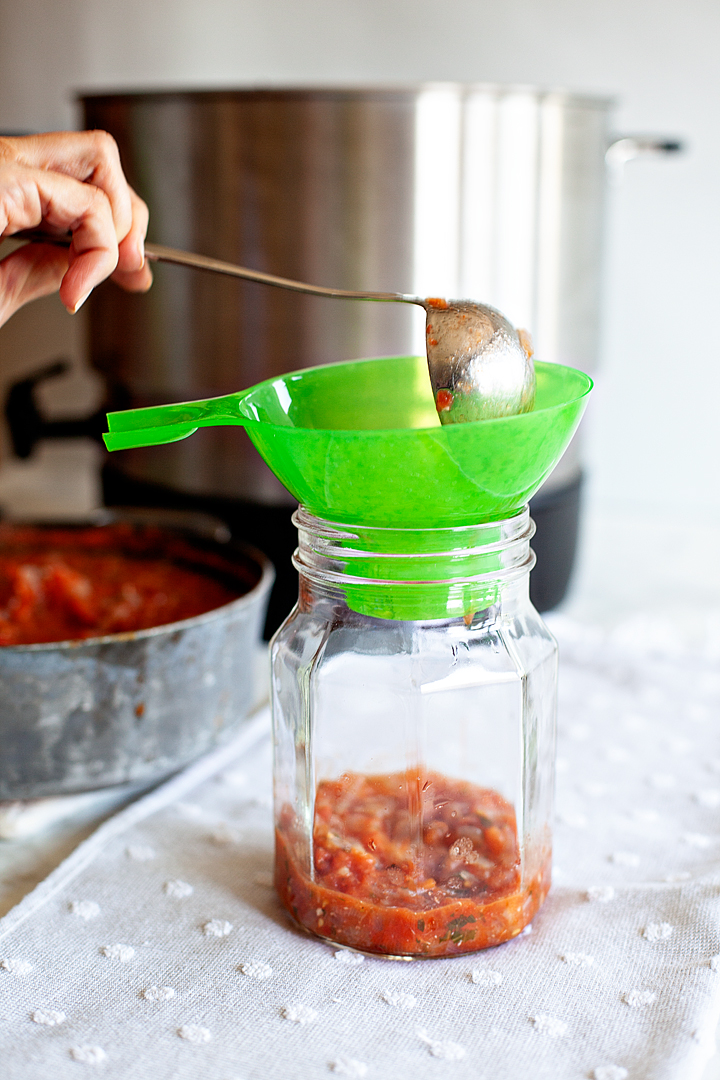
  • Jar Funnel: Place in mouth of the jar to fill without spilling I was recently introduced to a simple Roasted Garlic and Roma tomato sauce recipe from Ball® Fresh Preserving that I have been dying to try. I knew it was going to be a GREAT base for my favorite Israeli Shakshuka dish and boy was I right. Come learn how to make this fabulous sauce for your family.
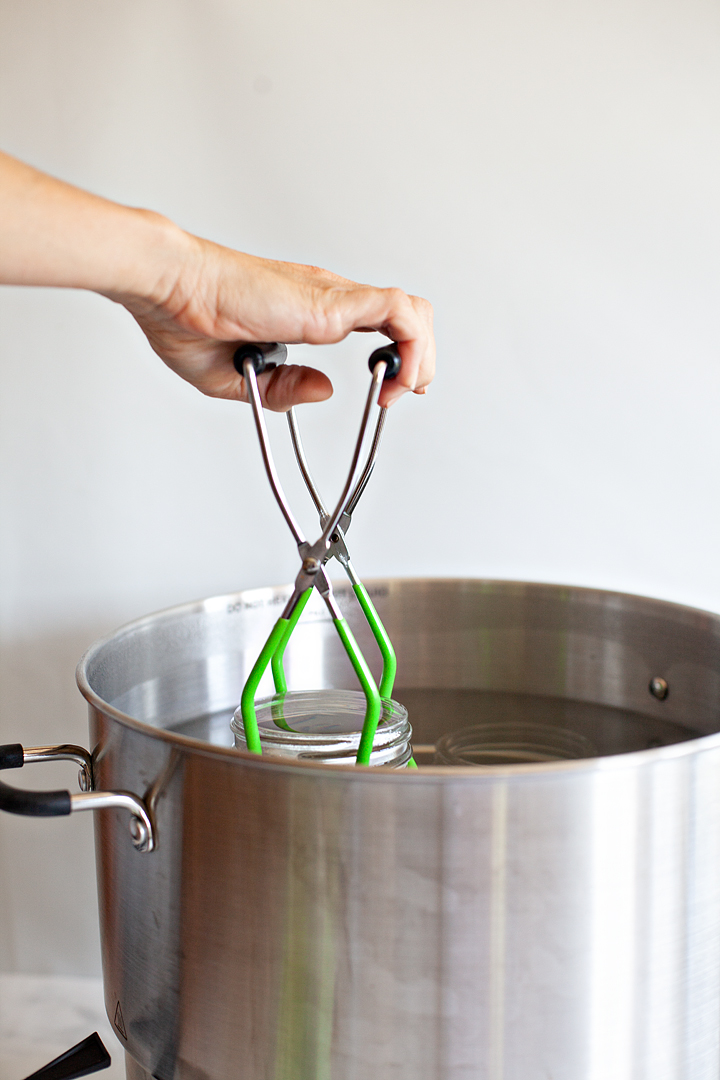
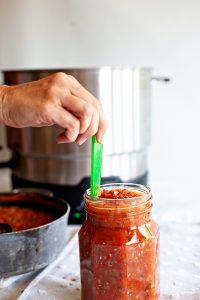
  • Jar Lifter: Safely lift jars out of hot water with the green gripping end
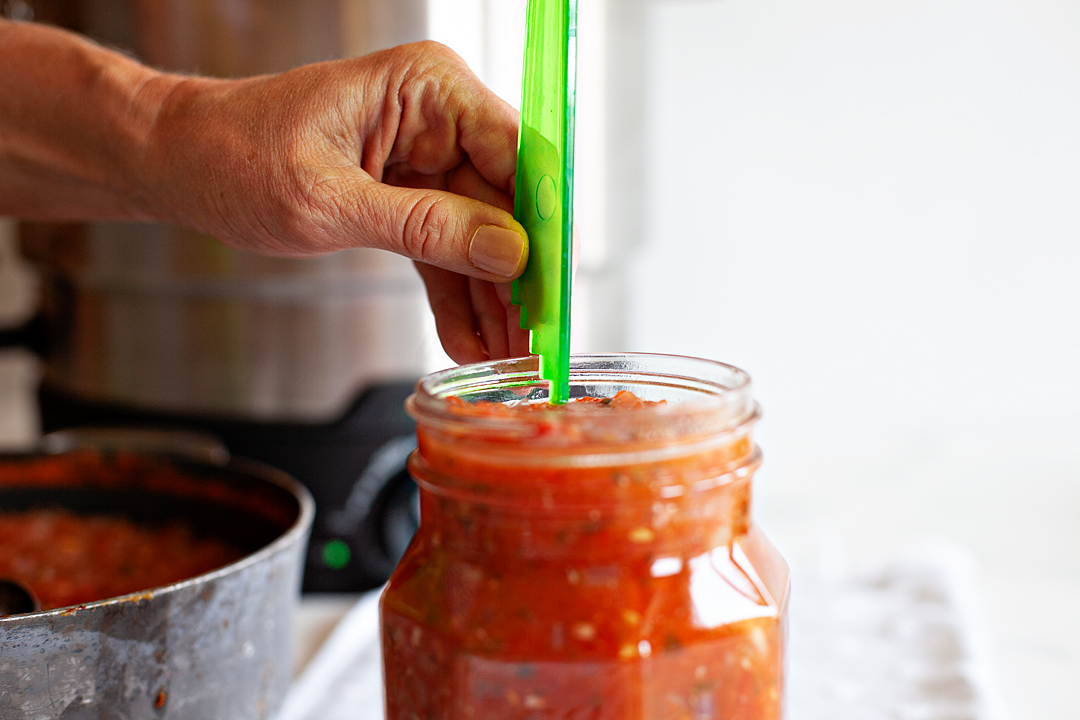
  • Bubble Remover & Headspace Tool: Slide into the side of filled jar to release air bubbles and measure headspace I was recently introduced to a simple Roasted Garlic and Roma tomato sauce recipe from Ball® Fresh Preserving that I have been dying to try. I knew it was going to be a GREAT base for my favorite Israeli Shakshuka dish and boy was I right. Come learn how to make this fabulous sauce for your family.
  • Roasting supplies – for this recipe we will be roasting our garlic and tomatoes before we get started so, there are a few items that you will need for that,
    • baking sheets
    • parchment paper
    • aluminum foil

Roasted Garlic & Roma Tomato Sauce Recipe 

I was recently introduced to a simple Roasted Garlic and Roma tomato sauce recipe from Ball® Fresh Preserving that I have been dying to try. I knew it was going to be a GREAT base for my favorite Israeli Shakshuka dish and boy was I right. Come learn how to make this fabulous sauce for your family.

Roasted Garlic & Roma Tomato Sauce Recipe

Ball® Fresh Preserving
Roasting tomatoes and garlic brings out a sweet smokiness, adding a deep, rich flavor dynamic to your sauce.
Print Recipe Pin Recipe
Prep Time 1 hr
Cook Time 40 mins
Total Time 1 hr 40 mins
Cuisine Italian
Servings 3 32 oz. Jars

Ingredients
  

  • 10 lbs roma tomatoes rinsed
  • 3 small whole heads of garlic
  • 2 med onions diced small (about 1 cup)
  • 1 tsp olive oil
  • 1 tbsp fresh oregano minced
  • 2 tbsp fresh basil minced
  • 1 tsp salt
  • 1/2 tsp coarsely ground black pepper
  • Ball® Citric Acid or bottled lemon juice

Instructions
 

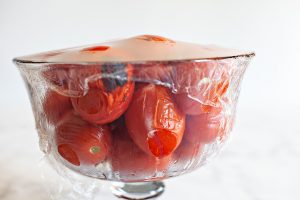
  • Roast tomatoes, in batches, on a grill or under a broiler until skins begin to wrinkle and blacken slightly, turning to roast on all sides. Repeat with remaining tomatoes. Place finished tomatoes in a large bowl.
  • Cover bowl of tomatoes tightly with plastic wrap. Let tomatoes steam and cool until they are easy to handle. 
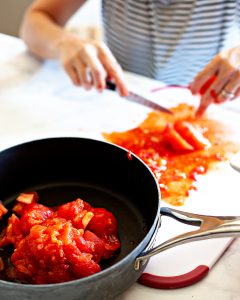
  • Remove peel and core tomatoes. Slice each one in half and remove seeds; dice into 1-inch chunks. Place diced tomatoes, and any collected juices, into a large saucepan.
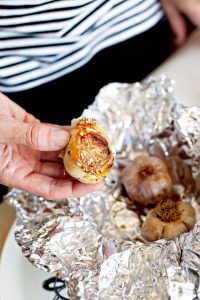
  • Slice top portion off the heads of garlic, revealing the cloves below, drizzle 1 teaspoon olive oil over cloves in each head. 
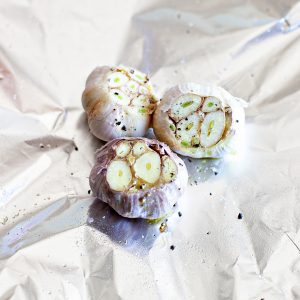
  • Wrap garlic tightly in aluminum foil and place top side down on the grill with tomatoes; grill until soft, about 30 minutes. Or, roast in a 350° oven for 60 minutes.
  • Prepare boiling water canner. Heat jars in simmering water until ready to use, do not boil. Wash lids in warm soapy water and set aside with bands.
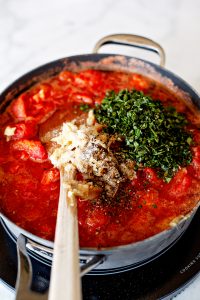
  • Remove roasted garlic by squeezing the softened heads of garlic allowing the cloves to pop out. Combine garlic, onions, herbs, salt, and pepper with tomatoes. Cook over medium heat until heated through, stirring occasionally.
  • Add ½ teaspoon citric acid or 2 tablespoons lemon juice to a hot jar; ladle hot sauce into a hot jar 
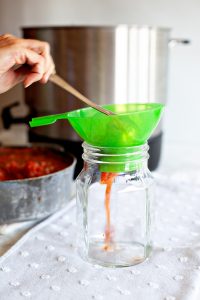
  • leaving a ½ inch headspace. 
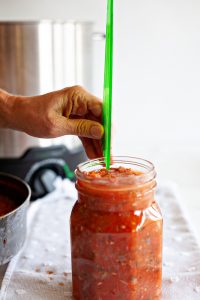
  • Remove air bubbles. 
  • Wipe jar rim. 
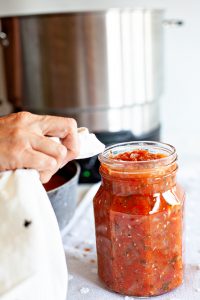
  • Center lid on jar and apply band, adjust to fingertip tight. Place jar in boiling water canner. Repeat until all jars are filled.
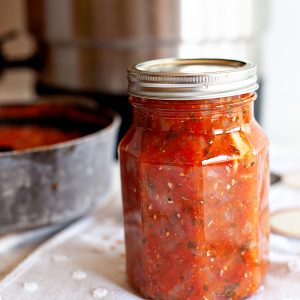
  • Process jars 40 minutes, adjusting for altitude. Turn off heat, remove lid, let jars stand 5 minutes. Remove jars and cool 12-24 hours. Check lids for seal, they should not flex when center is pressed.
Keyword homemade tomato sauce, Preserving tomato sauce

How to Use your AAAMAZING Sauce

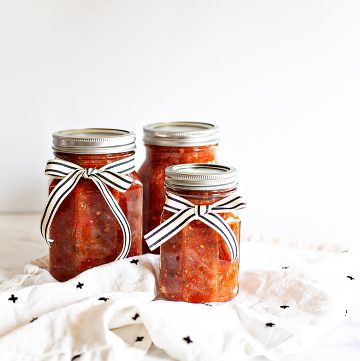
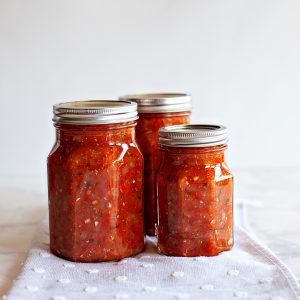
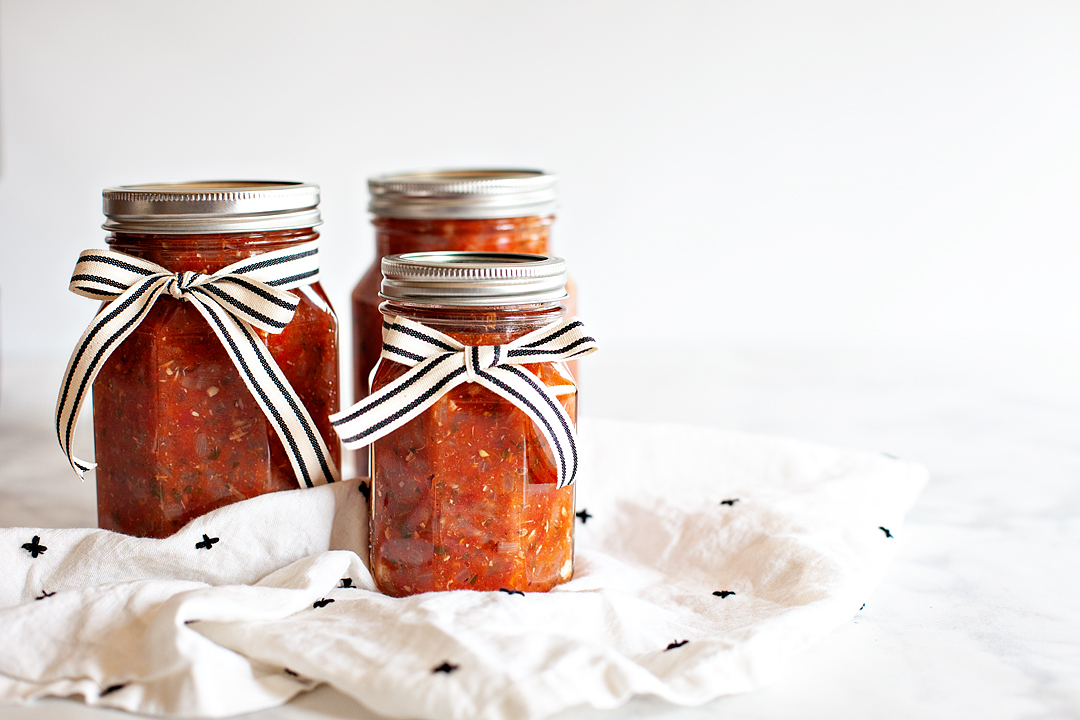
Now, here’s the fun part… Cooking with your fantastic sauce. First off, I should have doubled the recipe on sauce day. The recipe makes approximately 3 quarts of sauce. Mine really only made 2 quarts and a pint.  After I sent one quart home with my friend, I only had 1 quart and 1 pint to use. Note to self,  always make 2-3 batches when making this great sauce.

Also, this is a GREAT gift for the holidays, housewarming, new baby… The list goes on and on. I LOVE the new Ball® Sharing Jars, they are so elegant and designed perfectly for adding a ribbon or gift tag right at the top, I adore them!

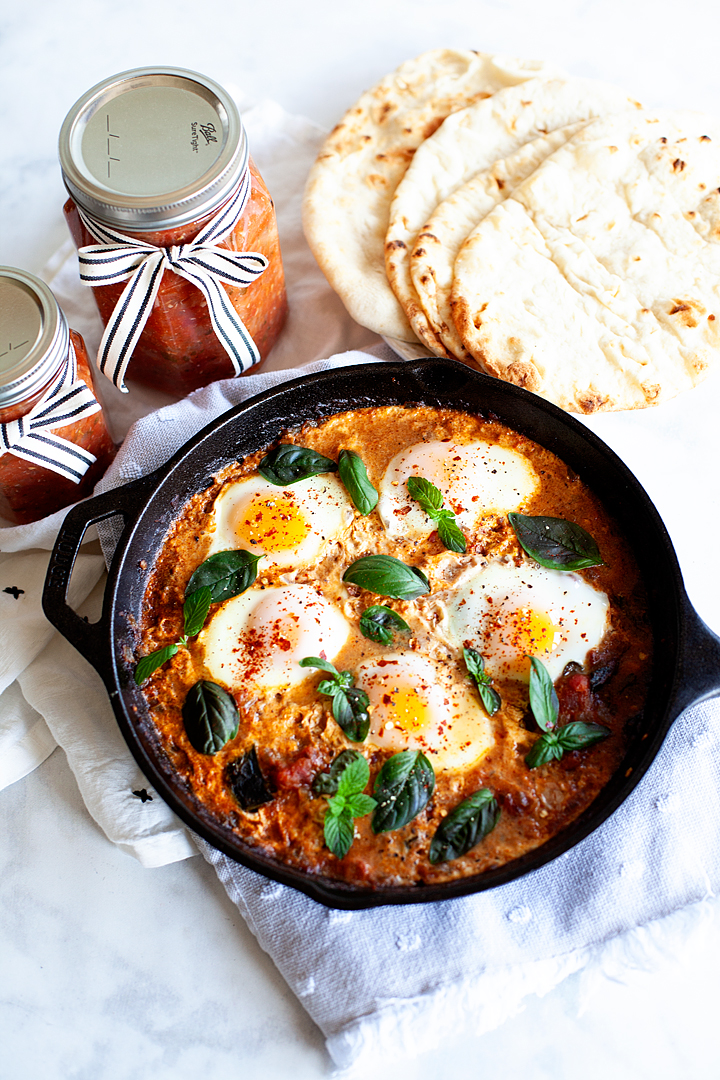
This sauce would be fantastic on its own just over some pasta but, I thought it would be perfect for Shakshuka! 

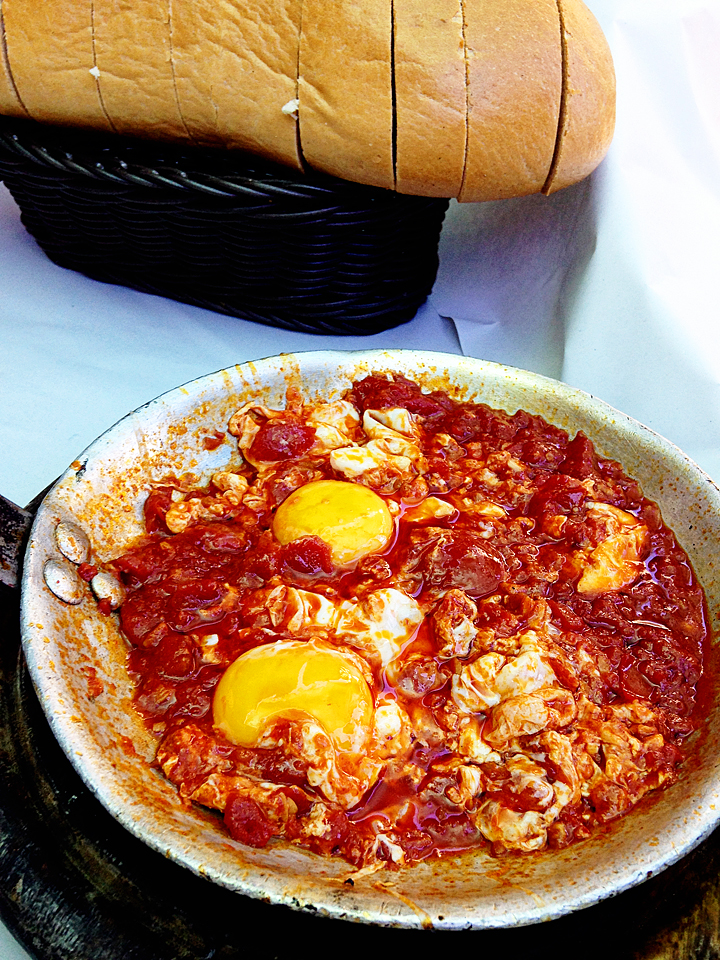
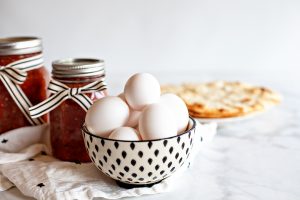
Shakshuka is a wonderful recipe that I was introduced to while traveling in Israel.  It is a very common dish there served any time of day. It’s a scrumptious tomato sauce filled with all kinds of earthy spices, herbs, onions & peppers. You top it off with some eggs and then serve right out of the pan with flatbread or a good crusty loaf of bread.  This is the Shakshuka that we ate in Jaffa, Israel and the fun outdoor restaurant where we enjoyed this dish.   

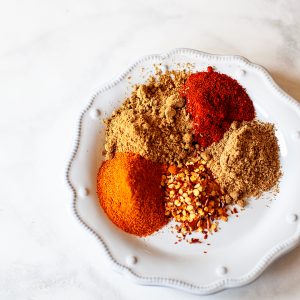
With the Roasted Garlic and Roma Tomato Sauce as our starting point, it already has the tomatoes, onions, garlic & herbs, all we need to add is the all-important spices & some peppers.   

Shakshuka

Heather
This simple Israeli dish served with bread will soon become a favorite in your home. It's easy to prepare for any time of the day and packs all kinds of amazing flavor!
Print Recipe Pin Recipe
Prep Time 8 mins
Cook Time 20 mins
Total Time 28 mins
Course Main Course
Cuisine Middle Eastern
Servings 4 servings

Ingredients
  

  • 2 tbsp olive oil
  • 2 tsp cumin
  • 1/2 tsp red pepper flakes
  • 1/2 tsp coriander
  • 1/4 tsp cayenne pepper
  • 1/2 tsp paprika
  • 2 tbsp tomato paste
  • 1 cup diced sweet peppers
  • salt & pepper
  • 5 eggs

Instructions
 

  • In a medium to large oven safe sauté pan over medium-high heat, add your olive oil & spices. 
  • Let your spices bloom for about 30 seconds then add your diced peppers, let the peppers cook down for a few minutes until nice and soft.
  • Add the tomato paste and cook for another minute. 
  • Add the roasted garlic and roma tomato sauce and stir to combine. Let this mixture come to a nice simmer.
  • Add 5-6 eggs and cover with a lid until the eggs are set to your desired taste. 
  • Traditionally they are pretty soft, but it's up to you. Serve with a nice loaf of bread or pita.
Keyword eggs, shakshuka


5 GREAT Thanksgiving Recipes

9 · Nov 21, 2016 · Leave a Comment

Are you gearing up for Thanksgiving? We sure are at our house. Everyone has placed their orders for their favorite Thanksgiving recipes. Most of the shopping has been done and we’re gearing up for a scrumptious day.

Last week, I had a fabulous opportunity to travel out to Denver for a fun early Thanksgiving with some blog friends at WhiteWave Foods. You may not be familiar with WhiteWave Foods, but I’m sure you are familiar with some of their brands. One of my favorites is International Delight!  They also have other great brands like Silk, Horizon Organic,  Earthbound Farms and many more.

Now, I’ve been an International Delight Ambassador for several months now and they invited me to help cook for their WhiteWave Foods Thanksgiving. Of course I said yes, and set to work to create a fun dessert using International Delight for the feast.

white-wave-food-thanksgiving

But before we get to dessert, here are some of the other Thanksgiving recipes that my co-chefs brought to the feast.

Lisa from Wine & Glue brought a tasty Bacon Jalapeño Creamed Corn that was scrumptious! This recipe is great for Thanksgiving and any time of the year really. It’s lovely with the Horizon Organic Milk & Cream.

bacon_jalapeno_cream_corn_2

wine-and-glue-at-the-white-wave-foods-thanksgiving

Lisa from Veggies don’t Bite made a Thanksgiving recipe that absolutely blew my mind! I came home raving about it. VEGAN SCALLOPED CAULIFLOWER is my new favorite Thanksgiving dish. This creamy veggie dish doesn’t have a lick of dairy in it and you would NEVER know. You’ll have to check out the recipe to see what magic she created using all plant based ingredients like Silk Cashew Milk. AAAAmazing!

vegan-creamy-scalloped-cauliflower-19

veggies-dont-bite-at-the-white-wave-foods-thanksgiving

Next, we had a lovely Roasted Acorn Squash Rings from Nosh & Nourish. Again, another totally plant based dish that was out of this world using some great organic ingredients from Earth Bound Farms.

img_2644

Now, onto the sweets! Kat from Mama’s Losin’ It made lovely Pumpkin Bars that were a scrumptious alternative to Pumpkin Pie!

Pumpkin Bars

Last but not least, was my recipe. A mini version of my No-bake Pumpkin Cheesecake using International Delight Simply Pure Vanilla Creamer.

No-Bake Pumpkin Cheesecake with International Delights Simply Pure Vanilla

No-Bake Pumpkin Cheesecake with International Delights Simply Pure Vanilla

You can grab the recipe and watch the video on how to make this simple & scrumptious treat HERE. All I did to make it mini was to make it in disposable baking cups that are a bit larger than your standard cupcake cup and super sturdy.

img_2636

All-in-all it was a fabulous WhiteWave Thanksgiving Feast! I LOVED trying all of the new recipes and can’t wait to make them for my own Thanksgiving and throughout the year!

img_2674

This is a sponsored conversation written by me on behalf of WhiteWave Foods. The opinions and text are all mine.

Pomegranate Chia Pudding Recipe // DAIRY-FREE

3 · Mar 8, 2016 ·

+ This Pomegranate Chia Pudding Recipe is brought to you by the lovely folks at SILK +

diary free pomegranate chia pudding parfait recipe from WhipperBerry // Breakfast Super Food!

Have you discovered a great Chia Pudding Recipe yet?

It is seriously one of our family’s favorite breakfasts these days. The crazy thing is, I thought for sure my kiddos would want nothing to do with those “alien” chia seeds (they’re kind of picky) but they love this stuff!

The fun thing is that the Chia Pudding is like a blank canvas that you can top with all kinds of fun toppers. We’ve tried a number of concoctions since we first discovered this treat. We started with a standard Chia Pudding topped with berries and granola with drizzle of honey… super yummy!

Chia Pudding recipe from WhipperBerry // Breakfast Super Food!

Now we’ve stepped it up a notch and we are making Chia Pudding layered with pomegranate seeds, an ancient grains mixture and pumpkin seeds… simply LOVELY!

The beauty of Chia Pudding is, typically it is made with dairy, milk & regular yogurt which is fabulous, BUT… Thanks to the folks at SILK, you can also make a dairy-free version with any of the tasty Silk Milks (Soy, Almond, Cashew, Coconut, Nutshell + more) AND their scrumptious Vanilla Dairy-Free Yogurt Alternative. For this recipe, I’ve used the Silk Unsweetened Almond Milk that is only 30 calories per serving (score!) AND Silk Vanilla Dairy-Free Yogurt Alternative. You can now get the Silk Dairy-Free Yogurt Alternative in a large size which is perfect for this recipe. Click HERE for more info on all of the Silk Products.

Pomegranate Chia Pudding Recipe Ingredients

Dairy-Free Pomegranate Chia Pudding Recipe from WhipperBerry // This is a dairy free option, but it works well with dairy as well!

Pair all of that with some Chia Seeds and you’re golden. If you haven’t heard, Chia Seeds are one of natures super foods. They are low in calories but pack a good health punch with tons of antioxidants, Omega-3 fatty acids, vitamins, protein, fiber and more. You can check out their health benefits HERE. That combined with the plant based, non-GMO, low fat Silk products you are starting your day off right!!

Dairy-Free Pomegranate Chia Pudding Recipe from WhipperBerry // This is a dairy free option, but it works well with dairy as well!

The other AWSOME thing is… Chia Pudding is sooooo easy to make! Here’s a quick little video to show you how.

Chia Pudding Recipe Video

Silk Dairy-Free Yogurt Chia Pudding from Heather Thoming on Vimeo.
See, isn’t that simple. Now all you have to do is let it sit over night so the magic can happen.
The next morning, all you have to do is top with your favorite toppings. Today we are going to layer our pudding with pomegranate seeds, an ancient grain mixture that I just love with a few pumpkin seeds. You can pick what ever goodie you want!
So think about that… You’re adding even more nutrition with your toppings as well. This is a power house house breakfast in the super food category. The funny thing is that it really is a treat. We tend to make if for dessert too, it really does feel that decadent. 

Pomegranate Chia Pudding Recipe

Pomegranate Ancient Grain Chia Pudding Recipe // DAIRY-FREE
 
Save Print
Prep time
5 mins
Cook time
24 hours
Total time
24 hours 5 mins
 
Author: Heather // WhipperBerry
Cuisine: Breakfast or Dessert
Serves: 3-4 servings
Ingredients
  • 2 cup Silk® Unsweetened Almond Milk
  • 2 cup Silk® Dairy-Free Yogurt Alternative - Any flavor you like, I used vanilla
  • 1 tsp vanilla extract
  • 1 tablespoon honey
  • ½ cup chia seeds
  • a pinch of salt
  • Pomegranate seeds
  • Ancient Grains or granola
  • pumpkin seeds
Instructions
  1. In a small mixing bowl or jar, add Silk® Almond Milk, Silk® Dairy-Free Yogurt Alternative, vanilla, honey, chia seeds and salt. Mix well.
  2. Cover pudding and place in the refrigerator for at least 4 hours or overnight.
  3. Layer with pomegranate seeds, ancient grains, pumpkin seeds or granola.
3.4.3177

Dairy-Free Pomegranate Chia Pudding Recipe from WhipperBerry // This is a dairy free option, but it works well with dairy as well!

This is a sponsored conversation written by me on behalf of Silk. The opinions and text are all mine.

Pineapple Coconut Scones Recipe // Dairy-Free

6 · Sep 3, 2015 · Leave a Comment

+ This Pineapple Coconut Scones Recipe brought to you by the folks at Crisco +

Pineapple-Coconut-Scones-Dairy-free-whipperberry

I adore scones. I mean really, what’s not to like? It’s like a sweet biscuit with a bit of a crunchy exterior and soft, fluffy interior. It’s a sweet addition to any breakfast or brunch. Not to mention that scones can be a blank canvas for all kinds of flavor profiles.

I’ve had blueberry, chocolate, raspberry, strawberry, cinnamon sugar scones in my life and I’m sure there are many more variations out there. After my recent trip to Hawaii, I thought a pineapple coconut scone would be LOVELY!

After doing a little playing around, I thought I would also make my pineapple coconut scones dairy-free.

WHAT’S that you say… You can’t even image your scones without their creamy buttery base? I’m telling you it’s possible. Not only possible, but scrumptious! The secret, I use Crisco Organic Coconut Oil instead of butter and rich Coconut Milk instead of cream. Crisco Organic Coconut Oil is PERFECT for this application, because it stays firmer than most coconut oils which is a must when baking goodies such as scones. I also love that it is certified organic and non-GMO. Crisco Organic Coconut Oil is an easy substitute in recipes calling for butter, margarine, and other oils, making it a go-to pantry staple. It has no coconut aroma or flavor, offering maximum cooking versatility without changing the taste of your food. Plus, I love that it is a better fat for your body than traditional animal fats.

Looking for more Crisco inspiration? Visit the Crisco Heritage Kitchen a hub dedicated to all things food, tradition and family, where generations of home cooks can gather and discover tried-and-true fresh summer recipes with this seasons bounty that will delight and inspire.

Pineapple Coconut Scones

Want to watch how I make my pineapple coconut scones? Here’s a quick video showing the entire process…

Pineapple Coconut Scones from Heather Thoming on Vimeo.

It truly couldn’t be any easier. The other secret is using Self-Rising Flour.

I found those fun dried young pineapple that looks like flowers at Trader Joe’s. I thought they really added to the presentation and taste of the overall scone, but they aren’t a deal breaker by any means if you can’t find them.

Pineapple-Coconut-Scones---Dairy-free-8

Pineapple Coconut Scones Recipe

Pineapple Coconut Scones // Dairy-Free
 
Save Print
Prep time
10 mins
Cook time
10 mins
Total time
20 mins
 
These tropical scones are perfect for any breakfast or brunch table. Packed with all kinds of tropical goodness and thanks to Crisco Organic Coconut Oil they are also DAIRY-FREE.
Author: Heather // WhipperBerry
Serves: 11-12
Ingredients
  • 2 cups SELF-RISING flour
  • ½ teaspoon salt
  • ¼ cup Crisco Organic Coconut Oil
  • 1 cup crushed pineapple
  • 1 tablespoon + 1 teaspoon sugar
  • 3-4 tablespoons Coconut Milk
  • ½ cup sweetened shredded coconut
  • 1 egg
  • GLAZE
  • 1 cup powdered sugar
  • 1 pinch of salt
  • 1½ tablespoons pineapple juice
Instructions
  1. Pre-heat oven to 425˚
  2. In a large bowl, add the flour, salt and coconut oil. Cut the coconut oil into the flour with a pastry cutter or two knives.
  3. Add the pineapple and coconut milk. Mix until just combined.
  4. Mix in shredded coconut until combined. Make sure not to over mix.
  5. Place on a floured surface and shape into a disk about 1 to ½ inches thick. Cut out with a biscuit cutter or just cut into wedges.
  6. Place on a parchment lined baking sheet.
  7. Brush an egg wash onto the top of the scones and then add a light layer of sugar on top.
  8. Bake in a 425˚ oven for 10 minutes.
  9. While the scones are baking, mix up the glaze.
  10. In a small bowl, add powdered sugar, salt and pineapple juice. Stir until the sugar and juice turn into a smooth glaze.
  11. 11 If you are garnishing with dried young pineapple. Add them to the tops of the scones in the last two minutes of baking.
  12. 12 Remove the scones from the oven and brush the tops with the pineapple glaze.
  13. 13 Serve warm, or store in an air tight container for a day or two.
3.2.2925

 *Disclosure: As a participant of the Crisco Ambassador Program, I’ve received compensation for my time and product samples for review purposes. Opinions are my own.

  • Go to page 1
  • Go to page 2
  • Go to page 3
  • Interim pages omitted …
  • Go to page 6
  • Go to Next Page »

Primary Sidebar

Heather from Whipperberry
Hello... my name is Heather and I'm the creator of WhipperBerry a creative lifestyle blog packed full of great recipes and creative ideas for your home and family. I find I am happiest when I'm living a creative life and I love to share what I've been up to along the way... Come explore, my hope is that you'll leave inspired!

Footer

  • Privacy Policy

Copyright © 2023 · Seasoned Pro