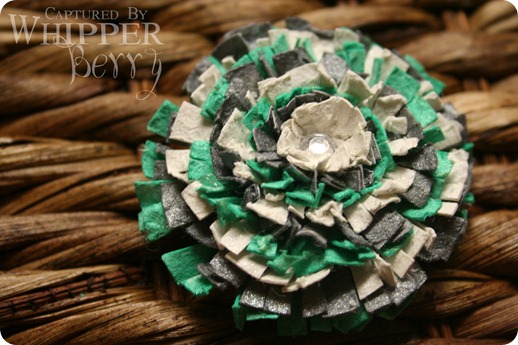
Here is the paper flower tutorial I promised. I first made this flower for the Ellie Pooh card, and then again on one of the favor boxes.
Step One:
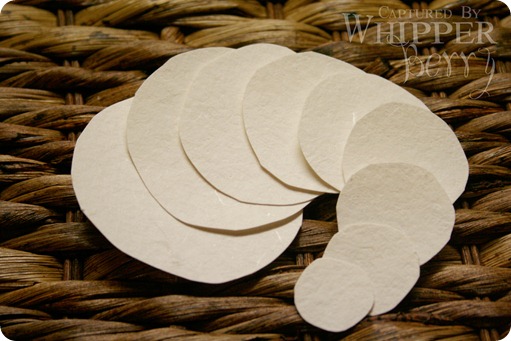
Start with heavy white paper. With a pair of scissors cut a circle slightly larger than you want the size of your flower to be. I don’t use a punch or a circle cutter because I think the flower looks better if the circles aren’t perfect. Continue cutting circles, successively smaller and in graduated sizes from the first. The more circles you use, the fuller the flower will be. For this example I use nine.
Step Two:
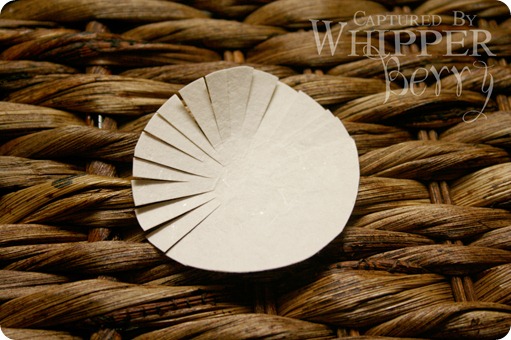
Cut slits from the edge of each circle towards the center. Make the cuts varying lengths and widths apart, while still keeping them fairly close together.
Step Three:
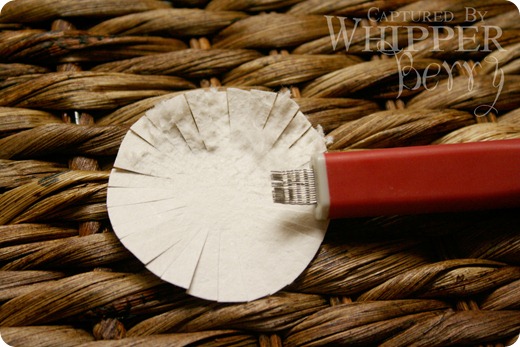
Use a paper scratcher, or the edge of a serrated knife, to scrape the paper from the center outward. This helps to give the paper a worn, aged look.
Step Four:
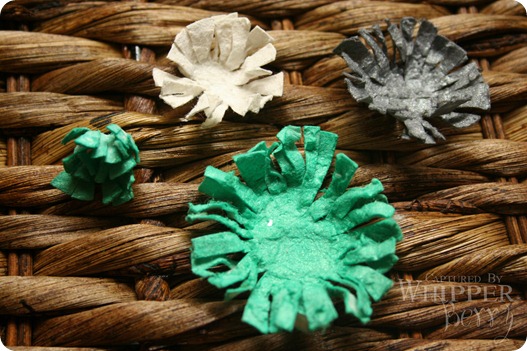
Color the circles, one at a time, using inks or dyes. For this example, as well as the favor box, I used Tattered Angel Glimmer Mists, but for the Ellie Pooh flower I used Tim Holtz Distress Inks diluted with water. While the circle is damp, use your fingers to crush it into a ball. Use a heat tool to dry the paper while it’s still in the ball. When it’s almost dry, gently unfold the paper circle being careful not to rip the “petals”.
Step Five:
Layer the colored shapes, and glue them together with a drop of craft glue at the center of each circle. Top it off with a button or rhinestone, and voila! You have yourself a super shabby-chic flower that can go just about anywhere.
If you make one, send me a picture. I would love to see it. Have fun!
2![WB_044_thumb[2] WB_044_thumb[2]](https://lh4.ggpht.com/_-fnKHrxIOI8/TNbSWkm_DPI/AAAAAAAAEXM/vTMuNNNeZBw/WB_044_thumb%5B2%5D%5B16%5D.jpg?imgmax=800)
![WB_113[3] WB_113[3]](https://lh4.ggpht.com/_-fnKHrxIOI8/TNbSXTE0QQI/AAAAAAAAEXQ/2SF5stsWixE/WB_113%5B3%5D%5B13%5D.jpg?imgmax=800)
![Signature[5] Signature[5]](https://lh6.ggpht.com/_vust898tmIA/TRpuVA0fIXI/AAAAAAAAA2E/d7738PCnVB8/Signature%5B5%5D_thumb%5B6%5D.jpg?imgmax=800)

Thanks for showing us how to make these! They are such a nice embellishment for so many things. Beautiful!
I love them Emily! Very Fun.
Who would have ever guessed that you could take a piece of paper and make it look so beautiful! Great job and I am sure lots of people should find this helpful.
Awesome! It looks like a lot of time and effort went into making this flower. It is a beautiful piece of art work and would be perfect for a loving occasion such as a wedding.
What a fantastic project! This is one I am tempted to recreate. Thank you for sharing.
Have a very Happy New Year!
WOW! I might have to give this a try. Too cute! 🙂
Visiting from the CSI project…
I love this flower, and have made tons of them. Here is the link to my blog with one of the projects. http://creatingmemorieswithallieroo.blogspot.com/2011/01/valentine-day-flower-frames.html
I just love your blog, I check it out everyday.
Wow, it doens't even look like paper. I though it was fabric at first.
Thanks for sharing this tutorial. I decided to rag mine up – just like on rag quilting. Here are some pics:
http://prairiepatch.blogspot.com/2011/02/how-to-make-fabric-flowers.html
Thanks again, Emily!