• Skip to primary navigation
  • Skip to main content
  • Skip to primary sidebar
  • Skip to footer

Whipperberry

WhipperBerry • Your Home For Creative Inspiration

  • Home
  • About
    • Terms
  • Recipes
    • ZipList
    • Starters
    • Easy Weeknight Dinners
    • Main Dish
    • Salads
    • Side Dish
    • Soups & Stews
    • Desserts
    • Breakfast
    • Miscellaneous
  • Tutorials
    • Creative Crafts
    • DYI Decor
    • Fabric Crafts
    • Food How-To
    • Jewlery
    • Paint Projects
    • Paper Art
    • Party Styling
    • Photography and Graphic Design
    • Silhouette
  • Holidays
    • St. Patrick’s Day
    • Easter
    • Mother’s Day
    • Father’s Day
    • 4th of July
    • Halloween
    • Thanksgiving
    • Christmas
    • New Years
    • Valentine’s Day
  • Gift Ideas
    • Gifts For Everyone
    • Gifts for Dad
    • Mother’s day
    • For The Girls
    • For The Kids
    • Teacher Gift Ideas
    • Christmas
  • Printables
    • Holiday
    • Gift Idea
    • LDS Primary
  • Travel
  • Contact
  • Nav Social Menu

    • Facebook
    • Instagram
    • Pinterest
    • RSS
    • Twitter

Dessert

Velvet Cherry Sauce | Recipe

16 · Jul 9, 2012 · 21 Comments

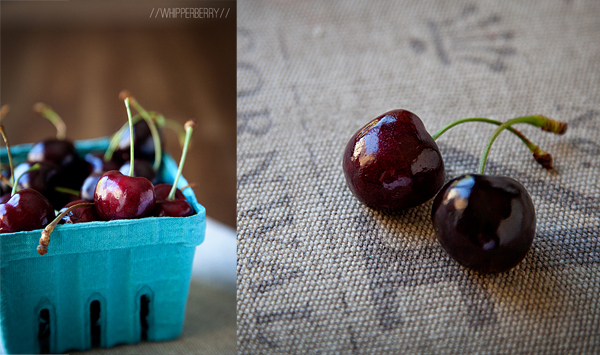
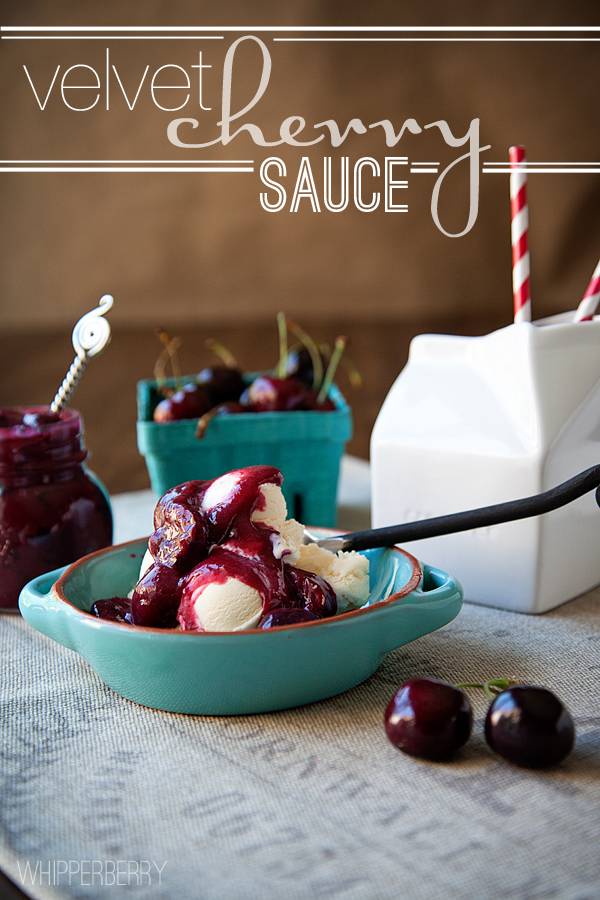
Last week during Friday Flair I hinted to a new cherry recipe in the works and my friends, it's aaaamazing!! If you follow me via Instagram or Facebook, you've seen some sneak peaks. After a bit of research and some experimentation… I give you WhipperBerry's Velvet Cherry Sauce!

My love affair with Cherries

My love affair with cherries started when I was a little girl and this is one love affair that never waxes or wains. It's true and loyal. Not a single soul can come between my love of sweet cherries and I.

My Issues with Cherries Jubliee

The other day I went to the store and bought several pounds of Bing cherries with the desire to come up with a fun new cherry dessert. Last year I made a fun Black Cherry White Chocolate Poke Cake in a Jar which has been one of my favorites, but it's time for something new this cherry season.

I wanted a great cherry sauce for ice cream, but I have issues with the standard Cherries Jubilee.  First, I don't love serving warm sauces on ice cream, I would like for my cream to stay iced while I am eating it. Second, I don't like the texture that results with the cherries being cooked. I would prefer that the cherries stay nice a sweet and firm for my ice cream dessert. Third, I don't like how thin and runny the sauce is, it's like cherry soup. I would like my sauce to have a little body and be able to stand up and stick to my ice cream rather than pooling at the bottom of the bowl. Anyone with me on this?

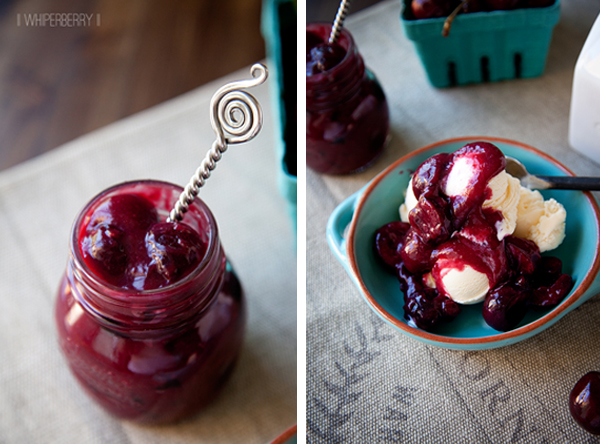
I started with a standard Cherries Jubilee recipe and then kicked it up a bit. I added a little of this and a little of that and created a fine cherry ice cream topping that is, dare I say it… Like VELVET!  The sauce enrobes the ice cream in a velvety blanket with layers of tart and sweet, it may just be my new favorite ice cream topping.

Recipe | Velvet Cherry Sauce

4 lbs of Bing cherries

1/2 cup sugar

juice from 1/2 a lemon

large strips of lemon zest from a whole lemon

1/4 cup Sherry

pinch of fresh nutmeg

2 tbs honey

1 tsp vanilla

2 tbs corn starch

1/4 cup water

2 tbs butter

Wash, pit and stem the four pounds of cherries. Cut cherries in half and divide in half. Two pounds goes into a large sauce pan. Reserve the other two pounds for later.  Along with the cherries in the sauce pan combine sugar, lemon zest, lemon juice, sherry and place over medium high heat for 20-25 minutes, stir occasionally. The cherries will release their juices and create a large amount of liquid. After 20-25 minutes take the sauce pan off the heat and remove the cherries and lemon zest with a slotted spoon.

Place cherries in a strainer and press with the back of your spoon to release all the remaining juices.  Pour juice into the sauce pan. Turn heat back onto medium  and add nutmeg, honey and vanilla.  In a small bowl combine water and cornstarch to create a slurry. Slowly whisk into the cherry sauce.  Bring to a low boil to let the sauce thicken a bit. Take off heat once it reaches your desired consistency. Off the heat add the butter and stir until melted to create a beautiful silky sauce.  Place sauce in a bowl and cover with plastic wrap right on the surface and chill in the fridge for one hour.

After an hour combine the remaining cherries with the cooled sauce. Serve over vanilla ice cream. Store in an air tight container for up to a week in the fridge.

If you would like to print or save this recipe, click on the arrow in the box below to download or click on the printer to print a copy of the recipe.

Give it a shot and tell me what you think.  I LOVE it!! What are some of your favorite cherry recipes?
Homemade Chocolate Pudding with Chantilly Cream | Recipe in a Jar

2 · Feb 28, 2012 · 20 Comments

I have no idea when it happened, I know it was pretty early on in my life… my love affair with chocolate pudding began. The day my Mom made… HOMEMADE chocolate pudding it was earth shattering.  I had no idea you could make your own pudding from scratch without the box of the infamous big J and little-O.

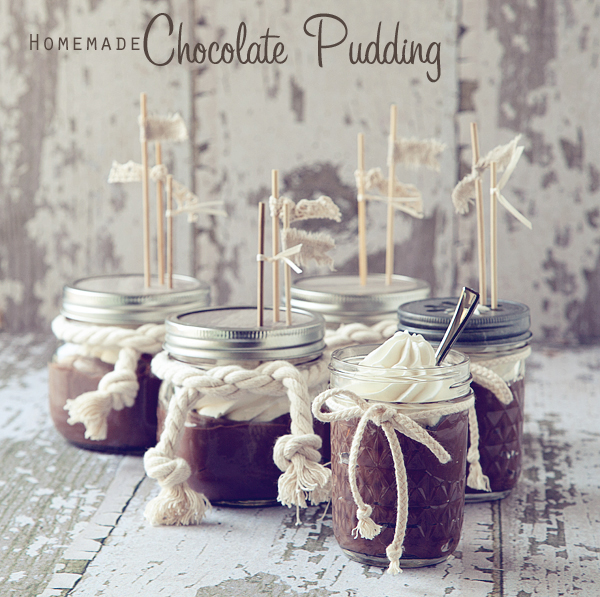
It's so easy to make and tastes so much better than the box stuff.  Pair it with some real Chantilly cream and dress it up in a jar and it's the perfect little dessert to serve at your next get together.

Chocolate Pudding

1 cup sugar

1/2 cup baking cocoa

1/4 cup cornstarch

1/2 teaspoon salt

4 cups milk

2 tablespoons butter

2 teaspoons vanilla extract

In a heavy saucepan, combine sugar, cocoa, cornstarch and salt.  Place over medium heat and slowly whisk in the milk. Bring to a boil stirring frequently.  Once it reaches a low boil, let it boil for 2 minutes stirring constantly. Remove from heat, stir in butter and vanilla. Bring to room temperature and then place in a container to chill in the refrigerator.  Place some plastic wrap on the top of the pudding to avoid developing a skin on the top. Chill for 2-4 hours before serving.

Serves 6-8

Chantilly Cream

1 pint whipping cream

1/4 cup powdered sugar

1 teaspoon vanilla extract

Ten minutes before you start your Chantilly cream, place your mixing bowl in the freezer.  Remove bowl from freezer and add whipping cream.  Mix on high speed for 2 minutes until it starts to stiffen. Add powdered sugar and vanilla and continue to mix on high until cream becomes stiff and hold is shape. 

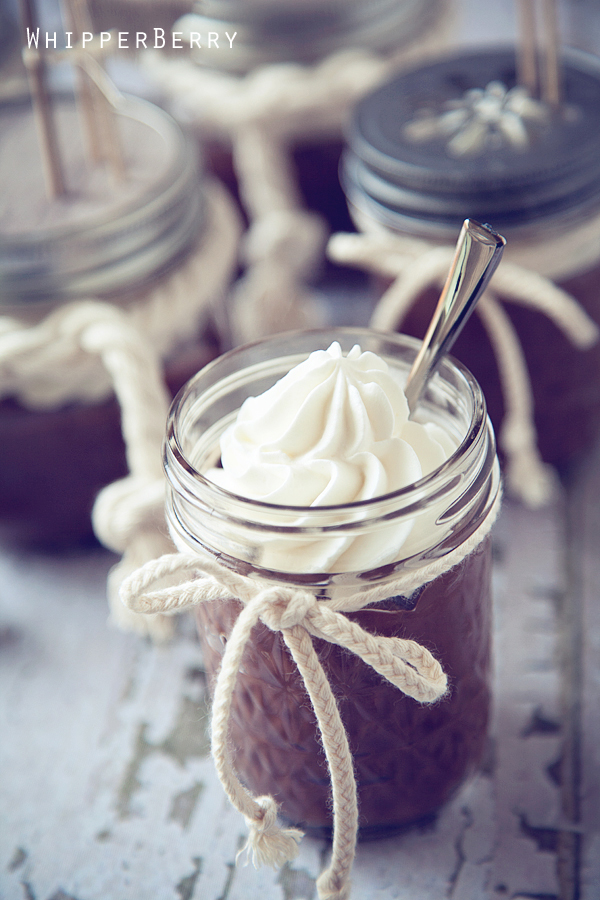
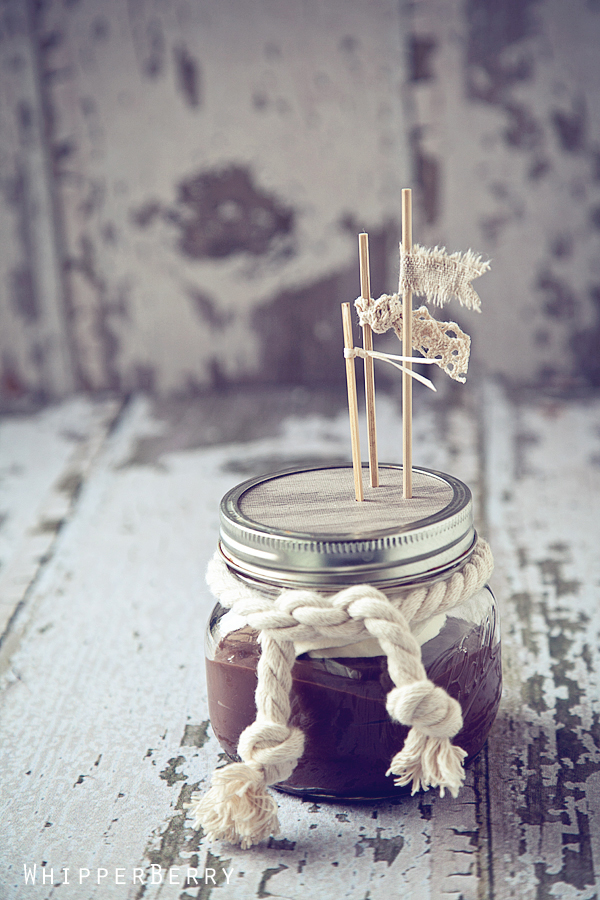
Fill your jars with the chilled pudding and then pipe the Chantilly cream on top with a large closed star tip in a pastry bag {I ordered my from Sweet Baking Supply} and pipe the Chantilly cream on top of the pudding.

I dressed up the single serving pudding jars with some fun rope. Then I topped the jars with a simple piece of scrapbook paper cut in a circle to fit on top of the jar. Then I decorated some bamboo skewers with crocheted lace, ribbon and fabric to make little flags on top of the pudding.  I found that punching small holes in the paper worked better than trying to stab the skewers into the paper.

This will be the talk of the room at your next book club, baby shower or party.  Give it a try and let me know what you think!

What's your favorite party treat to share with friends and family?

Meyer Lemon Doughnuts | Recipe

5 · Feb 15, 2012 · 28 Comments

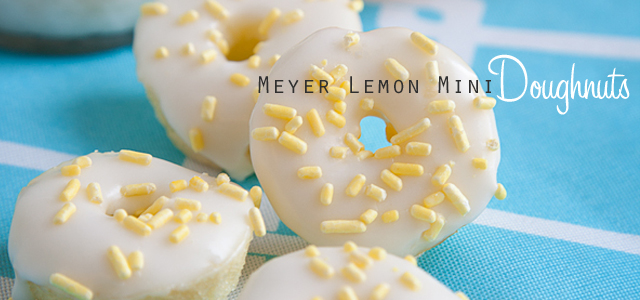
I have made no secret of the fact that I am falling in love with baked doughnuts. Last month I made Vanilla Bean Heart Doughnuts for Valentines Day. This month I am loving experimenting with the Meyer Lemons that my local grocery store has started to stock. This is my first lemon recipe this season. Last year we had Lemon Crinkle Cookies and Lemon Curd Cheesecake.  Believe me, I'm sure it won't be the last.  I love lemon!!

First off, what is a Meyer lemon? Well, since you asked so nicely… a Meyer Lemon is a cross between a lemon and a Mandarin Orange, thus taking the sweetness of the orange and the tart from the lemon and making a wonderful hybrid for us lemon lovers. It's perfect for baking with and for adding a little slice of one to your or Diet Coke.

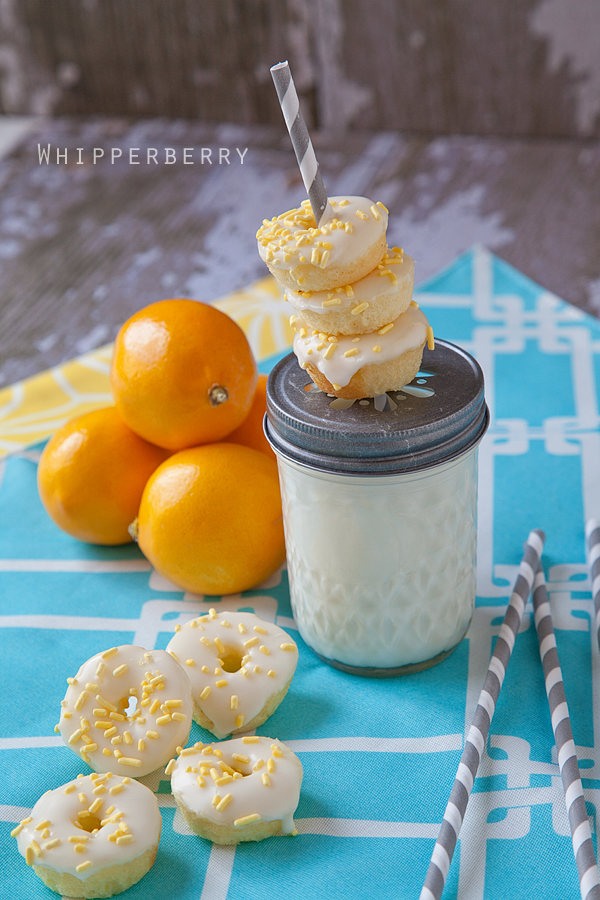
For this doughnut I took the standard vanilla doughnut recipe added some zest from the lemons and then glazed them with a lemon infused glaze. Here is the recipe…

2 1/2 cups cake flour

1 cup sugar

2 1/2 teaspoon baking powder

1 teaspoon salt

1 cup buttermilk

2 teaspoons lemon zest

1 teaspoon vanilla extract

2 eggs slightly beaten

3 tablespoons melted butter

Preheat oven to 400 degrees and spray pan with non-stick cooking spray

In a large mixing bowl sift together the flour, sugar, baking powder and salt. In a separate bowl add buttermilk, vanilla, lemon zest, and eggs. Add wet mixture to the dry mixture and then add the melted butter. Mix just until combined. Fill each doughnut cup 1/2 full and bake accordingly.

I find the best way to fill the pan is to fill a pastery bag with the doughut batter and with a simple round tip gently add your batter to the pan.  Better yet, a pancake pen is PERFECT for the job!

large doughnut pan or heart shaped pan 10-12 minutes

mini doughnut pan 4-6 minutes

4 cups confectioners sugar

4 tablespoons Meyer Lemon juice

In a small bowl combine confectioners sugar with lemon juice. Add lemon juice slowly until you reach the desired consistancy.  The doughnuts in the pictures had a pretty thick glaze, but if you would like a light glaze add more lemon juice.

Let me know how your doughnut adventures go. Send over some pictures if you make some. I would LOVE to see them!!

Pazookie | Recipe

8 · Dec 28, 2011 · 26 Comments

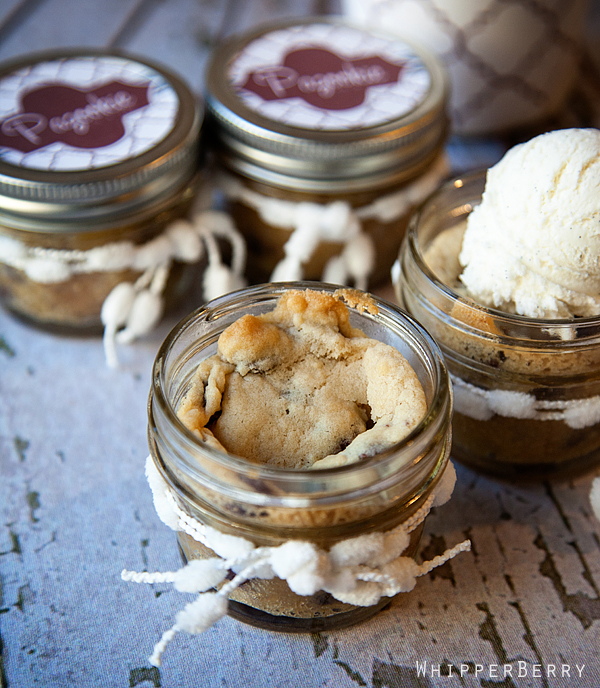
A few weeks ago I participated in the holiday cookie exchange at LoveFeast Table and thought I would share my Pazookie with you guys today.  No, no… it's not misspelled, it's a Pizookie in a jar, so I called it a PAZOOKIE. I came up with it for a fun, out of the box cookie exchange idea, but I think it would also be great for a cozy New Years celebration… So, here you have it, the Pazookie!


You may have heard of a Pizookie… a chocolate chip cookie baked in a pan and is kind of like a gooey, chocolate pizza.  Well, a Pazookie is a similar treat, however it is baked in a jar.  I am a big fan of creating fun treats in jars.  They are portioned perfectly and provide a fabulous blank canvas in order embellish your fun treat.  Here are some of the other treats in a jar from WhipperBerry…

…

Read On →

{Recipe} Simple Vanilla Buttercream

25 · Aug 11, 2011 · 53 Comments

All my life I've never been much of a frosting girl.  I was a cake lover and my sister would always eat my frosting.  That was until I had the most amazing buttercream frosting a few months ago here in Vegas at a place called Project Cupcake. I am now obsessed with buttercream and I vow today to figure out how to make the heavenly concoction.  Maybe Project Cupcake will hook me up with some lessons…

With that said, I am going to start simple and work my way up.  Here is a fabulously easy buttercream recipe that anyone can master.  


The trick… make sure the butter is at room temperature!  Do not put it in the microwave to soften. Plan ahead and take the butter out of the fridge an hour or two before you need it and you will have the most divine frosting.


Simple Vanilla Buttercream

1 cup of unsalted butter {2 sticks ~ softened}

2-4 cups of powdered sugar {sifted}

1/8 teaspoon of salt

1 tablespoon of good vanilla extract

2~4 tablespoons of milk or heavy cream

In a mixing bowl fited with the paddle attachment, mix the butter at medium speed until nice and smooth.  Turn the mixer down to low and slowly add 3 cups of the sifted sugar.  Once sugar is fully incorporated turn the mixer up to medium and add salt and vanilla.  Add 2 tablespoons of cream and mix for 3 minutes.  Check the consistancy of the buttercream.  If it is to loose, add more sugar. If it is stuff, add more cream.  This recipe is really forgiving so work with it until you have the consistancy that you are looking for.

We've linked to…

Dine & Dish

  • « Go to Previous Page
  • Go to page 1
  • Interim pages omitted …
  • Go to page 19
  • Go to page 20
  • Go to page 21

Primary Sidebar

Heather from Whipperberry
Hello... my name is Heather and I'm the creator of WhipperBerry a creative lifestyle blog packed full of great recipes and creative ideas for your home and family. I find I am happiest when I'm living a creative life and I love to share what I've been up to along the way... Come explore, my hope is that you'll leave inspired!

Footer

  • Privacy Policy

Copyright © 2023 · Seasoned Pro