• Skip to primary navigation
  • Skip to main content
  • Skip to primary sidebar
  • Skip to footer

Whipperberry

WhipperBerry • Your Home For Creative Inspiration

  • Home
  • About
    • Terms
  • Recipes
    • Starters
    • Easy Weeknight Dinners
    • Main Dish
    • Salads
    • Side Dish
    • Soups & Stews
    • Desserts
    • Breakfast
    • Miscellaneous
  • Tutorials
    • Creative Crafts
    • DIY Decor
    • Fabric Crafts
    • Food How-To
    • Jewlery
    • Paint Projects
    • Paper Art
    • Party Styling
    • Photography and Graphic Design
    • Silhouette
  • Holidays
    • St. Patrick’s Day
    • Easter
    • Mother’s Day
    • Father’s Day
    • 4th of July
    • Halloween
    • Thanksgiving
    • Christmas
    • New Years
    • Valentine’s Day
  • Gift Ideas
    • Gifts For Everyone
    • Gifts for Dad
    • Mother’s day
    • For The Girls
    • For The Kids
    • Teacher Gift Ideas
    • Christmas
  • Printables
    • Holiday
    • Gift Idea
    • LDS Primary
  • Travel
  • Contact
  • Nav Social Menu

    • Facebook
    • Instagram
    • Pinterest
    • RSS
    • Twitter

Vinyl

Goldfish Games • Tasty Road Trip Game Fun

12 · Feb 26, 2019 · Leave a Comment

This post has been sponsored by Goldfish® Crackers. All thoughts and opinions are my own.

Road trip season is going to be here before we know it! Now’s the time to start preparing some fun activities that your littles will love in the car for those long hours. I know, I know… We all have our digital devices, and road trips aren’t as tedious as they were in the past. I have even found myself telling my kiddos, “we will be there in about 3 movies.” Akkkk, for real? Have we all become so attached to our devices that we’ve lost the magic of a FUN road trip with the family? I sure hope not! We used to have all kinds of road trip games when I was little, and the best were the ones that also involved a snack. Do you know what’s perfect for road trip games? Goldfish® Baked Snack Crackers! They have all kinds of magic in those cute little bags. Today, I’m sharing a couple of fun road trip games that are packed with Goldfish FUN inside. I know, I know, we aren’t supposed to play with our food, but these games are just as fun as they are delicious! Baked with 100% real cheese and with no artificial flavors or preservatives, this is a snack you can feel good about serving your kids!

Road Trip Games

Two road trip staples are Tic-Tac-Toe and BINGO of course. How many times did you play these gems as a child? What I’ve done is kicked it up a notch and added some tasty fun to go along with the games. I grabbed some travel containers from my local discount store and then added vinyl (click HERE if you would like to learn how to apply vinyl) to the lid using my electronic cutting machine. Come watch this cute video that I’ve created to show you how fun Goldfish® games can be…

Any of that look familiar? Well, you can create some road trip games of your own. Grab some to-go containers and either draw on the lids with a permanent marker or, if you have a die-cutting machine and some vinyl, you can use my cut files to make some Goldfish® Games of your own. CLICK HERE to access the design files.

Goldfish® Tic-Tac-Toe • Travel Size

Goldfish® Bingo • Travel Size

Once you add your vinyl or your own hand-drawn design, all you have to do is fill your containers with yummy Goldfish®. I love that they are made with whole grain, real cheese & the colors are all plant based—which I LOVE.

Now, when your kiddos are getting restless in the car, all you need to do is pass them these Goldfish® games and they will have all kinds of fun with you playing tic-tac-toe or trying to find that cow so that you can win travel Bingo!

Disclaimer +

This is a sponsored post brought to you by the lovely folks at Pepperidge Farms®, the makers of Goldfish® Baked Snack Crackers. With that said, remember, I will only promote products that I truly love and use in my everyday life.
Vintage Canvas Christmas Tree Cart

47 · Nov 28, 2018 · 2 Comments

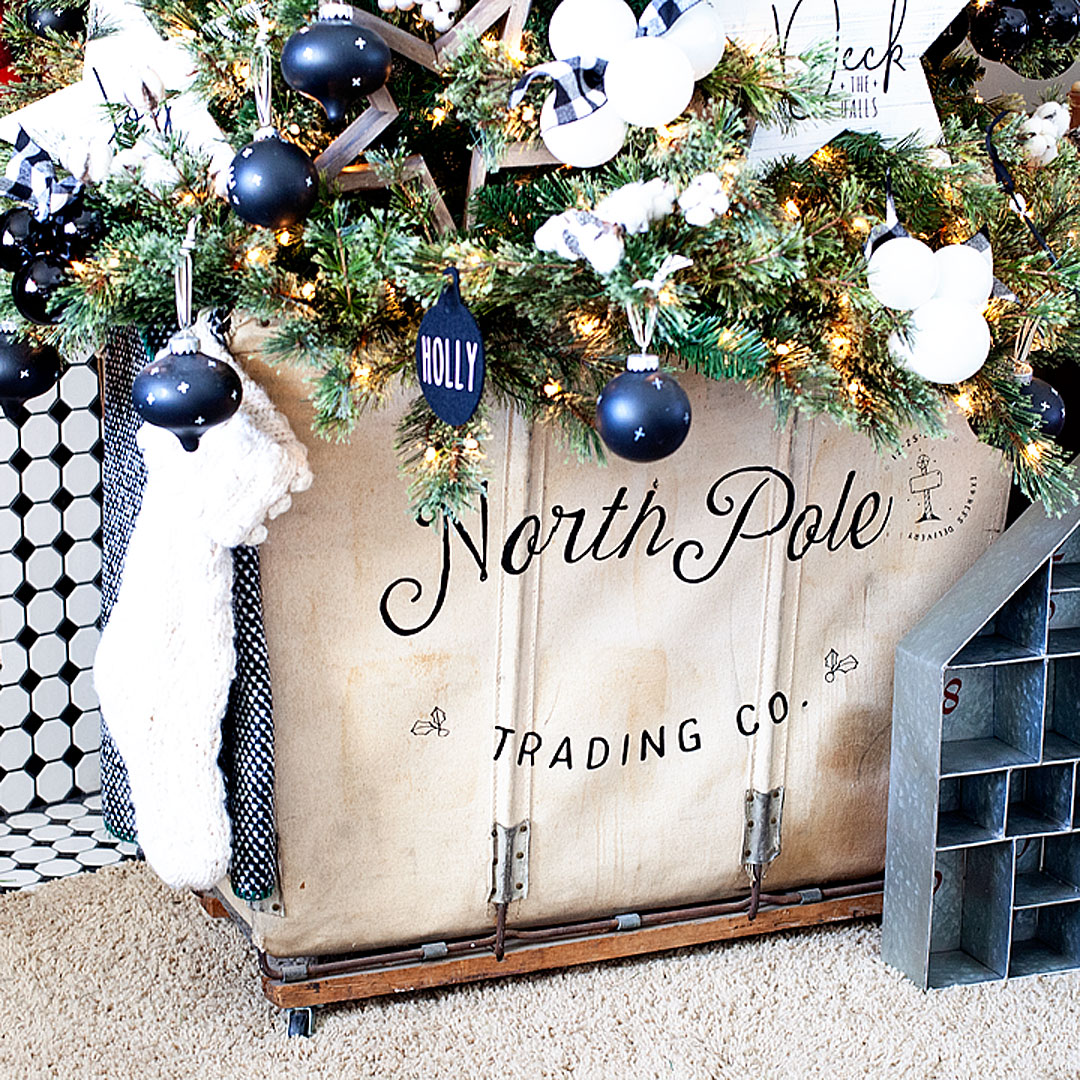
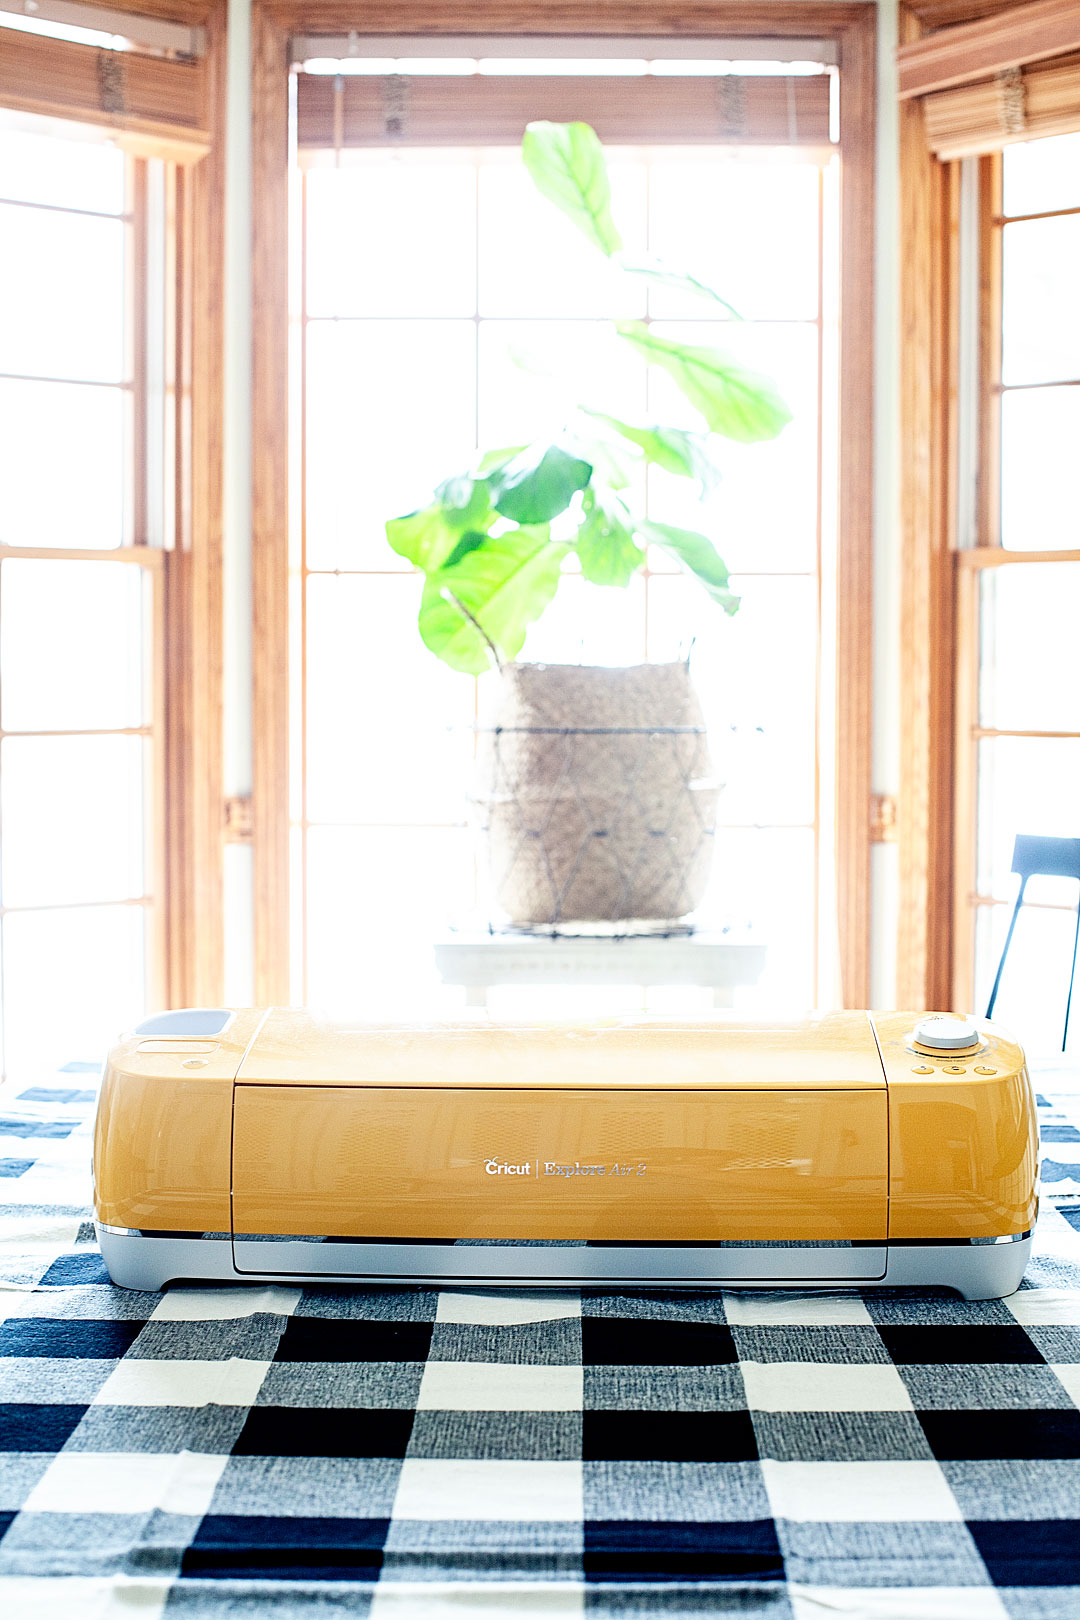
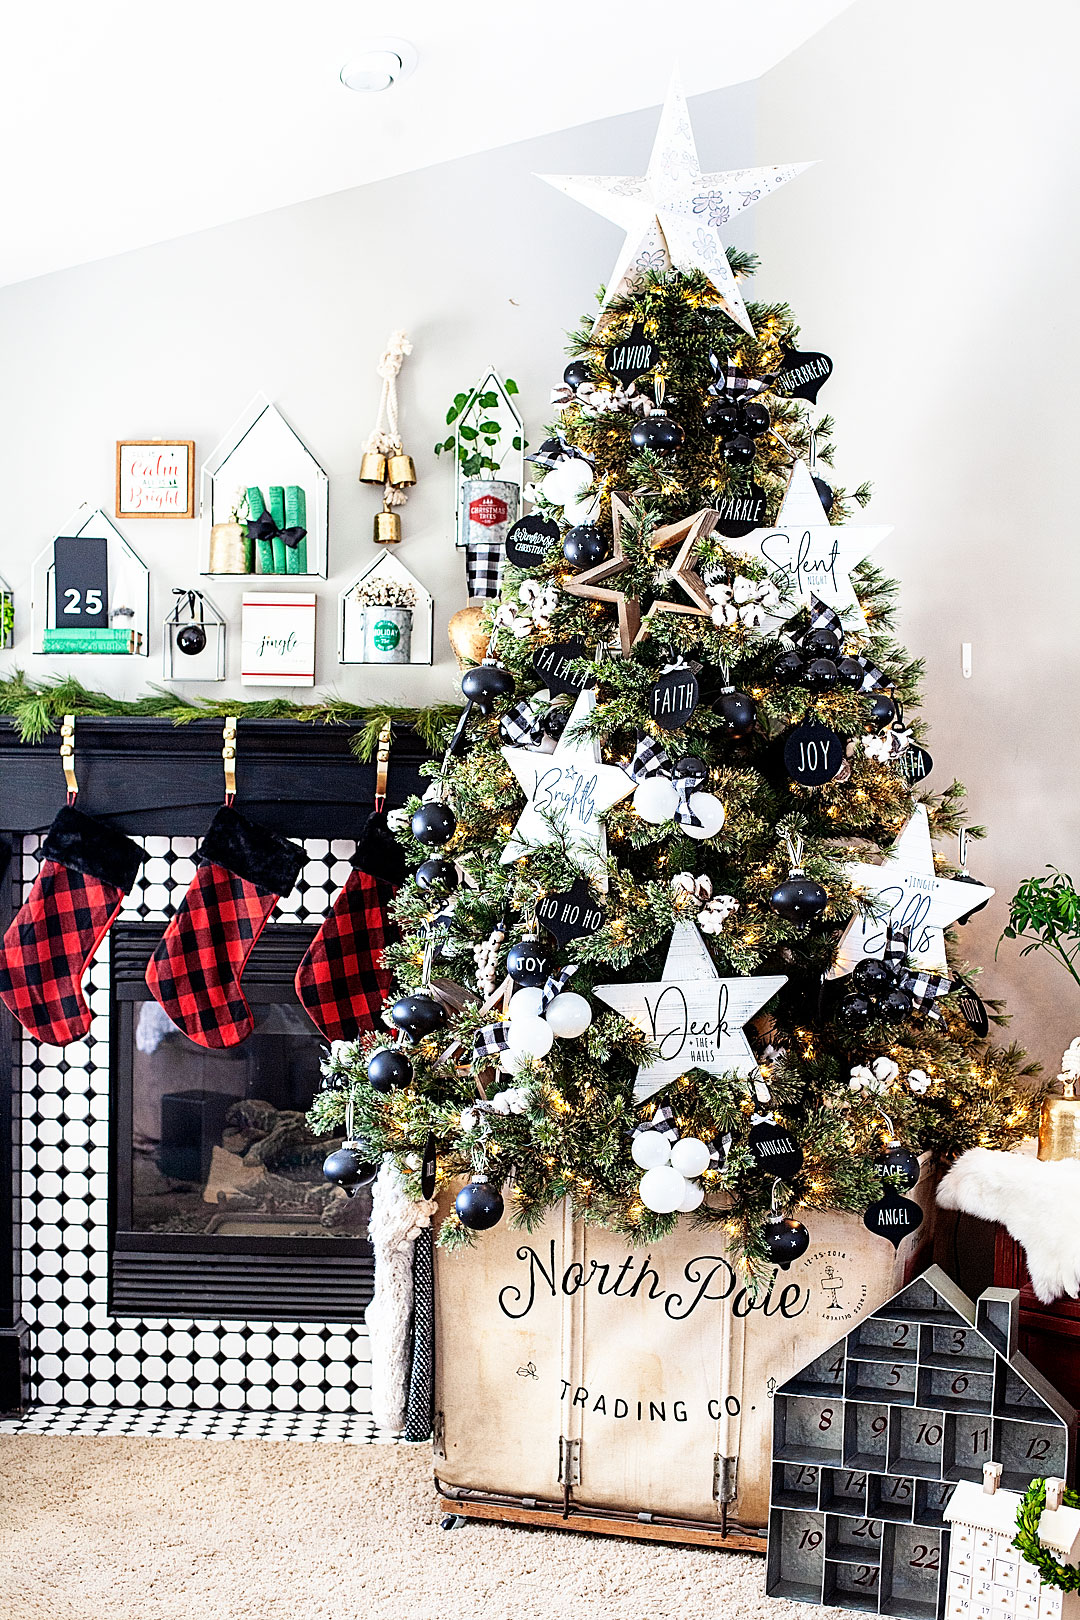
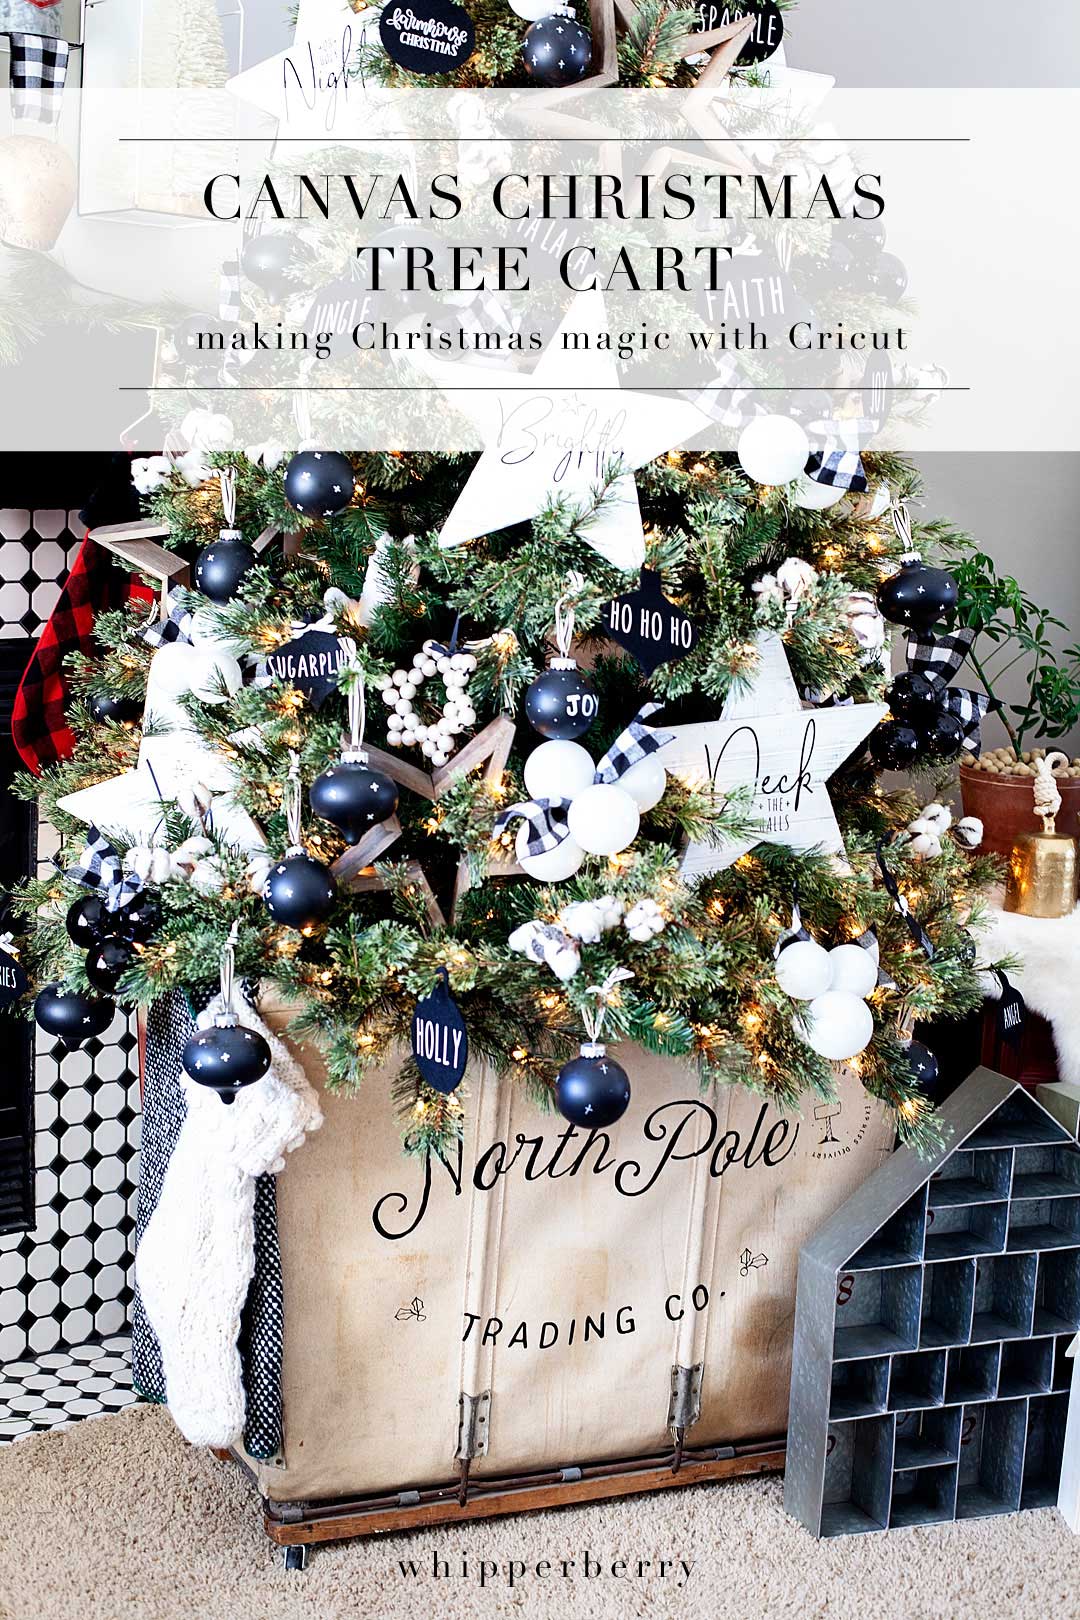
You guys, this project has been a long time coming! I’ve made all kinds of ornaments for my Christmas tree using my favorite Cricut tools like these felt ornaments or my farmhouse stars from last year. Now, I have something extra special for you! I have some good friends here in Nebraska, Brent & Leah from Old Cotton Wood, who are master pickers. They find all kinds of goodies and then travel the country selling at vintage markets. A few years ago Leah texted me about a vintage canvas mail cart that she thought I might like. The instant I saw it, I knew I needed it for my Christmas tree. My family hated me and begged me to get rid of it as we were moving to our new house and I held firm. I have plans for this beauty and you are all just going to have to wait and see what I create. Finally this year, I had the tools to create a beautiful canvas Christmas Tree Cart using my new, absolute favorite tools my Cricut Easy Press 2 mini & my new Sunflower Cricut Explore Air 2!! Now my family LOVES it and will be far more tolerant of my crazy hoarding of vintage finds. Come see how you can make one for your Christmas Tree.

+ this post brought to you by the amazing folks at Cricut +

create a beautiful canvas Christmas Tree Cart with @cricut • WhipperBerry

The Canvas Cart

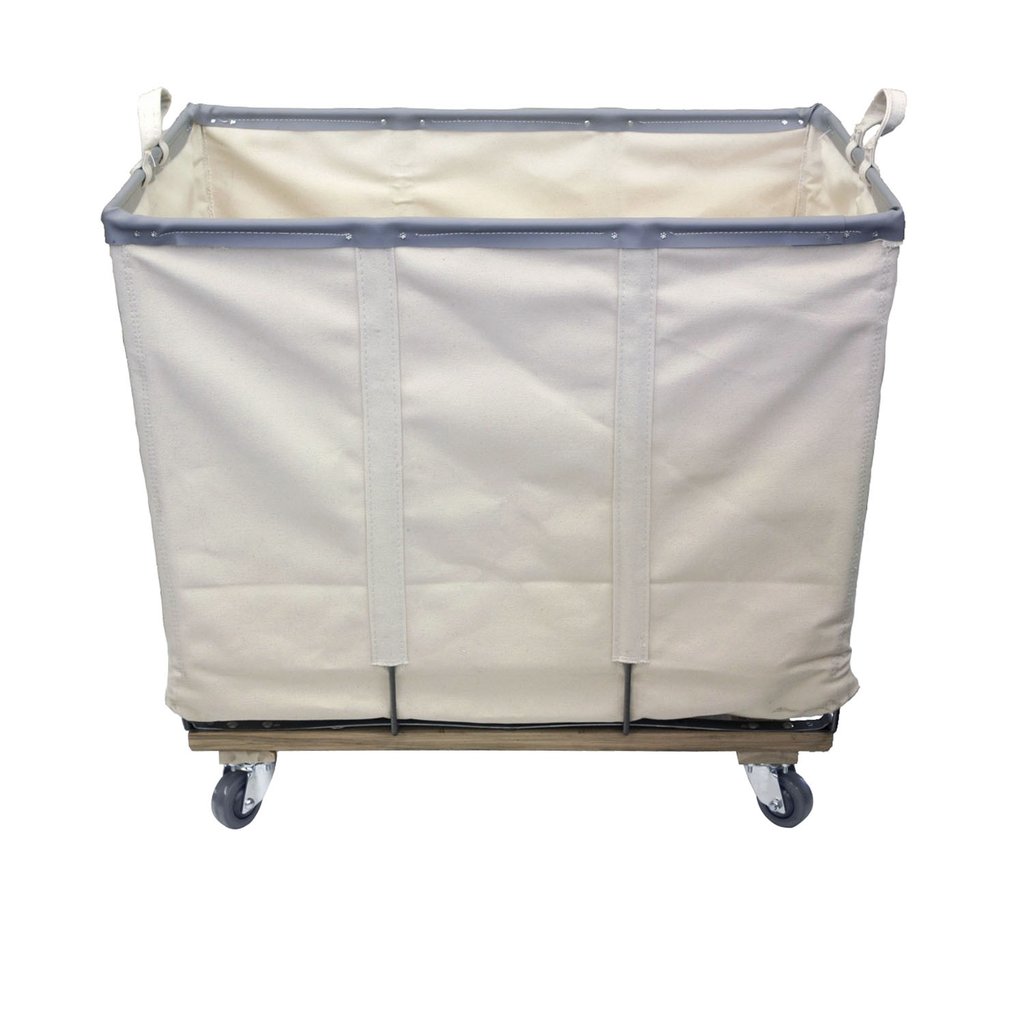
I know, I know, I know… You guys don’t have a Leah looking out for you, finding fabulous vintage canvas carts for you. I get it. However, you do have ME and I have found a fabulous new canvas cart that will be perfect for this project. It’s from one of my favorite (new to me) companies, Steele Canvas. They have a perfect canvas cart that will become a family favorite for the Holidays I’m sure! Plus, when it’s not holding up your Christmas tree, you can use it as a laundry cart or for storage. You guys, I crush hard on basically anything they make… I love canvas in all shapes and forms.

steel canvas cart

Now, your canvas cart won’t have that vintage patina but, it will look amazing either way… Old or New!

The Design

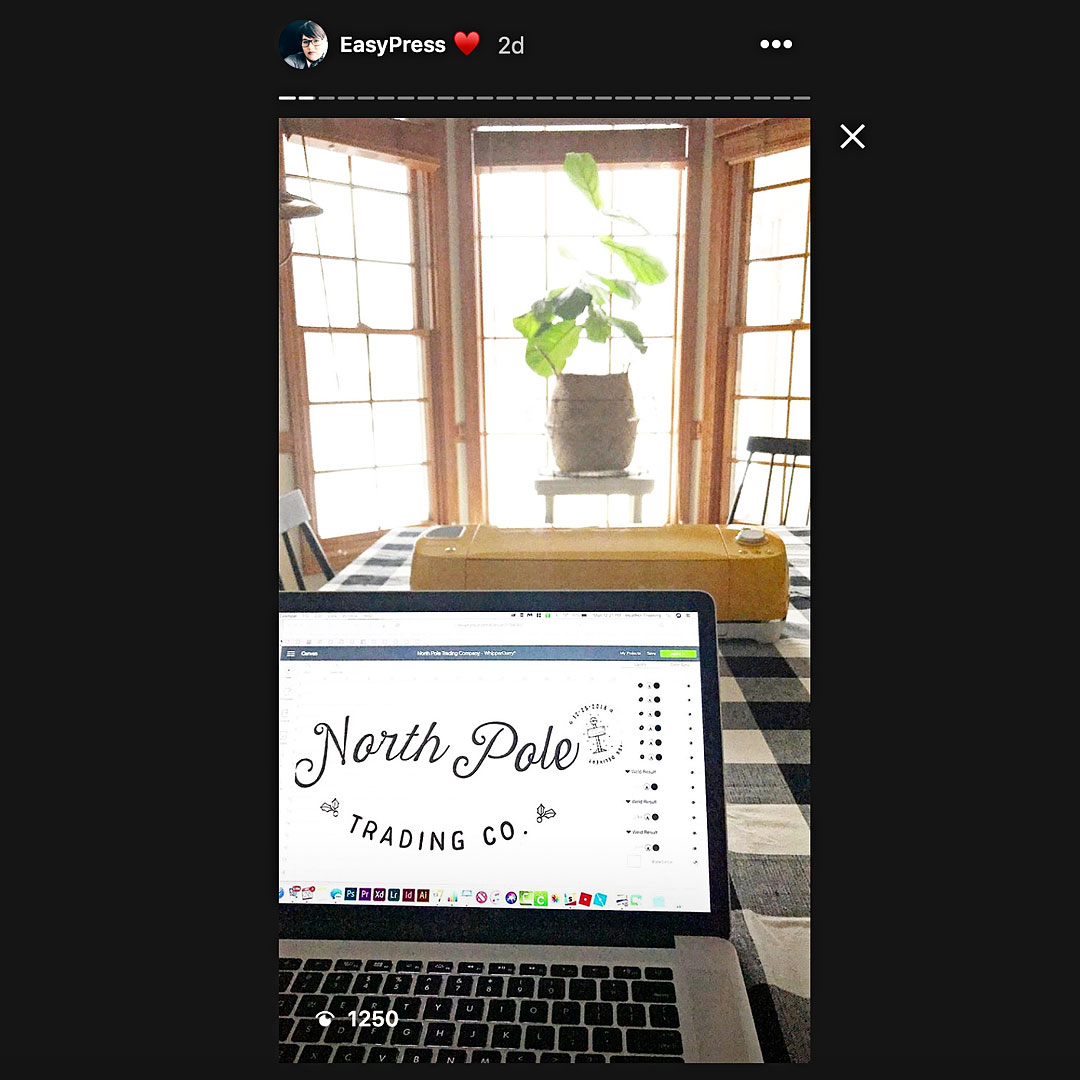
I do my best to create all of my designs within Cricut Design Space but, this one I had to design on my own in Illustrator. However, I’m sharing the SVG file for you guys to use on your own cart. Click on the image below to download the SVG file or click HERE to access it in Design Space.create a beautiful canvas Christmas Tree Cart with @cricut • WhipperBerry

Canvas Christmas Tree Cart Supplies

create a beautiful canvas Christmas Tree Cart with @cricut • WhipperBerry

Now, when you are cutting Iron-On material like Cricut Iron-On Lite or my new favorite Everyday Iron-On you can use any of the Cricut cutting machines; the Explore Air, Explore Air 2 or the Maker. Any of these fabulous machines cut iron material just fine. BUT… if you want the Sunflower Explore Air 2 you need to grab it at Michaels AND they are on a crazy awesome sale this week for Cyber Monday!

The new Sunflower @Cricut Explore Air 2 from @michaelsstores • WhipperBerry

Here’s what else you will need…


  • Cricut Machine • the Sunflower one will make you HAPPY
  • Cricut Everyday Iron-On OR Iron-on Lite  • black
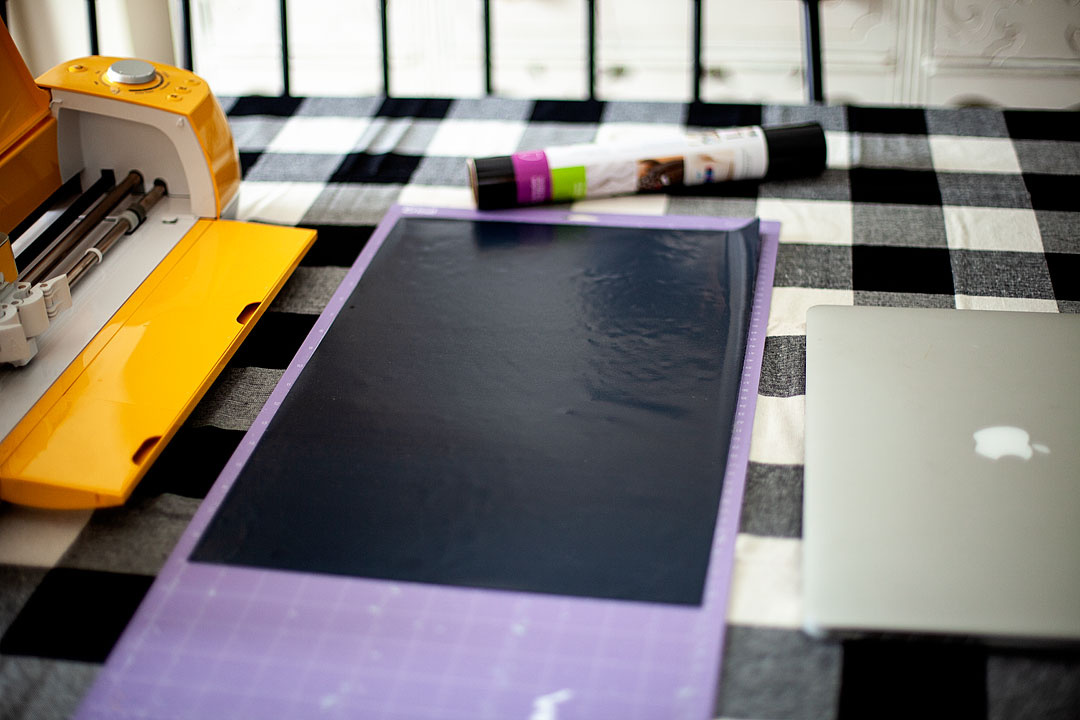
  • 12×24 cutting mat • green or purple
  • Cricut Easy Press 2 • small
  • Canvas Cart
  • North Pole Design in Design Space

Instructions

  1. You’ll need to cut the design in Design Space which is sized for a large canvas cart right now. However, you can resize as needed. I’m sharing several tips and tricks in my STORY that help with all kinds of things for this project. Go check it out before you start anything. DO NOT FORGET TO MIRROR YOU DESIGN BEFORE YOU CUT! Also, remember the shining side of the iron-on material goes face-down on your cutting mat.
  2. In my Instagram Story, I share how to get all of your design onto ONE cutting mat, therefore, saving MONEY by not wasting iron-on material. I also talk about using more than one piece of iron-on for this LARGE design. 
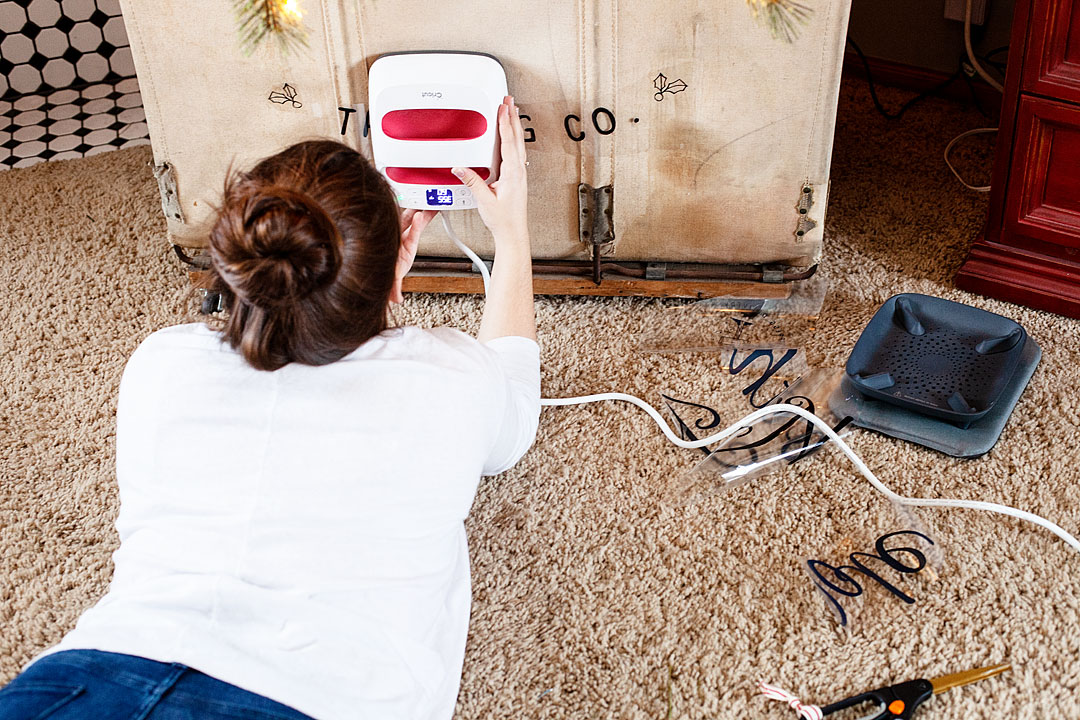
  3. Weed your design and grab your Easy Press 2 (small) and get ready to iron on your design onto your cart. I recommend starting by centering the  Trading Co. part first and pressing it onto your cart. If you are smart, you will do with before you load your tree into the cart and lay the cart on its side. It’s totally do-able pressing your iron-on vertical, it’s just a good arm workout. 😉 Again, watch my story to get all of the tips and tricks for this process. 
  4. Set your Easy Press to 375˚ and start pressing your design onto the cart. It helps to use the Cricut spatula tool to press the Cricut Iron-On lite or Everyday Iron-on onto the canvas surface. Not having a hard work surface, you do have to baby this project a little bit. Work in sections until the whole design is complete.

create a beautiful canvas Christmas Tree Cart with @cricut • WhipperBerry


Linen Wedding Organizer Envelopes with a Little Flair

7 · Jul 23, 2018 · Leave a Comment

Wedding planning… I am DEEP into the planning of my first daughter’s wedding that is coming up in a little over a month. I have taken the approach of staying as organized as possible for this monster project. Really, that’s the only way you can prepare for a wedding and not lose your mind! I found some linen organizing envelopes at Target from the Hearth and Hand line created by Joanna Gains the other day and thought they would be perfect to keep things organized for the wedding. Of course, I needed to add some labels and in true WhipperBerry fashion, they needed to look classy. I turned to DecoArt for a little help with their Stylin’ paint perfect for home or fashion accessories of all kinds!

• This post is brought to you by DecoArt •Add some style to fabric or leather office supplies with @decoart Stylin' Paint | #paint #homedecor #officesupplies #wedding #weddingplanning

Wedding Organization

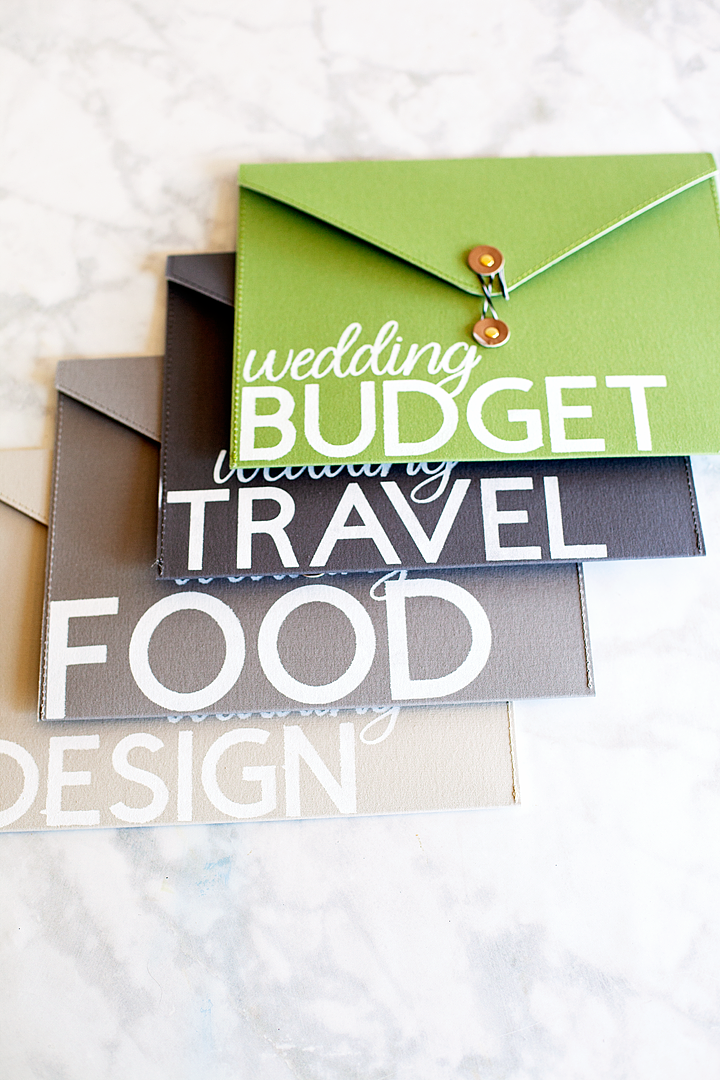
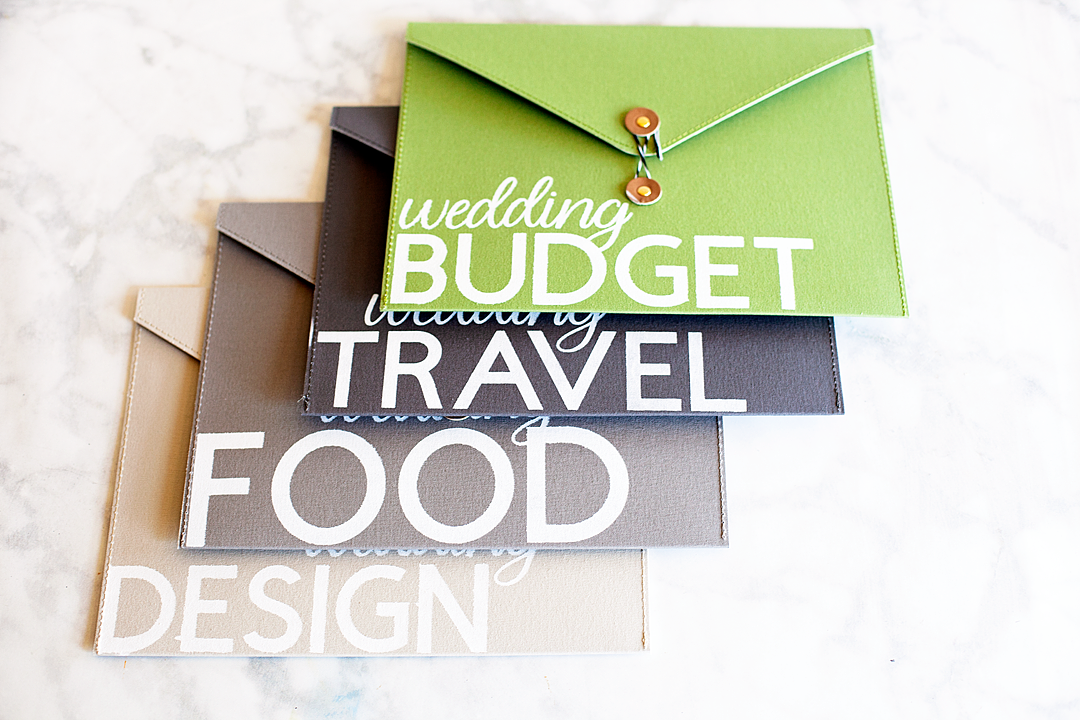
Wedding planning is NOT for the faint of heart. So many details, so many emotions, so much stuff! It really pays to be as organized as possible. Like I said before, I found some linen envelope organizers that I thought would be perfect to keep receipts, notes, menus and the like organized. I identified 4 areas that I thought would be good to have specific folders for,

  1. Budget
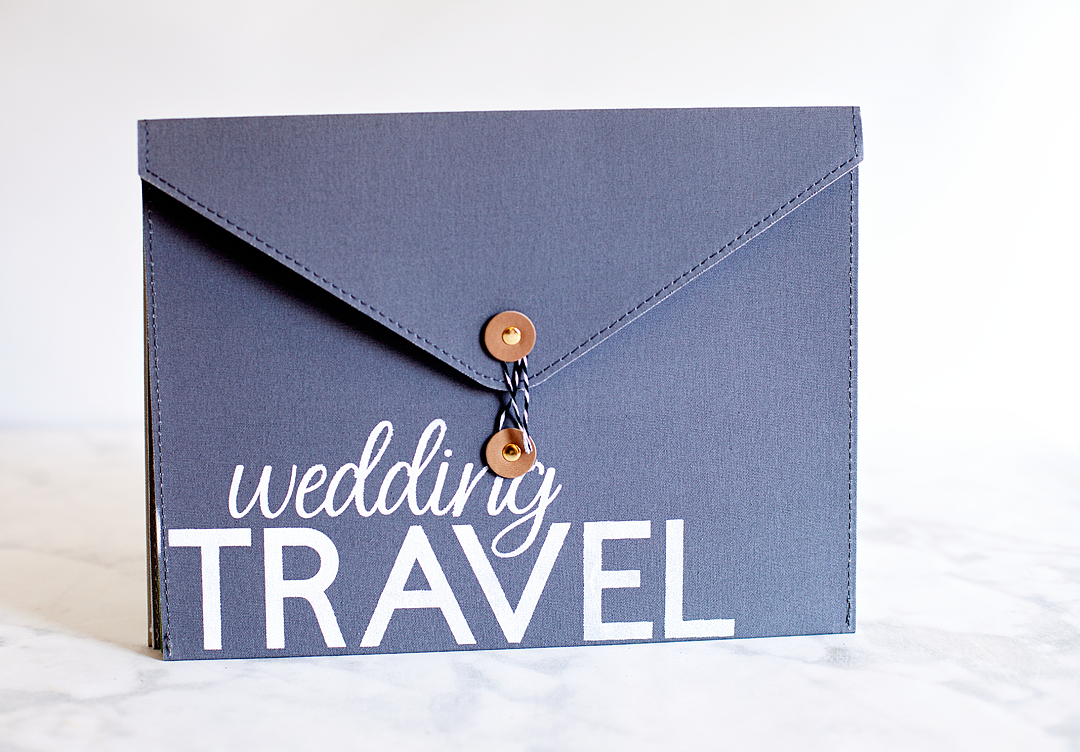
  2. Travel
  3. Food
  4. Design

Budget

This is where you can keep your notes as far as your budget goes along with receipts for everything purchased and paid for.

Travel

If your family is anything like ours, not everyone lives in the same place. Many family and friends will be traveling from elsewhere and this is a great way to keep track of those notes and itineraries.

Food

Food is one of the big elements to the reception. This is where you can keep track of proposals, budget, menu items, and such.

Design

You can think of this folder as your Pinterest hardcopy. Notes for your overall design of the event, different design elements, floral ideas, invitation ideas and so much more. Keep track of those ideas here along with any other pertinent information for the overall look of the event.

Linen Organizer Wedding Labels

There are a couple of different steps to this easy project and here’s a quick snippet of my Instagram Story to show a little more about how this works.

Label Design

I designed the labels in Cricut Design Space and used my Cricut Maker to cut out the vinyl for the project. I love making stencils with leftover vinyl and then using some DecoArt paint to create all kinds of projects. I’m thrilled to find that I can do the same with fabric, canvas, and leather now as well with DecoArt Stylin’. Here are some the key benefits to DecoArt Stylin’,

  • Flexible paint specially-formulated to prevent cracking or peeling
  • Bonds to surface to create a seamless finish
  • An ideal color palette for fashion décor
  • Water-based
  • Soap and water clean-up

If you are a Cricut user (if not, I highly suggest that you should be, they go hand in hand with paint!) you can access my design in my Design Space profile.  If not, you can create your own stencils designs using other design software and use either a cutting machine or craft knife to cut your stencil out of vinyl or freezer paper.

Linen Wedding Organizer Envelope Supplies

Here are the supplies you will need for your project.

  • linen or canvas folders
  • DecoArt Stylin’ Paint
  • vinyl, stencil vinyl
  • transfer tape
  • stencil sponge brush or a makeup sponge

Instructions

Add some style to fabric or leather office supplies with @decoart Stylin' Paint | #paint #homedecor #officesupplies #wedding #weddingplanning

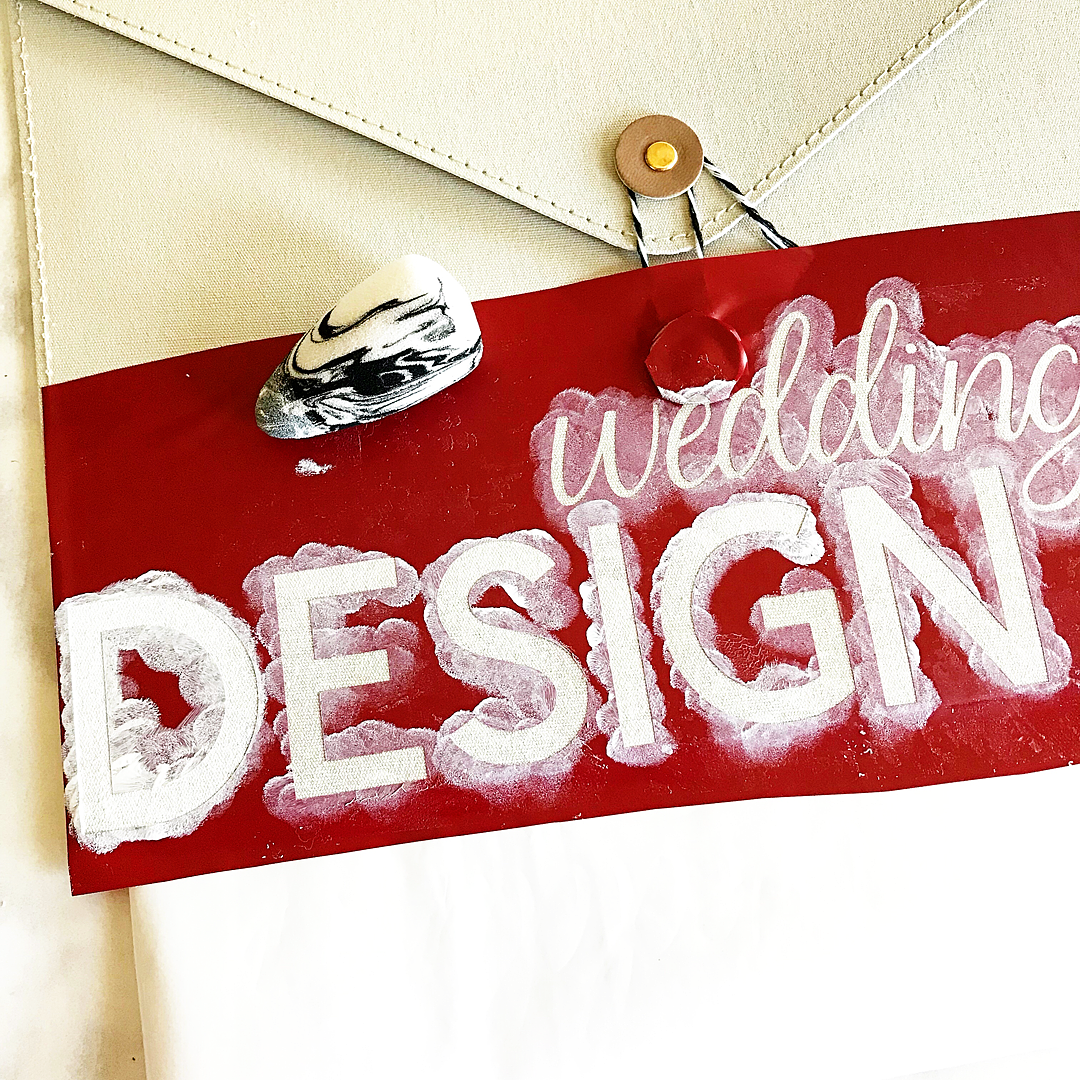
  1. Cut out your stencil and weed the vinyl make sure to keep the negative side of the design. That just means that you’ll need to remove the letters from the vinyl and leave the rest of your vinyl as the stencil. Be careful that you keep a good eye on the middle sections of letters and those darn dots at the top of “i”.
  2. Cover your stencil in transfer tape and remove the back of the vinyl.
  3. Carefully place the stencil onto the fabric folder and press down with a brayer or scraper tool. Fabric typically has a texture that is going to make it a little tricky to get a truly clean line but, if you press your vinyl down well, you’ll have a pretty good seal.
  4. Remove the transfer tape carefully.
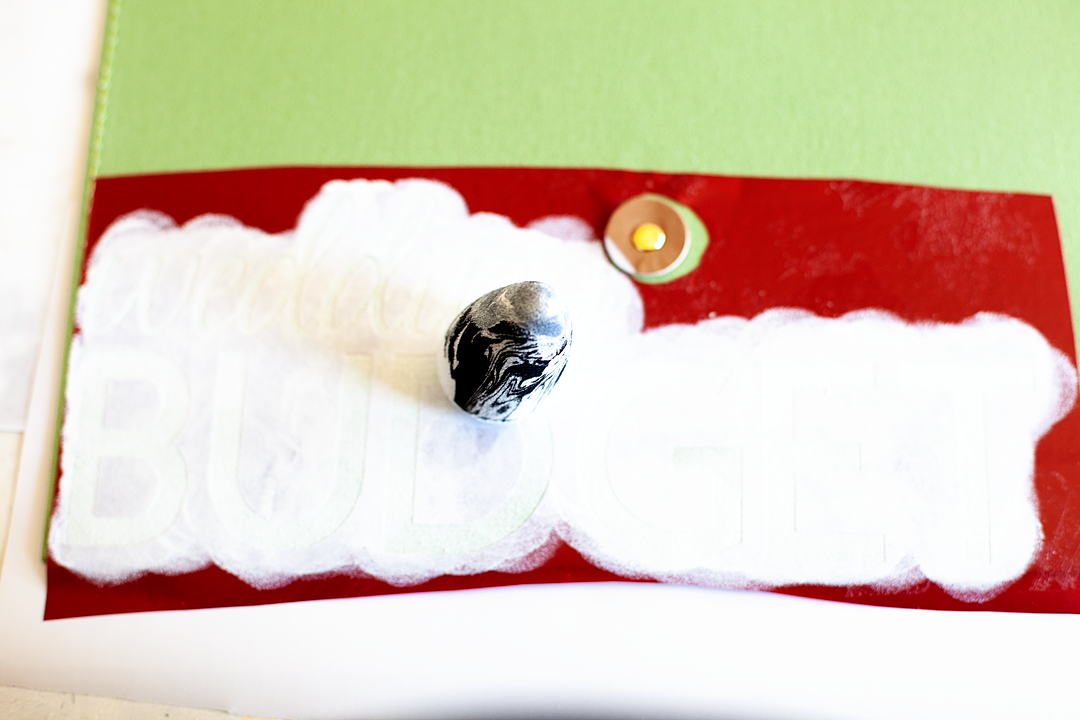
  5. Place a quarter size amount of paint onto a paper plate and use your sponge to lightly dab the paint onto the surface of your organizer. Add some style to fabric or leather office supplies with @decoart Stylin' Paint | #paint #homedecor #officesupplies #wedding #weddingplanningKeep the paint LIGHT to avoid any paint leaking under the stencil. It’s better to have several rounds with light paint than to have an unsightly leak area.
  6. Cover your stenciled image until you have the coverage you would like.Add some style to fabric or leather office supplies with @decoart Stylin' Paint | #paint #homedecor #officesupplies #wedding #weddingplanning
  7. Let dry.
  8. When the paint is dry, remove the stencil and get to work on that darn wedding!

Add some style to fabric or leather office supplies with @decoart Stylin' Paint | #paint #homedecor #officesupplies #wedding #weddingplanning

Disclaimer • This is a paid post with my friends at DecoArt. I am a member of the DecoArt Core Creator program and do receive payment and product to help facilitate these creative posts. However, keep in mind… I will NEVER share something I don’t truly love and use in my everyday life.

SaveSave

SaveSave

SaveSave

SaveSave

SaveSave

SaveSave

SaveSave

SaveSave

SaveSave

SaveSave

America The Beautiful Porch Sign

9 · Jun 8, 2018 · 3 Comments

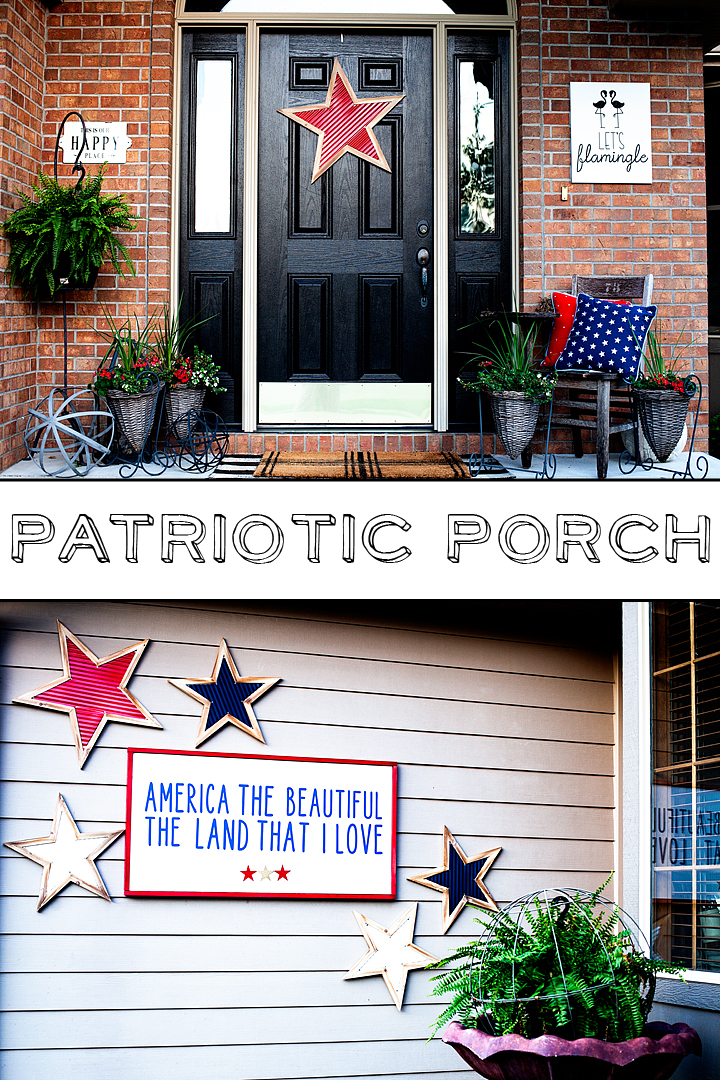
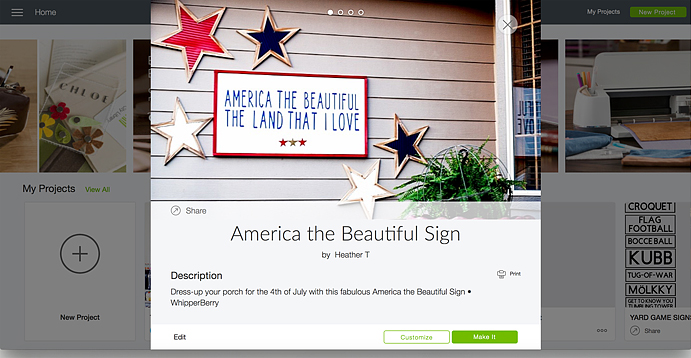
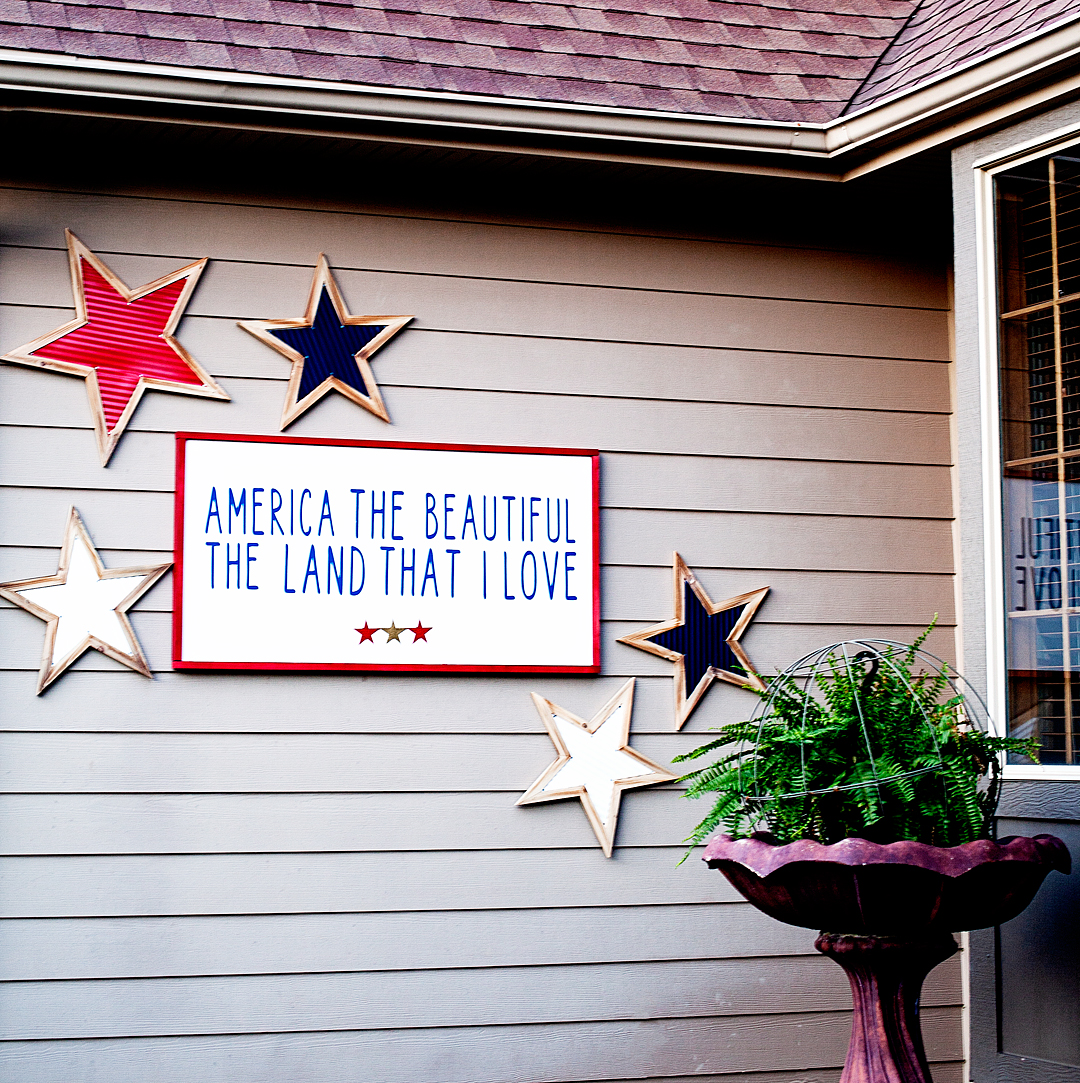
Dressing-up the front porch at my house has become one of my favorite things to do each season. Summer is always my time to show a little love for the good ol’e USA. I host a huge 4th of July party each year and I always try to dress things up extra special for that event. This year I created a new America The Beautiful porch sign to the mix and I jazzed it up with some great stars from Michaels!

+ This post is brought to you by the fine folks at Michaels +Patriotic front porch design for the 4th of July • Let's Flamingle Sign • Sign Making 101 • WhipperBerry

Shopping at Michaels Online

Michaels has all your red, white & blue needs this summer! And it’s now easier than ever to get all your supplies with Michael’s new buy online and pick up in store feature! Simply place your order online, select your store and your items will be ready and waiting for you there! I saved a ton of time by shopping online and then running in to my local michaels store to pick-up my order. I’m LOVING this option. No more wandering the isles with kiddos in tow. I can virtually wander the isles with my kiddos happy at home. So much less stress. Then I run in and grab my order when it’s ready… Super Slick! Have you tried this out at Michaels yet?

Supplies for the America the Beautiful Porch Sign Look

Here is what I ordered for this fun patriotic look…

  • Red Stars
  • Blue Stars
  • White Stars
  • Red Star Pillow
  • Blue Star Pillow
  • 24×48 canvas
  • red spray paint
  • 3M Command Strips
  • Cricut SportFlex – Midnight Blue • This one I did have to order online via Michaels
  • Cricut Iron-On Glitter – Red
  • Cricut Foil Iron-On – Gold
  • Cricut Easy Press or personal iron
  • Cricut Design Space File
  • Let’s Flamingal Sign

How to Put This Look Together

America the Beautiful Porch Sign • WhipperBerry

Now, this look has several different elements. We have the sign and the stars on the garden wall. This was using my new tried and tested method of using the Cricut Maker to cut Iron-On Vinyl and then affixing it to a canvas using the Cricut Easy Press. This is my new favorite sign making technique. You can learn how to do everything from start-to-finish in my Sign Making 101 post.

Then all you need to do is visit Cricut Design Space with the link above in the supply list and you’ll have access to my cut files that you can re-size to your desired sign size then, cut on your Cricut Machine for your sign.

America the Beautiful Porch Sign • WhipperBerry

Once your sign is finished then it’s time to hang everything. I’ve found that the 3M Strips are BRILLIANT even on outdoor walls.

Patriotic front porch design for the 4th of July • Let's Flamingle Sign • Sign Making 101 • WhipperBerry

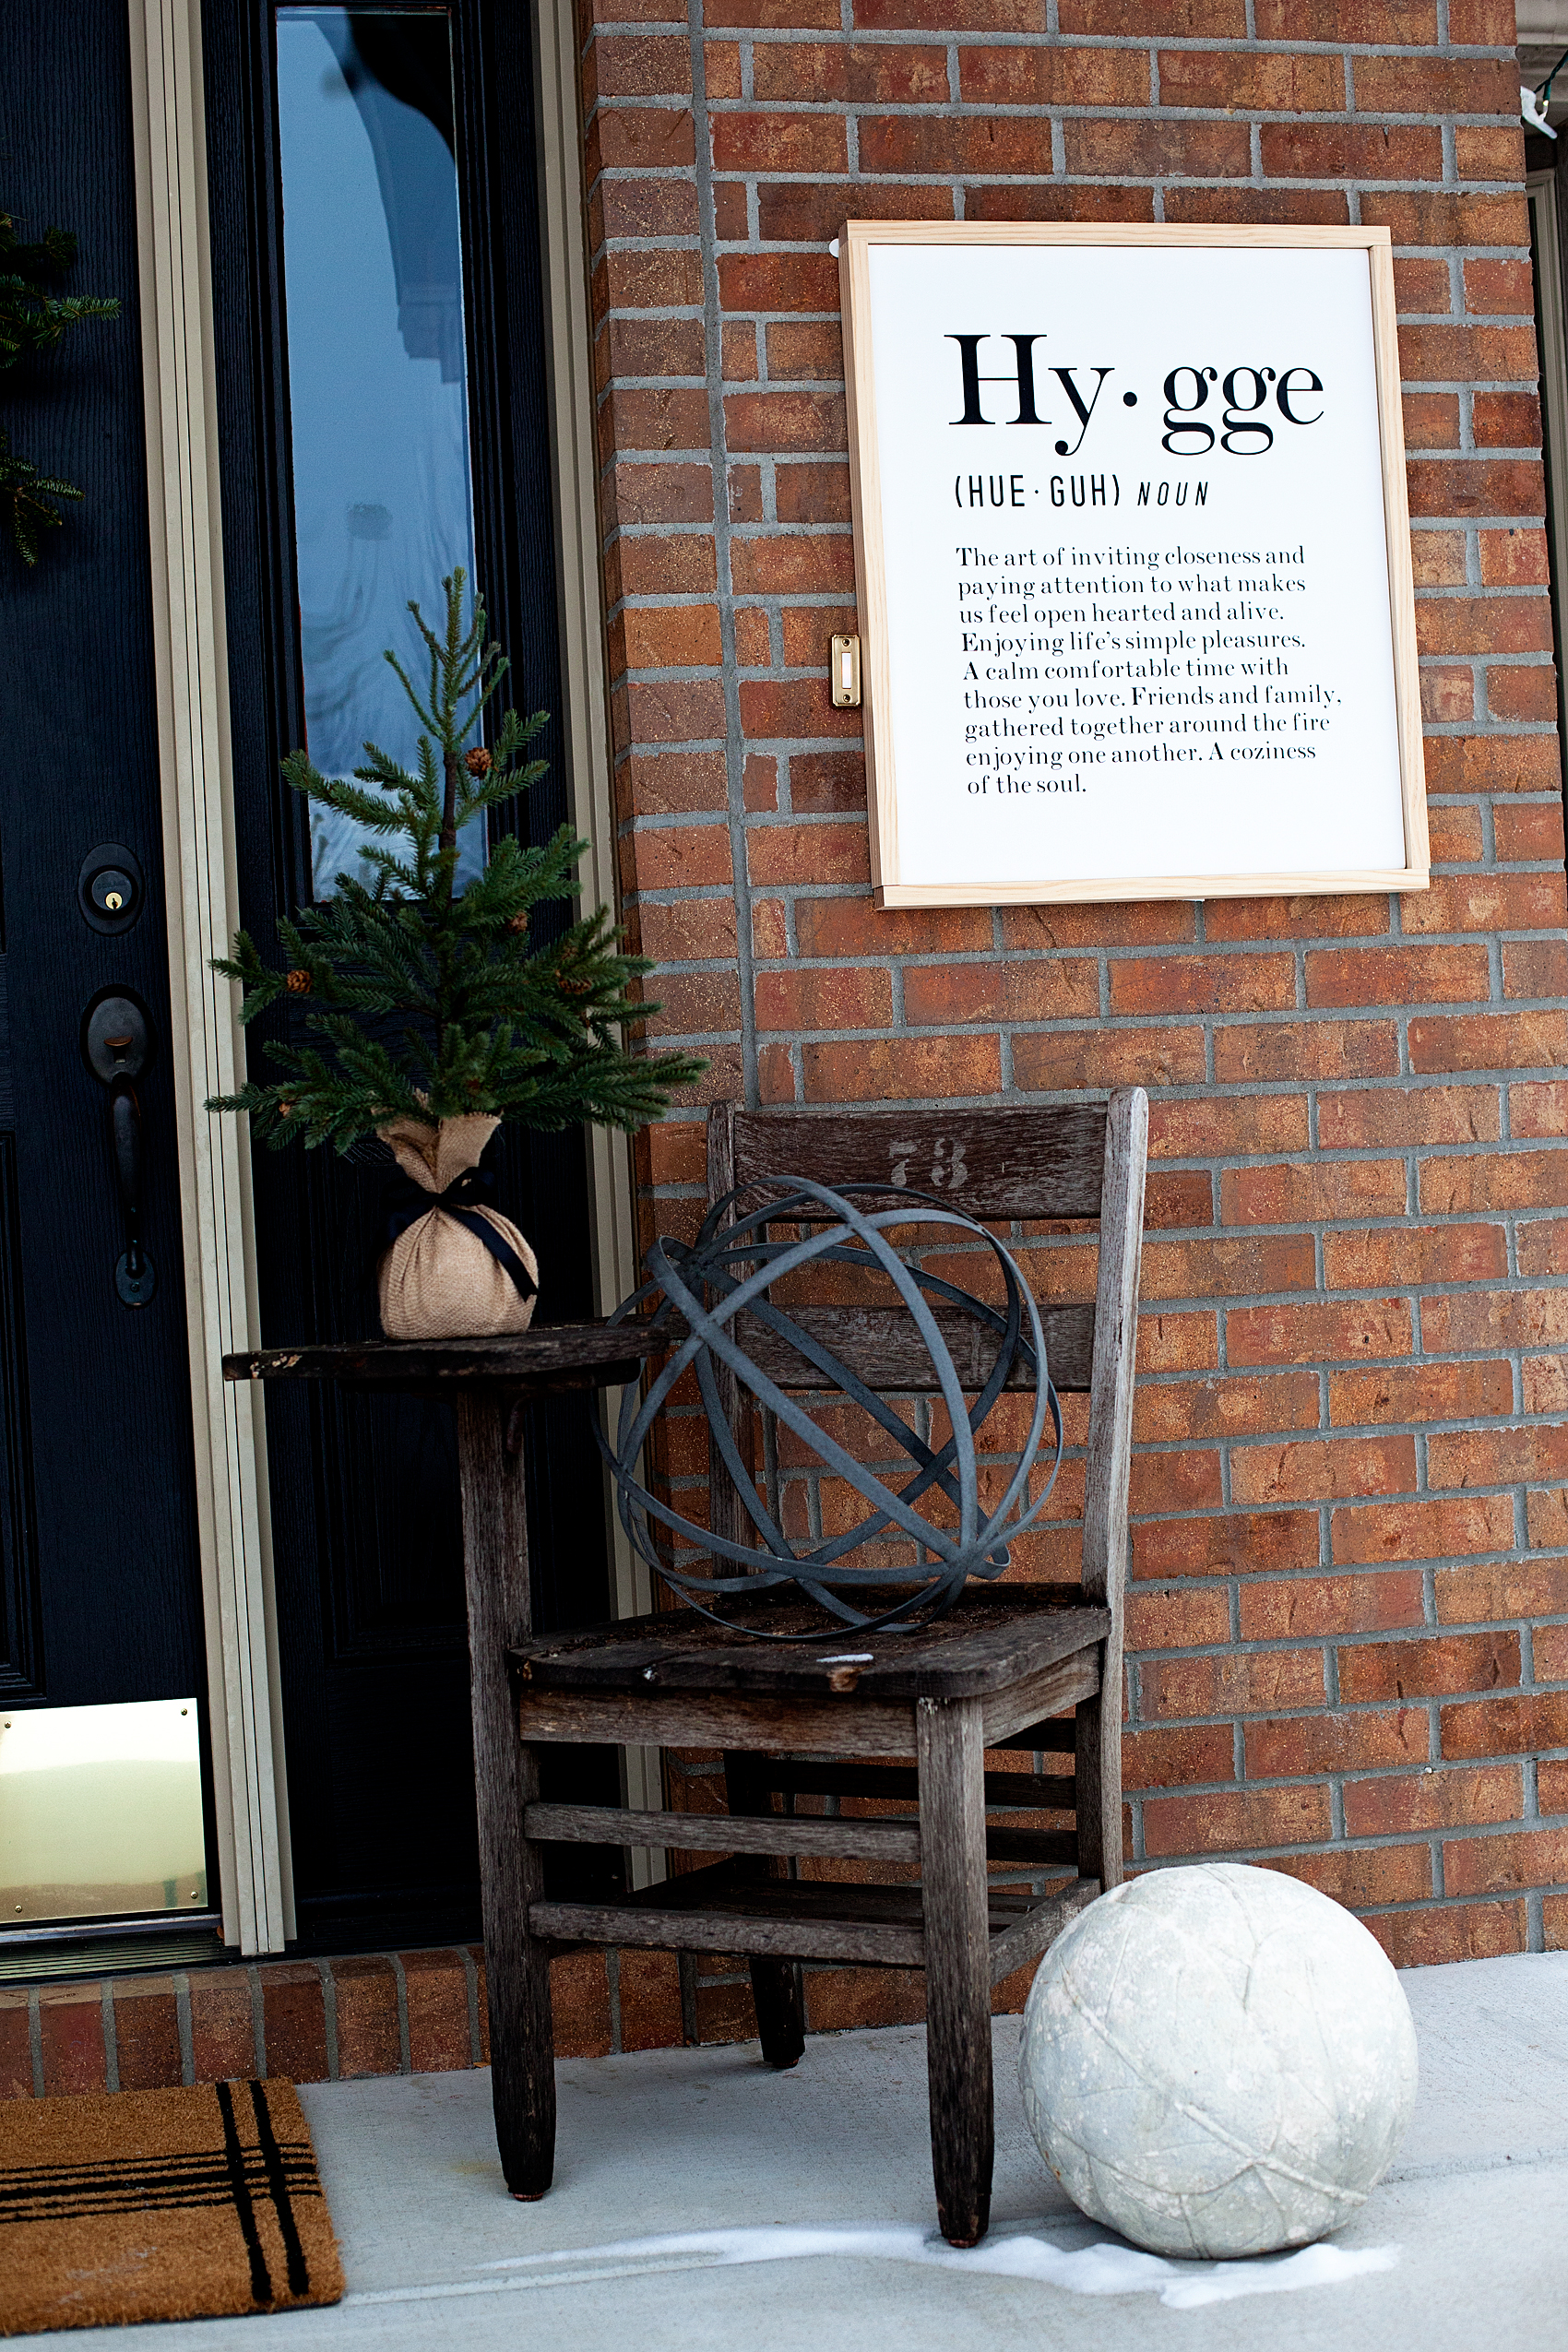
I hand new signs each season on my brick wall with my Command Strips. They have withstood strong winter storms without a problem at all and, let me tell you… Nebraska is no joke when it comes to strong winds and crazy storms. I have yet to have a sign fall using my Command Strips on Brick.

Hygge Canvas Sign • Sign Making 101 • WhipperBerry

I used the Command Strips to hang the large 24×48 America The Beautiful porch sign on the garden wall. With the size of the sign, I did need to use a fair number of the Command Strips to make sure the sign was secure. Then I used the command strips to hang the stars as well.

America the Beautiful Porch Sign • WhipperBerry

I kind of have a love affair with Command Strips if you can’t tell! Patriotic front porch design for the 4th of July • Let's Flamingle Sign • Sign Making 101 • WhipperBerry

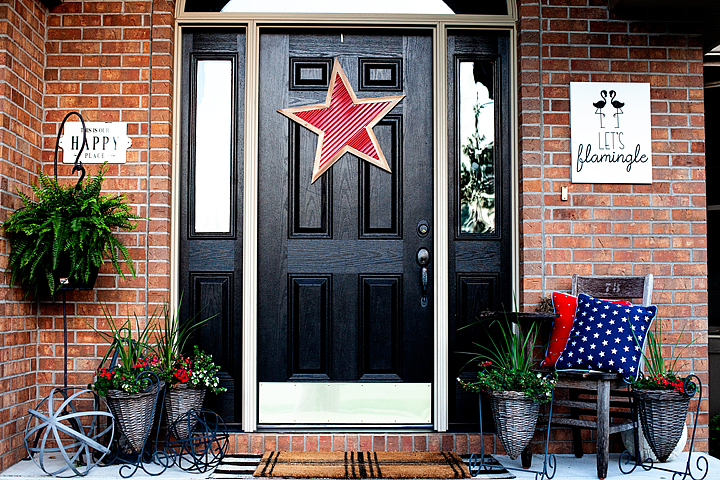
I also hung one of the stars on the front door to tie the two areas together and added the great star pillows from Michaels on my old chair. Add a few plants and the look is complete. It’s perfect for your 4th of July gatherings for sure!

What are you going to order from Michaels and pick-up at your local store this week? They have some amazing sales going on right now!!


SaveSave

SaveSave

SaveSave

SaveSave

SaveSave

SaveSave

  • Go to page 1
  • Go to page 2
  • Go to page 3
  • Interim pages omitted …
  • Go to page 8
  • Go to Next Page »

Primary Sidebar

Heather from Whipperberry
Hello... my name is Heather and I'm the creator of WhipperBerry a creative lifestyle blog packed full of great recipes and creative ideas for your home and family. I find I am happiest when I'm living a creative life and I love to share what I've been up to along the way... Come explore, my hope is that you'll leave inspired!

Footer

  • Privacy Policy

Copyright © 2023 · Seasoned Pro