• Skip to primary navigation
  • Skip to main content
  • Skip to primary sidebar
  • Skip to footer

Whipperberry

WhipperBerry • Your Home For Creative Inspiration

  • Home
  • Recipes
    • Starters
    • Easy Weeknight Dinners
    • Main Dish
    • Salads
    • Side Dish
    • Soups & Stews
    • Desserts
    • Breakfast
    • Miscellaneous
  • Tutorials
    • Creative Crafts
    • DIY Decor
    • Fabric Crafts
    • Food How-To
    • Jewlery
    • Paint Projects
    • Paper Art
    • Party Styling
    • Photography and Graphic Design
    • Silhouette
  • Holidays
    • Easter
    • Mother’s Day
    • Father’s Day
    • 4th of July
    • Halloween
    • Thanksgiving
    • Christmas
    • Valentine’s Day
  • Gift Ideas
    • Gifts For Everyone
    • Gifts for Dad
    • Mother’s day
    • For The Girls
    • For The Kids
    • Teacher Gift Ideas
    • Christmas
  • Printables
    • Holiday
    • Gift Idea
    • LDS Primary
  • Travel
  • About
    • Terms
  • Contact
  • Nav Social Menu

    • Facebook
    • Instagram
    • Pinterest
    • RSS
    • Twitter

Vinyl

Lazy Susan Art

53 · May 28, 2013 · 24 Comments

This post brought to you by DecoArt // I have become obsessed with the Lazy Susan! My Grandmother’s table had a large lazy susan that I was enamored with as a child. I was fascinated by the inner workings and the fact that it could double as a steering wheel in a pinch. Just in the last few months I’ve been on the hunt for the perfect lazy susan and then it hit me… It would look fabulous with a little artistic touch.

Ampersand Lazy Susan with DecoArt White Wash Paint

I am a part of the DecoArt Core Bloggers and did receive compensation for this post. However, all thoughts, ideas and opinions are my very own.

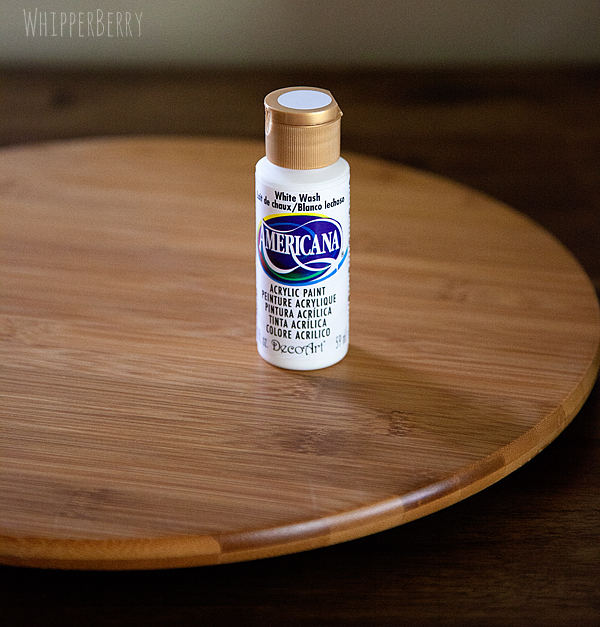
I found this great bamboo lazy susan at a local store and I just loved the wood grain. I thought it would look great with a negative graphic stenciled onto the surface. Meaning… You use a negative stencil thus showing the wood grain in the graphic while the rest of the surface is covered in paint. I’ve loved this look for quite some time now.  Here is what you will need…

Supplies

  • Lazy Susan
  • DecoArt Americana White Wash

Americana White Wash craft paint for some lazy susan art

  • Vinyl Stencil (I created mine using my Silhouette CAMEO)
  • Transfer tape
  • Sandpaper
  • Foam brush

Instructions

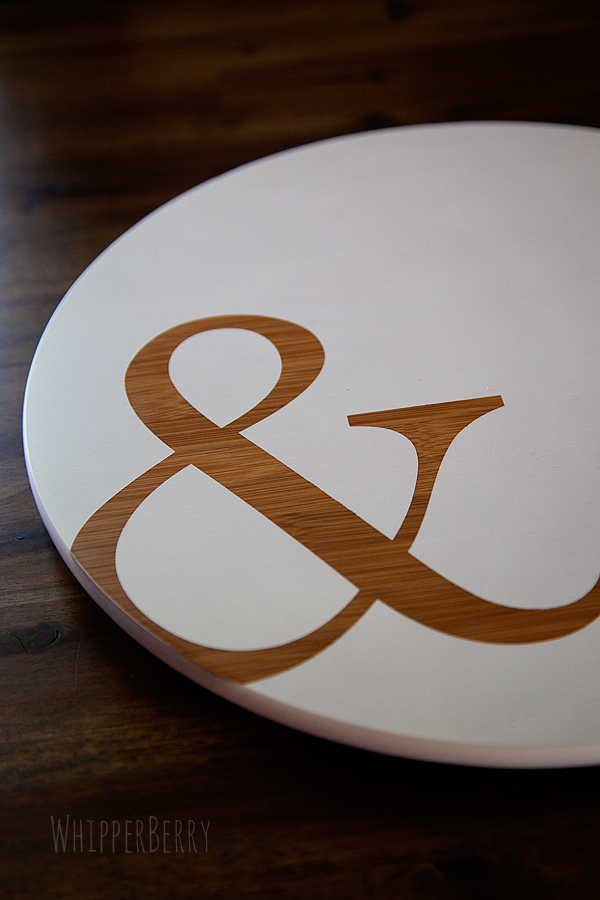
This project is so easy, it really only takes a half an hour at the most, a little more if you count drying time.  Yet, it creates a stunning piece for your table or for a gift. First you need to decide what graphic you would like to put on the surface of your lazy susan. I have always loved ampersands (&) and I thought it would look fabulous as a graphic on the table. I scrolled though a bunch of fonts until I found the perfect ampersand, it was in the Baskerville font. Isn’t it just lovely? For those of you who love ampersnads, you know just what I’m talking about.

I used my Silhouette CAMEO to cut the ampersand out in vinyl. I wanted the ampersand to be large, but not to take over the entire wood surface and I knew I wanted it to be a little off set. I used transfer tape to help me position the vinyl just right…

Using transfer tape place your vinyl onto your lazy susan

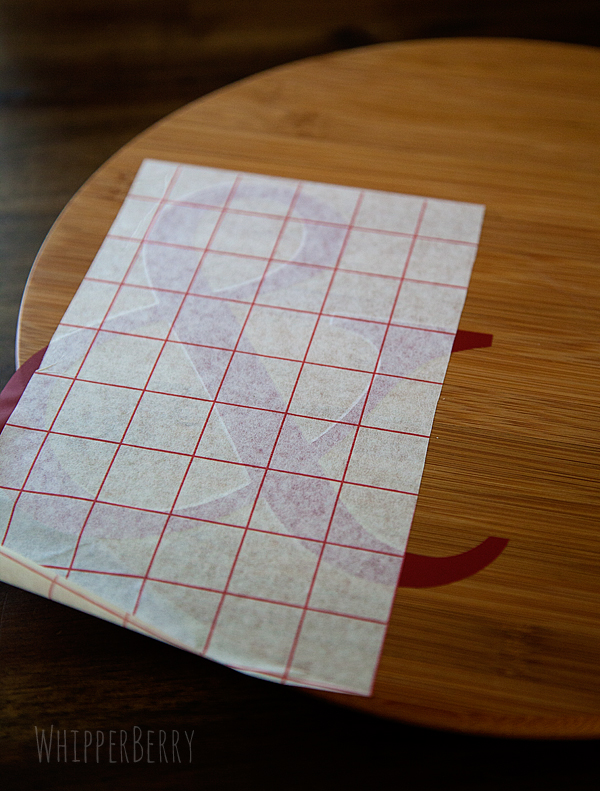
Notice how I left part of the vinyl hanging off the side of the lazy susan…

Use vinyl to create a stencil for your lazy susan

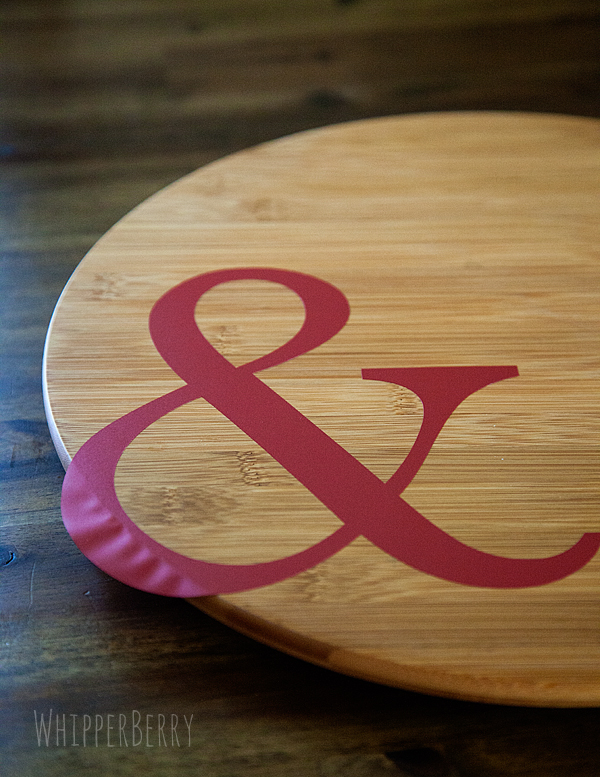
I just love that off set look. After the stencil was in place, I use some fine grit sand paper to carefully rough up the surface of the wood. That helps the paint adhere better. Then, I added 3 or 4 coats of the Americana White Wash so that it had a nice clean surface and that was it. I carefully removed the stencil and voila, I now have a fun lazy susan for the center of my table…

WhipperBerry Ampersand Lazy Susan

I have another lazy susan that I created for the brand new DecoArt Blog that will debut soon…

the-decoart-matallics-looks-like-brushed-metal

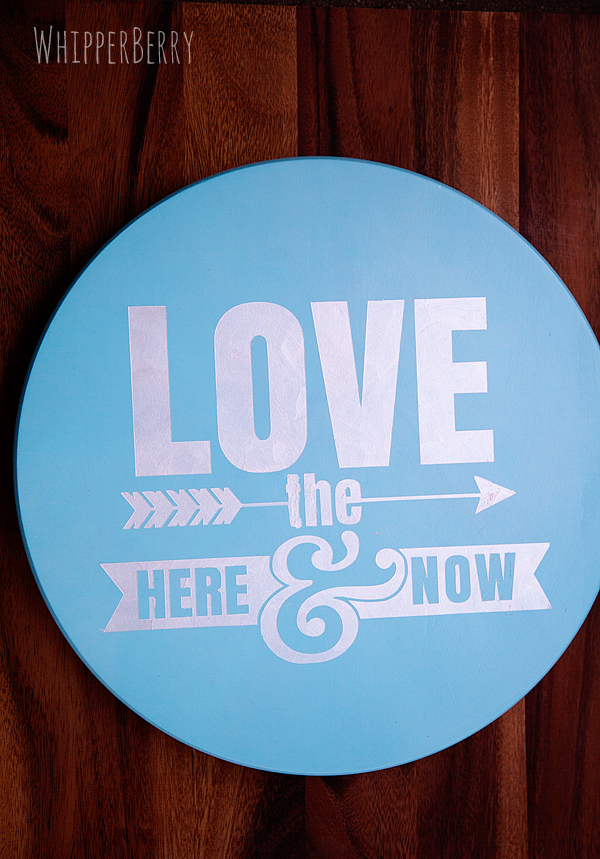
I am one of DecoArt’s Core Bloggers and will be sharing posts over there, (when the site launches) twice a month. As soon as this one goes live I will let you know, and you can learn how to make this beauty as well.

That’s it… I’m on a mission!  Every house needs to have a fabulous lazy susan!! Run out and grab one of your own, dress it up and then show off your photos on Facebook or Instagram and tag me so I can check them all out!!

How to Create Vinyl Chalkboard Art

147 · Apr 3, 2013 · 36 Comments

Chalkboard Art Inspiration Wall // Have you ever had a GREAT idea and then just couldn’t find the time to make it happen? I had this idea to create a chalkboard wall filled with inspirational quotes for my kitchen wall, about a million years ago… ok, well maybe five months ago when we first moved into our house here in Lincoln. I’ve been collecting chalkboards from Decor Steals for a bit, and had all the supplies, just none of the time to make it happen. Sadly we’ve lived with a naked wall for 5 months and last week I finally decided it was time, time to make this idea into a reality!

WhipperBerry's Chalkboard Inspiration Wall


Will Vinyl Stick to a Chalkboard or Chalkboard Paint?

Yes! You have to get the right kind of vinyl so it will stick. You will also need to prep the chalkboard first. More on this later though. Just know that yes, vinyl will definitely stick.

Now here’s the deal… As much as I love chalkboard art like the fabulous pieces created by my friend Rhonna Farrer, I have NO talent when it comes to hand-lettered art, like none. I wish that I did! I can however design stuff on my computer, so I thought I would create my chalkboard signs with white vinyl and make it look like chalkboard art. Easy fix!

Well, not so fast… You need a few tips before you can make a successful vinyl chalkboard sign.

  1. You need to prime your chalkboard. Here is a tutorial on how to prime your chalkboard.
  2. You need to clean your chalkboard with a wet cloth to remove any chalk dust, you need to work with a clean slate. Any dust or chalk on the board will make it difficult for the vinyl to adhere to your board.
  3. Cut your vinyl with whatever method or machine you like,  I have a Silhouette CAMEO so that’s what I used. I also used Silhouette Premium White Vinyl for this project as well. Affix your vinyl to your board using the transfer tape method.
  4. To make your chalkboard look like a chalkboard sign, you need to add some chalk to the board. You would think that drawing on the board with chalk would do the trick, it won’t. You risk compromising the vinyl. Here’s my super easy trick to solve this problem… Take a piece of chalk and place it in a Ziplock bag and crush with a hammer. Take a paper towel and load it with some chalk dust by placing it in the bag. Next, rub the chalk carefully all over the sign. Gently tap off the extra chalk and volia, you have a fabulous chalkboard sign. That’s all there is to it!

What Supplies Do You Need to Create Vinyl Chalkboard Art?

There are only a few things you’ll need and I’ve covered a little so far already. I’ll list them here so you can get your supplies!

  • Silhouette CAMEO (This is the bundle pack which is a really good deal!)
  • The right kind of vinyl so it sticks to the chalkboard
  • A chalkboard (if you don’t have it already)

That’s really all you need.

Chalkboard Quotes I Like

Here are the different quotes that I’ve been collecting for a while. Now that my girls are getting older {15,11 & almost 9} I wanted them to see something inspiring and uplifting each day before they head off into the world. Here are the quotes that I settled on…

WhipperBerry Quote Wall

“Choose your friends with caution. Plan your future with purpose and frame your life with faith.” This quote is from Thomas S. Monson the President of our Church, The Church of Jesus Christ of Latter-Day Saints. “Always be kinder than necessary.” – J.M.Barrie

Chalkboard Inspiration Wall with Silhouette

“You can change your future simply by changing your attitude.” This quote was suggested by Lil’Whip my 15 year old daughter Hales. I thought it was VERY appropriate. She’s not totally sure where she found the quote, so unfortunately I can’t give proper credit. “Let your smile change the world, but don’t let the world change your smile.” Again, this was from Lil’Whip’s Pinterest board, but we couldn’t find the person to give credit to, bummer!

Chalkboard Inspiration board

If you follow me on Instagram, you’ll know why the number 22 is my favorite number. Both my husband and I are born on the 22nd of two different months so of course, we also had to get married on the 22nd as well. It’s our number, so I had to add it to the board. The Thoming sign is from Signs by Andrea and I just adore it! I added the honeycomb graphic to go with the bee on one of the top boards. It’s to symbolize that, to have a successful family we ALL need to work together to create a successful home. I found the “Do small things with great love” quote from Lena Henzel.

I’m not totally finished with the project, I’m planning on adding some pops of color today for “Project Add Color” and I can’t wait to see how it turns out. I’ll show it off again when I’m totally finished. I may also have the svg files for you to download as well for the quotes that I used. Soooo, stay tuned!

Mirror Memo Board | Teacher Appreciation Week

2 · May 2, 2012 · 4 Comments

Can you believe the traditional school year is coming close to the end.  You know what that means… It's time for Teacher Appreciation week!!

The other day I was hosting a get together at my house and for hours I was busy playing hostess.  When everyone headed home I finally had a chance to take a look at myself in the mirror and almost SCREAMED!  My hair had gone totally NUTS!  I yelled at my husband and asked how long my hair had looked like that… to my chagrin he lovingly said, "the whole time… I thought you were trying something new."  Ahhhhhhh! I was mortified.

Although the experience was not one of my favorites, it got me thinking.  I'm sure that teachers have the same problem.  They are busy working in front of their class for hours at a time and do not time to run to the bathroom to just double check to make sure they haven't morphed into a bag lady.  It would be a perfect teacher appreciation gift to give your teacher a small mirror to add to his or her classroom for those quick little hair and makeup checks throughout the day. Then I thought it would be good if it could serve a dual purpose.  That's how I came up with the idea for the mirror memo board.  Here's how I made it…

I started with a thrifted mirror that I spray painted white and then distressed a bit.

I found some great washi tape at Target that coordinated with some fun clips that were perfect for dressing up the mirror. I framed the boarder of the mirror with the tape and then with another tape pattern I created another boarder on the frame.  It looked great!

With my Silhouette CAMEO I cut "Mrs. Johnson, You make life beautiful!" out of a lovely green vinyl and applied it to the mirror.  I used Courier New and Sign Painter as my fonts for the saying.  Then I glued the coordinating clips to the bottom of the frame with E600 and that was it.  It truly can't get easier than that!!

For good measure I added the cutest apple Post-it Note pad holder to the mix.  All I did was again, used my Silhouette CAMEO to cut the same green vinyl to add Mrs. Johnson's name to the apple.  A perfect addition to any teachers desk!

Here is another Teacher Appreciation Idea from last year that I just loved…

It's a super cute pencil bouquet that our teachers just loved.  You know you can NEVER have too many fun pencils, especially if you have a classroom full of kiddos who are constantly needing new ones.

The New Silhouette Cameo Test Drive

0 · Oct 25, 2011 · 19 Comments

It's no secret that I am a huge fan of the Silhouette personal electronic cutting tool. I've used  Sophie, my Silhouette SD to make my Portable Growth Chart and a fun Weathered Wood Sign for my friend Sarah.  I've made temporary tattoos, etched glass and have made all kinds of fun t-shirts for my kiddos.  All kinds of fun projects have come from my sweet Sophie.  Well… today I want to introduce Camille my new CAMEO to you guys!!

The Cameo is the next generation Silhouette electronic cutting tool and my friends… it was LOVE at first sight!  The Cameo has a much larger cutting capacity with a full 12 inch wide and 10 foot long cutting range. Did you hear that? You can make a vinyl sign that is TEN FEET LONG without having to piece it together!!!  This is a new day in the personal cutting tool world. 

Silhouette was kind enough to send one of their new Cameo's to my studio to take for a test drive.  It didn't take long for Camille {yes, that's what she has been named} and I to become fast friends. I decided I wanted to work on a project that I have had on the back burner for awhile.  I had this fun lamp that I new could use a little bit of love and I thought some vinyl inside and out would turn this simple and boring lamp into a lamp that could truly make a statement…


Did you notice the little secret the lamp has?  We all know, a clever girl ALWAYS leaves something to be discovered and this fun lamp is no different.  When you turn the lamp on you will see that the trendy chevron pattern continues on the shade as well…

…

Read On →

  • « Go to Previous Page
  • Page 1
  • Interim pages omitted …
  • Page 6
  • Page 7
  • Page 8

Primary Sidebar

Heather from Whipperberry
Hello... my name is Heather and I'm the creator of WhipperBerry a creative lifestyle blog packed full of great recipes and creative ideas for your home and family. I find I am happiest when I'm living a creative life and I love to share what I've been up to along the way... Come explore, my hope is that you'll leave inspired!

Footer

  • Privacy Policy
  • Crafts
  • Food
  • Gifts
  • Holidays
  • Home
  • Mom Life
  • Recipes
  • Travel

Copyright © 2026 · Seasoned Pro