+ Kitchen Marquee Sign post brought to you by Michaels Craft Stores +

I am obsessed with marquee signs… I truly am.
It started with this post back in July of 2013, my Designer Marquee Letters.
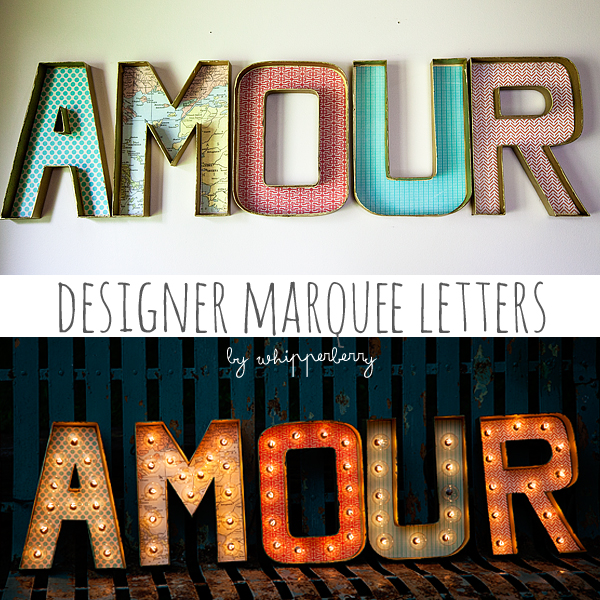
Back in the day when marquee letters were rather elusive. Your options were to either pay a fortune for the real deal, or find a way to DIY a set of your own. I went the DIY route which was great, the sign still lives in my kitchen and I love it, however… it was a tad challenging, still expensive and quite frankly it still looked a little wonkey with all kinds of wiring to contend with.
The day that Heidi Swapp released her Marquee Love, was a DREAM! Seriously, I’m not sure if I’ve ever been that excited about a product release in a long time. It’s BRILLIANT! Truly, I’m always kind of excited to see what Heidi has up her sleeve. She is taking the crafting world by storm these days with not only her Marquee Letters but her Minc Foil Applicator is GENIUS as well. One of my favorite crafting tools right now!
Heidi is one of those individuals who is amazingly innovative but someone who is truly genuine. She’s everyone’s cheerleader. We have connected a bit over social media and had a chance to chat at SNAP this last year. She is one lady who I truly admire and look up to. She’s brilliant and a go getter. She’s one of those ladies who dreams up a crazy idea like the Minc and just MAKES IT HAPPEN! I love that!
I had a ball this week creating with my favorite Heidi Swapp Marquee Love letters to celebrate Michaels Big Brand Sale Starting Sunday, August 2nd.
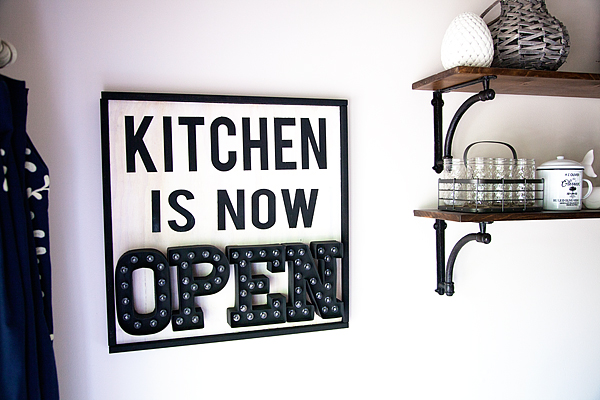
Kitchen Marquee Sign

I decided to take Heidi Swapp’s Marquee Love letters to the next level and add them to a wood sign, rather than just having them sit on a shelf. I have fallen in love with all kinds of fun typography signs for the kitchen floating around like this one from Gina of Shabby Creek Cottage
BUT… I thought, how fun would it be to have a marquee element to it. Why not do a sign saying, “Kitchen is Now OPEN” with the OPEN in marquee letters showing that when the sign is alight, the kitchen is open, when it’s off, the kitchen is CLOSED. Fun, right! Here’s how to make it…
Materials Needed
- 24×24 plywood board
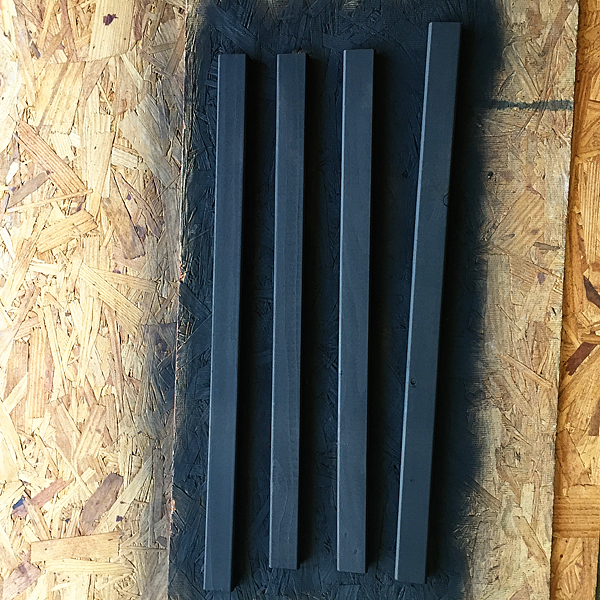
- 4 – 25 inch 1 1/2 x 1/2 inch boards for the frame
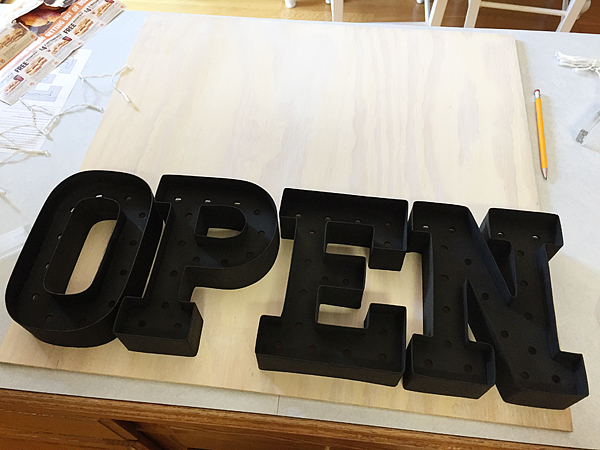
- Heidi Swapp Marquee Love letters O,P,E,N
- Krylon Chalk Board Spray Paint
- White Chalk Paint – I used BB Frösch Chalk Paint Powder
- Silhouette or Cricut cutting machine OR Stencil Letters
- Vinyl
- Scrap paper
- painters tape
- Hot glue
- Brad nails
- Glue dots
Directions

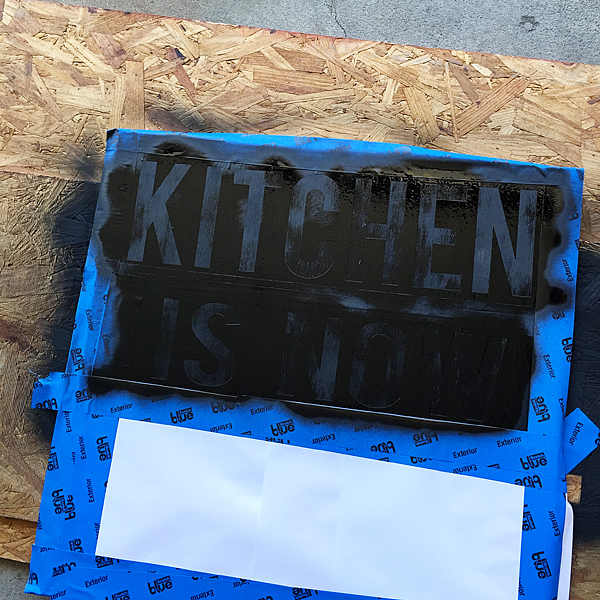
Gather your materials and prepare them to paint. I decided to use Krylon Black Chalkboard Paint because I love the deep black and the matte finish.
First, I spray painted my letters and the frame for the sign.

Then I used BB Frösch Chalk Paint to white wash the sign base. I chose that technique rather than just straight paint because I still wanted to see the wood grain.
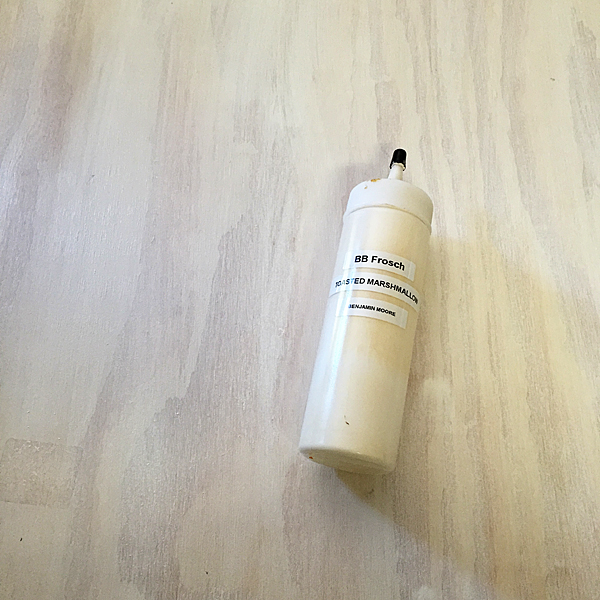
To white wash your board, all you need to do is use watered-down chalk paint and then lightly wipe-off the paint to reveal the grain of the wood. This is a great way to add a little color, keep the wood look and it also dries really quick!
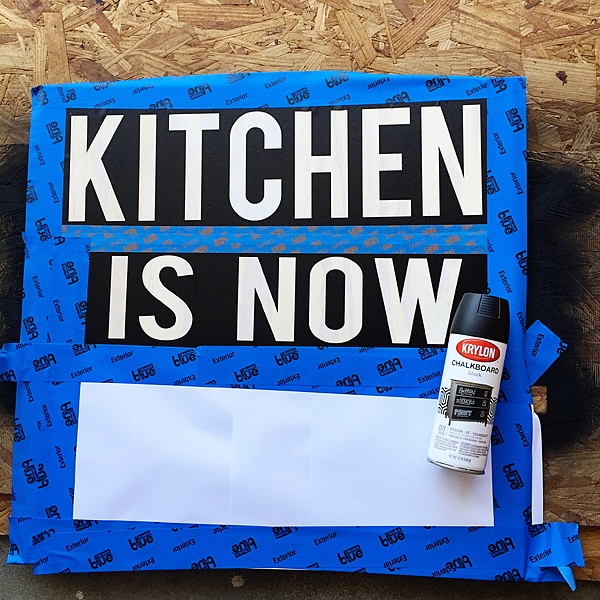
Next, I cut my vinyl with my Silhouette CAMEO using the Bebas font. Love that font!
I laid down my vinyl and then taped the rest of the board with painters tape and some scrap paper to mask the rest of the board while I spray painted the letters.
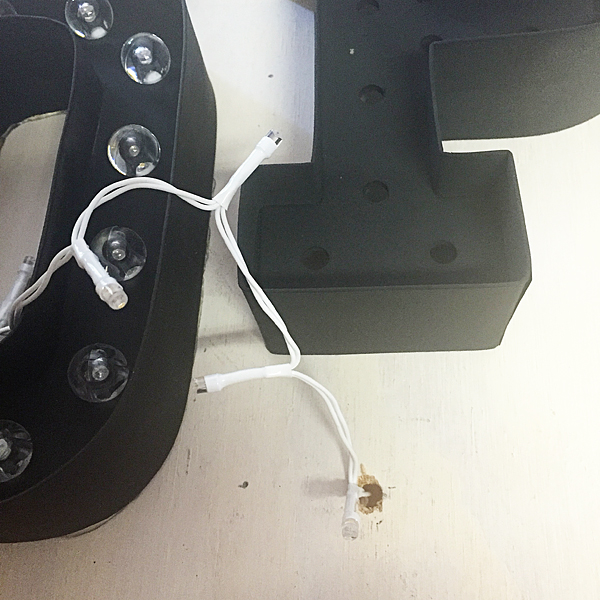
Once the paint was dry, I placed my marquee letters and drilled holes to feed the lights through. Now, keep in mind, you need to think through the pavement of the holes and how you are going to arrange the lights in the letters. You want the battery packs sitting on the bottom frame of the sign and you need to place the drilled holes accordingly.
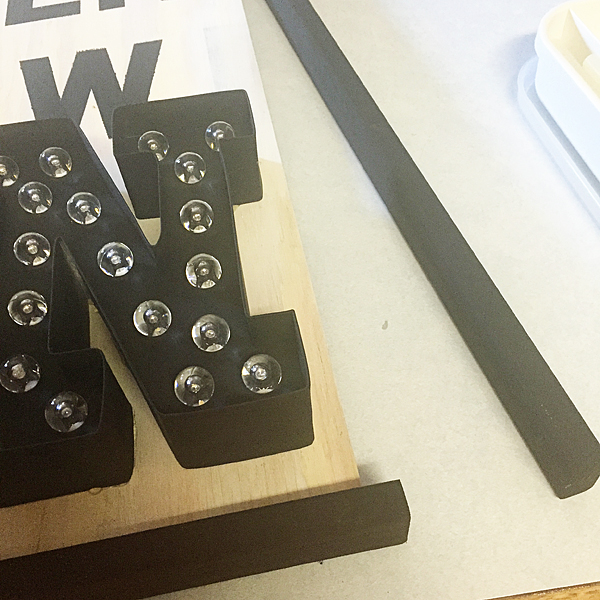
Then, I assembled my marquee letters and hot glued them to the board.
Next, I hot glued the frame to the sign base and then secured it with some brad nails.
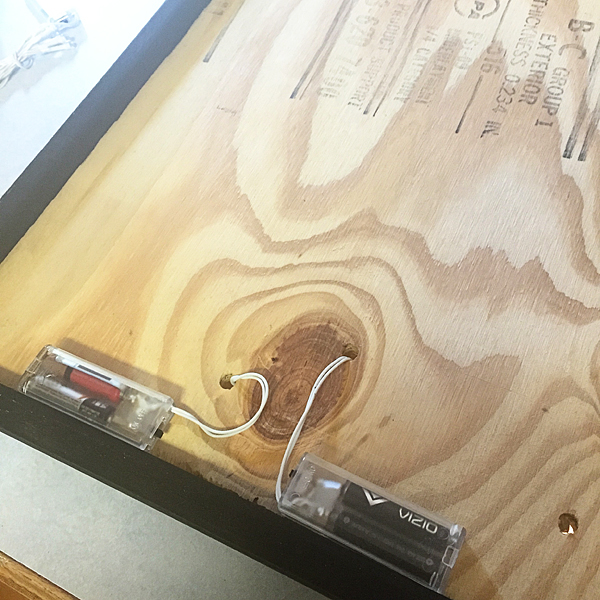
On the back of the board, I used a few glue dots to secure the battery packs for the letters to the back of the board.
And that was it… your Kitchen Marquee Sign is finished!
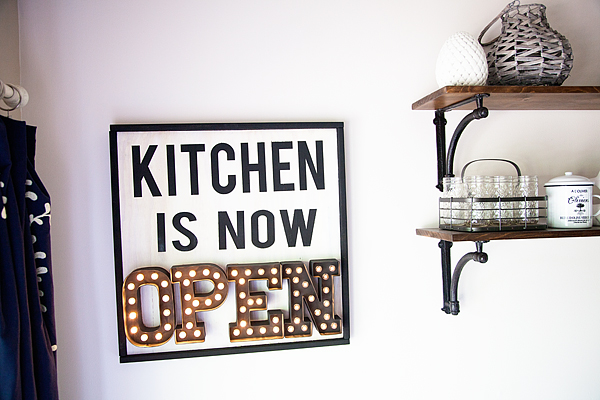
The cool thing it looks great with the lights ON or OFF!
I found the cutest sign on The Diary of Dave’s Wife not to long ago…
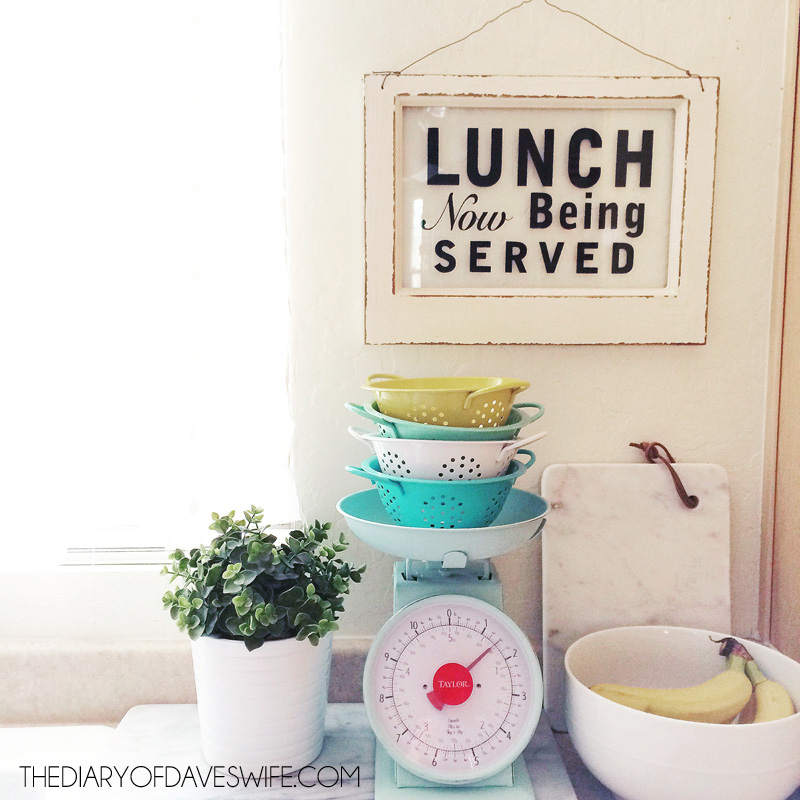
Of course had to make one of my own, I thought it look great placed right under my Kitchen is Now Open sign…

How fun is that! I used some 3M Command Picture Hanging Strips that are velcro so I can easily interchange my breakfast, lunch & dinner signs for fun! LOVE IT!!
Don’t forget this next week is the perfect time to stock-up on all your favorite brands at Michaels Big Brand Sale!!
Disclaimer // This post is sponsored by Michaels Craft Stores. I am Michaels Maker this year and will be posting all kinds of goodies from Michaels Craft Stores. I do receive free product to create with.