• Skip to primary navigation
  • Skip to main content
  • Skip to primary sidebar
  • Skip to footer

Whipperberry

WhipperBerry • Your Home For Creative Inspiration

  • Home
  • Recipes
    • Starters
    • Easy Weeknight Dinners
    • Main Dish
    • Salads
    • Side Dish
    • Soups & Stews
    • Desserts
    • Breakfast
    • Miscellaneous
  • Tutorials
    • Creative Crafts
    • DIY Decor
    • Fabric Crafts
    • Food How-To
    • Jewlery
    • Paint Projects
    • Paper Art
    • Party Styling
    • Photography and Graphic Design
    • Silhouette
  • Holidays
    • Easter
    • Mother’s Day
    • Father’s Day
    • 4th of July
    • Halloween
    • Thanksgiving
    • Christmas
    • Valentine’s Day
  • Gift Ideas
    • Gifts For Everyone
    • Gifts for Dad
    • Mother’s day
    • For The Girls
    • For The Kids
    • Teacher Gift Ideas
    • Christmas
  • Printables
    • Holiday
    • Gift Idea
    • LDS Primary
  • Travel
  • About
    • Terms
  • Contact
  • Nav Social Menu

    • Facebook
    • Instagram
    • Pinterest
    • RSS
    • Twitter

Vinyl

Wash and Dry Sign • Iron-On Vinyl on Black Canvas

11 · Apr 28, 2017 · 3 Comments

Every laundry room or bathroom for that matter, needs a Wash and Dry sign, right? Let me show you how to make a simple Fixer-Upper inspired sign with Cricut Iron-On Vinyl and a black canvas. Fixer-Upper inspired Wash and Dry Sign created by WhipperBerry • Create this easy to make sign using your @cricut® machine and their Iron-On Vinyl •  Download the digital design file at WhipperBerry.com

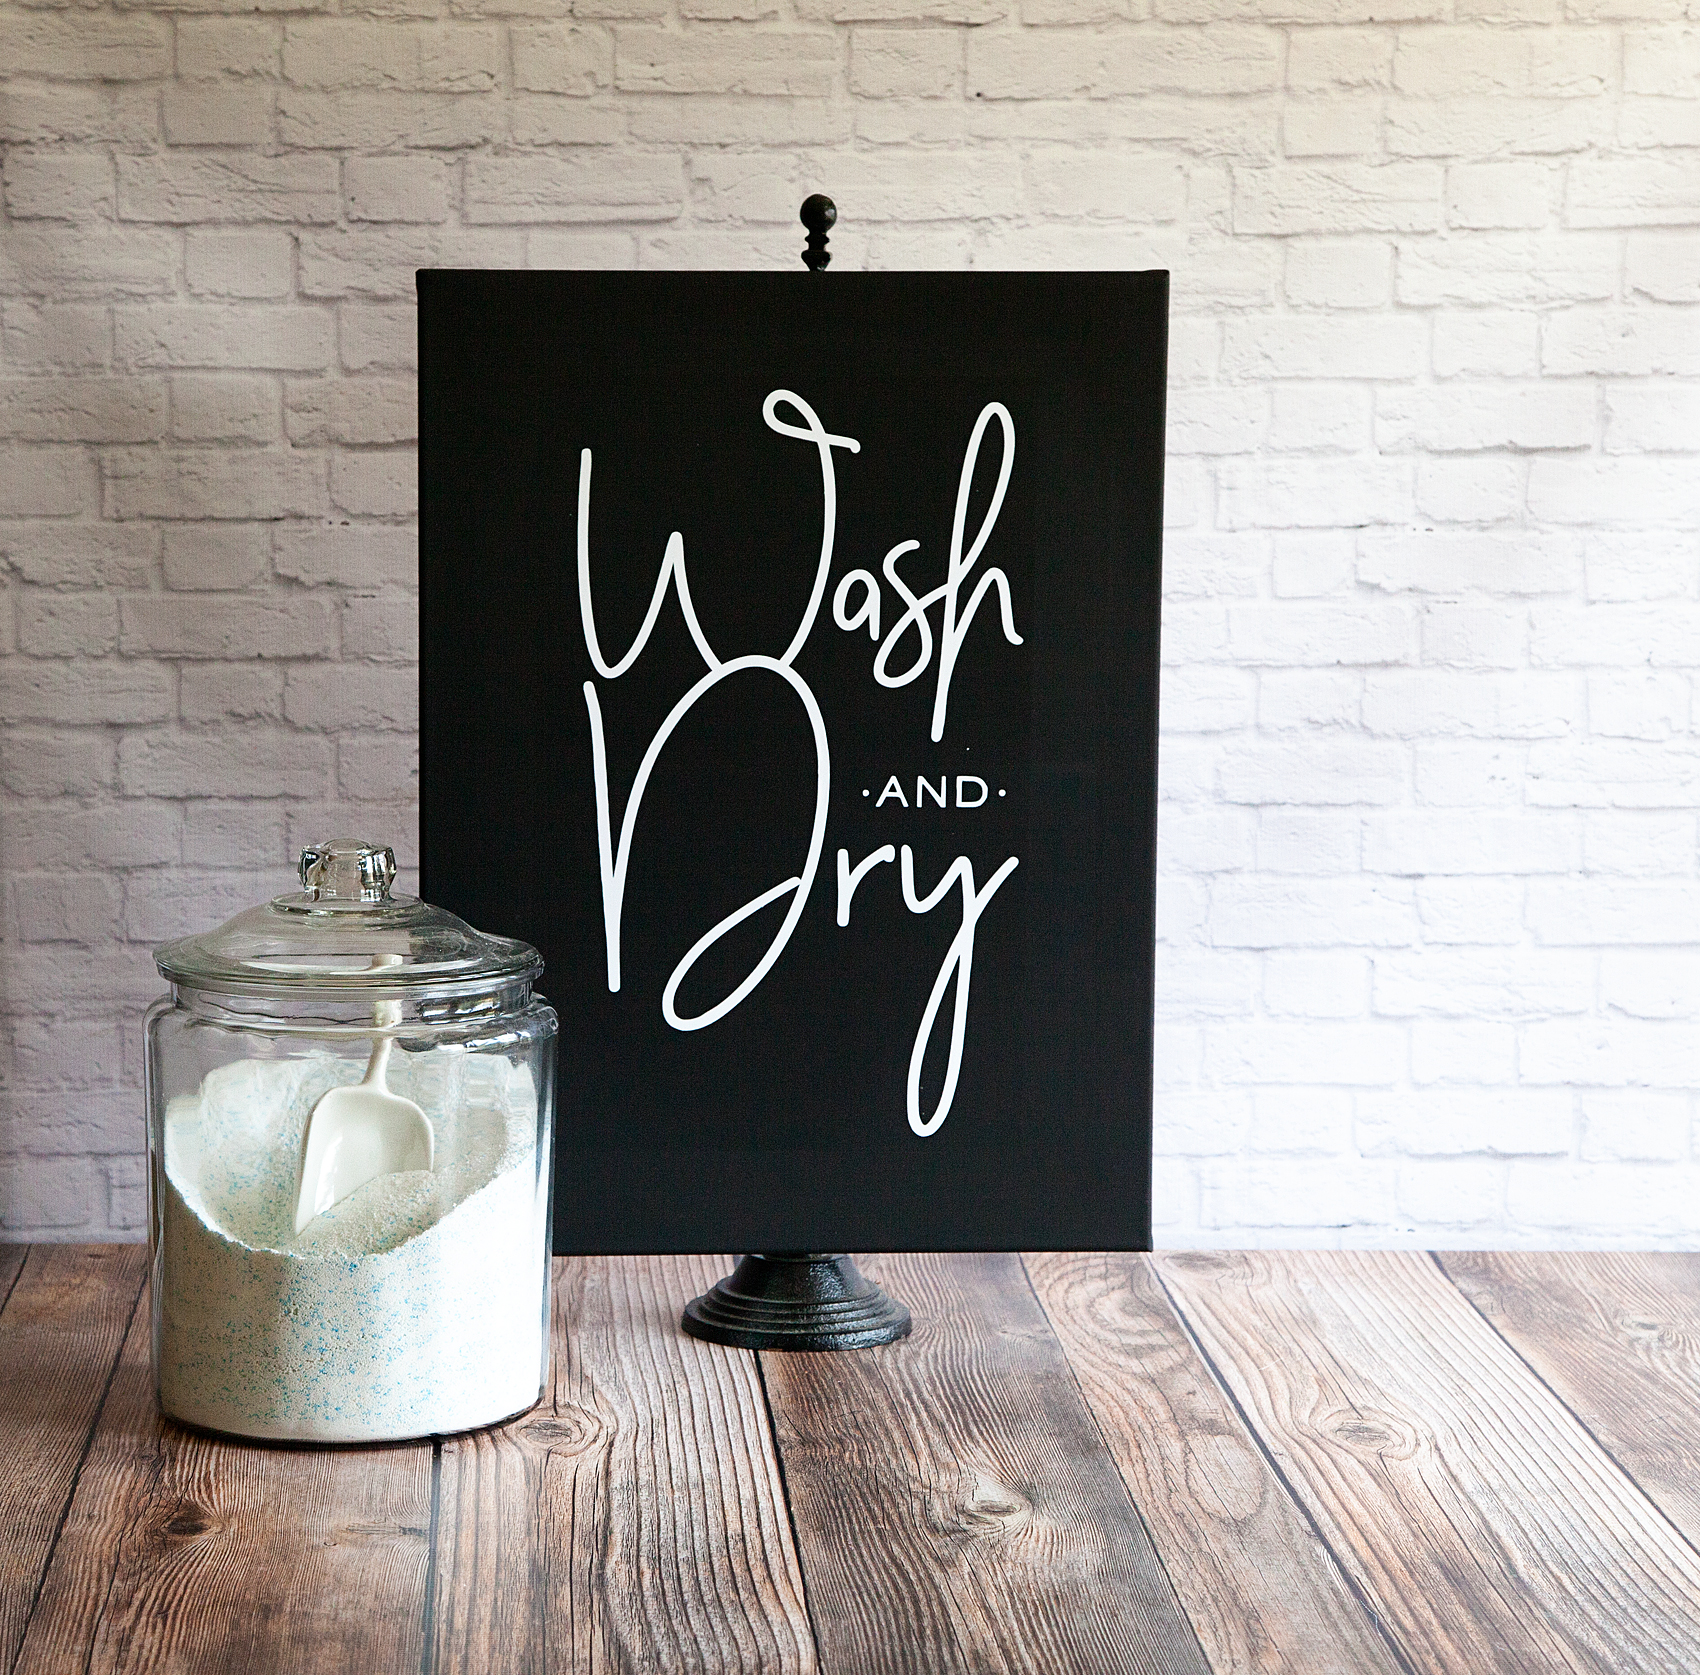
• This post is brought to you by Cricut •

A few weeks ago, I had the wonderful experience of traveling to Austin, Texas for the Indulge Conference (which was fabulous by the way!) On the last day of the conference, we hopped onto a bus and made our way to Mecca, I mean Magnolia Market a.k.a The Silos in Waco, Texas. To say that my heart was full that day would be an understatement. I came home with all kinds of goodies AND inspiration as well. They have a laundry room Wash and Dry sign at the Magnolia Market that I’ve been eyeing for awhile and I wanted to create something similar for my laundry room.

Prdctmgnl_1_of_8_1024x1024

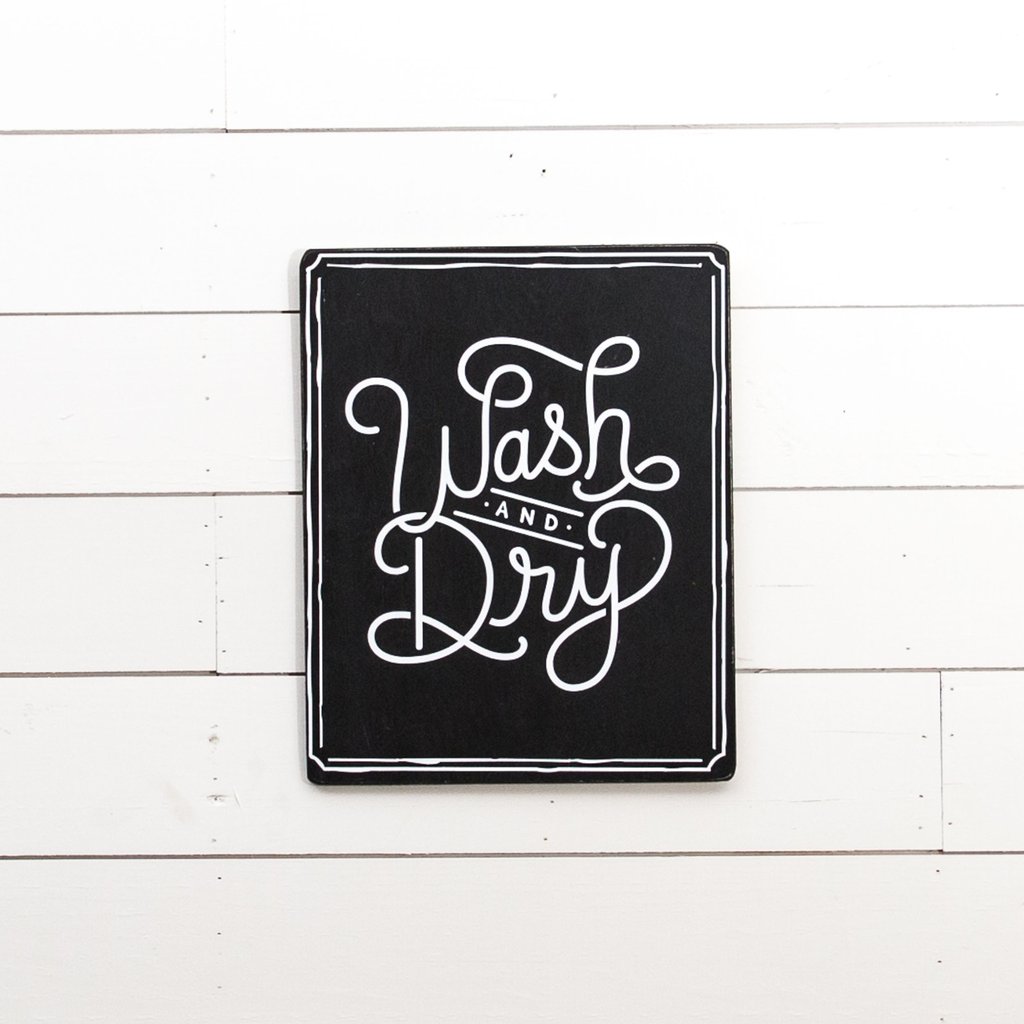
Magnolia Market  •  Wash and Dry Sign

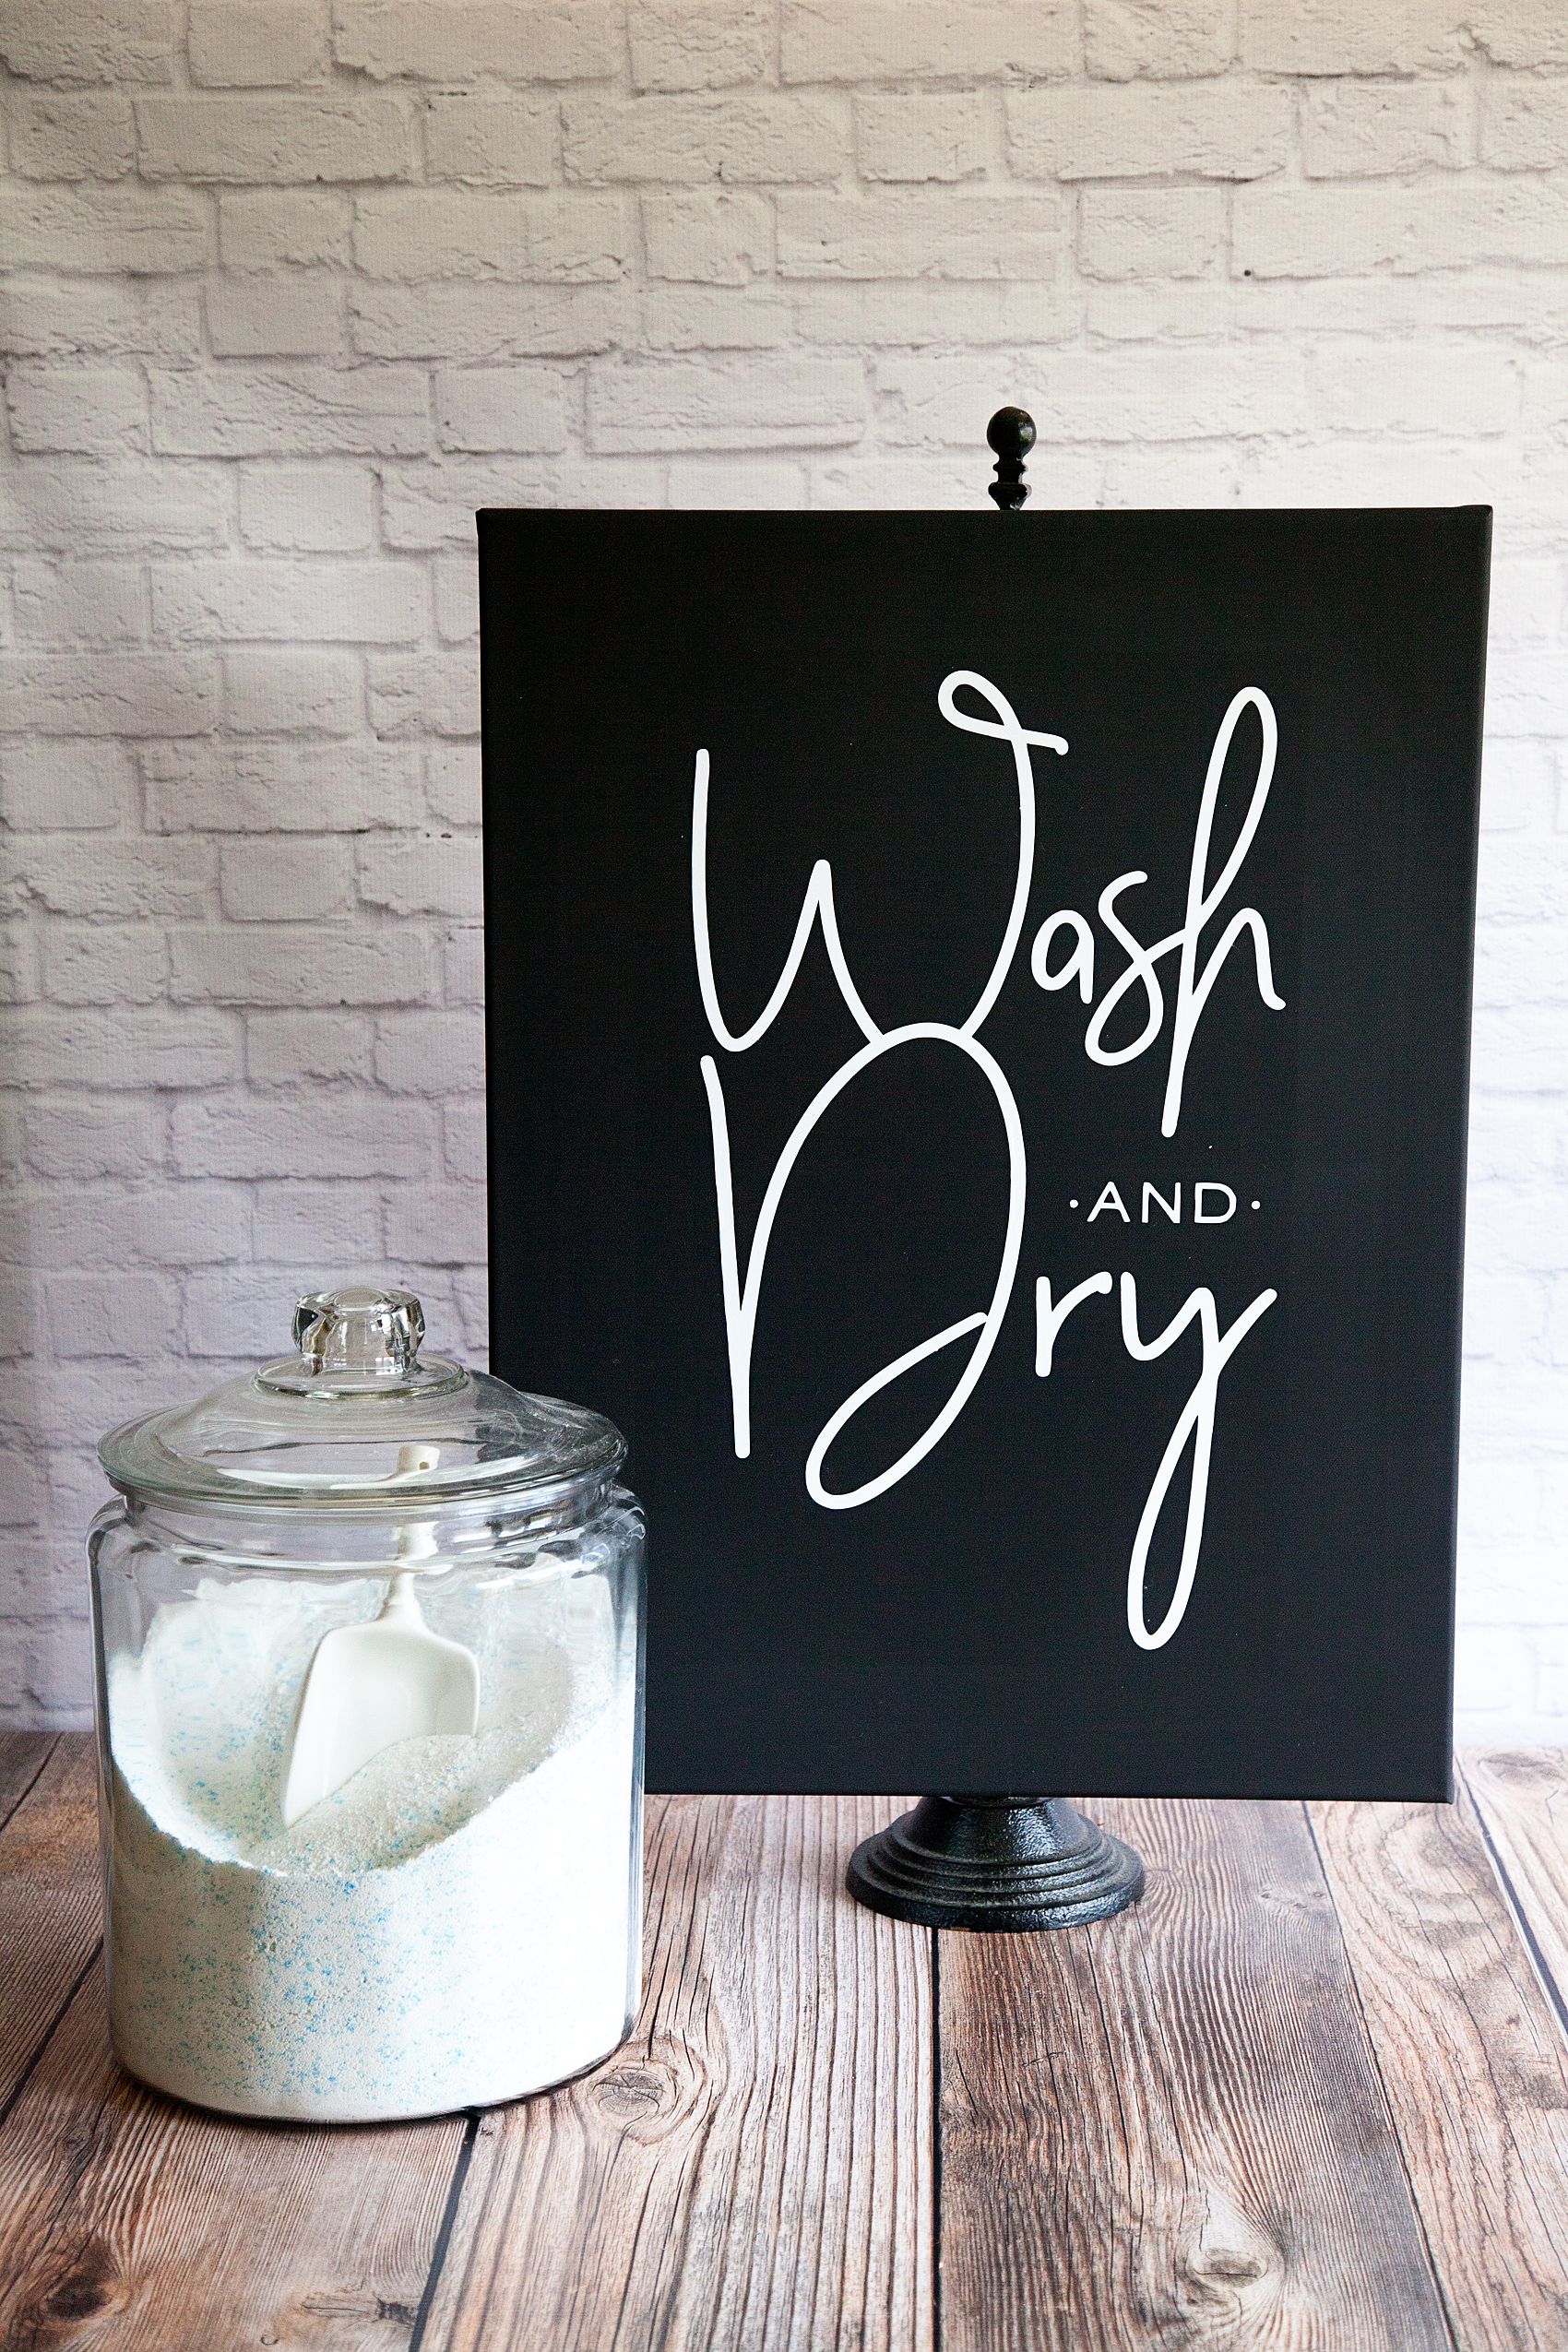
The WhipperBerry Wash and Dry Sign Design

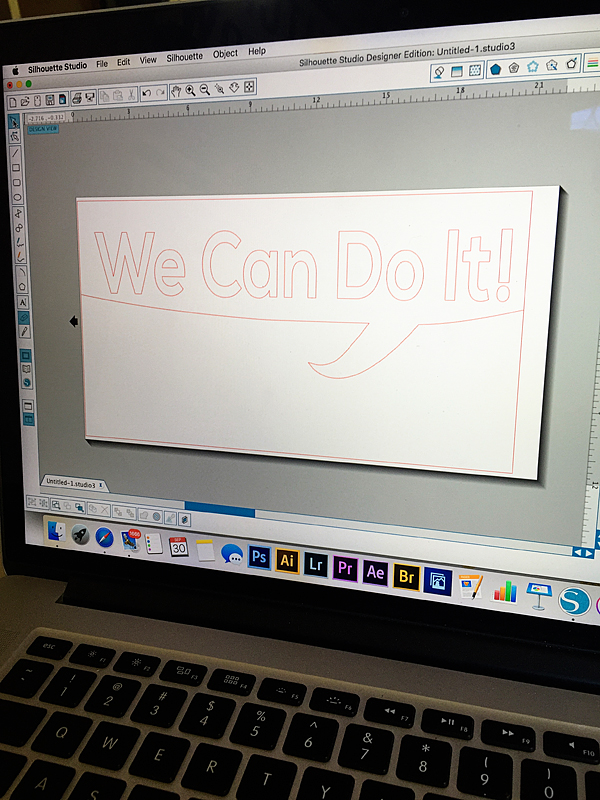
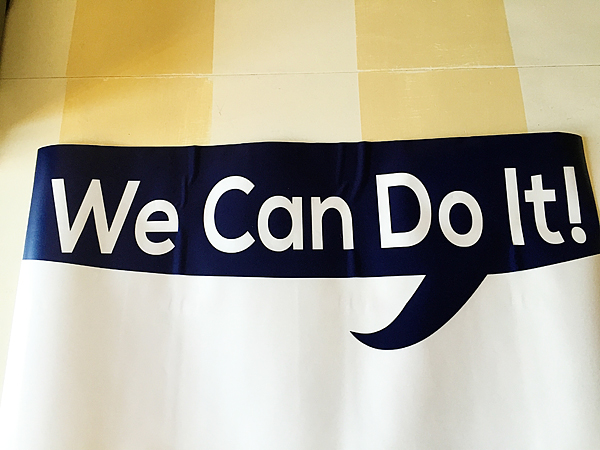
I set to work to create a Wash and Dry sign that fit my style and this is what I came up with…

Fixer-Upper inspired Wash and Dry Sign created by WhipperBerry • Create this easy to make sign using your @cricut® machine and their Iron-On Vinyl •  Download the digital design file at WhipperBerry.com

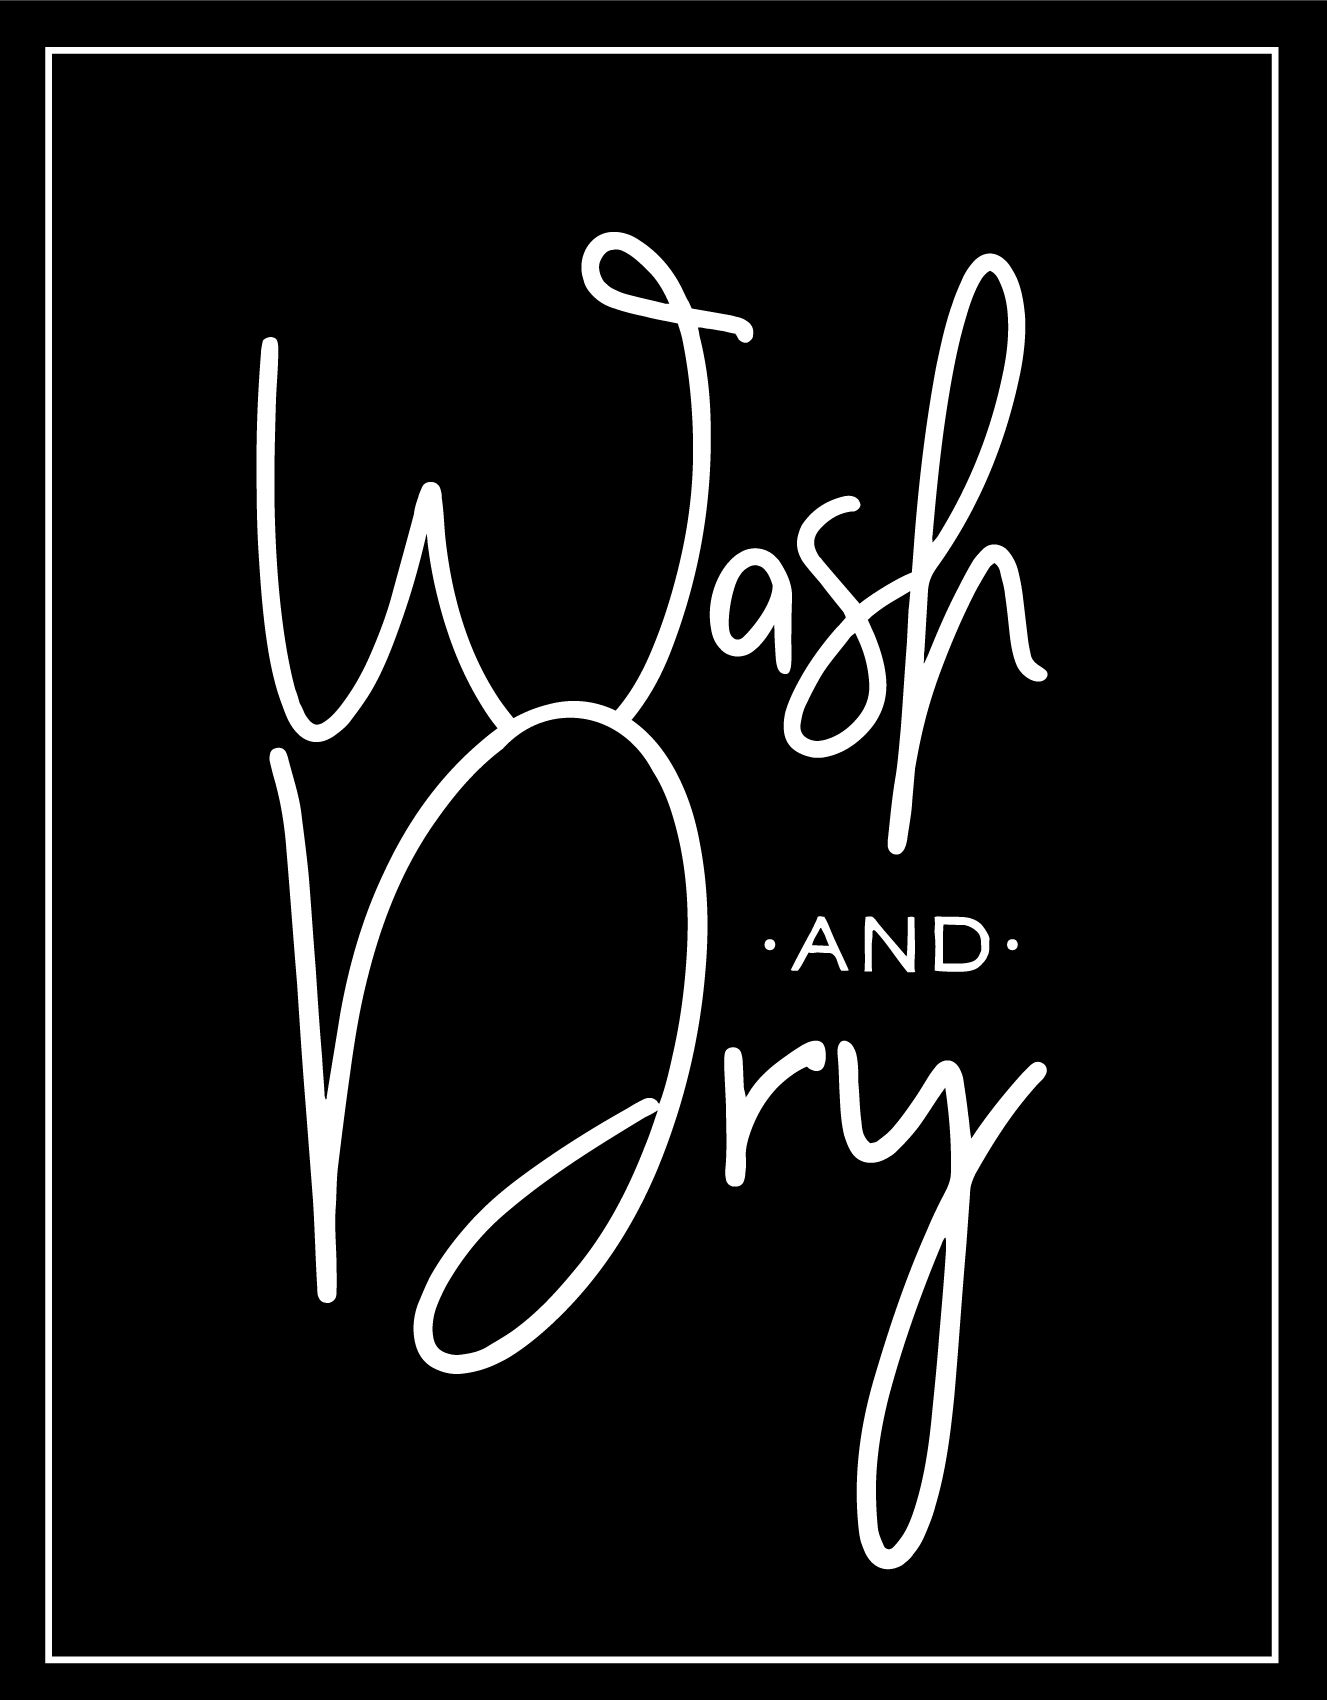
It has a little of JoJo’s vibe with more of a modern flair I would say. I kind of love it! For those of you who would like to download this sign design, click HERE for the PNG file. Shortly, I will have a full tutorial on how to use a PNG file in the NEW Cricut Design Space. It’s sooooo cool, so stay tuned!

How to create the Wash and Dry Sign

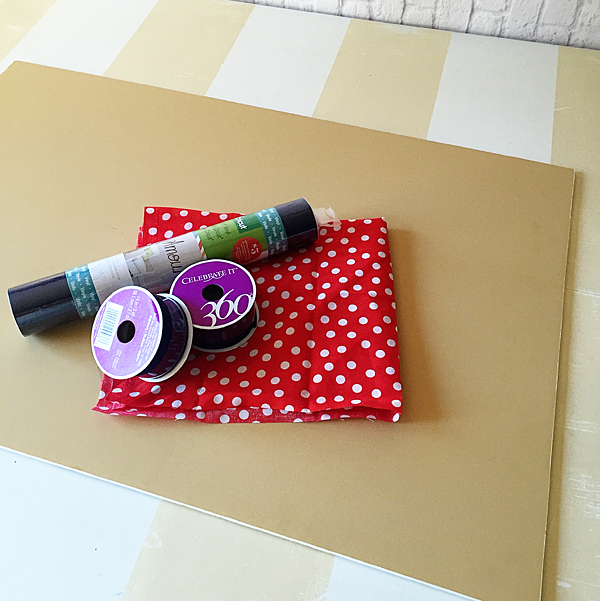
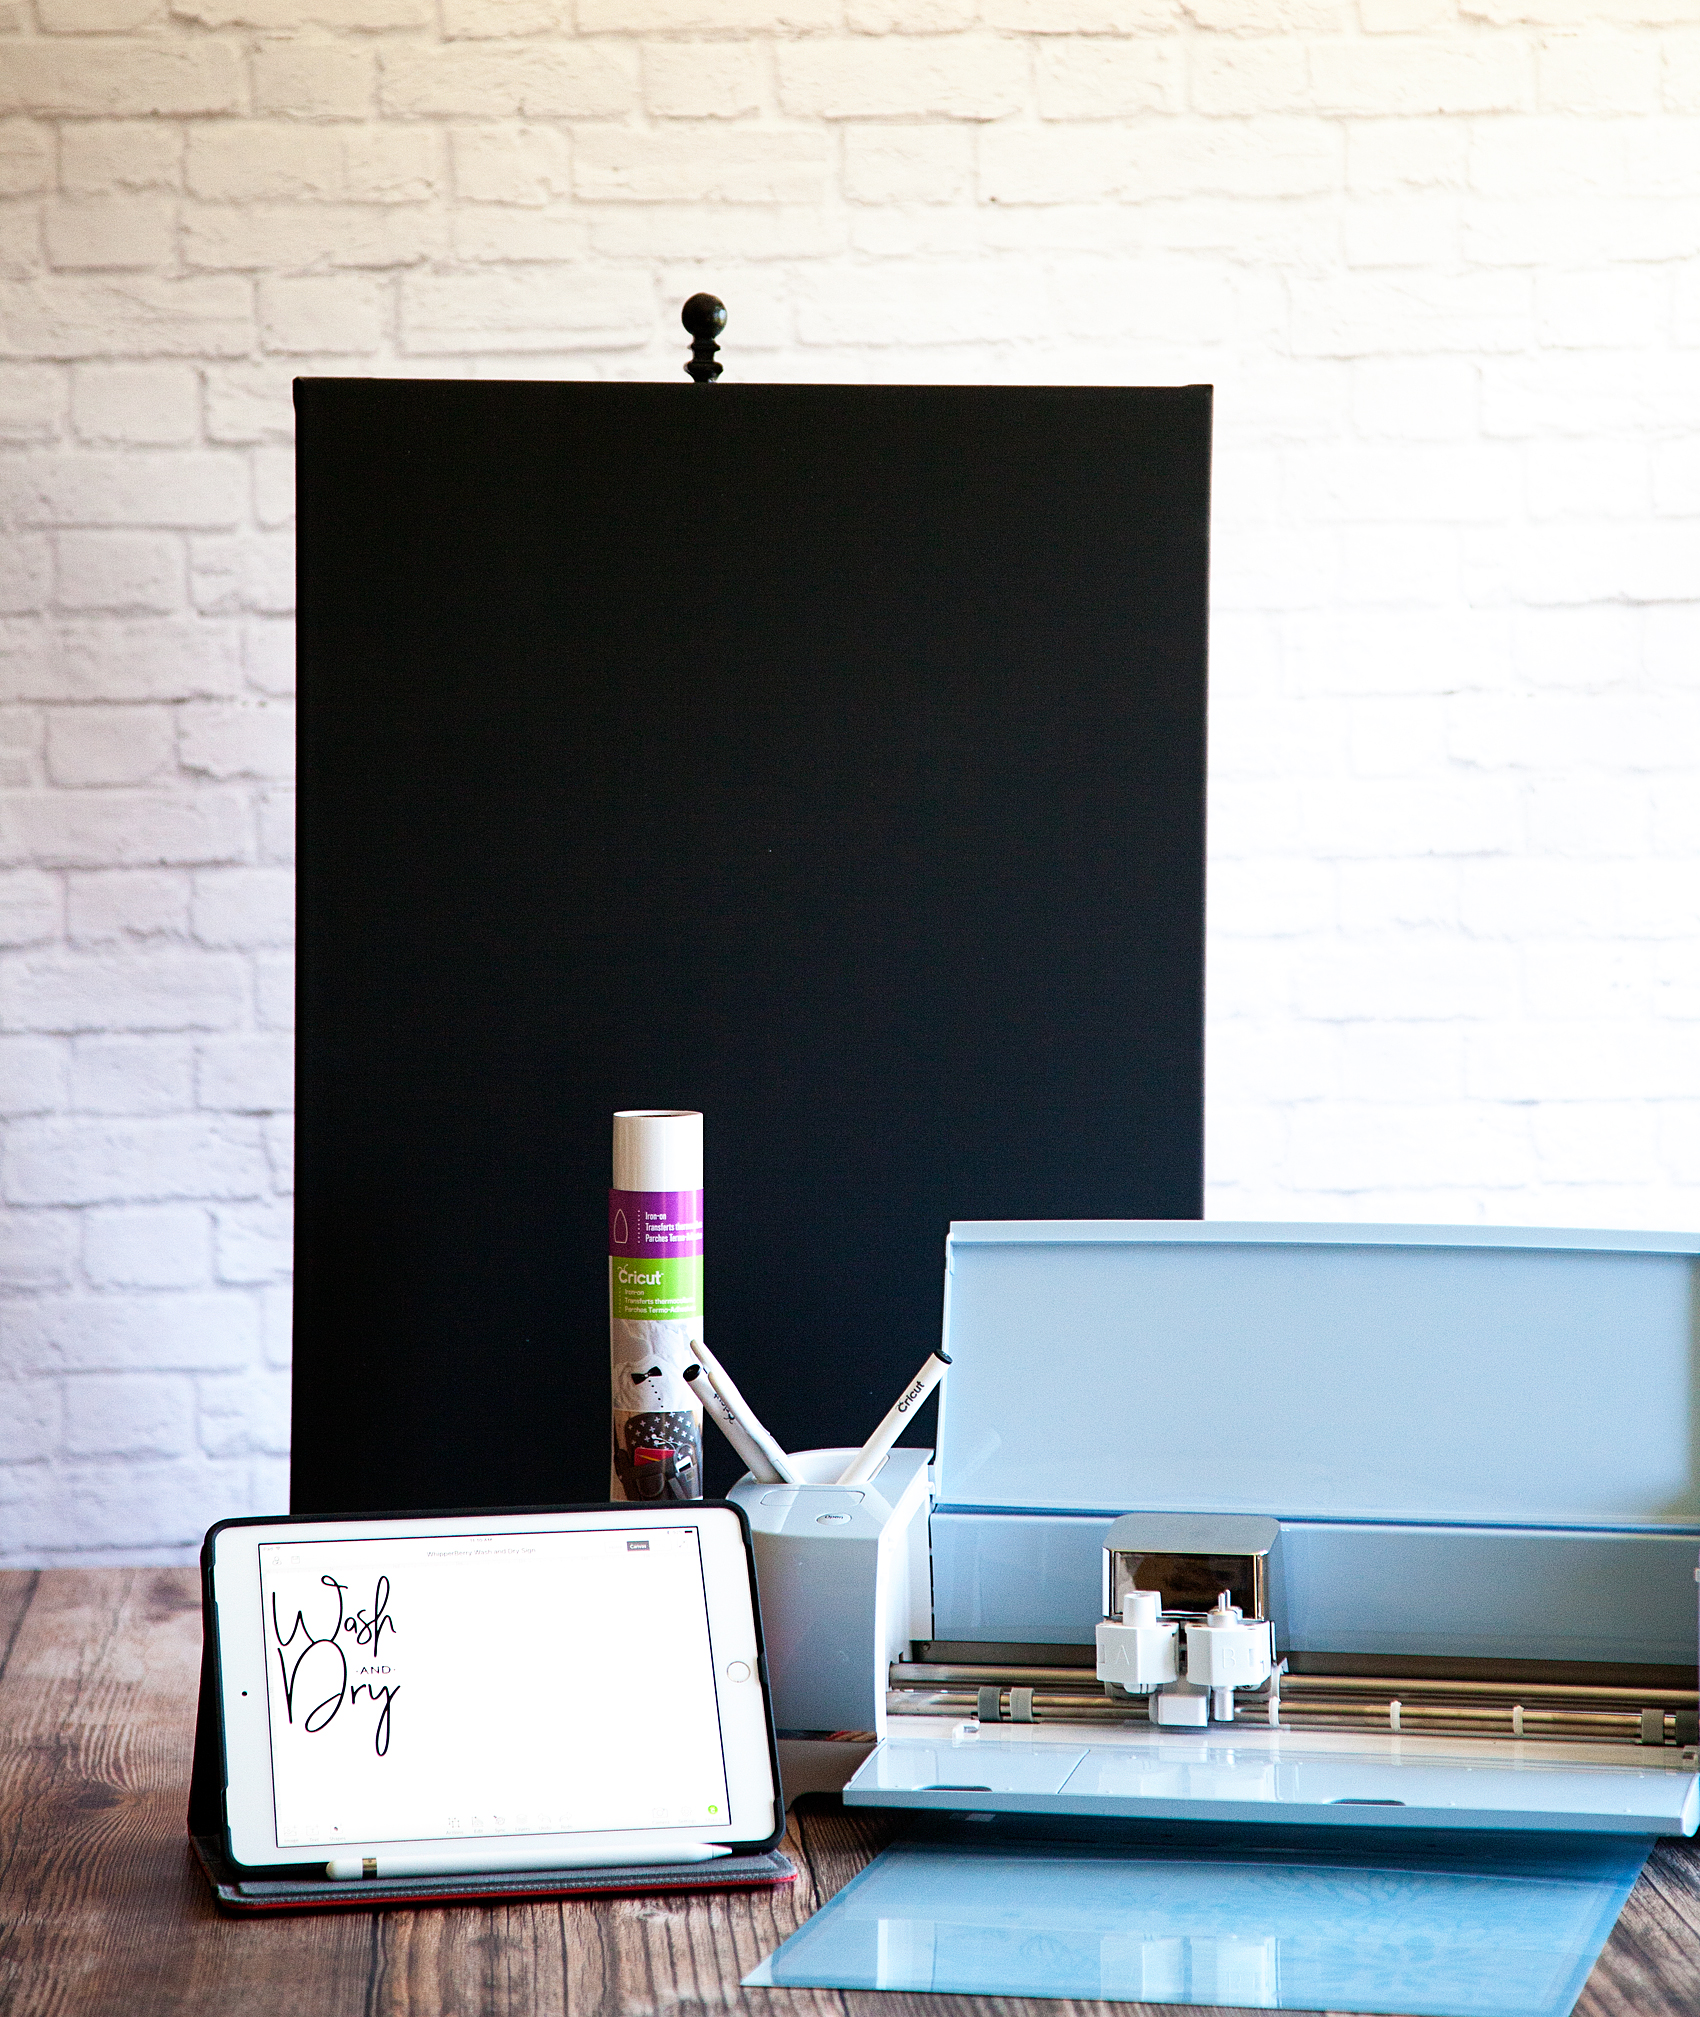
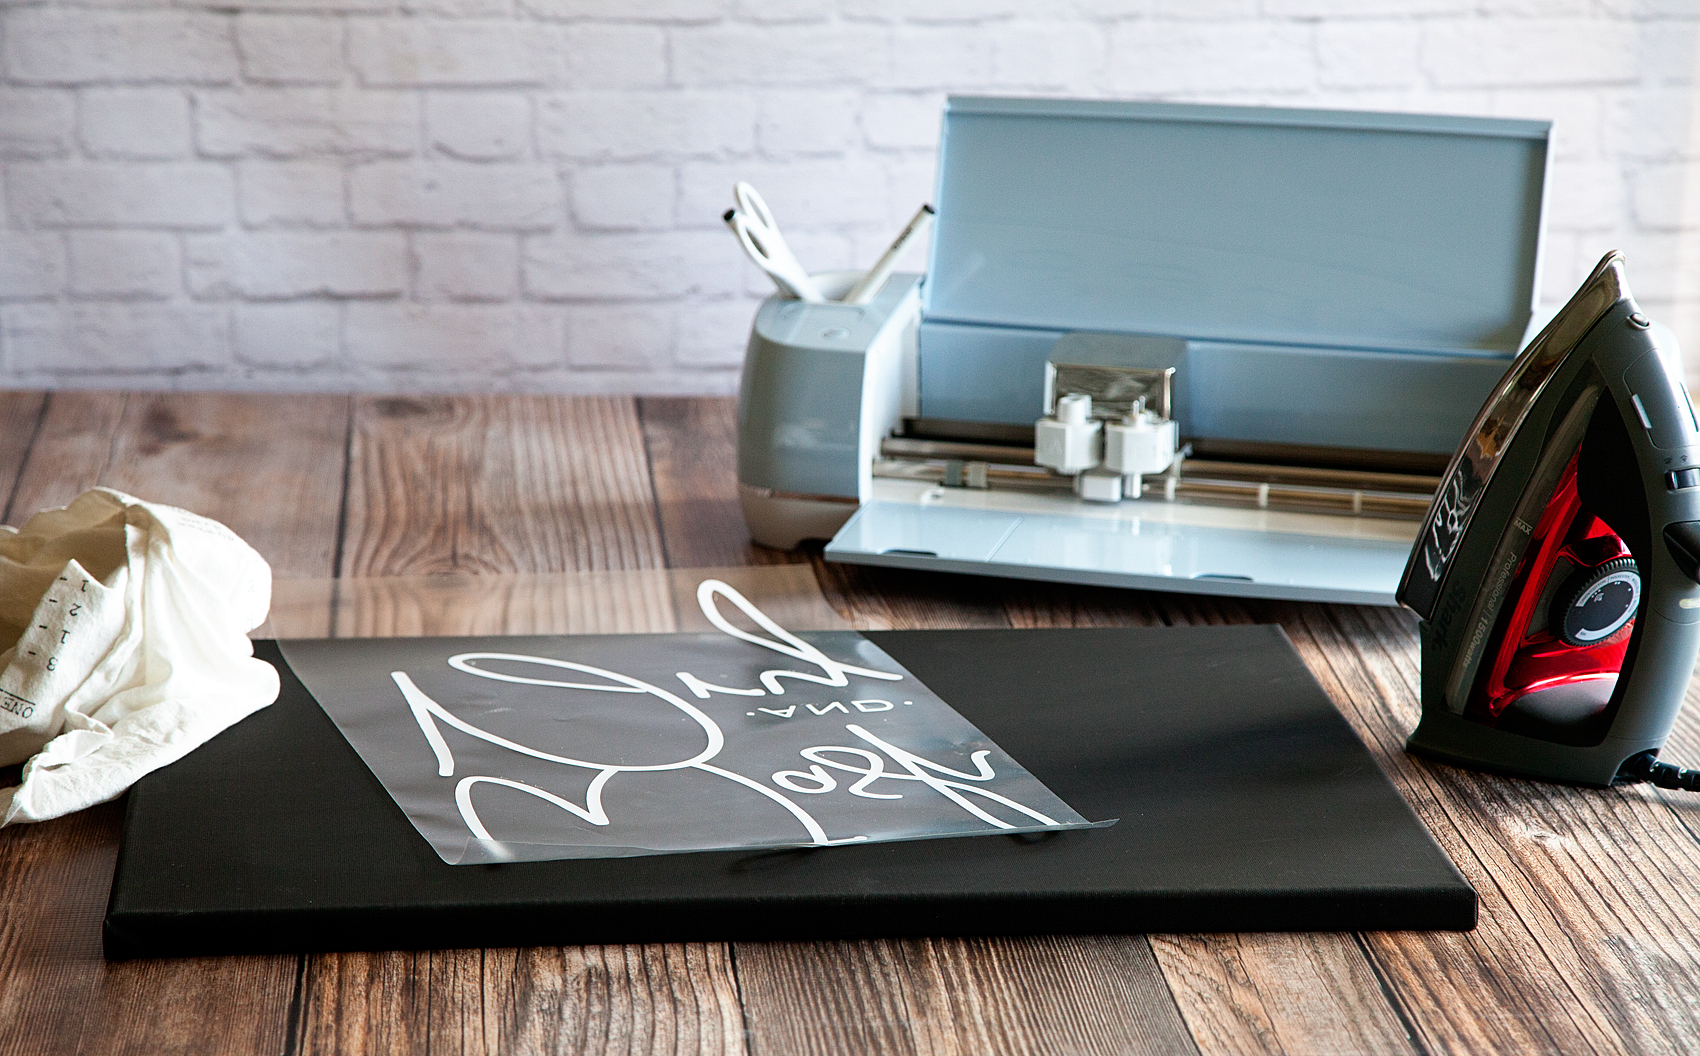
Once I had the design created, I needed to find the easiest way to create a nice looking sign. I decided that a black canvas with Cricut’s Iron-On Vinyl would be the best and easiest way to accomplish my mission. I grabbed a black canvas at Michaels and set to work… Here’s what you’ll need.

Wash and Dry Sign Supplies

  • Black Canvas 18×24
  • Cricut Machine { I use the Cricut Explore Air 2 }
  • Cricut Design Space { I don’t want to knock your socks off BUT… The new Cricut Design Space has launched in BETA. That is a link to the new, awesome software!! No more Flash, which means… No more lag time! }
  • Computer / Tablet / Phone { You guys… They all work WIRELESSLY with the Cricut Explore Air 2 }
  • White Cricut Iron-On Lite
  • Cricut 12×24 Light Grip Cutting Mat
  • Light cotton tea towel { flower sack material is great } OR Parchment paper

Fixer-Upper inspired Wash and Dry Sign created by WhipperBerry • Create this easy to make sign using your @cricut® machine and their Iron-On Vinyl •  Download the digital design file at WhipperBerry.com

Ok, before we get started on the project, here’s a quick time lapse that shows how I made the sign…

Wash & Dry Sign by WhipperBerry from Heather Thoming on Vimeo.

Seriously, to quote Ina Garten… “How easy was that?” Let’s go into it in a little more detail starting with my tips and tricks for a successful project.

Fixer-Upper inspired Wash and Dry Sign created by WhipperBerry • Create this easy to make sign using your @cricut® machine and their Iron-On Vinyl •  Download the digital design file at WhipperBerry.com

First tip, take your time. Many people try and rush through their projects and get frustrated when they don’t turn out right. SLOW DOWN! Especially if this is your first time working with the heat transfer vinyl. You want to love your project, take the time to do it right.

Cutting out the Iron-On Lite Material

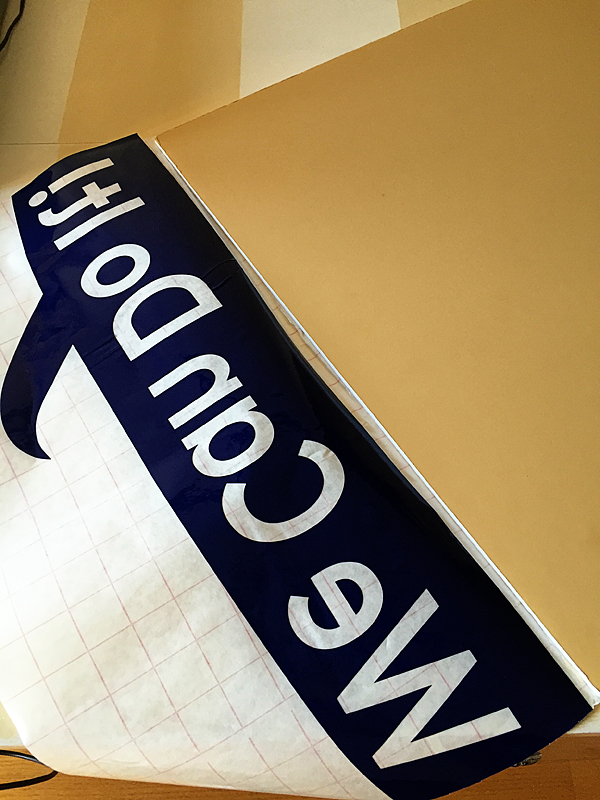
First thing you need to do is, cut your file on the Iron-On Lite material via your Cricut machine. When working with Iron-On lite, you’ll want to place the material with the shiny protective film down and the matte side facing up. Yep, I’ve messed that up a few times so, don’t beat yourself up if you do as well!

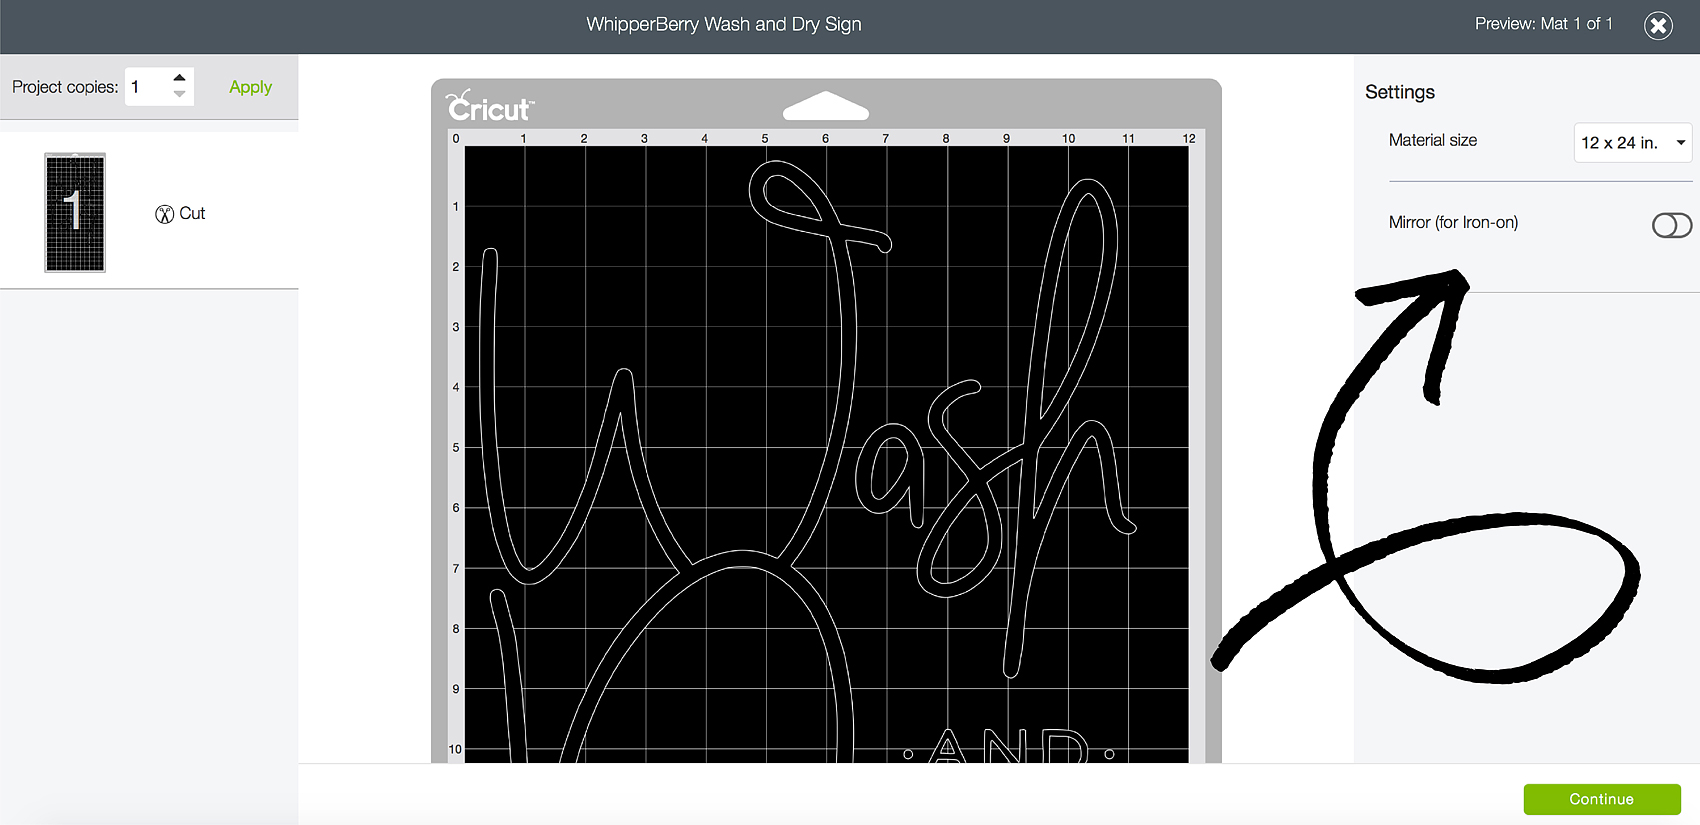
Another key item, make sure that you select the iron-on button when setting up your design in Design Space. This will mirror your image so that it will work with the iron-on vinyl.

Fixer-Upper inspired Wash and Dry Sign created by WhipperBerry • Create this easy to make sign using your @cricut® machine and their Iron-On Vinyl •  Download the digital design file at WhipperBerry.com

Next step, weeding your Iron-On Lite vinyl. This is my favorite part and if you don’t believe me, watch my Instagram story from yesterday. You’ll see why I love it and, you’ll get to see more of the project!

Wash and Dry Instagram Story @whipperberry from Heather Thoming on Vimeo.

Adhering your Iron-On Lite Vinyl to Your Canvas

Now, working with traditional stretched canvas rather than your fabric does provide for a few little obstacles. Namely, the canvas is stretched on a wood frame which makes it hard to “iron-on” something to it. To get a good transfer of the vinyl you need to apply pressure on a hard surface and the raised nature of the canvas makes that a challenge. To solve this problem, I put some books under the canvas to provide that firm surface that I needed.

Fixer-Upper inspired Wash and Dry Sign created by WhipperBerry • Create this easy to make sign using your @cricut® machine and their Iron-On Vinyl •  Download the digital design file at WhipperBerry.com

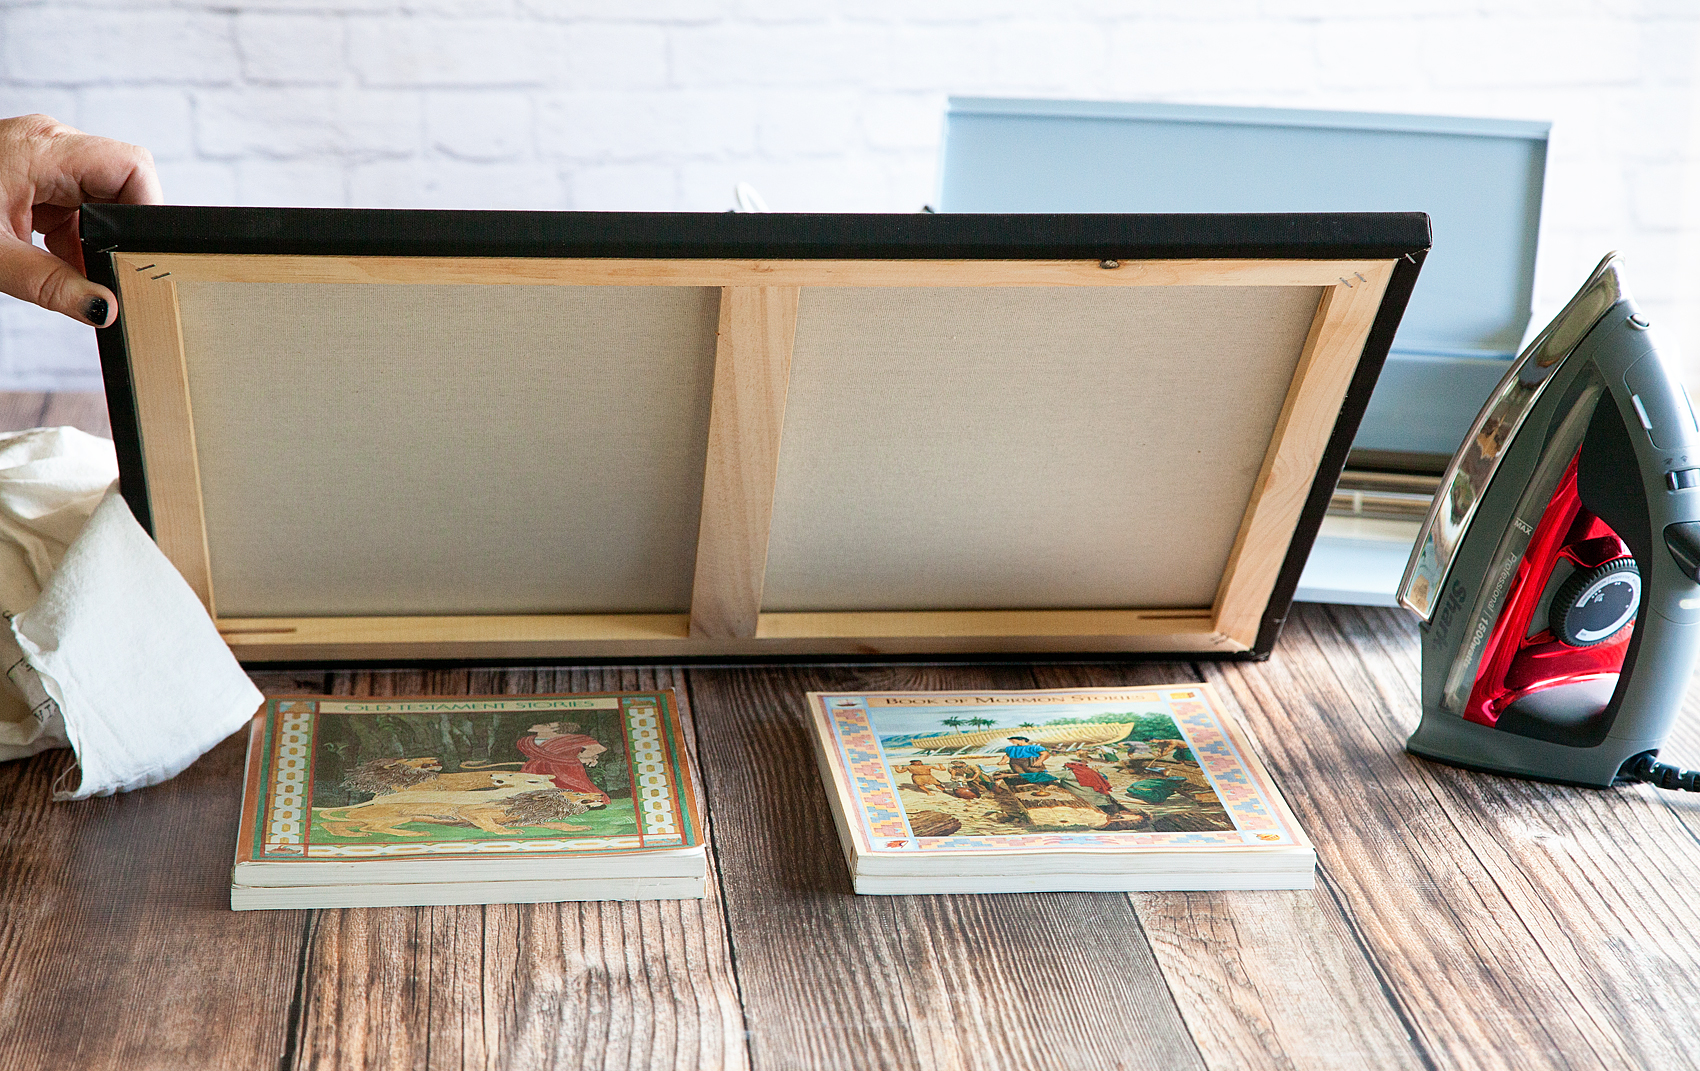
I also placed a heat mat on top of the books to protect them from the heat of the iron. I found this portable heat mat at Target in the laundry section.

Fixer-Upper inspired Wash and Dry Sign created by WhipperBerry • Create this easy to make sign using your @cricut® machine and their Iron-On Vinyl •  Download the digital design file at WhipperBerry.com

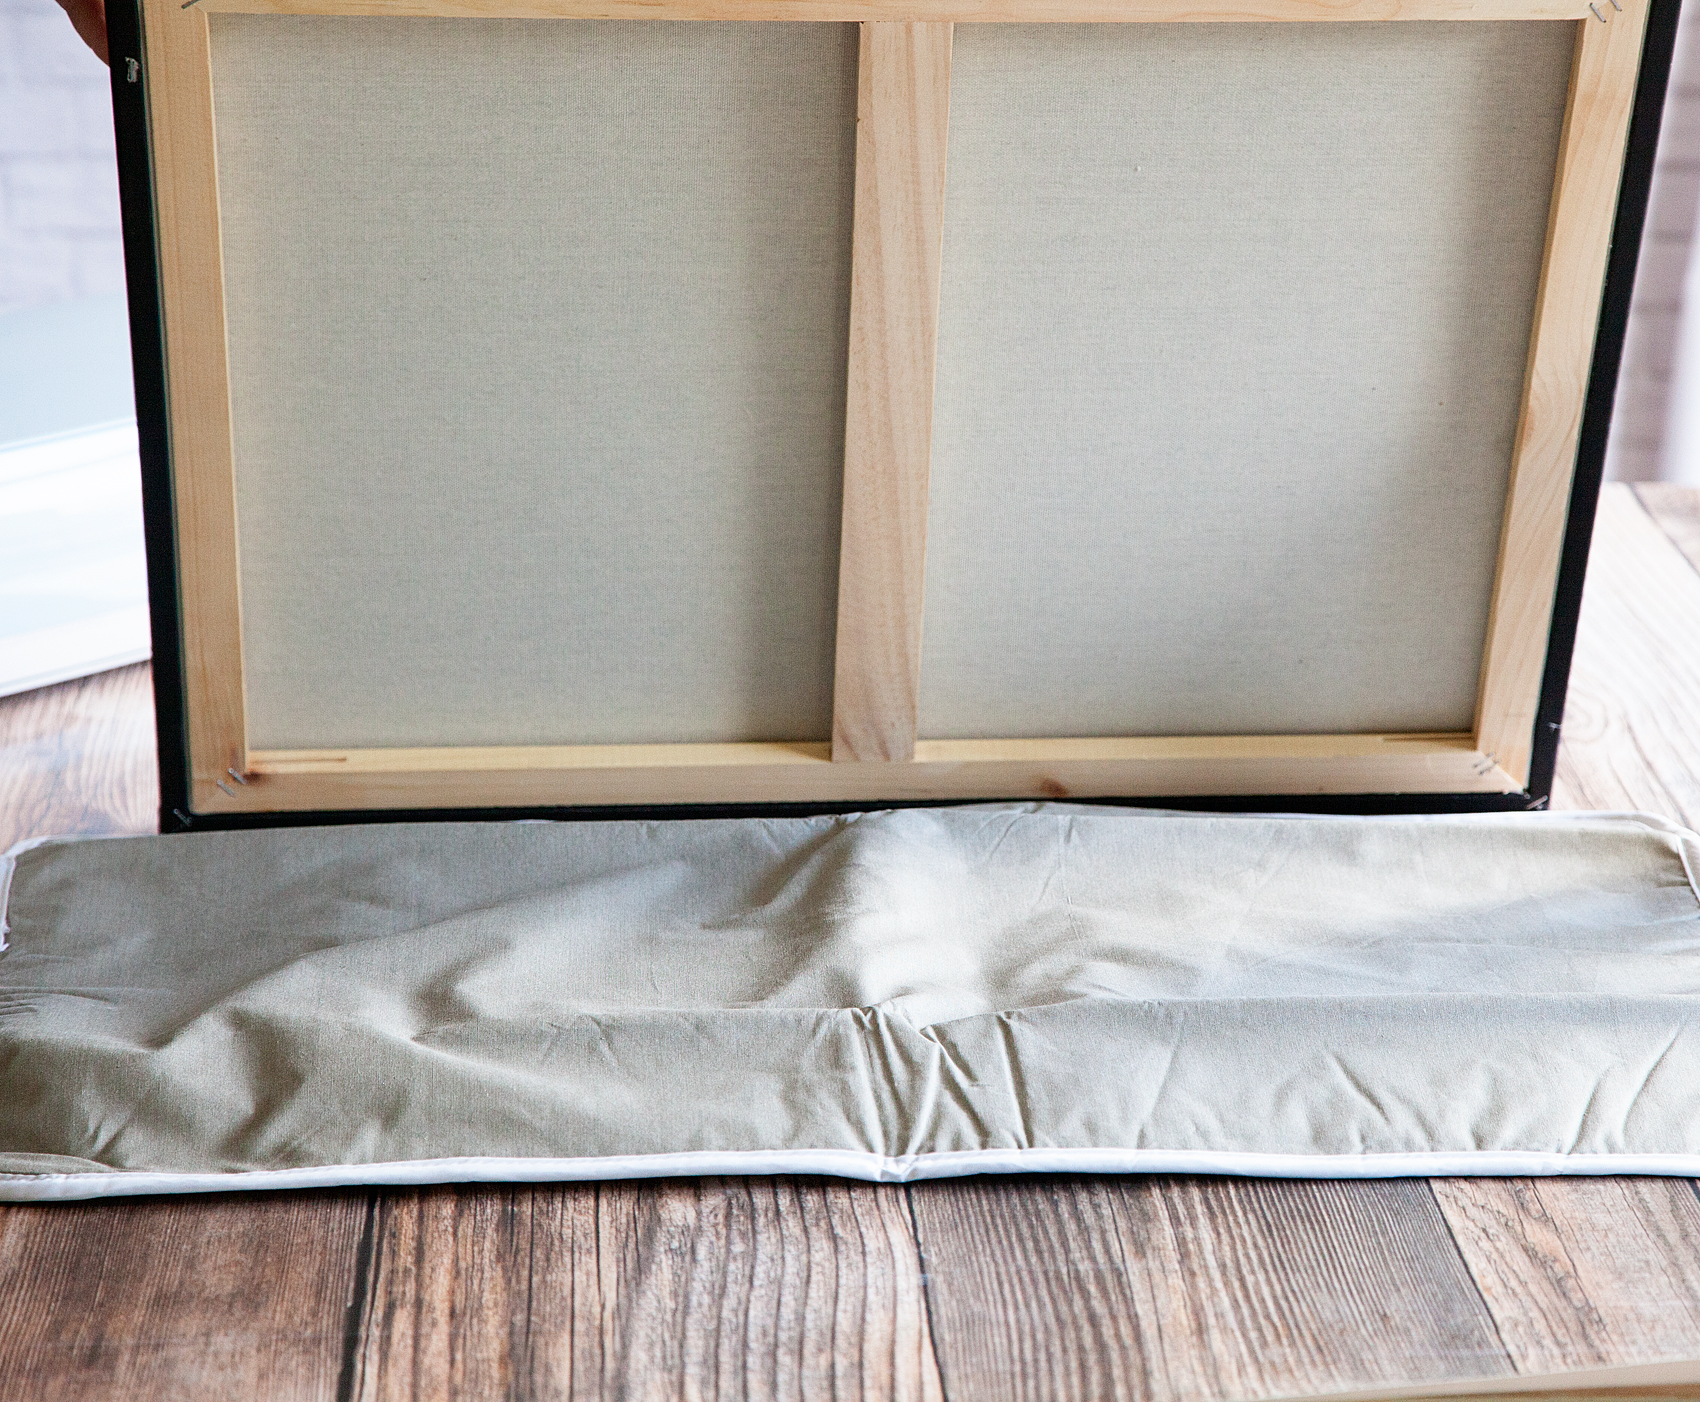
You’ll lay down your design onto the surface of your canvas with the protective film on top. That protective film is your friend at this point. It’s a bit sticky so it holds your design in place for you.

Fixer-Upper inspired Wash and Dry Sign created by WhipperBerry • Create this easy to make sign using your @cricut® machine and their Iron-On Vinyl •  Download the digital design file at WhipperBerry.com

Fixer-Upper inspired Wash and Dry Sign created by WhipperBerry • Create this easy to make sign using your @cricut® machine and their Iron-On Vinyl •  Download the digital design file at WhipperBerry.com

Cover your design with a light cotton cloth or some parchment paper. Set your iron to it’s hottest setting and then start to iron-on your design.

Now… This is not like ironing a shirt. You don’t want to use steam and it’s going to take a little time. You are basically wanting the vinyl to melt into the canvas and that takes a little time. DO NOT iron directly on the protective film OR place your iron on a section and just leave it there. Keep the iron moving and firmly press down on the canvas. This will help adhere the heat transfer vinyl to the canvas.

After a few minutes, check to see how things are sticking. Look at the protective film and you’ll kind of be able to see that the vinyl is pulling away from it and sticking to the canvas. You may find a few spots that need a little more time. Replace the cloth and continue to iron. Once you feel good about the adhesion, pull the protective film away and admire your sign.

At this point, I actually replace the cloth and do another light pass with the iron to make sure the vinyl is good and set. You could even flip your canvas over and iron on the back side with the protective film still in place to again make sure the vinyl is set.

Now, all you have to do is step back and admire your work! It’s so EASY and it looks AAAAMAZING!

Fixer-Upper inspired Wash and Dry Sign created by WhipperBerry • Create this easy to make sign using your @cricut® machine and their Iron-On Vinyl •  Download the digital design file at WhipperBerry.com

Disclaimer // I am a Cricut Ambassador and receive  product and payment to help with my projects. As always, I will NEVER promote a product that I don’t truly believe in!

Simple Kid Friendly DIY Christmas Village

3 · Nov 28, 2015 · Leave a Comment

WhipperBerry-Christmas-Village

Who’s looking for something fun & simple to do this Christmas? Something even the kiddos will love!

This year, I’m looking to simplify. I want to simplify everything, the gift giving, the message, the decor. I want the Holidays to be more about the family and the true meaning of Christmas. Several years ago my family spent a month in Germany in December and we had a chance to enjoy a European Christmas that was simply magical. For the Germans the holiday is all about nature, simplicity & family. We fell in love! Ever since then I have wanted to create more of an old-world Christmas experience and this year is finally the year… I’m so excited!!

It’s all starting with my simple kid-friendly DIY Christmas Village. I wish I could take all of the credit for this, but I can’t. I was inspired by a friend of mine here in Lincoln from Little Red Cabin. She has this beautiful shop where she sells simple, yet stunning decor items for the home. She used to sell these Christmas Villages in her shop but she no longer carries them, therefore I had to make one of my own and of course put my WhipperBerry spin on them. It’s really quite simple, you only need a few items.

Christmas Village Supplies

WhipperBerry-Christmas-Village-5-1

2×2 Select Pine Board

BB Frösch Chalk Paint Powder

Behr Premium Plus Sample Pots FLAT – Mink & Decorator White

Krylon Premium Metallic Spray Paint – Copper Foil

DIY Christmas Village Instructions

The trickiest thing with this project is getting access to a saw. If you don’t have a saw, hit up your neighbors or family members. I’m sure someone has something you can use. I have a Rigid 10 inch Sliding Compound Miter Saw and it works like a dream for this project, but it isn’t the only saw that will work.

How-to-cut-WhipperBerry-Christmas-Village

All you need is to be able to cut at an angle for this little village. There is no rhyme or reason when you’re cutting the little buildings. I made the little buildings roughly 3-4 inches tall, with all different types of angles for their roofs. I mostly used a 30-40˚ angle when cutting to tops of my buildings.

WhipperBerry-Christmas-Village-4

The only one that needs to be exact is the larger building in the center that you place your stencil on. For that one I used a 35˚ cut and made sure both sides of the building were the same hight.

Sand your blocks if needed. My wood cut so nice that I didn’t really need to sand them at all.

Now it’s time to paint your village. I knew that I wanted to keep some natural wood, Faux Stain some building with BB Frösch & then spray some of the buildings with copper spray paint for a metallic accent. I’ve see others use puffy paint for these kinds of projects but I liked the spray paint instead. If you have kids creating these then you can use puffy paint instead because they love it.  I wrote a post about how to make your own puffy paint too!

WhipperBerry-Christmas-Village-colors

Faux Staining & Painting with BB Frösch Chalk Paint Powder

This to me is my favorite part… I LOVE working with Chalk Paint! I use BB Frösch Chalk Paint Powder when I’m crafting. Typically Chalk Paint is too expensive for crafting, but not when you use BB Frösch. I mix the chalk paint powder with a sample pot of Behr Premium Plus Flat paint from Home Depot. The BB Frösch turns the regular paint into CHALK PAINT for a fraction of the cost.

It’s so easy to mix-up your chalk paint, here’s a quick video showing you how to do it.

For the White buildings, I just brush on the Decorator White BB Frösch Chalk Paint and because it’s has the all-natural mineral additives, it dries super quick! I don’t really bother to wax these guys, they don’t really need it. Plus, I like the look of the flat finish.

Now for the Faux Stain… You use this technique that I created when you want to see the natural wood come through. Traditionally people would use Stain for this, but I use BB Frösch because it’s so much easier. You can visit this post on WhipperBerry to learn how to Faux Stain.

Faux-Stain-BB-Frösch-Chalk-Paint-Powder

I love how the faux stain turns out for this Christmas Village. I use the color MINK from Benjamin Moore for most of my Faux Staining. YES, I use the sample pots of Behr at Home Depot, but they have the color recipe for the Benjamin Moore colors in their computer. Just ask for Benjamin Moore Mink and they will be able to look it up.

Copper Buildings

Now for the copper, I use Krylon’s Premium Metallic Spray Paint in Copper Foil. It’s super simple and adds that little pop of copper that is so hot right now.

WhipperBerry-Christmas-Village-6

Just spray paint a couple of your buildings for that accent color.

Spray-Paint-some-sections-of-the-Christmas-Village

Stencil

Now for the stencil…I’ve used a Swiss Cross, but you can use whatever you like. A star, snowflake, heart… Whatever you come-up with really. I cut my stencil out of vinyl on my Silhouette CAMEO but you can either buy a pre-made stencil or create one of your own.

I put the two pieces of cut wood together and then place the stencil on top.

Stenciling-WhipperBerry-Christmas-Village

Then paint with your desired color. ALSO, don’t forget that you can use both the positive and negative parts of the stencil. That way you don’t have to waste anything!

IMG_5997

Peel-off the vinyl once it is dry and voilá… You have a stylish decorated building for your set.

WhipperBerry-Christmas-Village-1

You can also drill a hole into one of your buildings and add a star. I just glued a star ornament from Michaels to the top of a dowel and it fit perfect with the village.

I love this simple decor that is kid friendly. So many Holiday decorations are breakable and we’re constantly following the kiddos around telling them not to touch… With this simple Christmas Village they can touch and play with it all they want!

+ This was originally a guest post on 30 Handmade Days +

Rosie the Riveter Costume

27 · Oct 1, 2015 · 6 Comments

+ This Rosie the Riveter Costume Post brought to you my Michaels Craft Stores +

Rosie-the-Riveter-Costume-from-WhipperBerry-2

You guys, I’m so excited… Halloween is right around the corner!!

I have a love/hate relationship with Halloween. I’m not a fan of the macabre scene, full of blood and gore, but I do love all of the fun creative ways to dress-up for the holiday. I love coming up with fun ideas for costumes with the family. I like to keep things simple, I don’t want to spend a ton of time or money on costumes for sure.

This months Michaels Maker’s Challenge was to create a simple DIY Halloween Costume.

_01190_MAKERS_0929_l

My daughter and I thought it would be fun to put together a quick costume with the iconic Rosie the Riveter as our muse. I have always LOVED this graphic.

rosie-the-riveter-poster-s

Rosie the Riveter Costume Materials

Here’s what you will need to make this simple costume.

Supplies-for-Rosie-the-Riviter-Costume

  • Elmer’s foam core board
  • Red and white polka dot fabric – available in store at Michaels, not online
  • Blue vinyl
  • 1 1/2 inch navy ribbon
  • Utility knife
  • Silhouette CAMEO – Not a deal breaker, but nice.
  • Blue button down shirt

Instructions

This is one of those costumes that really takes minutes if you have a Silhouette cutting machine. If not, NO WORRIES. It will take a little bit longer but you can still do it. With the silhouette all you need is to download this file that I created, and you can cut the image out of vinyl for your poster.

We-Can-Do-It-Poster-for-Silhouette-CAMEO-or-Portrait

The poster board is 20×30 and this will fit perfect to the top of the board.

We-Can-Do-It-poster

You will need to weed your vinyl, than place some transfer tape on top of it. I used the transfer tape to hinge the top of the vinyl transfer to the top of the board. Then I pulled the backing off the vinyl and with the hinge, laid the vinyl down right in the perfect spot.

Rosie-the-Riveter-Poster-from-WhipperBerry

Now, hindsight being 20/20… I would have either laid down some white vinyl or spray painted the top of the board white first. That would make the letters white, but I’m not too worried about that.

Rosie-the-Riveter-Costume-from-WhipperBerry-3

Next, I used a utility knife to cut some slits into the board right where I wanted to place the ribbon to create a kind of backpack effect. That way she could wear the board on her back with ease. I used navy ribbon so that it would blend in with the shirt and just tied it in cute bows on the back of the board.

Rosie-the-Riveter-Costume-from-WhipperBerry-5

It works perfect! Now all you have to do it tie-up your hair with the red & white polka dot fabric and you’re all set!!

Rosie-the-Riveter-Costume-from-WhipperBerry-4

It’s SUPER simple and so fun! What are your Halloween costume plans? Need some fun ideas? The rest of the 49 other Michaels Makers have been hard at work creating some fun ideas for you. You can check them out here!

An InLinkz Link-up


Disclaimer // I am a member of the Michaels Makers Crew and received store credit in order to create my project.

The Silhouette Curio is HERE

0 · Aug 27, 2015 · Leave a Comment

Silhouette-Curio

Guys… The new Silhouette Curio is HERE!!

I have a special discount just for you guys at the end of this post!!

Back in May, I had the chance to travel to Hawaii for the Silhouette Summit where they announced a TON of new products.

Silhouette-Summit

Linda from Craftaholics Anonymous and I with the CEO of Silhouette

All kinds of new consumable products, new software and software functions and TWO new members of the Silhouette family of crafting machines. The Curio and the Mint.

The Mint is a super fun little machine where you can create your own custom stamps and that will debut later this year.

Today, the Curio has launched. What’s special about the Curio you ask? Will this replace the CAMEO and Portrait?

The answer is no, it’s not meant to replace either machine. It is a new companion for your CAMEO or Portrait. It has all kinds of new features that the other machines do not have. For example…

Silhouette Curio Stippling

Stippling – Not familiar with Stippling? It’s SUPER cool!! You create with little dots. Create stippled ink projects with Silhouette felt tip pens or even stipple foils and metals.

Silhouette-Curo-New-Possibilities

Silhouette-Curio-Stippling-2

How fun is that? The world of creating with metal has just opened even wider!

Next on the list of new features…

Silhouette-Curo-Etch

You can etch on metal now as well. Create beautifully etched metal with the Curio’s etching tool to customize jewelry, charms, home décor, mixed media art, and more.

Silhouette-Curo-Emboss

The Curio can Emboss with a new embossing tool!

Silhouette-Curio-Double-your-creativity

The Curio has a dual carriage for double the fun!

Silhouette-Curo-Sketch

You can still Sketch, you can do with TWO Silhouette felt tipped pens now.

Silhouette-Curo-Cut

With the Curio you can still Cut, but you can cut even deeper!

Silhouette-Curo-Deeper-Cuts

The Curio has an improved blade and more clearance which means more options. The Curio’s 5mm clearance allows you to etch, sketch, or cut on new project palettes. Think wood, foil, leather, foam, and even metal.

I can go on and on… You’ll have to go over to Silhouette and check it out for yourself.

I will be working on all kinds of projects here on WhipperBerry with the new Curio and would love for you to join me.

The price for a Curio is $249.99

The folks at Silhouette are giving you guys $15 off a new Curio if you use the code WHIPPER at checkout.

Click the link HERE to get the $15 discount

I can’t wait to start creating with the Curio, what about you? Head on over to their site to check out all of the new products and software options. The Silhouette brand of machines are truly my favorite crafting tool. I use them more than any other tool that I have in my creative tool box!

Disclaimer – I am a member of the Silhouette Makers Affiliate Program.

  • « Go to Previous Page
  • Page 1
  • Interim pages omitted …
  • Page 4
  • Page 5
  • Page 6
  • Page 7
  • Page 8
  • Go to Next Page »

Primary Sidebar

Heather from Whipperberry
Hello... my name is Heather and I'm the creator of WhipperBerry a creative lifestyle blog packed full of great recipes and creative ideas for your home and family. I find I am happiest when I'm living a creative life and I love to share what I've been up to along the way... Come explore, my hope is that you'll leave inspired!

Footer

  • Privacy Policy
  • Crafts
  • Food
  • Gifts
  • Holidays
  • Home
  • Mom Life
  • Recipes
  • Travel

Copyright © 2026 · Seasoned Pro