Bread That Looks As Good As It Tastes
There’s nothing like pulling a loaf of homemade bread from your own oven…until you look at it. It tastes incredible, but somehow it’s a little lopsided, split open along the side, more “enthusiastic kitchen experiment” than “artisan masterpiece.”
If that’s ever been you, here’s the good news. The secret isn’t a fancier oven or years of practice. It’s one simple step that takes about ten seconds and costs you nothing. It’s called scoring. And once you learn it, your bread will never look the same again.
What Scoring Actually Does (It’s Not Just for Looks)
Scoring is just the act of making shallow cuts in the surface of your dough right before it goes into the oven. You’ve definitely seen it… that elegant slash down the middle of a baguette, the pretty crosshatch on a round sourdough boule.
But here’s the part most people don’t realize. Scoring isn’t only decorative. It’s functional, and it’s the difference between a loaf that bakes beautifully and one that bursts open in all the wrong places.
When bread hits the heat of the oven, it does something dramatic called “oven spring” a sudden burst of rising as the trapped gases expand. All of that energy has to escape somewhere. If you don’t give it a deliberate exit, the loaf will tear itself open wherever it finds a weak spot, usually along the side or bottom.
Scoring puts you in control. You’re essentially telling the bread, “Open here, please.” The cut becomes the path of least resistance, so the loaf expands exactly where you want it to. That’s how the pros get that signature high, even rise with the crisp, lifted “ear” along the slash.
So a good score does three things at once: it controls the shape, it creates a better crust, and it makes your loaf genuinely beautiful. Not bad for ten seconds of work.
The Simple Toolkit (No Fancy Equipment Required)
You can absolutely buy a special tool for this and it’s called a baker’s lame (pronounced “lahm”), and it’s basically a thin handle that holds a razor blade. They’re cheap and they work beautifully, and if you find yourself baking a lot of bread, it’s a lovely little upgrade.
But you do not need one to start. Here’s what works.
- A baker’s lame — the gold standard for clean, precise cut
- A very sharp paring knife — perfectly good for simple pattern
- A clean razor blade or craft knife — what a lame is, essentially, without the handle
The single most important quality in any of these is sharpness. A dull blade drags through the dough, deflates it, and leaves a ragged tear instead of a clean cut. Whatever you reach for, make sure it’s the sharpest thing in your drawer.
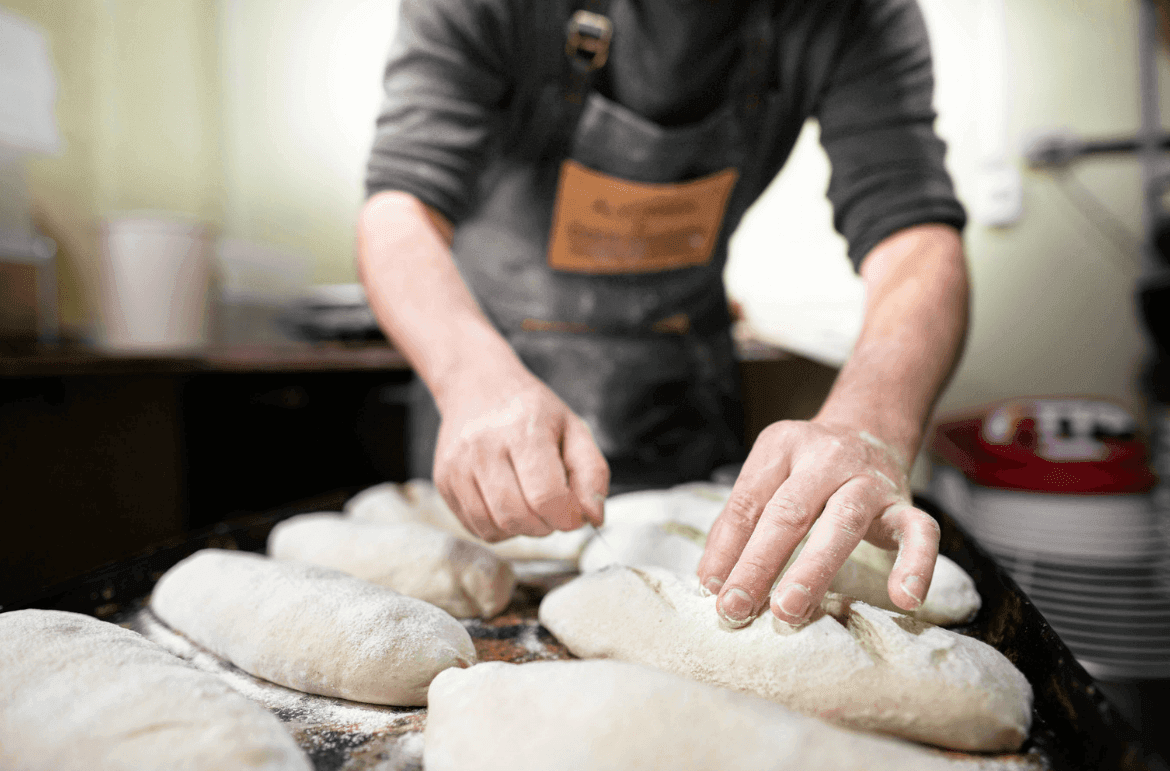
The Timing Mistake Almost Every Beginner Makes
If you take away one thing from this whole post, let it be this: score your bread at the very last second, right before it goes in the oven.
Not earlier. Not “while you’re waiting for the oven to preheat.” Right before.
Here’s why the timing matters so much. You want to score after the dough has finished its final proof, when it’s risen and airy but still holding its shape. Cut it too early, before it’s done proofing, and the cuts will simply close back up as the dough continues to rise, leaving you with nothing to show for it. Wait too long, or work with dough that’s over-proofed and overly delicate, and the loaf can deflate the moment your blade touches it.
That narrow window, right at the end of the proof, is the sweet spot. Make your cuts, then get that loaf into the heat as quickly as you can.
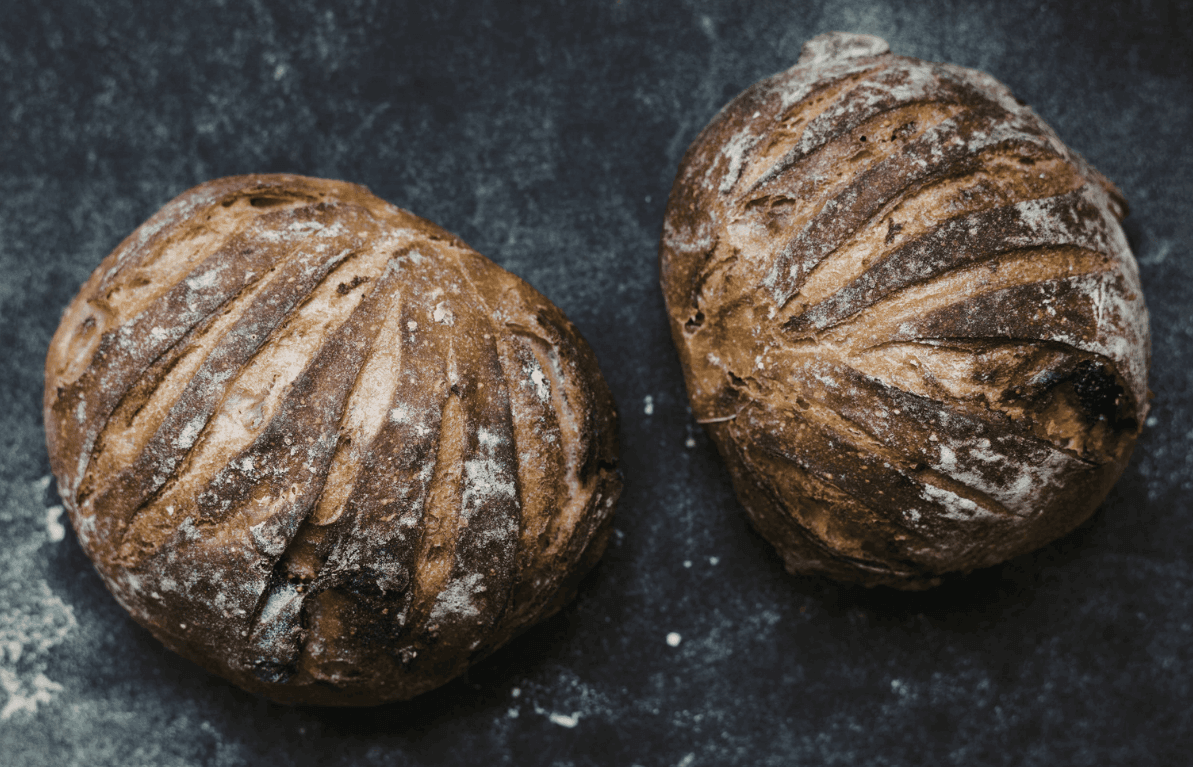
Three Beginner-Friendly Patterns to Try When Scoring Homemade Loaves
You don’t need anything elaborate to make a gorgeous loaf. Start with these three.
1. The Single Slash
The simplest and arguably the most striking. One bold, confident cut straight down the length of an oval loaf. Hold your blade at a slight angle — about 30 to 45 degrees, rather than straight down — and this is what creates that beautiful raised “ear” as the bread bakes. Perfect for rustic loaves and a wonderful place to begin.
2. The Cross or X
Ideal for round loaves. Two cuts crossing in the center help a boule expand evenly in all directions instead of bulging to one side. It’s forgiving, it’s classic, and it looks intentional every single time.
3. The Simple Wheat Stalk
Once you’re feeling brave, this one always impresses. A line down the center with small diagonal cuts branching off each side, like a stalk of wheat. It takes a little more confidence, but it turns an ordinary loaf into something that looks like it belongs in a window display.
The trick with all of them? Move with confidence. A swift, decisive motion gives you a clean line. Tentative little sawing motions are what create ragged edges. Commit to the cut.
Crusty Loaves vs. Soft Loaves
One last thing worth knowing, because it trips people up: not all bread wants to be scored the same way.
For crusty breads like sourdough, rustic artisan loaves, anything with a hearty crust, go bold. Deeper cuts (around half a centimeter), held at an angle, give you those dramatic, crackly folds those breads are famous for.
For soft breads like sandwich loaves, dinner roll or enriched doughs, scoring is gentler and more about shaping than drama. A single shallow slash, often straight down rather than angled, is all you need. (And if you’re baking in a loaf tin, you can usually skip scoring altogether as the tin does the shaping for you.)
In short, crusty breads love bold, angled cuts for crunch and drama. Soft breads just want a gentle, shallow guide.
Go Forth and Score
If you want to take a deeper dive, Australian bakery supplier Suprima has a wonderful breakdown of professional scoring patterns and techniques that the pros use behind the counter, and King Arthur Baking’s guide to scoring sourdough is full of helpful detail if sourdough is your thing.
But honestly? The best way to learn is to just do it. Bake a loaf this weekend. Make one simple slash. It might be a little wobbly the first time, and that’s completely okay… every gorgeous bakery loaf started with someone’s wobbly first cut.
Then do it again next weekend. And the one after that. Before long, you’ll be pulling out loaves so beautiful you’ll want to photograph them before anyone’s allowed to eat them.
I’d love to see what you create, tag me when you do.
Happy baking!