• Skip to primary navigation
  • Skip to main content
  • Skip to primary sidebar
  • Skip to footer

Whipperberry

WhipperBerry • Your Home For Creative Inspiration

  • Home
  • Recipes
    • Starters
    • Easy Weeknight Dinners
    • Main Dish
    • Salads
    • Side Dish
    • Soups & Stews
    • Desserts
    • Breakfast
    • Miscellaneous
  • Tutorials
    • Creative Crafts
    • DIY Decor
    • Fabric Crafts
    • Food How-To
    • Jewlery
    • Paint Projects
    • Paper Art
    • Party Styling
    • Photography and Graphic Design
    • Silhouette
  • Holidays
    • Easter
    • Mother’s Day
    • Father’s Day
    • 4th of July
    • Halloween
    • Thanksgiving
    • Christmas
    • Valentine’s Day
  • Gift Ideas
    • Gifts For Everyone
    • Gifts for Dad
    • Mother’s day
    • For The Girls
    • For The Kids
    • Teacher Gift Ideas
    • Christmas
  • Printables
    • Holiday
    • Gift Idea
    • LDS Primary
  • Travel
  • About
    • Terms
  • Contact
  • Nav Social Menu

    • Facebook
    • Instagram
    • Pinterest
    • RSS
    • Twitter

Recipes

5 Breakfast Jar Ideas for Busy Weekdays

0 · Jul 21, 2026 · Leave a Comment

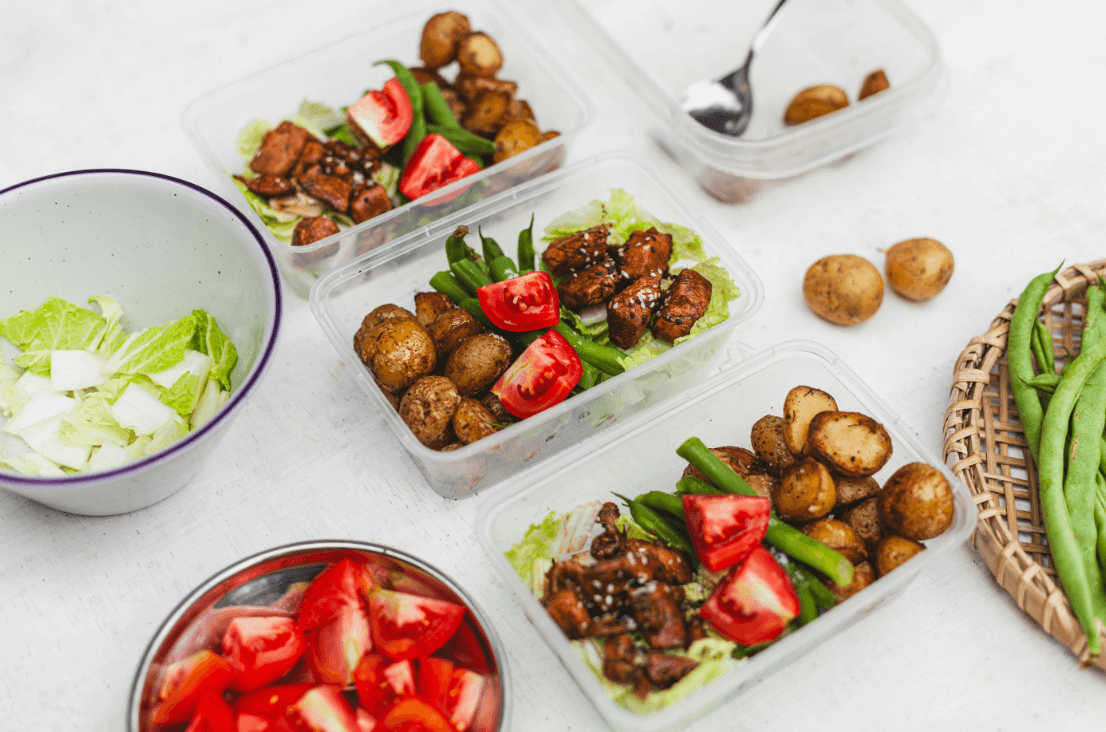
Monday mornings have a way of undoing even the best intentions. Someone needs help finding a backpack, lunches still have to be packed, and before you know it, breakfast is whatever you can grab on the way out the door. That’s exactly why breakfast jars have become one of my favorite meal-prep shortcuts. Spend a little time putting them together on Sunday, and you’ll have breakfast ready all week long.

Whether you’re heading to the office, working from home, or getting the kids out the door before school, having breakfast waiting in the refrigerator makes busy mornings feel just a little more manageable.

Breakfast Jar Ideas

Why Breakfast Jars Work So Well

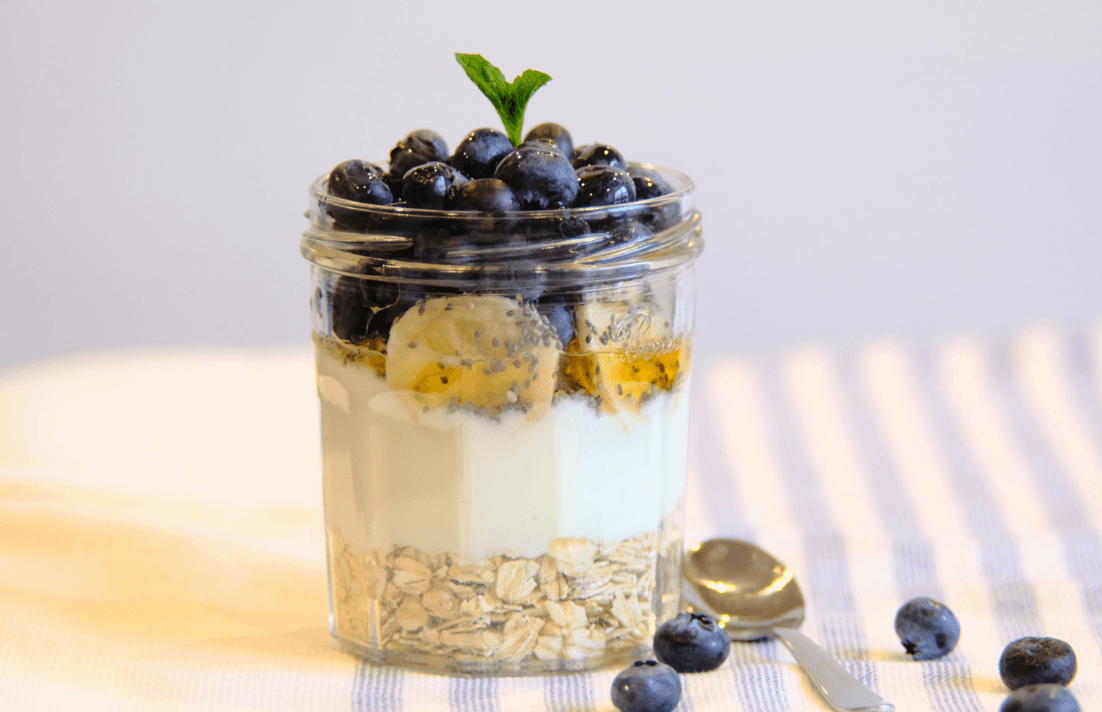
Breakfast jars are as simple as they sound: layer your ingredients into a mason jar, refrigerate overnight (or prep ahead for several days), and breakfast is ready when you are.

They’re perfectly portioned, easy to grab from the refrigerator, and travel well if you’re eating breakfast at your desk or on the go. Better yet, they save you from making one more decision during a hectic morning.

The layering also keeps everything tasting fresh. Oats and chia seeds absorb liquid overnight, while crunchy toppings like granola or nuts can be added just before serving for the best texture.

Stock Your Kitchen for Easy Breakfast Prep

The beauty of breakfast jars is that you only need a handful of versatile ingredients to create several different combinations throughout the week.

Keep staples like rolled oats, Greek yogurt, milk, chia seeds, frozen fruit, fresh apples, bananas, nut butter, cinnamon, vanilla extract, honey, maple syrup, granola, and chopped nuts on hand. With those basics, you can mix and match flavors without making a special trip to the grocery store.

If you’d like a little extra protein without measuring another ingredient, products like Protein Oats combine oats and protein in one mix, making breakfast even quicker on busy mornings.

Breakfast Ideas for Busy Weekdays

5 Breakfast Jars to Prep This Weekend

1. Blueberry Cobbler Overnight Oats

Combine ½ cup rolled oats with ¾ cup milk and 1 tablespoon chia seeds. Top with frozen blueberries and a drizzle of honey before refrigerating overnight. Add granola just before serving for extra crunch.

For an even quicker option, a Blueberry Cobbler Protein Oats blend already combines the oats, flavor, and protein in one mix, making assembly especially easy on busy weeks.

Breakfast Jar Idea

2. PB&J Chia Pudding

Mix 3 tablespoons chia seeds with 1 cup almond milk and ½ teaspoon vanilla extract. Refrigerate overnight until thickened, then top with peanut butter and your favorite strawberry jam before serving.

It’s a nostalgic combination that’s just as enjoyable for adults as it is for kids.

3. Apple Cinnamon Oat Jar

Start with your favorite overnight oat base, then stir in grated apple and a sprinkle of cinnamon before refrigerating. In the morning, finish with chopped walnuts and a drizzle of maple syrup for a cozy breakfast that tastes like apple pie.

4. Tropical Yogurt Parfait

Layer Greek yogurt with frozen mango, pineapple, or berries, then refrigerate overnight. Add toasted coconut and granola just before eating to keep everything crisp.

This one takes only a few minutes to prepare but feels like something you’d order at your favorite café.

5. Savory Egg & Veggie Breakfast Jar

If sweet breakfasts aren’t your thing, scramble eggs and layer them with sautéed spinach, roasted peppers, and crumbled feta in a mason jar. Warm it in the microwave for about a minute before eating.

It’s a hearty option that keeps you satisfied throughout a busy morning.

A Fun Idea for the Whole Family

Breakfast jars can also become part of your weekly family routine.

Set out bowls of fruit, granola, coconut flakes, cinnamon, nut butter, or mini chocolate chips and let everyone build their own jar for the week. Kids are often much more excited to eat a breakfast they helped create, and it’s an easy way to spend a few minutes together on a Sunday afternoon.

Tips for Making Breakfast Jars Ahead

A few simple tricks help breakfast jars stay fresh throughout the week.

  • Prepare oat jars up to five days in advance.
  • Yogurt parfaits are best enjoyed within three days.
  • Add crunchy toppings like granola, toasted nuts, or coconut just before eating.
  • Wide-mouth mason jars are the easiest to fill, clean, and eat from.

Labeling each jar with the day of the week can also make mornings even simpler, especially if you’re preparing breakfasts for multiple family members.

Easy Ways to Customize Every Jar

Breakfast jars are easy to adapt for different dietary needs and preferences.

For dairy-free versions, use your favorite plant-based yogurt and milk. If you need gluten-free breakfasts, choose certified gluten-free oats. Looking for something a little more filling? Add extra Greek yogurt, nuts, seeds, or a protein-rich oat blend to help keep you satisfied until lunchtime.

The beauty of these recipes is that they’re endlessly flexible—you can easily swap fruits, spices, or toppings based on what’s already in your kitchen.

A Little Prep Goes a Long Way

You don’t have to make all five recipes every week. Start with two or three favorites and see which combinations your family enjoys most.

A small amount of prep on Sunday evening can make weekday mornings feel far less rushed. With breakfast already waiting in the refrigerator, there’s one less thing to think about before the day begins.

Sometimes the simplest routines make the biggest difference—and a few mason jars in the fridge might just become your new favorite weekday shortcut.

A Beginner’s Guide to Scoring Homemade Loaves

8 · Jun 14, 2026 · Leave a Comment

Bread That Looks As Good As It Tastes

There’s nothing like pulling a loaf of homemade bread from your own oven…until you look at it. It tastes incredible, but somehow it’s a little lopsided, split open along the side, more “enthusiastic kitchen experiment” than “artisan masterpiece.”

If that’s ever been you, here’s the good news. The secret isn’t a fancier oven or years of practice. It’s one simple step that takes about ten seconds and costs you nothing. It’s called scoring. And once you learn it, your bread will never look the same again.

Scoring Homemade Loaves

What Scoring Actually Does (It’s Not Just for Looks)

Scoring is just the act of making shallow cuts in the surface of your dough right before it goes into the oven. You’ve definitely seen it… that elegant slash down the middle of a baguette, the pretty crosshatch on a round sourdough boule.

But here’s the part most people don’t realize. Scoring isn’t only decorative. It’s functional, and it’s the difference between a loaf that bakes beautifully and one that bursts open in all the wrong places.

When bread hits the heat of the oven, it does something dramatic called “oven spring” a sudden burst of rising as the trapped gases expand. All of that energy has to escape somewhere. If you don’t give it a deliberate exit, the loaf will tear itself open wherever it finds a weak spot, usually along the side or bottom.

Scoring puts you in control. You’re essentially telling the bread, “Open here, please.” The cut becomes the path of least resistance, so the loaf expands exactly where you want it to. That’s how the pros get that signature high, even rise with the crisp, lifted “ear” along the slash.

So a good score does three things at once: it controls the shape, it creates a better crust, and it makes your loaf genuinely beautiful. Not bad for ten seconds of work.

The Simple Toolkit (No Fancy Equipment Required)

You can absolutely buy a special tool for this and it’s called a baker’s lame (pronounced “lahm”), and it’s basically a thin handle that holds a razor blade. They’re cheap and they work beautifully, and if you find yourself baking a lot of bread, it’s a lovely little upgrade.

But you do not need one to start. Here’s what works.

  • A baker’s lame — the gold standard for clean, precise cut
  • A very sharp paring knife — perfectly good for simple pattern
  • A clean razor blade or craft knife — what a lame is, essentially, without the handle

The single most important quality in any of these is sharpness. A dull blade drags through the dough, deflates it, and leaves a ragged tear instead of a clean cut. Whatever you reach for, make sure it’s the sharpest thing in your drawer.

The Timing Mistake Almost Every Beginner Makes

If you take away one thing from this whole post, let it be this: score your bread at the very last second, right before it goes in the oven.

Not earlier. Not “while you’re waiting for the oven to preheat.” Right before.

Here’s why the timing matters so much. You want to score after the dough has finished its final proof, when it’s risen and airy but still holding its shape. Cut it too early, before it’s done proofing, and the cuts will simply close back up as the dough continues to rise, leaving you with nothing to show for it. Wait too long, or work with dough that’s over-proofed and overly delicate, and the loaf can deflate the moment your blade touches it.

That narrow window, right at the end of the proof, is the sweet spot. Make your cuts, then get that loaf into the heat as quickly as you can.

Scored Homemade Loaves

Three Beginner-Friendly Patterns to Try When Scoring Homemade Loaves

You don’t need anything elaborate to make a gorgeous loaf. Start with these three.

1. The Single Slash

The simplest and arguably the most striking. One bold, confident cut straight down the length of an oval loaf. Hold your blade at a slight angle — about 30 to 45 degrees, rather than straight down — and this is what creates that beautiful raised “ear” as the bread bakes. Perfect for rustic loaves and a wonderful place to begin.

2. The Cross or X

Ideal for round loaves. Two cuts crossing in the center help a boule expand evenly in all directions instead of bulging to one side. It’s forgiving, it’s classic, and it looks intentional every single time.

3. The Simple Wheat Stalk

Once you’re feeling brave, this one always impresses. A line down the center with small diagonal cuts branching off each side, like a stalk of wheat. It takes a little more confidence, but it turns an ordinary loaf into something that looks like it belongs in a window display.

The trick with all of them? Move with confidence. A swift, decisive motion gives you a clean line. Tentative little sawing motions are what create ragged edges. Commit to the cut.

Crusty Loaves vs. Soft Loaves

One last thing worth knowing, because it trips people up: not all bread wants to be scored the same way.

For crusty breads like sourdough, rustic artisan loaves, anything with a hearty crust, go bold. Deeper cuts (around half a centimeter), held at an angle, give you those dramatic, crackly folds those breads are famous for.

For soft breads like sandwich loaves, dinner roll or enriched doughs, scoring is gentler and more about shaping than drama. A single shallow slash, often straight down rather than angled, is all you need. (And if you’re baking in a loaf tin, you can usually skip scoring altogether as the tin does the shaping for you.)

In short, crusty breads love bold, angled cuts for crunch and drama. Soft breads just want a gentle, shallow guide.

Go Forth and Score

If you want to take a deeper dive, Australian bakery supplier Suprima has a wonderful breakdown of professional scoring patterns and techniques that the pros use behind the counter, and King Arthur Baking’s guide to scoring sourdough is full of helpful detail if sourdough is your thing.

But honestly? The best way to learn is to just do it. Bake a loaf this weekend. Make one simple slash. It might be a little wobbly the first time, and that’s completely okay… every gorgeous bakery loaf started with someone’s wobbly first cut.

Then do it again next weekend. And the one after that. Before long, you’ll be pulling out loaves so beautiful you’ll want to photograph them before anyone’s allowed to eat them.

I’d love to see what you create, tag me when you do.

Happy baking!

How Long Does Cheesecake Last in the Fridge?

0 · Jun 12, 2026 · Leave a Comment

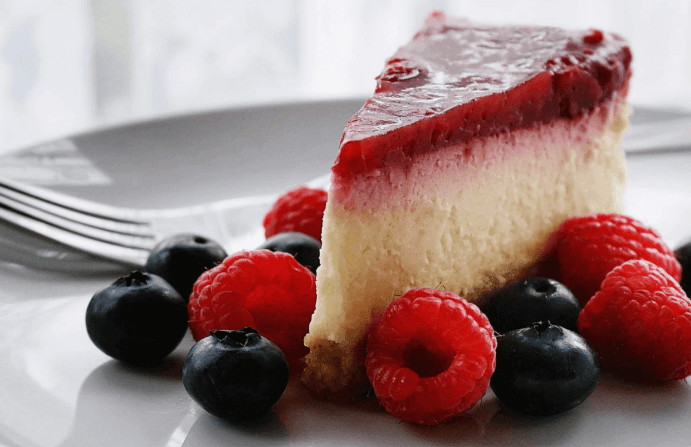
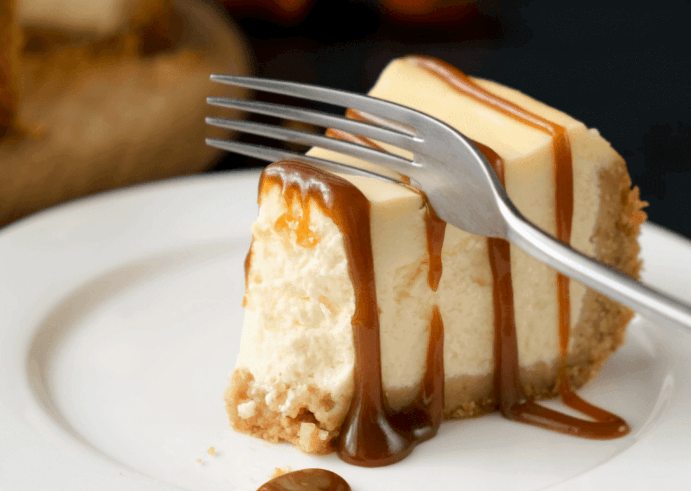
Few desserts evoke the same sense of pure indulgence as a perfectly baked, velvety cheesecake. Whether it is a classic New York-style slice, a trendy burnt Basque masterpiece, or a refreshing no-bake berry variant, cheesecake is the crown jewel of the dessert table.

But because cheesecake is rich, dense, and packed with dairy, it requires careful handling. If you have leftover slices from a weekend celebration—or if you are a professional baker managing inventory—a critical question arises: How long does cheesecake actually last in the fridge?

The short answer is that a standard, properly stored homemade cheesecake will remain fresh and safe to eat for 3 to 5 days in a residential refrigerator. However, its exact shelf life depends entirely on how it was made, how it is packaged, and the type of refrigeration environment it is held in.

Let’s dive deep into the science of cheesecake preservation, storage best practices, and how to spot the signs that your favorite dessert has crossed the line.

How Long Does Cheesecake Last

The Quick Guide: Cheesecake Shelf Life

Before breaking down the details, here is a quick-reference overview of how long different types of cheesecake will last when kept constantly refrigerated at or below 40°F (4°C):

Cheesecake TypeFridge Shelf LifeKey Characteristic
Homemade (Baked)3 to 5 daysContains no artificial preservatives; highly sensitive to ambient moisture.
Homemade (No-Bake)4 to 5 daysRelies on gelatin or chilling to set; texture can break down faster.
Store-Bought / Commercial5 to 7 daysOften contains stabilizers or vacuum packaging that extends life slightly.
With Fresh Fruit Topping1 to 2 daysFruit releases moisture rapidly, causing the crust to get soggy and mold to form.
Opened Commercial Box3 to 5 daysOnce exposed to outside air, the clock ticks at the homemade rate.
Left at Room Temperature2 hours maximumThe critical window before dangerous bacterial growth accelerates.

Why Cheesecake is Highly Perishable: The Science

To understand why cheesecake has a relatively brief shelf life compared to a standard sponge cake, we have to look at its ingredients.

Cheesecake is not really a cake at all—baking experts classify it as a custard or a tart. The primary ingredients are soft dairy products: cream cheese, sour cream, heavy cream, and eggs. This high-protein, high-moisture matrix creates an ideal breeding ground for foodborne pathogens and spoilage organisms if left exposed to the wrong conditions.

Microbiologists measure food safety using a metric called water activity, which dictates how much “free water” is available for bacteria and mold to use for reproduction. Cheesecake has a high water activity level. When kept at room temperature, bacteria like Staphylococcus aureus or Salmonella can multiply to dangerous levels in just a few hours.

This is why food safety agencies strictly enforce the Two-Hour Rule: cheesecake must never sit on a kitchen counter or buffet line for more than two hours total before being returned to cold storage.

Storage Environments: Home vs. Commercial Settings

Where you store your cheesecake matters just as much as how you wrap it. The dynamic changes dramatically when shifting from a quiet home kitchen to a bustling food service operation.

1. The Home Refrigerator

In a residential kitchen, a cheesecake easily lasts its full 5-day span if placed on a main shelf. The primary challenge in a home fridge is odor cross-contamination. Because cream cheese contains a high concentration of fats, it acts like a sponge for airborne aromas. If you store an uncovered cheesecake next to leftover garlic pasta or chopped onions, your dessert will absorb those savory flavors within 24 hours.

2. The Commercial Fridge Environment

For bakeries, restaurants, and catering businesses, managing cheesecake longevity requires a heavy-duty commercial refrigerator. These units are engineered to maintain strict, food-safe temperatures even when the doors are opened and closed hundreds of times a day by kitchen staff.

A commercial fridge relies on powerful, high-velocity fans to circulate cold air evenly across stainless steel shelving. While this constant airflow is spectacular for preventing hot spots and keeping the dairy safely below 40°F (4°C), it presents a unique threat to pastries: evaporative drying.

An uncovered cheesecake placed in a commercial fridge will experience rapid surface evaporation. Within a few hours, the smooth, glossy top of a New York cheesecake will dry out, develop unsightly cracks, and take on a rubbery, leathery texture. Furthermore, because commercial kitchens handle a vast array of raw and cooked ingredients, strict cross-contamination protocols must be enforced to ensure the delicate dessert remains pristine.

cheesecake

How to Maximize the Shelf Life of Your Cheesecake

Whether you are using a standard household refrigerator or a professional commercial fridge, following these preparation and packaging rules will preserve your dessert’s flavor and texture for as long as humanly possible.

Step 1: Cool Completely Before Refrigerating

Never rush a hot cheesecake straight from the oven into a cold fridge. The sudden temperature drop causes thermal shock, which violently contracts the structure and creates deep cracks across the surface. More importantly, trapping a hot cake inside a container creates immediate steam. This steam condenses into water droplets on the lid, dripping back down onto the cake, creating a slimy surface and a soggy, ruined graham cracker crust. Allow the cake to cool to room temperature on a wire rack first.

Step 2: Wrap Firmly and Securely

To protect against both the drying air currents of a commercial fridge and the unwanted odors of a home kitchen, your sealing technique must be airtight.

  • The Best Method: Place the chilled cheesecake on its cardboard round or plastic base. Wrap the entire structure snugly in two layers of plastic wrap, ensuring no gaps remain. For absolute protection, place the wrapped cake inside a dedicated plastic cake carrier or a sealable airtight container.
  • Slices: If you are storing individual slices, wrap each piece tightly in plastic wrap or place them inside individual, snap-lock glass containers.

Step 3: Hold the Toppings

If you are baking a cheesecake ahead of time for an event, do not add toppings like strawberry compote, cherry glaze, or fresh whipped cream until right before you plan to serve it. Fruit glazes contain high levels of moisture and acid that will gradually seep down into the dense filling, breaking down the structural integrity of the cake and causing it to become watery and sour.

Red Flags: How to Tell If a Cheesecake Has Gone Bad

Before taking a bite of a forgotten cheesecake, execute a sensory inspection using these three criteria:

  1. Visual Signs (The Surface Check): Look closely at the edges where the cake meets the crust. If you see any gray, green, or white fuzzy spots, mold has taken hold. Additionally, look for a distinct color shift; an aging cheesecake will often turn a dull, dark yellow or develop an oily sheen on top.
  2. Texture Shifts (The Consistency Check): A fresh cheesecake is dense, smooth, and creamy. If the cake has begun to separate, leaving a pool of watery liquid at the bottom of the container (a process known as syneresis), or if the edges have turned hard and rubbery while the center has become slimy, it is time to discard it.
  3. The Aroma Test: Fresh cheesecake smells delightfully sweet, milky, and faintly of vanilla or citrus. If you open the container and detect a sharp, sour, tangy, or yeast-like odor reminiscent of spoiled milk, microorganisms have altered the dairy. Trust your nose—when in doubt, throw it out.

Long-Term Storage: Can You Freeze Cheesecake?

If you realize you won’t be able to finish your cheesecake within the golden 5-day refrigerator window, the freezer is your best friend. Cheesecake freezes exceptionally well due to its high fat and low water content compared to delicate sponge cakes.

To freeze a cheesecake properly, let it firm up in the fridge first. Once cold, wrap the whole cake or individual portions tightly in a layer of plastic wrap, followed by a sturdy layer of heavy-duty aluminum foil to guard against freezer burn. When stored this way, a cheesecake will maintain peak quality for 2 to 3 months. When you are ready to indulge, simply transfer the cake back into your refrigerator and let it thaw slowly overnight before serving.

8 Energizing Drinks for Holiday Baking Days

0 · Apr 24, 2026 · Leave a Comment

Most of your baking mistakes late in the day are not about your skills; they come from doing too much to the point that your energy crashes. More often, your focus naturally declines over time during sustained tasks, a pattern supported by much cognitive research on mental fatigue and people’s attention span.

Here are some remedies in the form of enjoyable drinks that you can easily concoct to effectively support hydration, focus, and stamina without overwhelming your whole system.

Citrus Ginger Spritzer That Resets Your Focus

When your kitchen feels heavy with sugar and heat, your senses dull faster. Citrus, with all its tangy aroma, can improve alertness, while ginger supports digestion, according to research cited by the National Institutes of Health.

Mix sparkling water with fresh orange juice, lemon, and sliced ginger. Add a small amount of citrus-flavored energy drink if you want a mild lift. You can prepare it ahead, preferably before your baking bouts, and sip between oven checks.

It’s a way of staying refreshed without interrupting delicate baking steps.

Iced Chai Protein Boost That Steadies Your Pace

Actually, you need more than quick energy; you need balance, so choose carefully. Protein slows sugar absorption, helping prevent crashes, a benefit supported by Harvard Health research.

A cup of coffee on a table

You can brew strong chai, chill it, then mix with milk or some dairy-free option and vanilla protein. Add a touch of honey for a smoother flavor. Drink small amounts every 30 to 45 minutes to maintain steady energy during long baking sessions.

Quick Energy Shot Support When Timing Matters Most

Some moments do not allow you to stop or reset. This is where you might want to discover new energy shots that can deliver a fast and controlled boost without interrupting or increasing your workload.

You can choose options with clear caffeine levels and added B vitamins. The US Food and Drug Administration suggests staying within about 400 milligrams of caffeine daily for most adults, giving you just the right amount of spike without the crash. However, use this as a backup, not your base for a healthier day. You need to pair it with water, then go back to lighter drinks to keep your energy stable.

Minty Green Tea Lemonade That Sharpens Timing and Lifts Mood

Green tea is one recipe that can help you maintain calm focus instead of sharp energy bursts. It contains L-theanine, which supports attention when paired with caffeine mixtures.

Energizing cup of tea with a label, perfect

Often, this shows up in discussions around mood-boosting drinks that support both clarity and emotional balance needs. Brew green tea, chill it, then add lemon juice, mint, and a light sweetener. Keeping it bright and refreshing so you can feel it’s easy to sip during busy moments.

Use it during detailed tasks like decorating or glazing to stay precise without feeling overstimulated or mentally drained.

Berry Electrolyte Refresher That Keeps You Hydrated

Your body’s water level drops quickly in a warm kitchen, and even mild dehydration can reduce concentration. So mix cold water with a pinch of salt, a splash of berry juice, and a little honey.

It’s a simple electrolyte drink without artificial additives that you can easily mix and sip regularly to maintain hydration and prevent fatigue.

Cold Brew Cocoa Boost That Powers Your Late Session

When fatigue builds, you need a smooth but effective spike. This is where cold brew coffee can provide that steady caffeine, while cocoa adds depth without the heaviness that often comes with it.

Just combine cold brew with a small amount of cocoa powder and milk. Add light sweetener if needed. Keep it smooth and easy to drink. Use this in the late afternoon when your energy dips and timing becomes more critical.

Light Coconut Water Citrus Mix That Restores Balance

Oftentimes, long baking times can drain your body’s electrolytes through heat and movements as you pitter-patter around your kitchen. Here, you can count on coconut water; it contains the potassium you need to support hydration and muscle function.

Glass of water next to half a coconut

Mix coconut water with fresh lime or orange juice for a clean and bright flavor. You may have to keep it chilled for better refreshment all day long. Sip after longer baking stretches to restore balance and reduce fatigue.

Apple cinnamon iced infusion that sustains focus

Studies reveal that familiar aromas can help you stay mentally engaged and alert. For most small-scale studies, cinnamon has been linked to improved attention, especially during repetitive tasks.

So, you might as well join the line of satisfied enthusiasts. Steep apple slices and cinnamon in hot water, then chill. Add a small amount of honey if needed to round out the flavor.

Drink this mid-session when you need gentle support without adding more caffeine.

Bring the Same Energy to Your Last Tray

All in all, you may need to quit thinking you’re just baking; you’re actually managing your energy across hours of focused activity. Each of these drinks plays a role, from refreshing to stabilizing to boosting at the right moment.

Set up your drinks before you begin, pace your intake, and stay aware of how you feel. Start strong, stay steady, and finish every batch with the same level of focus.

  • « Go to Previous Page
  • Page 1
  • Page 2
  • Page 3
  • Page 4
  • Interim pages omitted …
  • Page 67
  • Go to Next Page »

Primary Sidebar

Heather from Whipperberry
Hello... my name is Heather and I'm the creator of WhipperBerry a creative lifestyle blog packed full of great recipes and creative ideas for your home and family. I find I am happiest when I'm living a creative life and I love to share what I've been up to along the way... Come explore, my hope is that you'll leave inspired!

Footer

  • Privacy Policy
  • Crafts
  • Food
  • Gifts
  • Holidays
  • Home
  • Mom Life
  • Recipes
  • Travel

Copyright © 2026 · Seasoned Pro