• Skip to primary navigation
  • Skip to main content
  • Skip to primary sidebar
  • Skip to footer

Whipperberry

WhipperBerry • Your Home For Creative Inspiration

  • Home
  • Recipes
    • Starters
    • Easy Weeknight Dinners
    • Main Dish
    • Salads
    • Side Dish
    • Soups & Stews
    • Desserts
    • Breakfast
    • Miscellaneous
  • Tutorials
    • Creative Crafts
    • DIY Decor
    • Fabric Crafts
    • Food How-To
    • Jewlery
    • Paint Projects
    • Paper Art
    • Party Styling
    • Photography and Graphic Design
    • Silhouette
  • Holidays
    • Easter
    • Mother’s Day
    • Father’s Day
    • 4th of July
    • Halloween
    • Thanksgiving
    • Christmas
    • Valentine’s Day
  • Gift Ideas
    • Gifts For Everyone
    • Gifts for Dad
    • Mother’s day
    • For The Girls
    • For The Kids
    • Teacher Gift Ideas
    • Christmas
  • Printables
    • Holiday
    • Gift Idea
    • LDS Primary
  • Travel
  • About
    • Terms
  • Contact
  • Nav Social Menu

    • Facebook
    • Instagram
    • Pinterest
    • RSS
    • Twitter

Recipes

Extra Creamy Yogurt Cups | Recipe

3 · Mar 14, 2012 · 30 Comments

Two times of the day that can be a little hairy at our house are breakfast and after school.  The kiddos are hungry and they are looking for whatever isn’t nailed down to eat.  If not careful, they will eat their body weight in junk and empty calories.  One trick I have is to make sure to have healthy, tasty alternatives ready at hand.  One of my secret weapons is a super rich and extra creamy yogurt cups with granola, berries and drizzled with a bit of agave. I keep these tasty little cups on hand in the fridge for the kiddos to easily grab for a healthy, satisfying breakfast or after-school snack.

I know this isn’t a new concept at all but what makes it a little different and super economical is the way I make the yogurt extra special.  Instead of buying the more expensive individual cups or even the creamy and a little more decadent Greek yogurt, I buy the cheaper low-fat or fat-free vanilla yogurt that you can purchase in large containers.  This is then where the magic a happens…

Here is what you will need…

  • Large container of your favorite yogurt
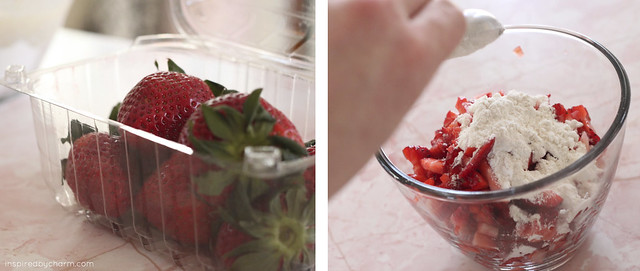
  • Fresh or frozen berries
  • Granola
  • Agave nectar or honey
  • Small containers in which to store individual portions of the tasty treat {optional}

I pour all of the yogurt in to a mesh strainer lined with a paper towel and let that sit in the fridge for a few hours. 


This drains some of the excess liquid from the yogurt and makes it extra decadent and creamy.  My kids LOVE it!  I top it with berries, granola and then drizzle a little Agave nectar over it and they couldn’t be happier. I store the creamy yogurt in small jars in the fridge so that the kiddos can run and grab one anytime they like!


What are some of your healthy treat options for your kiddos? What tricks do you employ to get them to crave healthy foods?

Strawberry Lemon Yogurt Muffins | Guest Recipe from Inspired by Charm

4 · Mar 6, 2012 · 25 Comments

I am giddy with excitement today. One of my FAVORITE bloggers Michael Wurm from Inspired by Charm has graciously created a fabulous guest post to share with you guys today here on WhipperBerry.  I LOVE Michael, he is incredibly talented and someone I would love to spend a day with!


Hello readers of WhipperBerry! I'm Michael from Inspired by Charm. I am so excited to be posting here today. I've been a fan of Heather's for quite some time and was honored when she invited me to guest post. Over at Inspired by Charm, I share a colorful mix of DIY projects, home decor ideas, gardening, quilting and baking! Today I wanted to teach you how to make one of my latest baking creations: Strawberry Lemon Yogurt Muffins. With spring and summer quickly approaching, I needed a quick and easy muffin recipes that was moist and jam packed with flavor. After combining a couple of previously great recipes, I invented this winner that is sure to please.

strawlem6.jpg

Ready to get baking? Lets go! Here's what you'll need to make 12 muffins: 2 cups all-purpose flour, plus 2 tablespoons 1/3 cup light-brown sugar 1/3 cup sugar 2 teaspoons baking power 1 teaspoon baking soda 1/2 teaspoon salt 1/2 cup butter – melted and cooled 2/3 cup milk 1/2 cup vanilla yogurt 2 eggs – beaten 1 teaspoon vanilla 2 teaspoons lemon zest 2 cups strawberries – diced Lemon Glaze: 1 cup powdered sugar 1-2 tablespoons fresh lemon juice Preheat your oven to 400 degrees F. Add paper liners to twelve muffin tins.

IMG_3365.JPG

Begin by mixing your dry ingredients. In a large bowl, stir together 2 cups flour, sugars, baking powder, baking soda and salt.

strawlem1.jpg

Next, mix your wet ingredients. In a medium bowl, stir together butter, milk, yogurt, eggs, vanilla and lemon zest.

strawlem2.jpg

Then, add your wet ingredients to your dry ingredients, stir until just combined.

 IMG_3398.JPG

Mix the remaining two tablespoons of flour with your diced strawberries. This will prevent the strawberries from sinking to the bottom of your muffins.

strawlem3.jpg

Gently fold the flour coated strawberries into your mix.

IMG_3413.JPG

Using a scoop, completely fill your muffin liners with batter.

IMG_3417.JPG

Bake for 15 – 20 minutes, or until a toothpick inserted in the center of the muffins comes out clean. Place muffin tin on wire rack to cool for five minutes. Then, remove muffins from the tin to finish cooling.

strawlem4.jpg

As your muffins cool, prepare your lemon glaze. Add powered sugar to a bowl, then add one tablespoon of lemon juice to your powered sugar and stir until combined. Continue to add the second tablespoon of lemon juice until you receive the constancy desired. Drizzle unto the top of your cooled muffins.

IMG_3501.JPG

And you're finished! I placed my muffins into a decorative liner and topped them with a slice of strawberry and lemon. It's a little teaser for what's inside.

  IMG_3549.JPG

The result is a light, fruity, and moist muffin perfect for breakfast, lunch, dinner or a late night snack!

IMG_3532.JPG

I'm sure your will love this recipe. If you give it a try, be sure to stop by Inspired by Charm and let me know what you think. A huge thanks (and kisses) to Heather for inviting me to share with all of you today. It was a delight. Happy baking!


Isn't Michael aaaaamazing!!  He is so talented and I LOVE everything that he creates.  He has such an eye for amazing design as well.  Here are some more of my favorites from Inspired by Charm…


A stunning Spring Neapolitan Cake and a fabulous Fauxnet wall art makeover.

Michael also write for Folk Magazine and is a Pinterest SUPER ROCK STAR!!  Seriously, you have to go check out his boards.  This guy has taste!

On top of all of that he runs a fabulous little inn in a small Pennsylvania town. The Inn is called Old Charm.  One day I would LOVE to take a fun trip and spend some time baking and crafting with Michael.  It's sounds DIVINE!!

Thank you, thank you Michael!  It's been so fun to have you over for a visit today.  Head on over to Inspired by Charm and check out all that Michael has to offer!!

Homemade Chocolate Pudding with Chantilly Cream | Recipe in a Jar

6 · Feb 28, 2012 · 20 Comments

I have no idea when it happened, I know it was pretty early on in my life… my love affair with chocolate pudding began. The day my Mom made… HOMEMADE chocolate pudding it was earth shattering.  I had no idea you could make your own pudding from scratch without the box of the infamous big J and little-O.

It's so easy to make and tastes so much better than the box stuff.  Pair it with some real Chantilly cream and dress it up in a jar and it's the perfect little dessert to serve at your next get together.

Chocolate Pudding

1 cup sugar

1/2 cup baking cocoa

1/4 cup cornstarch

1/2 teaspoon salt

4 cups milk

2 tablespoons butter

2 teaspoons vanilla extract

In a heavy saucepan, combine sugar, cocoa, cornstarch and salt.  Place over medium heat and slowly whisk in the milk. Bring to a boil stirring frequently.  Once it reaches a low boil, let it boil for 2 minutes stirring constantly. Remove from heat, stir in butter and vanilla. Bring to room temperature and then place in a container to chill in the refrigerator.  Place some plastic wrap on the top of the pudding to avoid developing a skin on the top. Chill for 2-4 hours before serving.

Serves 6-8

Chantilly Cream

1 pint whipping cream

1/4 cup powdered sugar

1 teaspoon vanilla extract

Ten minutes before you start your Chantilly cream, place your mixing bowl in the freezer.  Remove bowl from freezer and add whipping cream.  Mix on high speed for 2 minutes until it starts to stiffen. Add powdered sugar and vanilla and continue to mix on high until cream becomes stiff and hold is shape. 

Fill your jars with the chilled pudding and then pipe the Chantilly cream on top with a large closed star tip in a pastry bag {I ordered my from Sweet Baking Supply} and pipe the Chantilly cream on top of the pudding.

I dressed up the single serving pudding jars with some fun rope. Then I topped the jars with a simple piece of scrapbook paper cut in a circle to fit on top of the jar. Then I decorated some bamboo skewers with crocheted lace, ribbon and fabric to make little flags on top of the pudding.  I found that punching small holes in the paper worked better than trying to stab the skewers into the paper.

This will be the talk of the room at your next book club, baby shower or party.  Give it a try and let me know what you think!

What's your favorite party treat to share with friends and family?

Cheddar Corn Chowder | Recipe

6 · Feb 27, 2012 · 19 Comments

When a chill sneaks its way into the air, this is the first recipe that pops into my head.  This is my adaptation of Ina Garten's Cheddar Corn Chowder.  Her recipe is great, but I always have to tinker and make it fit more to my taste and lifestyle.

This chowder is thick, rich and really hits the spot on a cold day. The sweet corn pairs nicely with the bacon, potatoes and sharp cheddar cheese creating the perfect comfort food to share with family and friends.

It's a perfect starter or meal itself for a dinner party, potluck, or family gathering.  All you need is a couple of loaves of good crusty bread and you have a rich yet rustic dinner to share.

I'm sharing this recipe along with my Chili & Cornbread in a jar over at TidyMom & Dine and Dishes #Soupapalooza starting today. “Come join SoupaPalooza at TidyMom and Dine and Dish sponsored by KitchenAid, Red Star Yeast and Le Creuset”

Come on over and join the souper party!! {sorry had to be done}

  • « Go to Previous Page
  • Page 1
  • Interim pages omitted …
  • Page 58
  • Page 59
  • Page 60
  • Page 61
  • Page 62
  • Interim pages omitted …
  • Page 66
  • Go to Next Page »

Primary Sidebar

Heather from Whipperberry
Hello... my name is Heather and I'm the creator of WhipperBerry a creative lifestyle blog packed full of great recipes and creative ideas for your home and family. I find I am happiest when I'm living a creative life and I love to share what I've been up to along the way... Come explore, my hope is that you'll leave inspired!

Footer

  • Privacy Policy
  • Crafts
  • Food
  • Gifts
  • Holidays
  • Home
  • Mom Life
  • Recipes
  • Travel

Copyright © 2026 · Seasoned Pro