• Skip to primary navigation
  • Skip to main content
  • Skip to primary sidebar
  • Skip to footer

Whipperberry

WhipperBerry • Your Home For Creative Inspiration

  • Home
  • Recipes
    • Starters
    • Easy Weeknight Dinners
    • Main Dish
    • Salads
    • Side Dish
    • Soups & Stews
    • Desserts
    • Breakfast
    • Miscellaneous
  • Tutorials
    • Creative Crafts
    • DIY Decor
    • Fabric Crafts
    • Food How-To
    • Jewlery
    • Paint Projects
    • Paper Art
    • Party Styling
    • Photography and Graphic Design
    • Silhouette
  • Holidays
    • Easter
    • Mother’s Day
    • Father’s Day
    • 4th of July
    • Halloween
    • Thanksgiving
    • Christmas
    • Valentine’s Day
  • Gift Ideas
    • Gifts For Everyone
    • Gifts for Dad
    • Mother’s day
    • For The Girls
    • For The Kids
    • Teacher Gift Ideas
    • Christmas
  • Printables
    • Holiday
    • Gift Idea
    • LDS Primary
  • Travel
  • About
    • Terms
  • Contact
  • Nav Social Menu

    • Facebook
    • Instagram
    • Pinterest
    • RSS
    • Twitter

Painting Furniture

Painted Furniture Ideas

6 · Oct 17, 2024 · Leave a Comment

Are you thinking about painting that old dresser and need some inspiration? I’ve got you covered! I love sharing my furniture makeovers, and today I’m excited to show you my favorite painted furniture ideas.

Each one comes with a step-by-step tutorial and a product list so you can transform your furniture like a pro.

Is Painting Furniture a Good Idea?

Yes, painting furniture can be a great idea! It allows you to give new life to old or outdated pieces, match your furniture to your current decor, and express your creativity.

Plus, it’s an affordable way to update your home without having to buy new furniture.

Can You Paint Over Old Paint on Furniture?

Yes, you can paint over old paint on furniture. However, for the best results, it’s important to properly prepare the surface.

This typically involves cleaning the furniture, sanding it lightly to create a smooth surface, and applying a primer before adding your new coat of paint. This preparation helps the new paint adhere better and ensures a smooth, long-lasting finish.

This dresser makeover is proof that you don’t need high-end furniture to create a showstopper. With a bit of paint and some love, even get furniture on discount from a yard sale or clearance store can become a unique statement piece

Creative Painted Furniture Ideas to Explore

Discover DIY inspiration for furniture made of wood, metal, and plastic. Before picking up your brush or spray can, browse through these ideas for tips, step-by-step guides, and links to full tutorials.

If you’re looking to take your furniture-painting skills to the next level, pursuing jobs in USA related to design and restoration could be a rewarding path. Whether it’s becoming a professional furniture painter or a custom designer, the demand for creative talent in this field is growing.

Using Chalk Paint

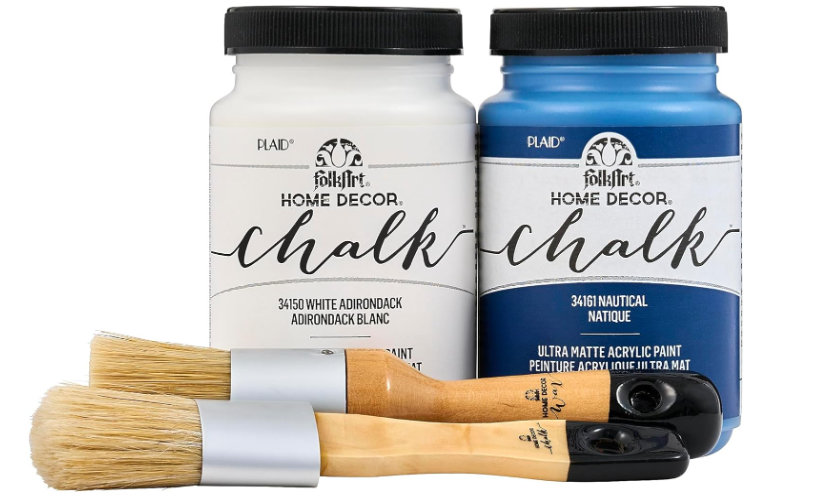
Chalk paint is a popular choice in the DIY-painted furniture trend. It’s user-friendly, adheres to various surfaces, and provides a charming matte finish.

Plus, it pairs wonderfully with other mediums like glaze and stain and can be used with stencils and transfers for one-of-a-kind designs. For a more detailed guide on using chalk paint, check out my other posts: How to Paint Over Chalk Paint, and if you want to learn more about Chalk Paint Techniques, read it here.

Try Milk Paint

Milk paint, similar to chalk paint in its results but with a different formulation, is also a favorite among crafters (you can even mix your own).

To achieve a cool distressed patina on a dresser, use a scraper on the almost dry surface to create dings and chips. You can also place tape on nearly dry milk paint and peel it off for a striped effect.

For more detailed instructions, check out these guides: How to Paint Over Milk Paint and Best Milk Paint.

Paint Upholstered Furniture

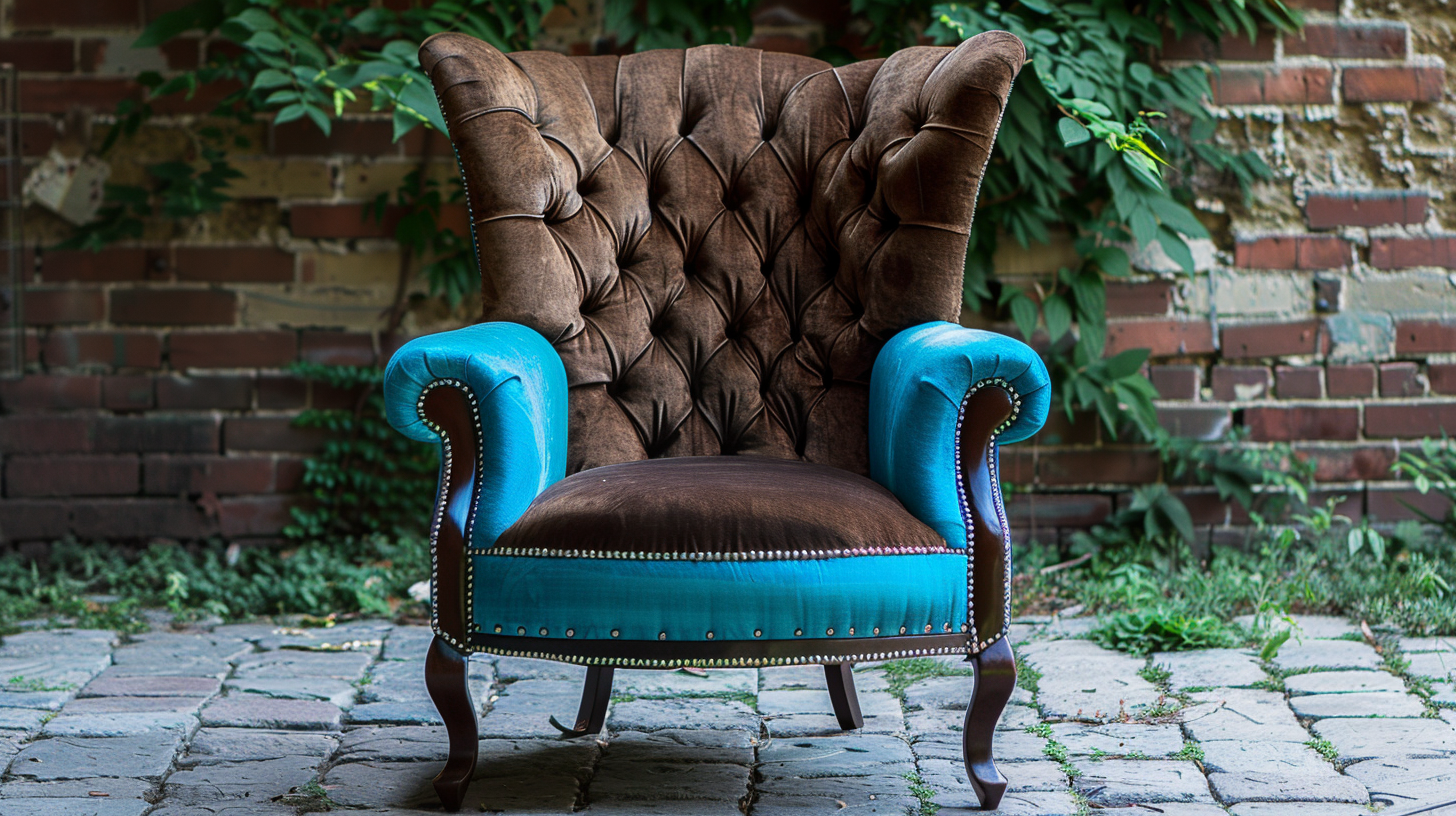
Painting upholstered furniture can be a creative and budget-friendly way to give old pieces a new look. Fabric paint or diluted acrylic paint works well for this type of project.

To begin, clean the fabric thoroughly and let it dry completely. Then, mix your paint with a fabric medium to ensure flexibility and softness. Apply the paint in thin, even coats with a brush or spray, allowing each layer to dry before adding the next.

Lightly sand between coats for a smooth finish.

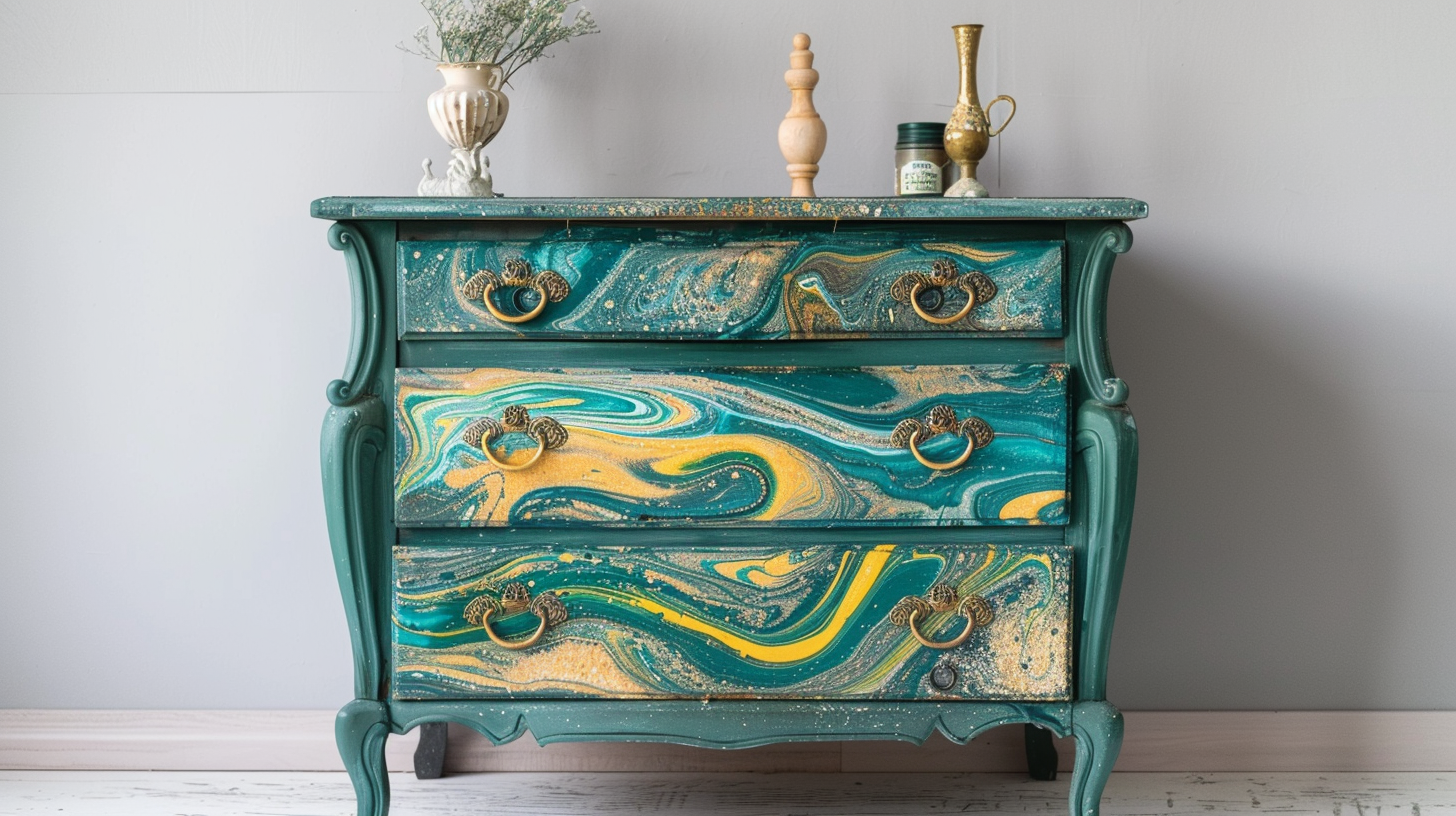
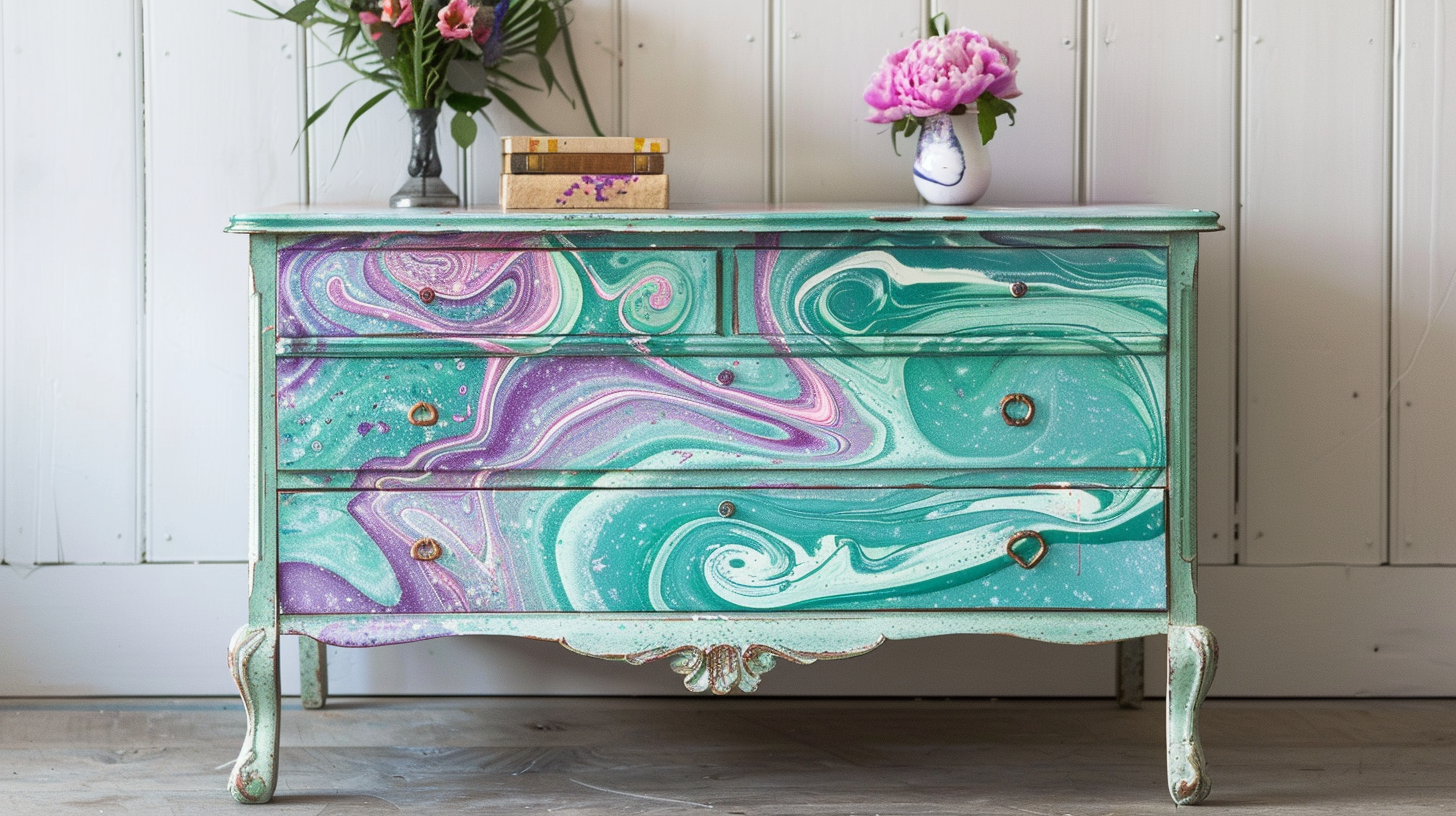
Try the “Pour-On” Method

The “pour-on” method is a unique and eye-catching technique for transforming furniture. This method involves pouring a mixture of paint and pouring medium directly onto the surface of your piece.

Begin by protecting your workspace with plastic sheeting or a drop cloth. Mix your desired colors of paint with a pouring medium in separate cups.

Slowly pour the mixtures onto the furniture, letting the colors flow and blend naturally. Use a heat gun or hairdryer to manipulate the paint and create interesting patterns. Allow the piece to dry completely before sealing with a clear topcoat.

Painting Metal, Plastic, and Fiberboard

Yes, you can paint metal, plastic, and fiberboard. For metal, start by cleaning the surface and removing any rust, then use a metal primer before applying your paint.

For plastic, clean the surface thoroughly and use a plastic-specific primer to ensure adhesion. Fiberboard should be sanded lightly, primed with a suitable primer, and then painted. Always use the appropriate type of paint for each material to achieve the best results.

Color Wash Furniture

If you love the natural warmth of wood but want to add a bit of flair, try a color wash technique. This method works well on both raw and stained wood, making it perfect for larger pieces like armoires or hutches. I have another post about how to tempera paint on wood.

Thin chalk paint with water, brush it onto the wood, and then wipe it off. This allows the beauty of the wood grain to shine through while adding a subtle hint of color.

Memphis Style

If you’re looking to add a bold and playful touch to your furniture, try Memphis-style painting. This vibrant and eclectic design trend involves using bright colors, geometric shapes, and striking patterns.

Start by selecting a few contrasting colors and use painter’s tape to create sharp lines and shapes on your furniture piece. Apply the paint in sections, allowing each color to dry before moving on to the next.

Finish with a clear topcoat to protect the design and give your furniture a glossy, modern look. The result is a fun and eye-catching piece that makes a statement in any room.

Faux Marble

Transform your furniture with the elegant look of marble using a faux marble painting technique. Start by painting the surface with a base coat of white or light gray paint and let it dry completely.

Next, mix darker shades of gray and black paint to create the marble veins. Use a fine brush or a feather to lightly drag the darker paint across the surface in a veining pattern, mimicking the natural lines found in real marble.

Soften the lines by dabbing them with a damp sponge to blend the colors slightly. Once you’re satisfied with the marble effect, let the paint dry and finish with a high-gloss clear topcoat to seal and protect the surface, giving it a realistic marble shine.

This technique can elevate the look of any piece, adding a touch of sophistication and luxury.

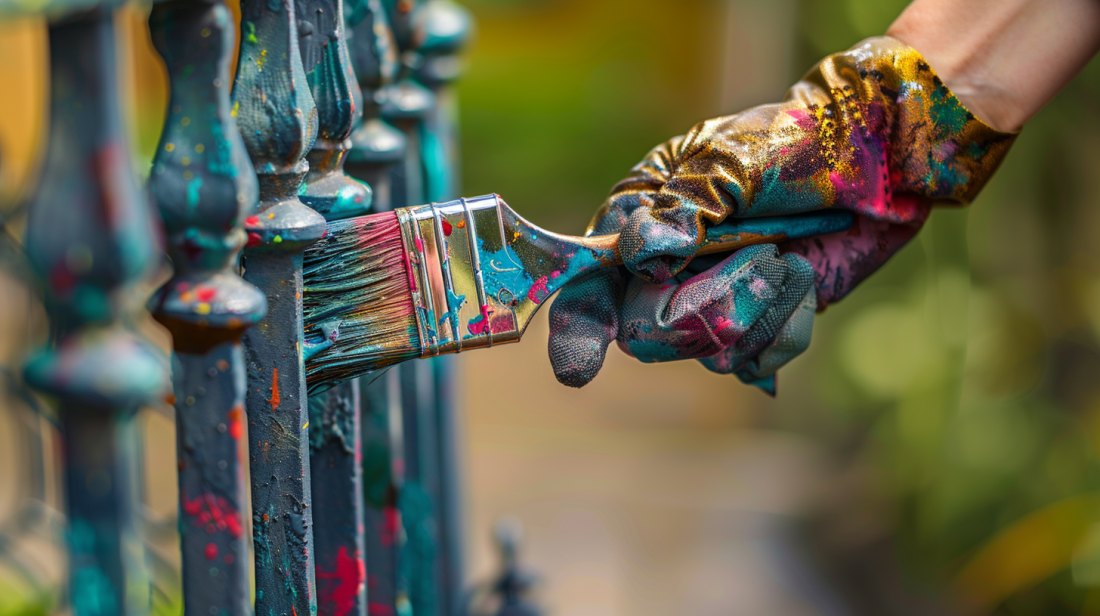
Painting Wrought Iron Furniture

Revitalize your wrought iron furniture with a fresh coat of paint. Start by thoroughly cleaning the surface to remove any dirt, rust, or old paint.

Use a wire brush or sandpaper to smooth out any rough spots and ensure a clean, rust-free surface. Once cleaned, apply a rust-inhibiting primer to prevent future rusting and to help the paint adhere better.

After the primer has dried, choose a high-quality, exterior-grade paint suitable for metal surfaces. Spray paint works well for wrought iron, providing an even coat without brush marks.

Apply the paint in thin, even layers, allowing each coat to dry before applying the next. Finish with a clear topcoat for added protection and durability. This process will give your wrought iron furniture a fresh, new look and extend its lifespan.

Decoupage Furniture

Decoupage is a creative way to personalize and beautify your furniture. Start by selecting your piece of furniture and ensuring its surface is clean and smooth. Choose your decorative paper or fabric—this could be anything from wrapping paper to old maps or fabric scraps. Cut your material into desired shapes or patterns.

Apply a layer of decoupage glue or Mod Podge to the furniture surface where you want to place your decoration. Carefully lay the paper or fabric onto the glued area, smoothing out any wrinkles or bubbles. Once all your pieces are in place, apply another layer of decoupage glue over the entire surface to seal it, ensuring the edges are well adhered.

Allow the glue to dry completely, then apply additional coats if necessary, sanding lightly between coats for a smooth finish. Finish with a clear sealer to protect your design and give your furniture a polished look. Decoupage can transform a plain piece into a unique and eye-catching addition to your home décor.

Spray Paint for Wood Furniture

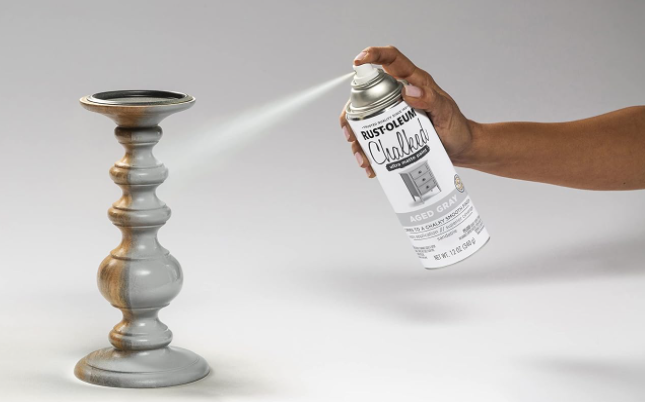
Spray painting wood furniture is a quick and effective way to give it a fresh, new look. Start by cleaning the furniture thoroughly to remove any dust, dirt, or grease.

Lightly sand the surface with fine-grit sandpaper to ensure the paint adheres well. Wipe down the furniture with a damp cloth to remove any sanding dust and let it dry completely.

Apply a coat of primer suitable for wood surfaces to achieve an even color and enhance the durability of the paint. Once the primer is dry, choose a high-quality spray paint designed for wood.

Hold the can about 10-12 inches away from the surface and apply the paint in thin, even coats, using a sweeping motion. Avoid heavy coats to prevent drips and runs.

Allow each coat to dry before applying the next one. Finish with a clear topcoat to protect the paint and add durability. For more detailed tips and recommendations, check out Best Chalk Spray Paint and Spraying Chalk Paint.

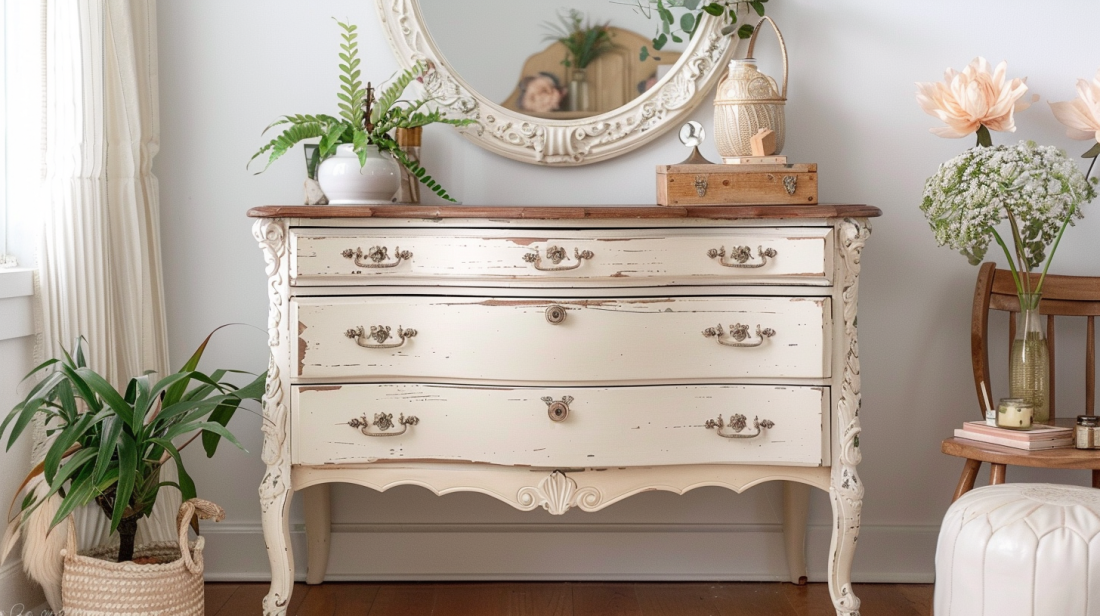
Distressed Furniture Diy

Creating distressed furniture is a popular DIY project that adds character and a vintage feel to your pieces. Start by selecting a piece of wood furniture and cleaning it thoroughly to remove any dust, dirt, or grease.

Lightly sand the surface with fine-grit sandpaper to ensure the paint adheres well. Apply a base coat of paint if you want a specific color to show through the distressed areas and let it dry completely.

Next, rub candle wax or Vaseline on areas where you want the base coat to show through, which helps create a distressed look by preventing the topcoat from adhering in those spots.

Apply the topcoat of paint over the entire piece and let it dry. Once the paint is dry, use sandpaper to gently sand the areas where you applied the wax or Vaseline, revealing the base coat and creating a distressed effect.

Finally, wipe down the piece to remove any dust and seal it with a clear topcoat for protection.

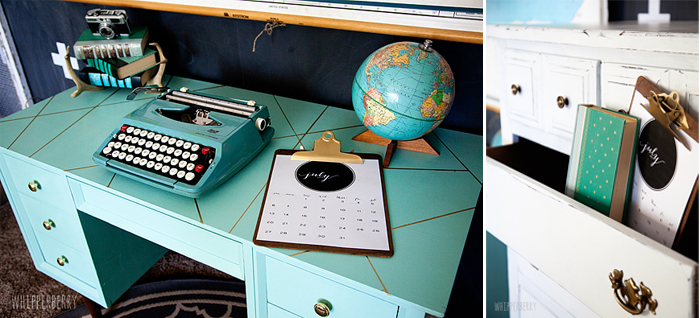
Paint Furniture to Match Decor

Painting furniture to match your decor is a great way to create a cohesive look in your home. Start by selecting the piece of furniture you want to update.

Clean the surface thoroughly to remove any dust, dirt, or grease, and lightly sand it with fine-grit sandpaper to ensure the paint adheres well. Choose a paint color that complements your existing decor. Pick a shade from your room’s color palette or opt for a neutral color that blends well with various styles.

Apply a primer suitable for the furniture’s material and let it dry completely. This step helps to achieve an even color and enhances paint durability. Once the primer is dry, paint the furniture with your chosen color, using even strokes and thin coats to avoid drips and runs. Allow each coat to dry before applying the next.

After achieving the desired coverage, seal the paint with a clear topcoat to protect the finish and add durability. This process will ensure that your painted furniture not only looks great but also stands up to daily use, perfectly matching your decor and enhancing the overall aesthetic of your space.

Conclusion

Painting furniture is a fantastic way to give new life to old pieces, match your decor, and express your creativity. Whether you’re using chalk paint, trying milk paint, or exploring unique techniques like decoupage or faux marble, the possibilities are endless.

So grab your paintbrush, pick your favorite idea, and get started on creating beautiful, personalized furniture for your study area, living room, lounge area, or any space in your home!

The 5 Best Milk Paints For Furniture & Home Projects

50 · Jan 21, 2023 · Leave a Comment

Milk paint has to be one of my favorite types of paint to use for home projects. I’ve always been a big fan of chalk paint and even worked with BB Frosch, which is a chalk paint powder company years back. 

Now I do more with milk paint these days because it has better coverage overall and doesn’t chip as much. 

Key Takeaways of this post: My favorite milk paint I recommend to everyone is Old Fashioned Milk Paint. I like this one more than others because it’s high quality, you can’t go wrong, and it’s reasonably priced. 

However, it does depend on your project. Keep reading to find out if it’s the best milk paint for you or if you’re short on time, just trust me and pick it up now.

What Is Milk Paint and Why is it Special?

Milk paint has been around for a long time, but is currently seeing a resurgence in popularity with interior designers and decorators. 

It is a non-toxic, highly durable paint made with milk protein (casein), lime, and natural pigments. 

It has almost no odor, unlike many other home decorating paints.  Because it is water-based, it cleans up easily with just mild soap and water. 

The drying time is another positive feature of milk paint; most brands dry in a little under one hour.

One of the most prominent features of milk paint is that it is amazingly durable over time. 

Types of milk paint date back literally thousands of years. Evidence of milk-based paint has been found in the tomb of Egyptian King Tutankhamun and in prehistoric cave paintings. 

These discoveries attest to just how durable milk paint can be! 

Milk paint manufactured today is a popular choice for people who want a vintage or antique look in their home decor. In fact, many artists and furniture makers in Colonial America used milk paint in their work. Today, milk paint is a favorite medium for anyone wanting to transform furniture into something resembling a historic reproduction. 

This paint dries to a smooth, almost completely matte finish similar to the look of chalk-style paint. 

The colors in milk paint are resistant to fading and will look as vibrant after many years as they do on the day they are freshly painted.

Unlike most other paints, milk paint is usually sold in a powder form that you mix with water. 

The powder form has a nearly indefinite shelf life, but once the paint is mixed it will only last for a few days. For this reason, you should only mix up as much milk paint as you’ll need at one time.

What do you use Milk Paint for?

Milk paint is so versatile! It can be used on wood furniture, walls, woodwork, metal, and even glass. 

The current trend is to use it as furniture paint. Plain or older furniture can be given new life with vibrant colors from milk paint.

Using it on wood trim or doors in your home is a fun way to add colorful accents to your decor.

Because milk paint is completely non-toxic, it’s a safe choice to paint children’s furniture, rooms, and even toys.

 It’s a fun choice for craft items, too. Wooden signs, decorations, and stenciled accents created with milk paint have an adorable “country chic” aesthetic.

What’s the Difference between Milk Paint and Chalk Paint?

Milk paint and chalk paint are often confused. They both are water-based matte paints; popular with anyone who wants to decorate with a “vintage” or “farmhouse” theme. They are available in similar color palettes, and they both dry pretty fast. That’s really where the similarities end, though. I covered the difference between milk paint and chalk paint in-depth in another blog post.

Chalk paint dries to a completely matte finish. 

There is no sheen to it at all. It’s a good choice if you want to distress a piece of furniture for an antique appearance. It also comes pre-mixed and is thick enough to cover in just one or two coats of paint.

The downsides to chalk paint are that you’ll need to apply a wax sealant on any surfaces that will be touched/moved frequently. 

This will give it a slightly satiny sheen instead of being perfectly matte, but your piece will be protected. 

Not all chalk paints are non-toxic, and some brands of low levels of VOC (volatile organic compounds) so there might be a slight odor.

Milk paint is also considered to be a matte-finish paint, but it does have a very slight sheen to it when dry. It’s completely non-toxic, with little to no odor and no VOCs. You can experiment with creating custom colors by mixing two of the powdered milk paints together with water. 

You can distress furniture with milk paint, but the chipping/distressing is a little harder to control than it is with chalk paint. 

If you’re going to distress a piece of furniture that you painted with milk paint, you should do it soon after the milk paint has dried. 

Use light-grit sandpaper. The longer the milk paint is on a painted piece, the harder it will have to adhere to the surface, and the more difficult it will be to distress.

One of the biggest downsides to milk paint is that once milk paint is mixed with water, it has a very short shelf life. 

You should use your mixed paint within a couple of days, otherwise, it starts to spoil. Mixing it can be tricky, too. You need to thoroughly mix the powder with water, then let it sit for a few minutes to allow any foaminess or bubbles to dissipate. 

Chalk paint tends to go on heavier than milk paint. One or even two coats of most milk paint could appear semi-transparent. 

This can be used as a nice effect if you want to do a colored wash over a piece of furniture, but if you want a solid covering you might need to apply more coats of milk paint than you would chalk paint.

What’s the Difference between Milk Paint and Regular Paint?

The most commonly used paints for home decorating projects are latex paint and oil paints. Both of these are significantly different from milk paints.

Both latex and oil-based enamel paints are available in a variety of finishes, from “extra glossy” to “satin”. Milk paint is always a matte finish paint, although it does have a very slight sheen to it when it dries.

Latex and oil paints also contain varying quantities of VOC’s (volatile organic compounds). 

A simple definition of VOCs is that they are chemicals that vaporize into the air around us, and can be dissolved in water. They’re common in many household products, but especially so in home paints. 

VOCs usually contain toxins that can cause health problems, so you should absolutely wear a face mask and work in a well-ventilated area when working with these substances.

Conversely, milk paints are completely non-toxic and contain no VOCs. Most brands of milk paint have little to no odor, although some do have a slightly “grassy” scent that completely disappears when the paint is dry. 

It’s a safe choice to use on any items that will come in contact with your children or pets.

Oil-based paints can take several days to fully dry. Latex paints are faster; usually becoming fully dry in approximately 24 hours. 

Milk paint, however, can be completely dry in an hour or two. This makes large painting projects go much faster, with less time spent waiting to apply second or third coats of paint.

The other big difference between milk paint and more traditional paints is clean up. Milk paint cleans up easily and quickly with just mild soap and water. 

You can clean up latex or other acrylic paints with soap and water also, but it takes a little more effort. Oil-based paints will require a solvent of some kind for cleaning. 

Turpentine, paint thinner, and mineral spirits are most commonly used to get brushes and other tools clean after using any oil-based paint.

Does Milk Paint Chip?

Milk paint can be purposely chipped or sanded to create a distressed look on furniture or other home accent pieces. 

However, you need to create this look before the paint has been dry on your painted piece for very long. 

If you want to lightly sand it for that popular distressed appearance, you should do so soon after the paint has dried. Otherwise, getting the paint to chip and “distress” will be much more difficult. 

Milk paint actually becomes more durable over time. The minerals (usually lime) and milk protein in the paint react to form a natural coating that cures to a rock-hard coating over longer periods of time. 

You can further increase the durability and adhesion of milk paint by mixing in a bonding agent. Most brands of milk paint also sell their own powdered bonding agents. 

Is Milk Paint Expensive? How Much Does Milk Paint Cost?

Any type of home paint seems to vary in price depending on the brand. It’s always a good idea to compare prices. 

Milk paint is a budget-friendly paint, with prices on average being $25-$40 for enough powder to mix a quart or so of paint. 

When you compare the price of this quantity with the price of a quart of some latex paints, milk paint might seem a little pricey. 

Consider though, since milk paint comes in a powdered form, you can mix up just enough paint for whatever project you’re working on, so you won’t have leftover paint that you can’t use. 

The milk paint powder lasts for years if properly stored, so you’re getting long-term value when you buy milk paint.

The Top 5 Best Milk Paint Brands

Ok so here’s what you came for. Let’s take a look at some of the most popular milk paint brands for home projects and furniture painting.

Old Fashioned Milk Paint

Old Fashioned Milk Paint is one of the most popular brands of milk paint. Their milk paint powders are made in small batches, so you know the product you buy will always be fresh. Their color selection has been created to reproduce the look of shaker and “old country” furniture. It’s a favorite with crafters and designers who want to transform modern furniture into something that appears to be a cherished antique.

View It Here

Amy Howard Toscana Milk Paint

Amy Howard Toscana Milk Paint brand focuses on soft colors that are meant to invoke the look of family heirlooms. This paint is one of the stronger milk paint formulas and can be a little more difficult to get a distressed or “chippy” appearance. 

The pigments are unique, using minerals sourced from Italy and the South of France. The “Strasbourg White” color is one of the nicest white shades if you’re looking for a soft, antiqued white. It has subtle cool undertones and an elegant velvety finish. 

The Real Milk Paint Co

The Real Milk Paint Co. is a good brand to use if you want to achieve a distressed finish on your painted furniture. This brand is durable, but easier to sand for that chipped look that transforms thrift store finds into treasured home decor. The color selection is outstanding, with over 50 choices. In addition to vintage-inspired hues, many of their colors are compatible with more contemporary color plans.

Miss Mustard Seeds Milk Paint

Miss Mustard Seeds Milk Paint is notable for not only having a great selection of 52 vibrant colors, but they are also one of the most eco-friendly milk paint brands on the market. 

Made in the U.S.A., not only are they non-toxic with zero VOC content, but this company also supports a co-op of family-owned farms that are dedicated to the societal and environmental impacts of their operations. 

The colors of Miss Mustard Seeds paint are easy to mix together for your own customization, with four shades that are specifically described as “mixing colors”. 

This kit from GreenBird Real Milk Paint Powders is perfect for anyone who wants to do smaller craft projects (such as decorative signs or holiday items) but doesn’t want to spend a lot of money buying several colors. 

This kit features eight brightly colored milk paint powders that can be mixed for endless customization. If you want to experiment a bit with mixing colors and just try milk paint techniques, this kit is a great option.

Tips for Milk Paint Furniture Projects and Clean Up

Milk paint is easy to use, but there are a few tips that can make your project go smoothly. 

First, you need to be sure to mix the milk paint powder thoroughly. It can help to use a kitchen whisk that you have designated just for paint mixing. Mixing the powder and water together in a jar or container with a lid can help. 

Put the lid on the jar tightly, then shake the mixture together for a few minutes. Vigorous stirring after the shaking will help remove any tiny lumps.

If you find lumps in your mixed paint that you just can’t get out, strain your paint into another container through a cheesecloth or fine mesh sieve.

You can achieve different looks using milk paint, depending on the technique you use. One or two light coats can have a semi-transparent appearance to give your project a nice color wash. 

Using a foam brush instead of one with bristles will help the paint glide on smoothly, with almost no signs of brushstrokes or streaks.

One of the great features of milk paint is that because it’s water-based, it’s so easy to clean up! 

For any drips or spills, as well as for cleaning brushes, containers, and rollers, you can just use mild detergent and warm water. Just be sure to clean your tools before the paint is fully dry.

If you happen to get milk paint on clothes you didn’t want to get dirty, you might be able to wash it completely out if you catch it before the paint is dry. You can try running the fabric under warm water to flush out most of the paint. 

Then, blot (don’t scrub!) the paint stain with a cloth soaked in mild detergent and water.  Just to be sure at this point, you can throw it in the washing machine and launder it as you normally would.

Wrapping Up

Milk paint is a fun and creative medium for transforming furniture and home decor. It’s easy to use, relatively inexpensive, and completely non-toxic. 

It’s versatile enough to create something with a vintage appeal or to add eye-catching color to any contemporary piece. The uses for this popular paint are only limited by your imagination!

Primary Sidebar

Heather from Whipperberry
Hello... my name is Heather and I'm the creator of WhipperBerry a creative lifestyle blog packed full of great recipes and creative ideas for your home and family. I find I am happiest when I'm living a creative life and I love to share what I've been up to along the way... Come explore, my hope is that you'll leave inspired!

Footer

  • Privacy Policy
  • Crafts
  • Food
  • Gifts
  • Holidays
  • Home
  • Mom Life
  • Recipes
  • Travel

Copyright © 2026 · Seasoned Pro