DIY Marquee Letters // Today is the BEST DAY OF MY LIFE!! I'm guest posting over at Today's Creative Blog and I've created something rather fun. It's a two part post on how to make your very own Designer Marquee Letters. Part One, Designer Letters is over with Kim at TCB and Part Two, how to create Designer Marquee Letters with Lights is here on WhipperBerry.
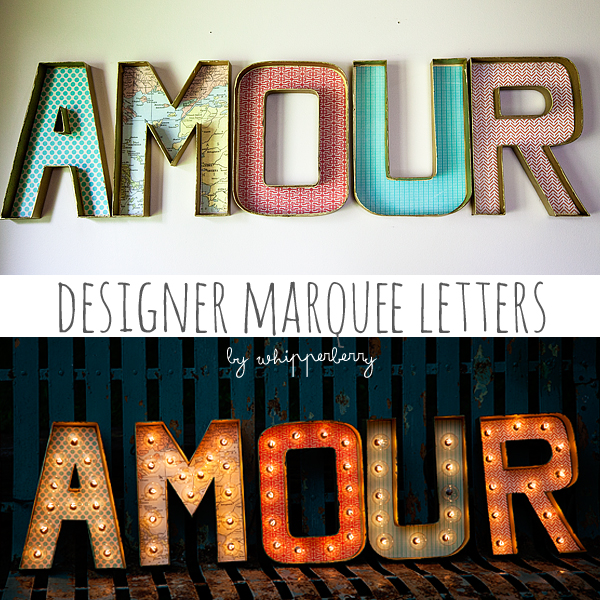
I have been in love with old marquee letters forever. I've collected several fabulous can lights over the years, but I really wanted some Broadway style marquee letters. To purchase a Broadway style sign would cost a fortune so, I thought I would create a sign of my own with parts that you can find at a couple of local stores. First, I needed to create my letters…
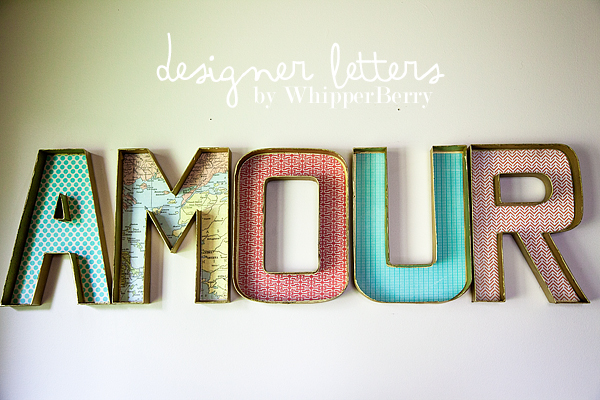
For this tutorial head on over to Today's Creative Blog, while you're there say hello to Kim for me. She's one of my favorite blog friends!! The cool thing about making your own letters, is that YOU get to pick what your sign says. You can do just one letter or and entire word, heck… write a whole paragraph if you want. the sky's the limit!!
Now that I've created my letters, it's time to add some lights to these babies!!
Supply List
- designer letters
- hole punch
- self-healing cutting mat
- globe string lights
Instructions
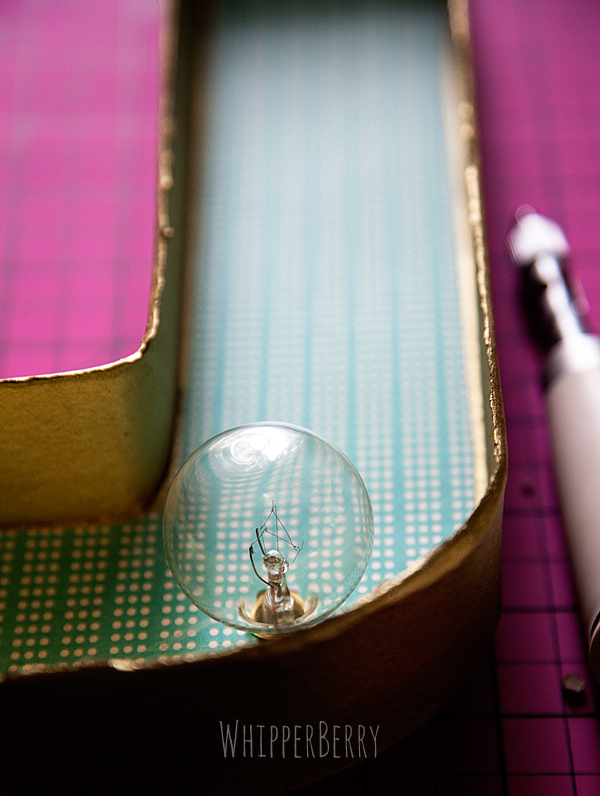
First you need to punch some holes into your letters…
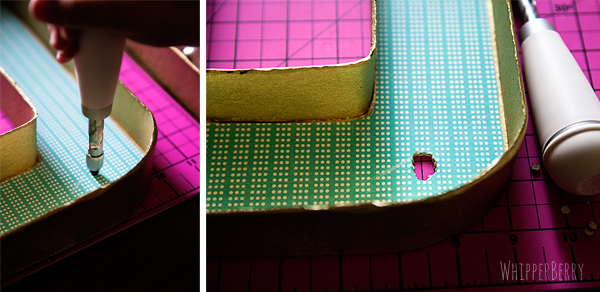
Now, this proved to be a bit of a challenge for me. I started the sign using my Martha Stewart Screw Punch which worked great. I just had to make several punches to create the circle that I needed for the light bulb to fit through. Which was fine, but later I decided to use a grommet punch and a mallet. It worked a little better. It was nosier, but did the job a little quicker. It's up to you how you decide to make your holes.
Space your holes carefully. I'm not going to give you specific measurements because it will depend on what type of lights you select. Basically, work slow and careful. Punch a hole and place a light bulb in the hole and then eye ball where the next hole should go.
Once you've created all your holes, it's time to add the lights…
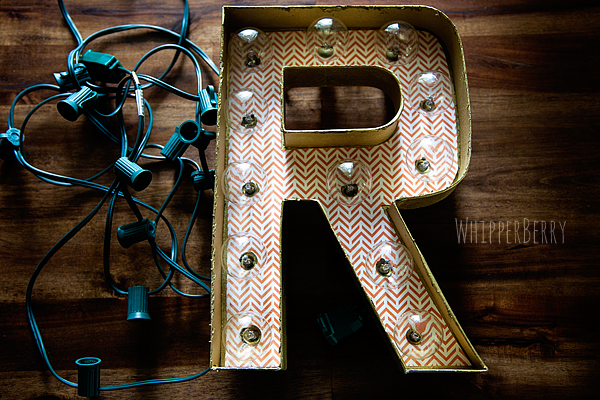
Unscrew the light bulbs and place them through the holes and screw the bulb back in the socket with the cord on the back of the letter… Keep in mind, before you start to place the cords, think about the most logical way to wire the letter. Where do you want the cord to start and end? Just think things through a bit and you won't have to go back and start over.

The lights that I used from Target had nice little clips on the light sockets that made it really easy to tuck the cords in so that they didn't peak out from behind the letters. They were perfect!!
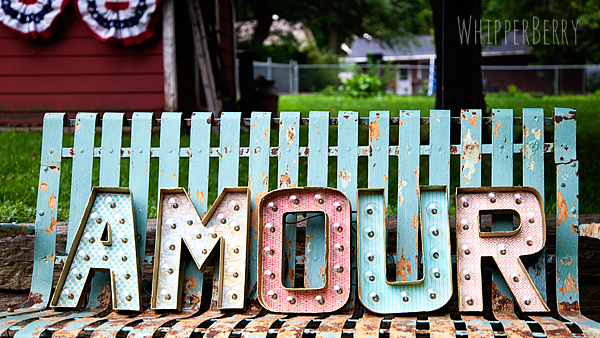
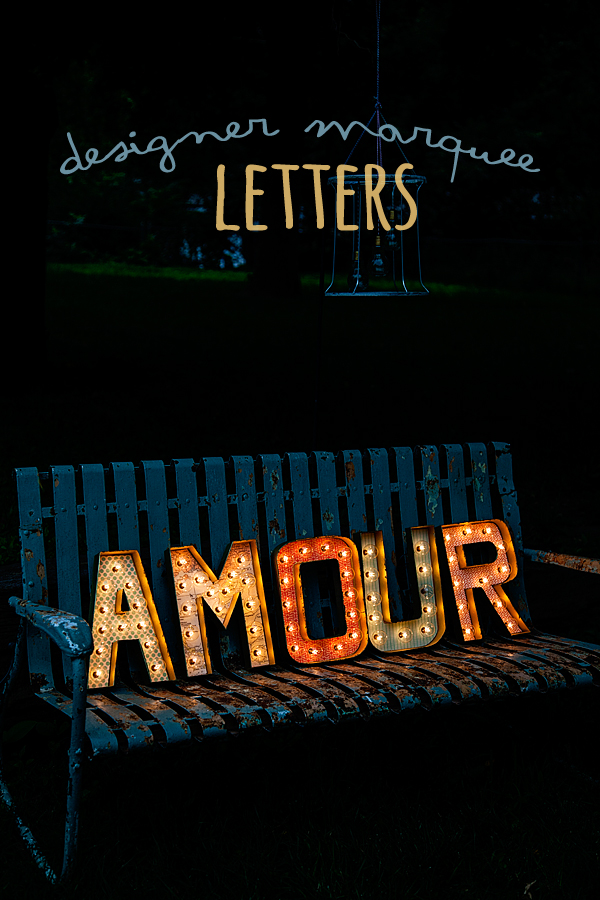
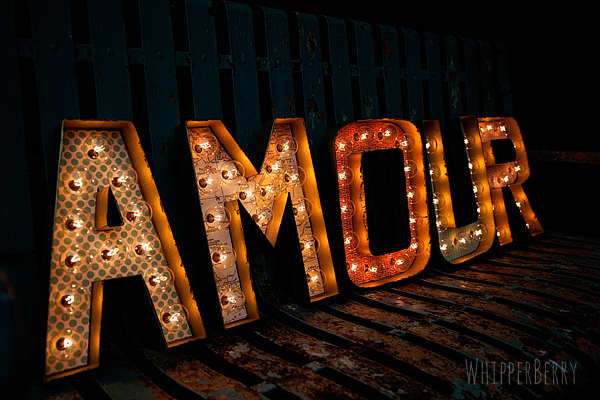
Once everything is wired up all you have to do it light it up!
Isn't it fun?! I plan on using it as part of a gallery wall in the near future. It will also be a fun way to dress up an event or dessert table. I can dream up all kinds of fun ways to use this sign.
Now keep in mind… the sign is made out of paper. DO NOT leave the lights on for a long period of time or leave unattended. I've turned mine on for quite awhile and nothing has happened, but the lights do warm up and I don't want any fires started with this fun sign.
Soooo, now that you know how to make your own Marquee Letter Sign… What word would you light up?
13
Wow Heather you make it look so easy. I absolutely adore these. I might actually try to tackle this!
LOVE this! Thanks for sharing! I've been a fan of marquee letters for so long too. I need to make this our summer project!
amazing!!
This is brilliant. And gorgeous. And seriously brilliant. I LOVE IT!!!!!
This is awe-some! Would love to see a final picture of the backside with all the lights attached.
Just AH-mazing!! LOVE them!
These are so amazing Heather! I LOVE them so much! Thanks for the great tutorial.
I love this! Seriously love it!
Fantastic! It really came together perfectly and the globe lights absolutely make it. I'm so happy I popped by today … this will be perfect for an outdoor movie night im hosting later in the summer!
These are awesome Heather!! Can't wait to see your final wall1
I absoultely Adore this project! You have an amazing Blog! I would love to have you come share on my Show Me Your Plaid Monday's linky party! https://www.pandpkitchen.com/2013/07/07/show-me-your-plaid-mondays-29/
Love this! We're doing this in my niece's room thanks to your tutorial. I have a question though about the lights. We found the lights at Target, they come 25 bulbs to a strand. We noticed you have 64 bulbs, what did you do with the extra 11 on the strand? Thank you again for such a neat project.
Cari- Good question! I unscrewed the bulbs from the sockets and left them empty. The lights still work this way, however I’m not sure if there are safety issues there. I’m going to look into that and let you know.
kisses // heather
Thank you. I thought that may be the case, but then I thought maybe cutting the excess and using a wire cap to the end, but then it was getting a little too complicated. This helps a lot.
Hi Heather! I love this project, it is so fun! I have featured it over at Copycat Crafts today 🙂 https://www.copycatcrafts.com/designer-marquee-letters-with-lights/
this question might be stupid, sorry…im really UNcrafty….If you hang this on a wall…do you see all the cords frmo one letter to another?? I wish i could see it hanging!! and then all the strands connect so you only need one outlet right?
I can't tell you how much I adore these! You inspired me so much- and I wanted to show you the ones I made- they are slightly different….
https://www.welivedhappilyeverafter.com/2013/09/diymarqueeletters.html?m=1
Thanks for the visual inspiration!
XOXO Hannah
I love these! Do you have a link to the actual lights you bought? I bought two strands so far (at Target and another local craft store), and neither one will work if bulbs are removed – but I can't find any strands short enough for me to use the whole strand. Thanks! Jenny
I absolutely love these! I am going to attempt to make them for my niece’s room and I wanted to hang them on the wall. I was wondering if you had any suggestions as to how to do this since the cords are rather bulky from the back and won’t “sit” on the wall properly.
Hi there!
I am interested in this but have very little time. We are looking to create a ‘BEER’ sign to display outside of our Chicago restaurant and love this look!
If this is something that would interest you, please email me and we can discuss details!
Or if you know of someone who would be able to tackle this project and has had success in the past, please let me know!
Best,
Kelsie M.
Good post. I definitely love this website. Stick with it!