Boy-oh-Boy… I LOVE large scale projects! Sometimes bigger really is better in my book. There are times when you really need to make a statement and a large scale felt banner or large drop cloth sign created to wow your guests or to really make a room POP! I wanted to create a large felt sign for the Christmas season to add to my living room and to also use for a Christmas party that I’m planning this year. Let me show you what I made and how YOU can make one yourself!
• This post is brought to you by the amazing folk at Cricut •
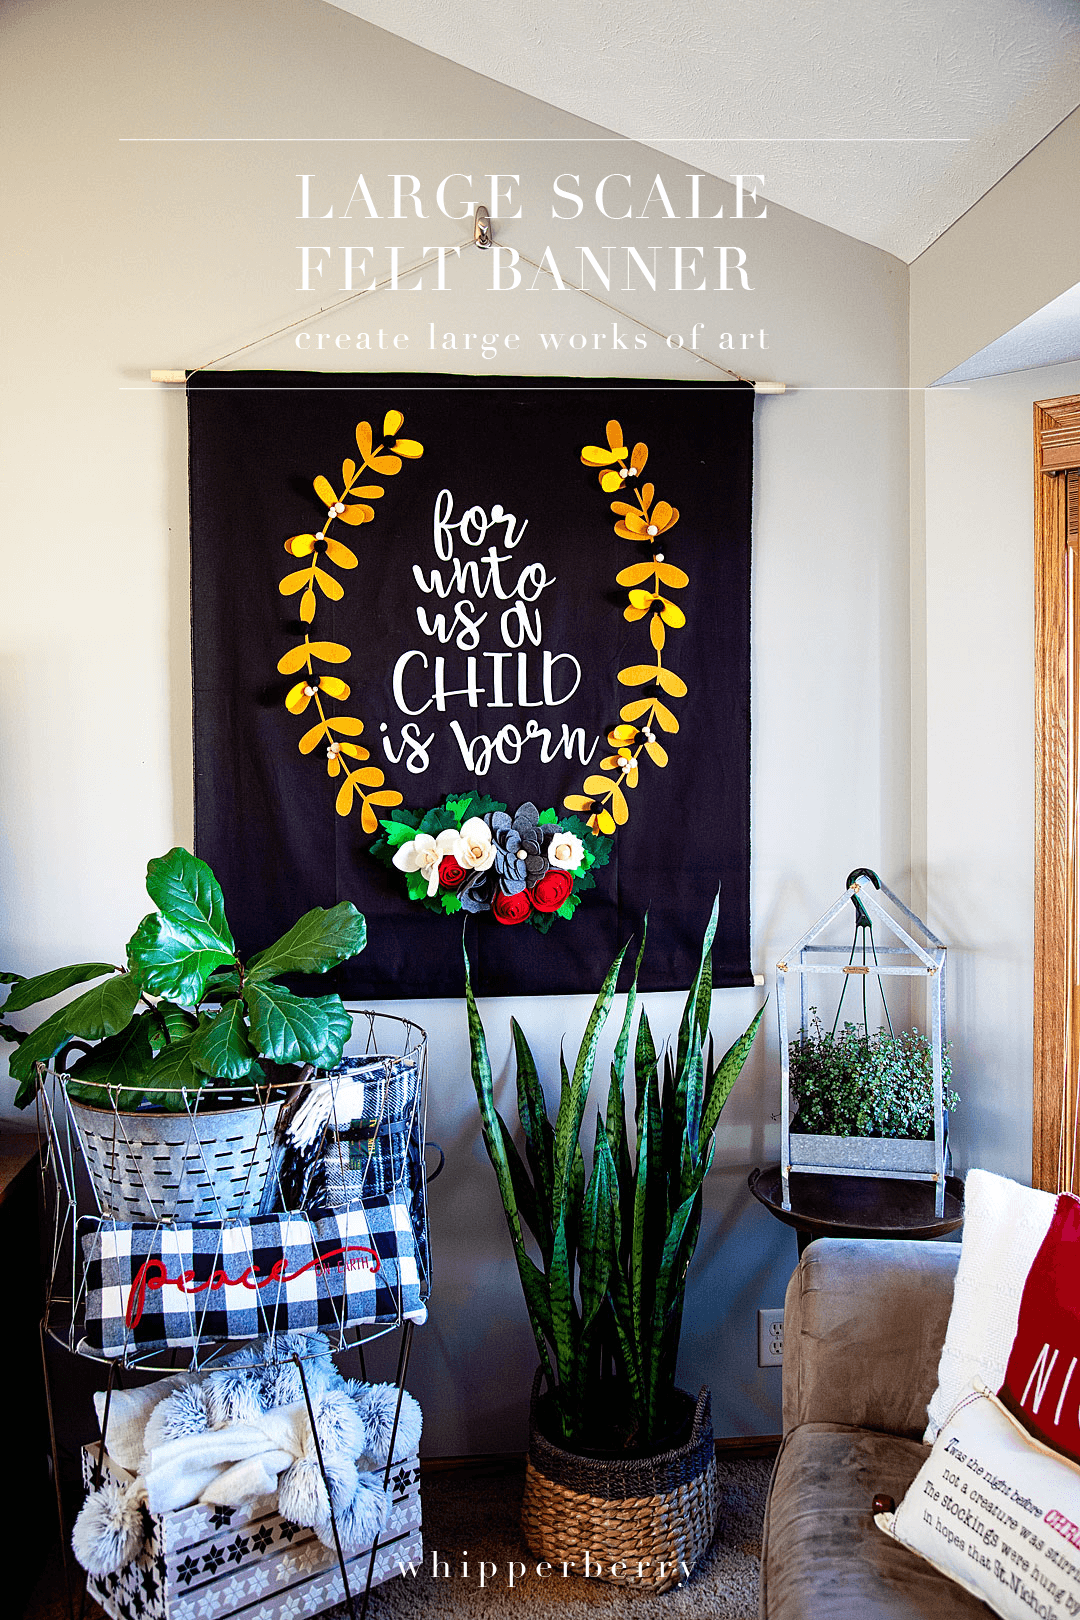
Many of you might say that a project of this size is impossible, especially with the Cricut cutting machines. You can really only cut 12 inches by 24 inches, right? Technically, yes. However, if you have learned to master the Slice & Contour tools in Cricut Design Space, it’s actually very do-able. Especially now, with the Cricut Maker & the new larger Easy Press 2… Projects like this are a DREAM! The Maker can handle all kinds of materials like the most delicate paper and fabric to the tough stuff like matboard, leather, and balsa wood. What I especially love is that you can use it to cut FELT! One of my favorite materials to create with. Now, you can do it on a much LARGER scale with the help of some tips and tricks that will follow.

How to Use the Slice and Contour Tools
I have heard a few people who have complained about the lack of freedom in Design Space and I’m here to tell you… That’s not true! You have a ton of freedom when designing in Cricut Design Space if you are good friends with your Slice and Contour tools. These are the two tools that help you customize either your own graphics or graphics from the huge library of designs in the Design Space library. Here is a quick video to show you how I break this large design ( it’s roughly about 4 feet wide and a little over 4 feet tall) into smaller pieces so that they will fit on my 12×24 cutting mat for the Cricut Maker.
Isn’t that cool! I love that with a little knowledge and some imagination, you can truly create something incredible with the Cricut tools.
Supplies for Large-Scale Felt Banner
- 1 1/2 yards of black canvas fabric
- 24 – gold felt 9×12
- 8 – white premium felt 12×18
- 5 – antique white felt 9×12
- 3 – red premium felt 12×18
- 5 – heathered gray premium felt 12×18
- 3 – dark green felt 9×12
- 3 – light green felt 9×12
- 24 – large wood beads of various sizes 1 inch, 1 1/4 inch
- 10 – black wool felt balls – 2.5cm
- Cricut Maker with Rotary Blade
- 1 – Fabric Grip Cricut Cutting Mat
- Heat n’Bond
- Cricut Easy Press 2 – 12×10
- Cricut Easy Press Mat-20×16
- Cricut Iron-On Protective Sheet
- hot glue gun
- hot glue sticks
- 2 – 4 ft. wood dowels
- cotton rope
- measuring tape
Instructions
- You will want to set-up your Easy Press 2 and the Easy Press Mat and iron-on the Heat n’Bond on one side of each of the felt pieces. I LOVE the Easy Press 2 for this!! Seriously way easier than using a small iron and the consistency of the heat plate make this a breeze.


- Jump into Cricut Design Space via this LINK HERE to get access to my design file. I have this project all ready to go for you. It’s sized to create a LARGE 3 1/2 x 4 foot banner. The design is already sliced and contoured so that you don’t have to worry about that step. All you need to do is follow the on-screen prompts and load the mat with the color of felt that it corresponds with and you’ll be good to go.
 NOW, the felt that I had was smaller than the designs, not to worry though. I placed my felt onto the cutting mat and easily pieced them together while I was pressing them onto the fabric. If you’re careful you won’t even see the seam.
- You will find that some of the designs don’t all fit onto one sheet of felt. Don’t worry about that. Just keep all of your pieces organized with where they need to go. Then when you’re ready to iron them on, you’ll do just that with even the little pieces and you’ll never know there was a cut there.

- Once everything is cut, press your black canvas. You don’t want to have any wrinkles. I just use my Easy Press 2 for this process. WAY EASIER!
- Now, I have you cutting 2 sets of the gold wreath section of the banner. That’s not a mistake, I wanted the wreath section to pop out so that it’s 3D rather than a flat design.
- Lay out your wreath & quote on the black canvas and make sure that it is placed in the center and spaced according to the photo below. This is when you will want to make sure you have kept any small pieces and have placed them in the right spot.
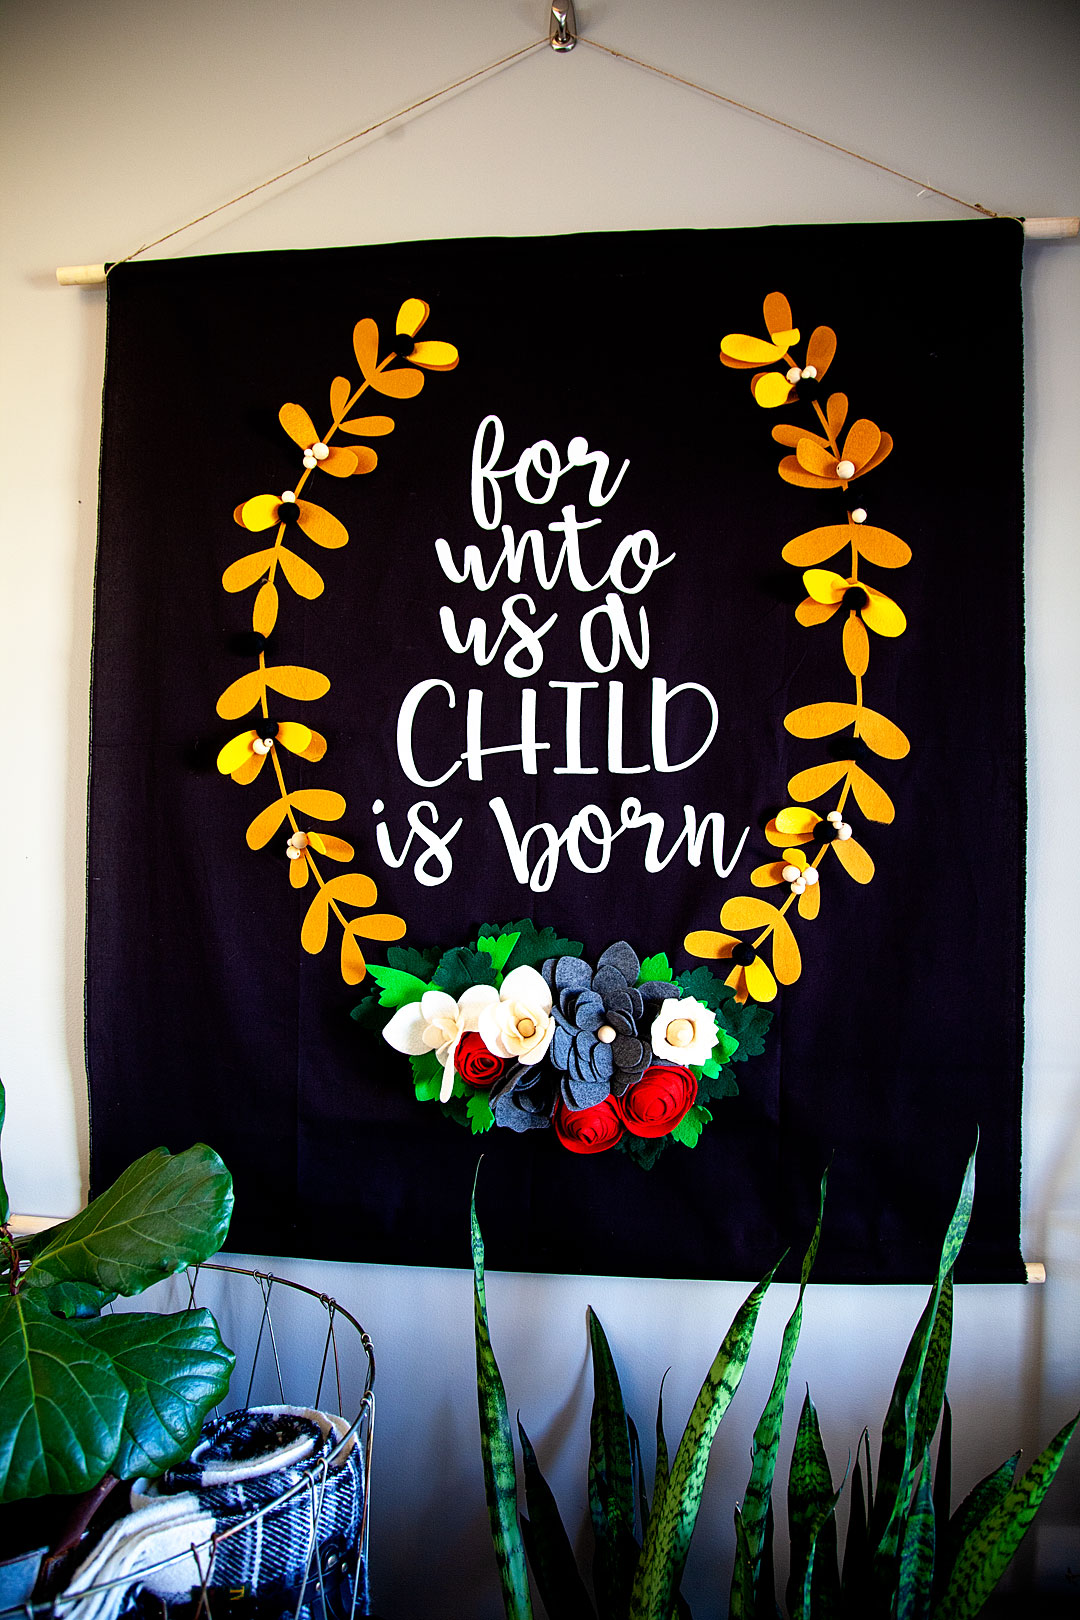
- Once you have placed the design the way you would like it. Place the Easy Press Mat under the first section and set your Easy Press 2 to 350˚. Lay the Iron-On Protective Mat on top of the first felt section and then lightly press the Easy Press 2 for 60 seconds on that first section.
- Continue over the entire design until it is all ironed onto the canvas.

- Next, you assemble the flowers with hot glue. I used a wood bead in the center of each flower because I like the look and it stabilizes the flower a little more.

- Once the flowers are assembled, start laying them out on the canvas until you get the look that you like. Then section by section, hot glue the flowers and leaves onto the banner.
- At this point, you have two choices. You can finish off the banner by sewing the pocket for the dowel OR, you can faux sew like me and just hot glue the pocket. I fold the top of the fabric down about 2 1/2 – 3 inches and then hot glue or sew across the bottom of the fold leaving a pocket to feed the dowel through.

- Repeat the last step at the bottom of the banner as well. This is needed to add some weight at the bottom of the banner. If you don’t have this the banner will hang a little wonky.
- Tie the cotton rope onto the top dowel so that you can hang the banner.
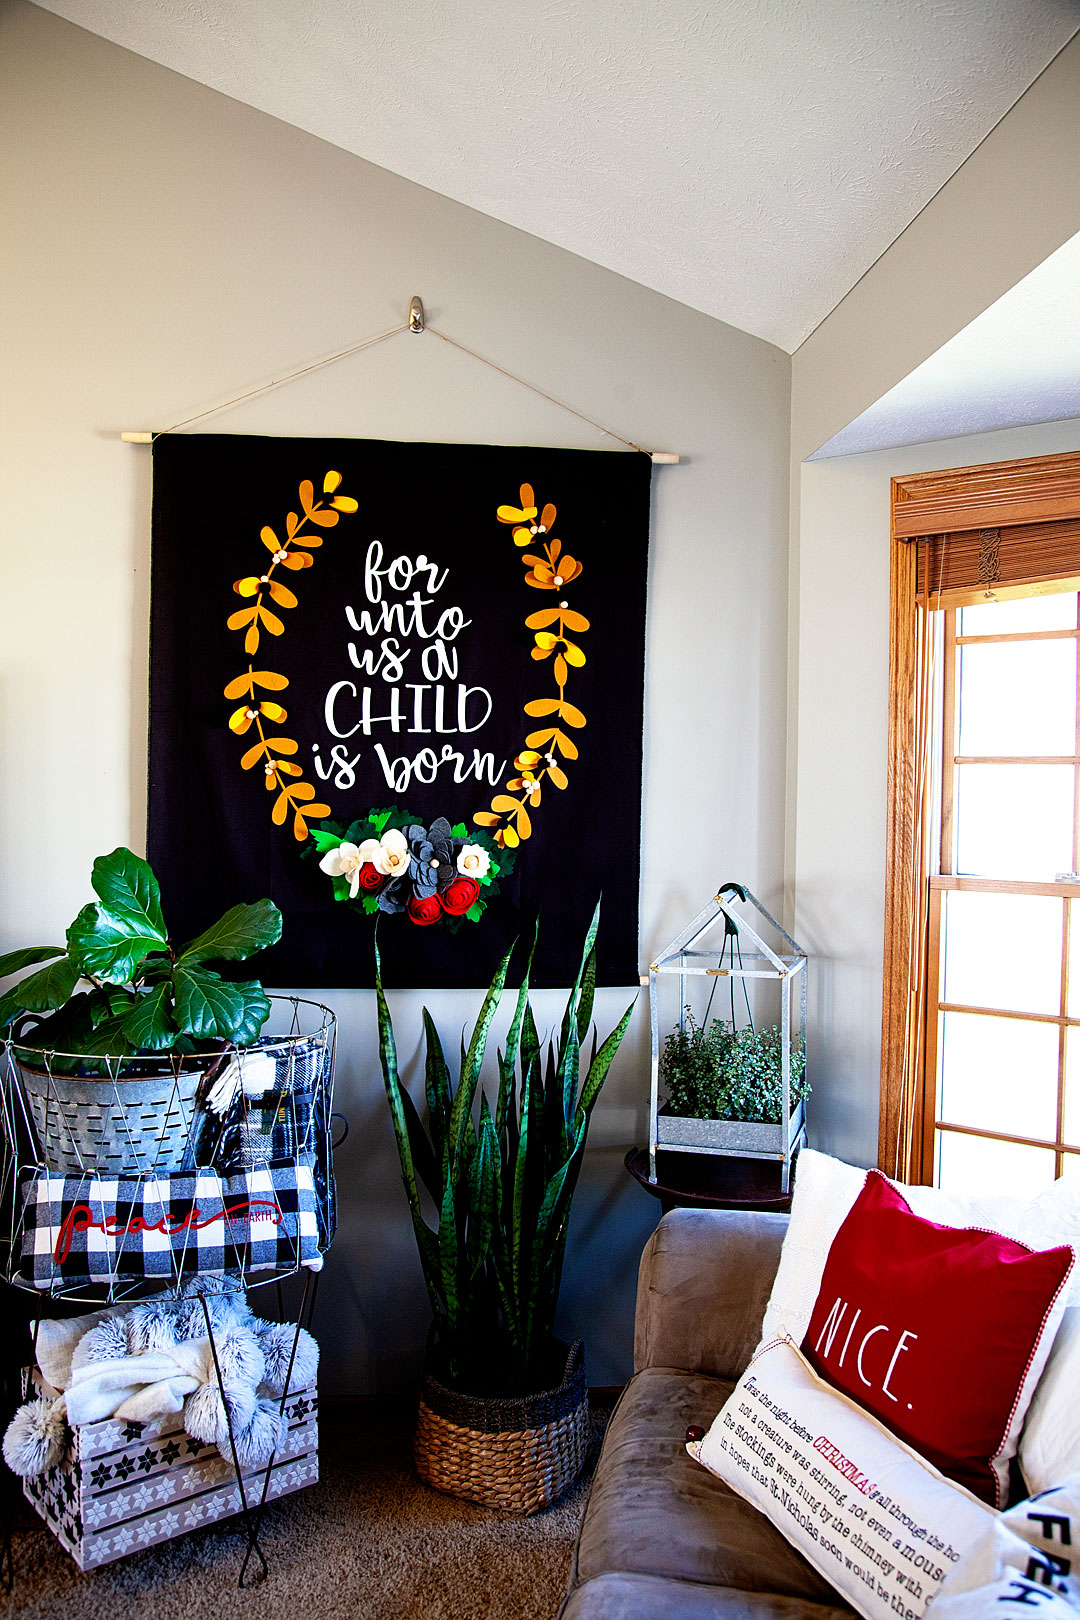
Now, you’re all finished! You have an amazing work of art that you will treasure for years. What other large-scale signs are you wanting to make? I just finished creating all kinds of large-scale projects for my daughter’s wedding and I can’t wait to show you what I created for that amazing event.
This is a sponsored conversation written by me on behalf of Cricut. The opinions and text are all mine.
