• Skip to primary navigation
  • Skip to main content
  • Skip to primary sidebar
  • Skip to footer

Whipperberry

WhipperBerry • Your Home For Creative Inspiration

  • Home
  • About
    • Terms
  • Recipes
    • ZipList
    • Starters
    • Easy Weeknight Dinners
    • Main Dish
    • Salads
    • Side Dish
    • Soups & Stews
    • Desserts
    • Breakfast
    • Miscellaneous
  • Tutorials
    • Creative Crafts
    • DYI Decor
    • Fabric Crafts
    • Food How-To
    • Jewlery
    • Paint Projects
    • Paper Art
    • Party Styling
    • Photography and Graphic Design
    • Silhouette
  • Holidays
    • St. Patrick’s Day
    • Easter
    • Mother’s Day
    • Father’s Day
    • 4th of July
    • Halloween
    • Thanksgiving
    • Christmas
    • New Years
    • Valentine’s Day
  • Gift Ideas
    • Gifts For Everyone
    • Gifts for Dad
    • Mother’s day
    • For The Girls
    • For The Kids
    • Teacher Gift Ideas
    • Christmas
  • Printables
    • Holiday
    • Gift Idea
    • LDS Primary
  • Travel
  • Contact
  • Nav Social Menu

    • Facebook
    • Instagram
    • Pinterest
    • RSS
    • Twitter

halloween

Whimsical Neon Halloween Mantel

4 · Sep 17, 2018 · 1 Comment

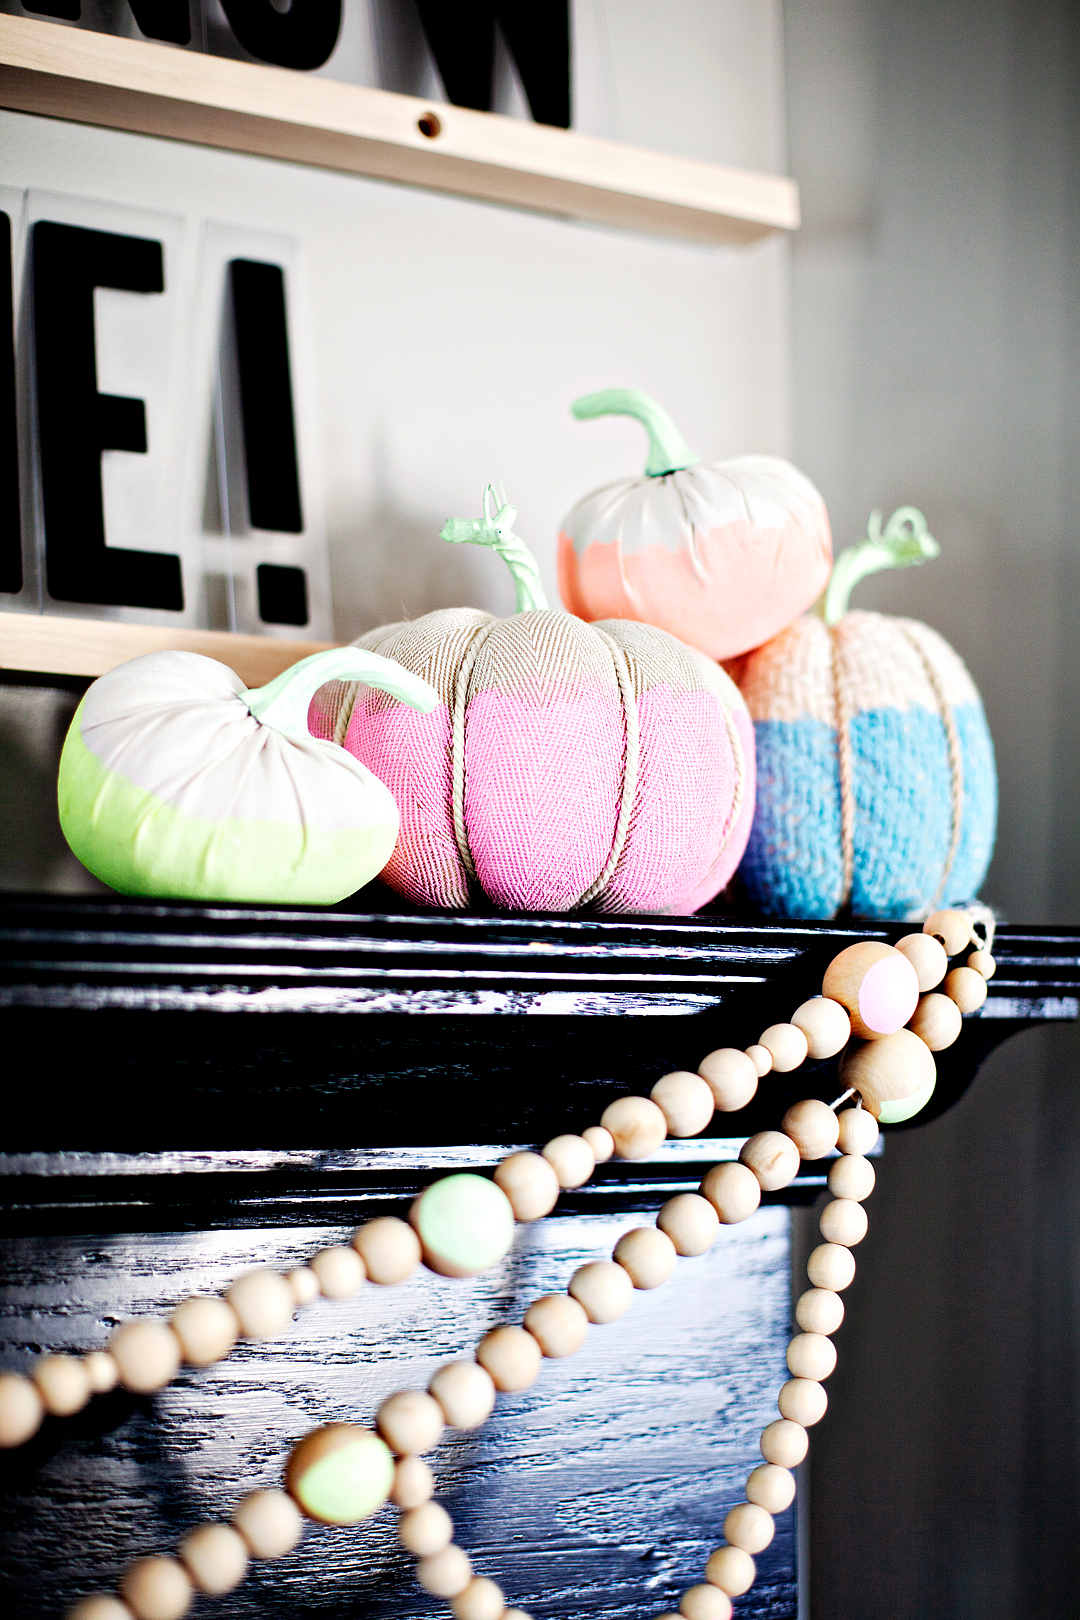
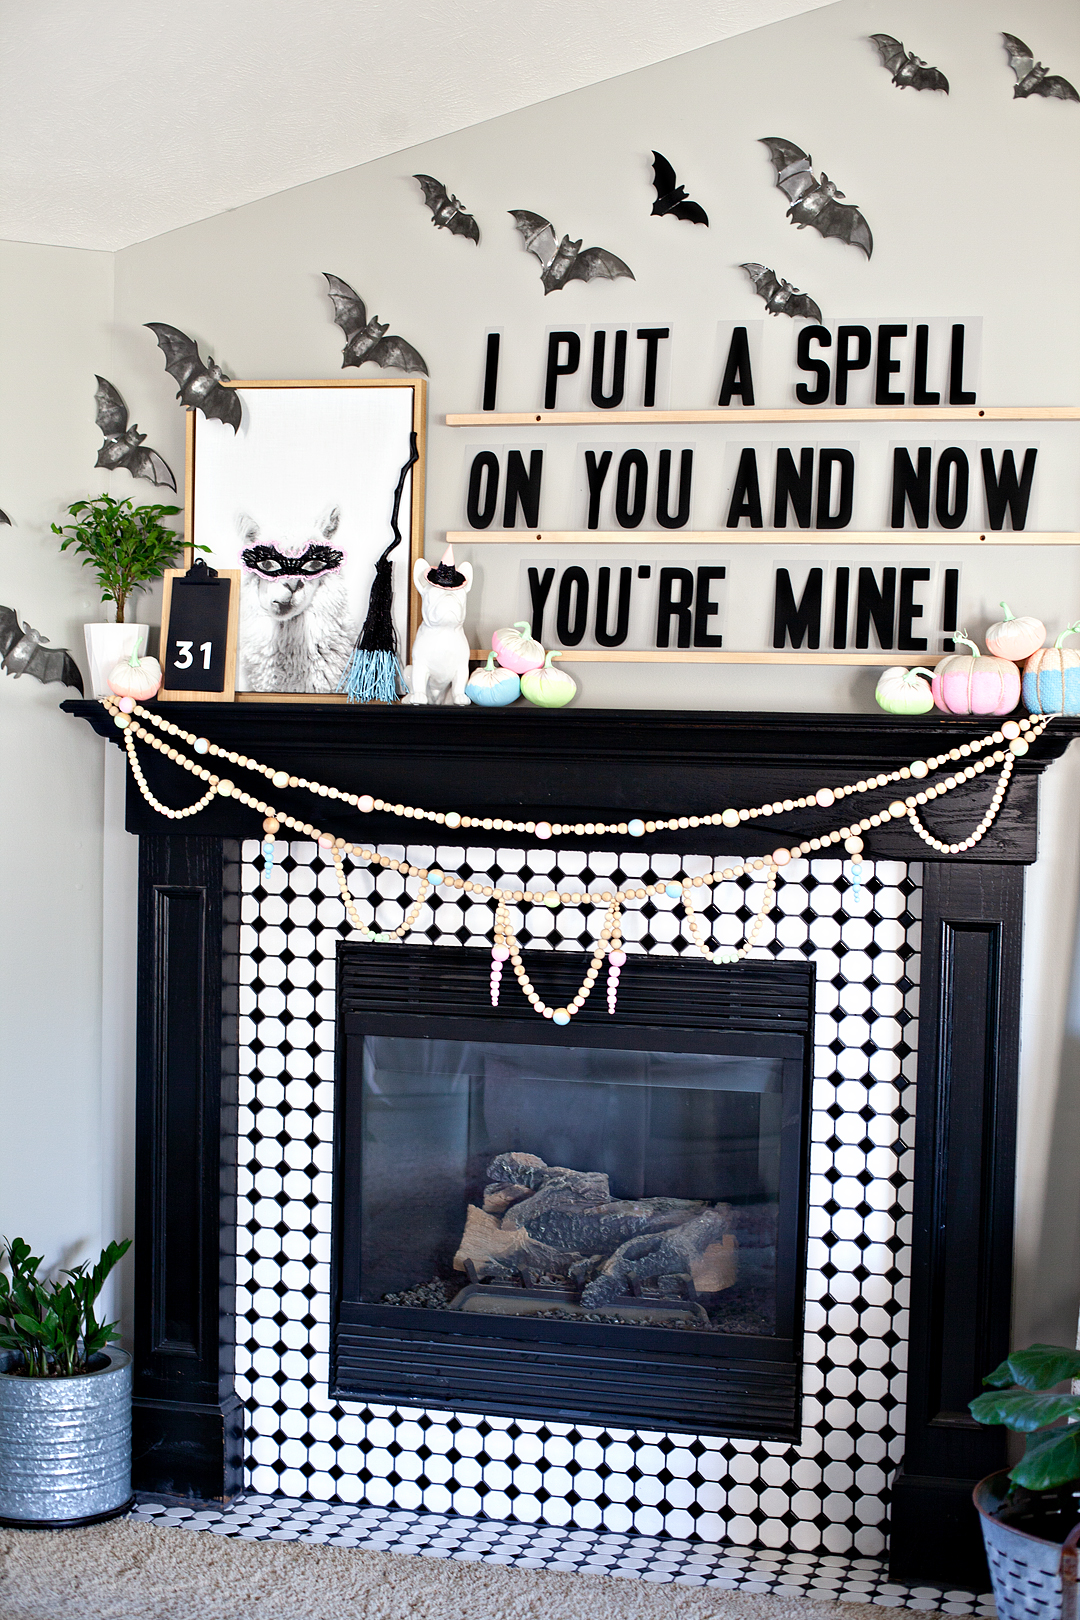
When it comes to my typical style choices I typically stick with classic and timeless. However, I also have a real love of fun and whimsey that sneaks out every once in a while.  This year I’ve created a whimsical mantel using all kinds of fun finds from DecoArt, Target & Refined Design for my whimsical NEON Halloween mantel!

• This post brought to you by DecoArt •When it comes to my typical style choices I typically stick with classic and timeless. However, I also have a real love of fun and whimsey that sneaks out every once in a while.  This year I've created a whimsical mantel using all kinds of fun finds from DecoArt, Target & Refined Design for my whimsical NEON Halloween mantel!
You may not be able to tell by looking at me but, I tend like walking the line sometimes when it comes to following the rules. Nothing that would involve a felony conviction or anything, more like… When my daughter was born, I felt like she looked better in blue. She had beautiful blueberry eyes and I loved highlighting that. To this day she still is weirded out by the fact that I dressed her in blue instead of pink.

The same holds true when I decorate for holidays, sometimes I don’t really want to stick with the normally prescribed color palette. For example, we don’t really have to decorate with black and orange for Halloween, we can decorate in NEON and create a really fun, whimsical Halloween display.

Neon Halloween Mantel Supplies

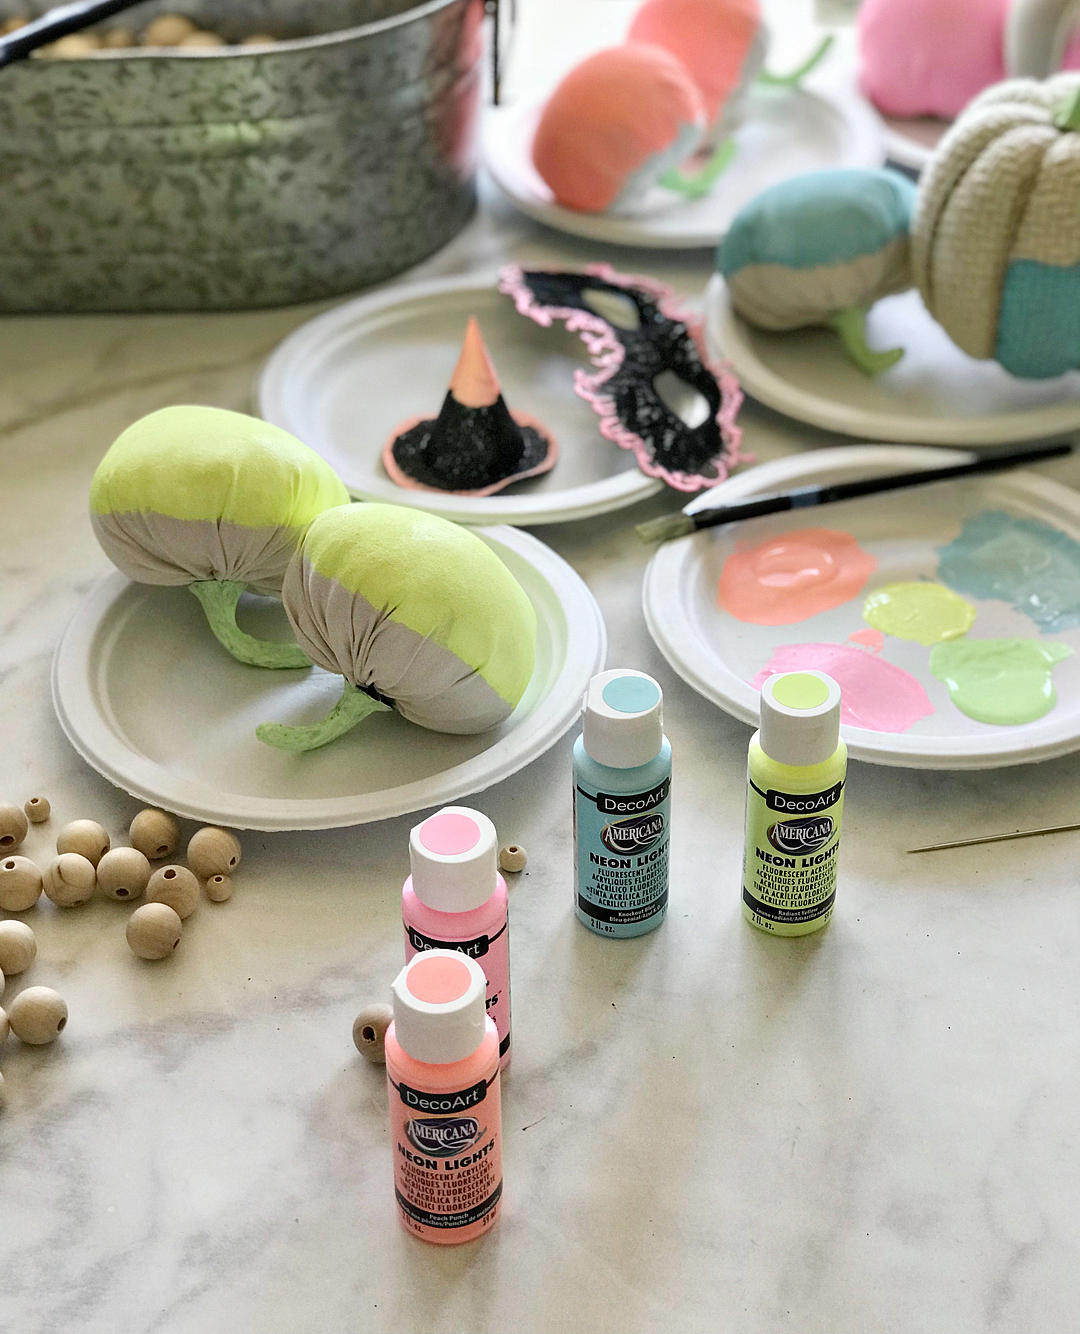
With a mission in mind, I grabbed my DecoArt Americana Neon Light paints and headed to the Target Bullseye’s Playground (the former dollar spot) and grabbed some inexpensive Halloween trinkets to add to my mantel and got to work. Here’s my supply list…
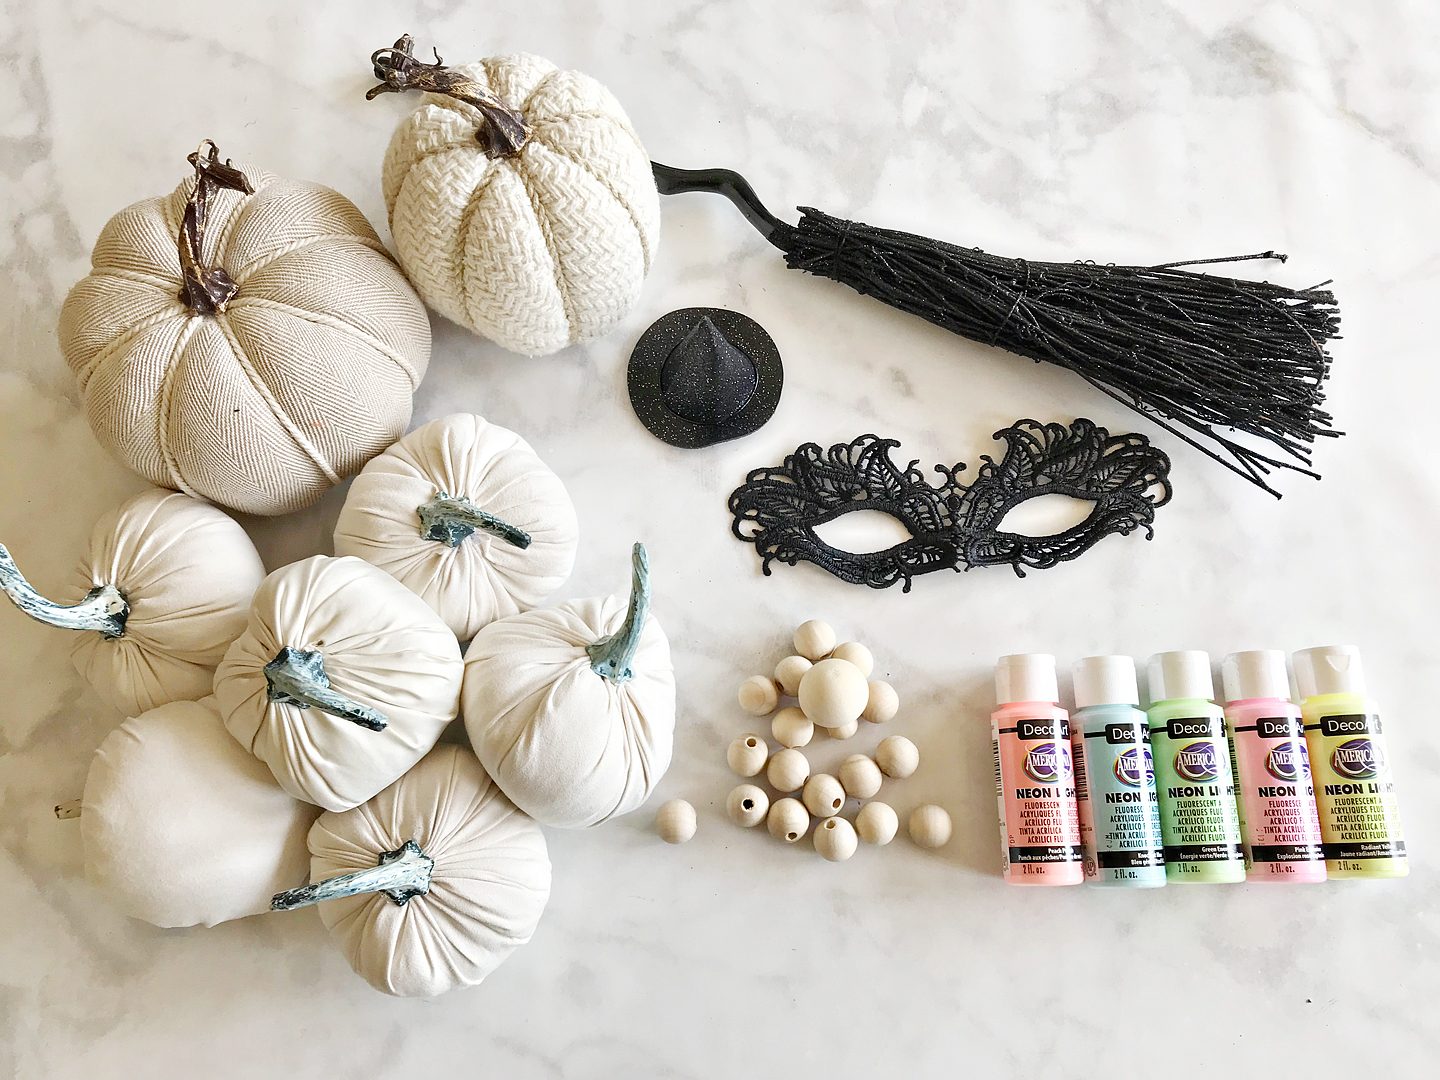
    • Americana Neon Lights 2oz – Pink Explosion
    • Americana Neon Lights 2oz – Peach Punch
    • Americana Neon Lights 2oz – Green Energy
    • Americana Neon Lights 2oz – Knockout Blue
    • Americana Neon Lights 2oz – Radiant Yellow
    • foam paint brushes
    • small witches broom
  • various fabric pumpkins
  • tiny witches hat (it was a headband originally)
  • mascarade mask
  • wood beads in various sizes
  • cotton bakers twine
  • an upholstery needle
  • a set of Letters and Ledges
  • scissors
  • command stips

Instructions

With this project, I wanted to add touches of color to typical Halloween objects. Kind of like color blocking in some cases without the hard lines. I wanted it to have a free spirit air about the mantle. Remember, we are going for whimsical.

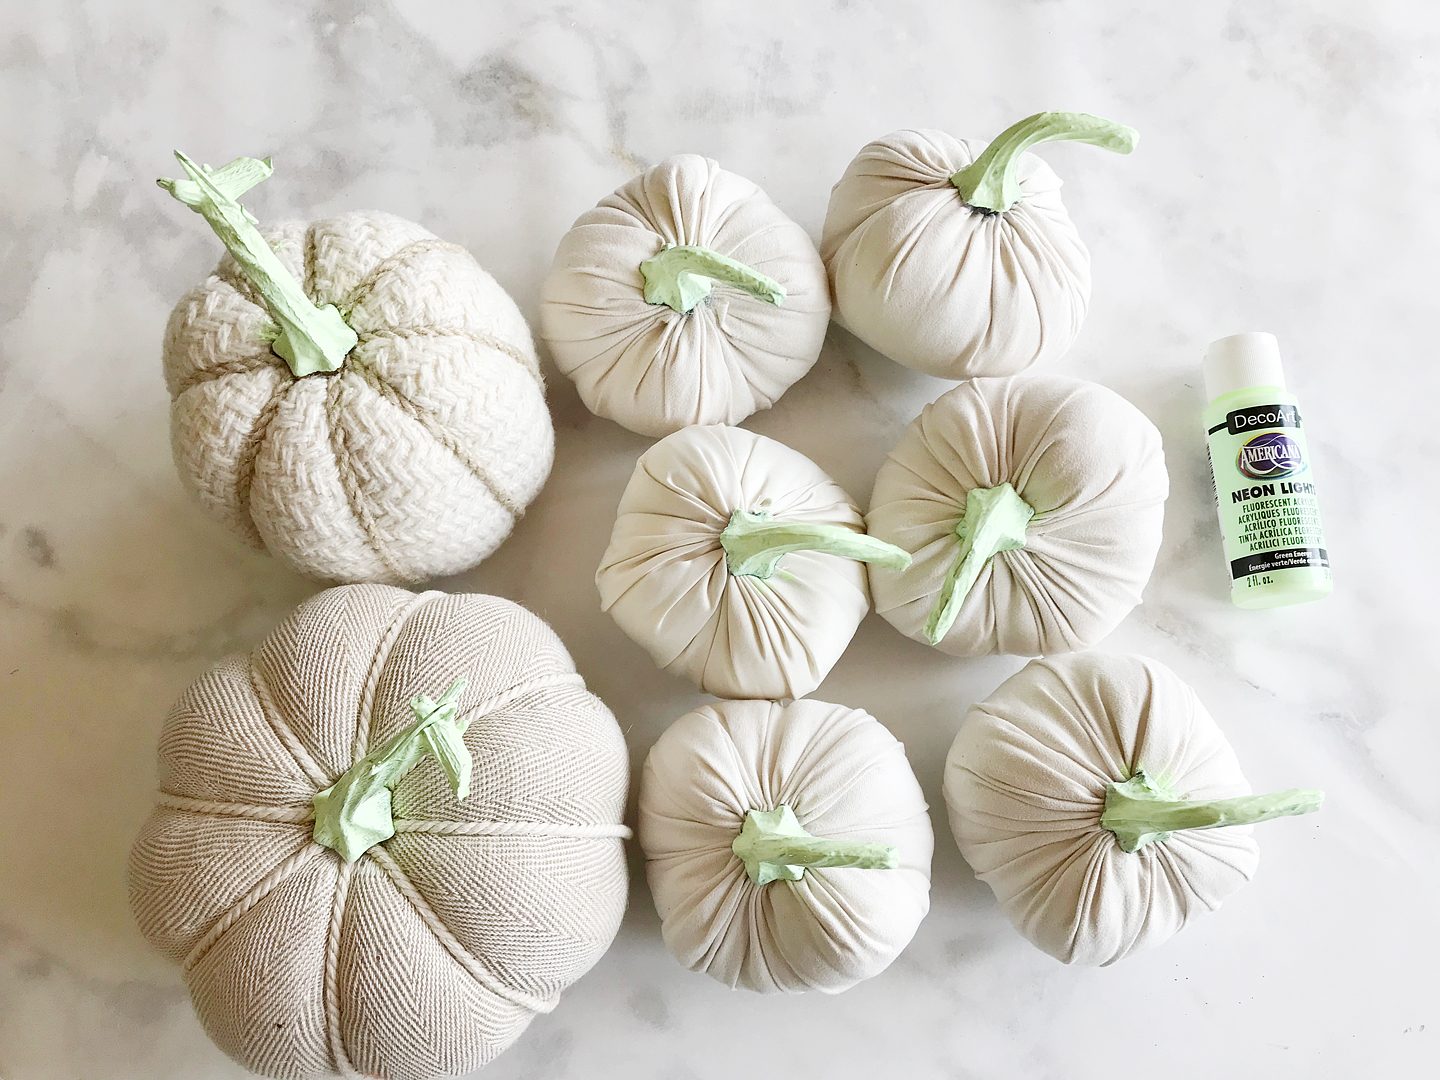
I started by painting the stems of the pumpkins green.
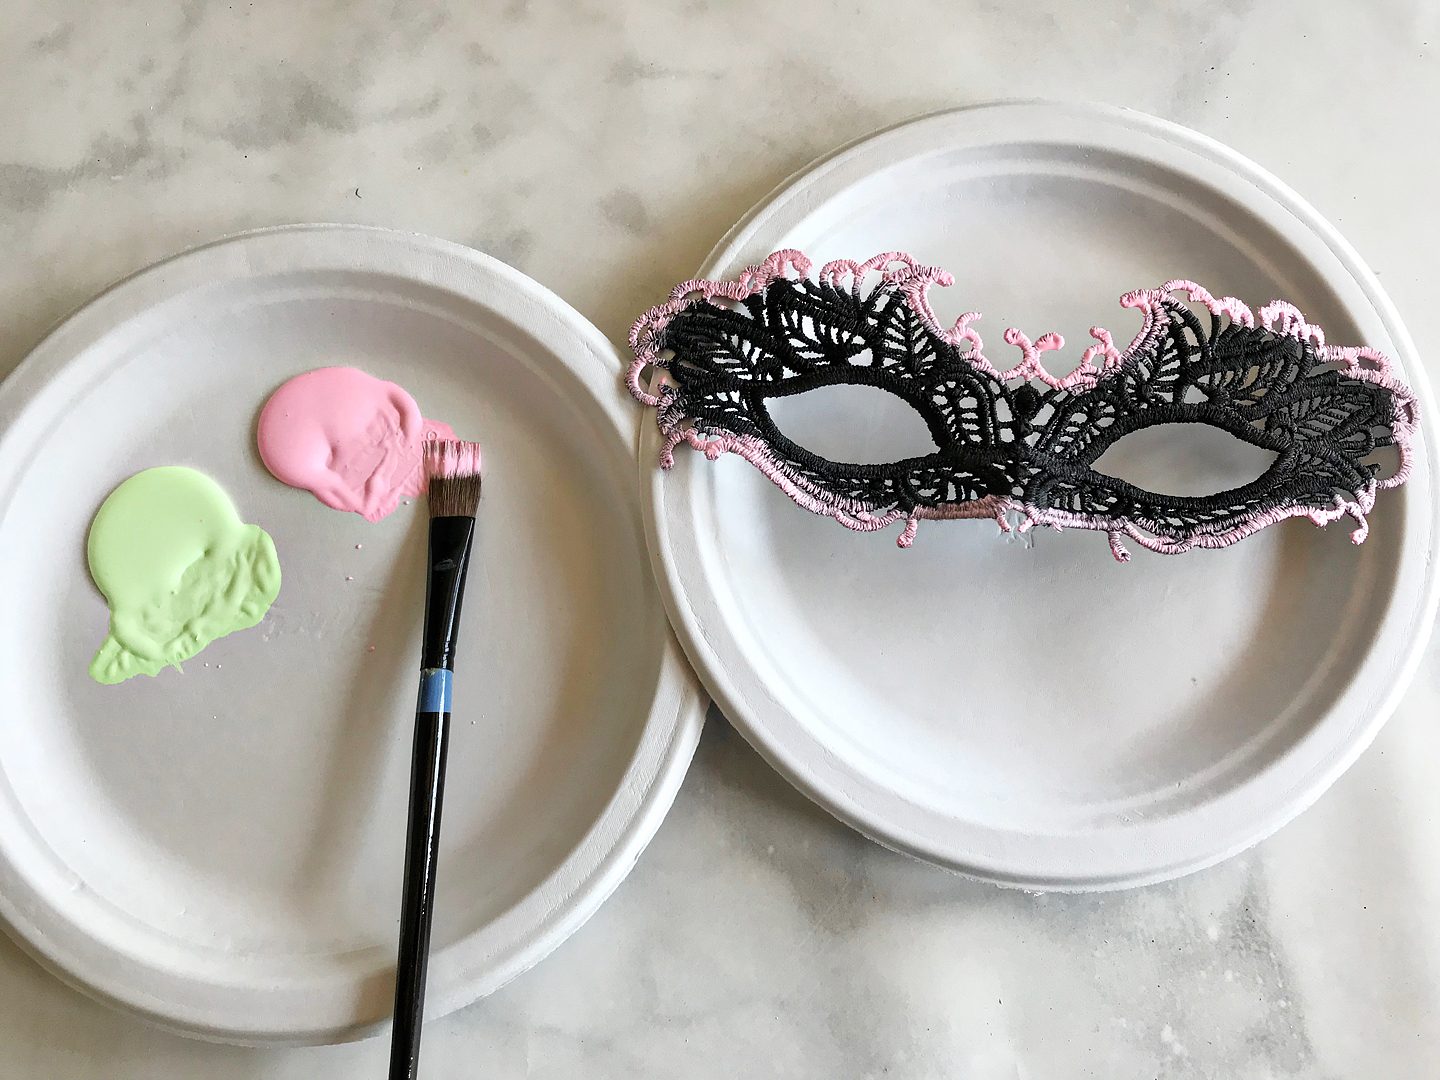
While those were drying, I painted the edge of the masquerade mask with the neon pink.
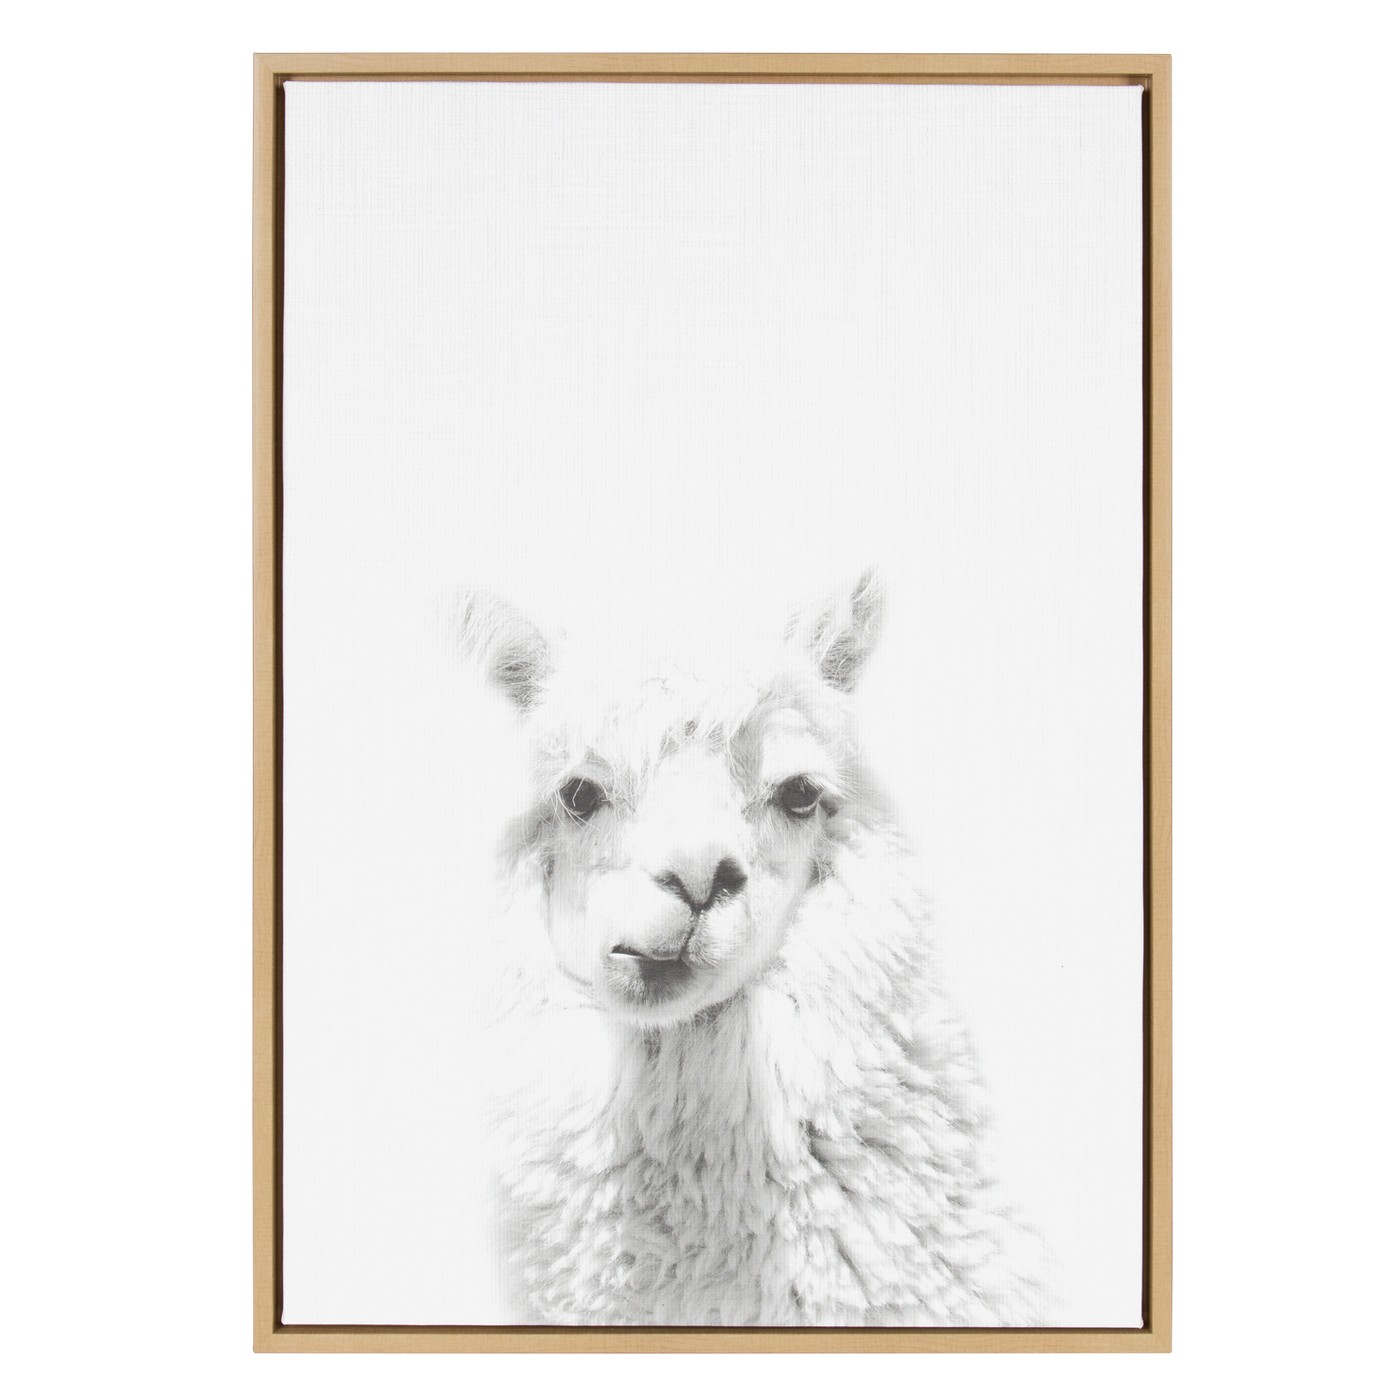
I have a quirky llama picture that I found at Target that sits on my mantle. Her name is Poppy and I adore her!
I thought it would be fun to get her in on the action, so Poppy will be wearing the mask for Halloween.
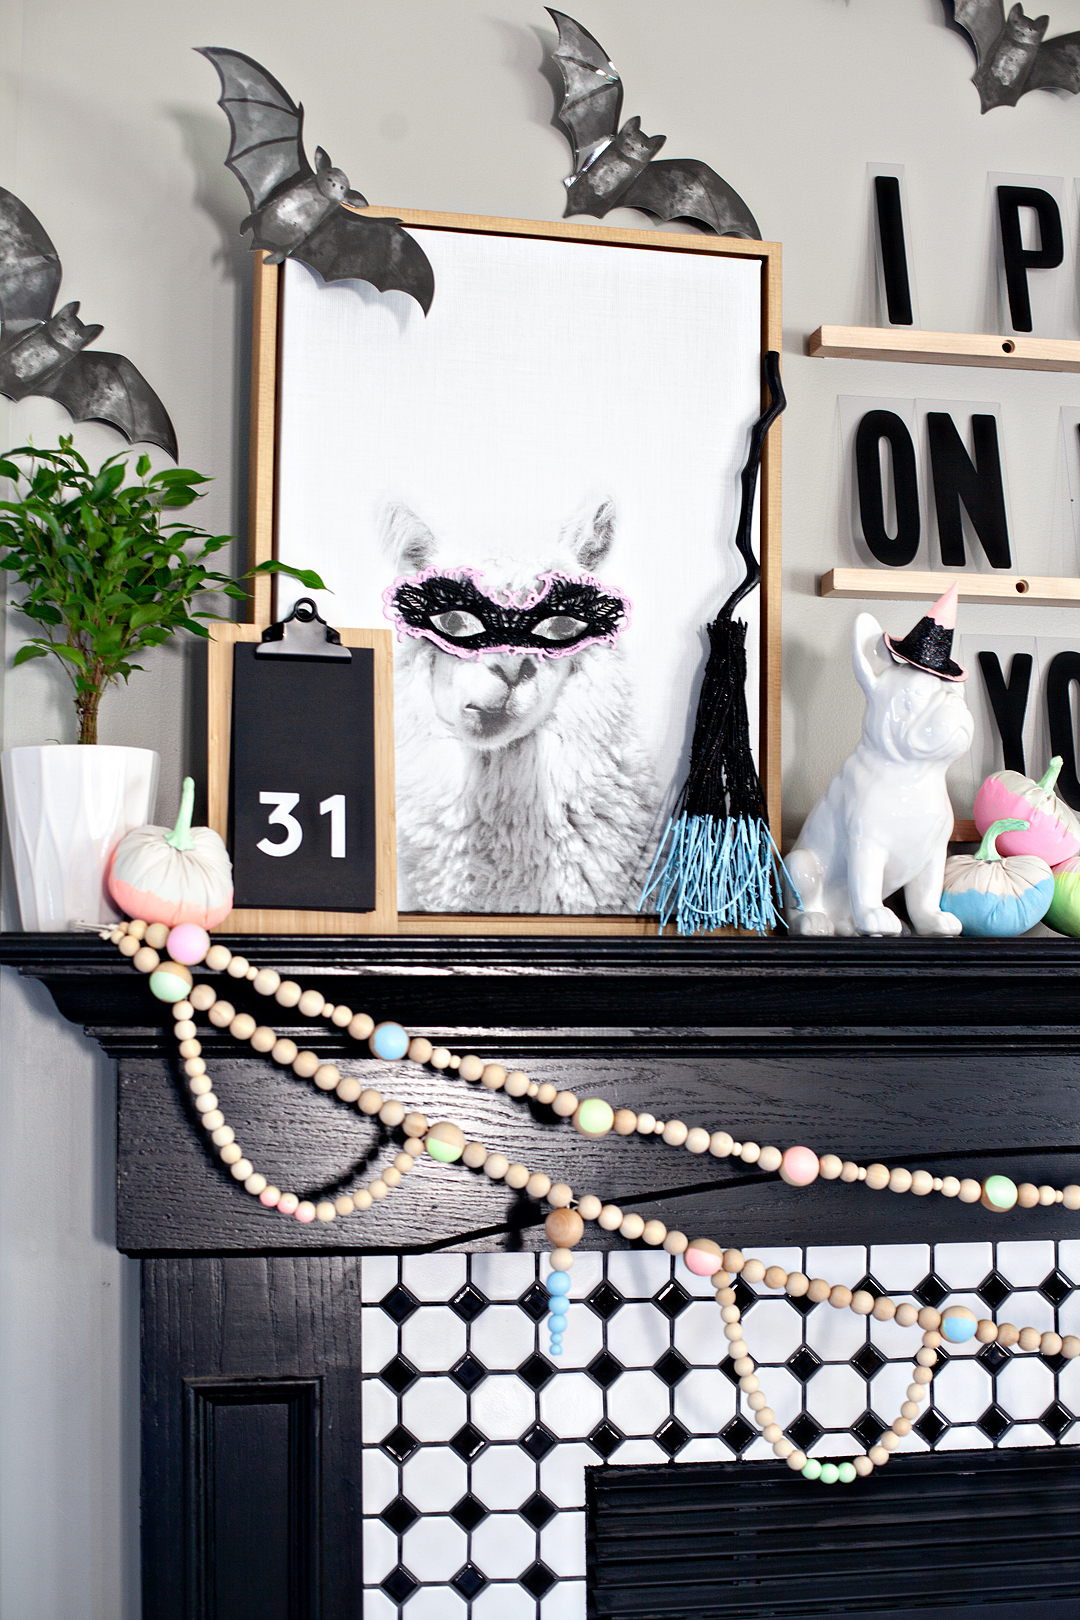
Then I added the color block on the bottom of the pumpkins, the broom & the little witches hat.
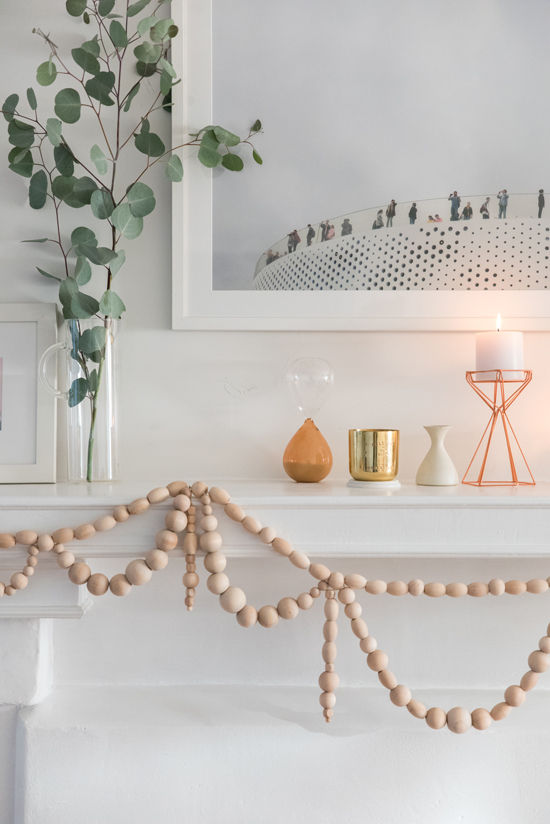
While I was waiting for them to dry, I starting to string my wood beads to create a garland. I was inspired by this tutorial from Design Love Fest…

You have to vist Design Love Fest to learn how to make fun bead garlands like this. Click on the link above.

I decided that since I didn’t want to paint the entire bead, it would be easier to string the garlands, hang them on the fireplace and then paint them.
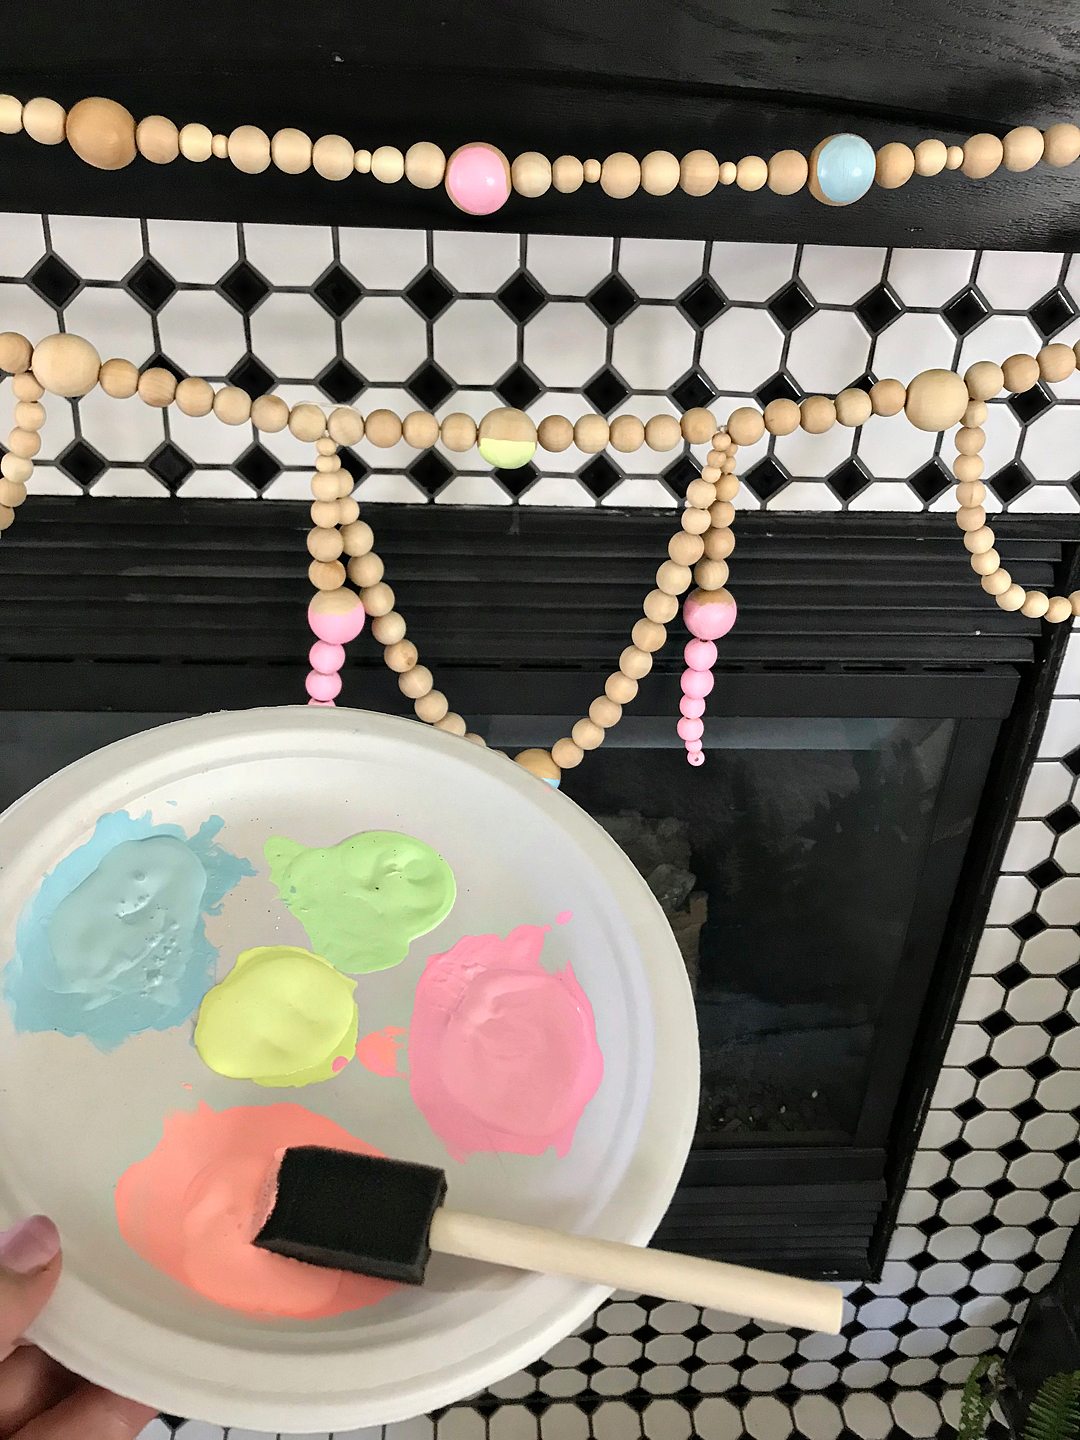
Worked like a charm and saved a ton of time!
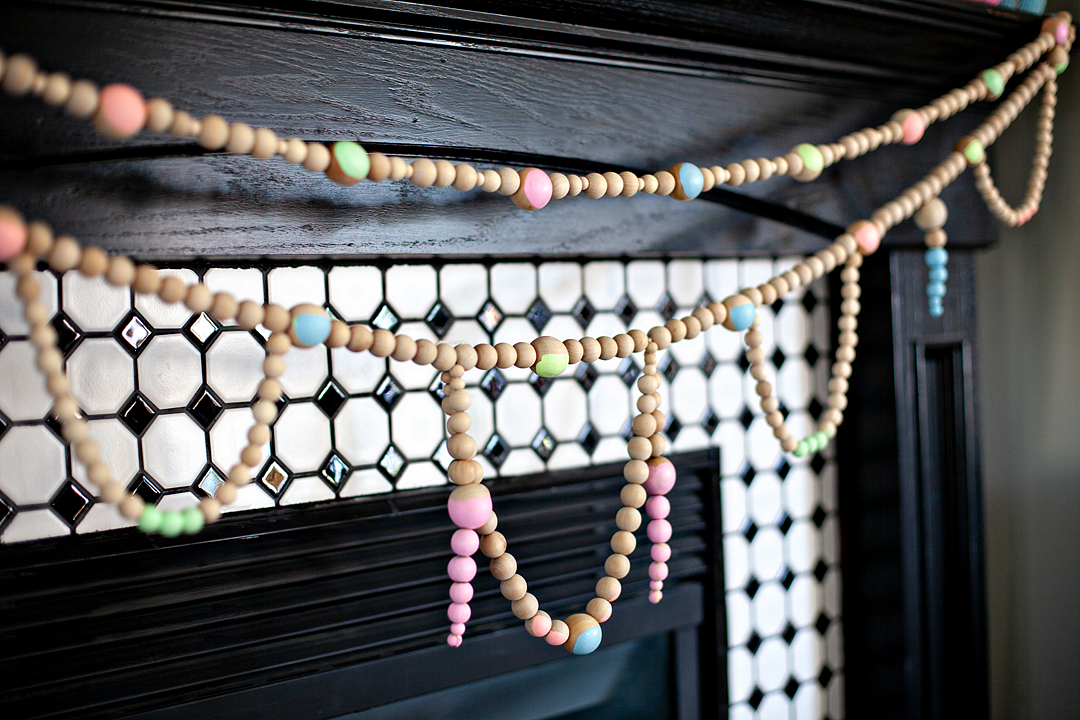
Once all of the paint was dry, it was time to dress the mantel.
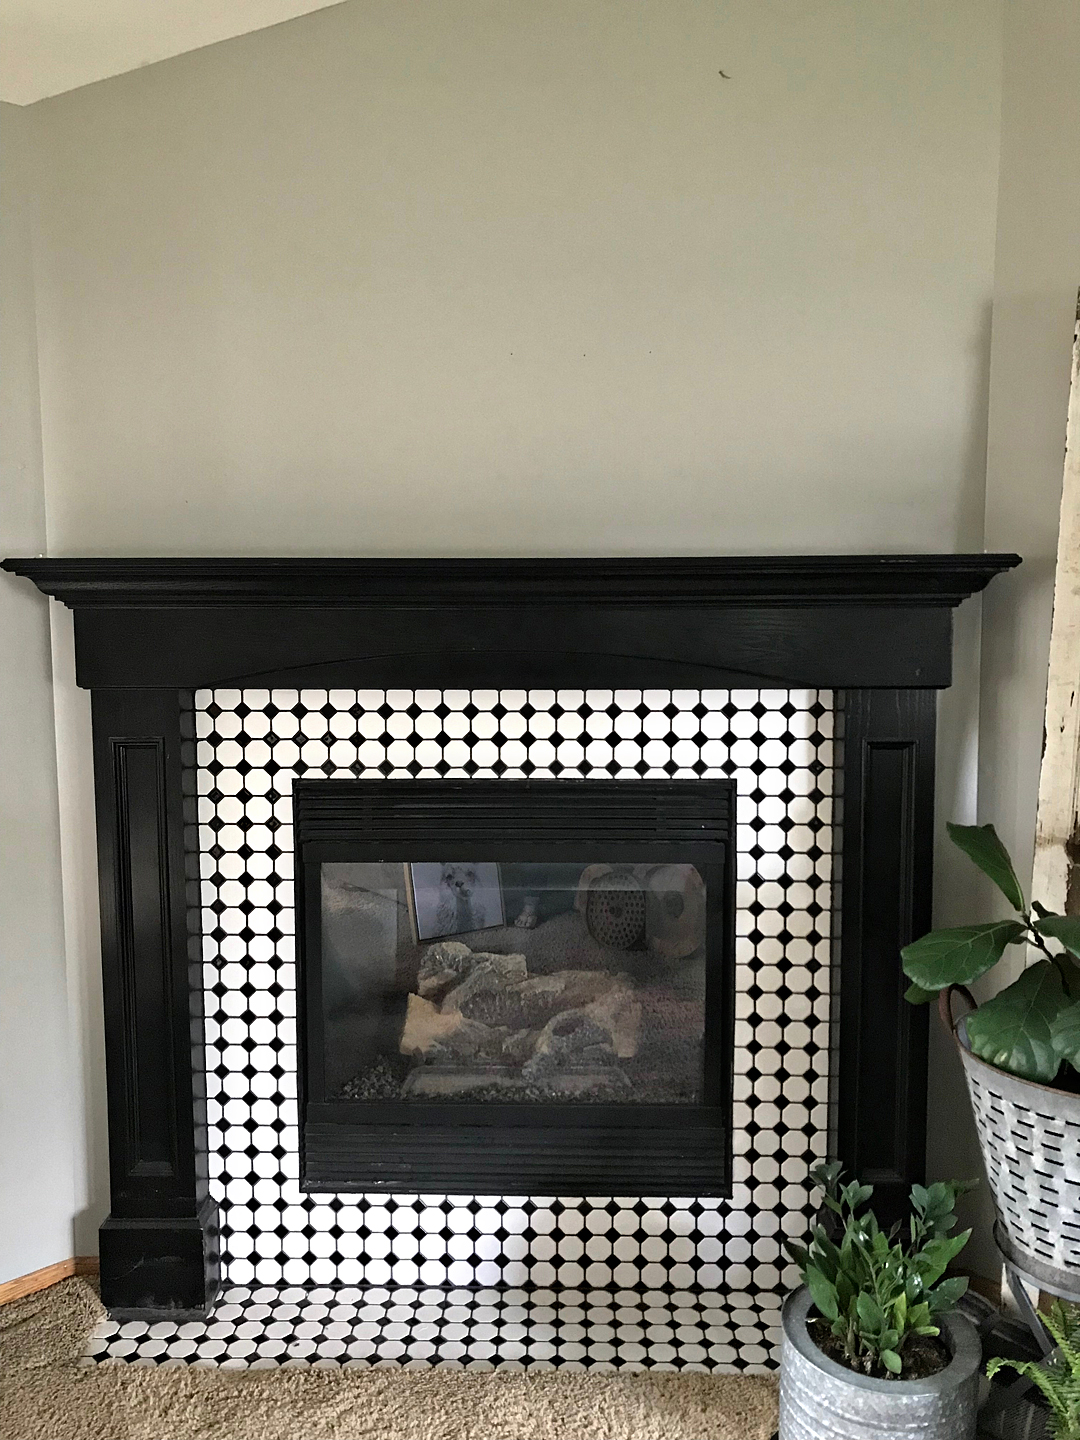
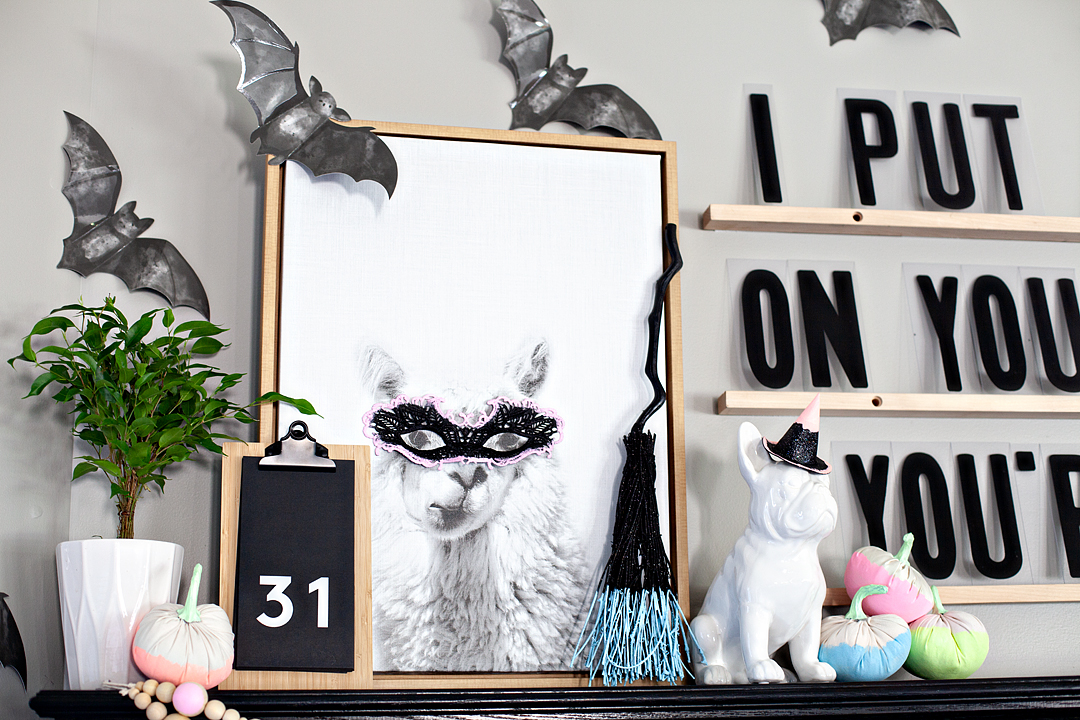
With the addition of the Ledges & Letters and the bats the mantel was complete!

When it comes to my typical style choices I typically stick with classic and timeless. However, I also have a real love of fun and whimsey that sneaks out every once in a while.  This year I've created a whimsical mantel using all kinds of fun finds from DecoArt, Target & Refined Design for my whimsical NEON Halloween mantel!

Now, every few days we can change-up the Halloween quote and tickle our funny bone all over again!

Disclaimer • This is a paid post with my friends at DecoArt. I am a member of the DecoArt Core Creator program and do receive payment and product to help facilitate these creative posts. However, keep in mind… I will NEVER share something I don’t truly love and use in my everyday life.
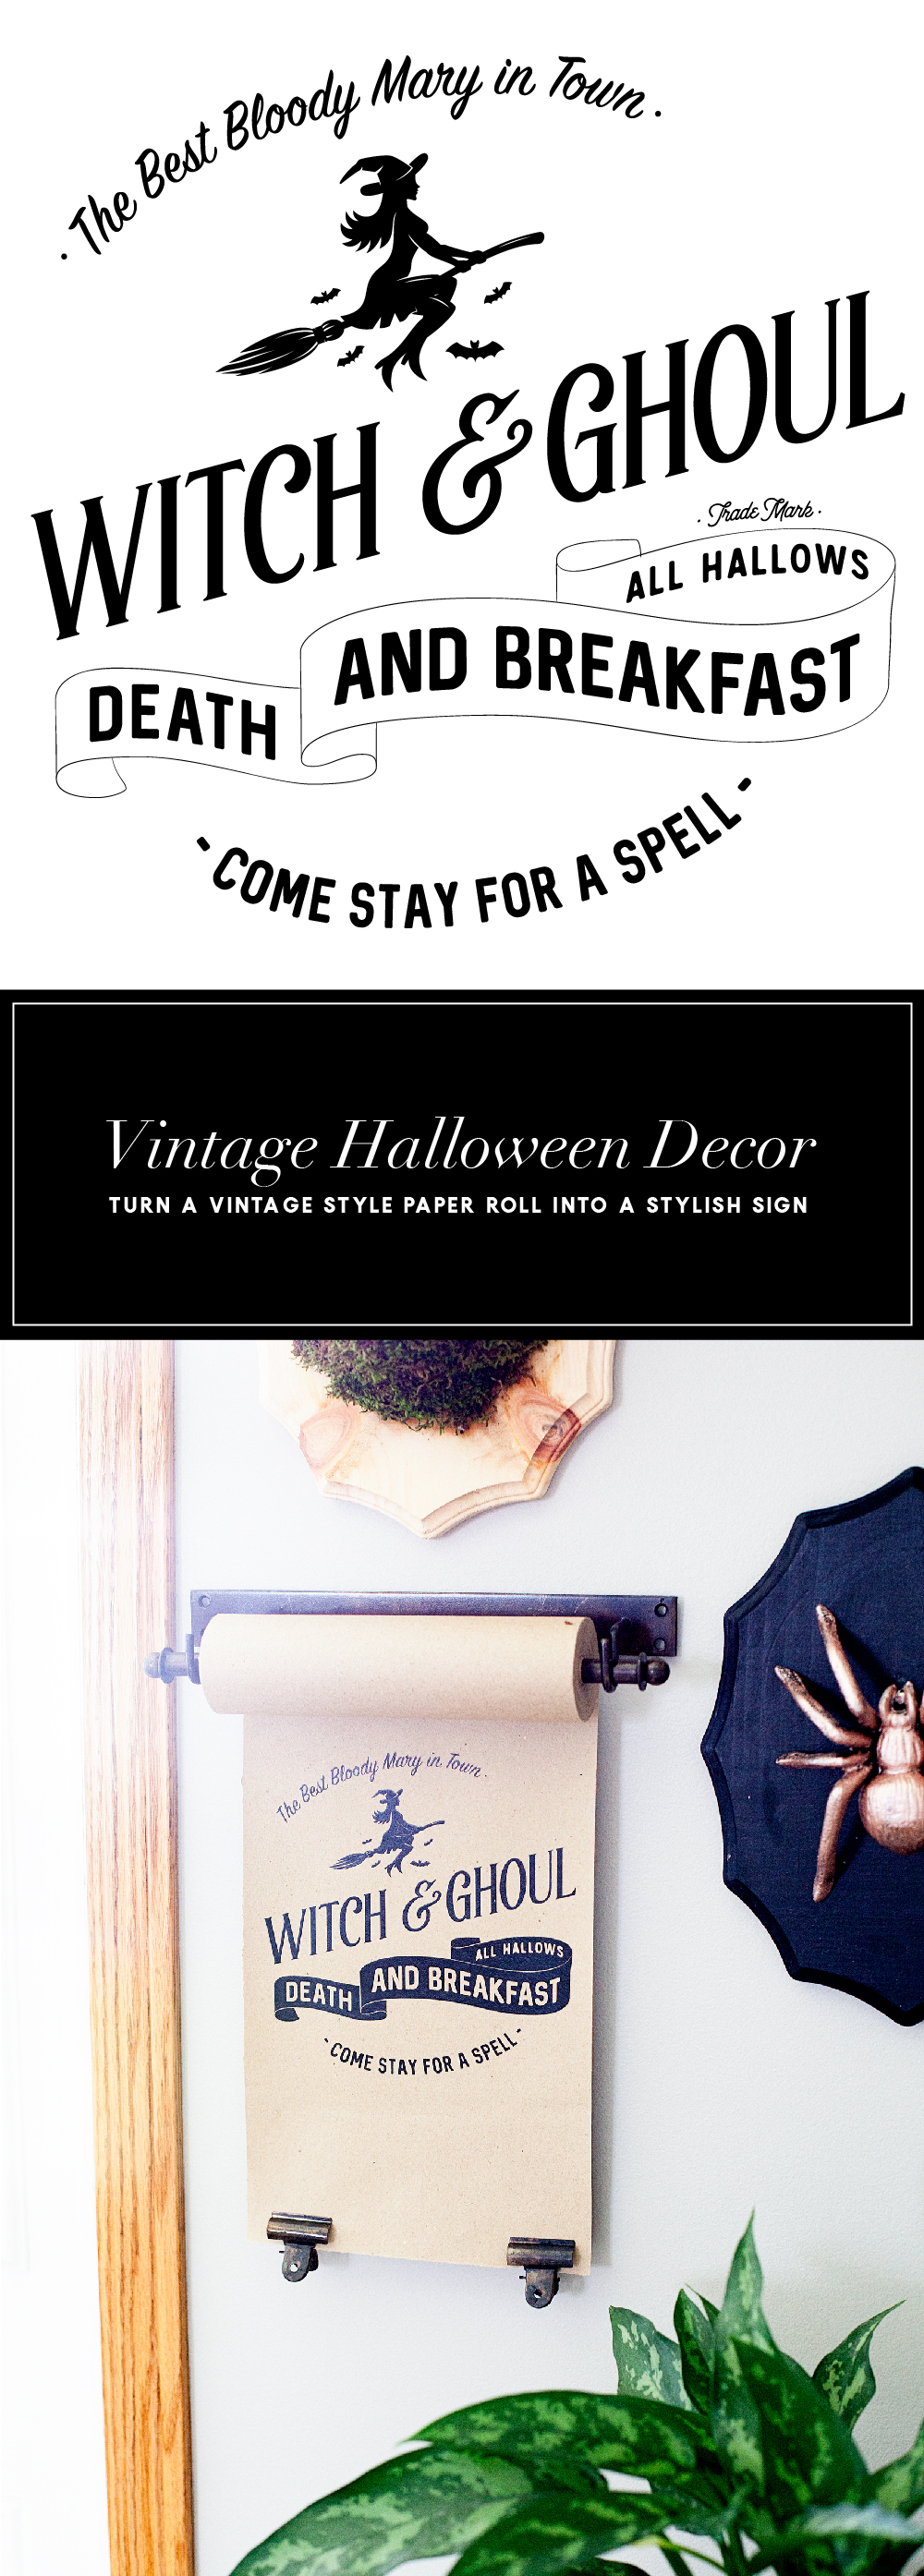
 Witch and Ghoul Death and Breakfast Paper Roll Sign with Cricut Easy Press

2 · Oct 16, 2017 · Leave a Comment

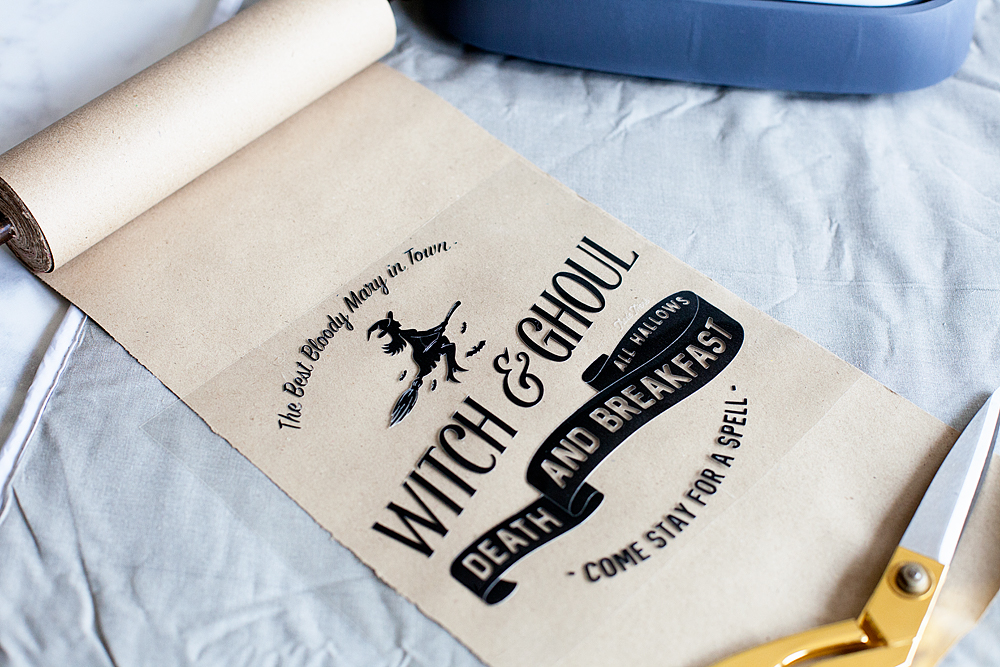
Today, I have a fun new idea. I’ve always loved the vintage paper rolls that little shops used to have. They would keep a roll of brown paper on it and use it to wrap parcels for their shoppers. Well, they are making a come back thanks to the vintage farmhouse lovers. I have found some vintage style paper rolls that aren’t too expensive and thought it would be fun to create new signs for the seasons with heat transfer vinyl and the NEW Cricut Easy Press.Travel back in time with this fun vintage paper roll sign created by WhipperBerry for Halloween. Witch and Ghoul Death and Breakfast sign available as an SVG file for cutting machines or a printable file for FREE!

• This post brought to you by Cricut •

Isn’t that fun?! It’s kind of a new concept when it comes to signage around the home.

Now, some people are naturally gifted and can create beautiful signs with just a sharpie and a little imagination. I however, can not… I wish I could! I was not gifted with that talent. The problem is that I love the look and I don’t have an arm and a leg to pay and actual artist to create my design each time I want to change it out. Then, I thought I could use vinyl and cut a design with the Cricut cutting machine. The problem with that is, the transfer tape would be a nightmare on the paper. It would just turn into a hot mess. Plus… I’m not a fan of weeding intricate designs out of vinyl. Although, I don’t mind weeding the Cricut Iron-on Lite! It’s so much easier to weed. I set out to see if it was possible to use Cricut Iron-On Lite on paper and sure enough, it works with the Easy Press!! I LOVE this new tool from Cricut!

All you need to do is to download my SVG file for the Witch and Ghoul sign OR you can download the free printable and print it out to display. You could even frame it if you’d like. I’ve sized it at 8×10 for your use.

Paper Roll Sign Supplies

  • vintage style paper roll like the one here
  • Cricut Iron-On Lite – Black
  • Cricut Maker or Explore series machine
  • Cricut Easy Press
  • light cotton towel
  • heat resistant surface to work on
  • scissors

Paper Roll Sign Instructions

First, you’ll need to upload the SVG file into Cricut Design Space and size your design for the size of your paper roll. My roll is 8 inches but, you can get even larger paper rolls. You’ll be able to size the design for your paper roll size.

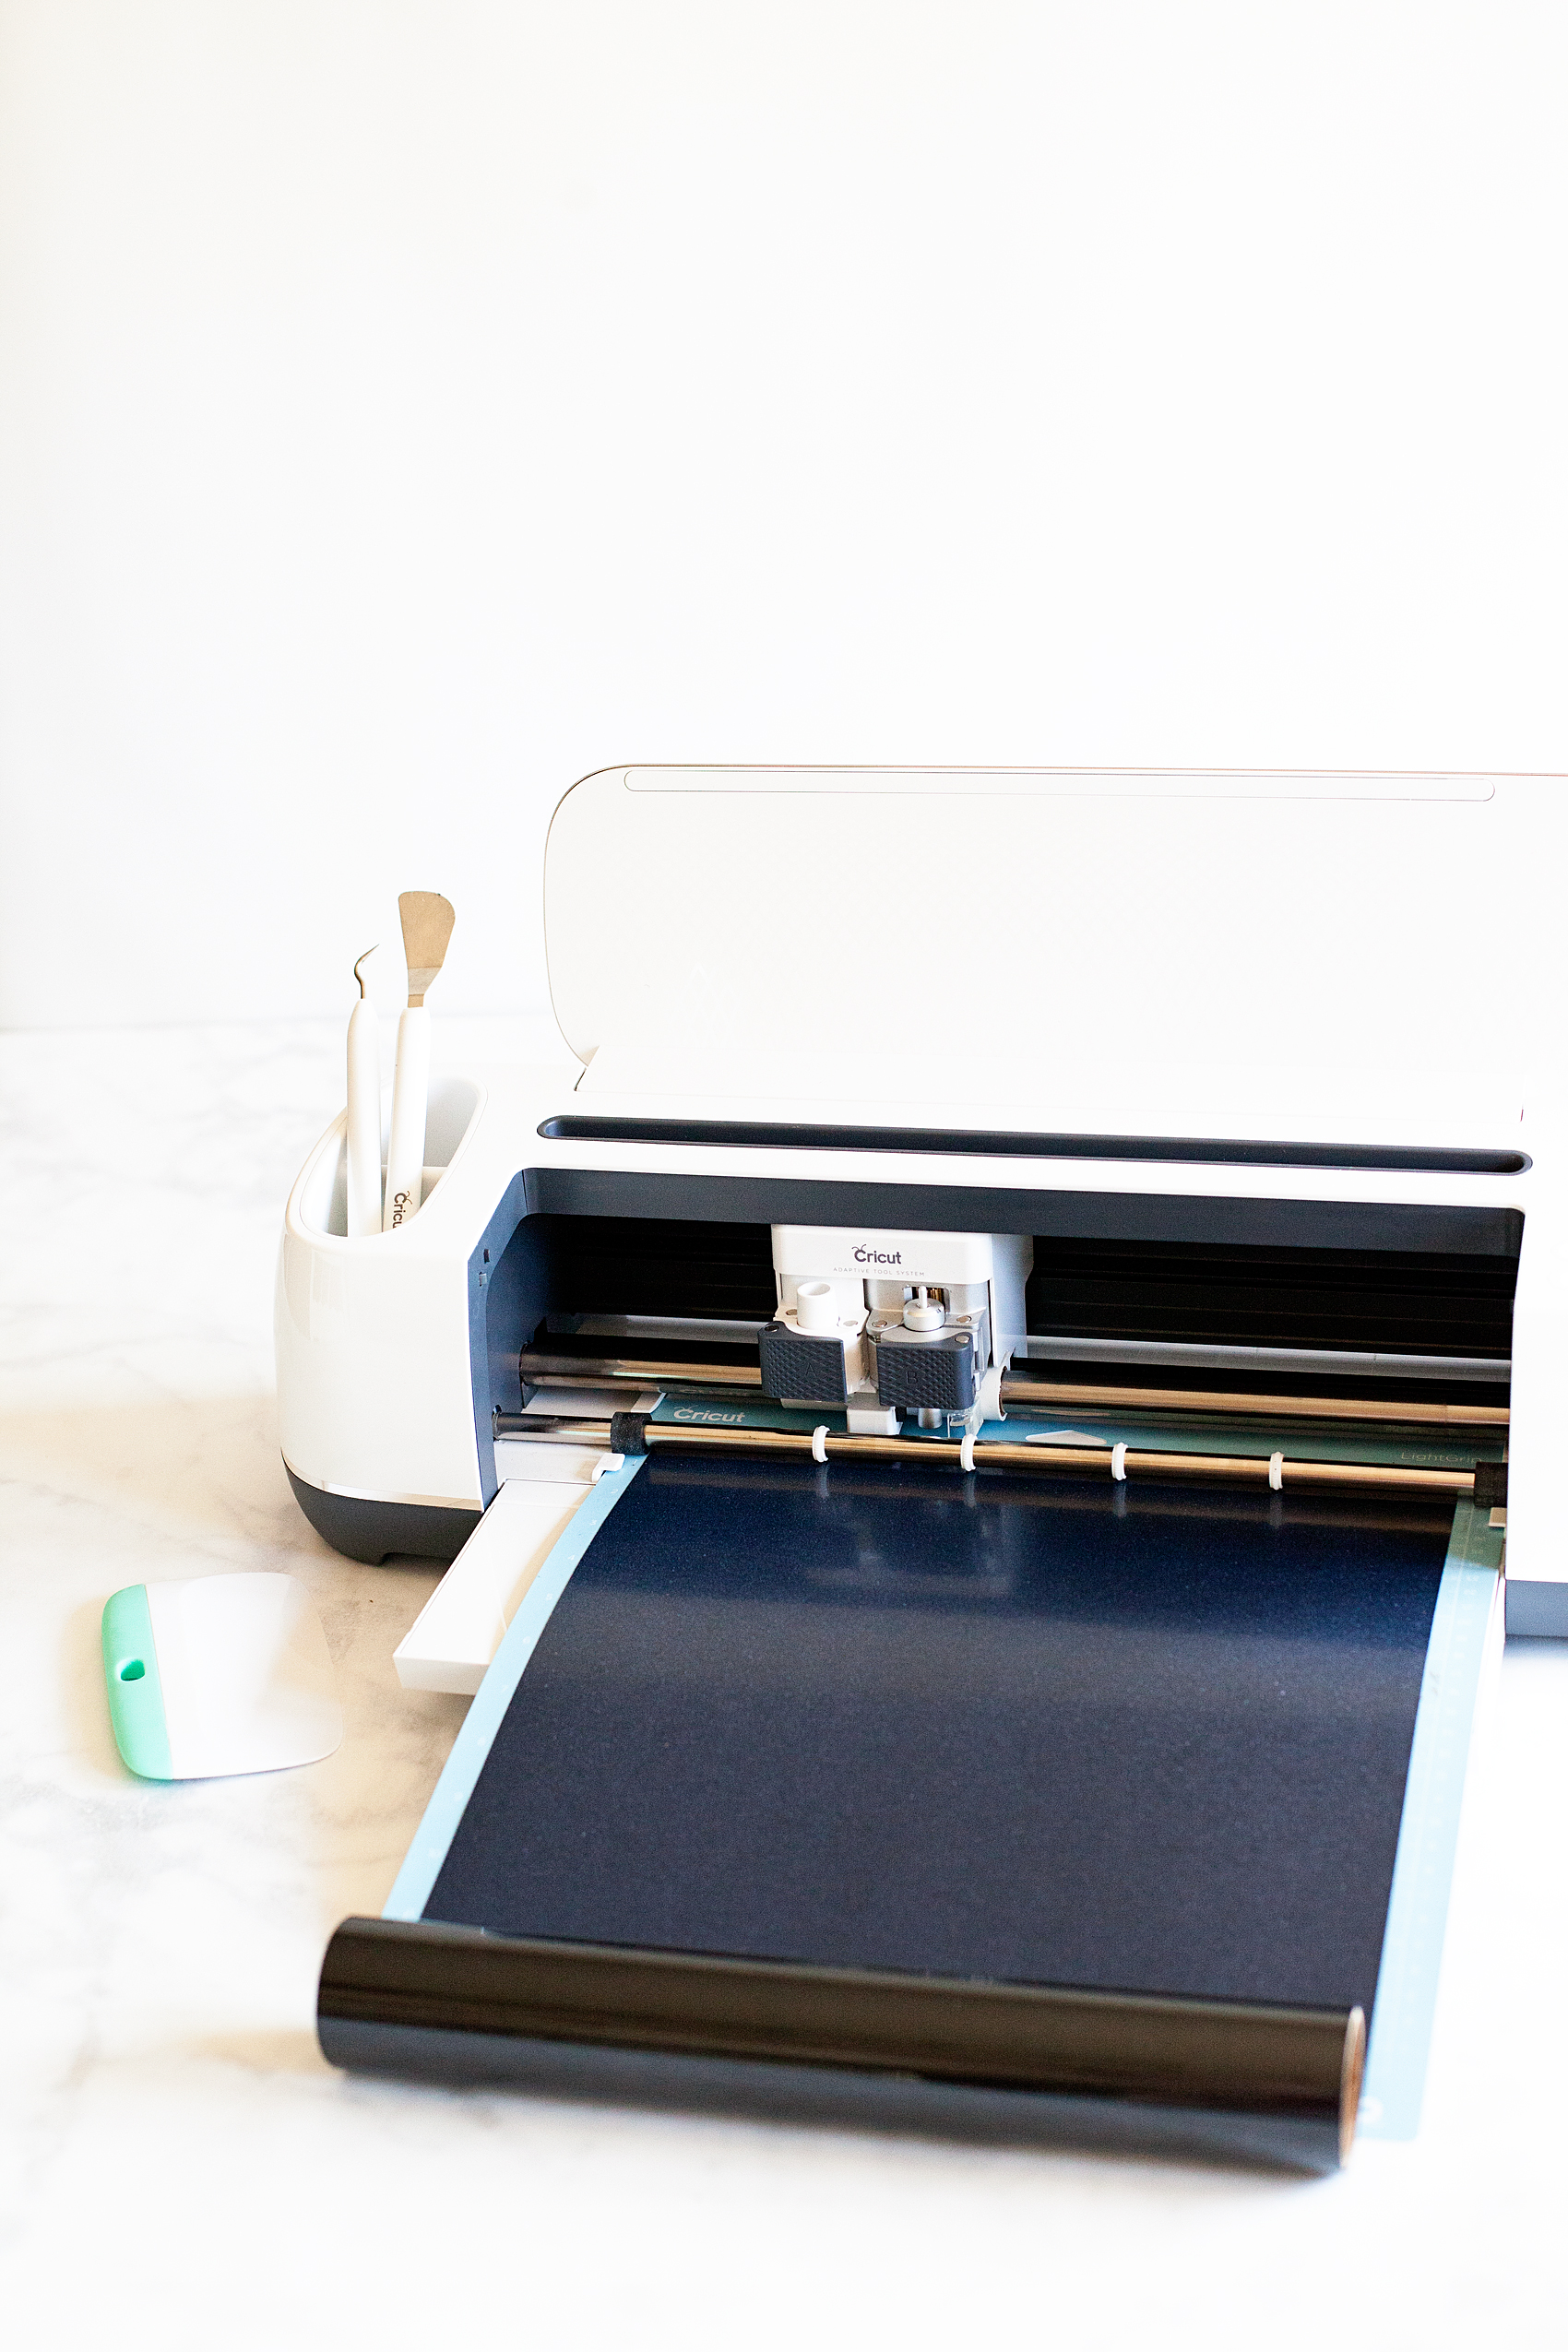
Then you’ll need to load your heat transfer vinyl onto your cutting mat and load into your machine and cut out the design.

Learning how to cut iron on vinyl with the Cricut Maker via WhipperBerry


Quick tip… I leave the vinyl on the roll while I am cutting it. It doesn’t interfere with the cutting process and it cuts down on waste.

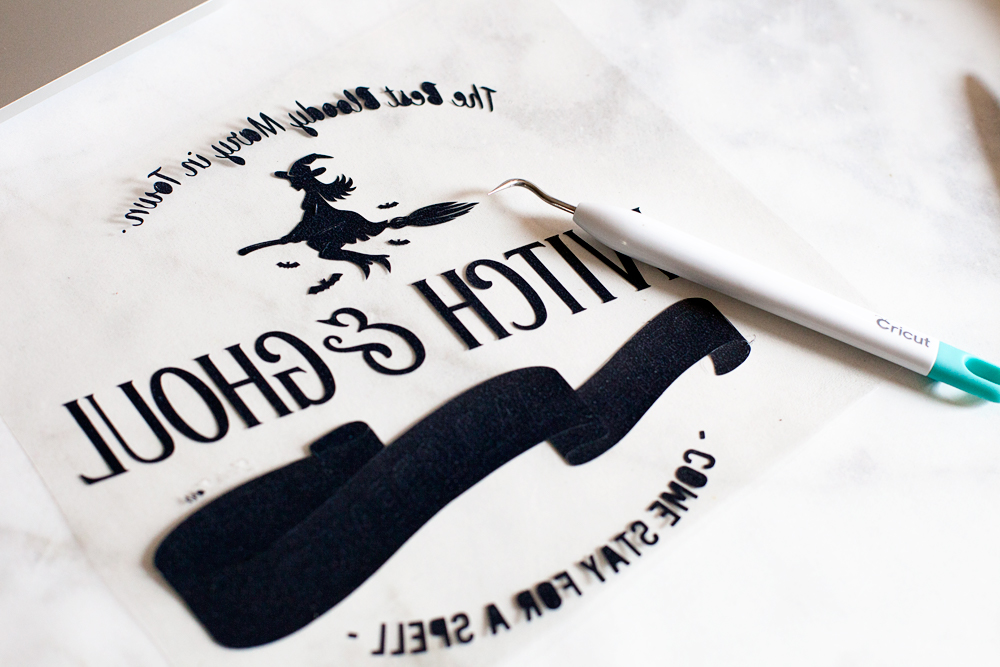
Then you’ll need to weed your design to remove the excess vinyl.

Travel back in time with this fun vintage paper roll sign created by WhipperBerry for Halloween. Witch and Ghoul Death and Breakfast sign available as an SVG file for cutting machines or a printable file for FREE!

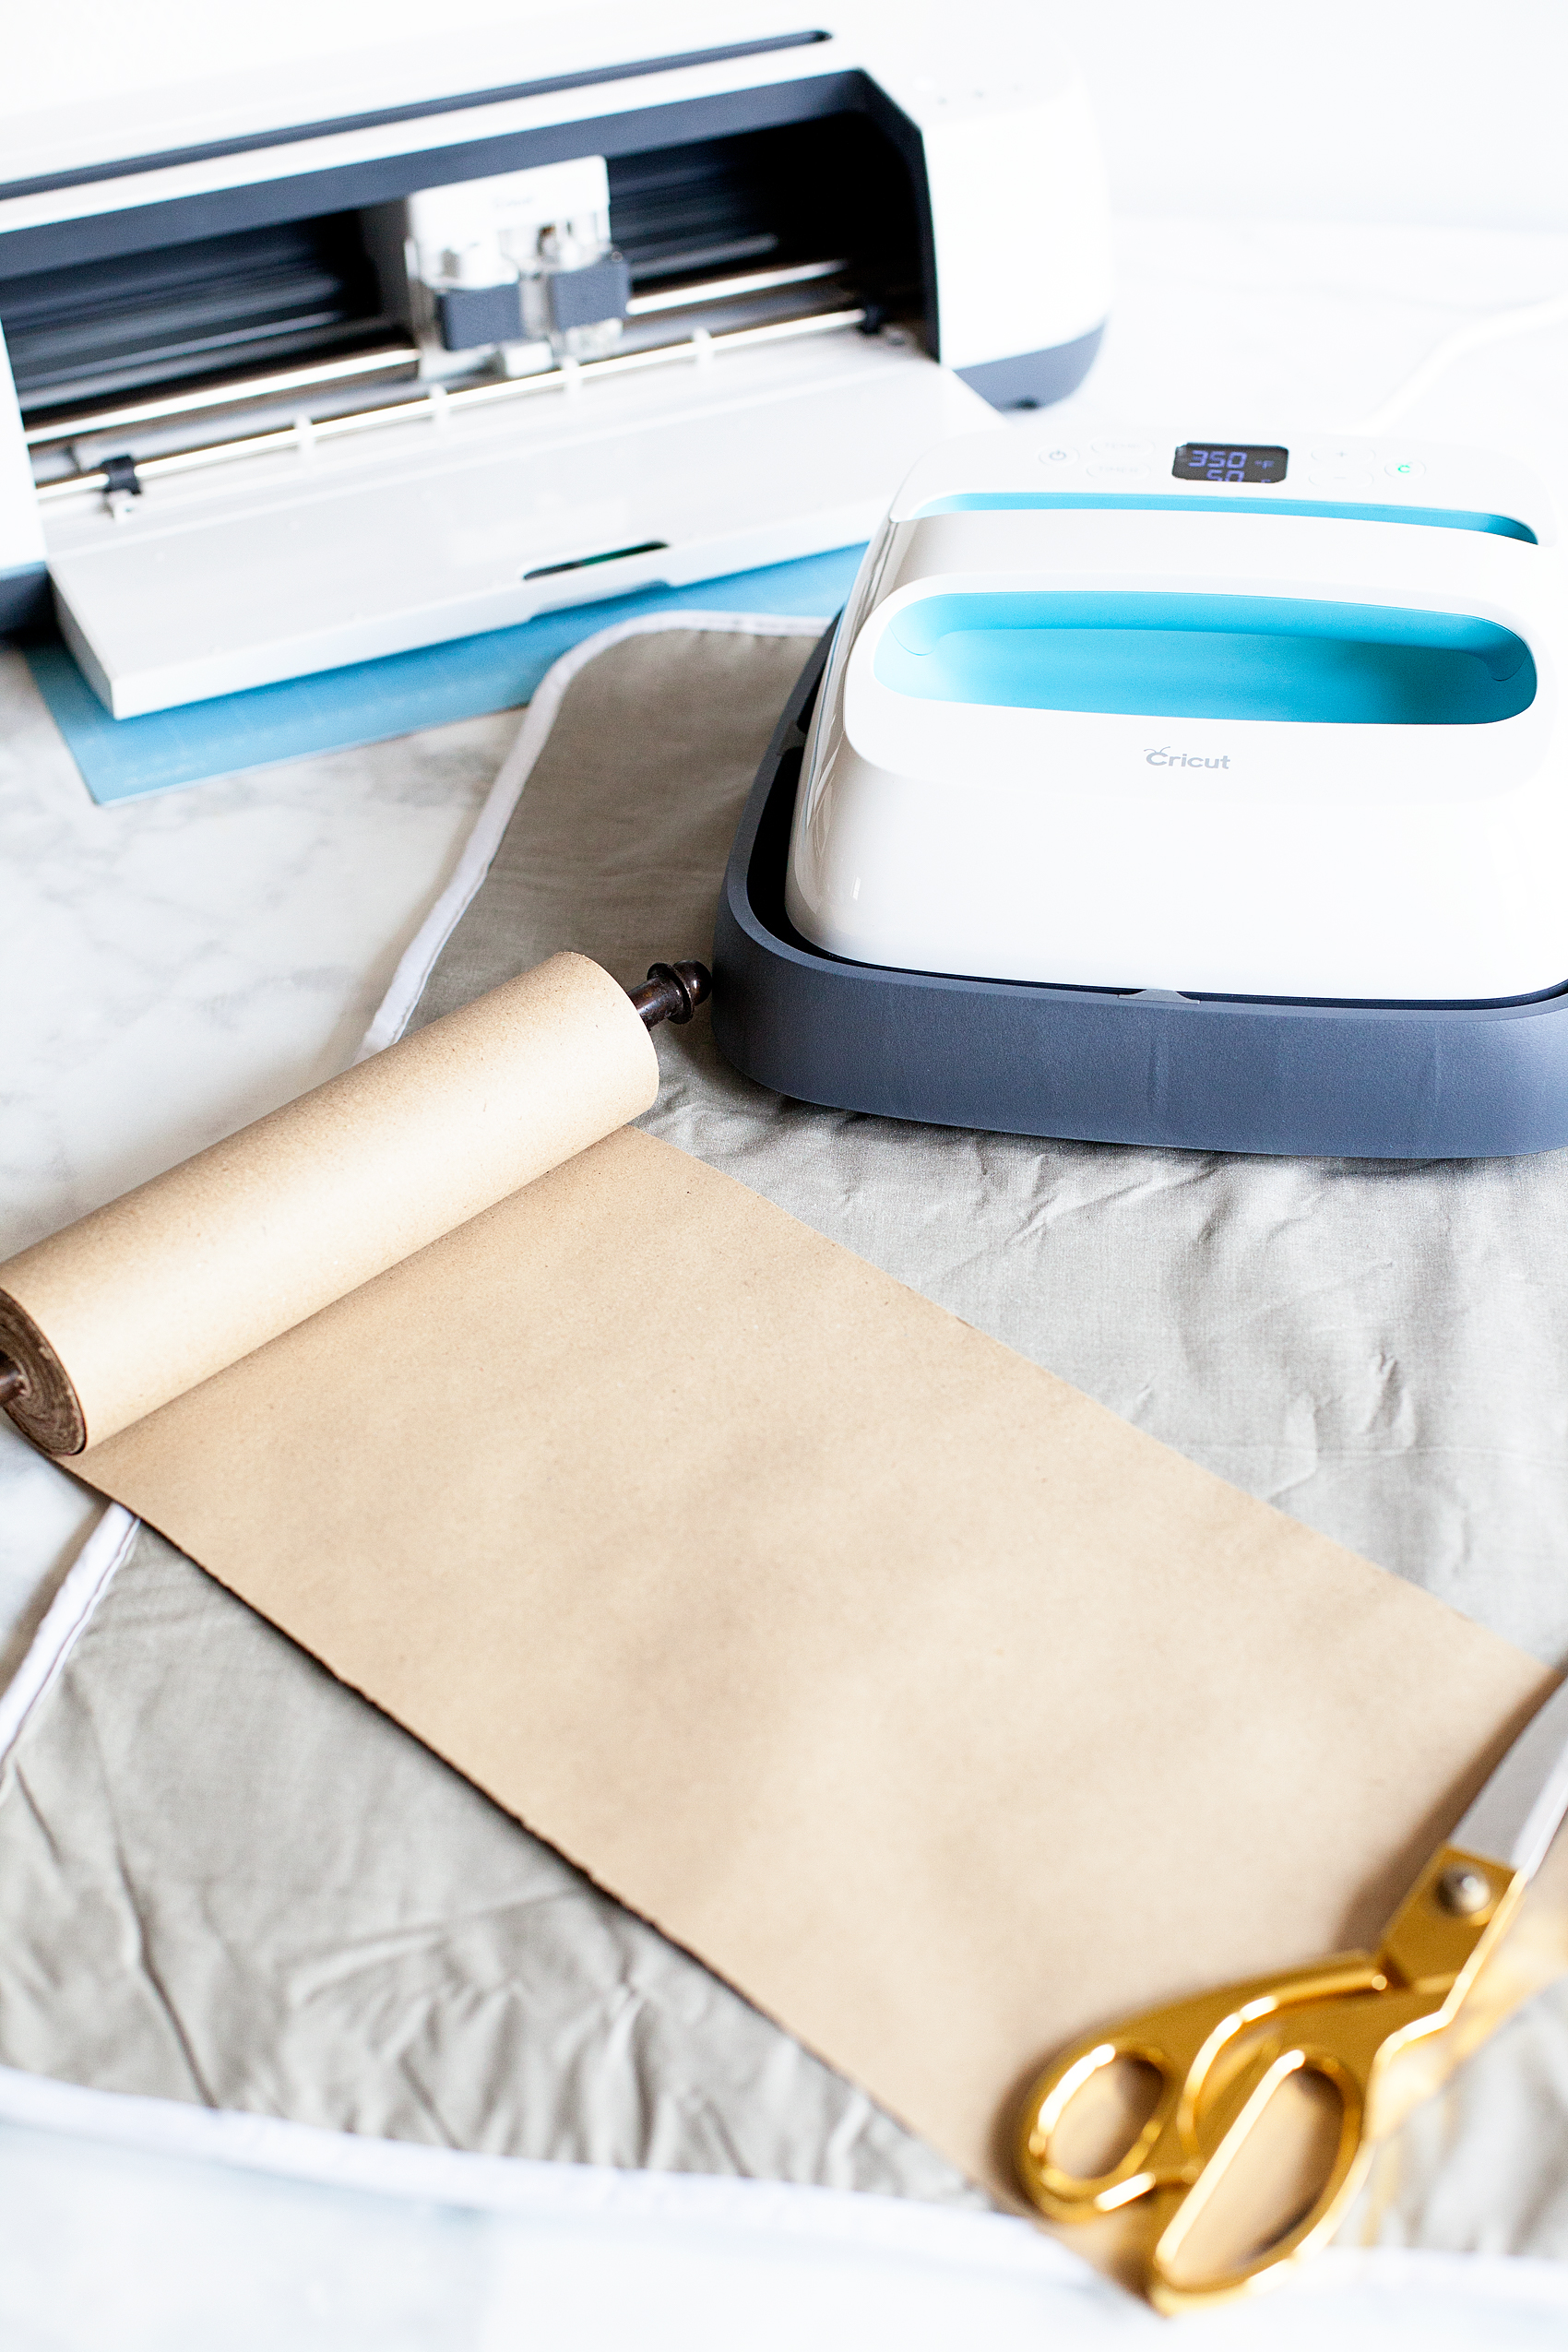
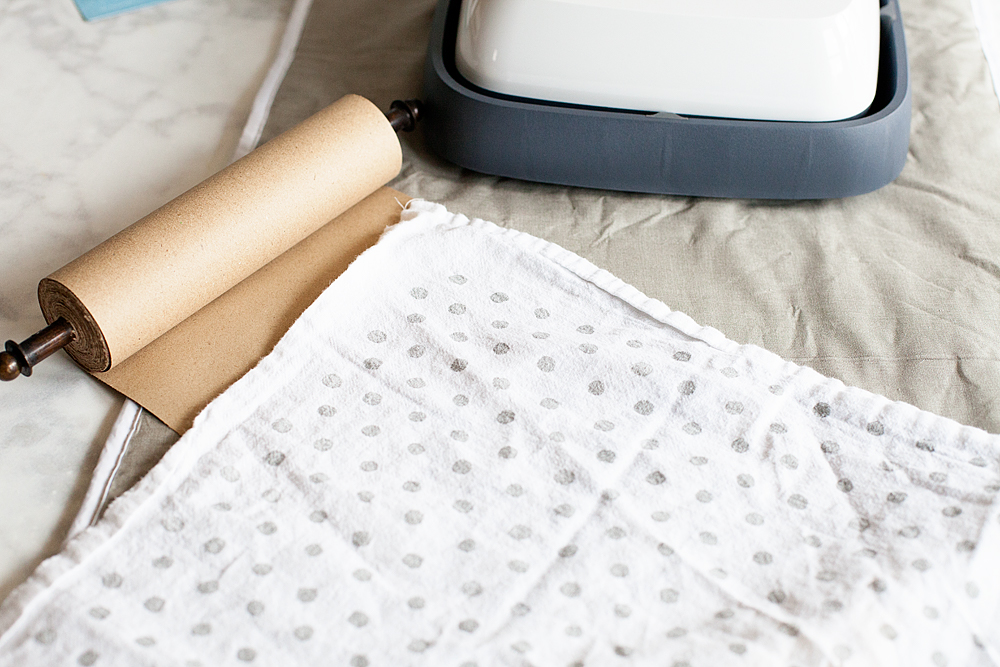
While you are weeding your vinyl, you’ll want to pre-heat your Cricut Easy Press. Once you finish with the weeding process, you should unroll some of your paper  and place something at the bottom of the roll to keep it from rolling back-up.

Travel back in time with this fun vintage paper roll sign created by WhipperBerry for Halloween. Witch and Ghoul Death and Breakfast sign available as an SVG file for cutting machines or a printable file for FREE!

I like to pre-heat my surface before I lay down my design. The transfer seems to work best that way. Then I center the design onto the paper like so…

Travel back in time with this fun vintage paper roll sign created by WhipperBerry for Halloween. Witch and Ghoul Death and Breakfast sign available as an SVG file for cutting machines or a printable file for FREE!

I then cover it with the cotton tea towel to protect the paper.

Travel back in time with this fun vintage paper roll sign created by WhipperBerry for Halloween. Witch and Ghoul Death and Breakfast sign available as an SVG file for cutting machines or a printable file for FREE!

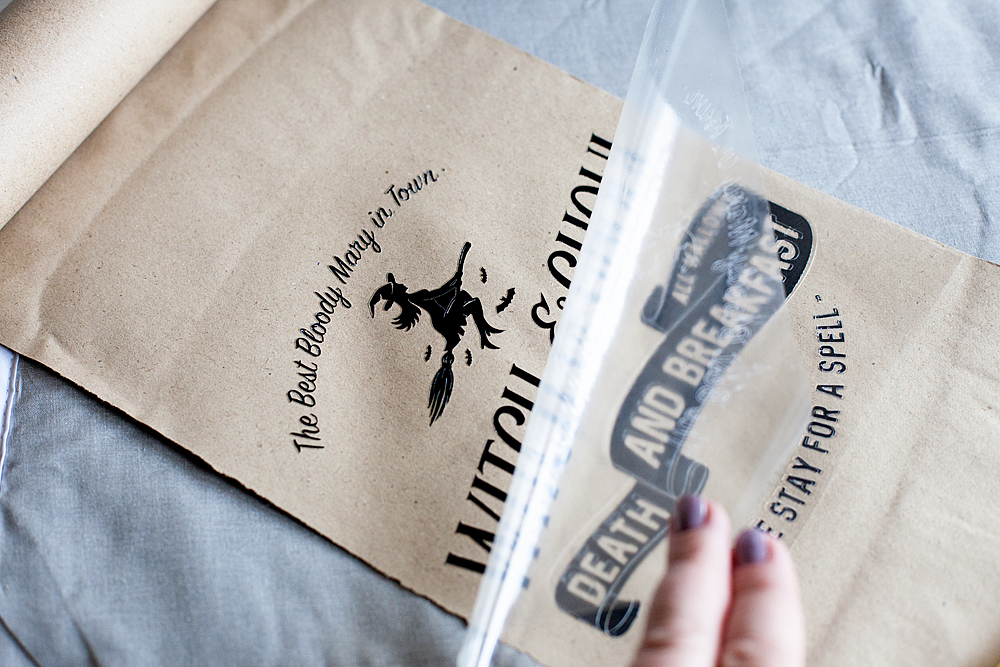
Then I place the Easy Press or the iron right on top and let it works it’s magic. I have found that 350˚ for about 50 seconds typically does the trick. Then, I let it cool for a minute or two and then remove the plastic protective covering.

Travel back in time with this fun vintage paper roll sign created by WhipperBerry for Halloween. Witch and Ghoul Death and Breakfast sign available as an SVG file for cutting machines or a printable file for FREE!

Replace the towel and do one more shot with the Easy Press. Voilá.. You’re finished!

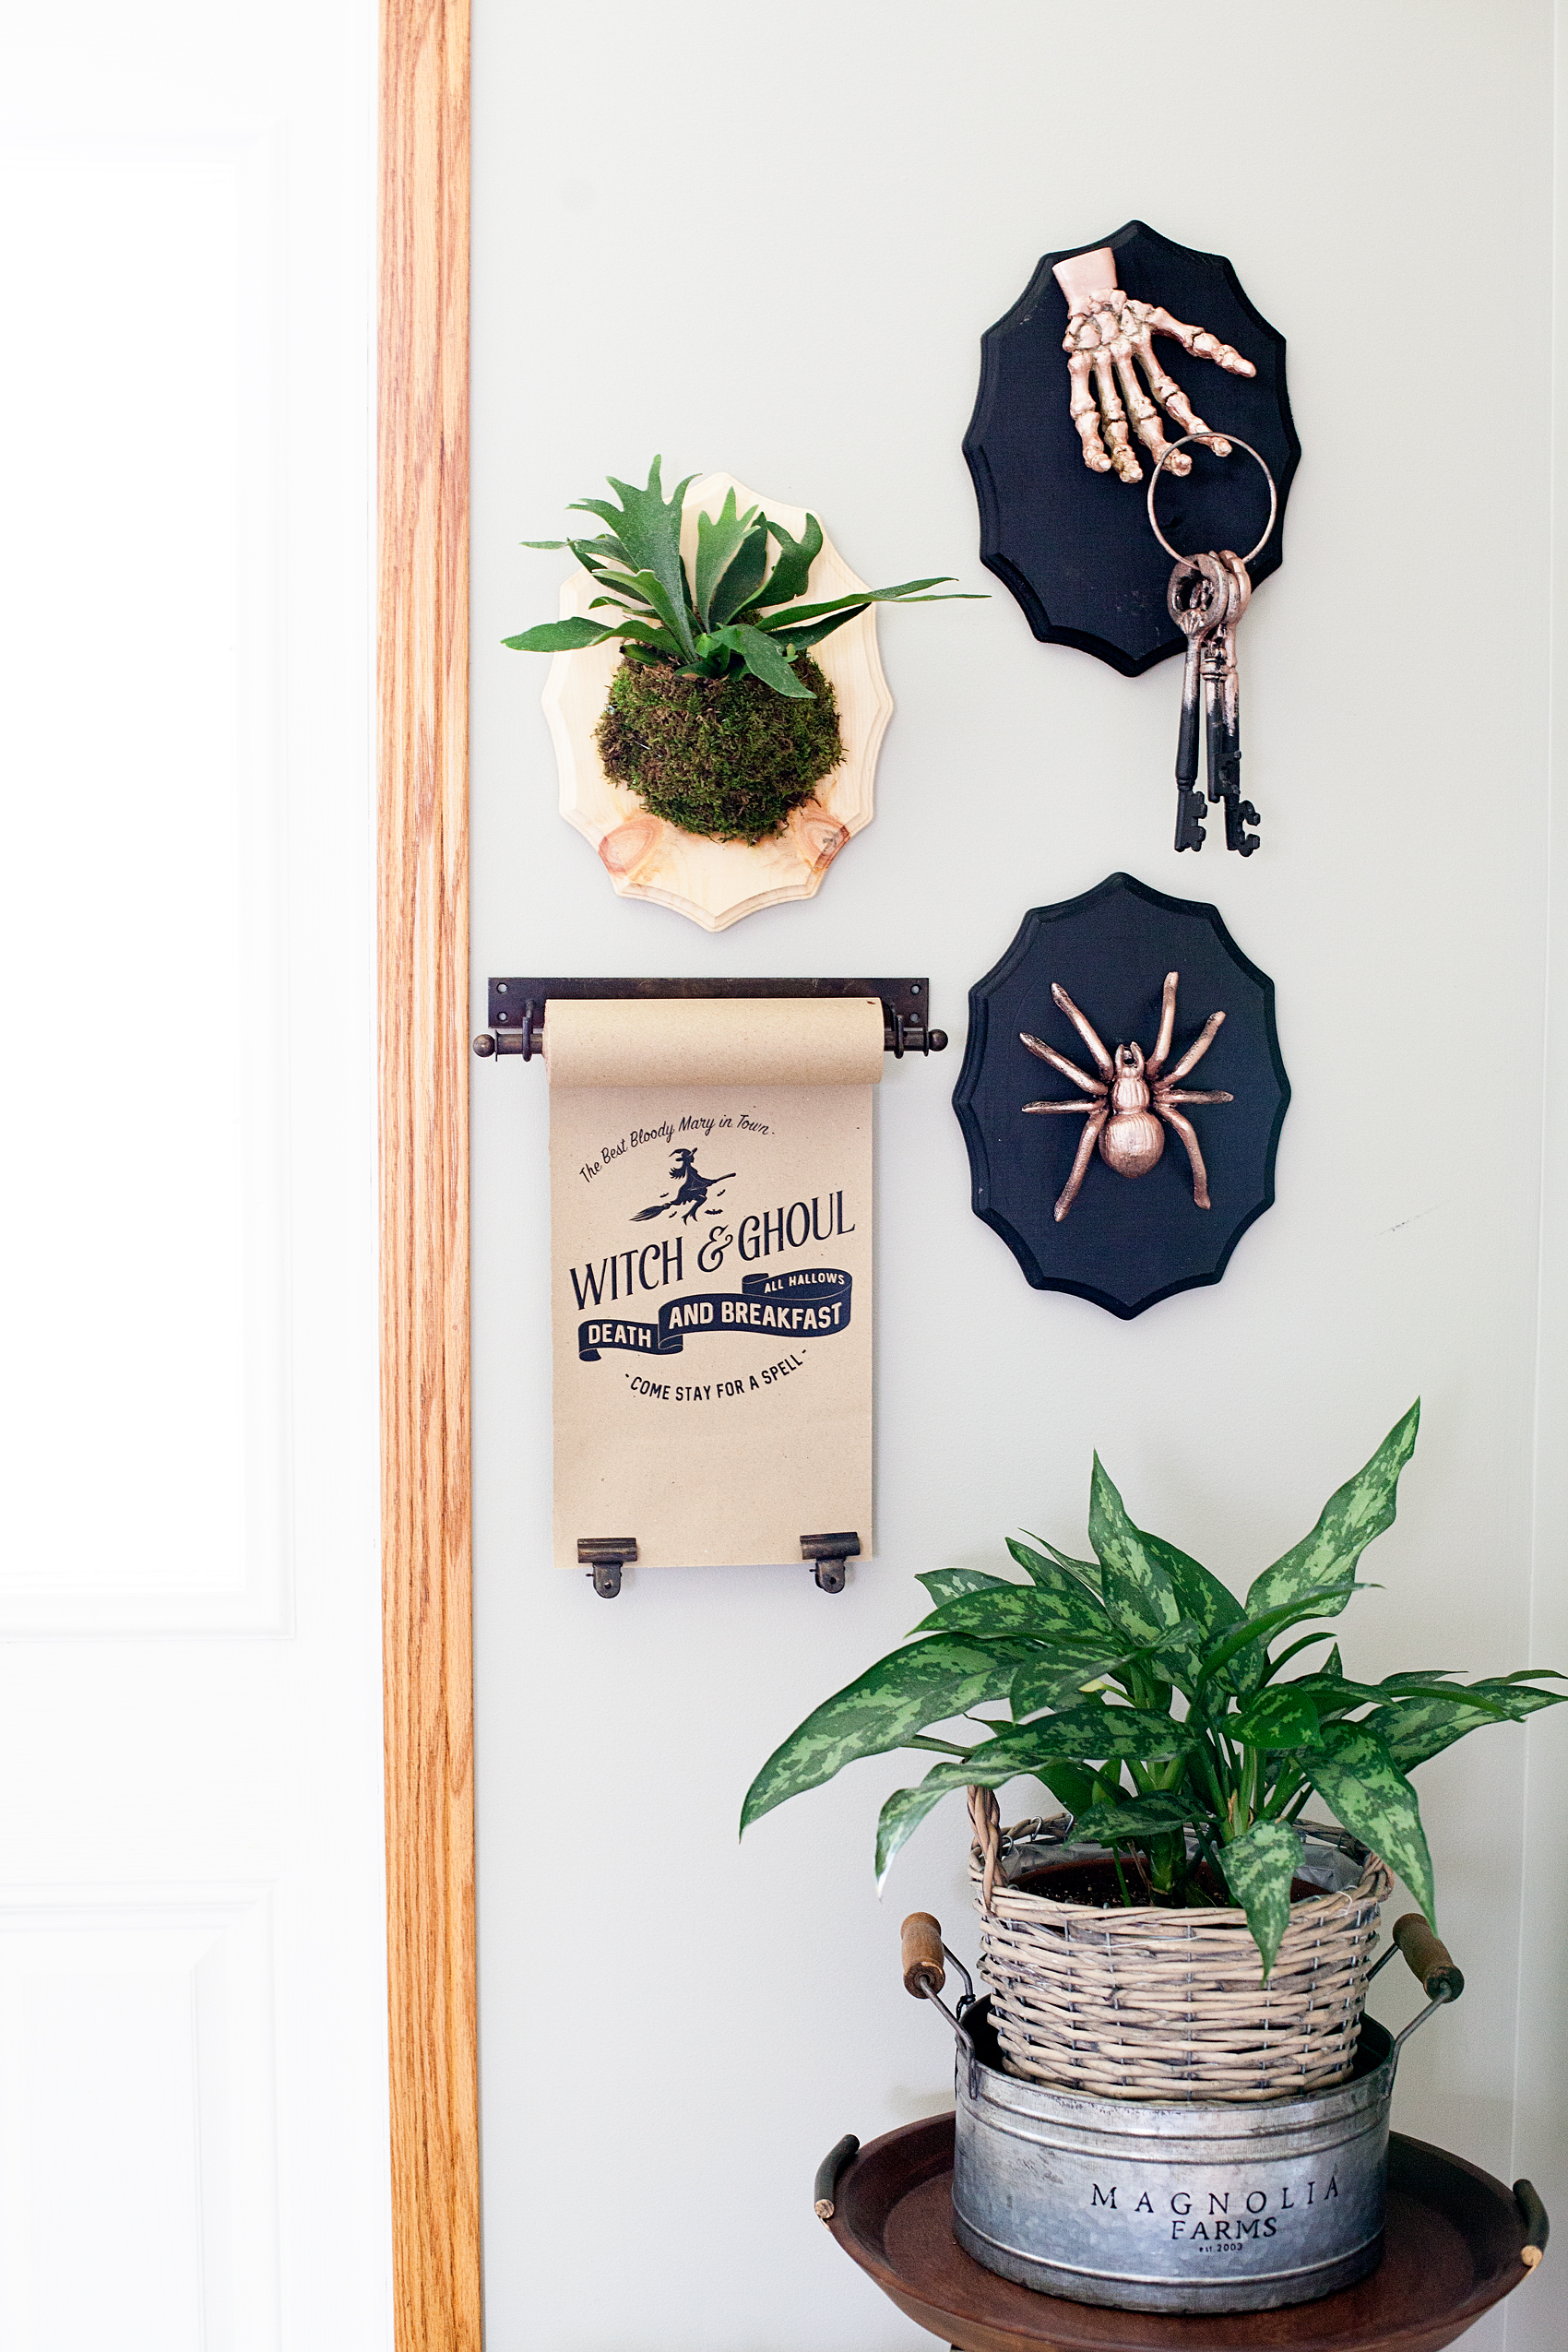
Travel back in time with this fun vintage paper roll sign created by WhipperBerry for Halloween. Witch and Ghoul Death and Breakfast sign available as an SVG file for cutting machines or a printable file for FREE!

Doesn’t it look kinda of cool? You can check out my post on how to create that Halloween Taxidermy  to complete the entire look. It’s super easy too.

I LOVE, LOVE, LOVE the new Easy Press! I’ve used it on all kinds of surfaces now. Paper, canvas, fabric and my next project will be on ribbon. I can’t wait to show you how it turns out. Make sure you add the Cricut Easy Press to your Christmas list AND make sure you make it on the Nice List so that you will for sure get one. It’s one of those game changing tools that you are going to LOVE.

This is a sponsored conversation written by me on behalf of Cricut. The opinions and text are all mine.

Mummy Hot Dogs • How To Video

13 · Sep 26, 2017 · Leave a Comment

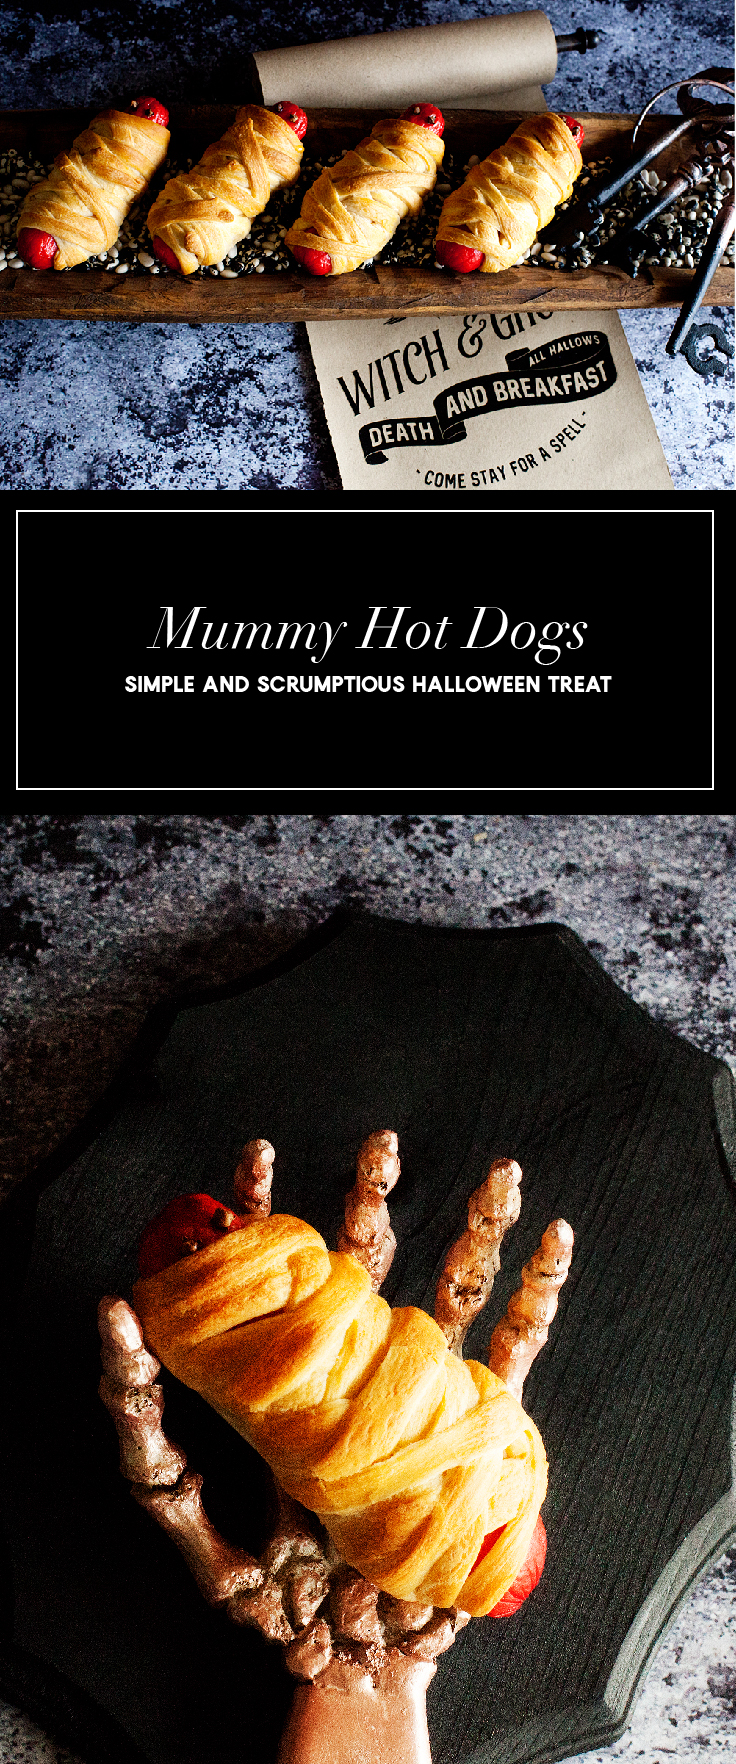
There’s nothing better than a simple, scrumptious and slightly spooky treat for Halloween! Come learn how easy it is to make these frightfully delicious Mummy Hot Dogs for your little {and BIG} Trick-or-Treaters.

• Disclaimer – This post brought to you by Pillsbury™ & Walmart. All thoughts, ideas & opinions are my own •

There’s nothing better than a simple, scrumptious and slightly spooky treat for Halloween! Come learn how easy it is to make these frightfully delicious Mummy Hot Dogs for your little {and BIG} Trick-or-Treaters • WhipperBerry

You guys… Halloween is almost upon us and it’s time to start preparing for the fun night. My little guy is super excited and the funny thing is my older kiddos are just as excited. Part of the fun for us adults is in creating the magic for our kiddos. It’s so fun to create creepy treats that have that weird quality of visually grossing you out, and then actually tasty quite good. Have you seen the brain cake that’s going around these day… eeeew! I’m not sure I could do that one.

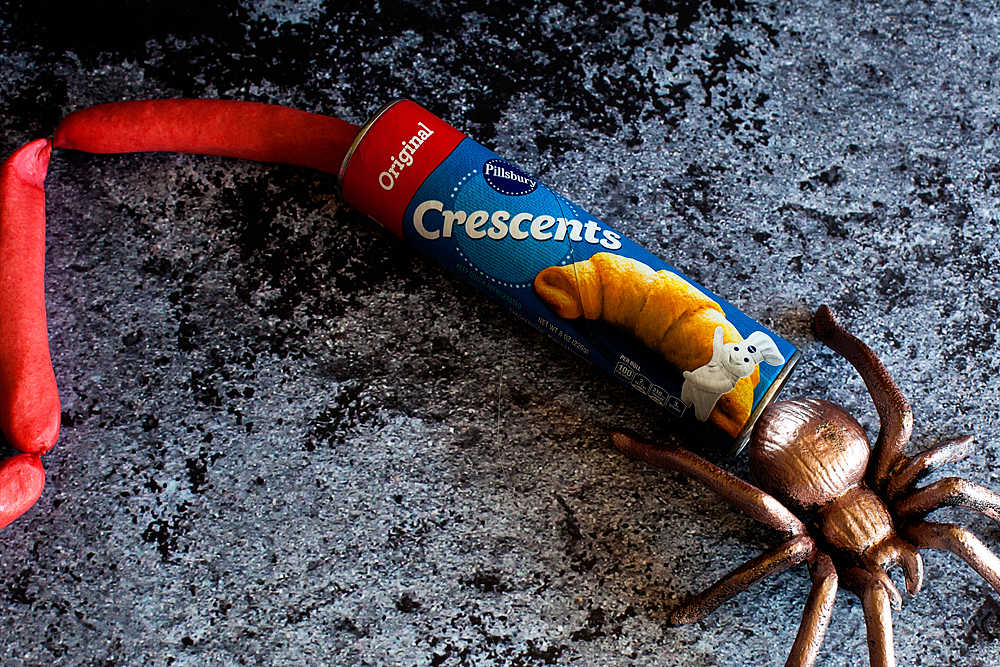
Pillsbury™ has a classic addition to the Halloween meal menu, the Mummy Hot Dog. This one is almost a little too cute to be creepy… My kiddos love them! We headed to Walmart today and grabbed some Mummy Hot Dog supplies. You’ll need…

Mummy Hot Dog Ingredients

There’s nothing better than a simple, scrumptious and slightly spooky treat for Halloween! Come learn how easy it is to make these frightfully delicious Mummy Hot Dogs for your little {and BIG} Trick-or-Treaters • WhipperBerry

•Hot dogs

•Pillsbury™ Crescent Rolls

•Sliced cheese

•Whole cloves

They are super easy to make. Here is a little video that I put together to show how fun they can be…

How cool is that? It’s one of those fun meals that the whole family can make together. You can change up the hot dog option for Dad and use a cooked brat instead or, how good would they be with pepper jack cheese… Really, the sky’s the limit. You can have all kinds of fun with this meal.

Creepy Halloween Taxidermy Plaques

9 · Sep 1, 2017 · Leave a Comment

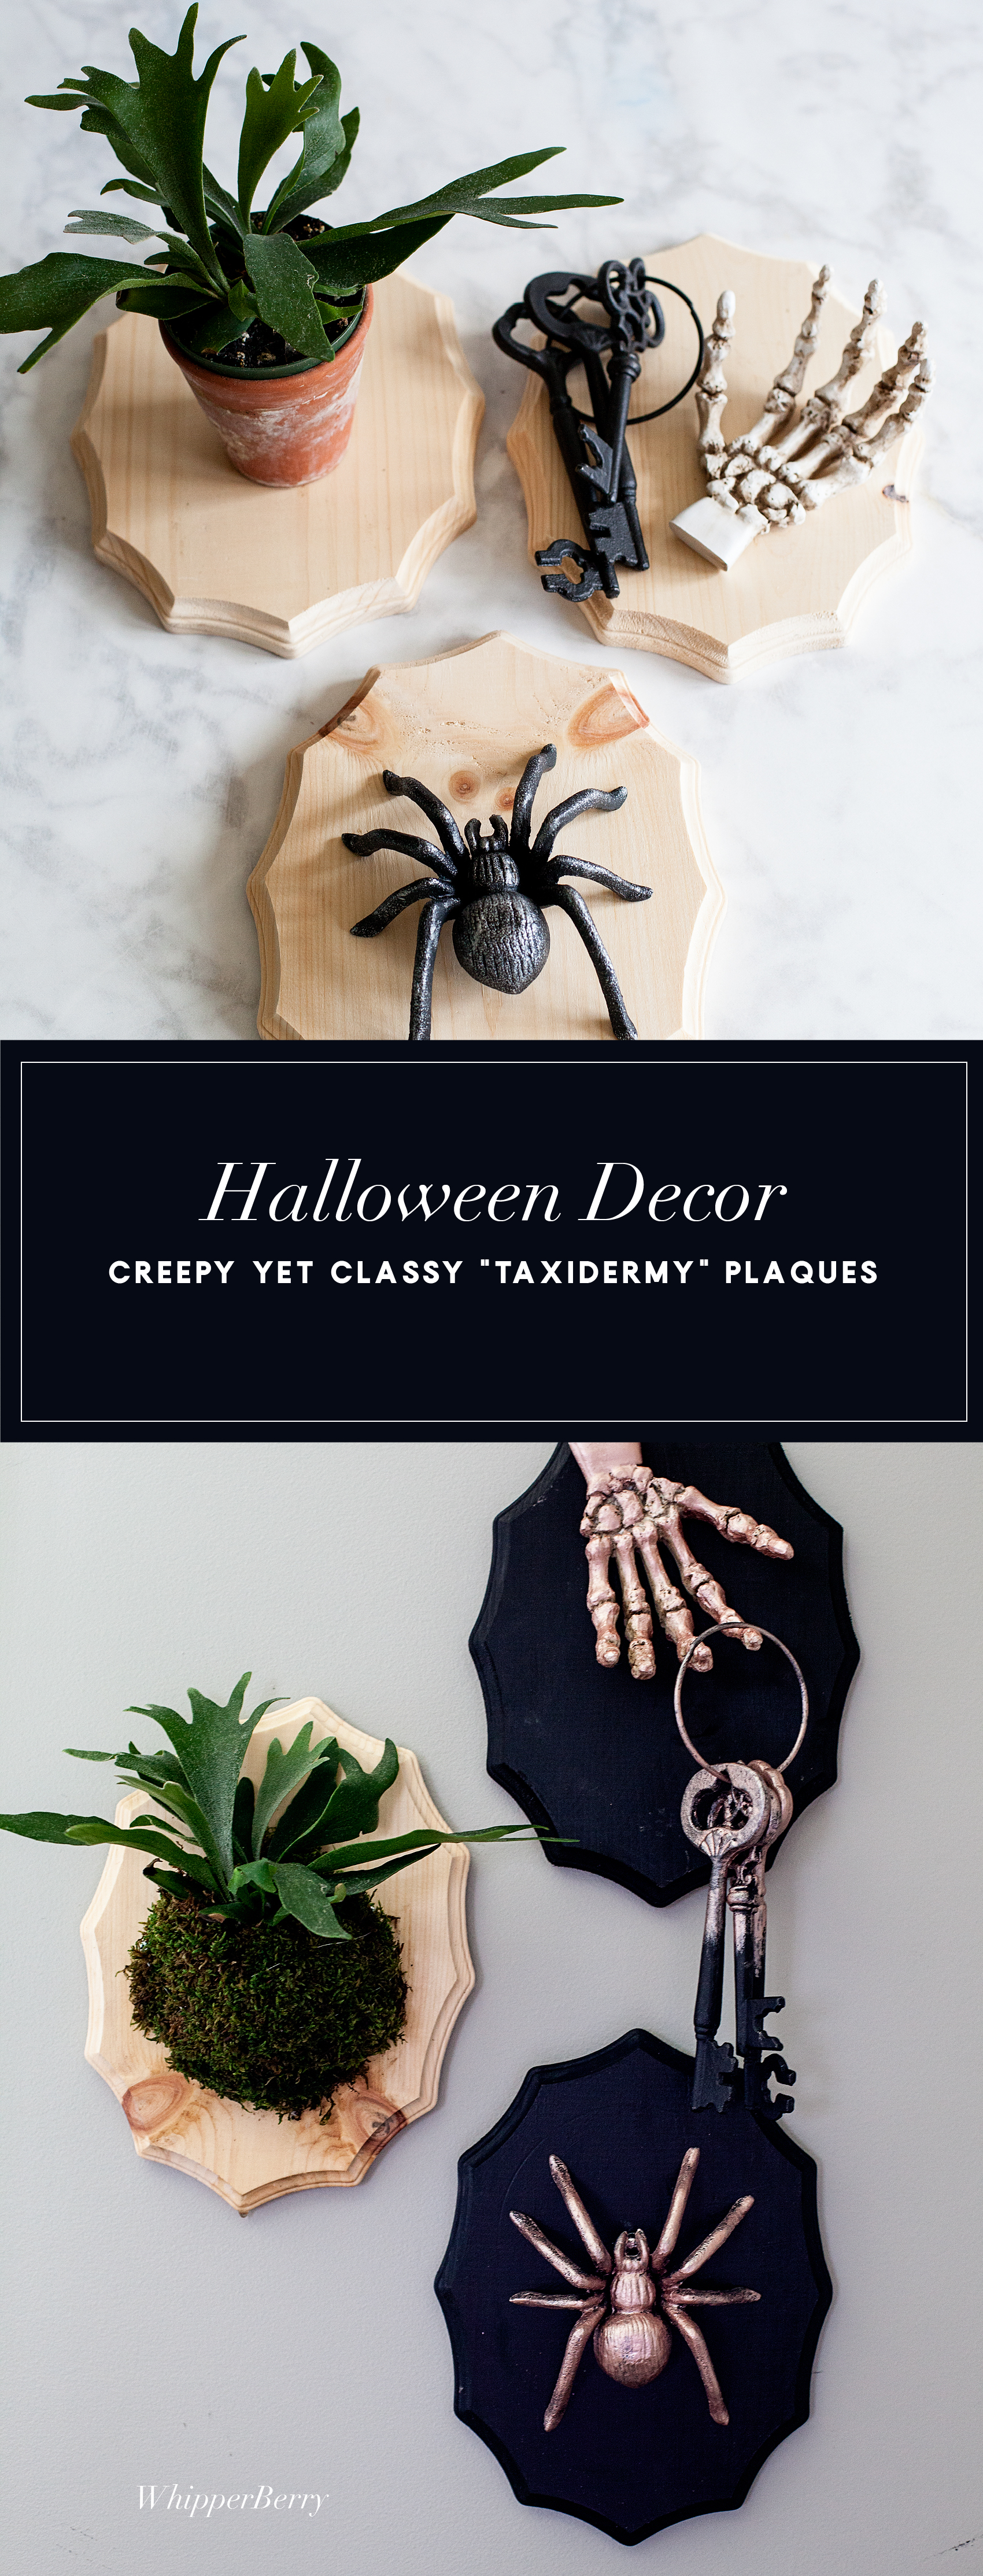
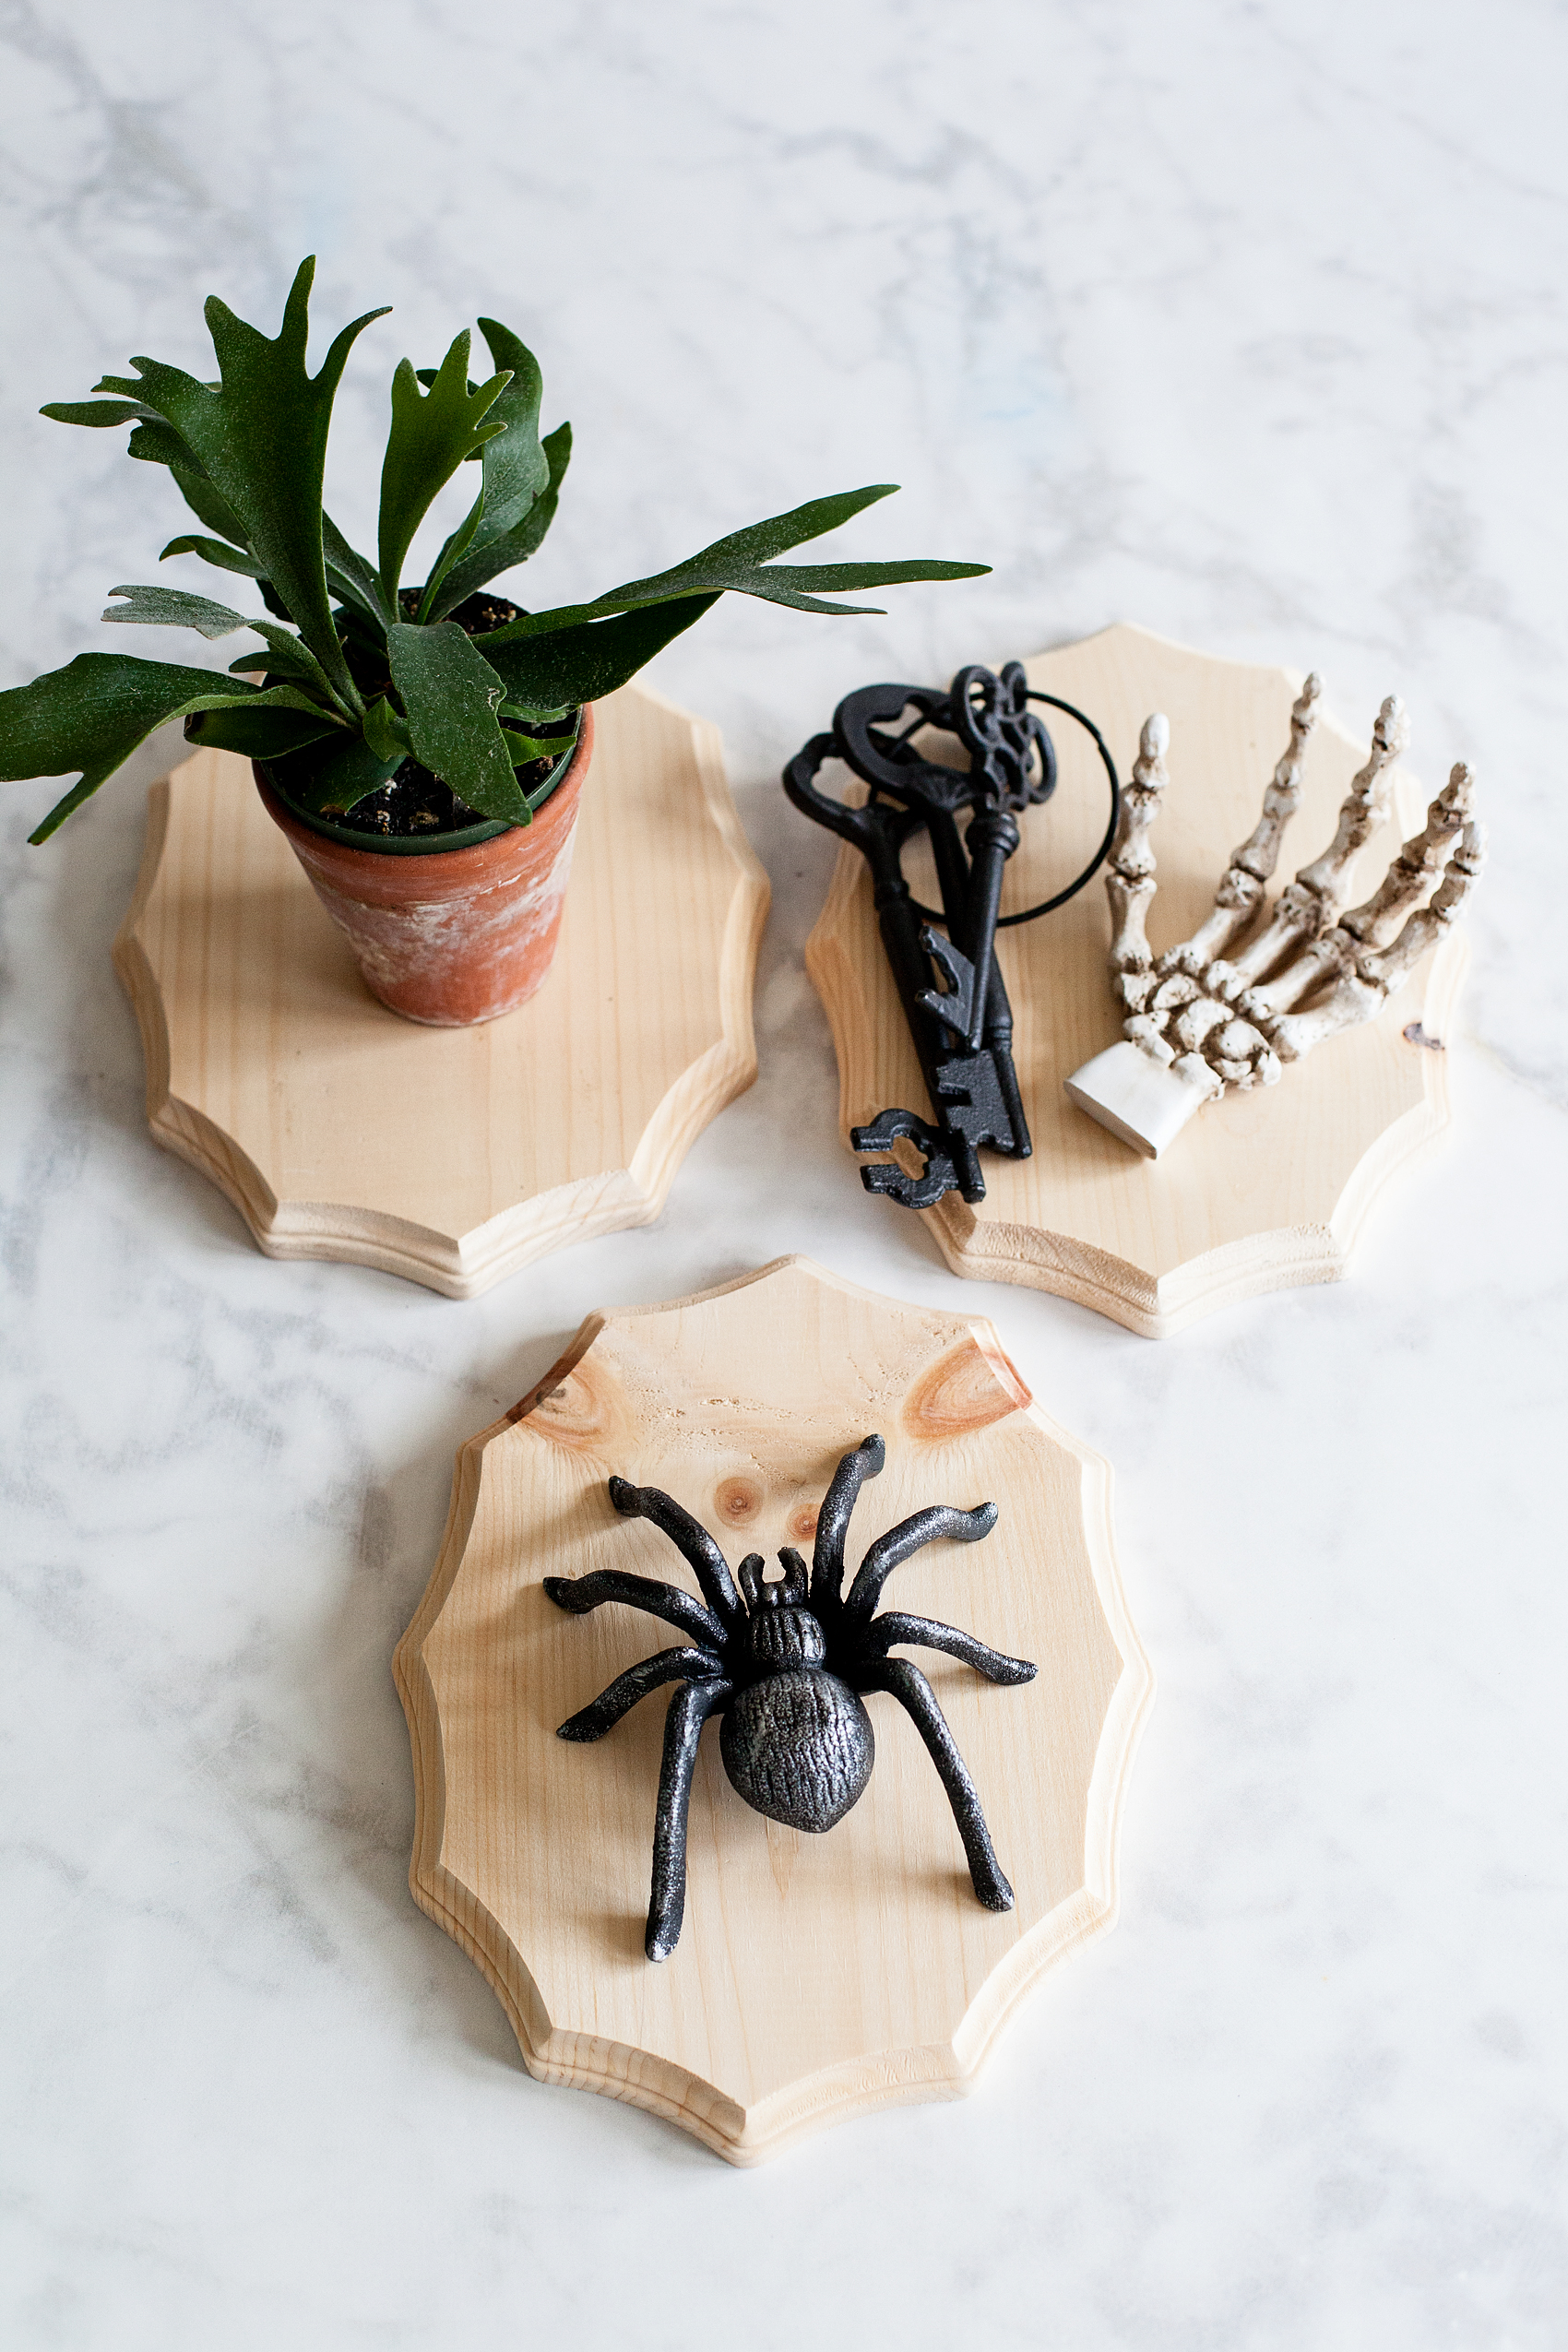
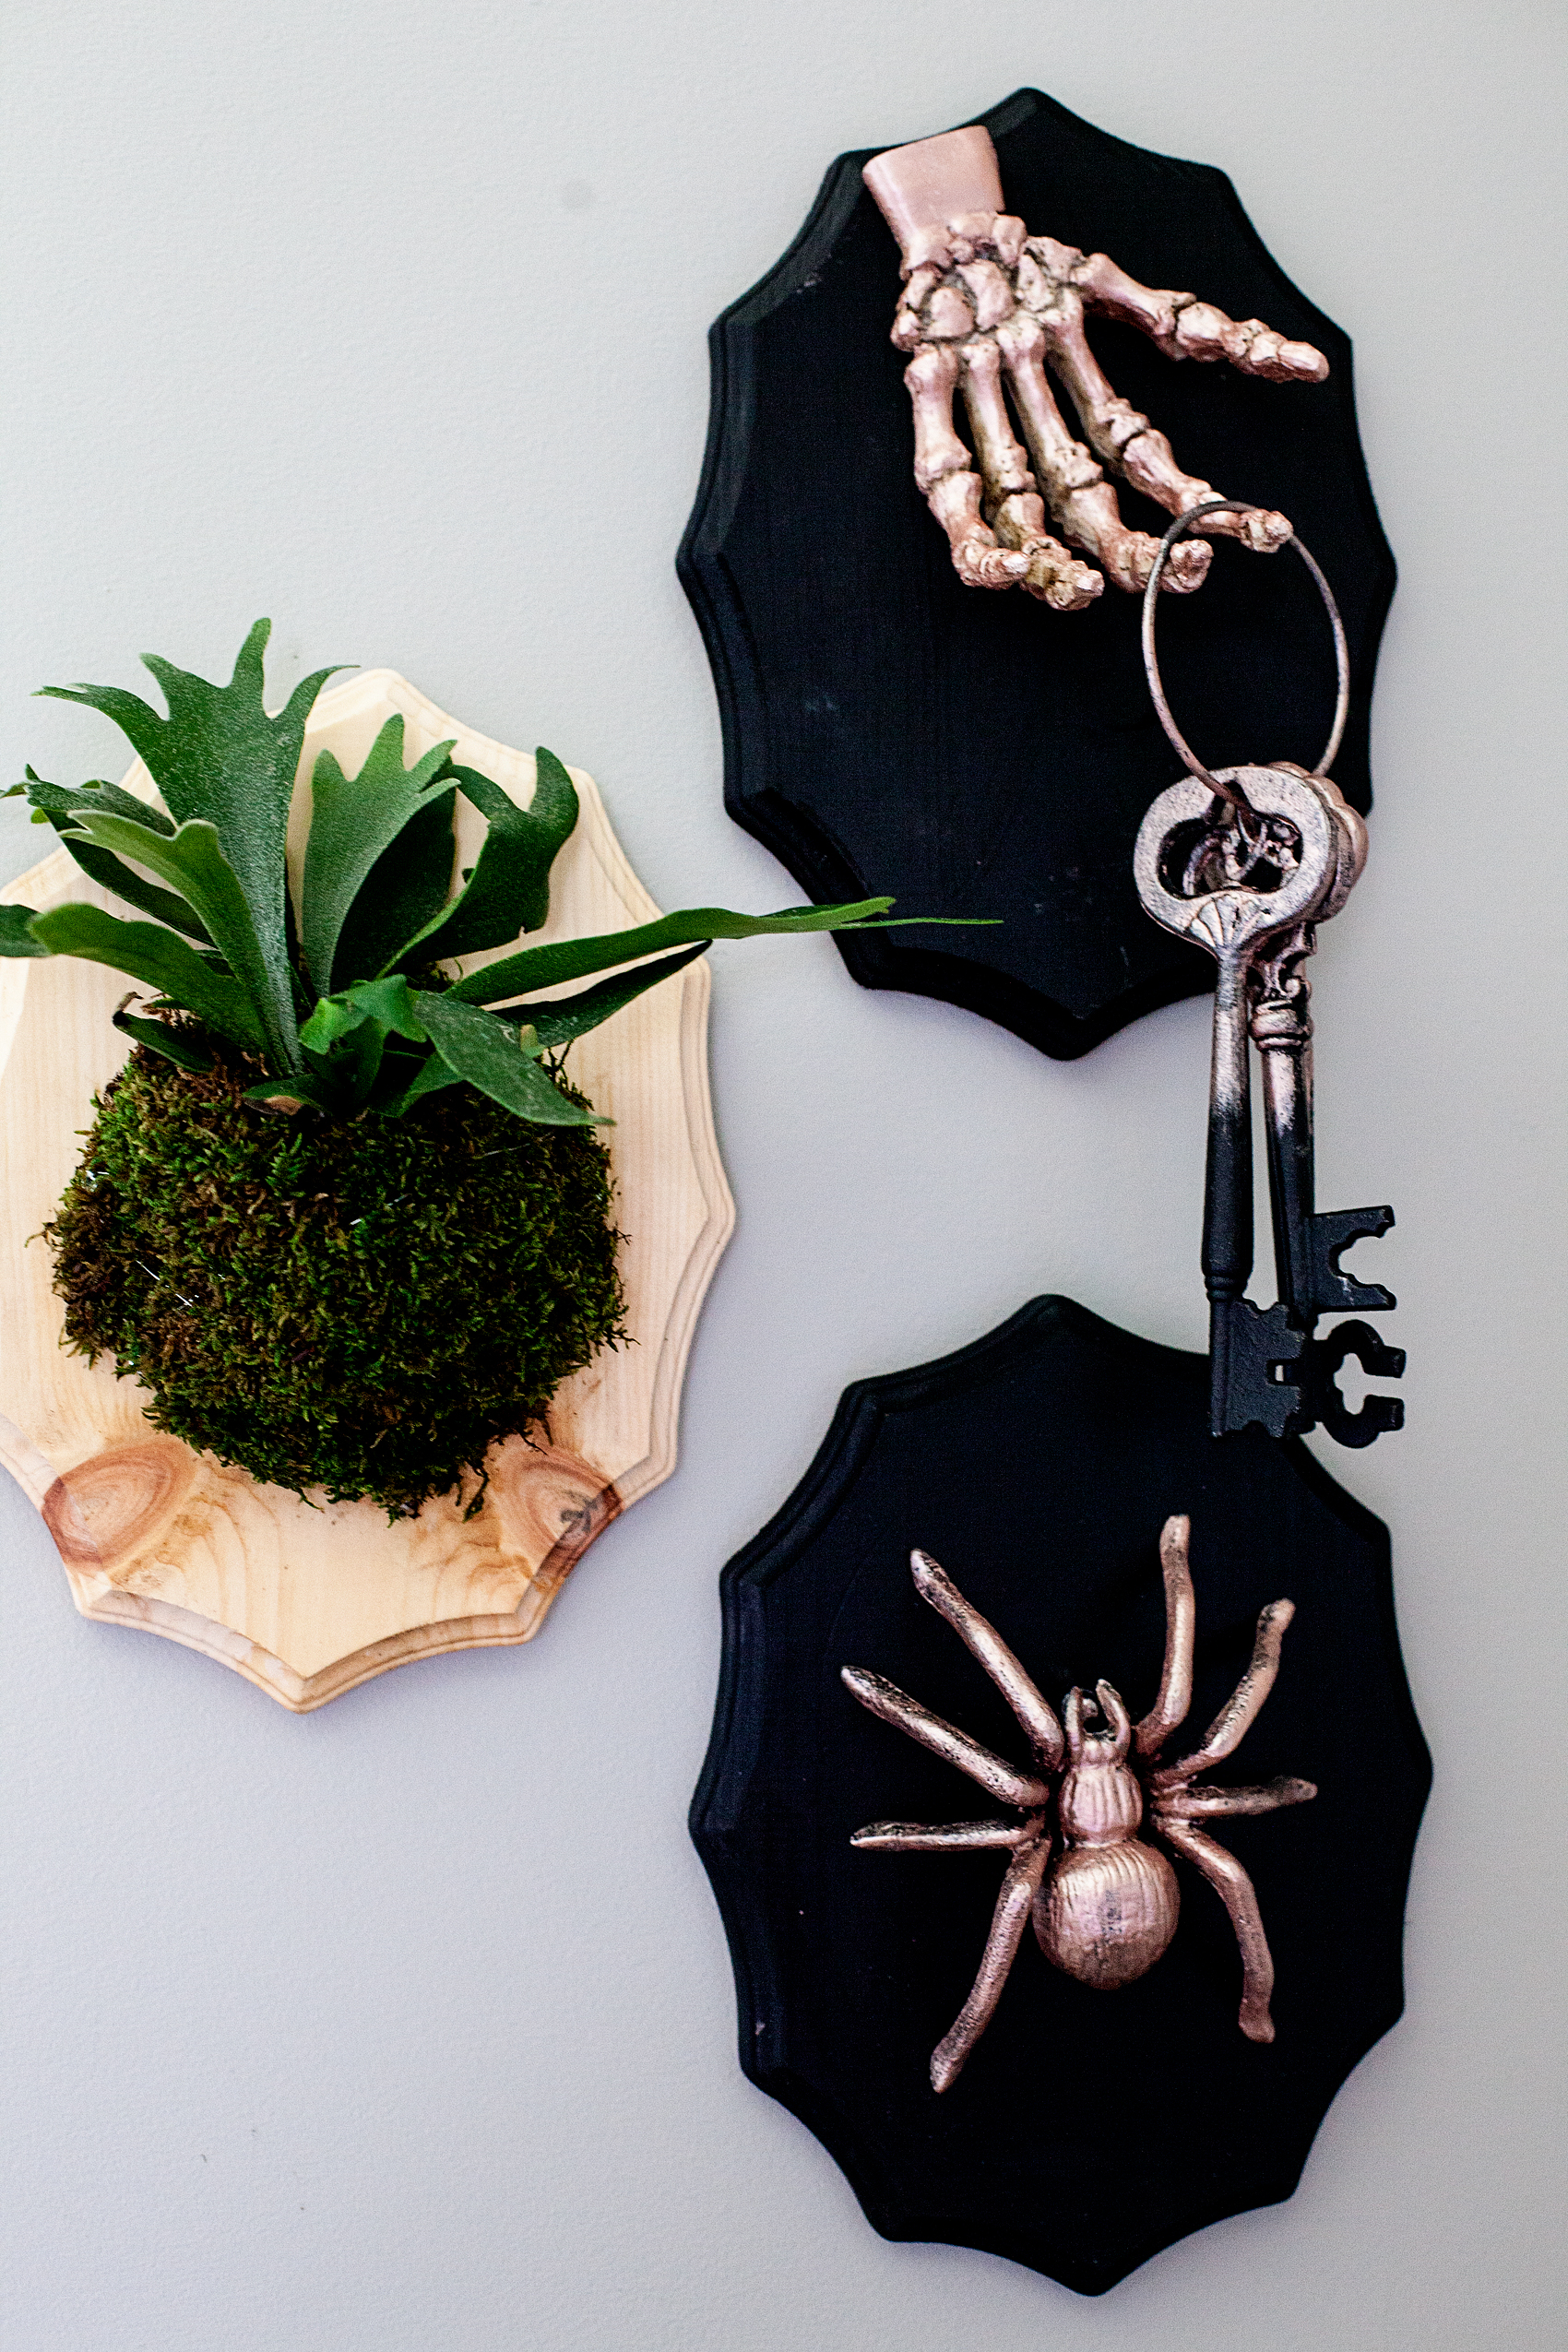
Add a little flair to your spooky Halloween decorations with taxidermy plaques! I used the DecoArt Metallic Lustre to turn  simple spooky objects into creepy yet classy home decor. Come check it out… If you dare!

Add a little flair to your spooky Halloween decor with DecoArt! I used their Metallic Lustre to turn simple spooky objects into creepy yet classy taxidermy plaques to decorate our entryway for Halloween.

{ disclaimer • I am a DecoArt Ambassador and they have sponsored this post. However, all thoughts, ideas and opinions are my very own.}


 O.K. guys… It’s never too early to start thinking about your Halloween decorations! Over the years I’ve become quite the fan of decorating for this creepy holiday. I used to hate it, but I’ve kind of fallen in love with what you can create for this spooky night. I wanted to create some new pieces to add to my collection for the new home and found myself wandering the isles at Michaels wondering what to make. Then it hit me… I wanted to make some “taxidermy” plaques to add some cringe worthy art to my front entry way. I wanted to keep it simple and still classy so I thought a little Rose Gold Metallic Lustre from DecoArt would do the trick! Here’s how you can make them.

Add a little flair to your spooky Halloween decor with DecoArt! I used their Metallic Lustre to turn simple spooky objects into creepy yet classy taxidermy home decor.

Taxidermy Plaques Supply List

Add a little flair to your spooky Halloween decor with DecoArt! I used their Metallic Lustre to turn simple spooky objects into creepy yet classy taxidermy home decor.

  • wood plaques
  • DecoArt Metallic Lustre – Rose Gold
  • Americana Curb Appeal – Black
  • iron spider
  • iron keys
  • skeleton hand
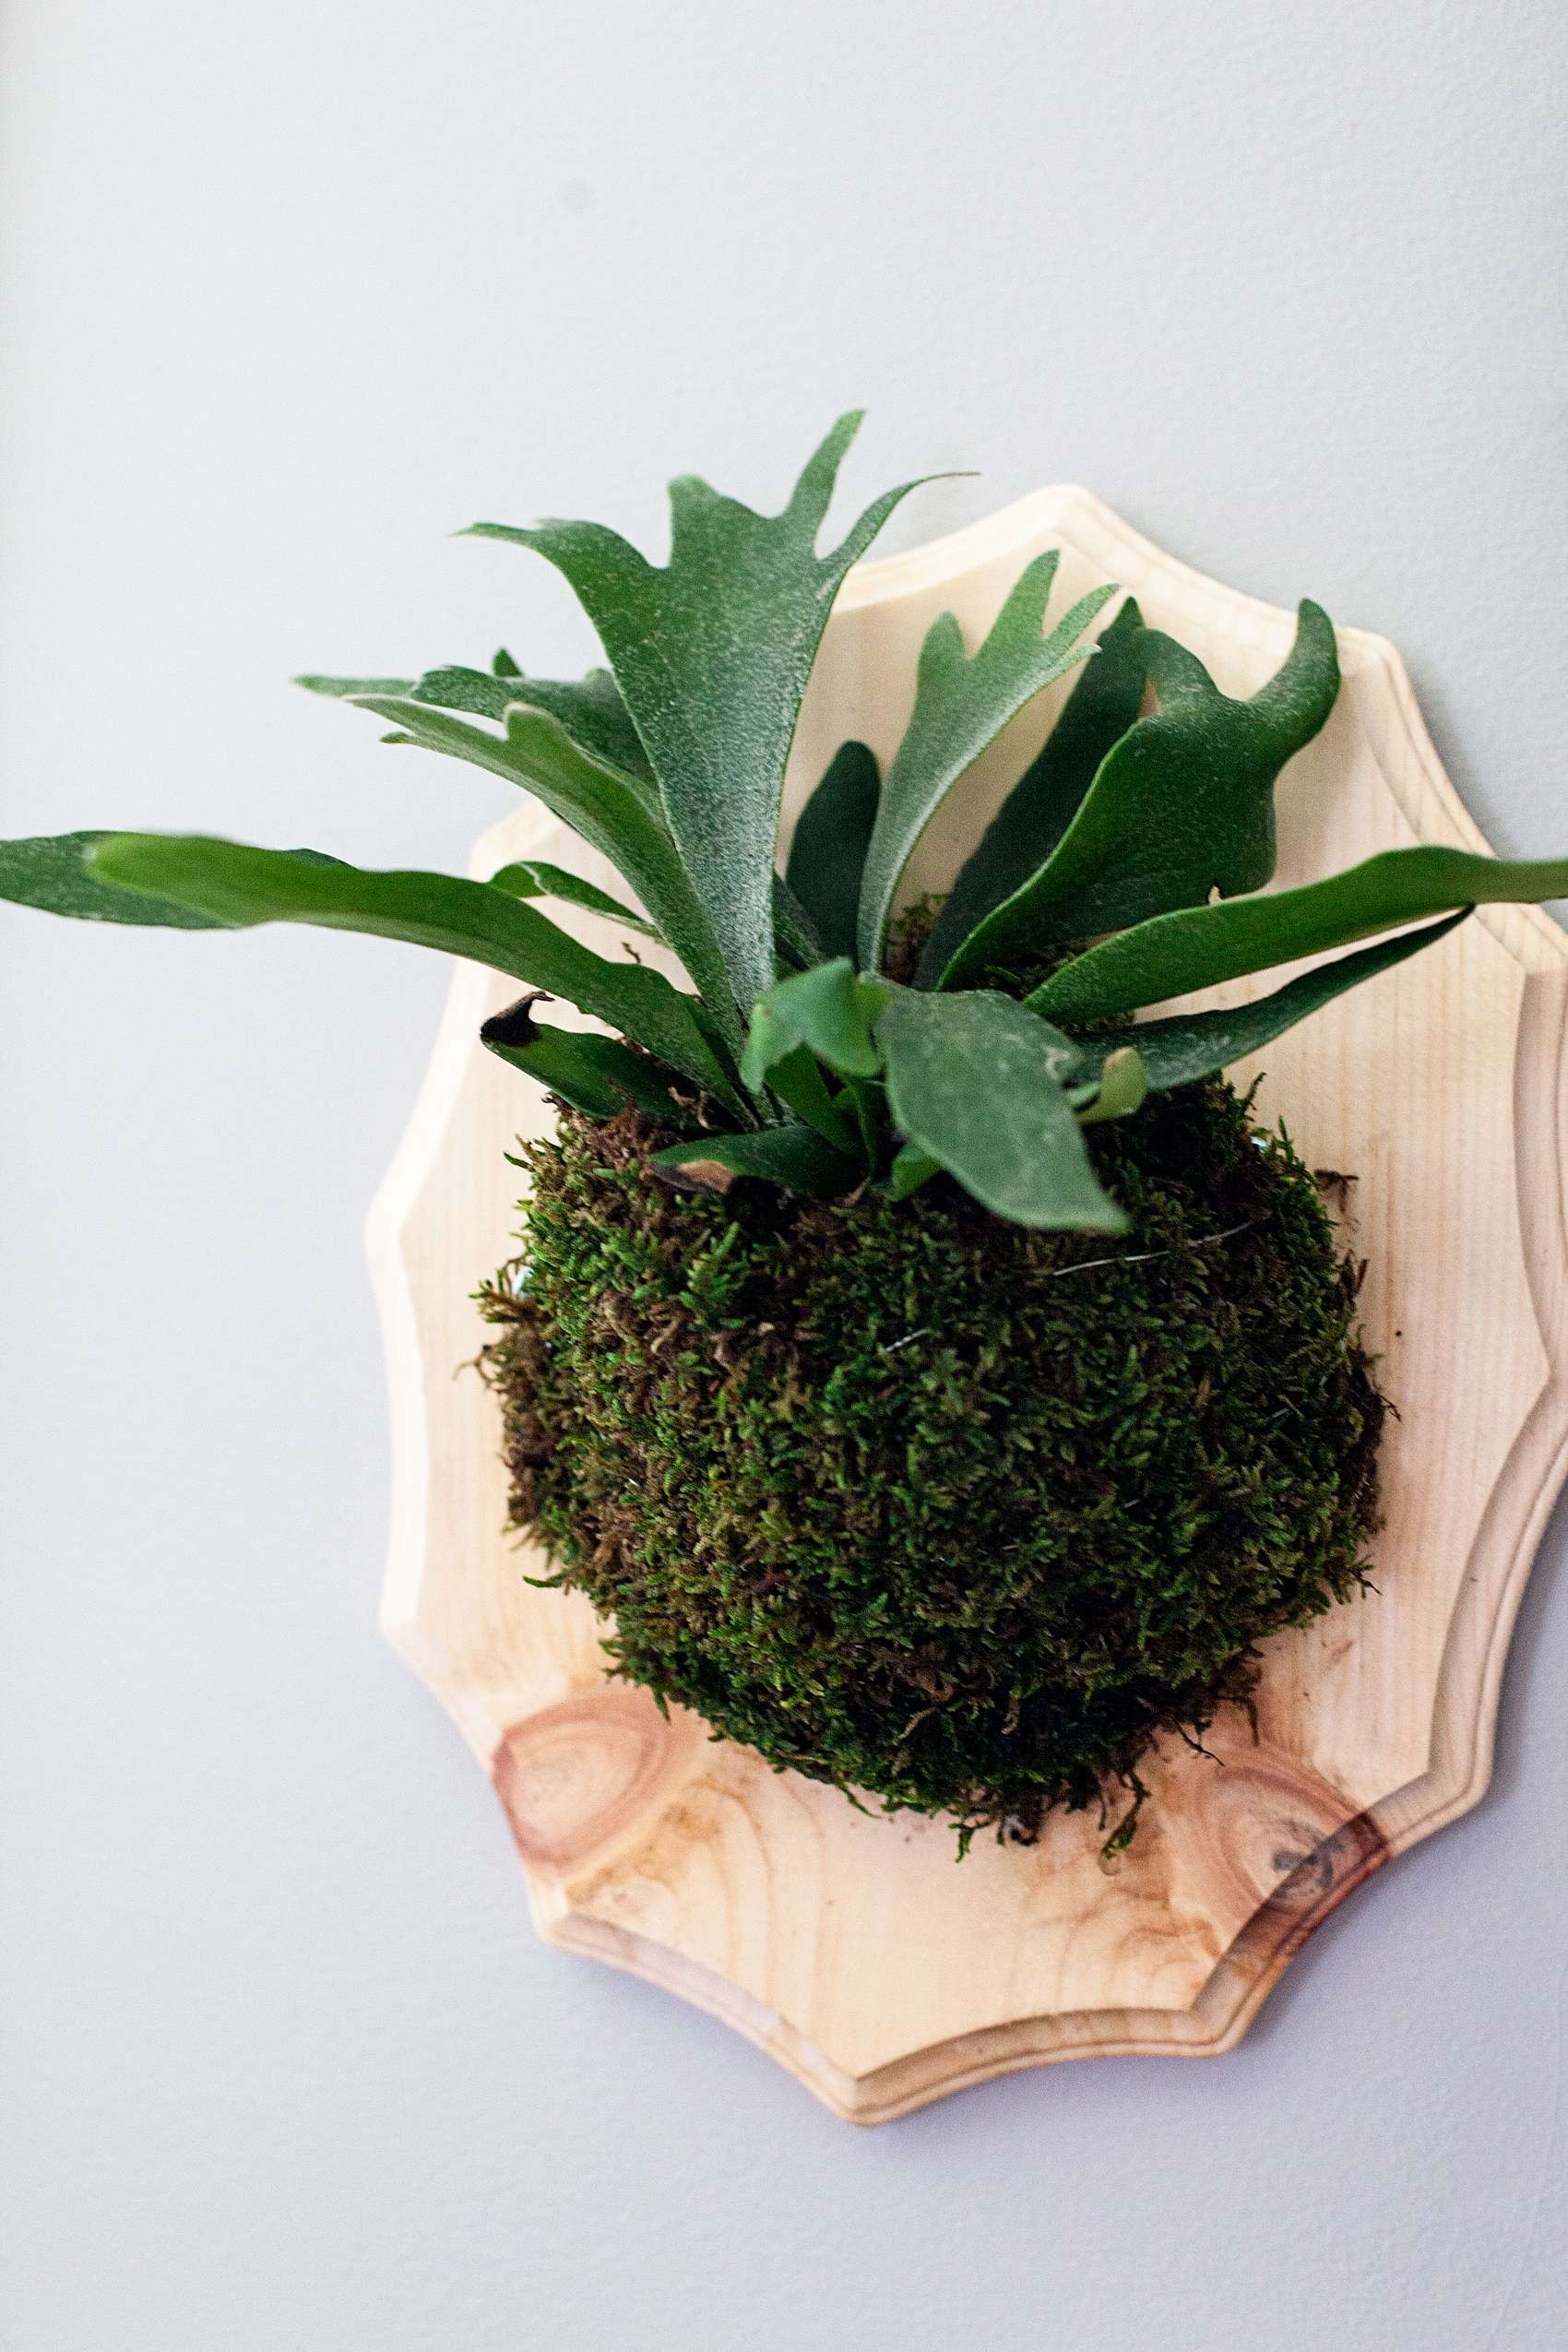
  • small Staghorn Fern
  • paint brush
  • lint free cloth
  • drill
  • 8 screws
  • floral wire
  • moss
  • large bowl of water
  • baking sheet
  • drop cloth or something to protect your work surface

Instructions for Taxidermy Plaques

To begin, you will need to prep your work surface and cover it with a drop cloth or some type over covering to protect it.

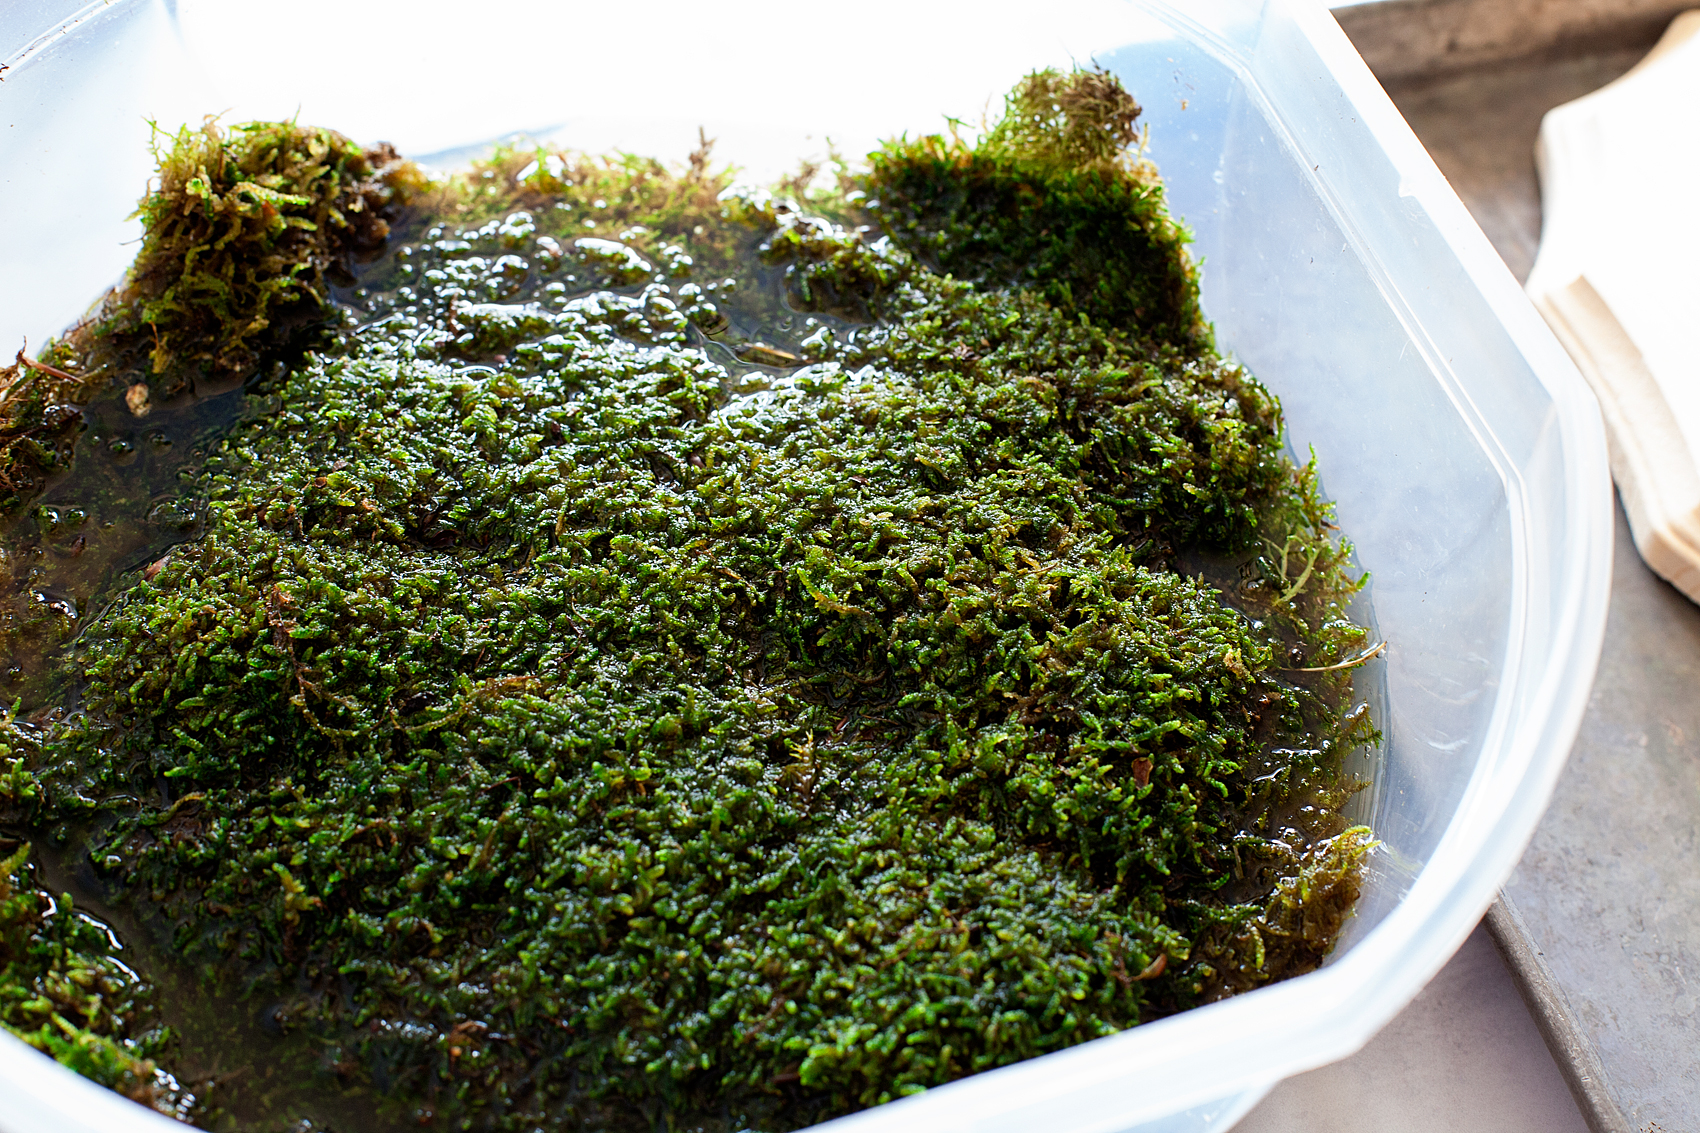
Next, place your moss into a large bowl of water so that it can soak while you are working with the other pieces. Set it aside.

Add a little flair to your spooky Halloween decor with DecoArt! I used their Metallic Lustre to turn simple spooky objects into creepy yet classy taxidermy plaques to decorate our entryway for Halloween.

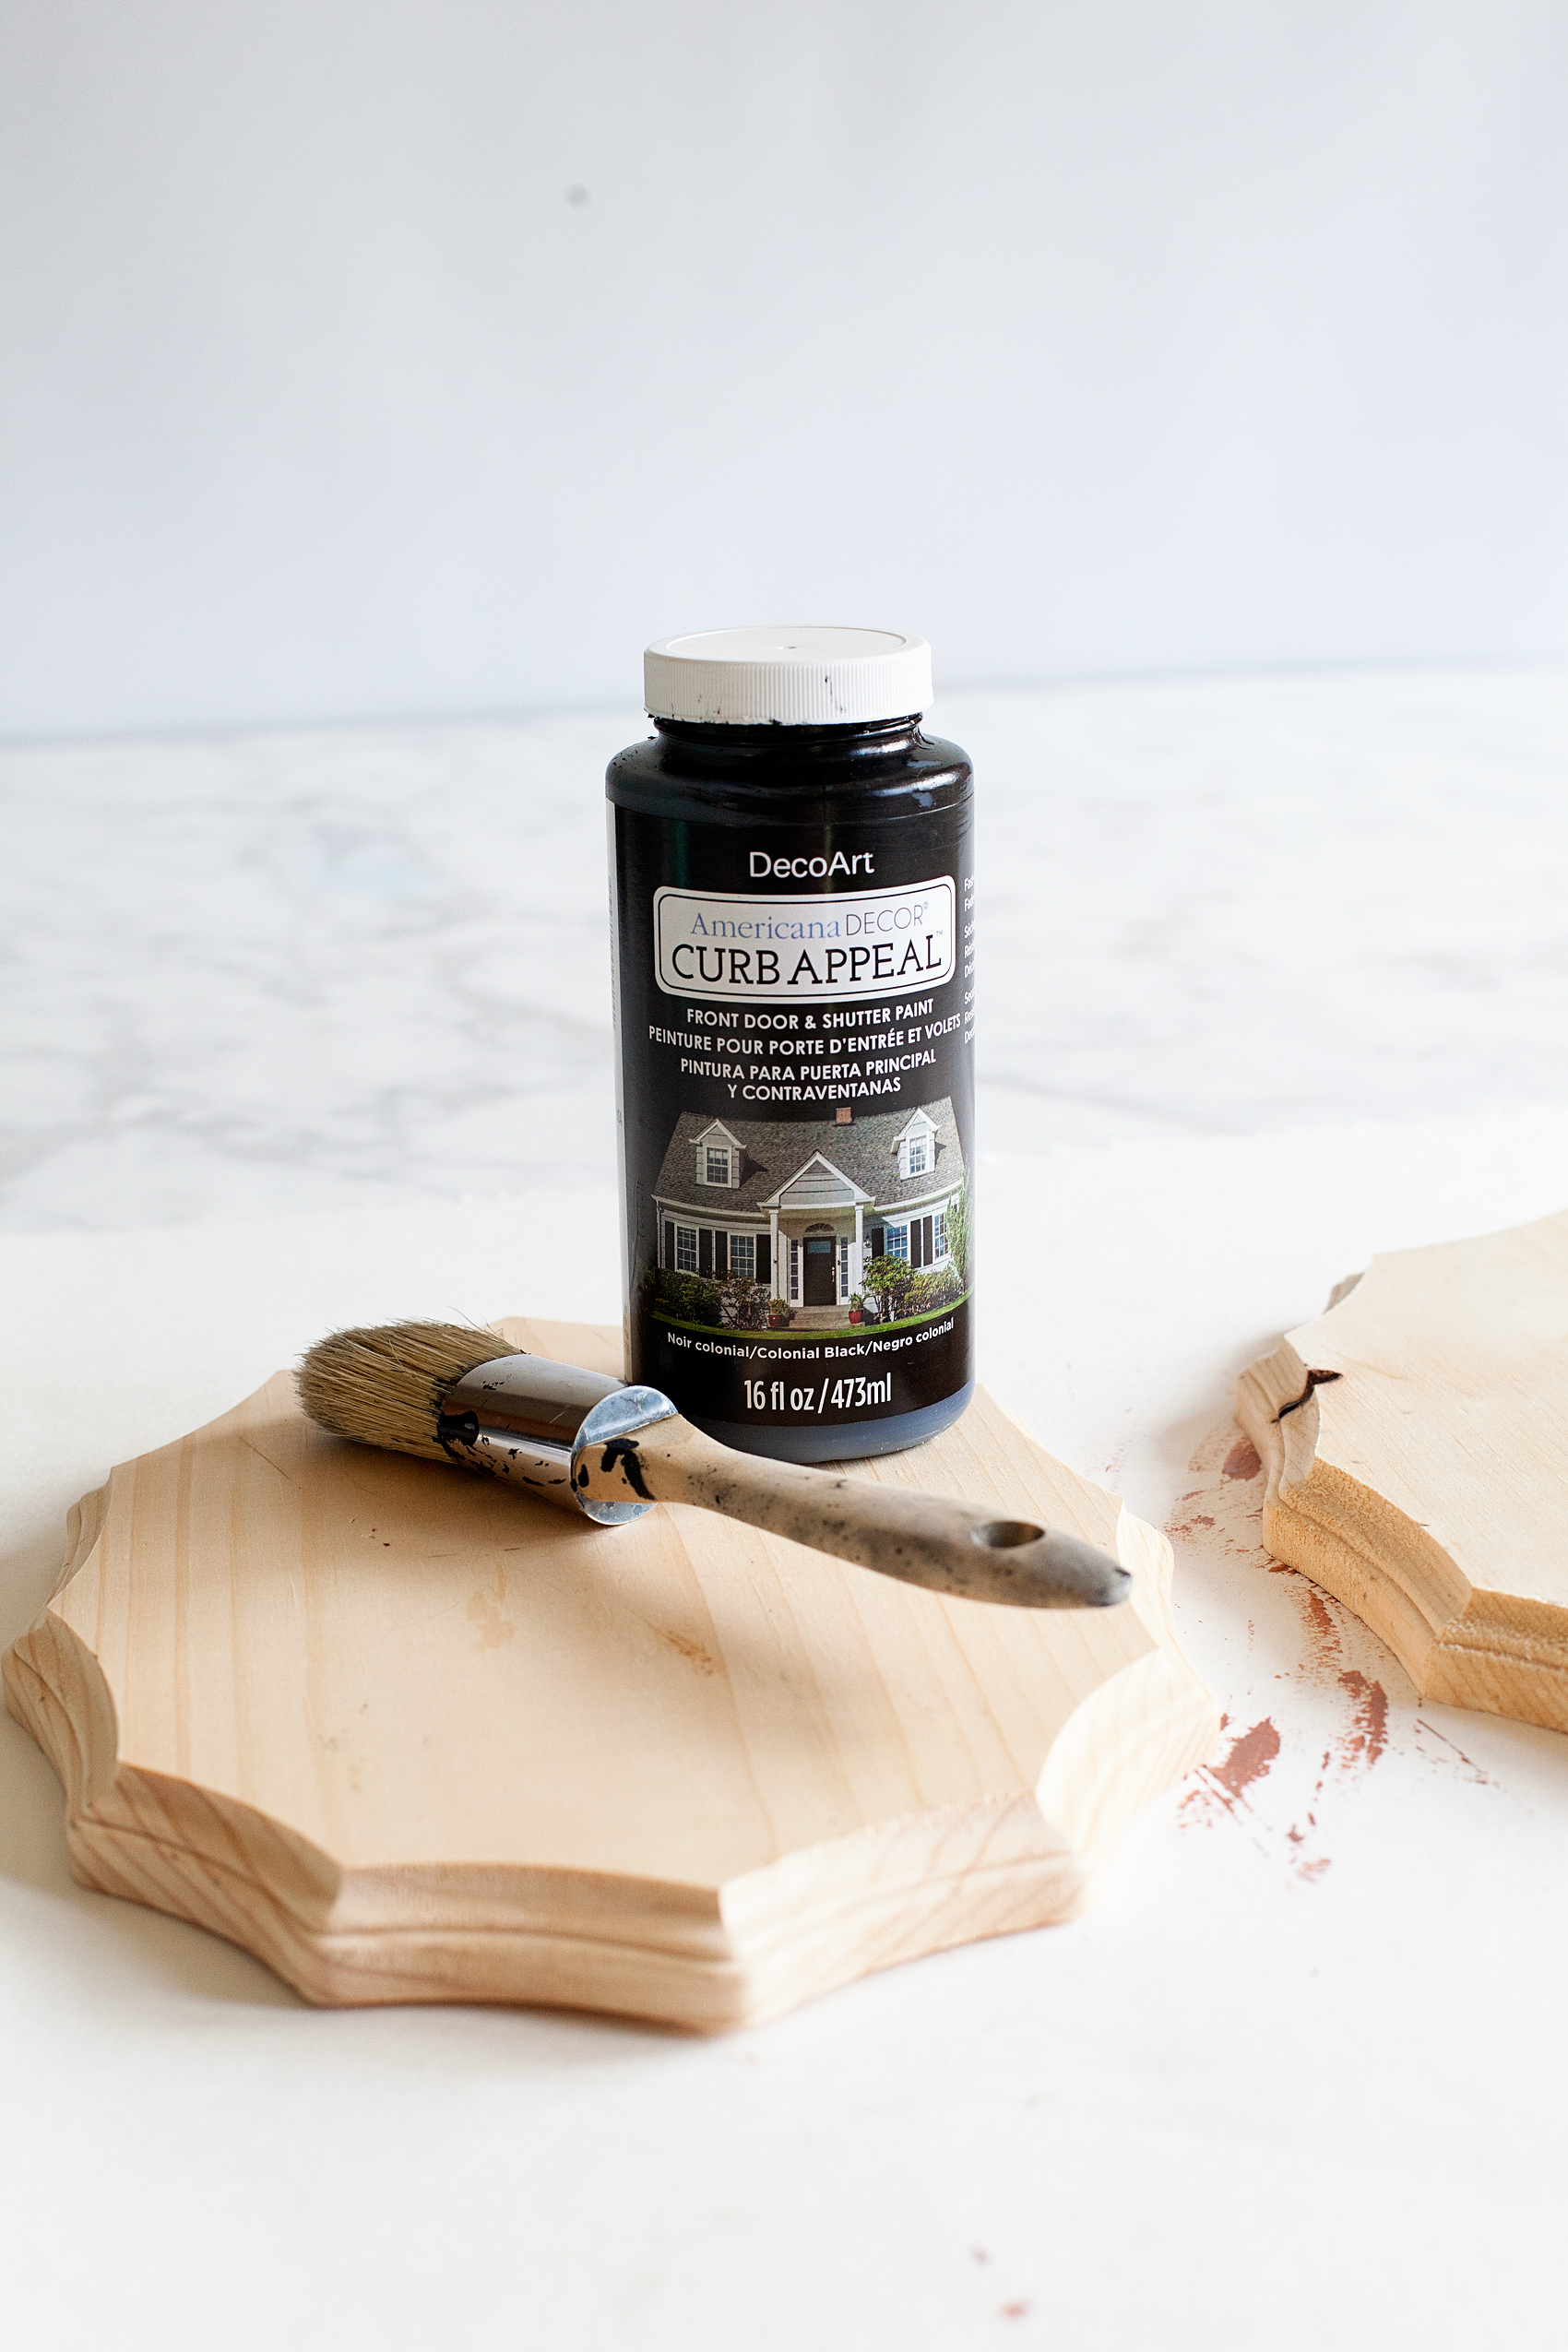
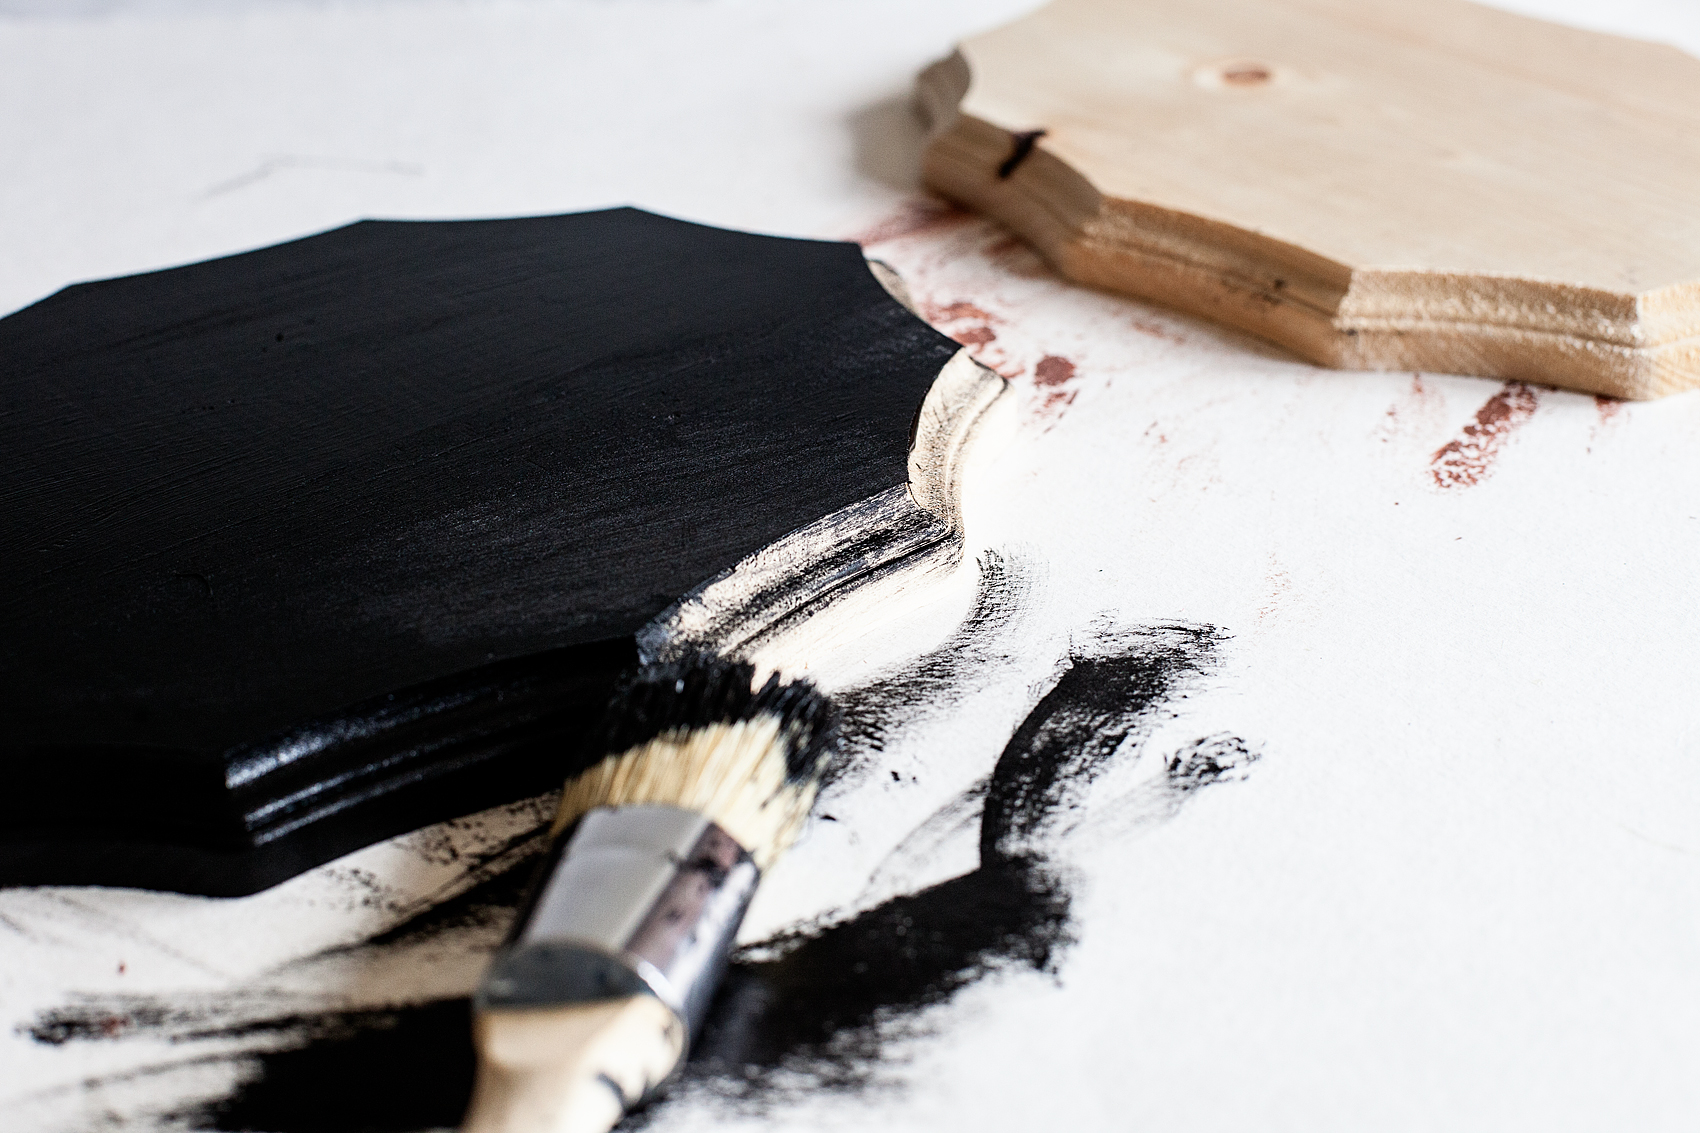
Then, grab your Americana Curb Appeal paint and paint 2 of your wood plaques. Keep one natural for your Staghorn Fern.

Add a little flair to your spooky Halloween decor with DecoArt! I used their Metallic Lustre to turn simple spooky objects into creepy yet classy taxidermy home decor.

I really like the Americana Curb Appeal paint and traditionally it’s not really used for crafting, it’s used to paint door and shutters typically. I had some on hand and thought it would work just fine for the wood plaques for this project. PLUS… I have used that same paint for my doors, fireplace & banister therefore, my plaques would match the rest of my space. Not only that but, I really like the finish that it create on the wood. You won’t see brush strokes, the coverage is phenomenal and you’ll still see the wood grain through the paint. I really like that! I like to paint wood but, I don’t want it to look plastic… you know?

Add a little flair to your spooky Halloween decor with DecoArt! I used their Metallic Lustre to turn simple spooky objects into creepy yet classy taxidermy home decor.

Once those are both painted, set them aside to dry. Don’t worry, they dry pretty quick.

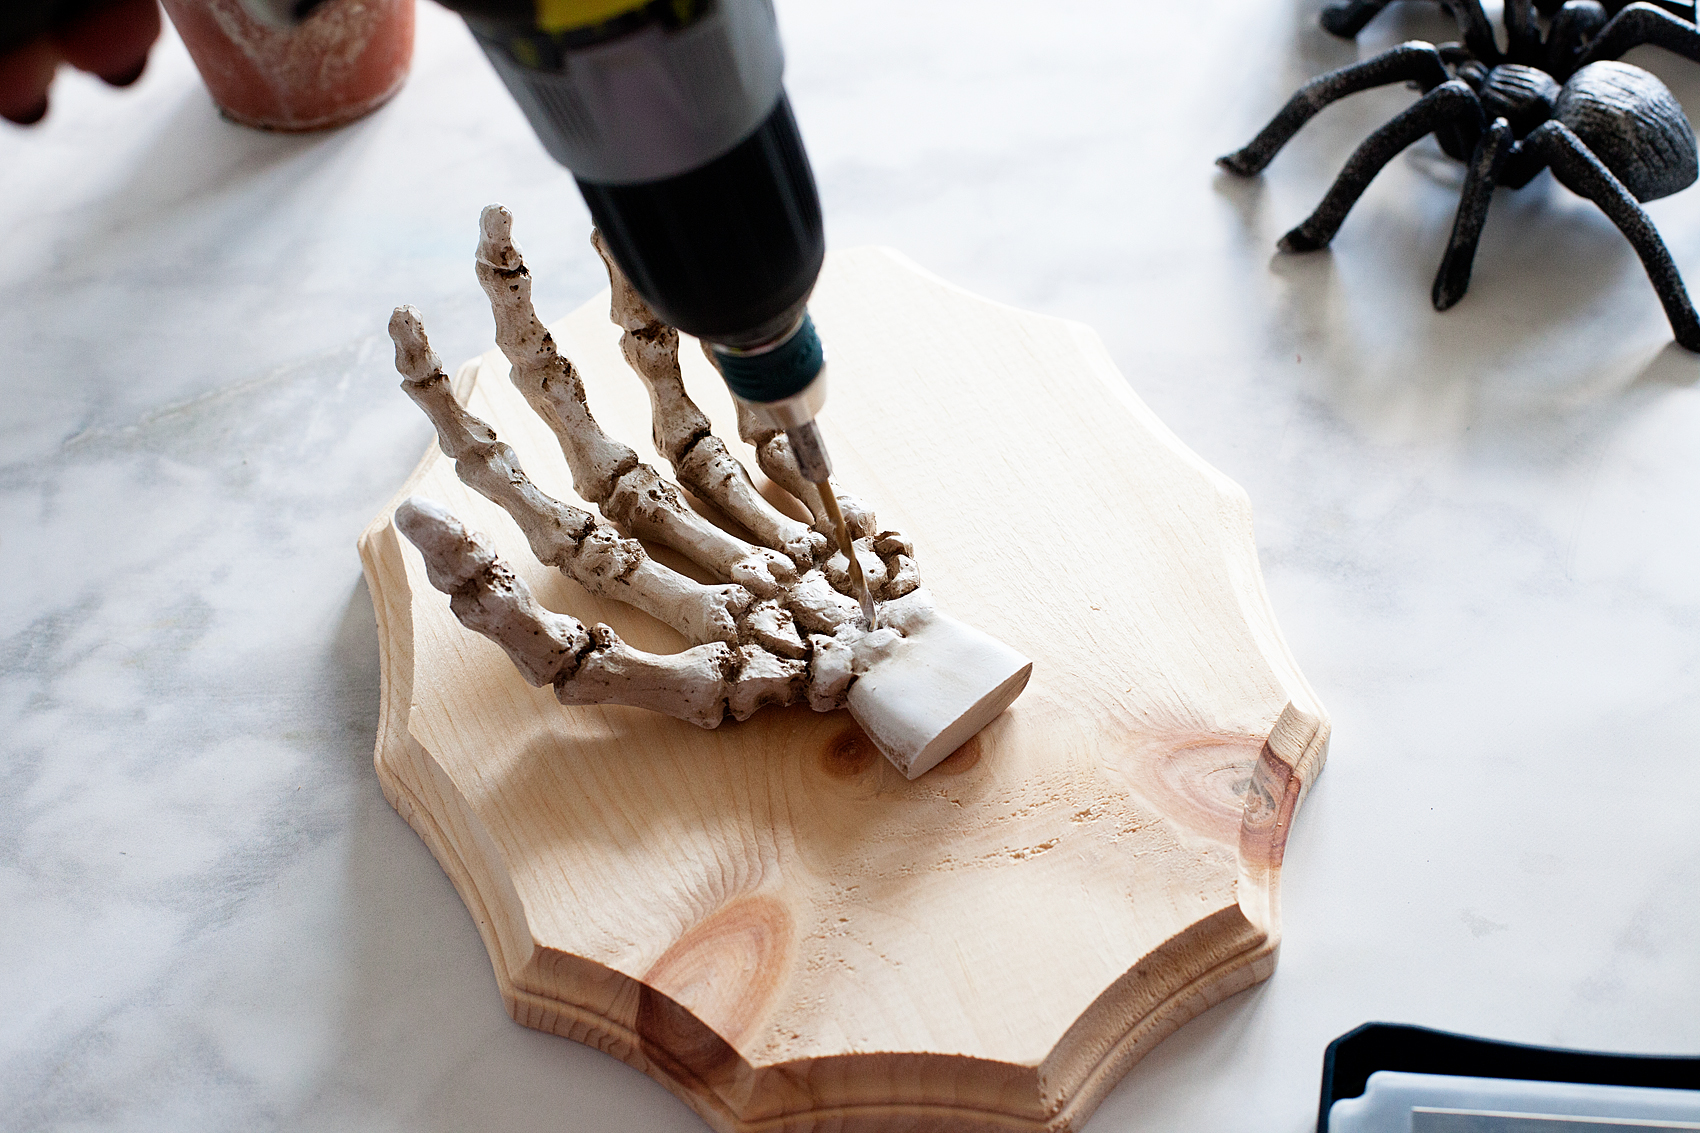
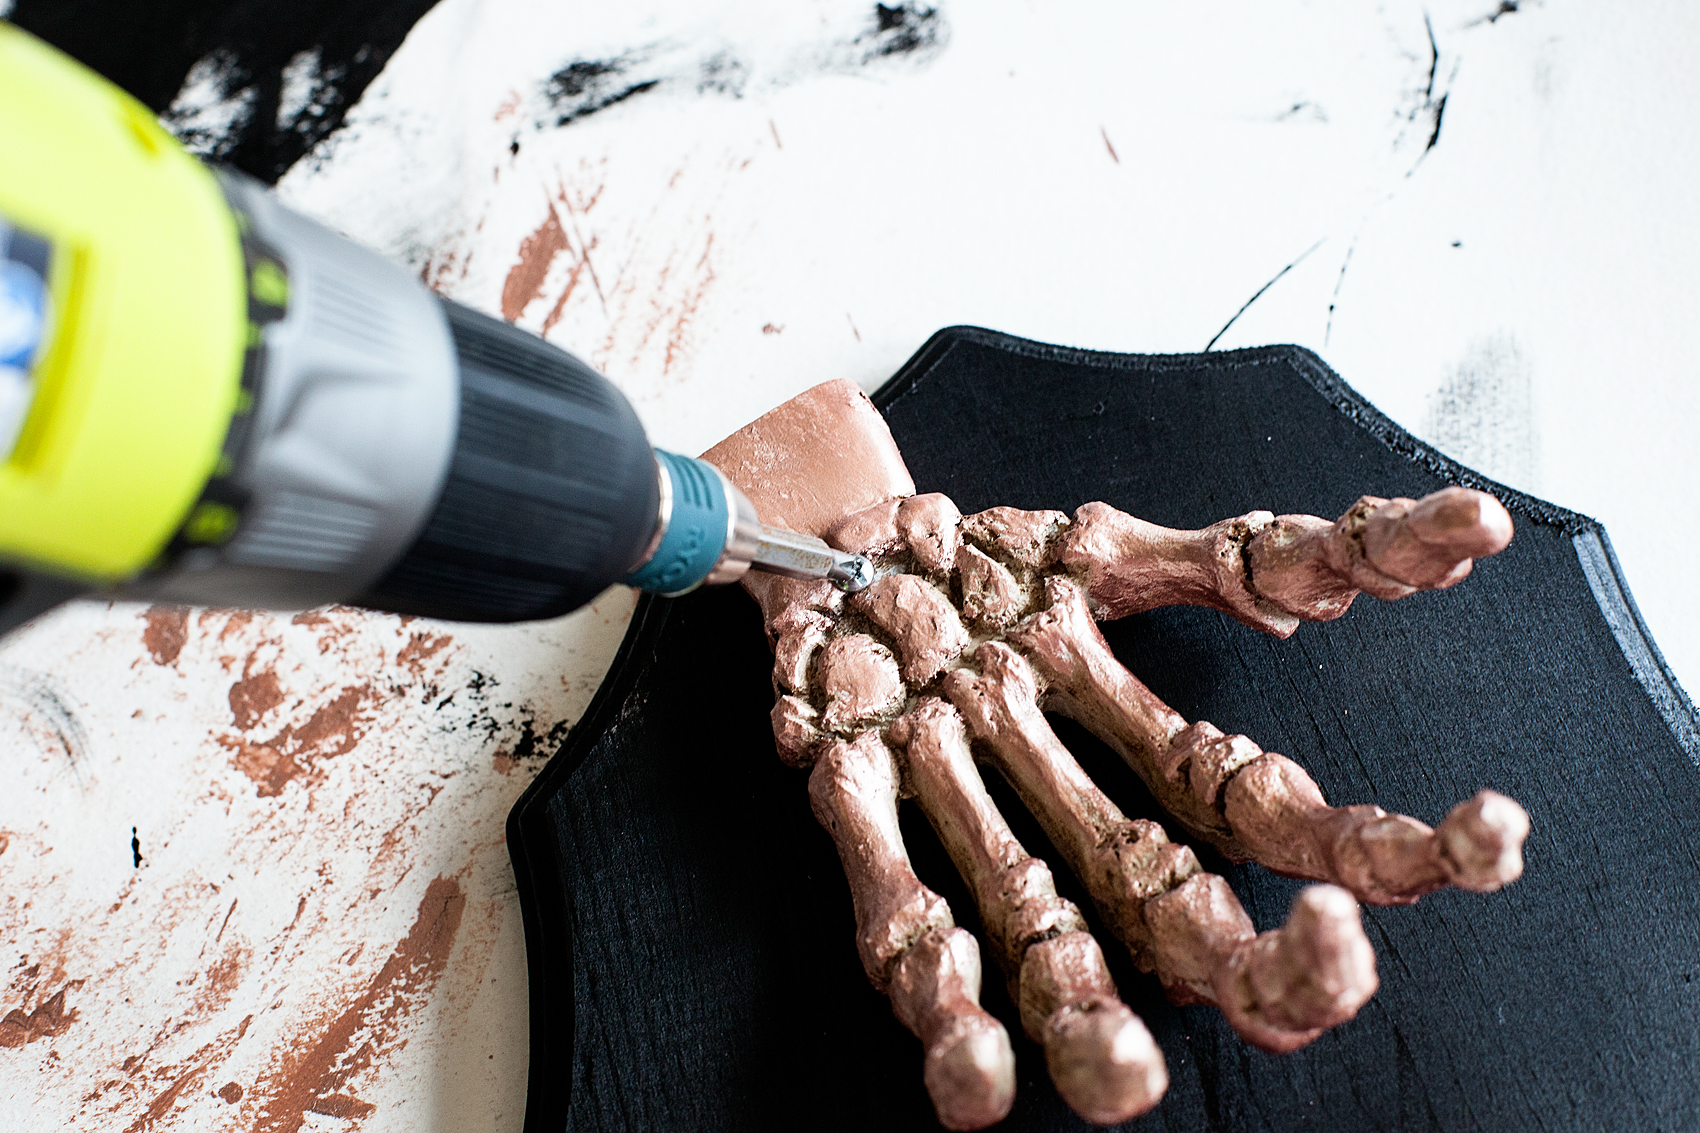
Next, let’s drill a hole into the skeleton hand before we add the DecoArt Metallic Lustre.

Add a little flair to your spooky Halloween decor with DecoArt! I used their Metallic Lustre to turn simple spooky objects into creepy yet classy taxidermy plaques to decorate our entryway for Halloween.

The hand is made out of a resin so it isn’t a problem to drill a hole into it. It  might be a little hard to start, but once you get the hole stared, it’s not a big deal.

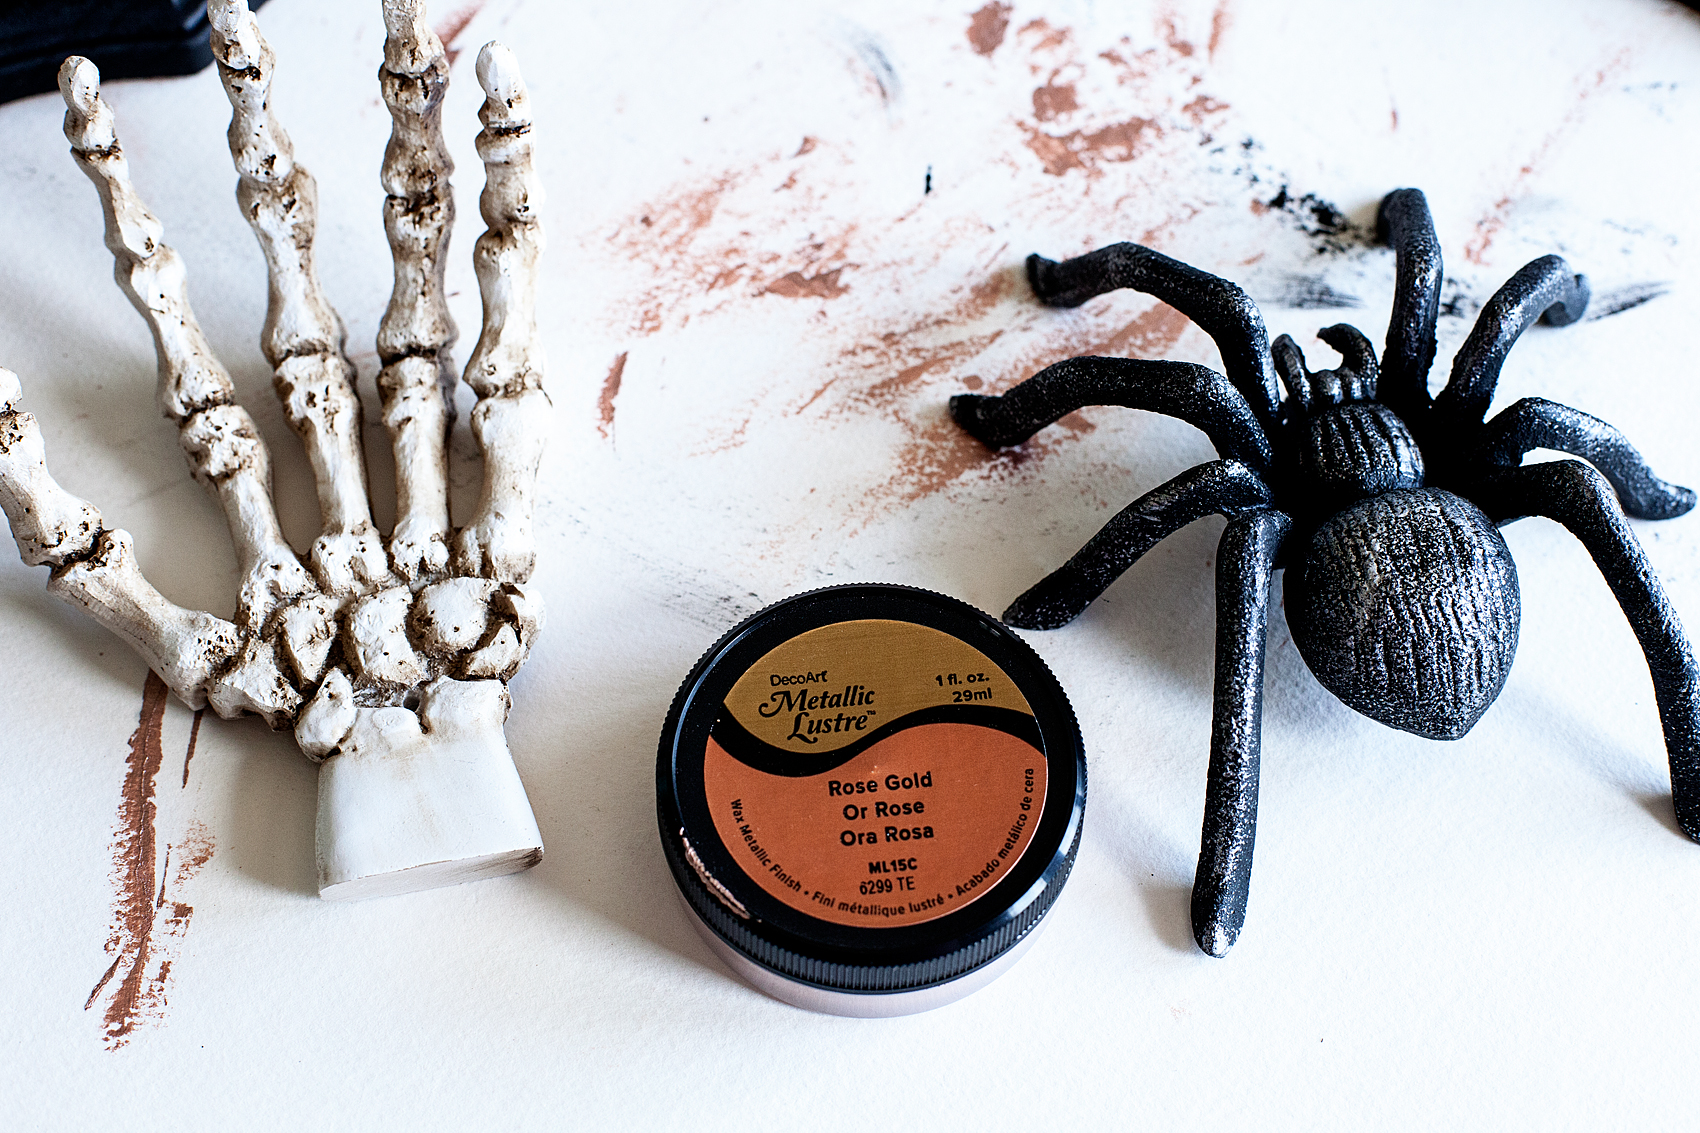
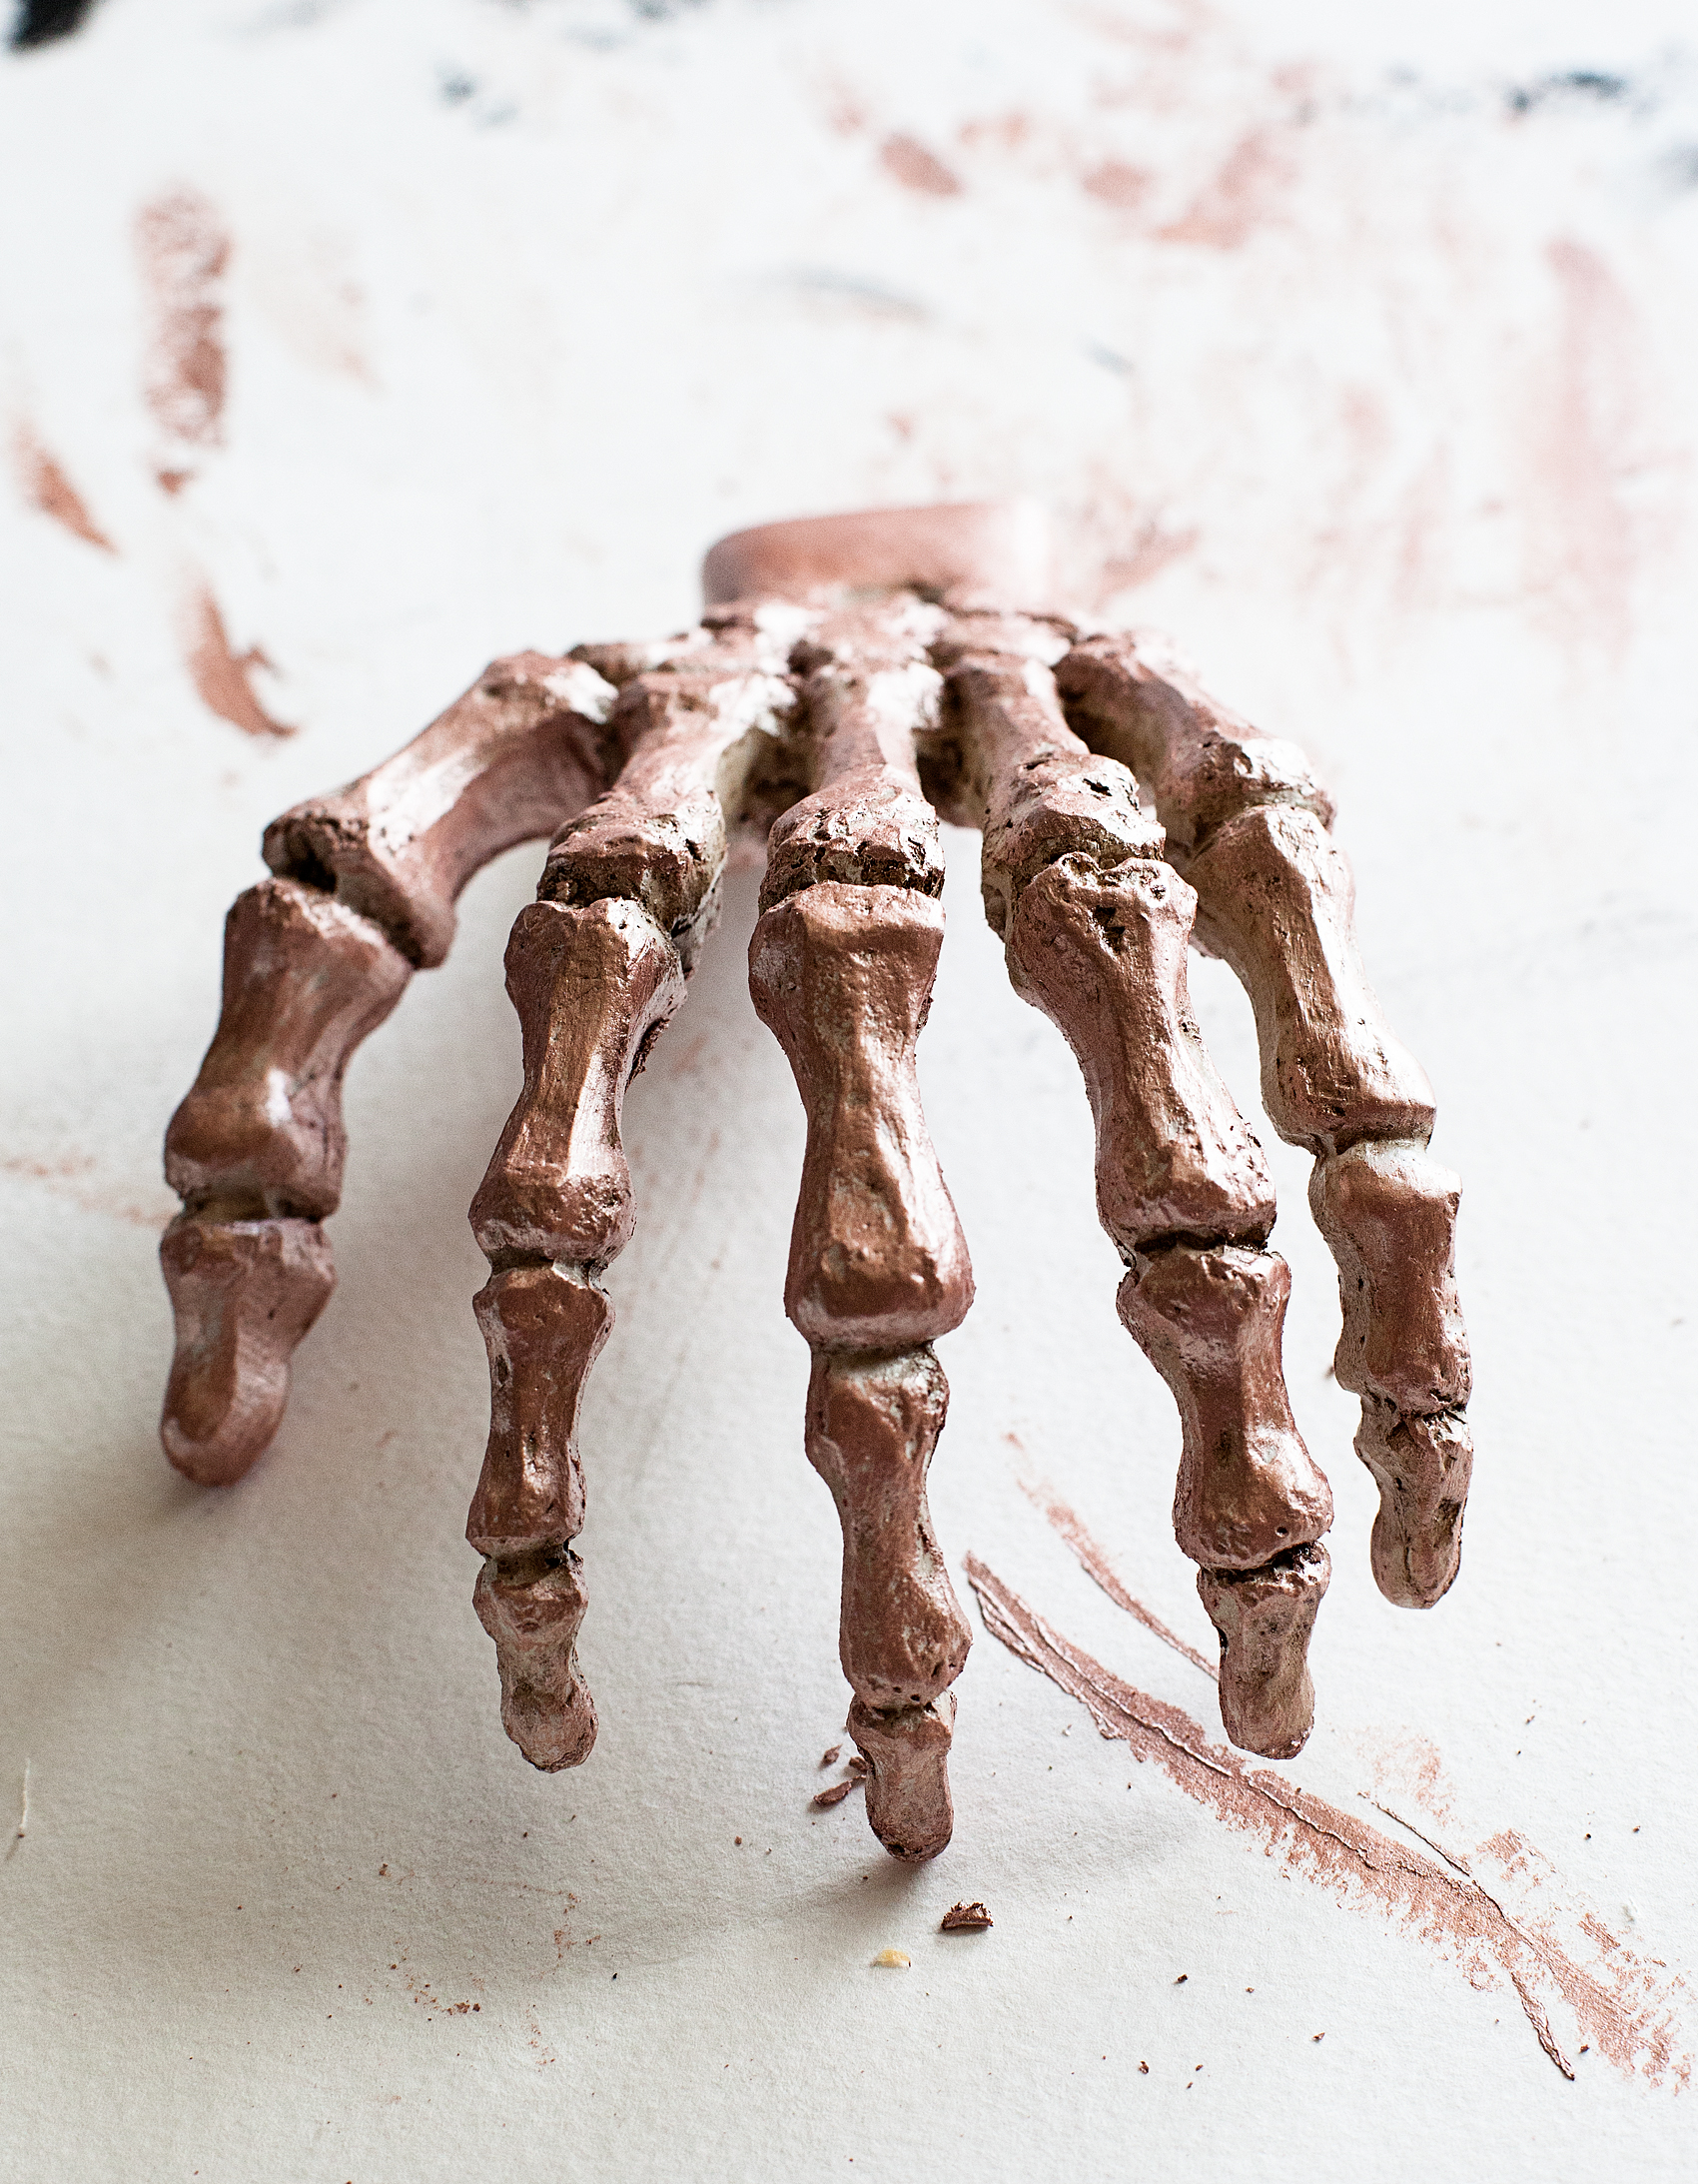
Next, grab the skeleton hand, keys, spider, the rose gold Metallic Lustre and your lint free cloth (or paper towel if you are in a pinch. Just don’t rub too hard.)

Add a little flair to your spooky Halloween decor with DecoArt! I used their Metallic Lustre to turn simple spooky objects into creepy yet classy taxidermy plaques to decorate our entryway for Halloween.

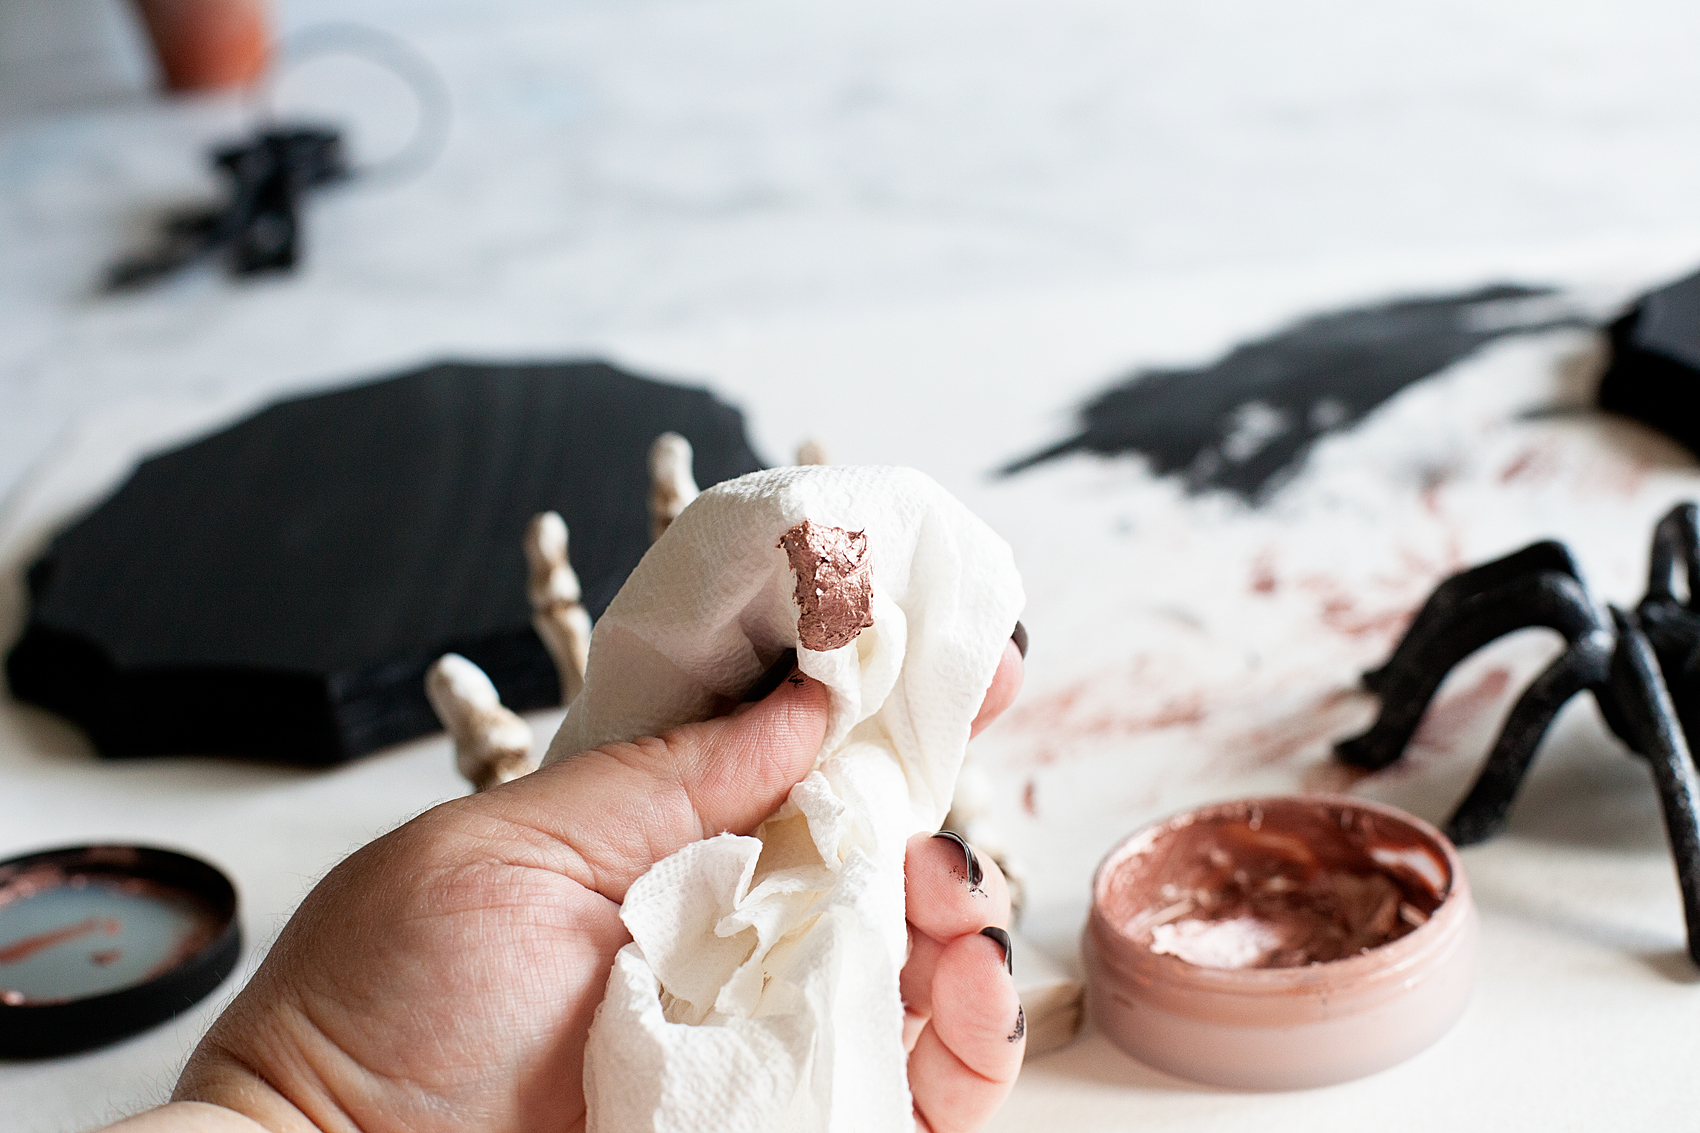
Now, the DecoArt Metallic Lustre is a wax finish, not paint. IT AWESOME!!  I love this stuff! I put a little onto my cloth like so…

Add a little flair to your spooky Halloween decor with DecoArt! I used their Metallic Lustre to turn simple spooky objects into creepy yet classy taxidermy plaques to decorate our entryway for Halloween.

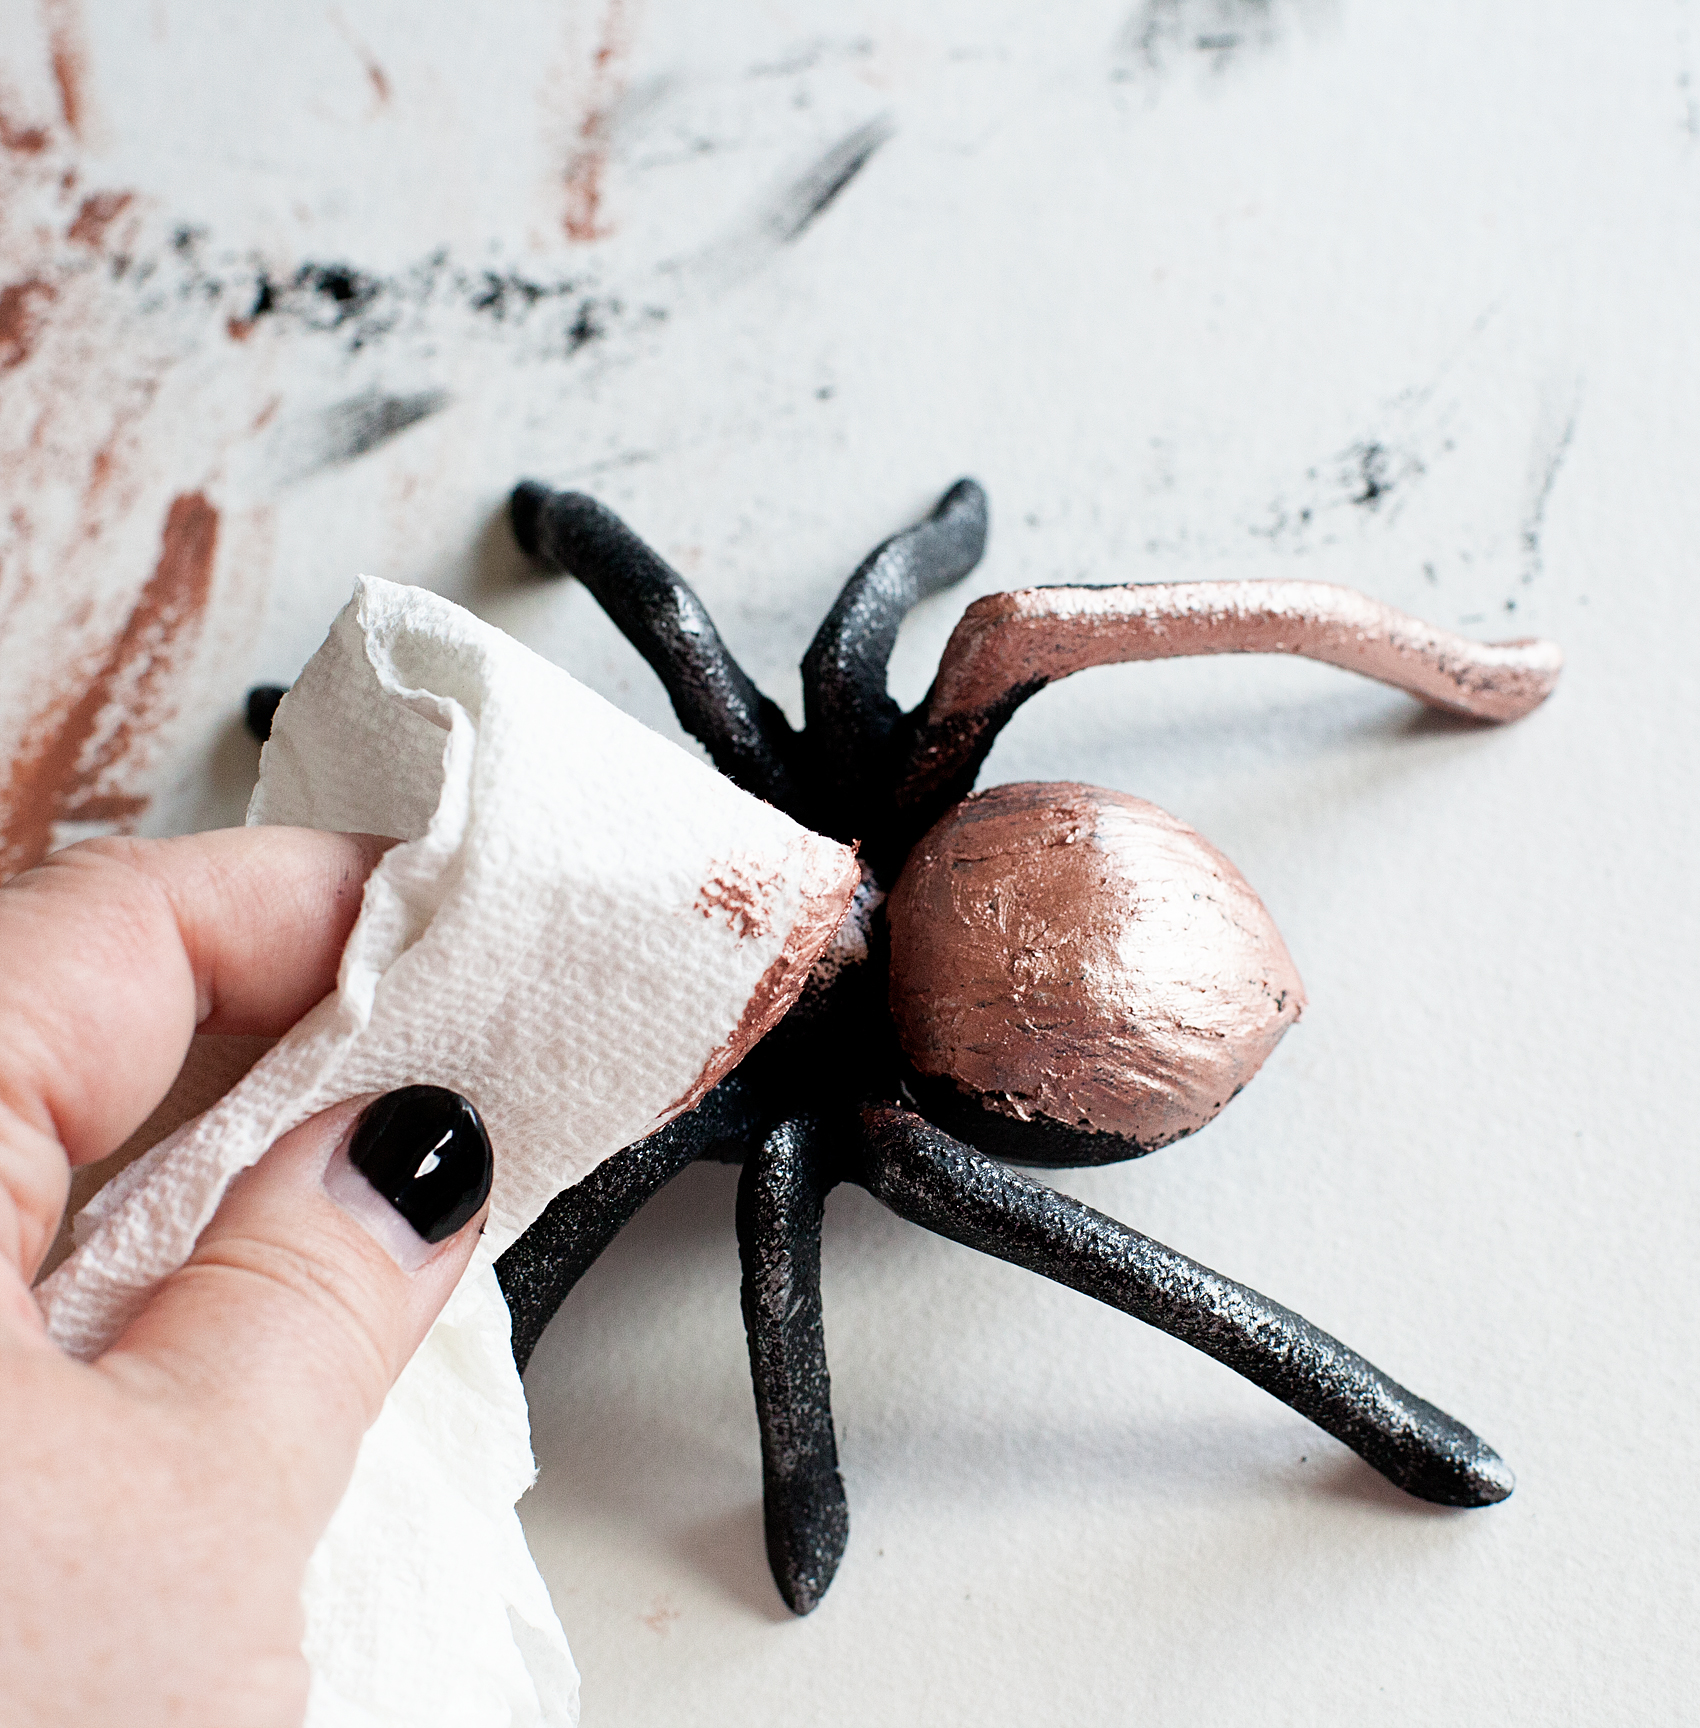
… And then, rub it all over your object that you are wanting to add a little flair to.

Add a little flair to your spooky Halloween decor with DecoArt! I used their Metallic Lustre to turn simple spooky objects into creepy yet classy taxidermy plaques to decorate our entryway for Halloween.

It cures really quick so, if you don’t want to have full coverage, make sure you work in small sections and work quick. With these pieces, I didn’t want full coverage, I still wanted them to look a little rough. As for the keys, I only wanted the rose gold at the top of the keys and then left the bottom black.

Add a little flair to your spooky Halloween decor with DecoArt! I used their Metallic Lustre to turn simple spooky objects into creepy yet classy taxidermy plaques to decorate our entryway for Halloween.

Once the paint on the plaques is dry and the Metallic Lustre has cured (it only takes a few minutes) you are ready to mount them on their plaques.

Add a little flair to your spooky Halloween decor with DecoArt! I used their Metallic Lustre to turn simple spooky objects into creepy yet classy taxidermy plaques to decorate our entryway for Halloween.

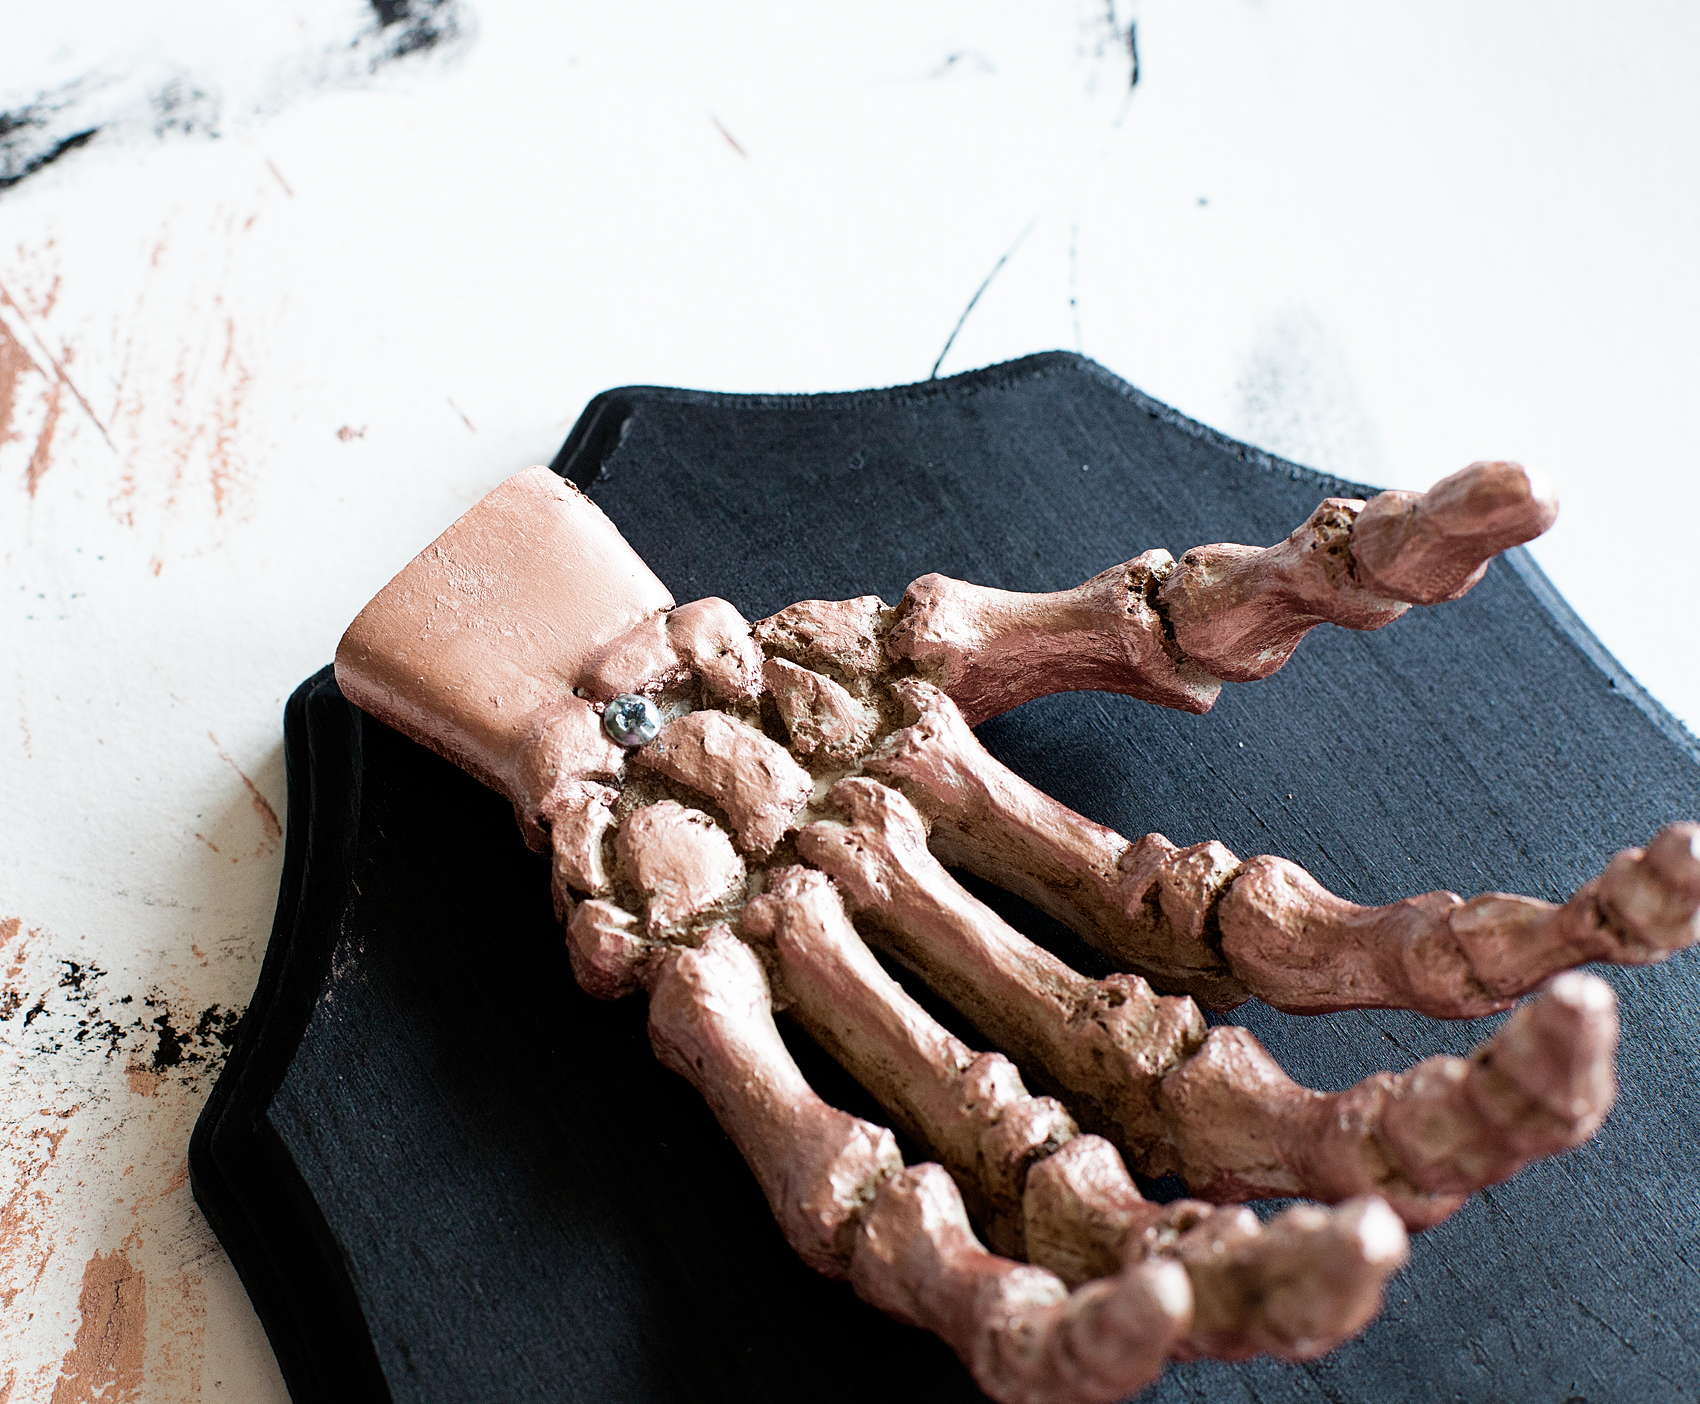
I just used a 1 1/2 inch screw to adhere the skeleton hand to the plaque. However, I did drill pilot holes into the hand and the plaque before to ensure a proper fit.

Now… I’m sure you’ve noticed that there is now a unsightly screw in the hand.

Add a little flair to your spooky Halloween decor with DecoArt! I used their Metallic Lustre to turn simple spooky objects into creepy yet classy taxidermy plaques to decorate our entryway for Halloween.

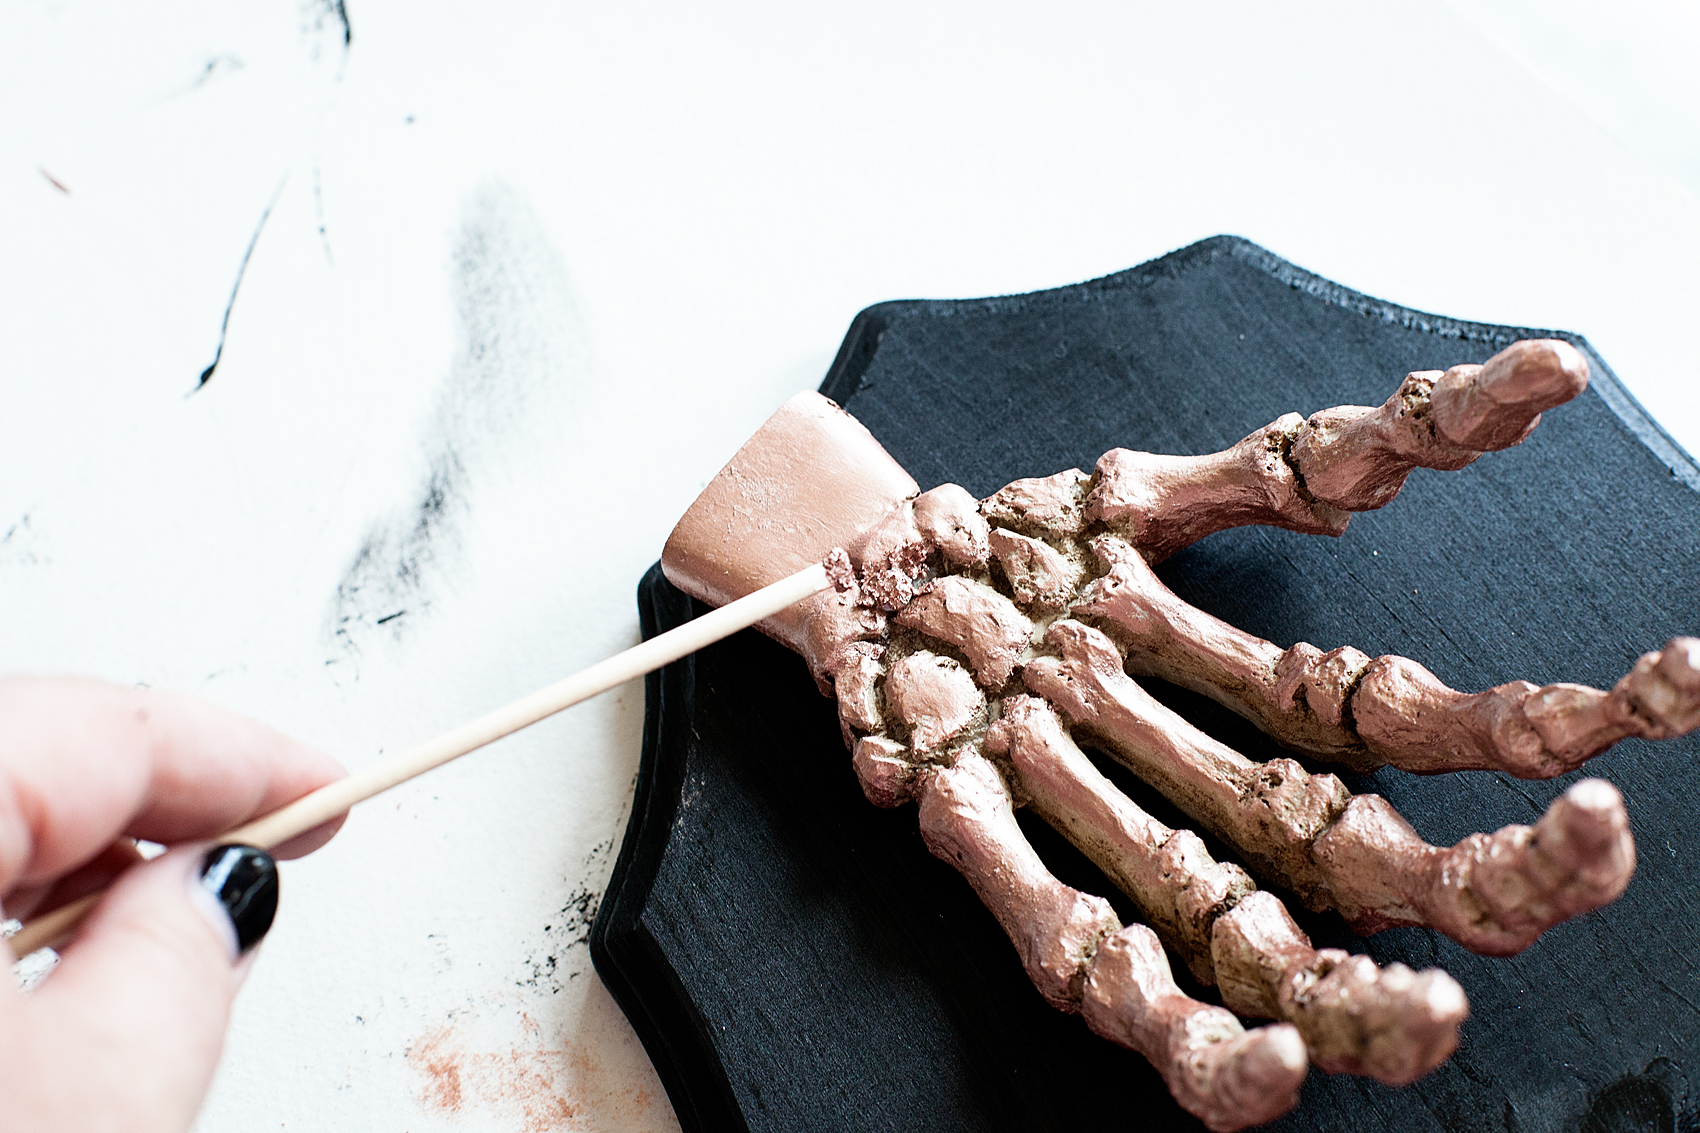
No worries!! I took a stick and roughly added more of the Metallic Lustre to cover the screw head.

Add a little flair to your spooky Halloween decor with DecoArt! I used their Metallic Lustre to turn simple spooky objects into creepy yet classy taxidermy plaques to decorate our entryway for Halloween.

Once it cures, it’s hard and voilá… You can’t see the screw! Nice, huh?

For the spider, I placed a screw on the plaque and hung the spider on it. If you use the same spider that I used, it has a screw hanger on the back so it works perfect. I did add some of the Metallic Lustre to the screw to help it blend in.

Now it’s time to mount your Staghorn Fern. Grab the plaque that you didn’t paint along with your drill and 6 1 1/2 inch screws and some floral wire.

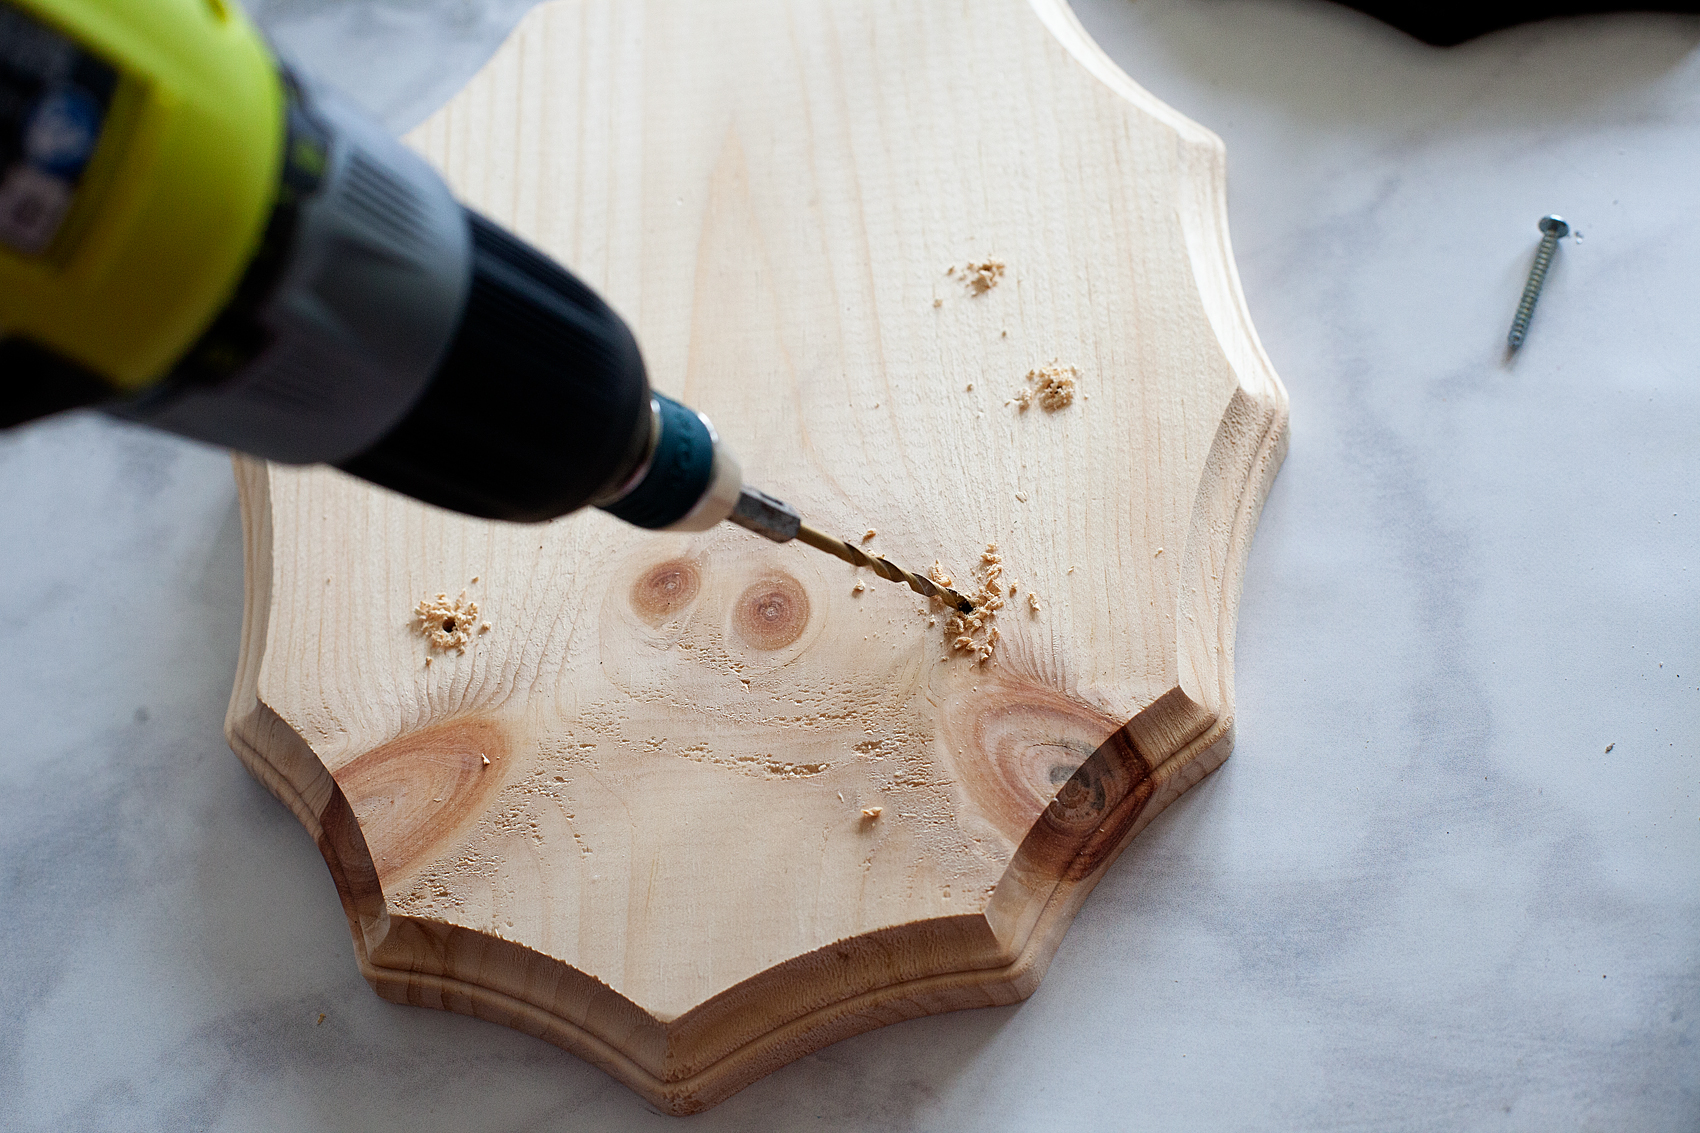
First, I drill pilot holes into the plaque.

Add a little flair to your spooky Halloween decor with DecoArt! I used their Metallic Lustre to turn simple spooky objects into creepy yet classy taxidermy plaques to decorate our entryway for Halloween.

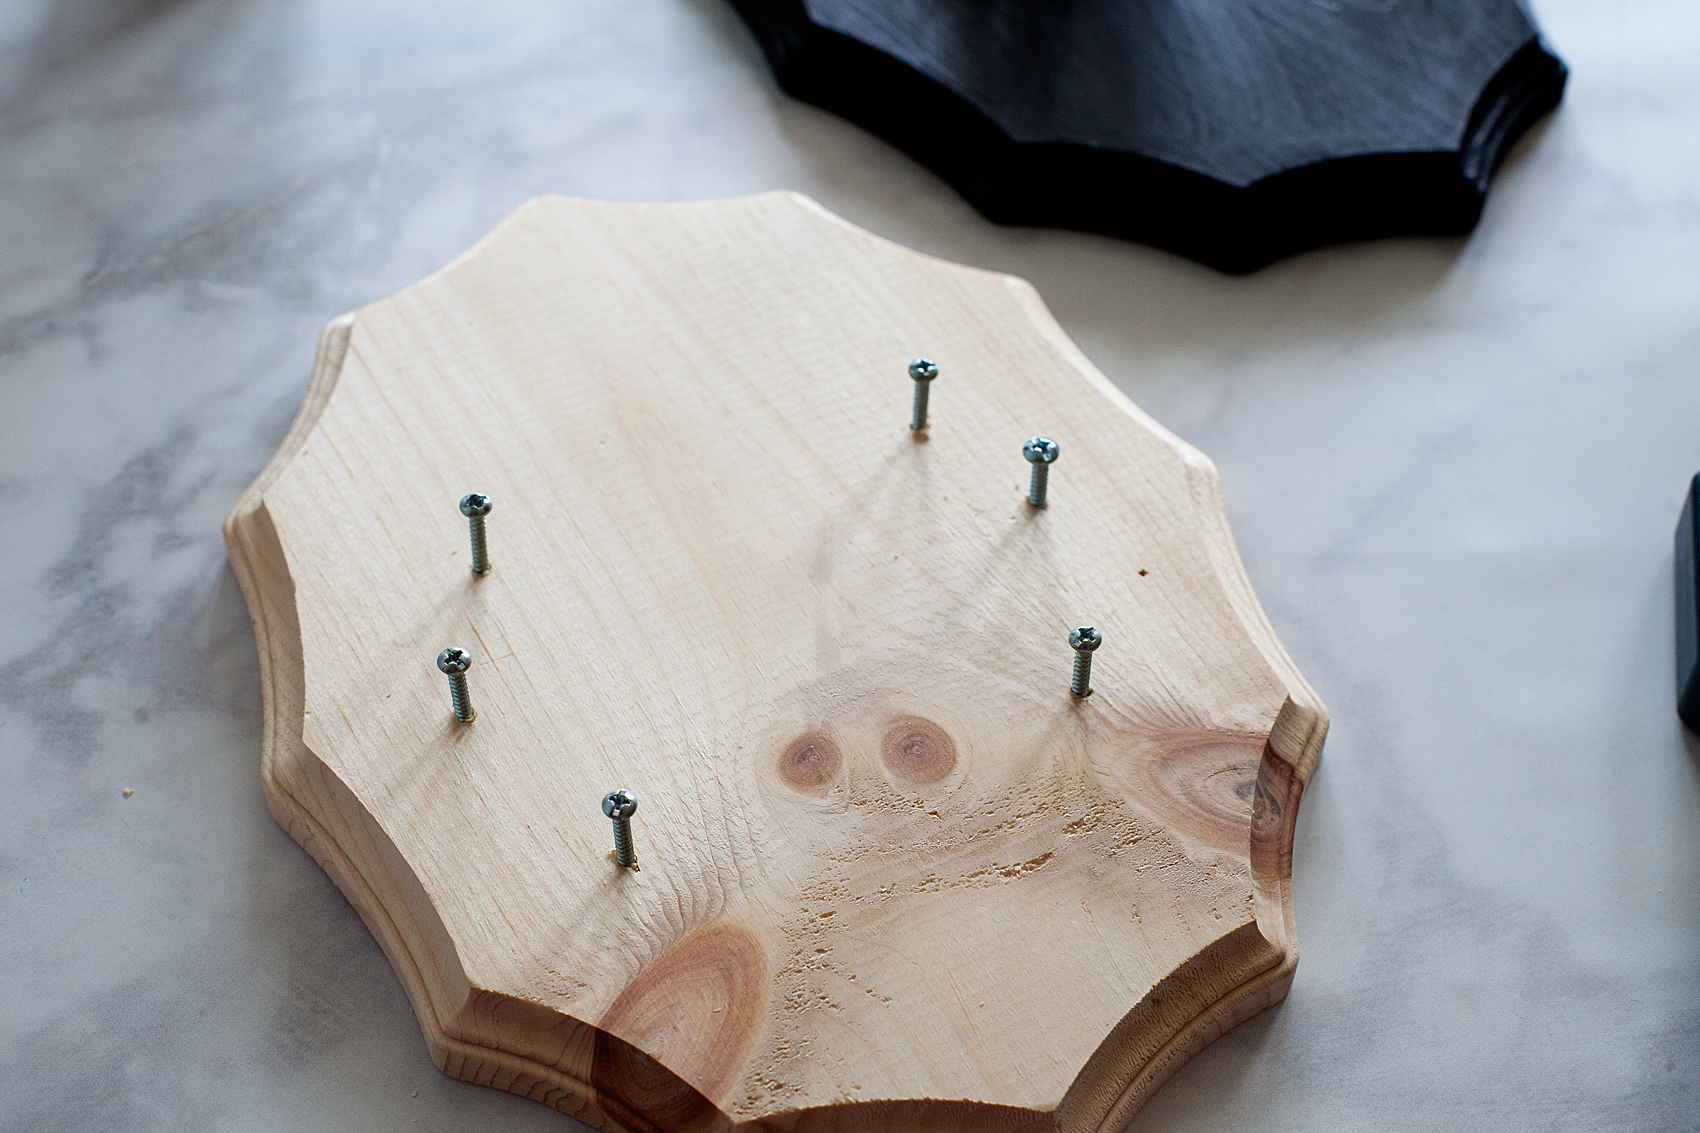
Three on each side about an inch away from the edge of the board. Then I add my screws but keep about an inch sticking up from the board.

Add a little flair to your spooky Halloween decor with DecoArt! I used their Metallic Lustre to turn simple spooky objects into creepy yet classy taxidermy plaques to decorate our entryway for Halloween.

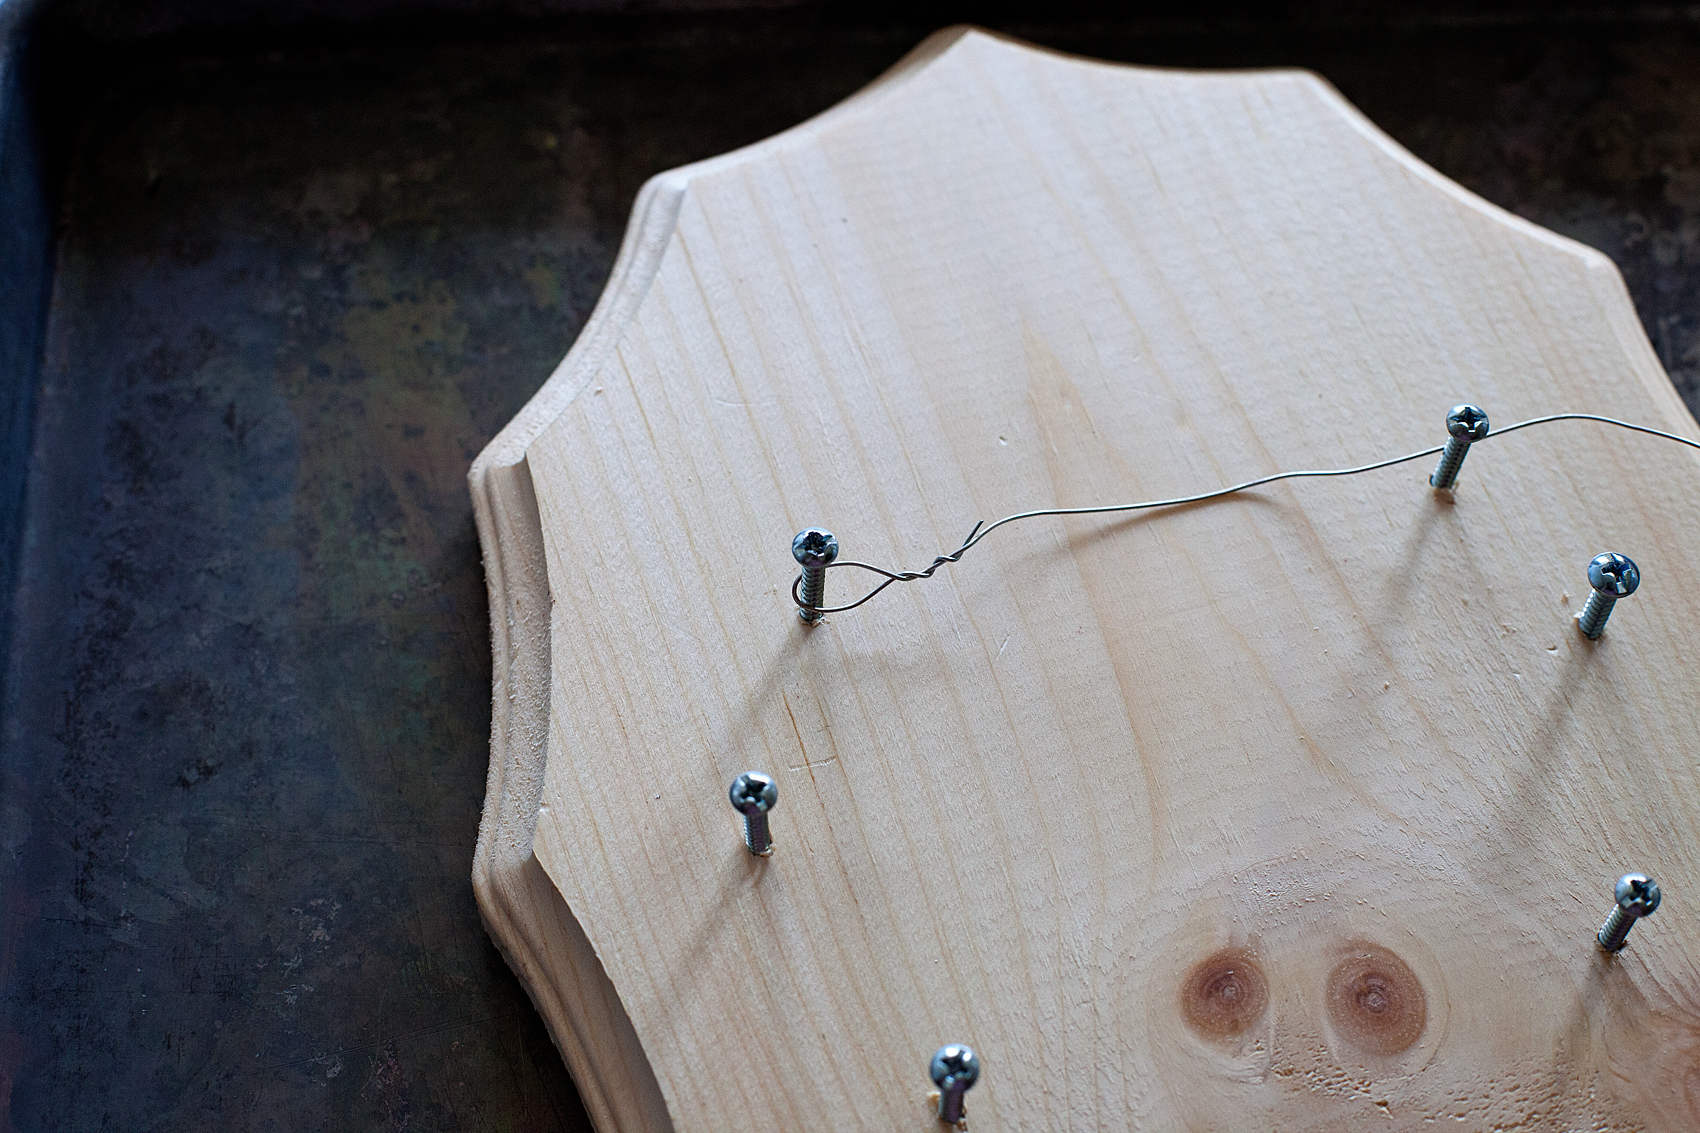
At this point, I lay my plaque in a baking sheet. This part can get a little messy and the baking sheet will help contain the mess. Then I take the floral wire and make a little loop to help start the process and attach it to the top screw.

Add a little flair to your spooky Halloween decor with DecoArt! I used their Metallic Lustre to turn simple spooky objects into creepy yet classy taxidermy plaques to decorate our entryway for Halloween.

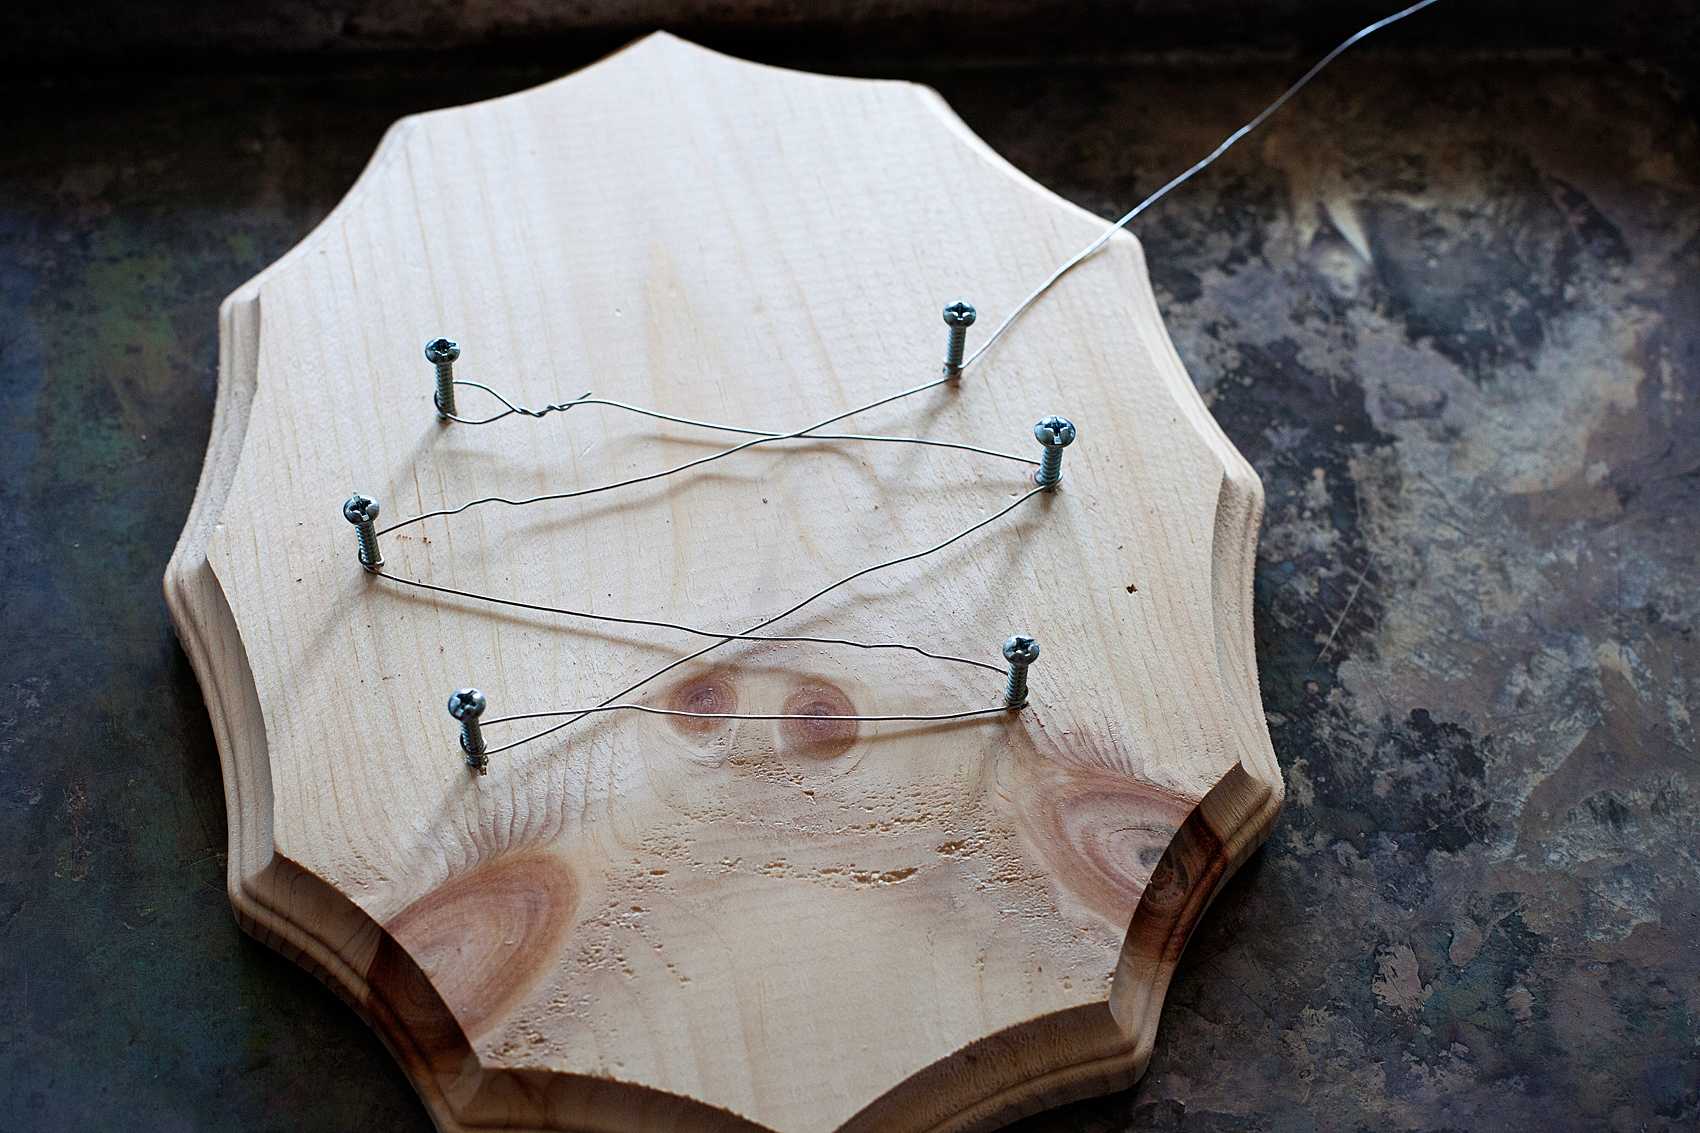
Then I wind it around the rest of the screws making sure to keep the wire close to the base of the screw close to the wood.

Add a little flair to your spooky Halloween decor with DecoArt! I used their Metallic Lustre to turn simple spooky objects into creepy yet classy taxidermy plaques to decorate our entryway for Halloween.

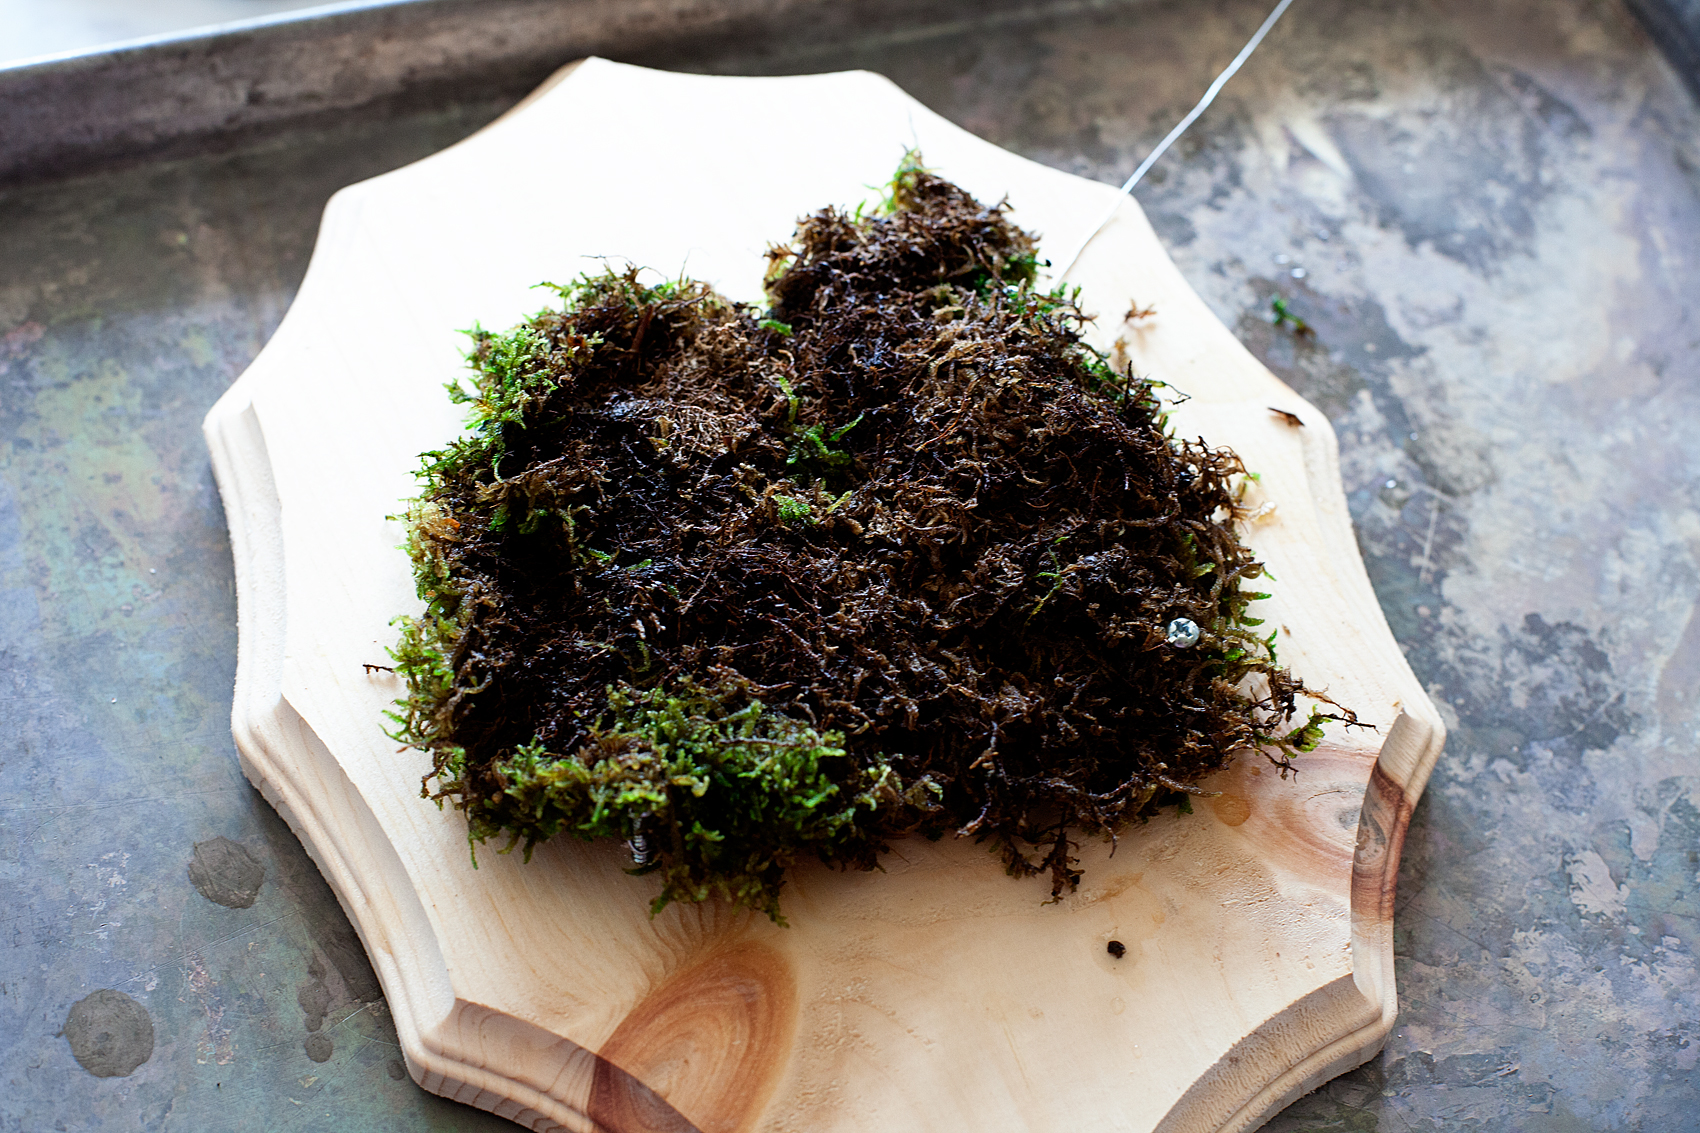
Do not cut the floral wire yet. Take some of your moss, gently wring it out a bit and lay it on top of the wire.

Add a little flair to your spooky Halloween decor with DecoArt! I used their Metallic Lustre to turn simple spooky objects into creepy yet classy taxidermy plaques to decorate our entryway for Halloween.

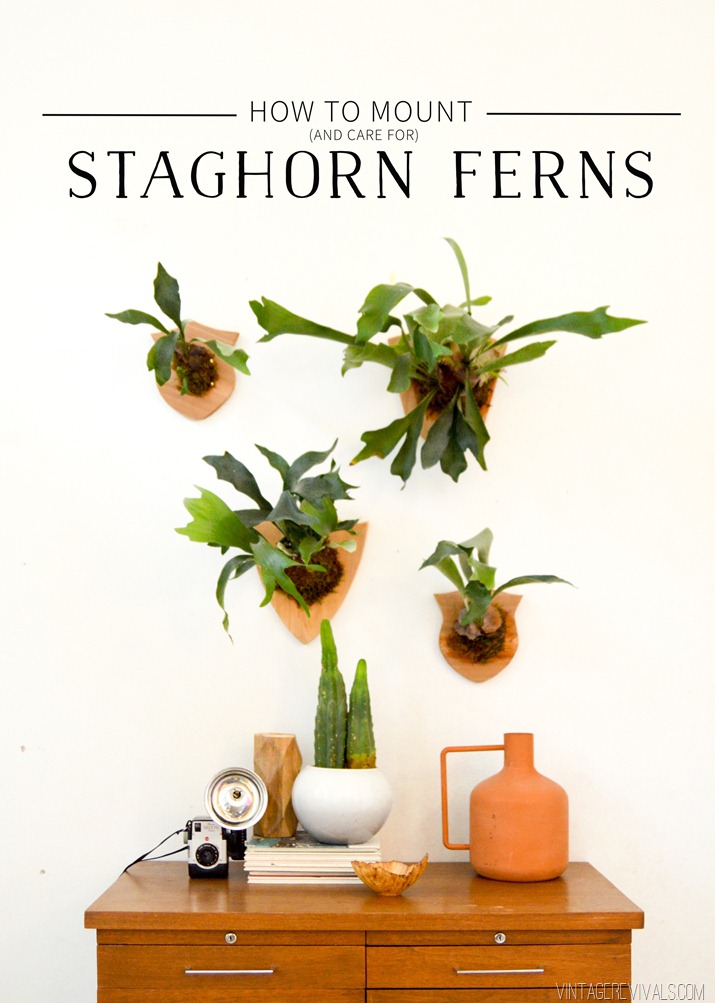
Then take your Staghorn Fern and gently take it out of the pot and remove as much dirt as possible. Staghorn Ferns are air plant so they really don’t need to live in soil. They get their nutrients from the air and the moisture on their frawns. For a really great post on Staghorn Ferns and how to mount and care for them, check out Vintage Revivals. Mandi has a real love for these plants.

HowtoMountandCareforStaghornFernscompletetutorialwithpictures

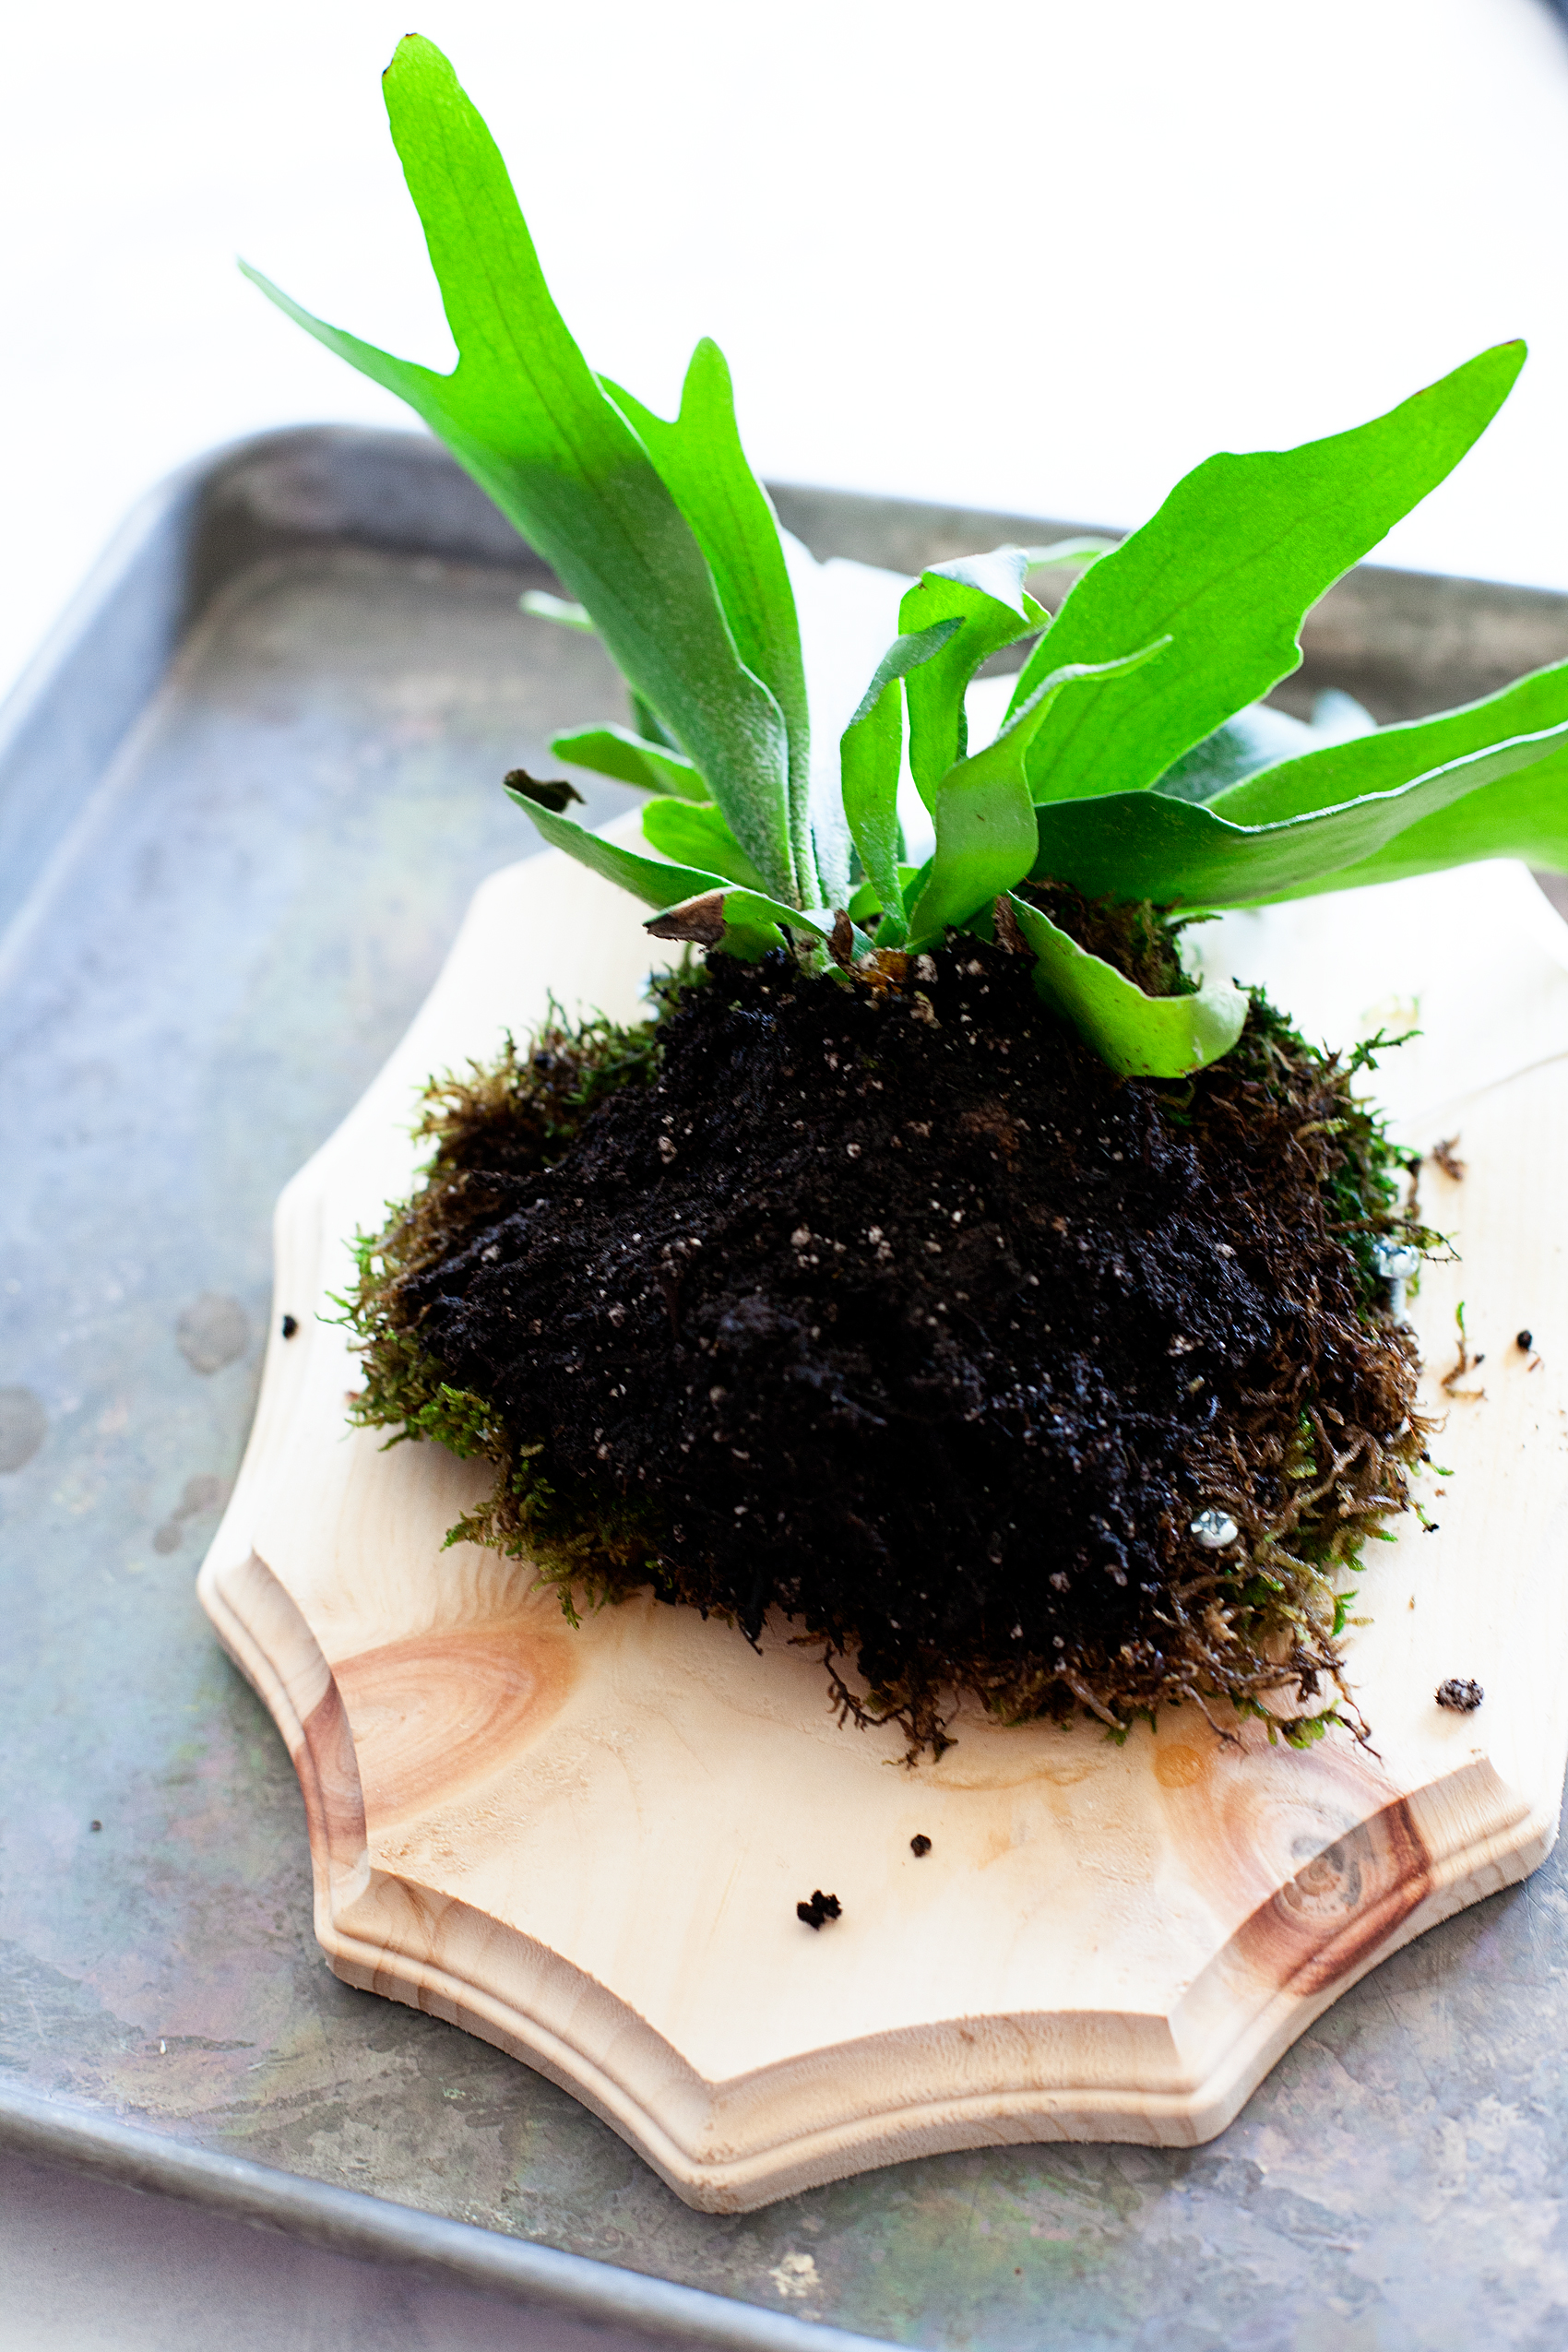
Once I’ve removed as much of the dirt as I am comfortable with, I lay it down on top of the moss.

Add a little flair to your spooky Halloween decor with DecoArt! I used their Metallic Lustre to turn simple spooky objects into creepy yet classy taxidermy plaques to decorate our entryway for Halloween.

Here’s a funny tip…

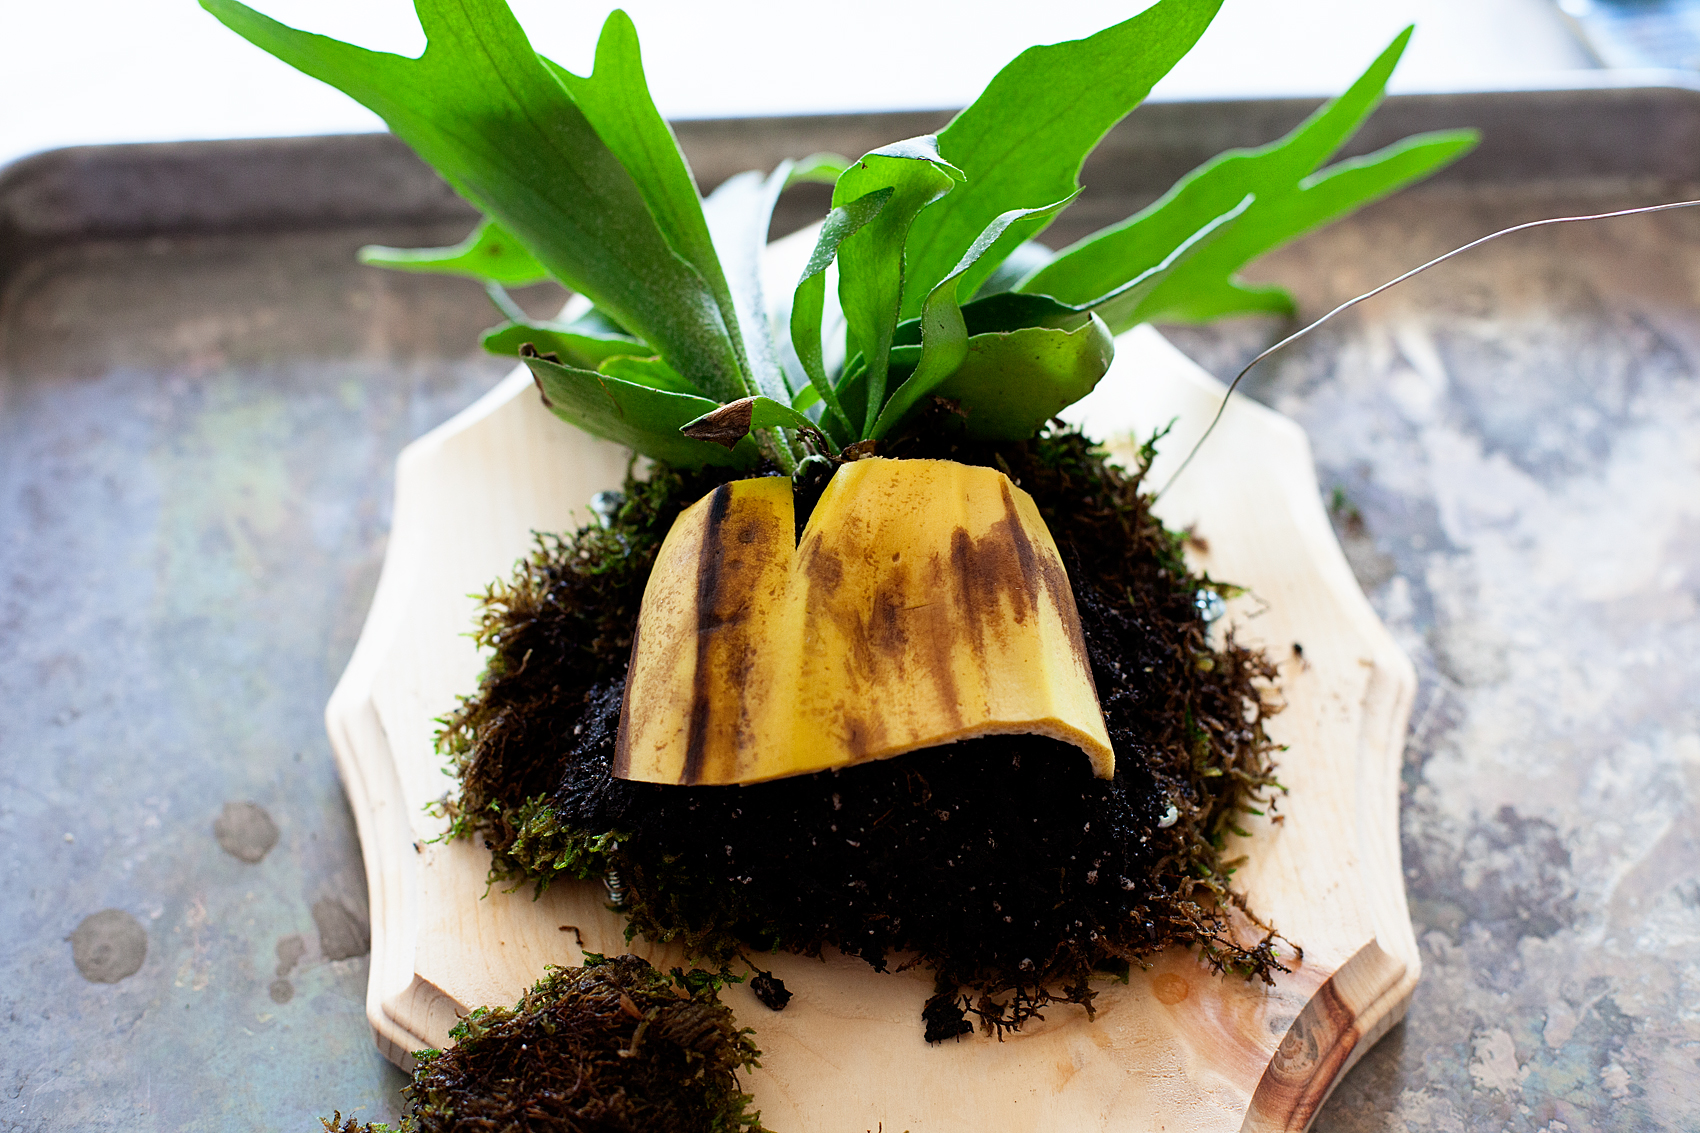
Staghorn Ferns love banana peels. Apparently, they provide the kind of nutrition that the plants really like. Before I cover the plant with moss, I add a little bit of banana peel.

Add a little flair to your spooky Halloween decor with DecoArt! I used their Metallic Lustre to turn simple spooky objects into creepy yet classy taxidermy plaques to decorate our entryway for Halloween.

Next, cover it with more moss and then criss cross the wire over the whole mound like before, until it is secure. The wire actually melts right into the moss and you don’t see it at all.

Add a little flair to your spooky Halloween decor with DecoArt! I used their Metallic Lustre to turn simple spooky objects into creepy yet classy taxidermy plaques to decorate our entryway for Halloween.

Check out Mandi’s post for tips on how to care for your new mounted Staghorn Fern. Now you’re all set to hang your macabre little scene on your walls.

Add a little flair to your spooky Halloween decor with DecoArt! I used their Metallic Lustre to turn simple spooky objects into creepy yet classy taxidermy plaques to decorate our entryway for Halloween.

Another little trick… I hung mine with those Command Strip Picture Hanging Strips. LOVE those babies!

Add a little flair to your spooky Halloween decor with DecoArt! I used their Metallic Lustre to turn simple spooky objects into creepy yet classy taxidermy home decor.

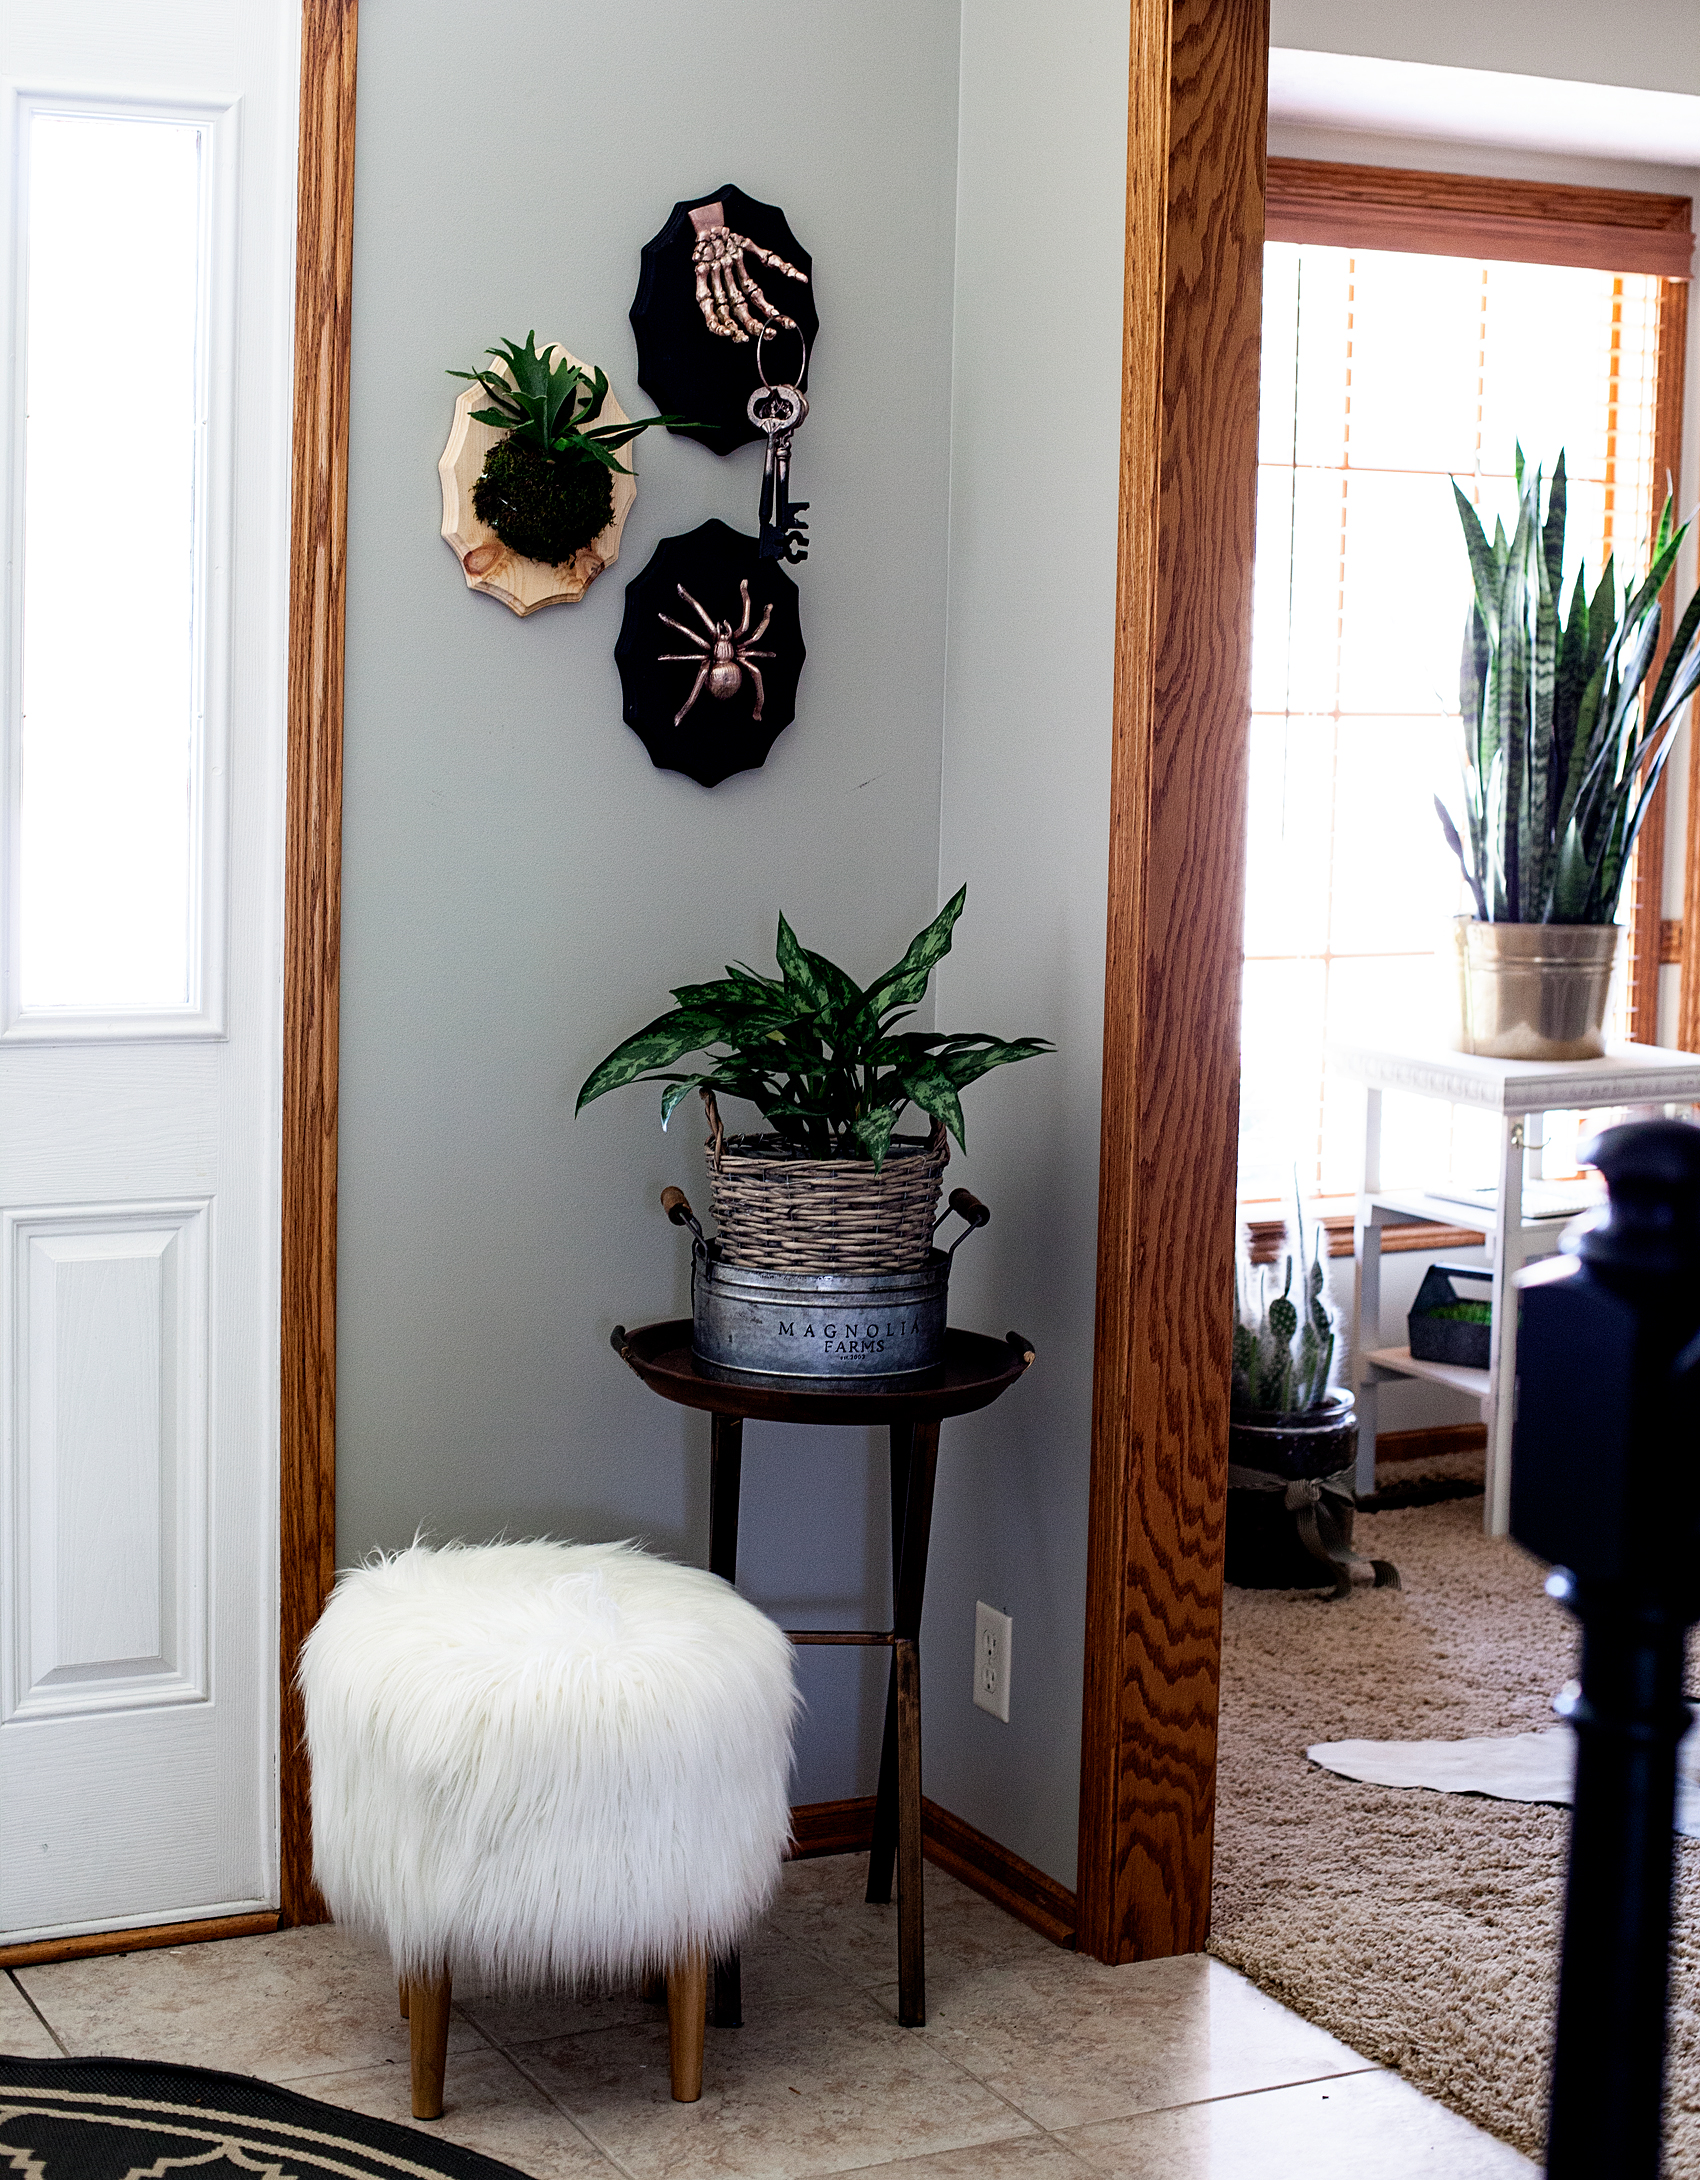
I love how these add a little creepy and yet class to my entryway if that’s even possible!

  • Go to page 1
  • Go to page 2
  • Go to page 3
  • Interim pages omitted …
  • Go to page 5
  • Go to Next Page »

Primary Sidebar

Heather from Whipperberry
Hello... my name is Heather and I'm the creator of WhipperBerry a creative lifestyle blog packed full of great recipes and creative ideas for your home and family. I find I am happiest when I'm living a creative life and I love to share what I've been up to along the way... Come explore, my hope is that you'll leave inspired!

Footer

  • Privacy Policy

Copyright © 2023 · Seasoned Pro