• Skip to primary navigation
  • Skip to main content
  • Skip to primary sidebar
  • Skip to footer

Whipperberry

WhipperBerry • Your Home For Creative Inspiration

  • Home
  • About
    • Terms
  • Recipes
    • ZipList
    • Starters
    • Easy Weeknight Dinners
    • Main Dish
    • Salads
    • Side Dish
    • Soups & Stews
    • Desserts
    • Breakfast
    • Miscellaneous
  • Tutorials
    • Creative Crafts
    • DYI Decor
    • Fabric Crafts
    • Food How-To
    • Jewlery
    • Paint Projects
    • Paper Art
    • Party Styling
    • Photography and Graphic Design
    • Silhouette
  • Holidays
    • St. Patrick’s Day
    • Easter
    • Mother’s Day
    • Father’s Day
    • 4th of July
    • Halloween
    • Thanksgiving
    • Christmas
    • New Years
    • Valentine’s Day
  • Gift Ideas
    • Gifts For Everyone
    • Gifts for Dad
    • Mother’s day
    • For The Girls
    • For The Kids
    • Teacher Gift Ideas
    • Christmas
  • Printables
    • Holiday
    • Gift Idea
    • LDS Primary
  • Travel
  • Contact
  • Nav Social Menu

    • Facebook
    • Instagram
    • Pinterest
    • RSS
    • Twitter
You are here: Home / Uncategorized / {Tutorial} Sweater Flowers

{Tutorial} Sweater Flowers

110 · Oct 27, 2010 · 26 Comments

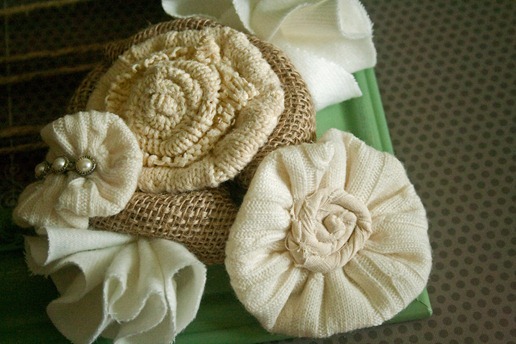
This is a sneak peak into our guest post for Jen at Tatertots & Jell-o Friday, but I just couldn’t wait to share!

Sweater Flower 060_edited-1

Not too long ago, I discovered some fabulous sweater flowers made by Linda over at Craftaholics Anonymous, and thought I would give them a go.

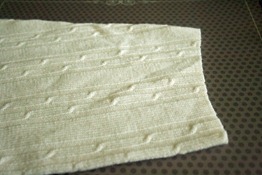
First, you will need some old sweaters.  I found mine at a thrift store for a few dollars, I just couldn’t stomach cutting up my sweaters knowing how much I paid for them.

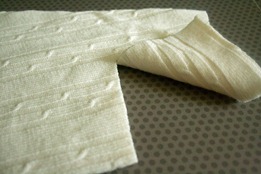
Take the sleeve of the sweater and cut roughly a 4 to 5 inch section off.

Sweater Flower 001  Sweater Flower 005

Sweater Flower 009

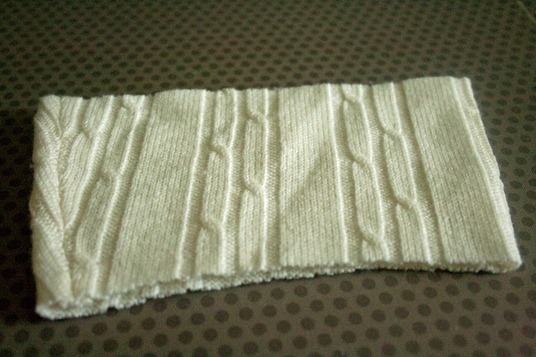
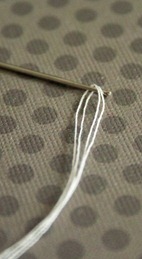
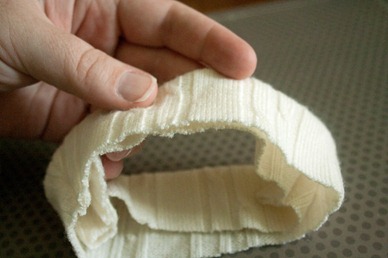
I double thread a regular sewing needle and tie a knot at the end. Fold the sweater round in half, right sides out.

Sweater Flower 023  Sweater Flower 012

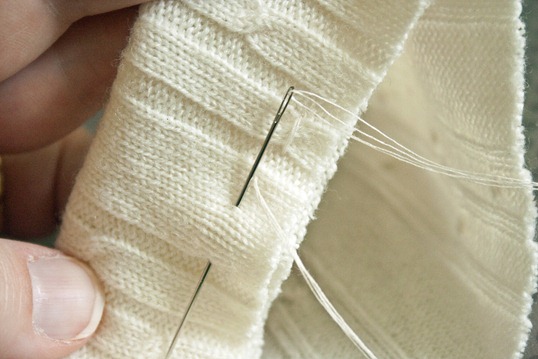
Hand sew a basting stitch along the bottom 1/4 of the sweater round, making sure to catch both layers of sweater.

Sweater Flower 027_edited-1

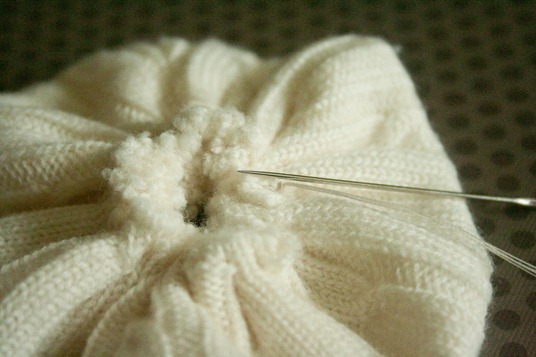
I like to pull the thread while I continue the basting stich.  I find it’s much easier to gather, and it lessens the likelihood of the thread breaking.

Sweater Flower 032

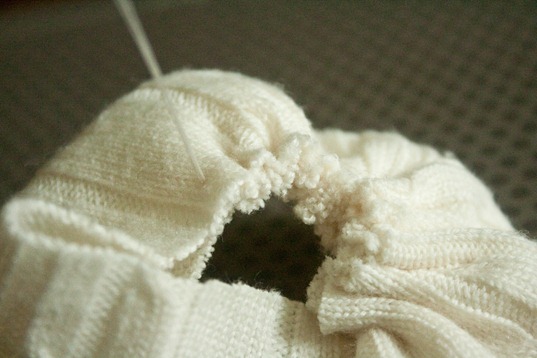
Once you have completed the basting stitch, tie a knot to secure.

Sweater Flower 035

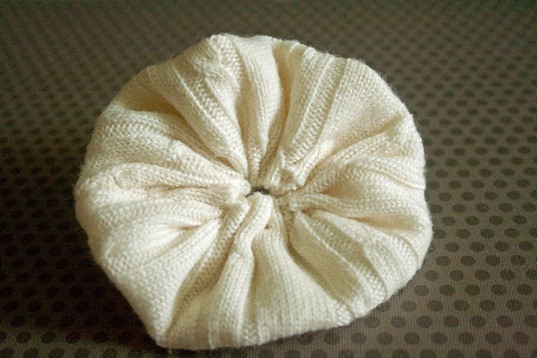
Flip the flower over.

Sweater Flower 042

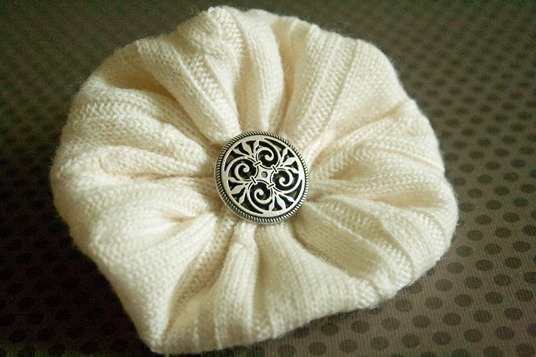
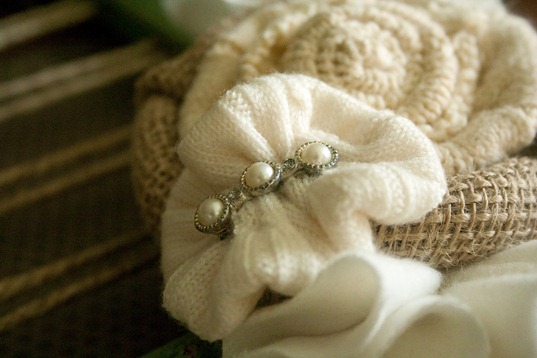
Now you can embellish the flower center however you like.

Sweater Flower 044

With a button…

Sweater Flower 059

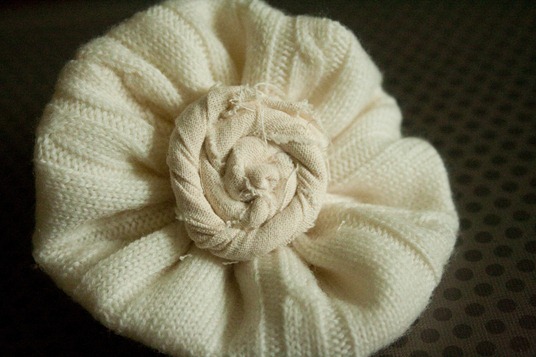
…or another type of fabric flower.  This is a twisted muslin flower.  Aren’t they fun!!!

Sweater Flower 066

The ideas are limitless!!  I have visions of a Sweater Flower Christmas Wreath in my future!!

Signature_edited-1

Visit thecsiproject.com

WhipperBerryLogo

110
Pin
Share
Tweet

Uncategorized

Reader Interactions

Comments

  1. Kim's Treasures says

    October 27, 2010 at 9:22 pm

    Sooo pretty!

    Reply
  2. Nicole Love says

    October 27, 2010 at 10:16 pm

    Those flowers are beautiful! Where do you find all of your cute buttons and pins for the center of your flowers?

    Reply
  3. Heather {WhipperBerry} says

    October 27, 2010 at 10:38 pm

    Nicole-the button is from JoAnn's and the pearl thing is actually a hair clip that I bought that never worked in my hair so I re-purposed it.

    Reply
  4. Jen.Jensen says

    October 28, 2010 at 2:32 pm

    Can't wait to try it.

    Reply
  5. Jane says

    October 28, 2010 at 4:26 pm

    Ohh! so sweet, simple and sassy! The possibilities are endless. Thanks!

    Reply
  6. Erin says

    October 28, 2010 at 7:44 pm

    I LOVE these!!!! I'm totally drooling over these!! 🙂

    Reply
  7. Pam Ponder says

    October 28, 2010 at 11:46 pm

    I have something for you over at my place…

    http://www.livelaughlovewiththeponderingprincess.com/2010/10/i-got-award.html

    Reply
  8. Tonia says

    October 29, 2010 at 3:56 pm

    Thank you, thank you, thank you for posting a project that seems so simple & easy enough for me to actually make a few. I'm seeing a visit to Goodwill & some homemade Christmas gifts in my future.

    Tonia

    Reply
  9. zoo keeper says

    October 30, 2010 at 5:47 am

    yes! exactly! i know what i'm going to do for some fun gifts! it's so handy when other people are so creative ;o) keep up the good work!

    Reply
  10. Sandy a la Mode says

    October 30, 2010 at 6:25 pm

    wow these are sooo lovely and are perfect the winter~!! thanks for sharing!

    Reply
  11. the 30 girl says

    November 2, 2010 at 6:21 pm

    These are lovely! I'm pretty sure I have several old sweaters just waiting to be turned into flowers. Thanks for sharing this idea!

    Reply
  12. laura says

    November 9, 2010 at 4:36 am

    those are seriously beautiful – so simple and elegant! love them!

    Reply
  13. Hope says

    November 19, 2010 at 7:51 pm

    i just made a lime green one and put a pink floral fabric rose in the center! I'm going to make it a pin for my black winter coat! SOOOO cute! But I think my sweater was kinda too thick. Going to the sal val tonight to find thinner sweaters. THANK YOU for the idea!

    Reply
  14. melissa says

    November 30, 2010 at 11:06 am

    ooooo….i love this tutorial! i can pictures these darlings on a headband…on my adorable three year olds head! oh the possibilities! thanks for sharing!

    Reply
  15. Nicki says

    December 1, 2010 at 5:56 pm

    Sooooo cute! I love easy projects like this one, and I have 2 (going on 3) girls that could wear these in their hair!

    Reply
  16. Yanet @ 3 Sun Kissed Boys says

    December 29, 2010 at 5:39 am

    How cute! I wonder if my husband would notice if I cut up one of his sweaters. 🙂

    Reply
  17. Cindy says

    January 2, 2011 at 3:57 am

    Those are really sweet, I could probably make those they are so easy. Thanks for showing us how.
    Hugs, Cindy

    Reply
  18. Donnie says

    January 4, 2011 at 2:41 am

    I could envision so many uses for those. Really pretty.

    Reply
  19. Chasing Whimsy says

    May 20, 2011 at 4:04 pm

    so cute I love it

    Reply
  20. Julie says

    August 24, 2011 at 7:59 am

    I've used this many times.  Thanks so much.  Here is one version: http://gluegunsandspatulas.blogspot.com/2011/08/pillowcase-dress.html

    Reply
  21. Helen B. @ Blue Eyed Beauty Blog says

    September 27, 2012 at 11:16 pm

    I LOVE this idea! It is perfect for a sweater I want to design!

    Helen
    Blue Eyed Beauty Blog

    P.S. I am now following your blog!

    Reply
  22. The Home Made Real says

    October 5, 2012 at 8:44 pm

    You seriously have a great tutorial! Thanks so much! Keep up the good work! Somehow you made sewing look easy and I hate it! I always try a glue gun first ;)!!!

    Reply

Leave a Reply Cancel reply

Your email address will not be published. Required fields are marked *

Recipe Rating


Primary Sidebar

Heather from Whipperberry
Hello... my name is Heather and I'm the creator of WhipperBerry a creative lifestyle blog packed full of great recipes and creative ideas for your home and family. I find I am happiest when I'm living a creative life and I love to share what I've been up to along the way... Come explore, my hope is that you'll leave inspired!

Footer

  • Privacy Policy

Copyright © 2023 · Seasoned Pro