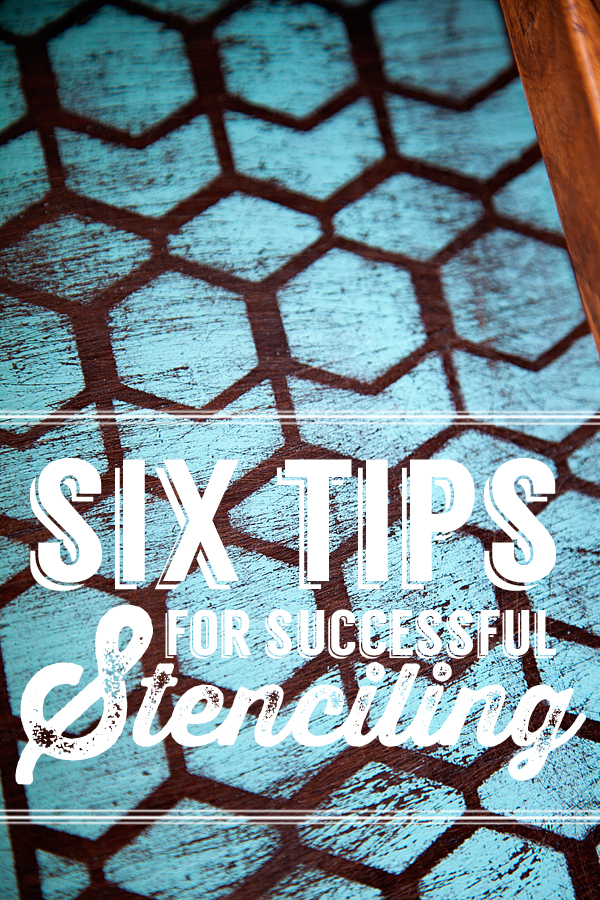
This post brought to you by DecoArt // I am a sucker for a good old wood caddy. Even better, is an old caddy that I have dressed up with some paint and maybe a stencil or two. I have a fabulous picnic caddy that I dressed up not too long ago and I have recently found another rustic old caddy to dress up. When it comes to adding some graphic elements to anything, I turn to the Americana Multi Surface Satin Paint and the Americana Mixed Media Stencils for sure. But… I also have a few tricks up my sleeve when it comes to using those stencils. Below you will find 6 tips on painting with stencils.
I found another great caddy from Antique Farmhouse (they also have a sister site called Decor Steals)…
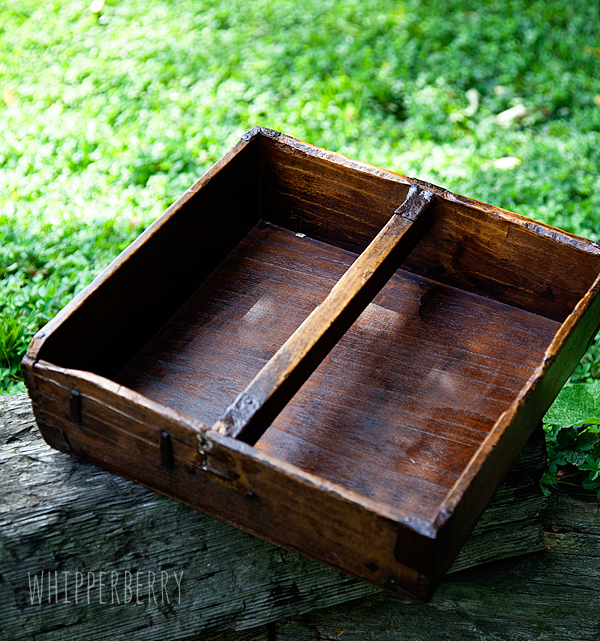
… And I thought it would look fabulous with a fun geometric design on the floor of the caddy using the new Americana Multi Surface Satin Paint.
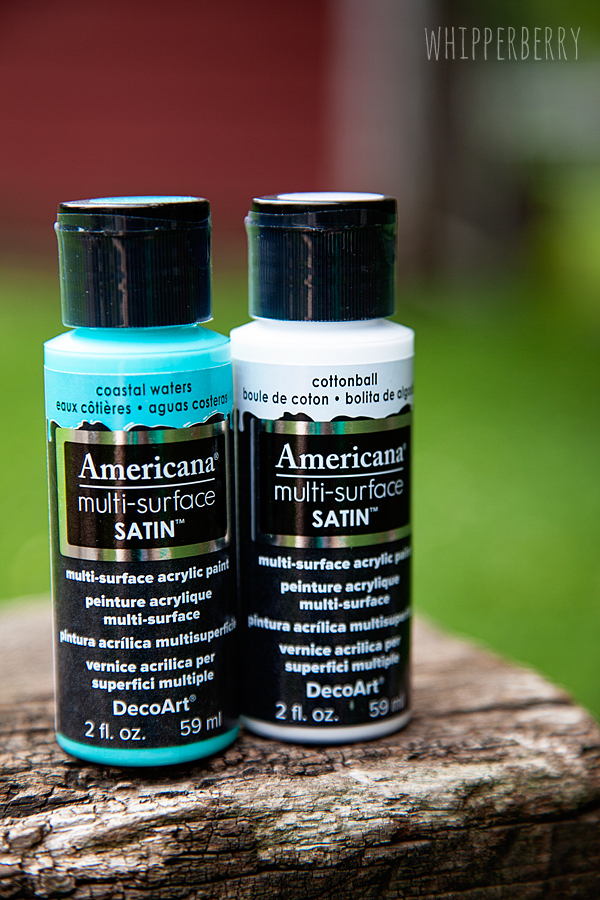
This paint is fabulous for all kinds of surfaces. Wood, glass, metal, plastic… You name it, it will look wonderful. I recently had a chance to travel to Kentucky to the home of DecoArt and learned all kinds of goodies about all of their different paints. It’s amazing how so many of us just grab a bottle of craft paint at the store without really thinking about what surface we are going to use as our canvas. Sometimes… the paint we pick just won’t work with our desired surface. With the Multi-Surface Satin, you won’t have to worry about that!
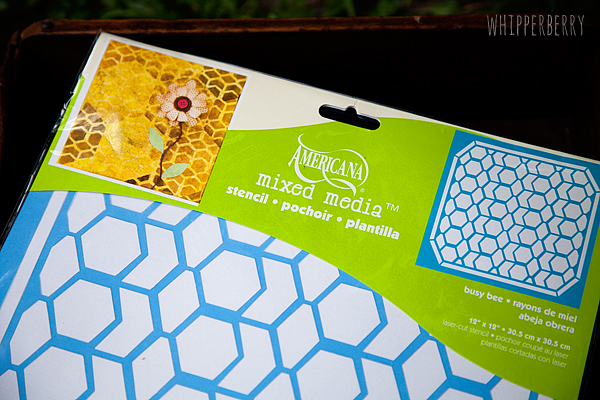
For this project, I used a mixture of Coastal Waters and Cottonball. I wanted the blue to be a little lighter, that’s why I added a little white. I used one of the new Americana Mixed-Media Stencils called Busy Bee and some painter’s tape as well.
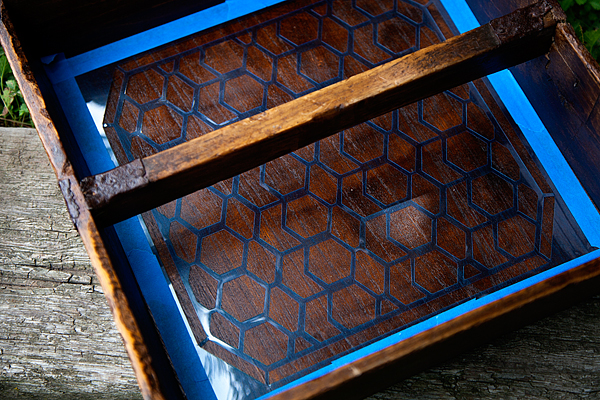
I taped down the stencil on the surface of the caddy, just so I didn’t have to worry about it moving around.
How to Paint with Stencils
Next, using a Dual-Sided Paint Pouncer, I carefully paint the surface of the caddy. Now, here are a few tips when it comes to getting good stencil lines. It’s important that you know how to use stencils if you’re doing this for the first time.
- Load your stencil pouncer or brush carefully, A little paint goes a long way. Never just dip your brush into the paint and then go directly to your surface. Always dip your brush into the paint and then have another surface like a paper plate to work out all the paint kinks before you start working on your surface.
- Light, up and down movements are best when it comes to working with stencils. Never brush side to side or press down firmly. This is just asking the paint to slide right under that stencil and create muddy, unattractive lines.
- Work in layers. If you want a light weathered look, you may only need one coat. But, If you want a strong vibrant stenciled image, work in light layers. This way you are slowly building your image and will have cleaner lines and a professional-looking finish.
- Secure your stencil with painter’s tape so that you don’t have it moving around while you are trying to work with it.
- Don’t let the stencil dry for long before you remove the stencil. This will help keep the lines sharp. More on this below.
- Use a good brush and stencil cleaner to clean and preserve your brush and stencil for future use.
Should You Remove The Stencil When The Paint is Wet or Dry?
You should actually remove the stencil it’s wet. This may seem backwards but it always turns out better in my experience. When you do it this this way, the paint cannot bleed underneath and ruin the crisp lines. It can be a bit more difficult if the paint dries to the stencil too. This is how you keep the paint from peeling when removing vinyl stencil
For this project, I wanted a light weathered look so I carefully loaded just a tiny bit of paint, prepped my brush on a paper plate, and then with careful up and down strokes started covering my surface.
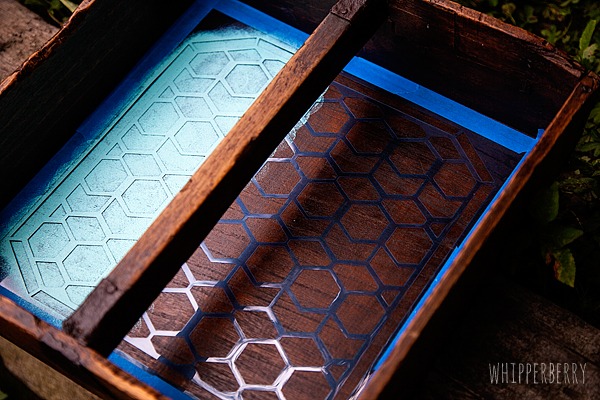
Because I was only going to do one light coat, the paint dried within just a few minutes. I removed the stencil and then waited for a couple of hours before I distressed the paint. The paint needs time to cure and ideally, I should have waited overnight but, it turned out fine this time. You just gotta love painting with stencils!
I used some sandpaper to lightly distress the paint so that the graphic design matched the patina of the piece itself. When you are distressing, think about how you want the finished product to look. Do you want to work in circles, up and down, side to side, or criss-cross, there are so many ways to create 100 different looks for your finished product. I chose a simple side-to-side motion to match the grain of the wood.
Here is how the caddy looks finished…
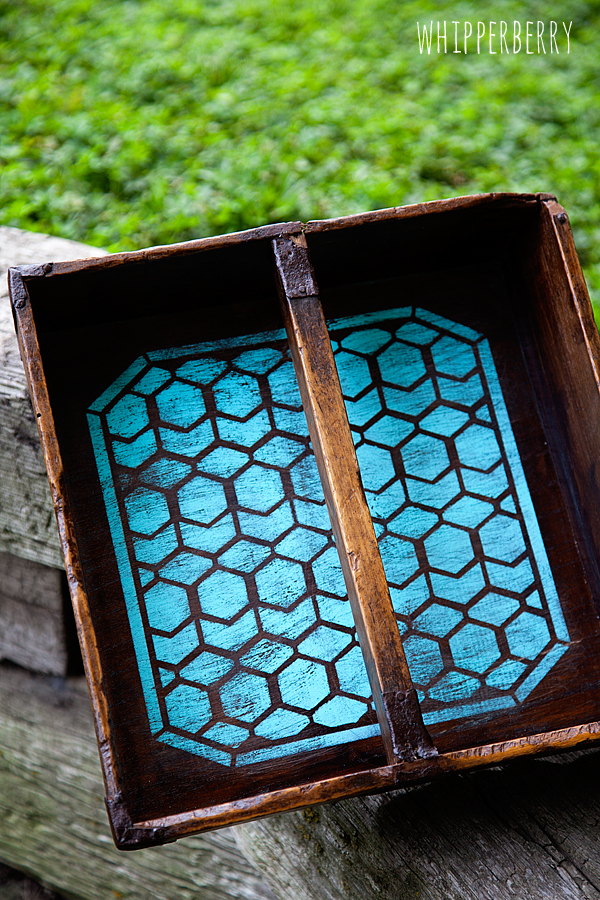
Isn’t it fun?! A perfect addition to my picnic caddy collection. You bet we are going to be picnicking in style here at the WhipperBerry house!
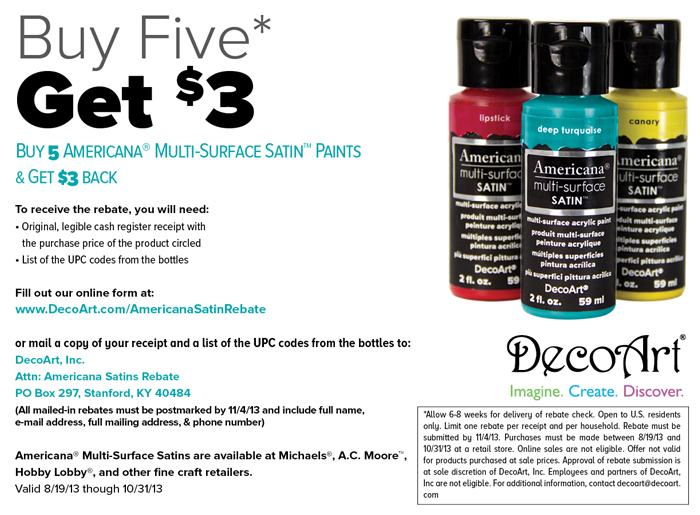
You can find all of the products that I used for this project at Michaels, A.C. Moore, Hobby Lobby, and other fine craft retailers. To sweeten the deal, DecoArt has even offered a fabulous rebate offer to each of you!!
 Disclaimer // This is a post sponsored by DecoArt. I have received payment along with the product to create this project and post. However, all thoughts, ideas, and opinions are my very own!
Aqua and Brown — one of my favorite color combinations, but seeing it with the brown being an antique find and the aqua being so vibrant yet sanded right into the wood? You've taken this color combo to a new level! Love it!
Looks so lovely!
I love this project- and that color is perfection! I've been playing around with some of Deco Art's patio paints on a few planters lately, and it's time to try these multi surface paints now I think. 😉
I swear these are some greatest tips ever! Saving this up for future reference.
That looks pretty fabulous, I love a good stencil! Great tips, too.
The Caddy turned out great! It’s Inspiring.
I’m thinking of replacing a bad painting in a large frame with stencil art.
What type of material would be best for stenciling. Canvas, matting, fabric or what?
I’m thinking of replacing a bad painting in large frame with stencil art. What type of material would be best for stenciling? Canvas, matting, fabric or what?