I was a guest over at Infarrently Creative a little bit ago and I thought I would share what I created for Beckie and her friends over there. A Sharpie Art Gift Set. Check out how to make this fun and inexpensive gift for your family and friends this holiday season…
Hello all my IC friends! I’m Heather from WhipperBerry and I’m over the moon excited to be here with Beckie to share my Sharpie Art Gift Mugs today. I just adore Beckie and all her amazing talents. She’s one lady I would LOVE to spend a day with, just to hopefully glean from some of her knowledge, talents & energy!! One talented lady I must say…
I love this pennywise presents series she’s running this month and I have a fun one to share…
arrow design element from Rhonna Designs
Who doesn’t love a good hot chocolate mug during the chilly months and especially if it’s a mug full of LOVE?! That’s how I came up with my “A Mug A Love” gift idea to share. Here is what you will need…
Supplies
-
light colored ceramic mug
-
a Sharpie
-
plastic sandwich bag
-
hot chocolate mix, favorite coffee blend, tea or Choffy
-
Kraft paper gift tag
Optional Supplies
-
vinyl
-
vinyl cutting tool (I used the Silhouette Portrait)
-
burlap gift bag
-
bag embellishments (ribbon, bakers twine, whatever you would like to use to dress up your bag)
Directions
You can go big or minimalist with this project for sure. It all depends on your style and your budget. Also, the sky is the limit as far as the design is concerned. I’ve seen some lovely hand written designs that people have created with their sharpies on ceramic mugs, plates and bowls. I, however am not gifted in the hand writing area. I have decent handwriting, but I’m too much of a perfectionist and I would blow through 150 mugs, (I’m sure,) trying to get it just right!! I decided to create a vinyl stencil so I didn’t have to go through that headache. If you are artistically inclined, you can just skip this step and free-hand your design.
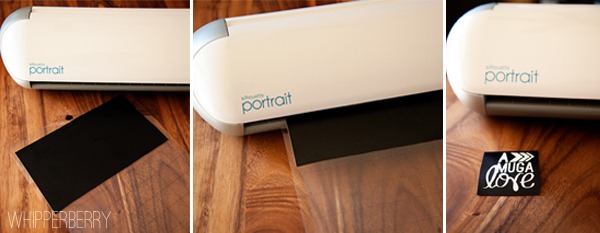
I created a design using my Silhouette Designer Edition software and cut the vinyl on my Silhouette Portrait.
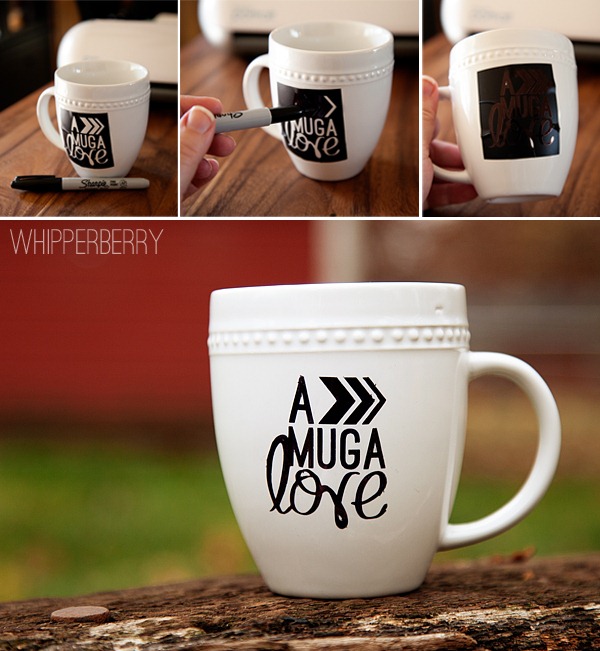
This way I had a custom stencil for my Sharpie art. I placed the stencil on the mug and then carefully colored in the design…
I say carefully because, even with the vinyl the Sharpie ink can bleed through and mess up your crisp lines. What I learned is to press on the marker lightly and trace the edges first. By doing that your design will come out perfect!
Once your design is complete, place it in a 350 degree oven for 30 minutes to set the ink. This way your design will become permanent and whom ever you are gifting it to can wash it, run it through the dishwasher, you name it and the Sharpie ink will not smudge!! How fun is that?
I did two different versions… A Mug A Love and Mug A Love, basically because I couldn’t decide which one I liked better. Yep… commitment issues.
Like I said before, it’s up to you and your budget as to how you dress-up your bag that goes inside the mug. You can take the minimalist approach and put your mix in a basic bag with a gift tag which would look lovely, or you could dress it up however you like. I chose to put my hot chocolate mix into a small burlap bag and dress it up with a small crocheted red doily paired with a simply Kraft paper tag. I wrote Merry Christmas on the tag with a white chalk pencil that you can find in any art supply store. It’s has a finer tip than your basic stick of chalk so it looks a little better.
Now all you have to do is fill it with your desired hot beverage mix and voila, you have a personal, yet inexpensive, not very time consuming gift to give to your friends and family.
Come on over an join me at WhipperBerry… I have all kinds of simple crafts and fun goodies to share for this holiday season and any time of year really. Plus, I love to make new friends!! Thanks Beckie for having me over today, I had a ball!!
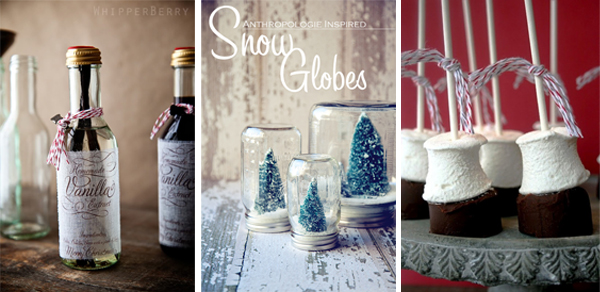
Here are some more gift ideas from WhipperBerry…
homemade vanilla extract /// anthro inspired snow globes /// hot chocolate on a stick
You can also find me over at…
Pinterest /// Facebook /// Twitter /// Instagram
4


That would make a wonderful gift, thanks for posting!
I’ve read by a bunch of people that the Sharpie marker wipes off even after baking. No one I know personally, but there is enough out there saying it doesn’t work. Has anyone here tried it personally?
I have tried this method and unfortunately it did smear after baking :(. I read somewhere that there are special sharpie markers that are used for stoneware. I have yet to actually look for them.
Found this on Ben Franklin: http://www.benfranklin.com/item.php?id=MP-PO020-008&c=a&s1=Crafts,+Modeling+&+Home+Decora&s2=Glass+Painting&s3=Porcelaine+150+Markers&gclid=CIW_u5TazrMCFQ-f4Aod92MAbA (They had them on Amazon, but Ben’s is cheaper!)
I tried it this morning and it washed right off. I used the sharpie on a white mug from Target.
What a darling gift idea for the holidays! I love pretty and practical craft ideas.
I tried this a month or two ago with some friends and all of ours wiped off even with a gentle hand washing. Very disappointing because it is such a cute and fun idea!
You are so clever! Love this idea!
Unfortunately I too learned the Sharpie marker lesson the hard way after making 3 plates for my children and then having it all wash off. I found out you can purchase DecoArt glass paint markers at any craft store and they work great on plates/mugs. This brand has a larger variety of colors than the markers sold at Ben Franklin. They are a little pricey but definitely well worth it when you consider you can buy plates/mugs at the Dollar Store & use the markers for multiple projects.
We tried it this morning and it washed off after baking. 🙁
We are trying again and baking a little longer to see if that helps. A great idea, but not if it’s going to wash off the first time the recipient washes it.
I just wanted to come back and update me previous comment. When we did it the first time, about 90 percent of the marker washed right off after.
We tried again later in the day and baked it for an hour this time instead of the 30 mins that your post says. I have washed it once by hand and once in the dishwasher and it still looks wonderful. I’m not sure it will last permanently, but it looks like baking it just a little longer does help it stay on for longer.
Hi everyone,
I used this idea in a different way. I painted babyfood jars with colored sharpie to give them a light stained glass finish. I baked at 450 for 45 minutes. I did NOT pre-heat the oven plus I left them in the oven while it cooled down. Took much longer – but thus far the results have lasted.
I tried this a few weeks back and was disappointed about it washing off. However, I was determined to find a way to make t work! Sharpie sells oil based markers and they work great! You do not even have to bake them. They dry fast so you have to make sure to complete a section of the design at a time and touch up after completely dry. I did make a mistake and found that rubbing alcohol and a q-tip help remove the error (ie in straight lines, etc). Hope this helps!
Thanks so much Michelle! We’ve all been looking for a good solution to this problem.
kisses
heather
what font did you use?
tell me, please! 😀
I tried this and it didn't work either. After reading some other comments, I baked it again, into a cold oven, then preheat to 450 this time and 1 hour. seems to have worked well enough for hand washing at least. It easily rubbed off before.
Can you do this to a stone mug?