• Skip to primary navigation
  • Skip to main content
  • Skip to primary sidebar
  • Skip to footer

Whipperberry

WhipperBerry • Your Home For Creative Inspiration

  • Home
  • About
    • Terms
  • Recipes
    • ZipList
    • Starters
    • Easy Weeknight Dinners
    • Main Dish
    • Salads
    • Side Dish
    • Soups & Stews
    • Desserts
    • Breakfast
    • Miscellaneous
  • Tutorials
    • Creative Crafts
    • DYI Decor
    • Fabric Crafts
    • Food How-To
    • Jewlery
    • Paint Projects
    • Paper Art
    • Party Styling
    • Photography and Graphic Design
    • Silhouette
  • Holidays
    • St. Patrick’s Day
    • Easter
    • Mother’s Day
    • Father’s Day
    • 4th of July
    • Halloween
    • Thanksgiving
    • Christmas
    • New Years
    • Valentine’s Day
  • Gift Ideas
    • Gifts For Everyone
    • Gifts for Dad
    • Mother’s day
    • For The Girls
    • For The Kids
    • Teacher Gift Ideas
    • Christmas
  • Printables
    • Holiday
    • Gift Idea
    • LDS Primary
  • Travel
  • Contact
  • Nav Social Menu

    • Facebook
    • Instagram
    • Pinterest
    • RSS
    • Twitter

sign

How To Make A Large Scale Felt Banner for Christmas

58 · Nov 9, 2018 · 3 Comments

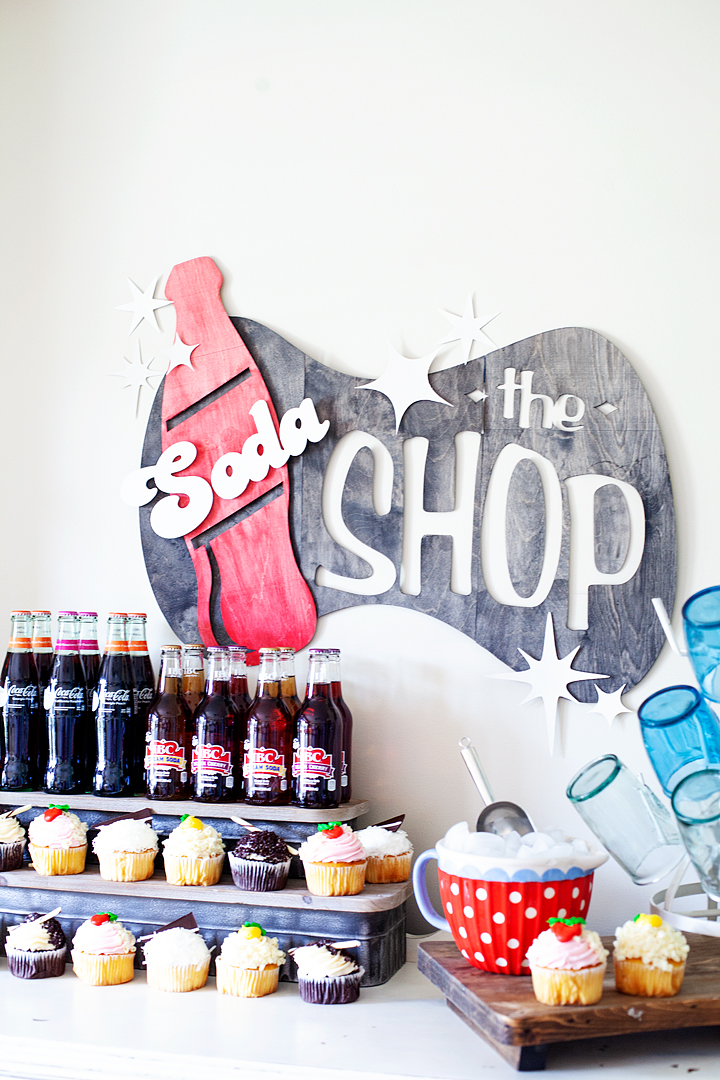
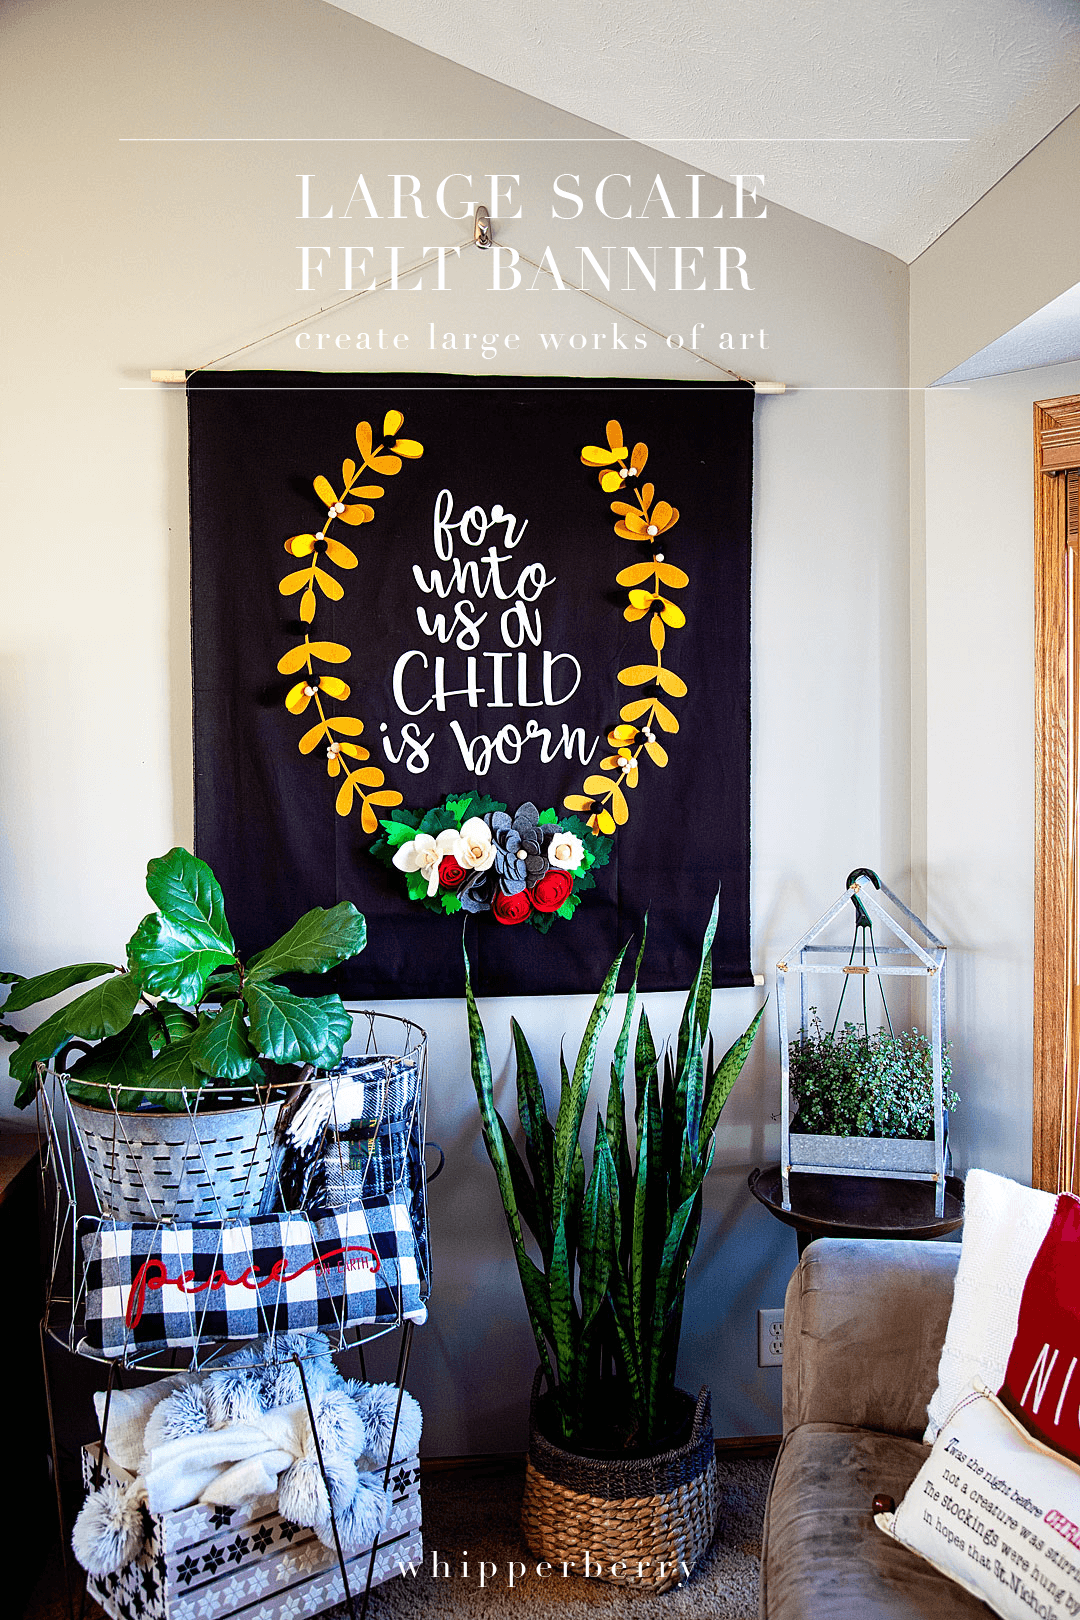
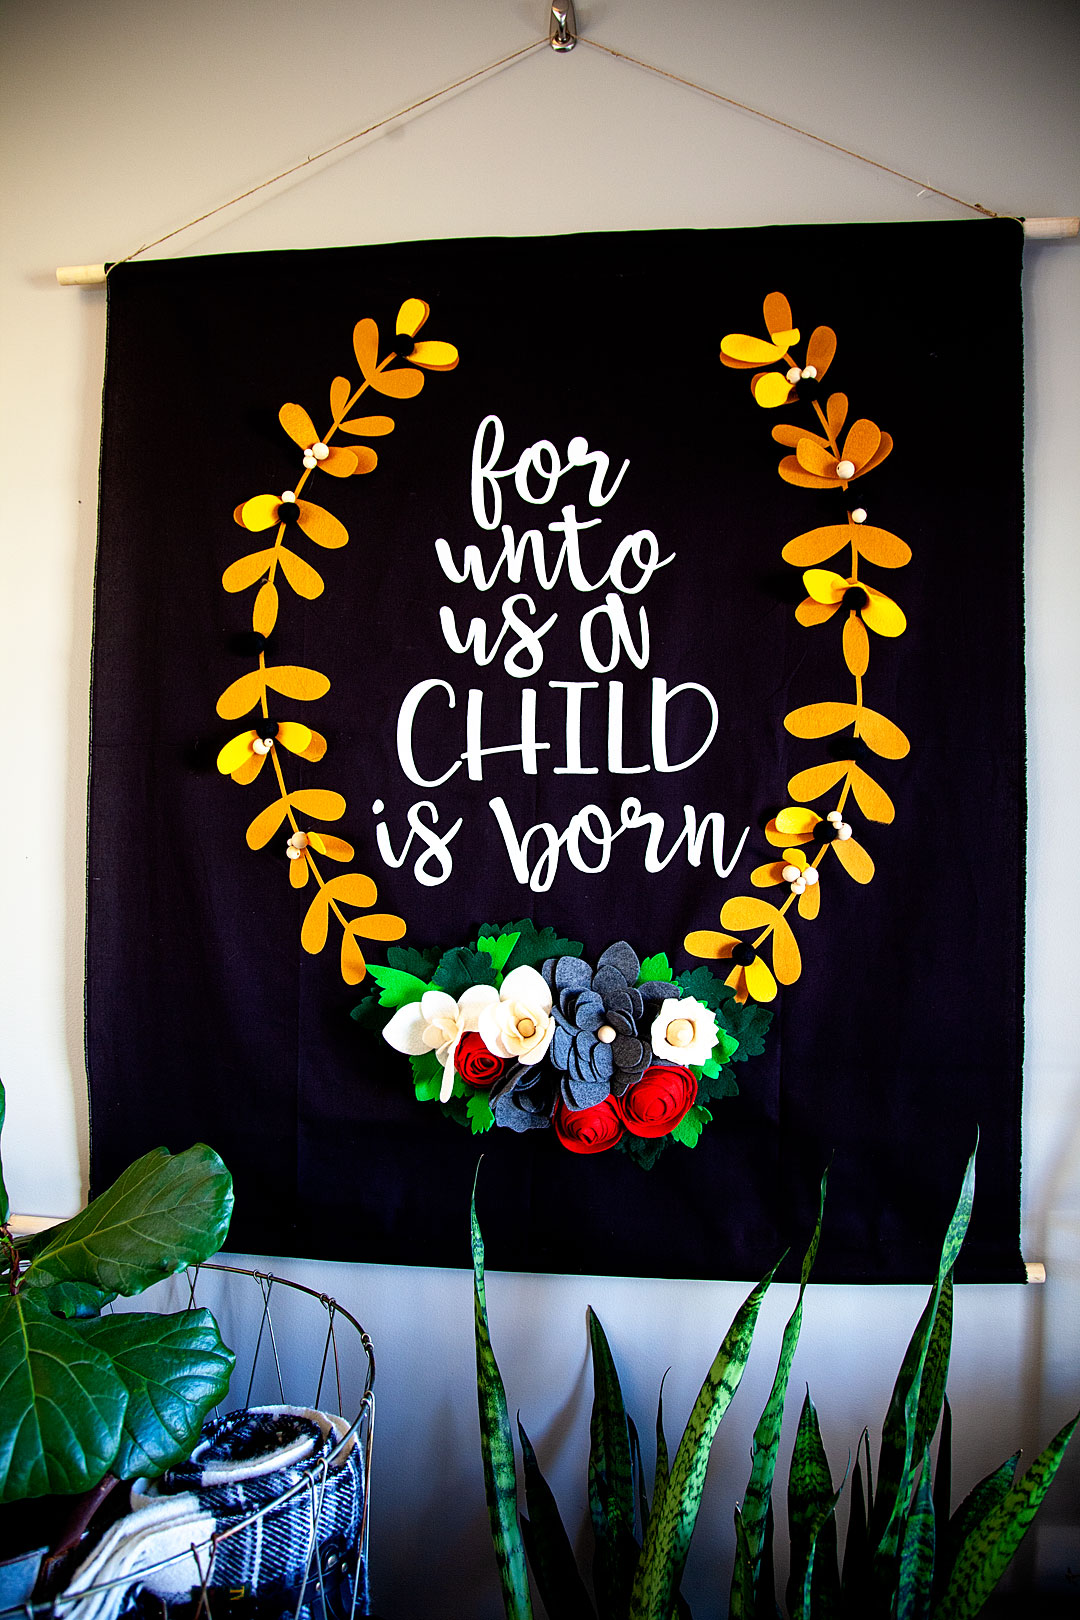
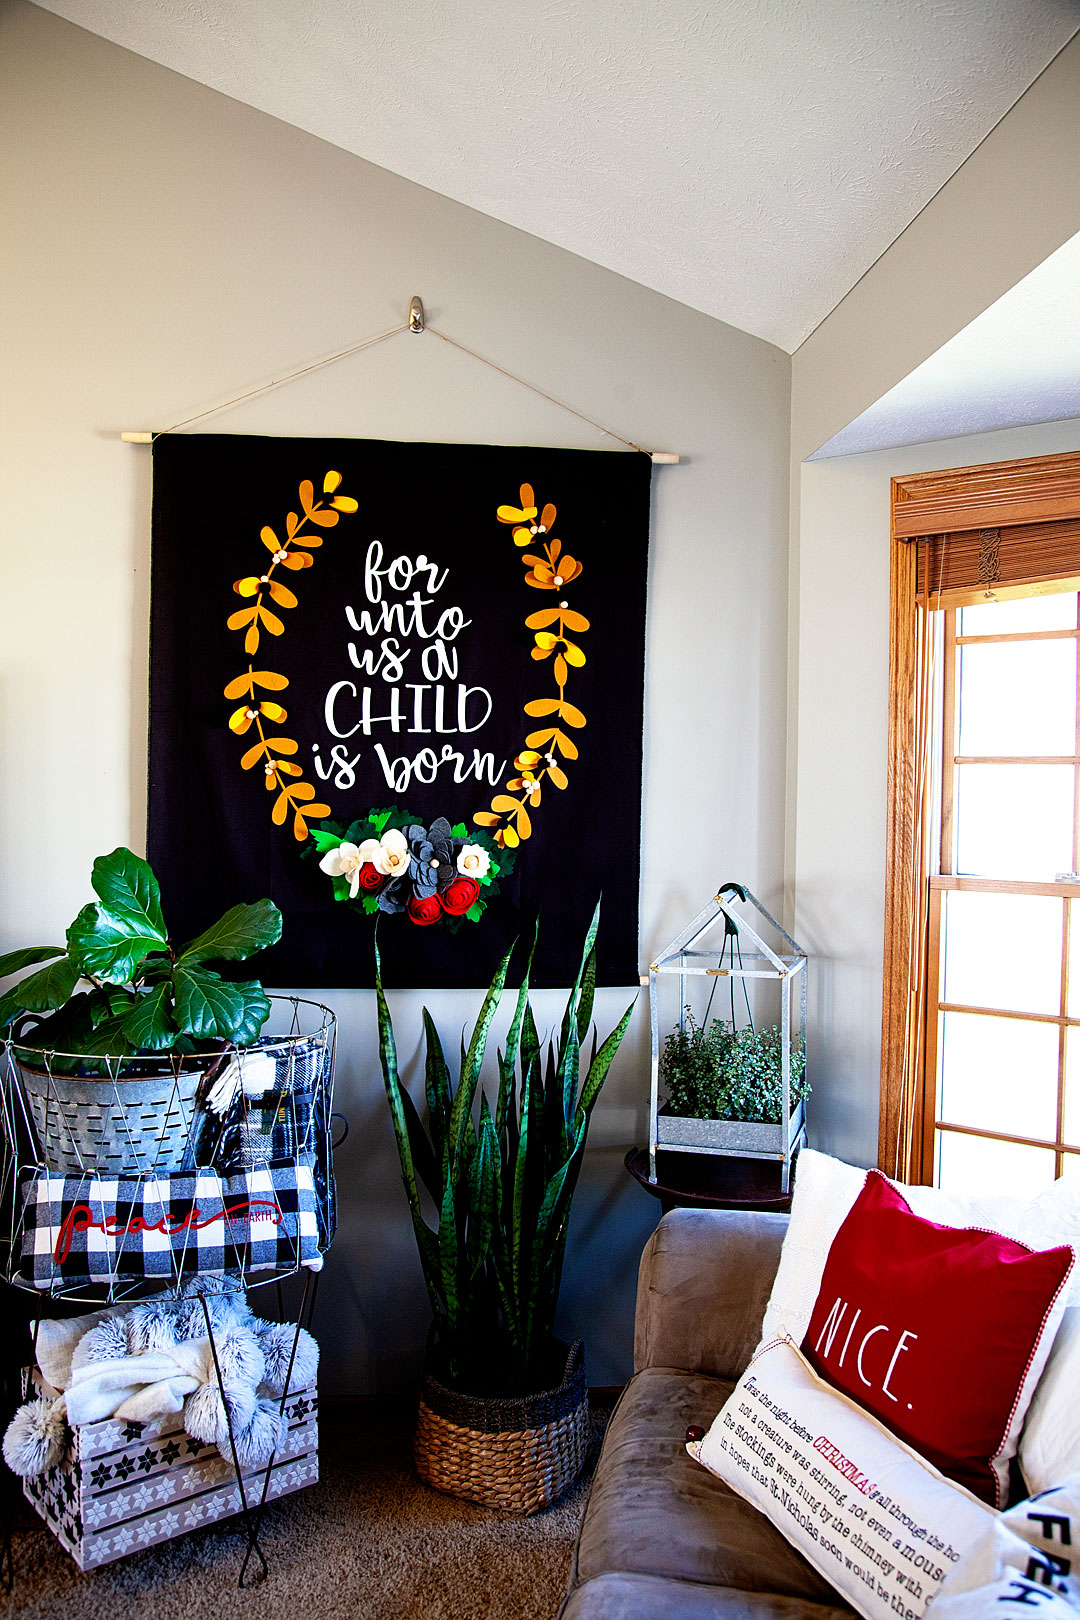
Boy-oh-Boy… I LOVE large scale projects! Sometimes bigger really is better in my book. There are times when you really need to make a statement and a large scale felt banner or large drop cloth sign created to wow your guests or to really make a room POP! I wanted to create a large felt sign for the Christmas season to add to my living room and to also use for a Christmas party that I’m planning this year. Let me show you what I made and how YOU can make one yourself!

• This post is brought to you by the amazing folk at Cricut •

Boy-oh-Boy... I LOVE large scale projects! Sometimes bigger really is better in my book. There are times when you really need to make a statement and a large scale felt banner or large drop cloth sign created to wow your guests or to really make a room POP! I wanted to create a large felt sign for the Christmas season to add to my living room and to also use for a Christmas party that I'm planning this year. Let me show you what I made and how YOU can make one yourself! - WhipperBerry #feltsign #largescalesign #christmassign #christmasdecor #christmasdecoration

Many of you might say that a project of this size is impossible, especially with the Cricut cutting machines. You can really only cut 12 inches by 24 inches, right?  Technically, yes. However, if you have learned to master the Slice & Contour tools in Cricut Design Space, it’s actually very do-able. Especially now, with the Cricut Maker & the new larger Easy Press 2… Projects like this are a DREAM! The Maker can handle all kinds of materials like the most delicate paper and fabric to the tough stuff like matboard, leather, and balsa wood. What I especially love is that you can use it to cut FELT! One of my favorite materials to create with. Now, you can do it on a much LARGER scale with the help of some tips and tricks that will follow.

Boy-oh-Boy... I LOVE large scale projects! Sometimes bigger really is better in my book. There are times when you really need to make a statement and a large scale felt banner or large drop cloth sign created to wow your guests or to really make a room POP! I wanted to create a large felt sign for the Christmas season to add to my living room and to also use for a Christmas party that I'm planning this year. Let me show you what I made and how YOU can make one yourself! - WhipperBerry #feltsign #largescalesign #christmassign #christmasdecor #christmasdecoration

How to Use the Slice and Contour Tools

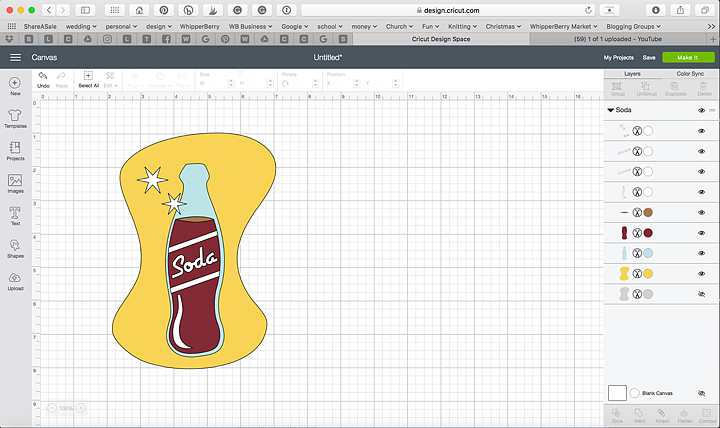
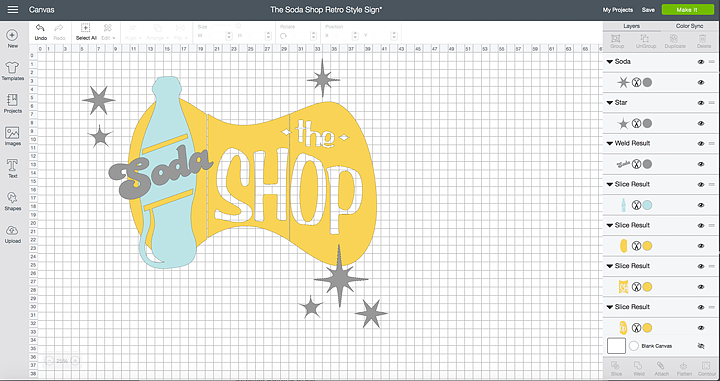
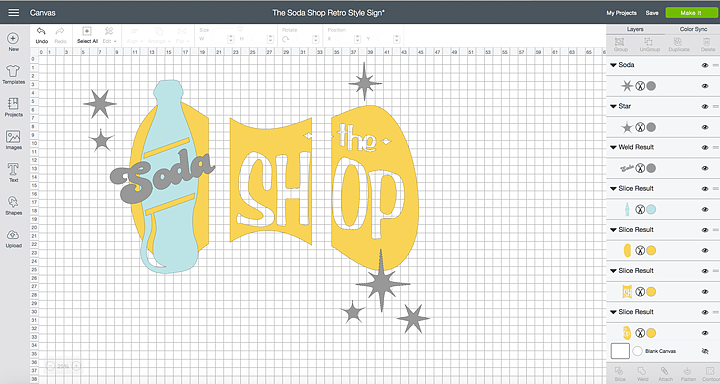
I have heard a few people who have complained about the lack of freedom in Design Space and I’m here to tell you… That’s not true! You have a ton of freedom when designing in Cricut Design Space if you are good friends with your Slice and Contour tools. These are the two tools that help you customize either your own graphics or graphics from the huge library of designs in the Design Space library. Here is a quick video to show you how I break this large design ( it’s roughly about 4 feet wide and a little over 4 feet tall) into smaller pieces so that they will fit on my 12×24 cutting mat for the Cricut Maker.

Isn’t that cool! I love that with a little knowledge and some imagination, you can truly create something incredible with the Cricut tools.

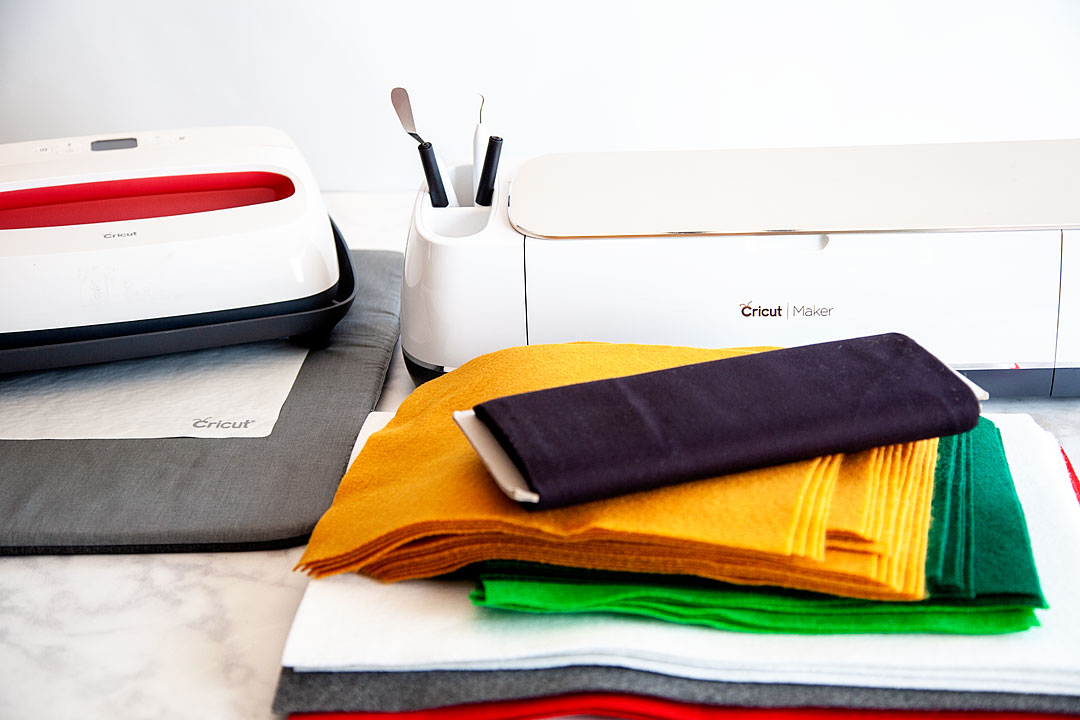
Supplies for Large-Scale Felt Banner

  • 1 1/2 yards of black canvas fabric
  • 24 – gold felt 9×12
  • 8 – white premium felt 12×18
  • 5 – antique white felt 9×12
  • 3 – red premium felt 12×18
  • 5 – heathered gray premium felt 12×18
  • 3 – dark green felt 9×12
  • 3 – light green felt 9×12
  • 24 – large wood beads of various sizes 1 inch, 1 1/4 inch
  • 10 – black wool felt balls – 2.5cm
  • Cricut Maker with Rotary Blade
  • 1 – Fabric Grip Cricut Cutting Mat
  • Heat n’Bond
  • Cricut Easy Press 2 – 12×10
  • Cricut Easy Press Mat-20×16
  • Cricut Iron-On Protective Sheet
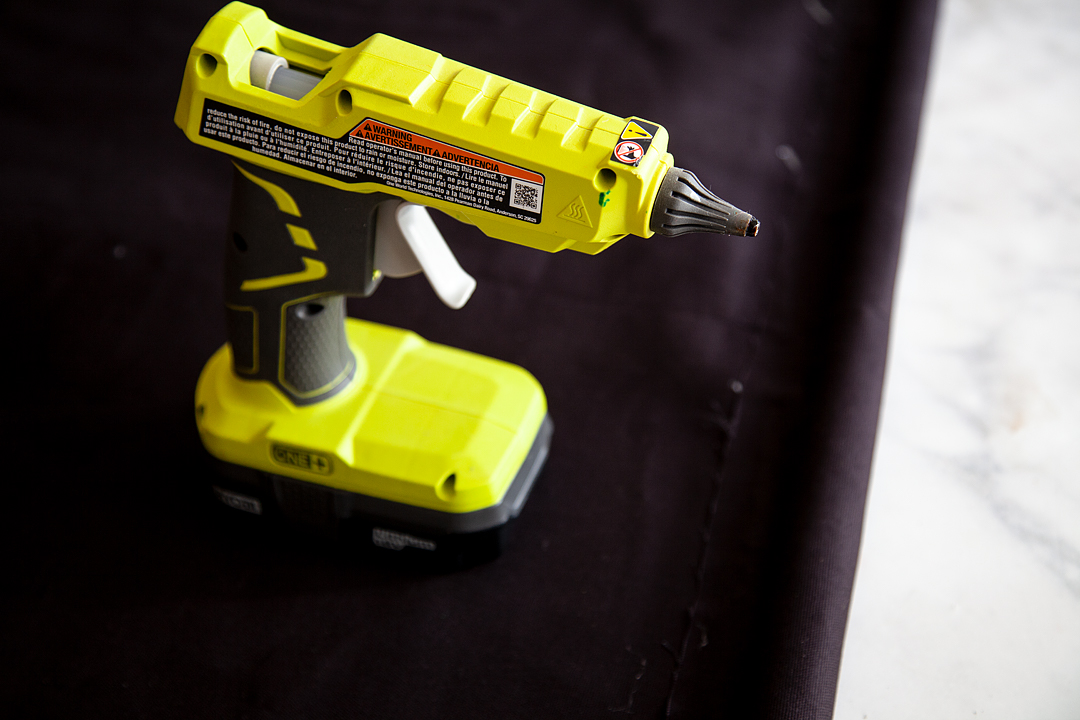
  • hot glue gun
  • hot glue sticks
  • 2 – 4 ft. wood dowels
  • cotton rope
  • measuring tape

Instructions

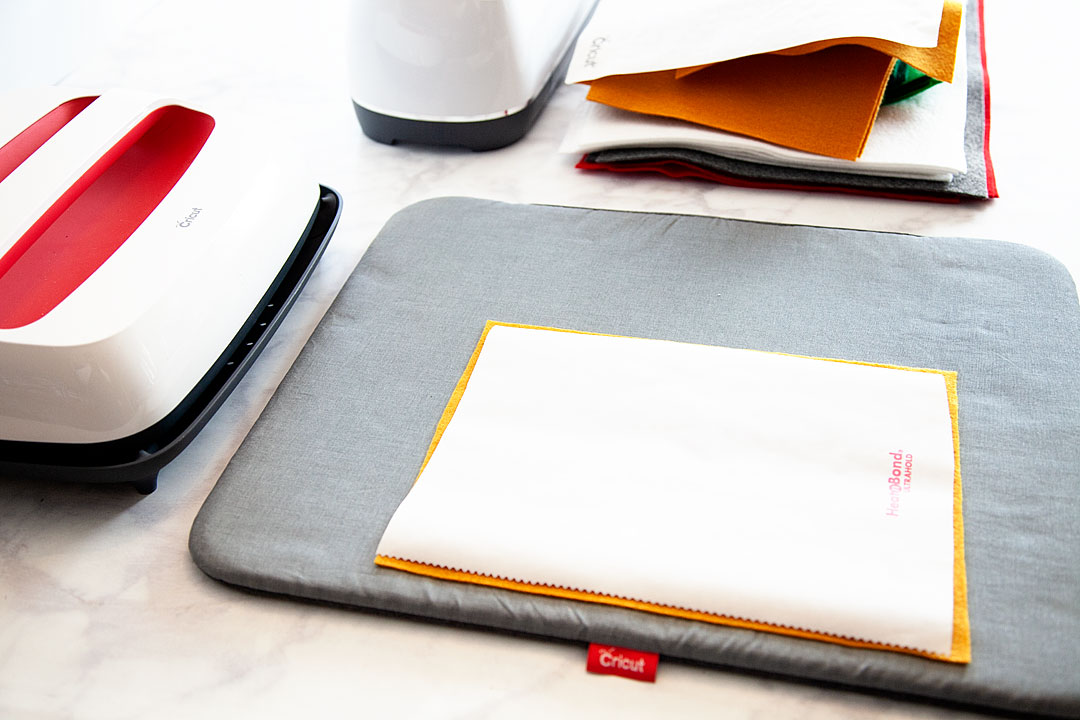
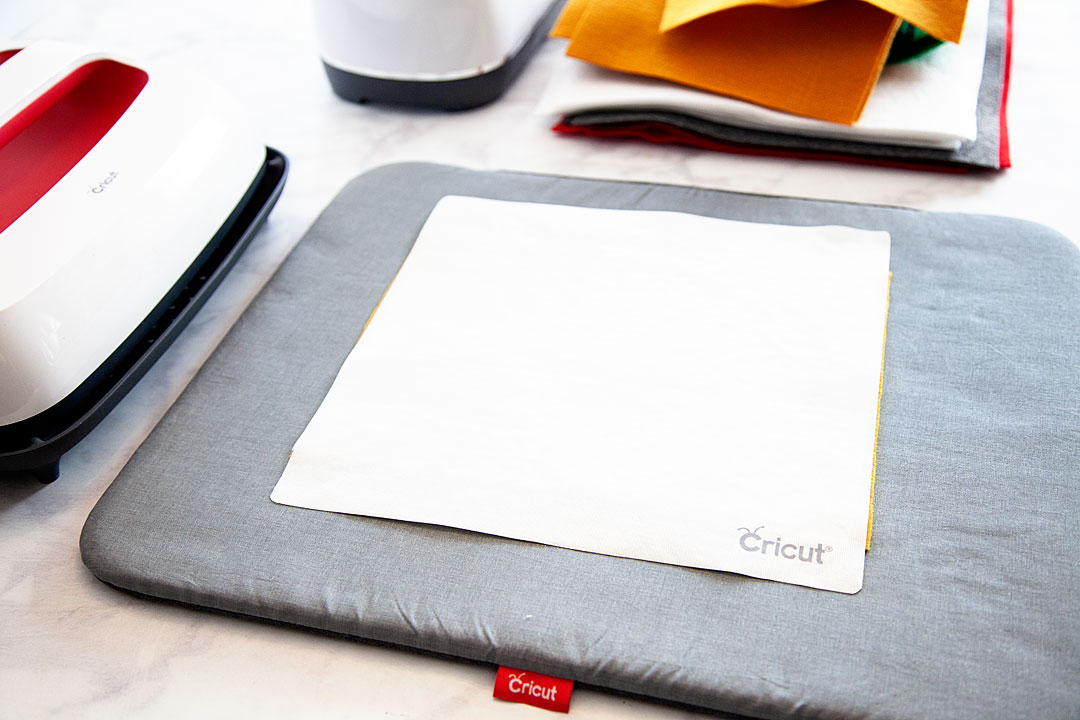
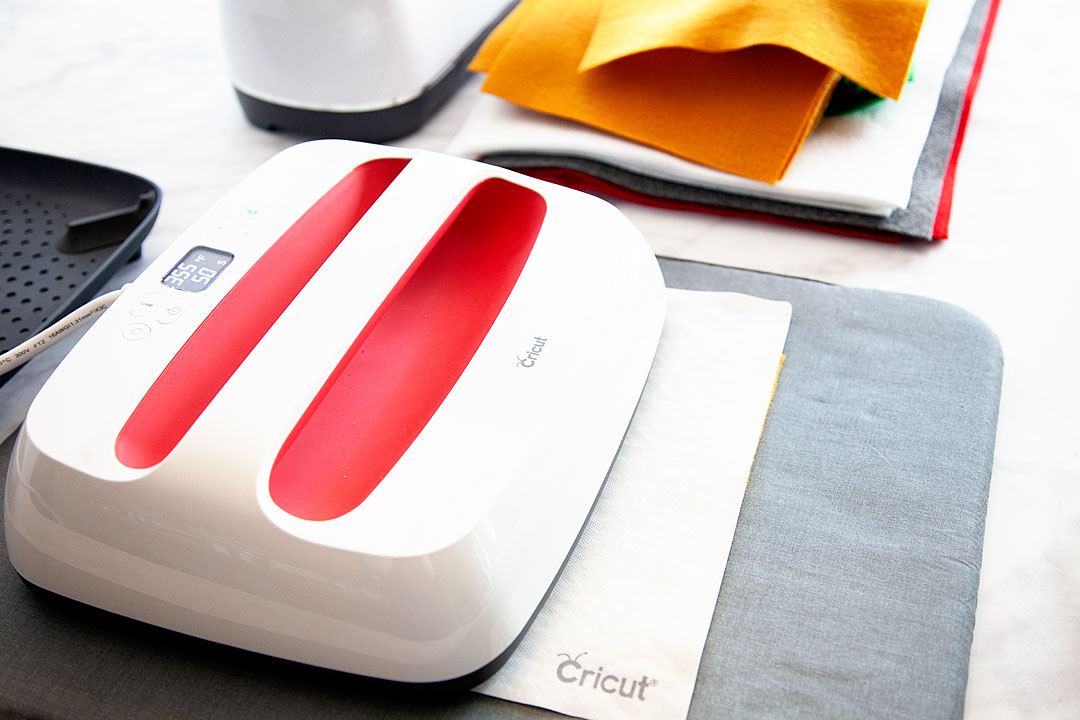
  1. You will want to set-up your Easy Press 2 and the Easy Press Mat and iron-on the Heat n’Bond on one side of each of the felt pieces. I LOVE the Easy Press 2 for this!! Seriously way easier than using a small iron and the consistency of the heat plate make this a breeze.
  2. Jump into Cricut Design Space via this LINK HERE to get access to my design file. I have this project all ready to go for you. It’s sized to create a LARGE 3 1/2 x 4 foot banner. The design is already sliced and contoured so that you don’t have to worry about that step. All you need to do is follow the on-screen prompts and load the mat with the color of felt that it corresponds with and you’ll be good to go. 
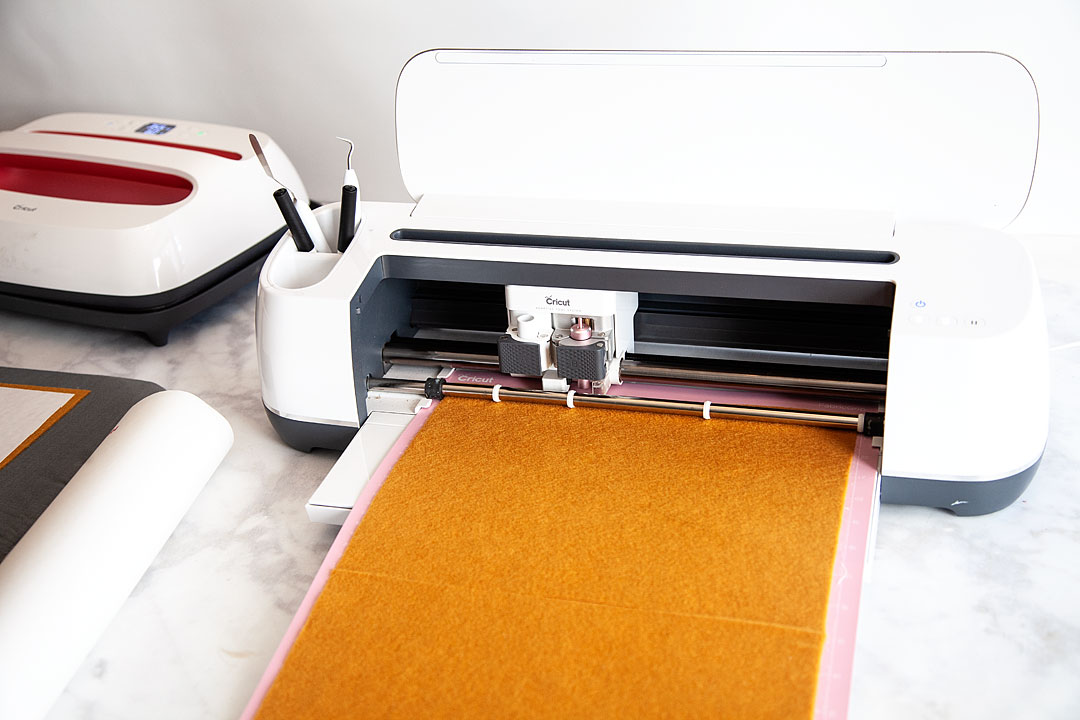
NOW, the felt that I had was smaller than the designs, not to worry though. I placed my felt onto the cutting mat and easily pieced them together while I was pressing them onto the fabric. If you’re careful you won’t even see the seam.
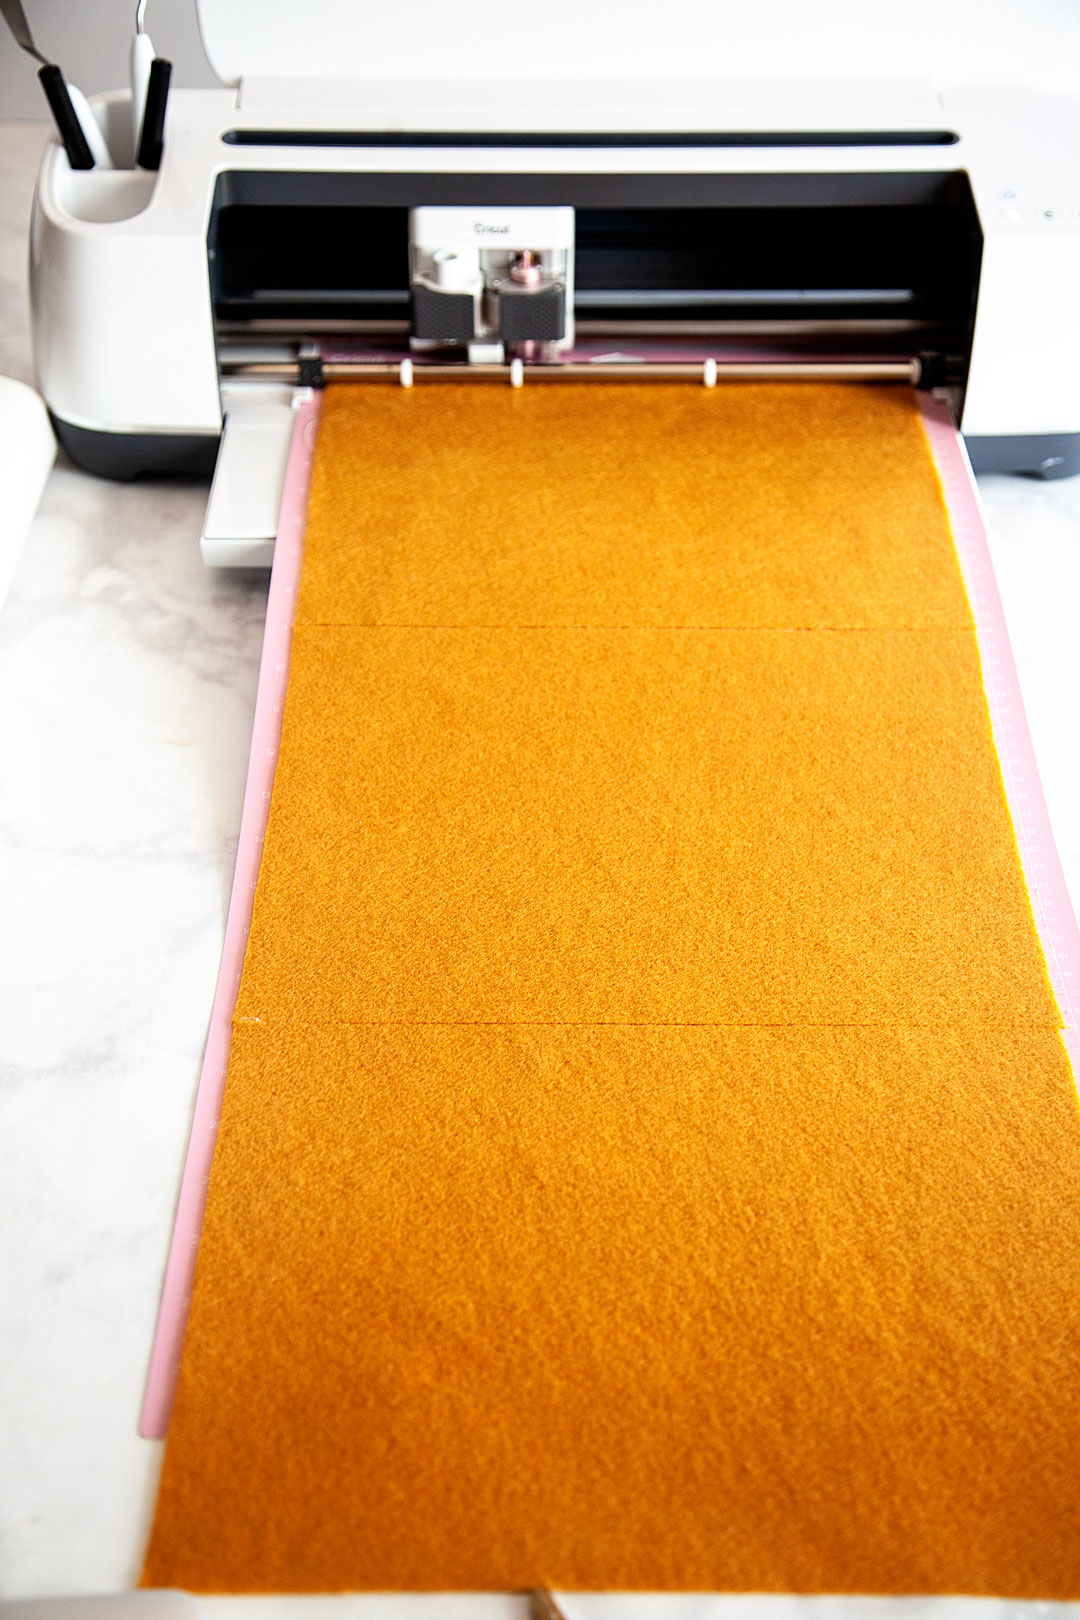
  3. You will find that some of the designs don’t all fit onto one sheet of felt. Don’t worry about that. Just keep all of your pieces organized with where they need to go. Then when you’re ready to iron them on, you’ll do just that with even the little pieces and you’ll never know there was a cut there.
  4. Once everything is cut, press your black canvas. You don’t want to have any wrinkles. I just use my Easy Press 2 for this process. WAY EASIER!
  5. Now, I have you cutting 2 sets of the gold wreath section of the banner. That’s not a mistake, I wanted the wreath section to pop out so that it’s 3D rather than a flat design.
  6. Lay out your wreath & quote on the black canvas and make sure that it is placed in the center and spaced according to the photo below. This is when you will want to make sure you have kept any small pieces and have placed them in the right spot.Boy-oh-Boy... I LOVE large scale projects! Sometimes bigger really is better in my book. There are times when you really need to make a statement and a large scale felt banner or large drop cloth sign created to wow your guests or to really make a room POP! I wanted to create a large felt sign for the Christmas season to add to my living room and to also use for a Christmas party that I'm planning this year. Let me show you what I made and how YOU can make one yourself! - WhipperBerry #feltsign #largescalesign #christmassign #christmasdecor #christmasdecoration
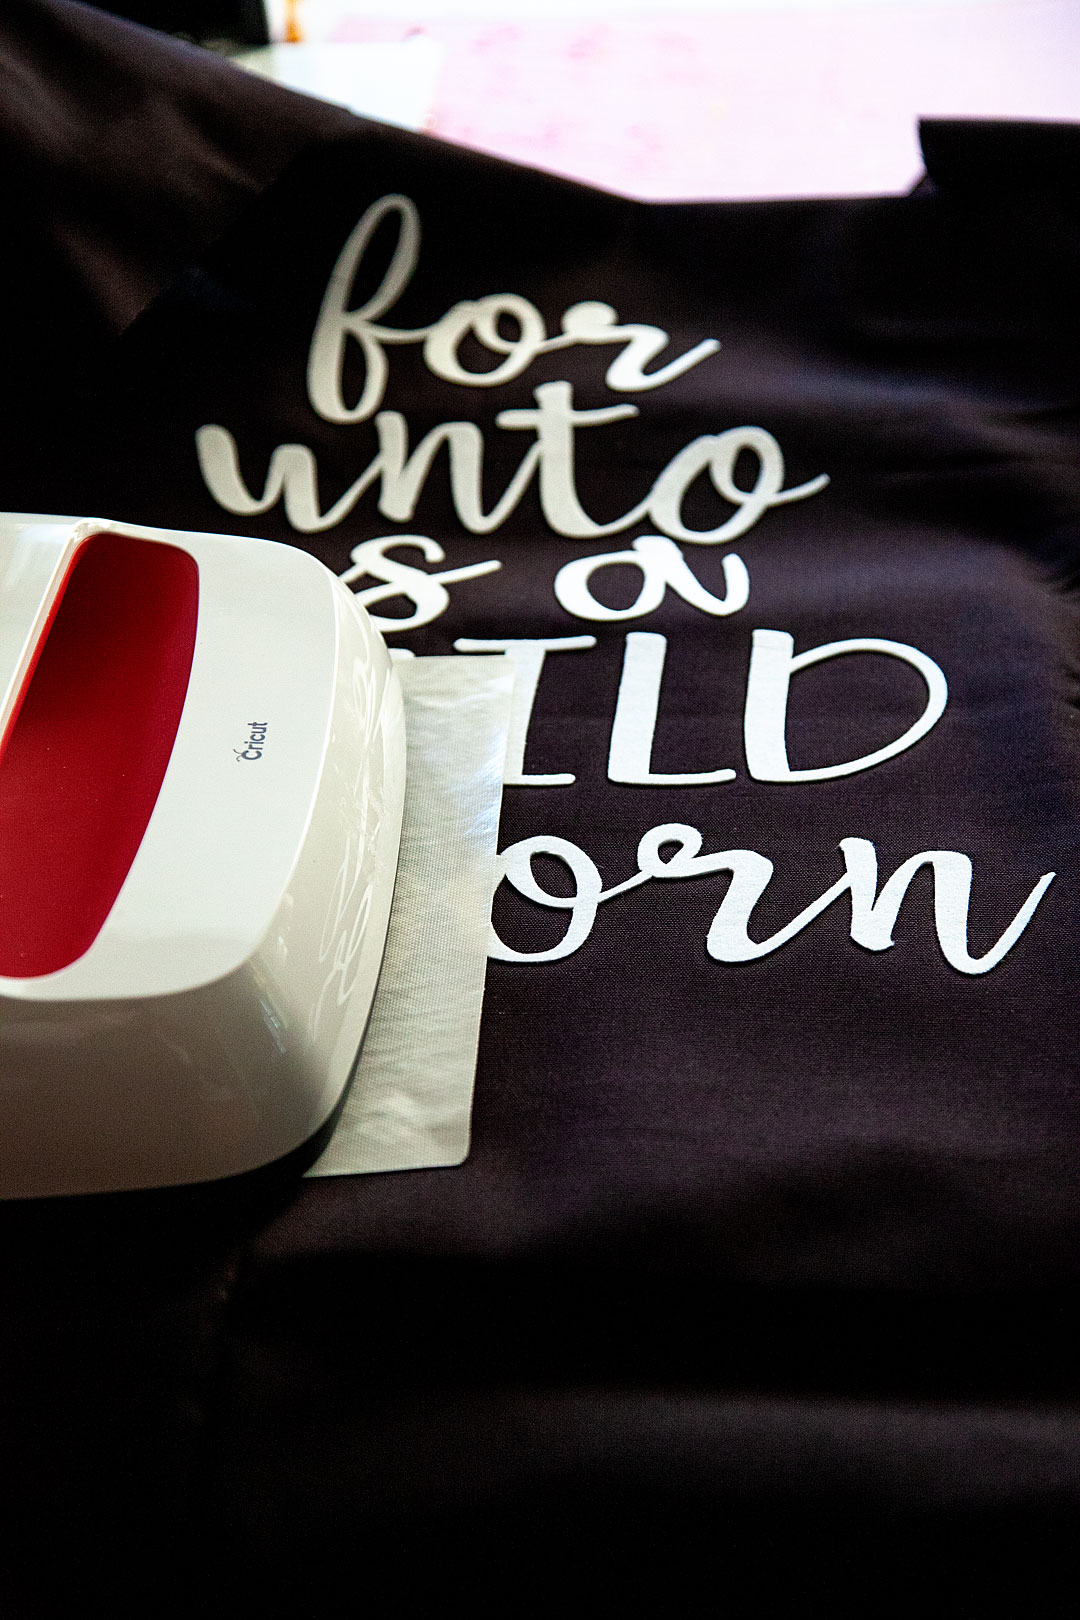
  7. Once you have placed the design the way you would like it. Place the Easy Press Mat under the first section and set your Easy Press 2 to 350˚. Lay the Iron-On Protective Mat on top of the first felt section and then lightly press the Easy Press 2 for 60 seconds on that first section.
  8. Continue over the entire design until it is all ironed onto the canvas.Boy-oh-Boy... I LOVE large scale projects! Sometimes bigger really is better in my book. There are times when you really need to make a statement and a large scale felt banner or large drop cloth sign created to wow your guests or to really make a room POP! I wanted to create a large felt sign for the Christmas season to add to my living room and to also use for a Christmas party that I'm planning this year. Let me show you what I made and how YOU can make one yourself! - WhipperBerry #feltsign #largescalesign #christmassign #christmasdecor #christmasdecoration
  9. Next, you assemble the flowers with hot glue. I used a wood bead in the center of each flower because I like the look and it stabilizes the flower a little more. 
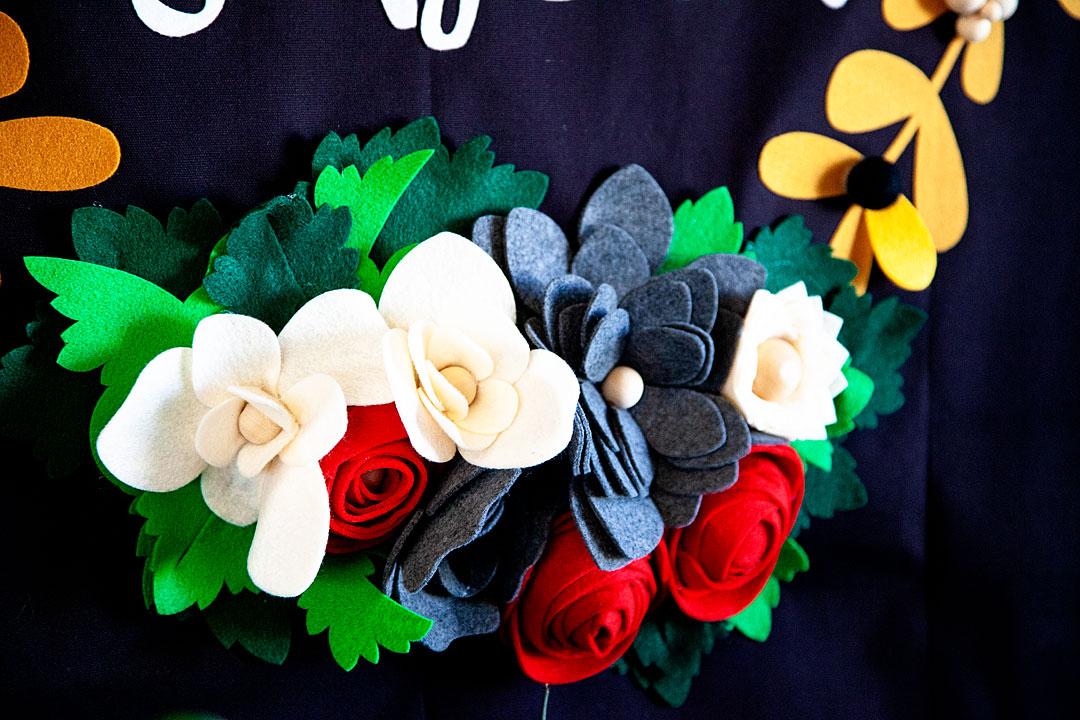
  10. Once the flowers are assembled, start laying them out on the canvas until you get the look that you like. Then section by section, hot glue the flowers and leaves onto the banner.
  11. At this point, you have two choices. You can finish off the banner by sewing the pocket for the dowel OR, you can faux sew like me and just hot glue the pocket.  I fold the top of the fabric down about 2 1/2 – 3 inches and then hot glue or sew across the bottom of the fold leaving a pocket to feed the dowel through. 
  12. Repeat the last step at the bottom of the banner as well. This is needed to add some weight at the bottom of the banner. If you don’t have this the banner will hang a little wonky.
  13. Tie the cotton rope onto the top dowel so that you can hang the banner.Boy-oh-Boy... I LOVE large scale projects! Sometimes bigger really is better in my book. There are times when you really need to make a statement and a large scale felt banner or large drop cloth sign created to wow your guests or to really make a room POP! I wanted to create a large felt sign for the Christmas season to add to my living room and to also use for a Christmas party that I'm planning this year. Let me show you what I made and how YOU can make one yourself! - WhipperBerry #feltsign #largescalesign #christmassign #christmasdecor #christmasdecoration

Now, you’re all finished! You have an amazing work of art that you will treasure for years. What other large-scale signs are you wanting to make? I just finished creating all kinds of large-scale projects for my daughter’s wedding and I can’t wait to show you what I created for that amazing event.

This is a sponsored conversation written by me on behalf of Cricut. The opinions and text are all mine.

Whimsical Neon Halloween Mantel

4 · Sep 17, 2018 · 1 Comment

When it comes to my typical style choices I typically stick with classic and timeless. However, I also have a real love of fun and whimsey that sneaks out every once in a while.  This year I’ve created a whimsical mantel using all kinds of fun finds from DecoArt, Target & Refined Design for my whimsical NEON Halloween mantel!

• This post brought to you by DecoArt •When it comes to my typical style choices I typically stick with classic and timeless. However, I also have a real love of fun and whimsey that sneaks out every once in a while.  This year I've created a whimsical mantel using all kinds of fun finds from DecoArt, Target & Refined Design for my whimsical NEON Halloween mantel!

You may not be able to tell by looking at me but, I tend like walking the line sometimes when it comes to following the rules. Nothing that would involve a felony conviction or anything, more like… When my daughter was born, I felt like she looked better in blue. She had beautiful blueberry eyes and I loved highlighting that. To this day she still is weirded out by the fact that I dressed her in blue instead of pink.

The same holds true when I decorate for holidays, sometimes I don’t really want to stick with the normally prescribed color palette. For example, we don’t really have to decorate with black and orange for Halloween, we can decorate in NEON and create a really fun, whimsical Halloween display.

Neon Halloween Mantel Supplies

With a mission in mind, I grabbed my DecoArt Americana Neon Light paints and headed to the Target Bullseye’s Playground (the former dollar spot) and grabbed some inexpensive Halloween trinkets to add to my mantel and got to work. Here’s my supply list…

    • Americana Neon Lights 2oz – Pink Explosion
    • Americana Neon Lights 2oz – Peach Punch
    • Americana Neon Lights 2oz – Green Energy
    • Americana Neon Lights 2oz – Knockout Blue
    • Americana Neon Lights 2oz – Radiant Yellow
    • foam paint brushes
    • small witches broom
  • various fabric pumpkins
  • tiny witches hat (it was a headband originally)
  • mascarade mask
  • wood beads in various sizes
  • cotton bakers twine
  • an upholstery needle
  • a set of Letters and Ledges
  • scissors
  • command stips

Instructions

With this project, I wanted to add touches of color to typical Halloween objects. Kind of like color blocking in some cases without the hard lines. I wanted it to have a free spirit air about the mantle. Remember, we are going for whimsical.

I started by painting the stems of the pumpkins green.

While those were drying, I painted the edge of the masquerade mask with the neon pink.

I have a quirky llama picture that I found at Target that sits on my mantle. Her name is Poppy and I adore her!

I thought it would be fun to get her in on the action, so Poppy will be wearing the mask for Halloween.

Then I added the color block on the bottom of the pumpkins, the broom & the little witches hat.

While I was waiting for them to dry, I starting to string my wood beads to create a garland. I was inspired by this tutorial from Design Love Fest…

You have to vist Design Love Fest to learn how to make fun bead garlands like this. Click on the link above.

I decided that since I didn’t want to paint the entire bead, it would be easier to string the garlands, hang them on the fireplace and then paint them.

Worked like a charm and saved a ton of time!

Once all of the paint was dry, it was time to dress the mantel.

With the addition of the Ledges & Letters and the bats the mantel was complete!

When it comes to my typical style choices I typically stick with classic and timeless. However, I also have a real love of fun and whimsey that sneaks out every once in a while.  This year I've created a whimsical mantel using all kinds of fun finds from DecoArt, Target & Refined Design for my whimsical NEON Halloween mantel!

Now, every few days we can change-up the Halloween quote and tickle our funny bone all over again!

Disclaimer • This is a paid post with my friends at DecoArt. I am a member of the DecoArt Core Creator program and do receive payment and product to help facilitate these creative posts. However, keep in mind… I will NEVER share something I don’t truly love and use in my everyday life.

Macrame Autumn Door Hanging

7 · Sep 17, 2018 · Leave a Comment

We’ve kind of fallen in love with the macrame trend at our house lately. We made a HUGE macrame celebration arch for my daughter Haley’s wedding a few weeks ago and I then felt inspired to make a macrame Autumn door hanging for my front entry for the impending season change. Oh, Autumn… You truly are my favorite!!

• This post is brought to you by Michaels Craft Stores •

We've kind of fallen in love with the macrame trend at our house lately. We made a HUGE macrame celebration arch for my daughter Haley's wedding a few weeks ago and I then felt inspired to make a macrame Autumn door hanging for my front entry for the impending season change. Oh, Autumn... You truly are my favorite!!

I’m going to date myself here, I’m not old enough to remember the first macrame trend in the 1970’s. However, I do remember the aftermath of that trend. Garage sales full of macrame goods looking desperately for a new home. Needless to say, when the Boho trend started a new a few years ago, I kind of chuckled a bit when macrame returned in fashion. Then my little side chuckles disappeared and I kind of fell in love with the look. Like fell hard… I want to macrame all the things now. My Macrame pinboard has gone nuts with all of the fun macrame projects I would like to tackle.

Macrame Autumn Door Hanging Supplies

Of course, when it came time to stock up on supplies I ran to Michaels my go-to supply store. They have everything you need to make all things macrame, fall decor & blank surfaces for signs. I especially love that you can order online and pick-up easily at the store. I save so much time just placing my order online and then my husband or daughter can run over and grab my supplies when they are out and about. We no longer have frustrating phone calls with my husband trying to find something at Michaels only to have him come home with the wrong item or not enough for what I need. I have the isles memorized but he sure doesn’t! It’s also nice to tack a pick-up to another errand without having to spend too much time walking through the store. Yep, I’m a big fan!

  • Cotton Rope
  • a branch from your yard or, wood dowel
  • square 9×9 galvanized metal sign
  • 1-2 Fall floral picks
  • scissors
  • wire cutters
  • hot glue gun and hot glue
  • Cricut Premium Vinyl
  • Cricut cutting machine

Instructions

For this project, I’m not going to share a tutorial for the macrame. Now don’t worry, I have you covered. I’m going to send you over to A Beautiful Mess to share the tutorial that I used to learn how to macrame. Seems only fair, right?

My neighbors were trimming their trees and I found a fun branch that would be perfect for a macrame door hanging and asked if I could snag it. I scaled down the macrame project from the curtain with 15 sections to 5 sections and set to work.

We've kind of fallen in love with the macrame trend at our house lately. We made a HUGE macrame celebration arch for my daughter Haley's wedding a few weeks ago and I then felt inspired to make a macrame Autumn door hanging for my front entry for the impending season change. Oh, Autumn... You truly are my favorite!!

Next, I cut the vinyl for the sign part of the door hanging with my Cricut Maker. You can even use my design if you’d like in Cricut Design Space. I then affixed the vinyl to the galvanized metal sign base.

I originally started with white vinyl and it didn’t stand out as I had hoped on the galvanized metal. So, I switched to some black vinyl to go with my door. You may want to try a different color that fits the color of your entryway.

Then I used my wire cutters and cut sections of the Fall floral picks of the pick and hot glued them onto the galvanized metal. Then I hot glued the metal sign onto the macrame and that was it. I had a perfect door hanger to use in Autumn.

For more Fall inspiration, visit Michaels. They have all kinds of fabulous Fall finds!

Soda Shop Wood Sign • The BEST 10 Tips for Working with the Cricut Knife Blade

37 · Jun 21, 2018 · 3 Comments

This my friends is one of the most exciting days of my crafting life! I have cut WOOD with my Cricut Maker using their new Cricut Knife Blade. All be it, thin wood but, it’s wood! My daughter Hannah graduated from High School and we made a simple soda bar for one of the elements of her Grad Party. Of course, our soda bar needed a soda shop sign and I thought it would be fun to create a retro style sign out of wood. Here’s how it turned out PLUS, the best 10 tips for working with the Cricut Knife Blade.

+ This post brought to you by the folks at Cricut +Come learn how to make this retro style soda shop sign made out of wood using the @cricut knife blade • whipperberry

When Hannah and I started working on her grad party one of the things she really wanted to have was a mini “soda shop.

Nothing too crazy or too expensive but, cute. I thought it would be fun to test out the Cricut Knife Blade and make a large scale sign out of Birchwood. Now Birch isn’t one of the officially approved woods that can be used with the Cricut Maker. However, I thought I would give it a go and see how it turned out.  It turned out beautiful! It took a little time so, I wouldn’t take on a project of this nature if you were in a hurry. Here is a quick little video along with my best 10 tips for working with the Cricut Knife Blade…

The Soda Shop Sign Design

The inspiration for the design was classic retro style soda shop signs. Hannah is a bit of a retro type girl herself so I thought this was fitting. I found a retro looking soda bottle design in Cricut Design Space and thought it would be perfect to use as the base for my project.

Come learn how to make this retro style soda shop sign made out of wood using the @cricut knife blade • whipperberry

I used some of the elements of this design and then made a few tweaks here and there and this is what I eventually came up with…

Come learn how to make this retro style soda shop sign made out of wood using the @cricut knife blade • whipperberry

That’s what’s so cool about Cricut Design Space, you can play around with almost anything and make it your own. Do feel like you are stuck with whatever they have. Be creative and learn how to use the tools that Cricut provides for you to make your own style.

For this sign, I wanted it to be a rather large scale and knowing that with my Cricut Maker, I’m limited to 12 x24 inches I did a little creative troubleshooting. I used the slice tool to slice up my sign so that I could make it as big as I wanted it to be.

Come learn how to make this retro style soda shop sign made out of wood using the @cricut knife blade • whipperberry

I sized the sign to the desired size and then broke it down into thirds by creatively using the square tool along with the Slice Tool. With that, each section of the yellow part of the sign would fit on a 12 x 24 cutting mat and would allow for a much larger sign. Here is how I did that.

How to Create Sections Using the Slice Tool in Cricut Design Space

Cutting the Wood Sign on the Cricut Maker

Like I alluded to in the tips video, working with the knife blade takes more time and patience. However, it is soooo fun to work with (if you know how to use it right) so, don’t let that discourage you from using it. It is WELL WORTH IT!

I did have some frustration when making my sign at times because it wasn’t cutting through my wood at the beginning. After a little grumbling, I figured out that you really do need to calibrate your machine EACH TIME you start a cut with the knife blade. I cut the first section with the basic settings for Basswood and then had to hit the continue cut several more times to get it fully through the Birchwood. You just check each time the Maker finishes a pass (DO NOT REMOVE THE MAT FROM THE MAKER), lift up on the wood to see if it has completely cut through the wood. If it hasn’t, press the cut button and it will take another pass at the design, each time adding more pressure to go deeper through your material. Therefore, you need to keep an eye on things so that you don’t accidentally cut through your mat.

Make sure you watch my 10 tips video above for the rest of my tips for working with the knife blade. They’re pretty handy! You may also want to visit the Cricut blog to learn even more great tips for working with the new Cricut Knife Blade.

Painting and Hanging The Soda Shop Sign

Once the sign was cut, it was time to paint it and get it all dolled up for the party. I wanted to make sure that the wood grain could still be seen through the paint so, I created a wash with some DecoArt Americana Acrylics. All you have to do is add a little water to the paint to create a color wash. You may want to have a rag on hand to wipe off the color wash, almost like you are staining the wood instead of painting it. With this technique, the sign will dry pretty fast and be ready to hang soon after painting.

Come learn how to make this retro style soda shop sign made out of wood using the @cricut knife blade • whipperberry

Hanging the Sign

I wanted the sign to have a bit of a 3D effect and not lay flat on the wall. Typically I use Command Strips but they get pretty pricey so, I opted for some removable mounting putty from 3M to mount the sign on the wall. I could use the putty to create the 3D effects by using more putty to build up the layers. It worked like a charm!

Come learn how to make this retro style soda shop sign made out of wood using the @cricut knife blade • whipperberry

One word of advice… If you have small little pieces of a wood sign, like the center of an “O” for example. Use some painters tape to tape them to the back of the sign so that you don’t lose them in transit. Becuase, that would be a crying shame!

The party turned out great. We had a ball celebrating Hannah and all of her accomplishments. Mom brag time, she graduated a year early! Yea, high school in 3 years! Nice job Hannah.

I’m holding onto the sign to use for her sister Haley’s wedding coming up in September. It just so happens that she is going to have a soda bar as well! Stay tuned… I’m going to have all kinds of Cricut projects coming up this summer for the wedding. You won’t want to miss out!

What do you want to make with a Cricut Maker and the new Cricut knife blade?


SaveSave

SaveSave

SaveSave

SaveSave

SaveSave

SaveSave

SaveSave

SaveSave

SaveSave

This is a sponsored conversation written by me on behalf of Cricut. The opinions and text are all mine.

SaveSave

SaveSave

  • Go to page 1
  • Go to page 2
  • Go to page 3
  • Interim pages omitted …
  • Go to page 7
  • Go to Next Page »

Primary Sidebar

Heather from Whipperberry
Hello... my name is Heather and I'm the creator of WhipperBerry a creative lifestyle blog packed full of great recipes and creative ideas for your home and family. I find I am happiest when I'm living a creative life and I love to share what I've been up to along the way... Come explore, my hope is that you'll leave inspired!

Footer

  • Privacy Policy

Copyright © 2023 · Seasoned Pro