• Skip to primary navigation
  • Skip to main content
  • Skip to primary sidebar
  • Skip to footer

Whipperberry

WhipperBerry • Your Home For Creative Inspiration

  • Home
  • About
    • Terms
  • Recipes
    • ZipList
    • Starters
    • Easy Weeknight Dinners
    • Main Dish
    • Salads
    • Side Dish
    • Soups & Stews
    • Desserts
    • Breakfast
    • Miscellaneous
  • Tutorials
    • Creative Crafts
    • DYI Decor
    • Fabric Crafts
    • Food How-To
    • Jewlery
    • Paint Projects
    • Paper Art
    • Party Styling
    • Photography and Graphic Design
    • Silhouette
  • Holidays
    • St. Patrick’s Day
    • Easter
    • Mother’s Day
    • Father’s Day
    • 4th of July
    • Halloween
    • Thanksgiving
    • Christmas
    • New Years
    • Valentine’s Day
  • Gift Ideas
    • Gifts For Everyone
    • Gifts for Dad
    • Mother’s day
    • For The Girls
    • For The Kids
    • Teacher Gift Ideas
    • Christmas
  • Printables
    • Holiday
    • Gift Idea
    • LDS Primary
  • Travel
  • Contact
  • Nav Social Menu

    • Facebook
    • Instagram
    • Pinterest
    • RSS
    • Twitter

Food

How To Seal Chalk Paint

12 · Aug 16, 2022 · Leave a Comment

chalk paint sealant


Chalk paint is a popular choice for home decor. It comes in a variety of brands and colors; something to suit anyone’s decorating style. If you want your chalk-painted pieces to last without chipping or staining, applying a sealant coat is recommended. If you’ve been a reader for a while you know I LOOOOVE using chalk paint for my craft projects. So, I want to share with you how to actually seal chalk paint.

What Is A Seal Coat?


A seal coat is a thin, usually transparent coating that protects your painted surface. Chalk paint is a little bit more fragile than acrylic or latex-based paints. Chalk paint on any “high touch” surface is more likely to chip or get scratched. Chalk paint also has a tendency to stain easier, especially chalk-painted table tops and cupboards. Fortunately, applying one or two coats of a clear sealant can prevent these things from happening. 

The Best Ways to Seal Chalk Paint

The best way to seal your chalk-painted projects depends on what type of item you’re going to seal, and what you want the final appearance to be. It’s important to keep in mind that if you like the “chalky” smooth appearance of your painted objects, you don’t want to apply a glossy sealant on top of them. Look for sealant with a matte or satin finish. Matte finish sealant won’t change the overall appearance of your chalk paint. A satin finish sealant will add a soft, very subtle shine to your piece, but isn’t glossy. 


The Best Seal Coats for Chalk Paint


No matter what type of sealant you choose for your chalk-painted projects, be sure to read the label thoroughly. Make sure it will work for whatever your object is made of; some sealants that are great for wood might not work as well on glass or metal pieces.  Also check the drying or curing time, so you can estimate how long it will take you to complete your project. Look online for video tutorials if you are curious about the application process for any sealants. Checking online reviews can be helpful, too. 

You can find all kinds of sealants for sale, but when it comes to sealing chalk paint these three types of sealant are the most popular.

Wax Finish For Chalk Paints


A wax sealant is the best choice for any chalk-painted furniture that you want to finish with an “antiqued” look. Chalk paint sealed with wax beautifully transforms an ordinary piece of furniture to look like a treasured heirloom. Wax sealant will give your surface a smooth, satiny finish. It does take a little more work to apply than other sealants. For best results, you should also reapply the wax sealant periodically.

To apply a wax sealant to your chalk-painted furniture, use a stiff paintbrush or a soft, lint-free cloth. Spread the wax evenly over the entire surface, in a thin layer. Let this dry, then take a clean lint-free cloth and buff the wax finish. An old t-shirt works great for buffing.

After you’ve buffed the wax to a nice satiny finish, it can take anywhere from several days to several weeks for the wax finish to be fully cured. During this time, be gentle with your painted piece to keep the wax finish free from scuffs or scratches.  After the wax sealant is fully cured, you can apply a second coat if you want a little more protection for your piece. One coat is usually enough, though.

Different brands of wax will require different curing times. It’s always best to check the instructions on whatever brand you buy to get the best results. Some brands manufacture furniture wax that is specifically formulated as a chalk paint sealer.

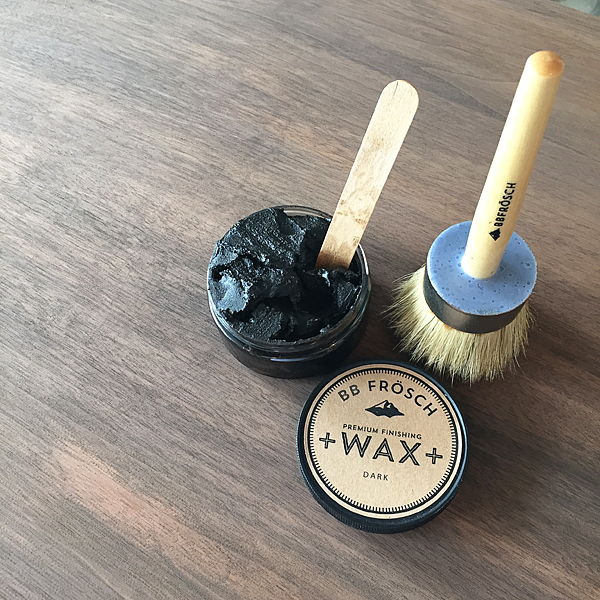
In addition to clear finish wax sealants, you can buy tinted wax to add some depth to your finished piece. Once your initial clear wax finish is completely dry, you can brush on a second coat of tinted wax in a dark or contrasting color. Let the darker wax sit for just a few minutes, then gently wipe it off with a clean, lint-free cloth.  This method easily achieves a “distressed” or “antiqued” appearance on your chalk-painted piece. The darker wax will highlight any carved or textured surfaces.

Wax sealants over chalk paint can make painted furniture look great, but it’s not the best choice for kitchen cabinets or anything that is in the bathroom. In the kitchen, grease and tiny bits of dust and crumbs will show up noticeably on chalk-painted surfaces. Humidity from being in a bathroom will eventually make the wax finish chalk painted piece look a little bit cloudy. For these rooms, using a polycrylic finish is a better choice. 

Spray Clear Coat For Chalk Paints


Just about any company that makes spray paint also makes various spray clear coats. Some even have products that are formulated especially for protecting chalk painted surfaces. When choosing a spray clear coat to go over chalk paint, you should look for one with a matte or satin finish. A matte finish will work the best if you want to preserve the lovely smooth, chalky look of your unsealed chalk paint. A satin finish will look similar to the finish achieved with furniture wax, with less work involved.

When using any spray sealant, you should work in a well-ventilated area, or outdoors. Be sure to have a drop cloth to protect your home or backyard from any overspray. Be sure to shake the can of sealant vigorously to get the sealant thoroughly mixed. Spray your painted piece in light even coats, using a back and forth motion.  You can apply a second coat after the first layer is completely dry. Two coats is usually perfect for optimal protection.

When your painted piece is drying, be sure it is in a place that will be free from wind and dust. Even the tiniest specks of dust that get blown on to your drying piece will show up in the sealant. 

Brush On Polycrylic Sealant For Chalk Paints


Polycrylic sealant or varnish is the most durable choice for sealing your chalk-painted projects. This is the best option for anything that will come in frequent contact with water, food, or people touching it on a regular basis. This finish is also the easiest to clean. Usually, all you will need to do is wipe it down with soapy water. 


Polycrylic sealant is sold in cans similar to paint, and just like with a can of paint, you’ll need to stir it thoroughly before applying. To keep the smooth appearance of your chalk paint, choose a sealant with a matte or satin finish. To apply, make sure your surface is clean and dry. Moving your paintbrush in one direction, brush on a thin coat of polycrylic sealant. Make sure the sealant gets into any small spaces. Let it cure fully before applying a second coat. Different brands will require different curing times, so always check the label on the product you are using. 

The polycrylic sealant provides the strongest coating of the three sealants in this article. It’s very resistant to scratches and scuffing. This is the best option for any chalk-painted surface that is going to come in frequent contact with other objects, or that will be handled by people. It’s ideal for table tops and cabinet doors. Because polycrylic cures to a smooth surface, it can be easily wiped clean with just a damp cloth. 

Be sure to work in a well-ventilated area or outdoors when working with polycrylic sealant. Protect your work surface with a drop cloth.  Your paint brushes should clean up easily with mineral spirits.

Polycrylic shouldn’t be confused with polyurethane sealant. Polyurethane is durable, but it has a stronger odor and has a tendency to yellow as time goes on. Even a piece of indoor furniture sealed with polyurethane can yellow from sunlight shining through a window. 

Is There Any Reason to Not Seal Chalk Paint?

You don’t have to apply a seal coat to some chalk-painted items. Anything that isn’t going to be handled frequently, or that won’t come into contact with other objects probably doesn’t need to be seal coated if you don’t want to. Smaller items such as vases, jars, picture frames, and desk accessories will still look nice if they haven’t had a sealant applied. If you have a chalk-painted piece of furniture, you could opt to apply a wax or polycrylic sealant only on the top surface where there will be frequent contact.

For any smaller chalk-painted item, you should apply at least two coats of paint if you aren’t going to apply a sealant. This will make the paint less likely to get scratched or to start chipping.  

Whether you choose to use a seal coat on your projects or not, chalk paint is a simple way to add distinctive accents to your home decor. Adding sealant gives an extra layer of protection to some chalk-painted objects and helps to ensure that they will look great for years to come. 

Fun Crafts to Do When You’re Bored

3 · Aug 14, 2022 · Leave a Comment

Boredom is the worst! Do you ever have those days where you want to do something, but just don’t know quite what it is you want to do? Or do you feel like crafting, but don’t want to tackle any projects that take a huge amount of time or energy? We all feel that way sometimes.

We have hundreds of crafts that you can find here on Whipperberry.com. All of these crafts are great for when you’re bored at home or even when you’re stressed.

Things to Make When You’re Bored

Here are some suggestions for fun and easy crafts to help alleviate that awful bored feeling. They’re all easy, inexpensive, and most can be done with things you probably already have around your house.

1. Rock Painting

  • Painting rocks is a fun activity for both adults and children. It’s easy, and anyone, regardless of painting skill, can get nice results. Here’s what you need for this craft:
  • Smooth rocks of any size and shape
  • Acrylic paints and paint brushes
  • Water, to rinse your paint brushes
  • Clear sealant


The first step to painting rocks is to find the best rocks! Look for rocks that aren’t too small, with a smooth surface. You can probably find suitable rocks around your own yard or in your neighborhood. Nice smooth river rocks can even be purchased from garden centers and craft stores. Be aware that it is prohibited to remove rocks from National and State parks, and it’s also prohibited to leave painted rocks in these parks.

Once you find your perfect painting rocks, you’ll need to clean them off in warm soapy water. Use a brush or dish scrubber to get rid of any dirt and debris. Once the rocks are dry, you’re ready to paint!

Acrylic paint is the best choice to use for painting on rocks. It’s inexpensive and durable, and it dries quickly. To begin, you might want to paint a solid background (any color) on the rock first. This will make the rest of your design stand out, as well as act as a primer coat. Acrylic paint dries very fast; it shouldn’t take more than 10-15 minutes.  Now it’s up to your imagination as to what to paint!

You don’t even have to use paintbrushes. You can create designs of multi-colored dots using a cotton swab, or the end of a pencil eraser. You can use acrylic paint markers to paint fine details and lettering on your designs.

After your rock painting is dry, you should protect it with a clear sealant. This will give it a nice glossy finish and will protect the paint from chipping. You can use brush-on varnish, spray sealant, or even clear nail polish. 


2. Bleach Tie-Dye 

Bleach tie-dye sometimes called reversed tie-dye, is an easy way to embellish t-shirts, hoodies, or household fabric items. It’s called reversed tie-dye because instead of adding color to fabric with dyes, you’ll be removing the color on the fabric with diluted bleach.  Here’s what you’ll need to get started:

  • A spray bottle, or plastic squirt bottle
  • Bleach
  • Water
  • Plastic tub or bucket
  • Rubber bands
  • Gloves
  • A tarp or plastic trash bags or plastic tablecloth to use as a dropcloth
  • Whatever item(s) you want to tie-dye. 100% cotton fabrics in dark or jewel-toned colors work best.


Whenever you work with bleach, you should be in a well-ventilated area. Working outdoors is probably best, but if you’re inside make sure you can open windows and have a fan blowing. Wearing gloves is advised, because bleach can irritate your skin. Be sure to wear old clothes, just in case any of the bleach solutions splashes or drips onto you. 

Lay down your dropcloth for your work area. Even if you’re working outdoors, you don’t want bleach coming in contact with anything other than the fabric you’re working with. Fill the plastic tub or bucket with enough cool water to submerge your fabric. In the spray bottle or squeeze bottle, mix a solution of half water and half bleach.

Now for the fun part; it’s time to tie up your shirt with the rubber bands! You can find tying patterns online to make specific tie-dye patterns, but you can also get great results from scrunching and “tying” with rubber bands randomly. Just bunch up a section of the fabric, wrap securely with a rubber band, then repeat as much as you want. Using different widths of rubber bands will give more interesting results.  Keep in mind while you’re doing this that the sections of fabric under the rubber bands and inside the folds will stay the original color, and the bleach you squirt on the fabric will lighten the color.

Now take your bottle of bleach solution and apply wherever you’d like the fabric lightened. If you’re using a spray bottle, varying the width of the spray gives interesting results. Depending on the fabric, you should begin to see color changes in about 5-10 minutes.

When you can see the results are lightened as much as you’d like (just take a peek under a rubber band), remove all the rubber bands and submerge the fabric in the tub of water. Be sure to rinse it thoroughly. Immediately wash your reverse tie-dyed piece in the washing machine to stop the bleaching process. Don’t put anything else in the machine with it.

It’s a fun surprise to see the final outcome using this method. Using a bleach solution doesn’t mean you’ll get white results. Trying this on a black fabric will usually give you orange or tan designs. Bleach on dark blues and purple fabrics will often result in pinkish or gray designs.
 

3. No-Sew T-Shirt Tote Bag

Everyone has those cherished t-shirts that have seen better days, but that you can’t quite bear to part with. This craft is a quick and easy way to create tote bags, and you won’t even have to get out a needle and thread. Here’s what you’ll need:

  • Tshirt
  • Fabric scissors
  • Ruler

Lay your t-shirt out on a flat surface, and, using a sharp pair of scissors, cut off the sleeves right at the seams. You just made the handles for your tote bag!  Next cut around the neck of the shirt to create a wider opening for the bag. 

At the bottom of the shirt, cut slits approximately 1” apart all the way across, cutting through both the front and back of the shirt. These slits should be long enough for you to tie a double knot with them; usually making them about 3” tall works well.

Now all you have to do is tie some knots! Keep the slits lined up, and start tying the front strip to the strip directly behind it. Tie them in tight double knots, beginning at one end of the shirt and working across. You’ve just closed up the bottom of the tote bag!

Tying the knots on the outside will give the bag a little fringed detail across the bottom. If you don’t like this look, you can flip the shirt inside out before tying. Just line up the slits, tie the front and back strips together, then turn the bag right side out. The knots will be on the inside.
If you want, you can add some extra decorations to the bag.

These make great reusable shopping bags. They’re easy to wash and should last a long while. By upcycling your old t-shirts, you’ve also reduced consumer waste and kept them out of landfills.


4. Paper Napkin Decoupage Flower Pots


Decoupage is an easy way to transform plain terra cotta flower pots into lovely one-of-a-kind home accent pieces. Here are the materials needed:

  • Terra cotta flower pot
  • Paper napkins with pretty patterns on them
  • Mod Podge, matte or gloss finish (whichever you prefer)
  • Acrylic craft paint
  • Paintbrush

The first step to decorating your flower pot is to paint it with a base coat of acrylic paint. Light colors will work best for this, so that the design on the paper napkin will show up nicely. Since terra cotta pots are porous, acrylic paint should dry in approximately 15 minutes or so.

Next, if your napkins are multi-layered, separate the layers. You’ll only need the top layer that has the printing on it. Then cut or tear around the design you want to apply to the flower pot.

With a paintbrush, spread a thin layer of Mod Podge over the area where you want to apply the napkin design. Carefully apply the design, smoothing out the edges as much as possible. Let it dry for a few minutes to make sure the napkin design is secure, then brush another thin layer of the Mod Podge over the top of the design. You’ll have to do this gently so the napkin won’t tear. Be sure to spread the Mod Podge over the edges so they won’t curl up. Don’t worry if the Mod Podge looks milky, it will dry perfectly clear. Let this dry, then repeat to add as many designs on the flower pot as you’d like.

Let it dry completely overnight, then brush another layer of Mod Podge over the entire flower pot to seal everything and give it a nice even finish. Not only are these flower pots eye-catching decorative pieces, they also make very nice gifts.


5. Easy No-Sew Felt and Fabric Coasters

Here is a quick project that is perfect for using up fabric scraps. The supplies you’ll need are:

  • Fabric (any kind)
  • Felt
  • Scissors
  • Ruler
  • Fabric Mod Podge 
  • Paintbrush

Cut the felt into 4” by 4” squares. Then, cut your fabric into 5” by 5” squares. Use the paintbrush to apply the Fabric Mod Podge evenly over one side of a felt square. Be sure to get it all the way to the edges.

Then, carefully apply the fabric square over top of the felt square. Try to get the fabric square lined up so that it is centered as much as possible. Smooth it out with your hands so there aren’t any wrinkles or air bubbles. Let it dry, then you can apply another layer of Fabric Mod Podge over the top of the fabric to give it a little more substance and a nice lightly glossed finish. Once that top coat is completely dry, trim the excess fabric edges with your scissors. If you don’t want to trim off the fabric edges, you can also snip along the excess edges to create a fringed edge look. 

That’s it! It’s a super easy project with cute results. Other than using up your fabric scraps, you can make these coasters with holiday print fabrics, or even by cutting up older clothes that aren’t in good enough shape to wear anymore.


6. T-Shirt Pillow


This is another easy craft that upcycles old t-shirts. Making a t-shirt pillow is a great way to hang on to a favorite shirt. If you have a t-shirt that doesn’t fit anymore, or it’s from a favorite concert or event, you can create a keepsake throw pillow with it to preserve those memories.
For this project you’ll need:

  • T-Shirt
  • Scissors
  • Ruler
  • Sewing Machine (or needle & matching thread)
  • Fiberfill or a pillow form

The first thing you need to do is to cut the t-shirt into two pieces. Just cut along the side seams, going straight up through the sleeves and across the shoulders. The next step is to measure your t-shirt pieces, so you can trim them to fit the pillow form (if using). If you’re using fiberfill to stuff the pillow, just trim the t-shirt pieces into a square or rectangle shape.

Now pin the two pieces together, with the “wrong” sides facing in towards each other. If you don’t want to use the back of the t-shirt, you can use a coordinating fabric for the back of the pillow. Using your sewing machine, or you can even hand sew this, sew three of the four sides together.

Turn the pillow right-side-out, and stuff it with the fiberfill or pillow form. The last step is to sew up the remaining side.This seam is the only one that will show, so you might want to make it at the bottom of the pillow. Now you’ve got a fun keepsake pillow! This is a good project for anyone who is beginning to learn to sew. You could even buy t-shirts from your local thrift store to practice making pillows.


7. Yarn Wrapped Bottles and Jars

  • This project is easy and a lot of fun for children as well as adults. You’ll need the following:
  • Glass bottles, jars, or vases
  • Yarn or twine, any color/styles/sizes
  • Tacky craft glue, such as Aleen’s Tacky Glue
  • Scissors


This project is so simple, yet so satisfying. To begin, make sure your bottle or jar is clean and dry. Starting at the top, apply enough glue around the top couple of inches to get your yarn to stick securely. Wrap the yarn once around the top, tying a knot to help keep it in place. Keep the tail end of the knot downward, so it will get wrapped under the yarn as you go. Now you just wrap the yarn tightly around the bottle or jar, reapplying more glue every so often as needed. Be sure your yarn layers are tight together and that none of the bottle is showing through.

Have fun with this! Use different colored yarns to create stripes. Wrapping jute or twine around your bottle is perfect for a “rustic chic” style.  Once you reach the bottom, just snip off the end of your yarn and glue it down securely.

Let your bottle or jar dry overnight, then you can decorate it more by gluing a strip of wide lace or coordinating fabric around the middle. You could even embellish with small beads or rhinestones. Of course, just leaving it with the yarn or twine wrapped around looks lovely, too. These make pretty vases, but they can also be used to hold pens, paintbrushes, or even makeup brushes. 

8. Duct Tape Bookmark

This is another quick and easy craft that is great to do with kids. Duct tape can be found in a wide variety of colors and patterns. Even if all you have is the “usual” silvery gray colored duct tape, you can make a cute bookmark with a little embellishment. Here’s what you’ll need for this craft:

  • Duct Tape, any brand, any color or pattern
  • Colorful yarn, twine, and/or ribbons
  • Scissors
  • Hole punch
  • Optional embellishments such as stickers, washi tape, scraps of lace, etc.

Cut two identical strips of duct tape, approximately 6” long. Now take the strips, and carefully stick the two sticky sides to each other. This is easiest if you start at the top of the strips, slowly pressing them together along the length. You can use a credit card to smooth out any air bubbles as you stick them together. This doesn’t have to be absolutely exact. Trim off any overlapping sticky edges, and cut it to your desired length.

Punch a hole in the center of the top of your bookmark, about ½” from the top edge. Then thread your yarn or ribbons through the hole and tie a knot to keep them secure. If you want, you can add some decoration to your bookmark by adding stripes from contrasting duct tape pieces, gluing on scraps of lace or fabric, or adding color washi tape pieces.  These bookmarks are a nice addition if you’re giving a book to someone as a gift.

The next time you’re feeling bored, or like you’ve hit a “crafting block”, try one of these fun and easy craft ideas. Hopefully, it will brighten your day and get the creativity flowing again.

Crane & Canopy Review – My Designer Bedding Makeover

14 · Aug 13, 2022 · 10 Comments

I recently got Crane & Canopy bedding. I’ve always wanted some designer bedding to go with my fancy pants sleep number bed. Now, let me share with you my Crane & Canopy review.

Bedroom Makeover with Crane & Canopy

Key Takeaways

I think Crane &Canopy makes great bedding but it’s expensive! Below are my key takeaways if you’re short on time.

  • Great Comforter
  • Perfect weight
  • Fluffy
  • Great features
  • BUT IT IS EXPENSIVE!

If $200+ is too expensive for bedding for you, then I have a great alternative for you that I’ve tried since writing this Crane & Canopy review years ago. The bedding is practically the same quality but for about half the cost.

Check out the Crane & Canopy Bedding alternative below:

View it Here

My Crane & Canopy Story & Review

I LOVE my bed. I know most of us do… but I REALLY LOVE my bed! As much as I love to travel, there is nothing like coming home to my own bed. If you have the right bed, (which I do… it’s a Sleep Number bed) it fits you like a glove and gently soothes you into a deep sleep. As a girl, I used to daydream about my bed (yea, I told you I love my bed). To me, the only way to go is a bed not unlike what you would find in a Swiss chalet (at least the Swiss chalet in my imagination, I’ve never really stayed in said chalet.)

  • Crisp & white.
  • White duvet, filled with a heavenly down comforter.
  • Crisp white sheets & lots and lots of white pillows.

It would be a perfect little white nest. I can just imagine coming home from a day of skiing out in the powdery Swiss snow and jumping into my plush white cloud, snuggling under the covers with my sweetie, and reading a good book… among other things (blush). Really, that was my dream Honeymoon for years… Instead, we went to Vegas. Yea, didn’t really hit the mark on that one.

Not to worry, minus the Swiss Alps and the skiing, I can still have my dream bed!!

For years I have searched for bedding that was just right. I’ve made due for many years because I wanted a certain quality that was just out of my price range. I could have gone to any big box store and purchased the same type of bedding, pretending that I really had the bedding of my dreams. In reality I would have a cheap impostor. The fabric would be rough and the fill would be clumpy and weak. It just wasn’t what I was looking for.

Not too long ago, the folks at Crane & Canopy introduced me to their innovative line of luxury bedding. After a few weeks of taking it for a test drive, I can safely say… From now on, Crane & Canopy is going to be my one-stop shop for affordable designer bedding!

I selected the bedding that was as close to a cloud as I could possibly find… The Valencia White Pintuck Duvet Set.

Crane & Canopy Bedding on WhipperBerry

There are surely some negative reviews about Crane and Canopy online but I really don’t understand them. When you’re sleeping in the clouds like this, what’s not to love?

Now, this bedding has a ton of features that you won’t find at your typical big box store.

Crane & Canopy Bedding

  • 400 thread count
  • 100% cotton sateen
  • The pintucks are sewn to perfection and will not come unpinned even when washing.
  • The duvet cover  has a hidden pocket zipper which makes it so much easier to use. No more clunky button closures.
  • Interior corner ribbons to tie down the insert… this my friends is aaaaamazing!!  For YEARS my husband and I have dealt with our down comforter shifting all over the place and creating all kinds of havoc on our bed. If you have a duvet, you know exactly what I am talking about. These corner ties are genius!

Crane & Canopy Duvet Ties

All you have to do is turn the duvet inside out and tie the top two corners. Then turn it right side out, pull the duvet down, tie the bottom two corners then zip up the bottom… It’s PERFECT!

The alternative bedding I suggested at the beginning of this review also has these features. You can check it out here:

View it Here

I decided that with the new bedding I needed to give our room a little makeover at the same time. I created some custom wall art with some amazing new products from DecoArt. I will be showing off this fun new technique in a few weeks on the DecoArt Blog.  Then, I added a few fun new accessories from my favorite shop… Target!

The bench is part of the fabulous Threshold collection, along with the accent tables. Both lamps are from Target as well. The one on the right I’ve had for awhile and they no longer carry it. The one on the right is a fabulous Architect Desk Lamp that I just love. The books are from Anthropologie. I actually took the color scheme for the makeover from the cover of Anthro’s Pride & Prejudice.

Pride and Prejudice

Just because I want to sleep in a cloud doesn’t mean that the whole room needs to be devoid of color. All in all, I adore my new room. I LOVE, LOVE, LOVE my new bedding from Crane & Canopy. My husband and I just celebrated 13 years together last week, and I can finally say… I have my dream bed!

Crane & Canopy Bedroom Makeover on WhipperBerry

Where is Crane & Canopy Made?

Crane & Canopy is designed in San Francisco, CA.  Then the bedding is manufactured in Oeko-Tex factories. These are the highest standard of factories that exist for bedding products. These certified factories are located all across the world in many different countries and likely help with distribution.

Crane & Canopy Bedding Features

I covered some of the features above in my rambling but I will list out some of the amazing features below.

  • Highest quality cotton
  • High thread counts
  • Zipper enclosure at bottom of the duvet cover.
  • Interior corner ties to keep your comforter in place.

The other alternative has very similar features but for half the cost.

View it Here

Is Crane & Canopy Bedding Worth The Cost?

If you can’t tell by now, I love my Crane & Canopy bedding and Duvet. It’s designer, it’s fluffy, and it’s amazing overall. The main question you probably have is if it’s worth the cost. After all, it is a bit expensive and there are some bad Crane & Canopy reviews out there online. In my humble opinion, it’s 100% worth it but you can also get something similar for half the price. You sleep in your bed every night. If there’s one thing you should spend a bit of extra money on it’s a comfy and fluffy bed. You’ll get a better night’s sleep and wake up thinking you’re in a chalet.

What’s your dream bed? Do you have it yet? If not, I highly recommend you head over to Crane & Canopy and check out their entire line of designer bedding. Tell them WhipperBerry sent ya! However, if that’s too expensive you can get an alternative here:

View it Here


Disclaimer // This post has been sponsored by Crane & Canopy. I did receive product to review, but I was not paid for my review. This is why I am also recommending an alternative. All thoughts, ideas & opinions are my very own. Rest assured, I will NEVER post about a product or a company that I don’t wholeheartedly believe in and use in my normal everyday life.

Rebecca Page Pattern Reviews – Maybe They Just Don’t Cut It

2 · Aug 12, 2022 · Leave a Comment

Rebecca Page, the person, seems to be a good person overall. But, the business and the customer service leave a lot to be desired. Read the rest of this article to find out why and to see where you should sign up instead of at RebeccaPage.

What is Rebecca Page?

Rebecca Page is a designer/craft blogger who has had a lifelong passion for sewing. In fact, she tells the story on her website of being an 8-year-old little girl who dreamed of sewing her own wedding dress someday. Now, her online business features sewing and other crafting patterns, tutorials and classes, and a monthly subscription service for her sewing patterns.

On the Rebecca Page website, you’ll find links to sewing patterns, crochet patterns, craft ideas, tutorials and classes, blog articles, and shopping links for fabric and notions. Also on her website is an option to subscribe to her patterns, so you’ll have access to one free pattern each month. 

If you’re short on time I’ll say this…

I would skip Rebecca-Page’s subscription. I’ve written reviews of other pattern sites and schools that I like much better. You can find one of those reviews here.


What’s Included In A Rebecca Page Subscription?

When you subscribe to Rebecca Page’s Sewing Patterns, you get one “pattern credit” each month. One “pattern credit” allows you to purchase and download any pattern from the website. New patterns are released each month, but if the new releases aren’t appealing you can choose from any sewing pattern available. If you don’t want to purchase any patterns in a given month, you just save your credits. They’ll remain in your account for 365 days from when you receive them. 


Home Much Does A Rebecca Page Subscription Cost?

There are three price options for a subscription to Rebecca Page Sewing Patterns.

The monthly option is $10 a month, and it is automatically rebilled on a monthly basis. With this option, you are paying $10 for one “pattern credit” a month; essentially this means you’re paying $10 per pattern. If you decide not to continue the subscription, you can cancel at any time.

The six-month option is $48, and is automatically rebilled every 6 months. This price works out to paying just $8 per month, or $8 for each pattern. This option also allows you to cancel at any time before the end of your billing cycle.

The twelve-month option is $78, and is automatically rebilled every 12 months. This price is equal to paying $6.50 each month, or $6.50 for each sewing pattern. Like the other subscription options, you can cancel at any time. The price of $6.50 for a sewing pattern is a great value, but definitely browse through the pattern selections to see if Rebecca Page’s style is right for you before committing to this plan.

If you decide to cancel your subscription, it can be done at any time before your next billing cycle. If you have a 6-month or 12-month subscription, they do not issue refunds for unused subscription time or any unused pattern credits you haven’t spent. Any unused pattern credits will remain in your account until you use them, or until they expire.

Rebecca Page Patterns

Rebecca Page has sewing patterns primarily for women’s clothing. Her styles are very feminine, featuring flowing styles accented with ruffles and other “girly” design touches. Most of the clothing designs are more suited to casual and “weekend wear”, so if you are looking for patterns for office attire or to build a “professional capsule wardrobe” you might not find as many styles that appeal to you. Many of the designs seem to be styled for younger women, so a more mature woman might not find as many appealing patterns.

The women’s clothing patterns from Rebecca Page are definitely inclusive to a variety of body types, with many styles having a fit range from XXS to 5XL. She has also designed patterns for little girls that match some of her women’s clothing styles, making for adorable  “Mommy and Me” outfit options. There are even doll clothes patterns to match some outfits!

There is also a section of sewing patterns that are suitable for maternity and nursing clothing. This is a niche that many sewing pattern subscription services don’t always pay attention to.

In addition to the women’s clothing patterns, which are definitely the majority, there are numerous patterns for children (mostly girls) and men’s clothing available also.

You’ll find sewing patterns from Rebeca Page for more than clothing. There are also patterns for accessories like tote bags and pouches. There are also patterns to create home decor items and soft children’s toys.   

Rebecca Page Classes and Tutorials

Rebecca Page has an extensive amount of video classes and tutorials available on her website. These are not included with a subscription, but most of them are reasonably priced. You can complete them on your own time, at your own pace, and rewatch them as much as you’d like.

There are also video sew-along tutorials for many of her clothing patterns. The sew-alongs are free; you’ll just need to purchase her pattern to go with it. If you are a beginner at sewing, it might be useful to watch a sew-along video before buying a particular pattern, just to see if you think it’s within your range of expertise. When you sign up for a sew-along tutorial, you’ll also be invited to join the private Sew-Along Facebook group. 


Is A Subscription To Rebecca Page Patterns Right For You?

Now that we’ve described most of what you will find on Rebecca Page’s website, are you still trying to decide if you should get a pattern subscription? Here are some things to consider.

Rebecca Page sewing patterns are good quality and come in a wide range of sizes. As mentioned earlier in this article, her women’s clothing designs are very feminine and youthful. They’re very size-inclusive, and reviews online are quite favorable. However, before committing to a subscription, browse through the patterns and see if her designs are something you or your family members would enjoy wearing.

Some of her sewing patterns for accessories, such as tote bags and zippered pouches, are cute, but very similar patterns can be found online for free from various crafting websites.

Other than the private Facebook group, there is no online social community for Rebecca Page subscribers. Facebook groups can be fun, but it would be nice to have a social community right on her webpage, similar to what other sewing pattern websites have done.

If you’d like to try a Rebecca Page sewing pattern, you don’t need to sign up for a subscription. You can directly buy any of the patterns on her website. The retail prices range from $10.50 to $16.50. You don’t have to be a subscriber to buy any of her online classes or download the sew-along tutorials, either.

One possible downside to purchasing Rebecca Page sewing patterns (or any online sewing patterns for that matter) is that you’ll need access to a printer for your pattern. Once you buy a pattern, you’ll receive a digital file to download, which you’ll then need to print and piece together to use.


Another downside to any sewing pattern subscription is that you end up buying multiple patterns from one single designer. It limits the variety of your wardrobe pieces.

While Rebecca Page designs are very pretty, overall they might not be “right” if you’re wanting to sew a wardrobe of professional/business attire.

Before joining any pattern subscription service, you should decide if you’ll wear numerous clothing items from that designer, especially when the designer has a distinctive style. For more variety in your wardrobe items, and for the ease of not having to print patterns yourself, Joann Fabrics has a large selection of patterns from long-established companies, such as Butterick and McCall’s. Joann Fabrics also has a large selection of online and in-person classes at very affordable prices. 

How To Prime a Chalkboard – Blackboard Seasoning

3 · Aug 12, 2022 · Leave a Comment

Chalkboards are such a fun way to decorate around the house, in your office, or for parties! Here is a quick video showing you how to prime your chalkboard. Make sure to read this whole article for other tips and tricks!


Chalkboard signs, labels, and even entire chalkboard walls are a clever and creative way to personalize your home decor. Whether using a traditional slate chalkboard, or a surface painted with chalkboard paint, a little bit of preparation and maintenance goes a long way to ensure your chalk art will always look vibrant.

What Does it Mean to Prime a Chalkboard?

Just like applying a primer coat before painting a house, or brushing on a layer of gesso to stretched canvas, your chalk art will look best when the chalkboard surface is properly primed. Priming fills any tiny holes or pores in your chalkboard with a thin layer of chalk dust. This smooths out the surface of your chalkboard, making it easy to write/draw on, and easy to erase.

Have you ever tried to erase something on a chalkboard, and the images stubbornly remain there, just barely visible? That’s commonly known as “ghosting”. Thankfully, priming is an easy way to prepare the chalkboard so that “ghosting” doesn’t occur.

How To Prepare a Chalkboard Before Using It

If you’re using a traditional slate chalkboard, there isn’t much you need to do to prepare it. Make sure it’s clean of any dirt or tiny bits of debris (natural slate can have tiny chips at the edges). Once it’s cleaned and dry, you can go ahead and prime the surface.

If you’re painting a sign or a door with chalkboard paint. It’s important to paint the surface in two to four coats, allowing a full 24 hours of drying time between each coat of paint. Once that’s done, it’s time to prime your chalkboard surface.

How to Prepare a Chalkboard for Traditional Chalk

Priming (sometimes known as “seasoning”) your chalkboard for traditional chalk is quick and easy. An adequately primed chalkboard is key to creating chalk art and messages that get noticed. It can be done in minutes, with just a few simple steps:

Step One: Make sure your surface is clean and dry.

Step Two: Using a stick of ordinary white chalk, lightly rub all over your chalkboard using the side (not the end) of the chalk. Cover the surface first going horizontally, thing over it again vertically.

Step Three: Using a soft, dry rag gently buff the chalk all over the chalkboard, This will help the chalk dust fill in any nooks and crannies, giving you a smooth surface for your art.


Step Four: Now erase the chalk. You can use a traditional felt chalk eraser or a barely damp cloth. Be careful not to use a cloth that is too rough so you won’t scratch the chalkboard.


How to Prepare a Chalkboard for Liquid Chalk

Liquid chalk markers are water-based markers with pigments that dry to a chalk finish. They’re available in a wide variety of colors, including neon and metallic styles. They are a little bit different than traditional chalk, however. The biggest difference is that liquid chalk markers should only be used on non-porous surfaces. On porous surfaces, such as slate, the liquid chalk is difficult to erase, even with proper priming.

Priming your chalkboard for liquid chalk markers is just as easy as priming for traditional chalk. In fact, you can prime your surface using the method for traditional chalk and your liquid chalk markers will work just fine. However, if you want to take a few extra steps for optimal results, here’s what you should do:

Step One: Make sure your surface is clean and dry.

Step Two: Using a white liquid chalk marker, doodle all over your chalkboard. You don’t have to cover every bit of surface, just make sure the marker is spread out over most of it.

Step Three: Let your chalk doodles sit there for 20 to 30 seconds. The liquid chalk should be almost, but not completely dry.

Step Four: Using a soft, damp cloth, wipe your chalkboard clean. Be careful not to use a cloth that it too rough so the chalkboard paint doesn’t become scratched.

Tips For Maintaining and Enjoying Your Chalkboard 

When priming your chalkboard, keep in mind that this process blows minuscule bits of chalk into the air. You might want to wear a mask to cover your nose and mouth while doing this if you’re sensitive to dust. If you’re priming a large chalkboard surface, such as a wall or door, you might also want to have a drop cloth nearby to catch all the chalk dust created by the priming process.

Once you’ve primed your chalkboard surface, you should be able to draw and easily erase it many times. If you start to notice ghosting, just follow the steps to re-prime your chalkboard.

Chalkboard paint can scratch or chip over a long period of time. Adding another coat or two of paint periodically, as well as re-priming, can both help keep it looking new.

If you do have some “ghost images” on your chalkboard, use a wet sponge with a small amount of liquid dish soap to gently wash the image away. Other suggested methods for cleaning include a damp cloth with a tiny bit of white vinegar or a magic eraser cleaner.  Before using any of these to clean a chalkboard painted surface, do a small test spot in a corner. Some brands of chalkboard paint may discolor with certain cleaning chemicals.

Once your chalkboard is primed and ready, it’s time to start creating! Chalk is a fun, versatile medium with so many possibilities. Play around with different techniques to produce eye-catching art. You can use cotton balls or swabs to softly blend different layers of colored chalk together. To get more vibrant coverage from traditional chalk you can dip the end of the chalk stick in a little bit of water. You can cut stencils and templates from card stock to create fun designs. The possibilities are only as limited as your imagination!

  • « Go to Previous Page
  • Go to page 1
  • Go to page 2
  • Go to page 3
  • Go to page 4
  • Go to page 5
  • Go to page 6
  • Interim pages omitted …
  • Go to page 256
  • Go to Next Page »

Primary Sidebar

Heather from Whipperberry
Hello... my name is Heather and I'm the creator of WhipperBerry a creative lifestyle blog packed full of great recipes and creative ideas for your home and family. I find I am happiest when I'm living a creative life and I love to share what I've been up to along the way... Come explore, my hope is that you'll leave inspired!

Footer

  • Privacy Policy

Copyright © 2023 · Seasoned Pro