Whether you’re meeting friends for breakfast, enjoying a quiet coffee date, or spending quality time with family, the right café menu can make mornings feel more special. Thoughtful beverage and food pairings create a welcoming experience that encourages people to slow down and enjoy time together.
A well-planned menu helps customers discover combinations that naturally complement each other in flavor and texture. Whether you’re refining your café offerings or exploring a pastry products list for inspiration, thoughtful pairings can enhance the dining experience while adding value for every guest.
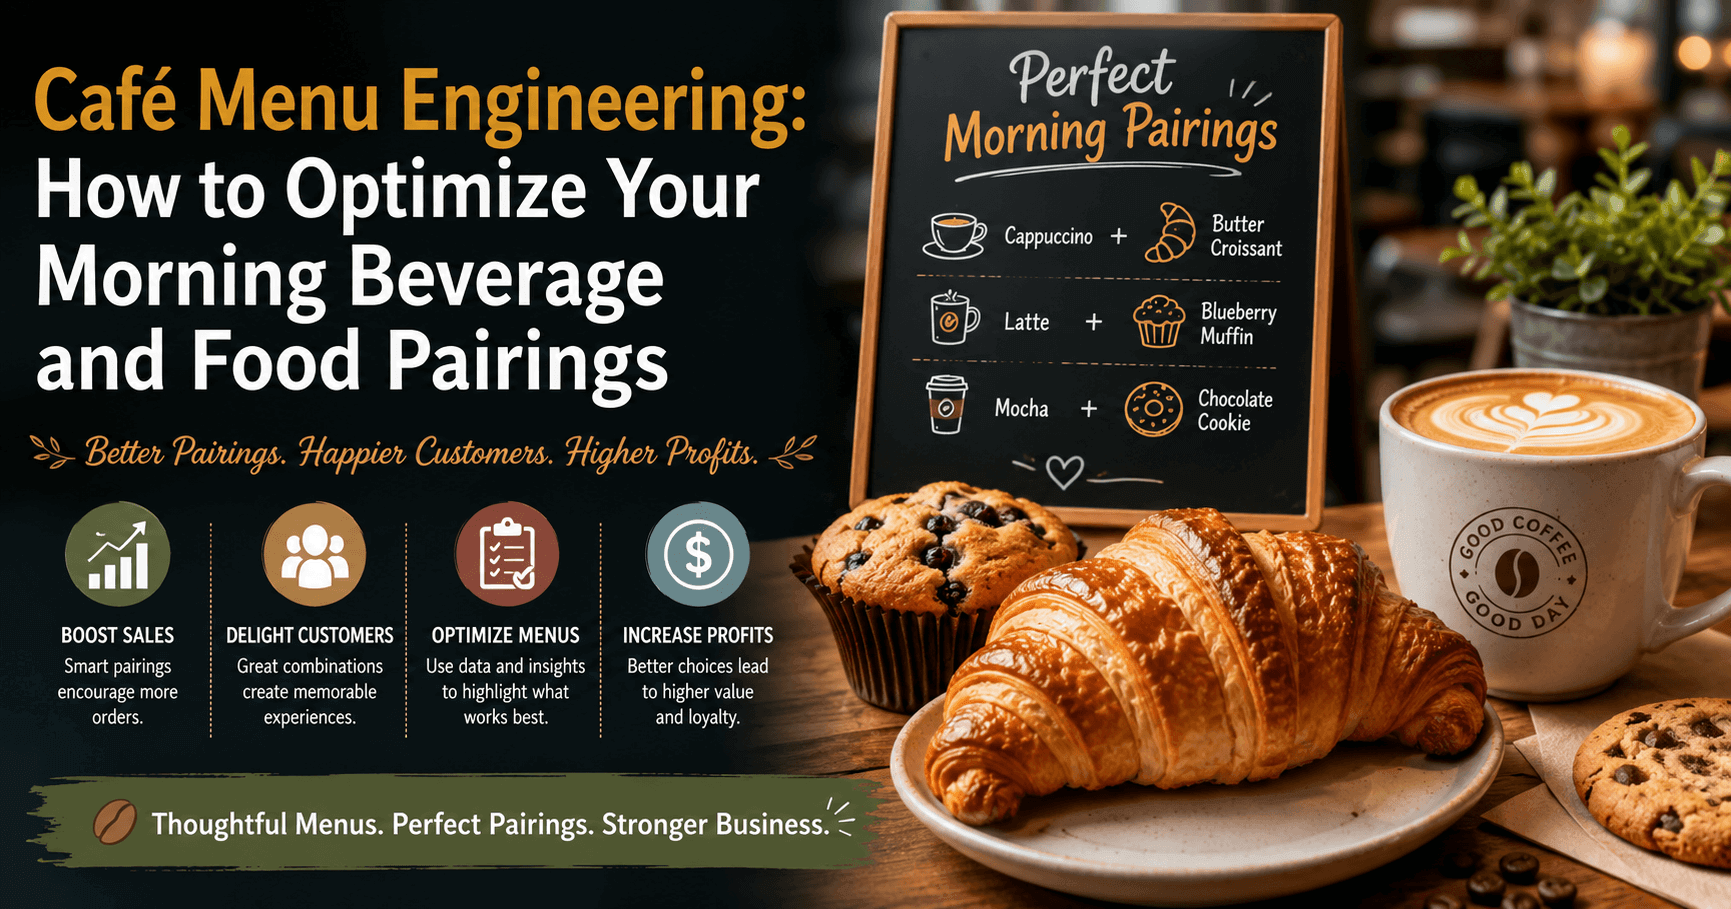
The most memorable cafés don’t simply offer more choices. They offer combinations that feel carefully selected for every occasion. Strategic morning pairings can increase customer satisfaction, strengthen your brand, and create inviting spaces where families and friends look forward to gathering.
What Is Café Menu Engineering?
Menu engineering is the process of organizing a café menu to improve sales and customer satisfaction. It helps customers choose food and drinks that pair well together.
A smart menu also increases the average order value without feeling pushy. Reviewing a pastry products list can help cafés select options that complement their beverage menu. The result is a better customer experience and stronger business growth.
Why Morning Pairings Matter
Morning pairings make breakfast choices easier and more enjoyable for customers. The right food and beverage combination creates a balanced flavor experience.
Smart pairings can also increase the value of every order. Using a pastry products list helps cafés find options that match popular morning drinks. Happy customers are more likely to return for the same great experience.
Understanding Flavor Synergy
Flavor synergy is about matching food and drinks that naturally taste better together. The right combinations create a more enjoyable café experience for every customer.
- Balance the Flavors: Pair beverages with foods that complement their sweetness, acidity, or richness for a smooth taste.
- Enhance Customer Experience: Thoughtful pairings make every sip and bite more satisfying, encouraging repeat visits.
- Choose Quality Options: Reviewing a pastry products list can help cafés select baked items that pair well with their signature drinks.
Designing Menus That Influence Purchasing Decisions
A well-designed menu helps customers make faster and smarter choices. Clean layouts and clear descriptions attract more attention.
Featured pairings can naturally increase the average order value. A carefully selected list of pastry products also supports better menu planning. Simple design choices can lead to higher sales and happier customers.
The Psychology Behind Food Pairings
People enjoy choices that feel simple and well-matched. Thoughtful food pairings make ordering easier and more enjoyable.
Customers are more likely to try recommended combinations they trust. A carefully chosen list of pastry products can support balanced pairing ideas. Smart recommendations improve satisfaction and encourage repeat visits.
Creating Value Without Discounting
Cafés can increase value without lowering their prices. Great pairings make every purchase feel more rewarding. Customers appreciate quality and convenience over constant discounts.
A well-planned pastry products list helps create combinations worth choosing. This strategy builds trust, loyalty, and long-term profits.
The Role of Quality Bakery Selections
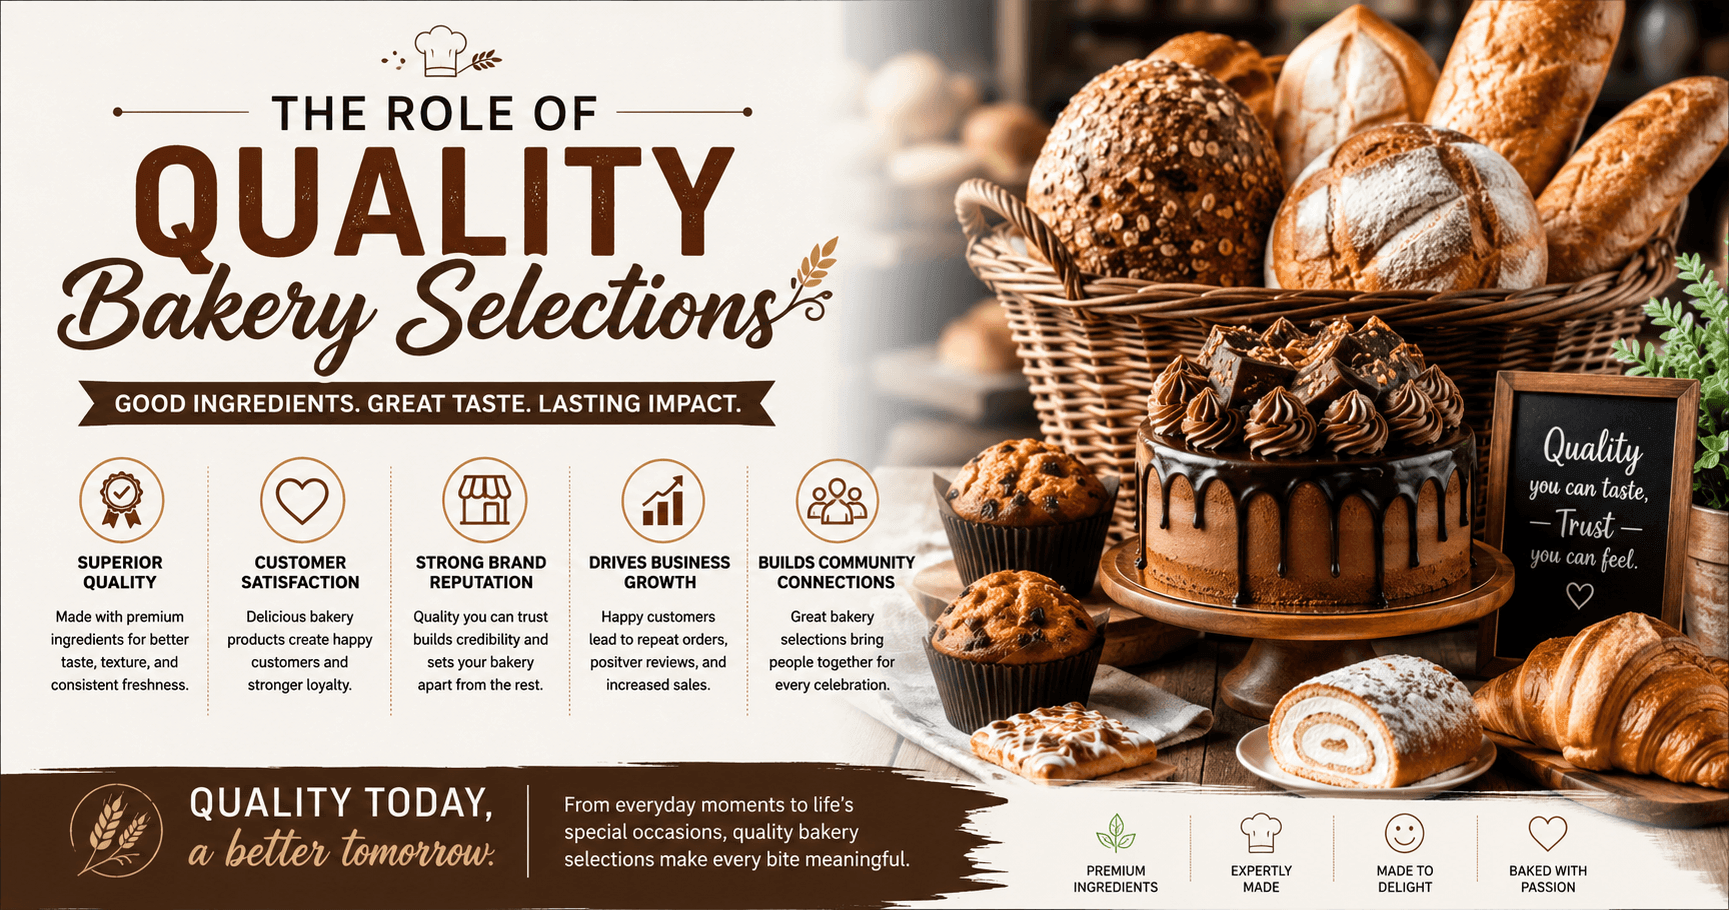
Quality bakery selections play an important role in creating a complete café experience. The right choices can enhance beverage pairings and improve customer satisfaction.
- Improve Flavor Balance: Premium bakery options complement coffee flavors and create a more enjoyable taste experience.
- Increase Customer Value: A thoughtful pastry products list helps cafés offer appealing combinations that encourage additional purchases.
- Build Brand Reputation: High-quality selections show attention to detail and help customers remember the café experience.
Seasonal Menu Engineering
Seasonal menu engineering keeps café offerings fresh and exciting throughout the year. It helps businesses match customer preferences with changing seasons.
New flavors create curiosity and encourage repeat visits. Updating a pastry products list with seasonal choices can improve menu appeal. Smart seasonal planning supports growth and customer satisfaction.
Training Staff to Recommend Pairings Naturally
Well-trained staff can make café recommendations feel natural and helpful. They guide customers toward pairings that match their tastes and preferences.
Friendly suggestions create trust instead of pressure. Knowledge about a pastry product list helps staff recommend better combinations. Great service turns simple orders into memorable experiences.
Leveraging Technology for Smarter Menu Decisions
Technology helps cafés understand customer behavior and make smarter menu choices. Digital tools provide useful insights for improving pairings, sales, and overall performance.
- Use Sales Data: Tracking customer orders helps identify popular drink and pastry product combinations.
- Improve Menu Planning: Digital insights make it easier to update menus based on real customer preferences.
- Create Better Experiences: Technology helps cafés offer personalized recommendations that increase satisfaction and loyalty.
Measuring the Success of Your Menu Engineering Strategy
Measuring menu performance helps cafés understand what customers love most. Tracking results makes it easier to improve pairings and increase profitability over time.
- Analyze Customer Choices: Review sales data to discover which beverage and pastry product combinations perform best.
- Track Order Value: Monitor average spending to see how menu improvements impact café revenue.
- Collect Customer Feedback: Listen to guest opinions to refine offerings and create better experiences.
Why Customer Experience Drives Profitability
A great customer experience turns first-time visitors into loyal café guests. Happy customers are more likely to return and recommend the brand.
Quality service and smart pairings create lasting impressions. A well-designed pastry product list can improve choices and satisfaction. Better experiences lead to stronger sales and long-term profitability.
How disjobelusa Supports Smarter Café Growth
Disjobelusa helps cafés create smarter strategies for sustainable growth. The brand focuses on quality, efficiency, and customer-focused menu solutions. It supports cafés in building better experiences through thoughtful planning.
By understanding trends like a pastry products list, businesses can improve their offerings. Smart decisions help cafés increase value and build lasting customer relationships.
Future Trends in Café Menu Engineering
The future of café menu engineering is becoming more innovative and customer-focused. Technology and data will help cafés create smarter choices.
Personalized recommendations will improve the ordering experience. Trends like digital menus and updated pastry product lists will shape café growth. Businesses that adapt quickly will stay ahead in the market.
Practical Tips for Café Owners
Café owners can improve their menu performance with simple and smart strategies. Small changes in planning and customer understanding can create better results.
- Study Customer Preferences: Analyze buying habits to create a list of beverage and pastry product pairings that customers enjoy.
- Keep Menus Fresh: Update selections regularly to match seasonal trends and changing tastes.
- Focus on Experience: Offer quality, convenience, and helpful recommendations to build stronger customer loyalty.
Final Thoughts
Great café experiences are about more than serving coffee and pastries. They create comfortable spaces where families, friends, and communities can enjoy meaningful moments together. By understanding flavors, customer preferences, and menu trends, cafés can offer pairings that make every visit more enjoyable.
A well-planned pastry products list supports balanced beverage combinations while giving customers more reasons to return. With thoughtful menu engineering, cafés can build customer loyalty, improve profitability, and create welcoming morning experiences that people will want to share with the ones they love.
FAQ’s
What Is Café Menu Engineering?
Café menu engineering is the process of designing menus strategically to improve customer choices, sales, and profitability.
Why Are Beverage And Food Pairings Important?
Smart pairings create better flavor experiences and encourage customers to explore more menu options.
How Can Cafés Increase Order Value Through Menu Design?
Cafés can highlight recommended combinations and create simple choices that naturally encourage additional purchases.
How Does Technology Help With Menu Engineering?
Technology helps cafés analyze customer behavior and make smarter decisions based on sales data and trends.