• Skip to primary navigation
  • Skip to main content
  • Skip to primary sidebar
  • Skip to footer

Whipperberry

WhipperBerry • Your Home For Creative Inspiration

  • Home
  • About
    • Terms
  • Recipes
    • ZipList
    • Starters
    • Easy Weeknight Dinners
    • Main Dish
    • Salads
    • Side Dish
    • Soups & Stews
    • Desserts
    • Breakfast
    • Miscellaneous
  • Tutorials
    • Creative Crafts
    • DYI Decor
    • Fabric Crafts
    • Food How-To
    • Jewlery
    • Paint Projects
    • Paper Art
    • Party Styling
    • Photography and Graphic Design
    • Silhouette
  • Holidays
    • St. Patrick’s Day
    • Easter
    • Mother’s Day
    • Father’s Day
    • 4th of July
    • Halloween
    • Thanksgiving
    • Christmas
    • New Years
    • Valentine’s Day
  • Gift Ideas
    • Gifts For Everyone
    • Gifts for Dad
    • Mother’s day
    • For The Girls
    • For The Kids
    • Teacher Gift Ideas
    • Christmas
  • Printables
    • Holiday
    • Gift Idea
    • LDS Primary
  • Travel
  • Contact
  • Nav Social Menu

    • Facebook
    • Instagram
    • Pinterest
    • RSS
    • Twitter

DIY

How To Make A Large Scale Felt Banner for Christmas

58 · Nov 9, 2018 · 3 Comments

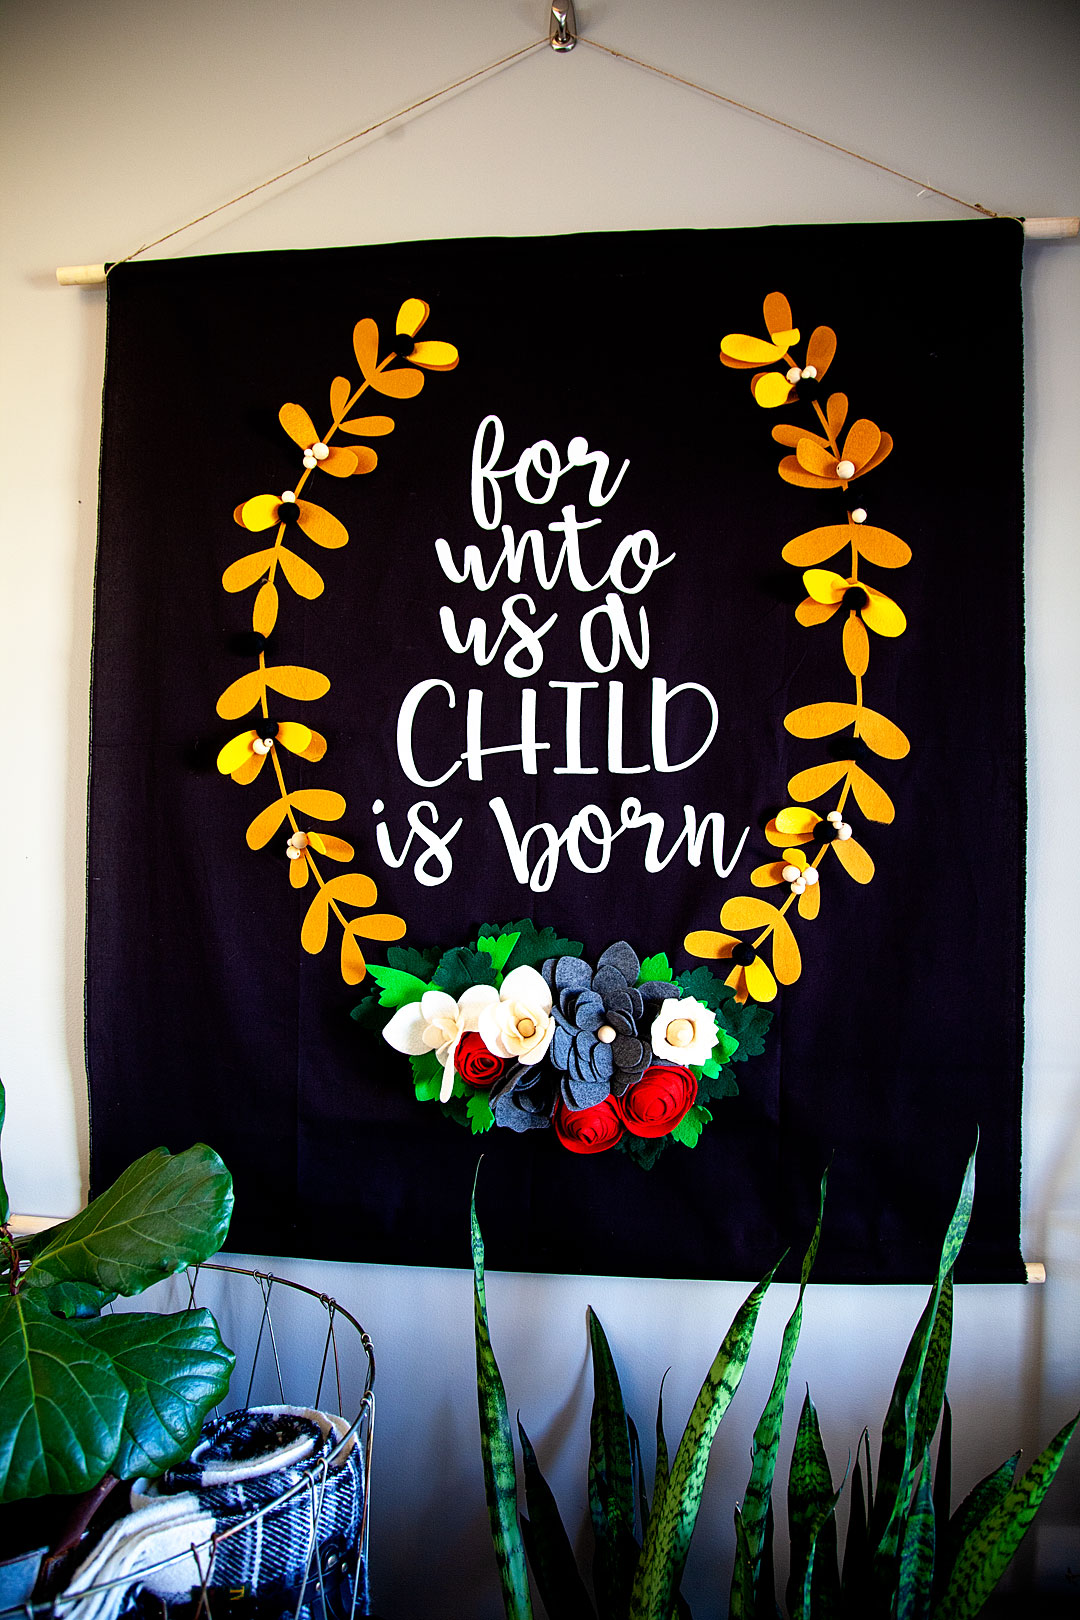
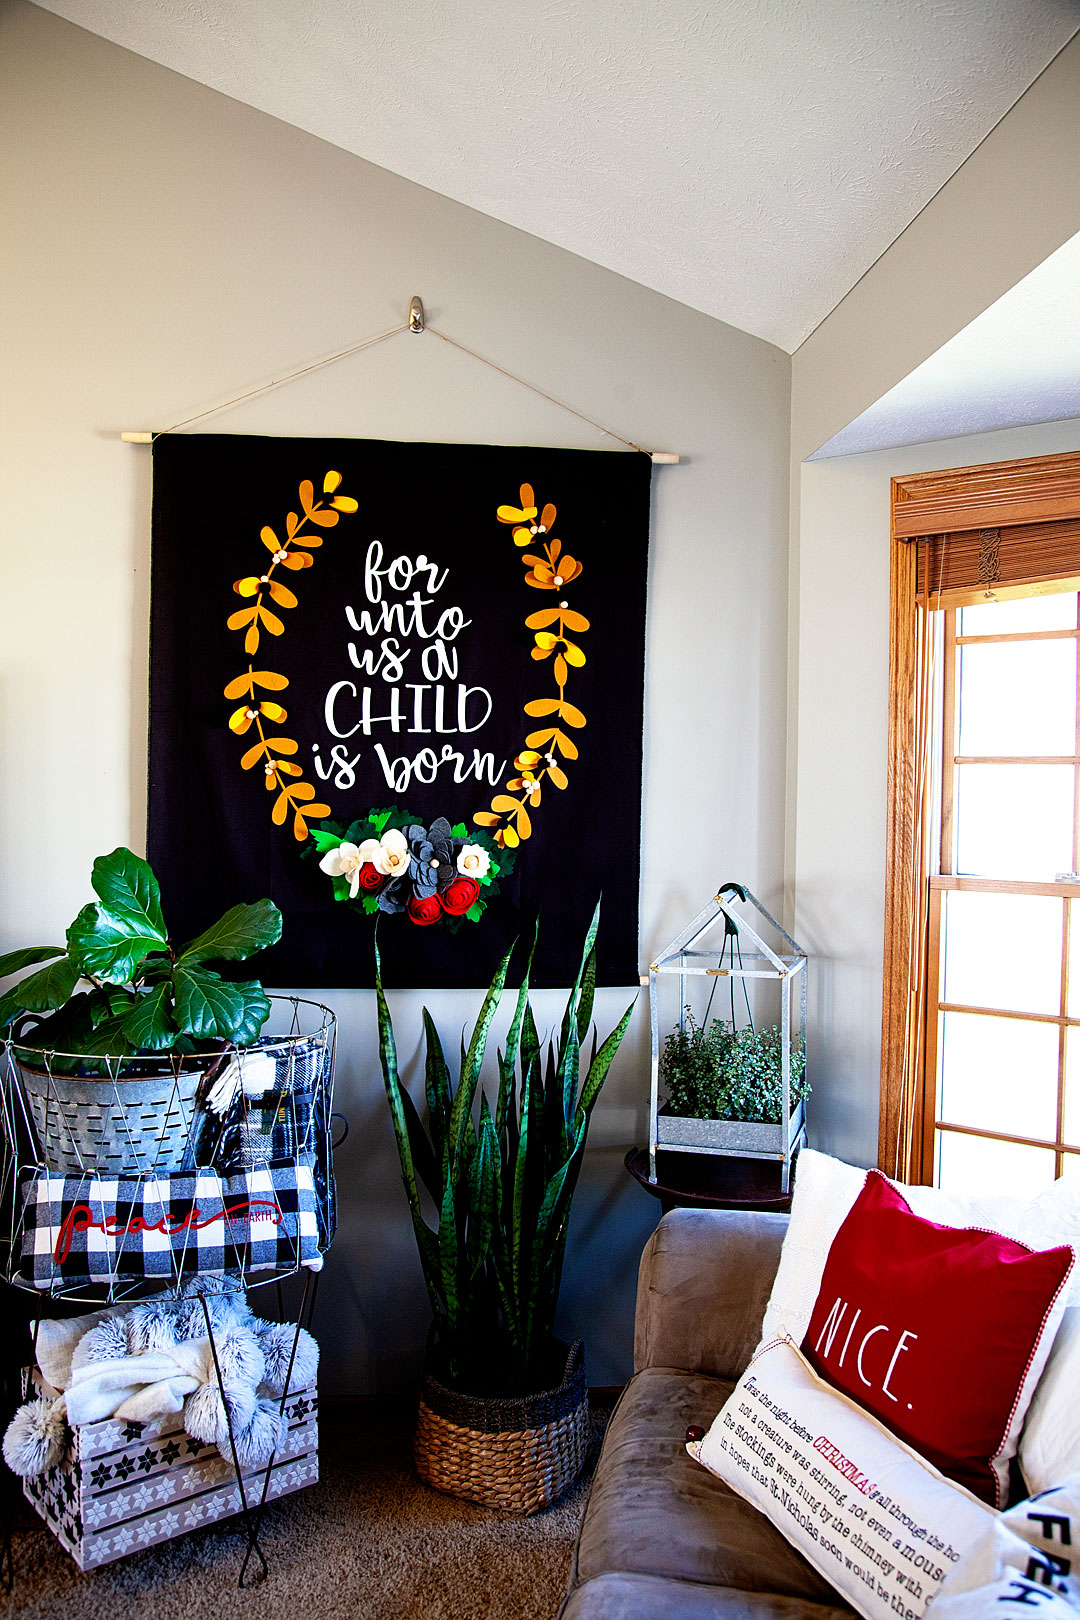
Boy-oh-Boy… I LOVE large scale projects! Sometimes bigger really is better in my book. There are times when you really need to make a statement and a large scale felt banner or large drop cloth sign created to wow your guests or to really make a room POP! I wanted to create a large felt sign for the Christmas season to add to my living room and to also use for a Christmas party that I’m planning this year. Let me show you what I made and how YOU can make one yourself!

• This post is brought to you by the amazing folk at Cricut •
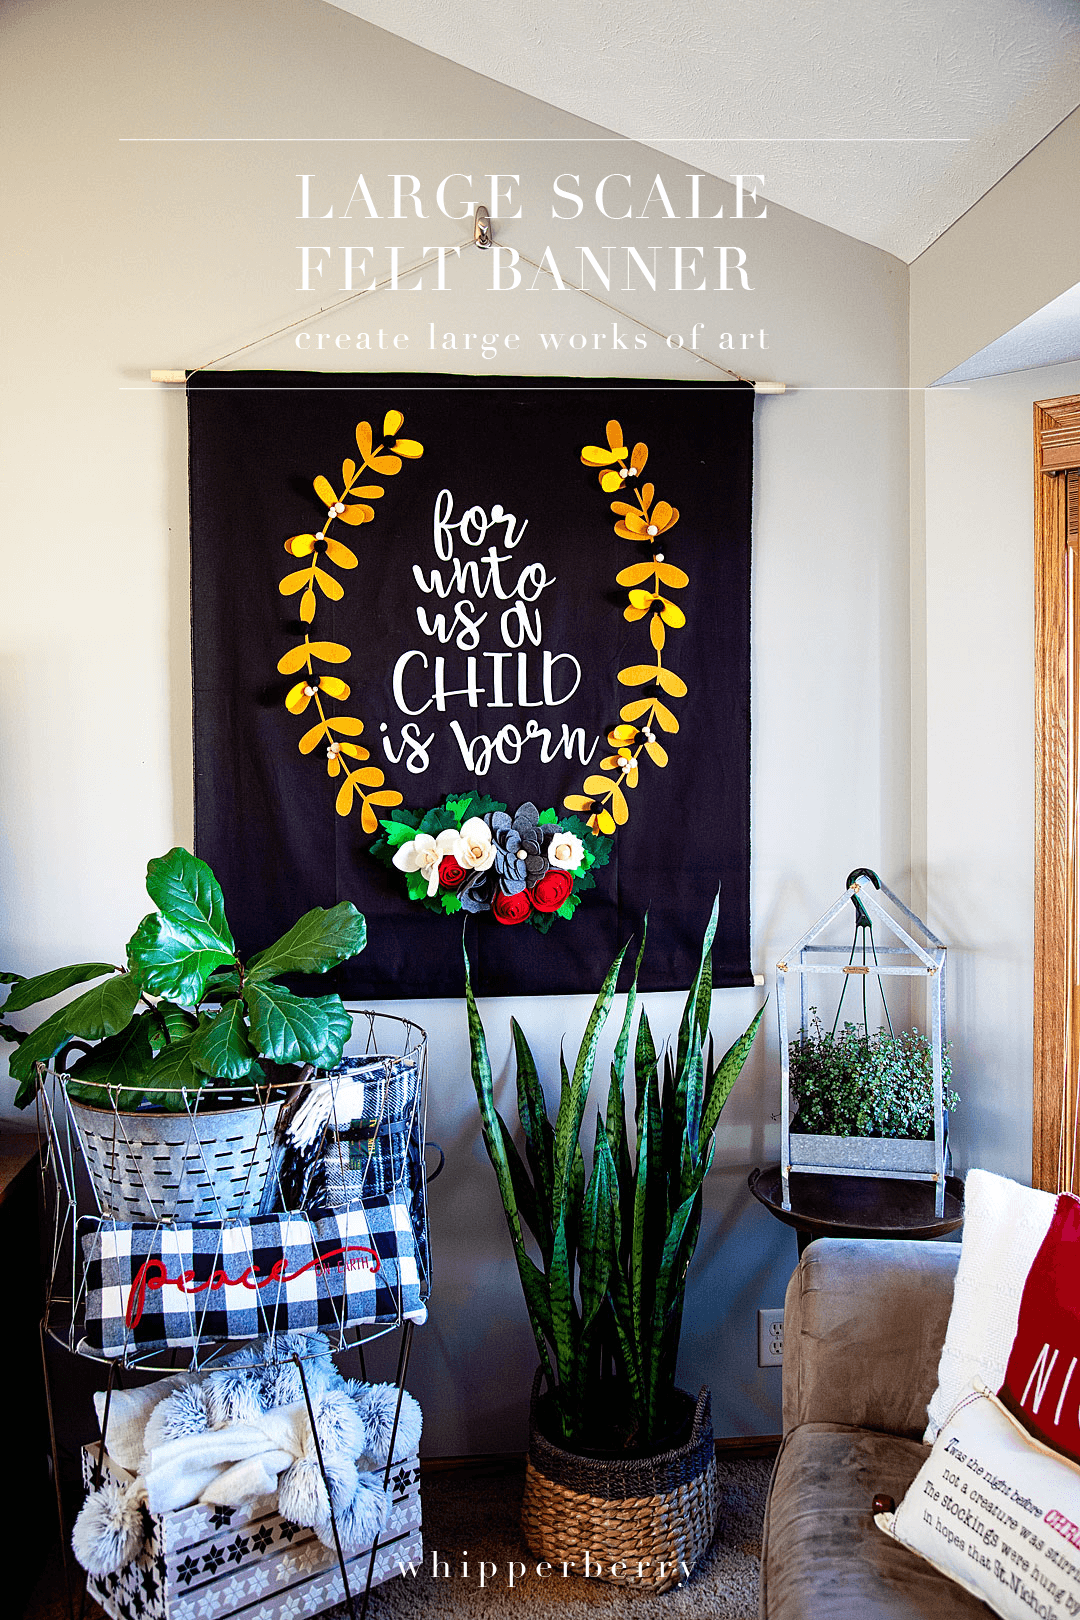
Boy-oh-Boy... I LOVE large scale projects! Sometimes bigger really is better in my book. There are times when you really need to make a statement and a large scale felt banner or large drop cloth sign created to wow your guests or to really make a room POP! I wanted to create a large felt sign for the Christmas season to add to my living room and to also use for a Christmas party that I'm planning this year. Let me show you what I made and how YOU can make one yourself! - WhipperBerry #feltsign #largescalesign #christmassign #christmasdecor #christmasdecoration

Many of you might say that a project of this size is impossible, especially with the Cricut cutting machines. You can really only cut 12 inches by 24 inches, right?  Technically, yes. However, if you have learned to master the Slice & Contour tools in Cricut Design Space, it’s actually very do-able. Especially now, with the Cricut Maker & the new larger Easy Press 2… Projects like this are a DREAM! The Maker can handle all kinds of materials like the most delicate paper and fabric to the tough stuff like matboard, leather, and balsa wood. What I especially love is that you can use it to cut FELT! One of my favorite materials to create with. Now, you can do it on a much LARGER scale with the help of some tips and tricks that will follow.

Boy-oh-Boy... I LOVE large scale projects! Sometimes bigger really is better in my book. There are times when you really need to make a statement and a large scale felt banner or large drop cloth sign created to wow your guests or to really make a room POP! I wanted to create a large felt sign for the Christmas season to add to my living room and to also use for a Christmas party that I'm planning this year. Let me show you what I made and how YOU can make one yourself! - WhipperBerry #feltsign #largescalesign #christmassign #christmasdecor #christmasdecoration

How to Use the Slice and Contour Tools

I have heard a few people who have complained about the lack of freedom in Design Space and I’m here to tell you… That’s not true! You have a ton of freedom when designing in Cricut Design Space if you are good friends with your Slice and Contour tools. These are the two tools that help you customize either your own graphics or graphics from the huge library of designs in the Design Space library. Here is a quick video to show you how I break this large design ( it’s roughly about 4 feet wide and a little over 4 feet tall) into smaller pieces so that they will fit on my 12×24 cutting mat for the Cricut Maker.

Isn’t that cool! I love that with a little knowledge and some imagination, you can truly create something incredible with the Cricut tools.

Supplies for Large-Scale Felt Banner

  • 1 1/2 yards of black canvas fabric
  • 24 – gold felt 9×12
  • 8 – white premium felt 12×18
  • 5 – antique white felt 9×12
  • 3 – red premium felt 12×18
  • 5 – heathered gray premium felt 12×18
  • 3 – dark green felt 9×12
  • 3 – light green felt 9×12
  • 24 – large wood beads of various sizes 1 inch, 1 1/4 inch
  • 10 – black wool felt balls – 2.5cm
  • Cricut Maker with Rotary Blade
  • 1 – Fabric Grip Cricut Cutting Mat
  • Heat n’Bond
  • Cricut Easy Press 2 – 12×10
  • Cricut Easy Press Mat-20×16
  • Cricut Iron-On Protective Sheet
  • hot glue gun
  • hot glue sticks
  • 2 – 4 ft. wood dowels
  • cotton rope
  • measuring tape

Instructions

  1. You will want to set-up your Easy Press 2 and the Easy Press Mat and iron-on the Heat n’Bond on one side of each of the felt pieces. I LOVE the Easy Press 2 for this!! Seriously way easier than using a small iron and the consistency of the heat plate make this a breeze.
  2. Jump into Cricut Design Space via this LINK HERE to get access to my design file. I have this project all ready to go for you. It’s sized to create a LARGE 3 1/2 x 4 foot banner. The design is already sliced and contoured so that you don’t have to worry about that step. All you need to do is follow the on-screen prompts and load the mat with the color of felt that it corresponds with and you’ll be good to go. NOW, the felt that I had was smaller than the designs, not to worry though. I placed my felt onto the cutting mat and easily pieced them together while I was pressing them onto the fabric. If you’re careful you won’t even see the seam.
  3. You will find that some of the designs don’t all fit onto one sheet of felt. Don’t worry about that. Just keep all of your pieces organized with where they need to go. Then when you’re ready to iron them on, you’ll do just that with even the little pieces and you’ll never know there was a cut there.
  4. Once everything is cut, press your black canvas. You don’t want to have any wrinkles. I just use my Easy Press 2 for this process. WAY EASIER!
  5. Now, I have you cutting 2 sets of the gold wreath section of the banner. That’s not a mistake, I wanted the wreath section to pop out so that it’s 3D rather than a flat design.
  6. Lay out your wreath & quote on the black canvas and make sure that it is placed in the center and spaced according to the photo below. This is when you will want to make sure you have kept any small pieces and have placed them in the right spot.Boy-oh-Boy... I LOVE large scale projects! Sometimes bigger really is better in my book. There are times when you really need to make a statement and a large scale felt banner or large drop cloth sign created to wow your guests or to really make a room POP! I wanted to create a large felt sign for the Christmas season to add to my living room and to also use for a Christmas party that I'm planning this year. Let me show you what I made and how YOU can make one yourself! - WhipperBerry #feltsign #largescalesign #christmassign #christmasdecor #christmasdecoration
  7. Once you have placed the design the way you would like it. Place the Easy Press Mat under the first section and set your Easy Press 2 to 350˚. Lay the Iron-On Protective Mat on top of the first felt section and then lightly press the Easy Press 2 for 60 seconds on that first section.
  8. Continue over the entire design until it is all ironed onto the canvas.Boy-oh-Boy... I LOVE large scale projects! Sometimes bigger really is better in my book. There are times when you really need to make a statement and a large scale felt banner or large drop cloth sign created to wow your guests or to really make a room POP! I wanted to create a large felt sign for the Christmas season to add to my living room and to also use for a Christmas party that I'm planning this year. Let me show you what I made and how YOU can make one yourself! - WhipperBerry #feltsign #largescalesign #christmassign #christmasdecor #christmasdecoration
  9. Next, you assemble the flowers with hot glue. I used a wood bead in the center of each flower because I like the look and it stabilizes the flower a little more. 
  10. Once the flowers are assembled, start laying them out on the canvas until you get the look that you like. Then section by section, hot glue the flowers and leaves onto the banner.
  11. At this point, you have two choices. You can finish off the banner by sewing the pocket for the dowel OR, you can faux sew like me and just hot glue the pocket.  I fold the top of the fabric down about 2 1/2 – 3 inches and then hot glue or sew across the bottom of the fold leaving a pocket to feed the dowel through. 
  12. Repeat the last step at the bottom of the banner as well. This is needed to add some weight at the bottom of the banner. If you don’t have this the banner will hang a little wonky.
  13. Tie the cotton rope onto the top dowel so that you can hang the banner.Boy-oh-Boy... I LOVE large scale projects! Sometimes bigger really is better in my book. There are times when you really need to make a statement and a large scale felt banner or large drop cloth sign created to wow your guests or to really make a room POP! I wanted to create a large felt sign for the Christmas season to add to my living room and to also use for a Christmas party that I'm planning this year. Let me show you what I made and how YOU can make one yourself! - WhipperBerry #feltsign #largescalesign #christmassign #christmasdecor #christmasdecoration

Now, you’re all finished! You have an amazing work of art that you will treasure for years. What other large-scale signs are you wanting to make? I just finished creating all kinds of large-scale projects for my daughter’s wedding and I can’t wait to show you what I created for that amazing event.

This is a sponsored conversation written by me on behalf of Cricut. The opinions and text are all mine.
Garden Girl Canvas Zipper Bag Tutorial • Mother’s Day Gift Idea

1 · Apr 28, 2018 · 2 Comments

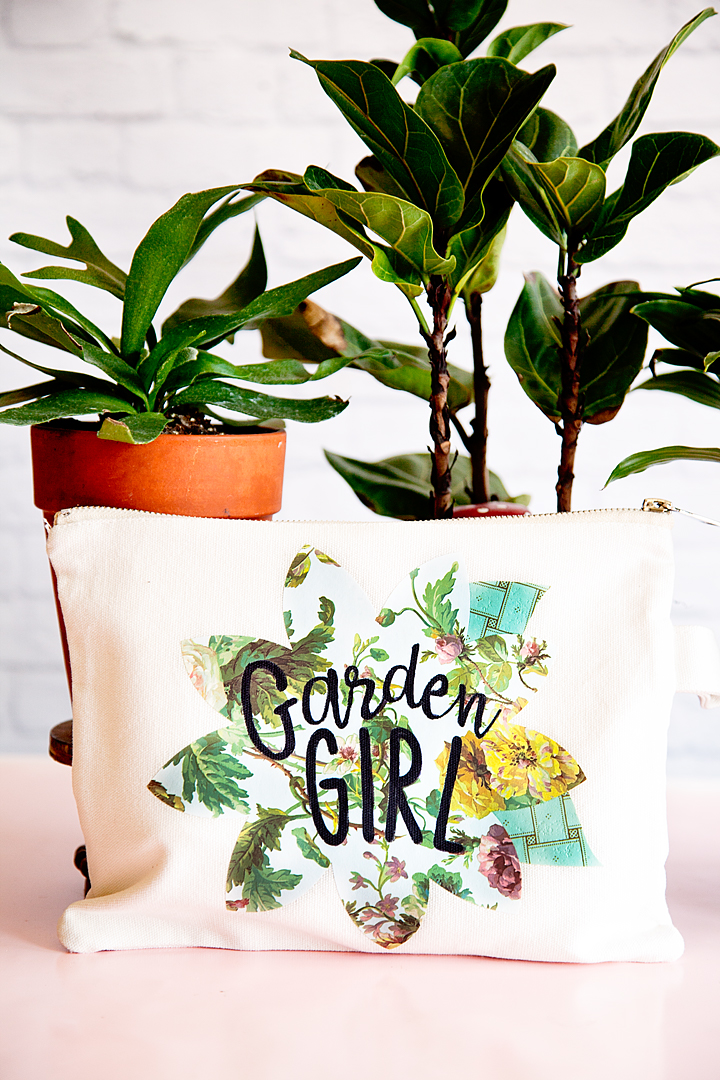
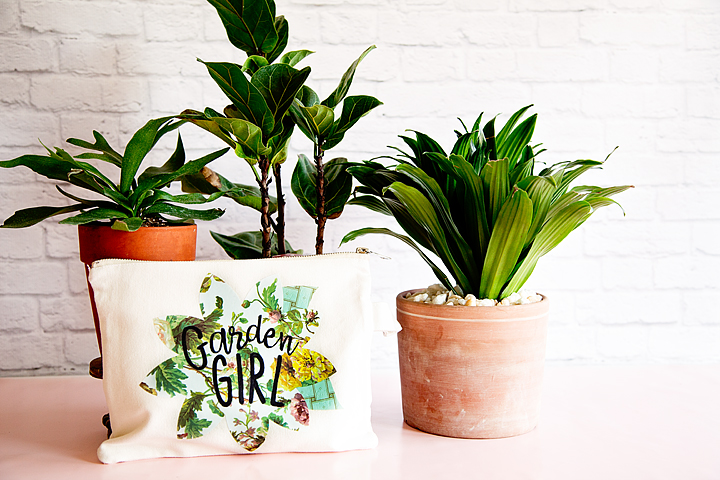
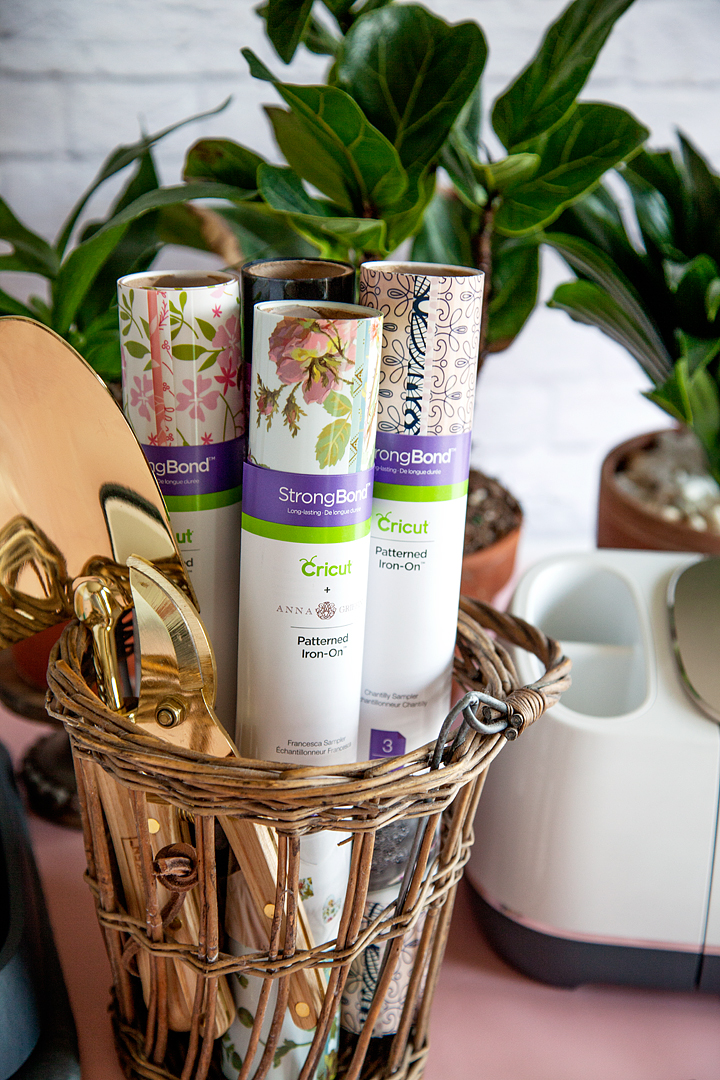
Hello… Mother’s Day is right around the corner, are you getting ready? I always love to create something fun for my Mom and for all the “Mothers” in my life. My Mom is a true garden girl and I thought it would be fun to create a cute garden girl canvas zipper bag using the new Cricut Patterned Iron-On for Mother’s Day. Have you guys seen this? It’s the cutest stuff!

+ This post brought to you by the amazing crew at Cricut +My Mom is a true garden girl and I thought it would be fun to create a cute garden girl canvas zipper bag using the new Cricut Patterned Iron-On for Mother's Day. Have you guys seen this? It's the cutest stuff! • created by whipperberry

Cricut Patterned Iron-On

You guys… This stuff is so fun to work with! It comes in florals, lace, polka-dots, geometrics, plus more. The Cricut Patterned Iron-On is the next creative wave coming out of the fabulous minds of the crew at Cricut. They are constantly working to make more and even better consumable products for us to use as we create with our favorite crafting machine. This iron-on vinyl is created with the long-lasting Strong Bond™ technology and adheres nicely to many types of fabrics. It works like a dream when using the Cricut EasyPress or even your home iron.

My Mom is a true garden girl and I thought it would be fun to create a cute garden girl canvas zipper bag using the new Cricut Patterned Iron-On for Mother's Day. Have you guys seen this? It's the cutest stuff! • created by whipperberry

Garden Girl Design

Since my Mom loves flowers, I thought the Anna Griffin floral patterns in the Francesca sampler would be perfect. I’ve been crushing on Anna Griffin’s work for years so, this was a natural fit for me as I started to design this Garden Girl bag.

My Mom is a true garden girl and I thought it would be fun to create a cute garden girl canvas zipper bag using the new Cricut Patterned Iron-On for Mother's Day. Have you guys seen this? It's the cutest stuff! • created by whipperberry

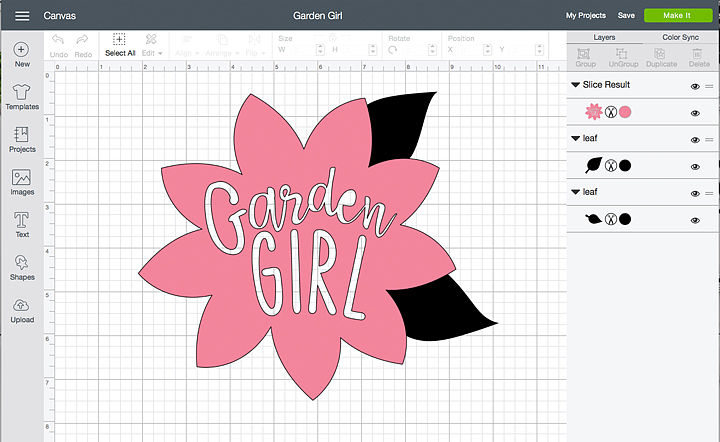
The design is pretty simple, it’s a flower that I found in the Cricut Design Space and then sliced the words into the flower and added a couple of leaves. But, no worries… I’ve got you covered. You can click on the link below, in the project supplies section, it will open this project up for you to use in Cricut Design Space.

Supplies

  • canvas zipper pouch
  • Cricut Patterned Iron-On
  • Garden Girl Cricut Design Space Project
  • Cricut machine
  • Cricut EasyPress or home iron
  • Cricut EasyPress Mat or towel
  • Cricut Iron-On Protective Sheet
  • Sharpie

Instructions

Now, that you’ve seen the video, here is the step by step instructions.

  1. Open the project in Cricut Design Space and click on the customize button. You may need to resize the design in order to fit your canvas bag.
  2. Cut the design on your Cricut machine following the steps that Cricut Design Space will walk you through. Make sure that when working with any iron-on material you need to MIRROR YOUR IMAGE and CUT ON THE WRONG SIDE of the iron-on vinyl.
  3. Weed your iron-on material. To “weed” vinyl or iron-on material means that you remove any iron-on material that you don’t want on your bag. For this design, you’ll want to remove the outside of the flower and leaves, then remove the letters from the inside of the flower.
  4. Pre-heat your Cricut EasyPress to 340˚ and set-up your EasyPress Mat.
  5. Place the canvas bag on the EasyPress Mat and prepare the surface by pre-heating the space where you are going to add the design for 15 seconds. This allows for greater adhesion for the Patterned Iron-On.
  6. Place your flower down on the surface of your bag then, slide the leaves under the flower and place them where you would like them. I trimmed the bottom of the leaves a bit since they were going to be covered by the flower.
  7. Remove the flower, cover the leaves with the Protective Iron-On Sheet and press the leaves at 340˚ for 30 seconds and gently pressing down on the EasyPress. First, on one side and then an additional 30 seconds on the other side.
  8. Remove the Iron-On Protective Sheet and then, peel back the clear protective film on the leaves.
  9. Place the flower over the leaves. Replace the Cricut Iron-On Protective Sheet and press again, like before. 30 seconds on one side, then 30 more on the other side.
  10. Let cool for a few minutes and then remove the protective film.
  11. At this point, you can decide whether you want to fill in the letters with Sharpie. I wanted my Garden Girl to stand out a little more so I decided to fill them in. You may have selected a Patterned Iron-On where the words standout just fine and you won’t need to fill them in. This is your call basically.

With that, your bag is finished and ready to gift to your favorite Garden Girl!

What would you like to create with the new Cricut Patterned Iron-On? Leave a comment and let me know, I love to see what you guys are working on!

My Mom is a true garden girl and I thought it would be fun to create a cute garden girl canvas zipper bag using the new Cricut Patterned Iron-On for Mother's Day. Have you guys seen this? It's the cutest stuff! • created by whipperberry

This is a sponsored conversation written by me on behalf of Cricut. The opinions and text are all mine.
DIY Farmhouse Tiered Bowls

6 · Jan 22, 2018 · Leave a Comment

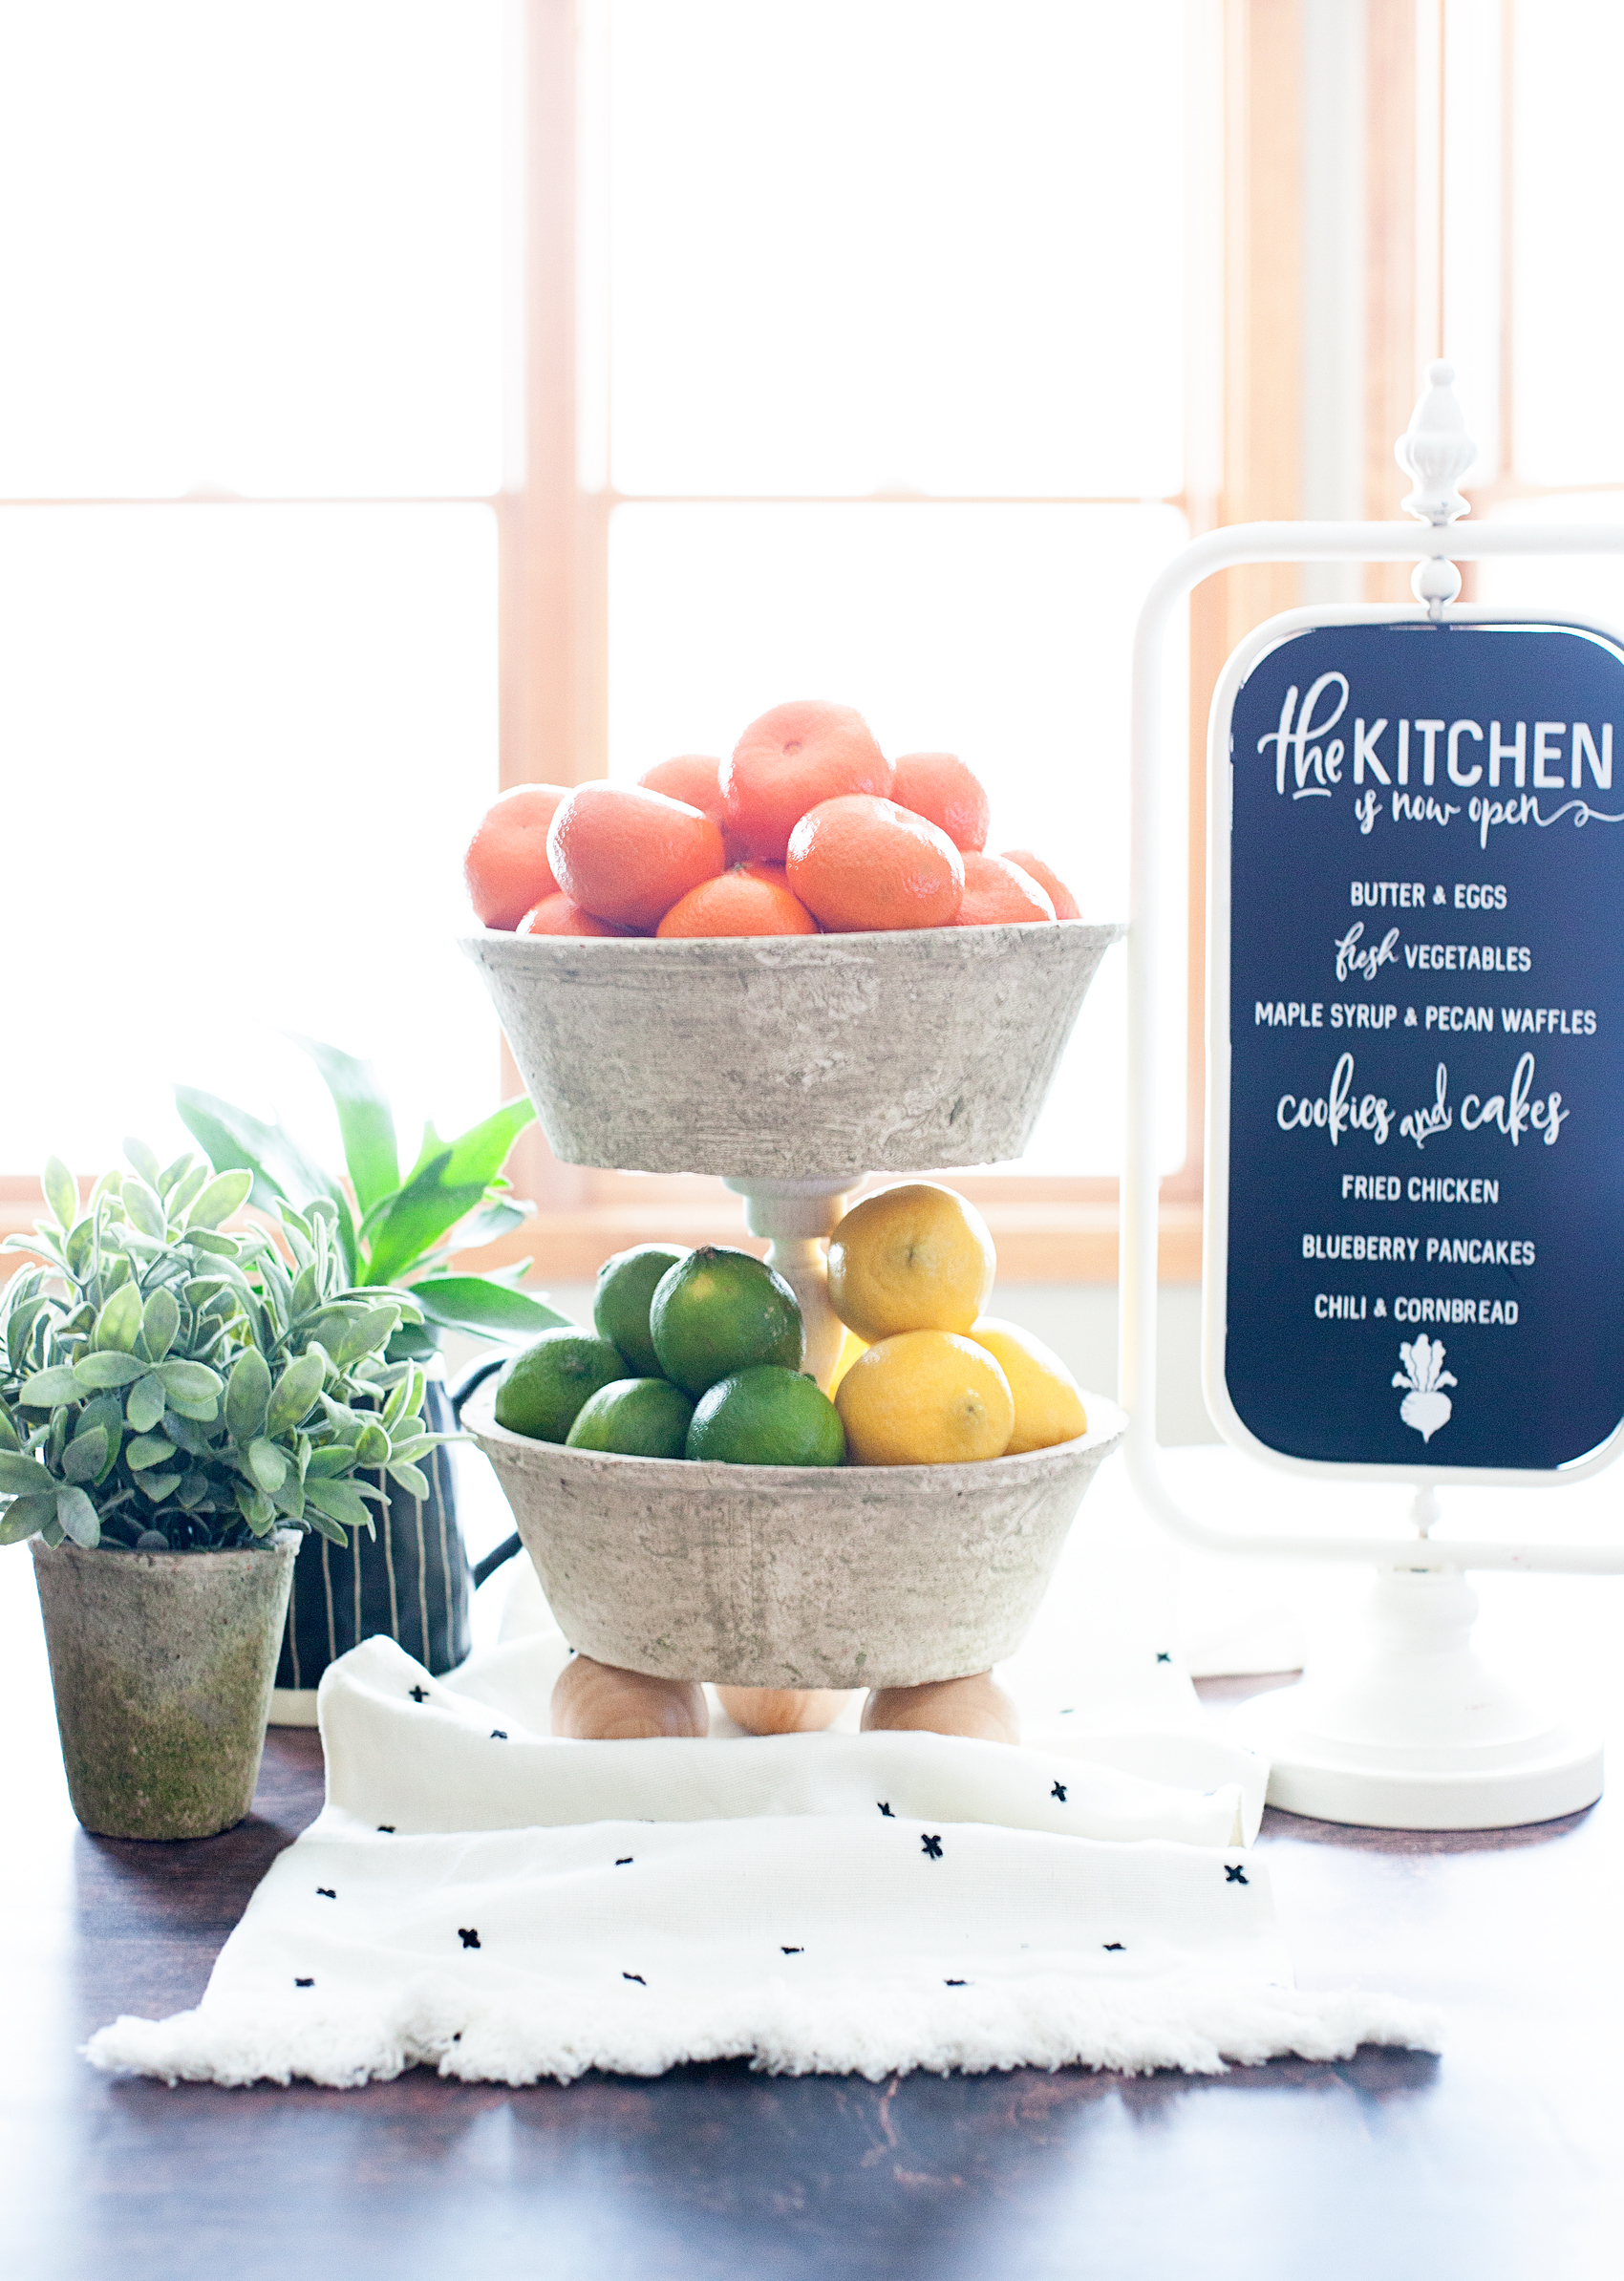
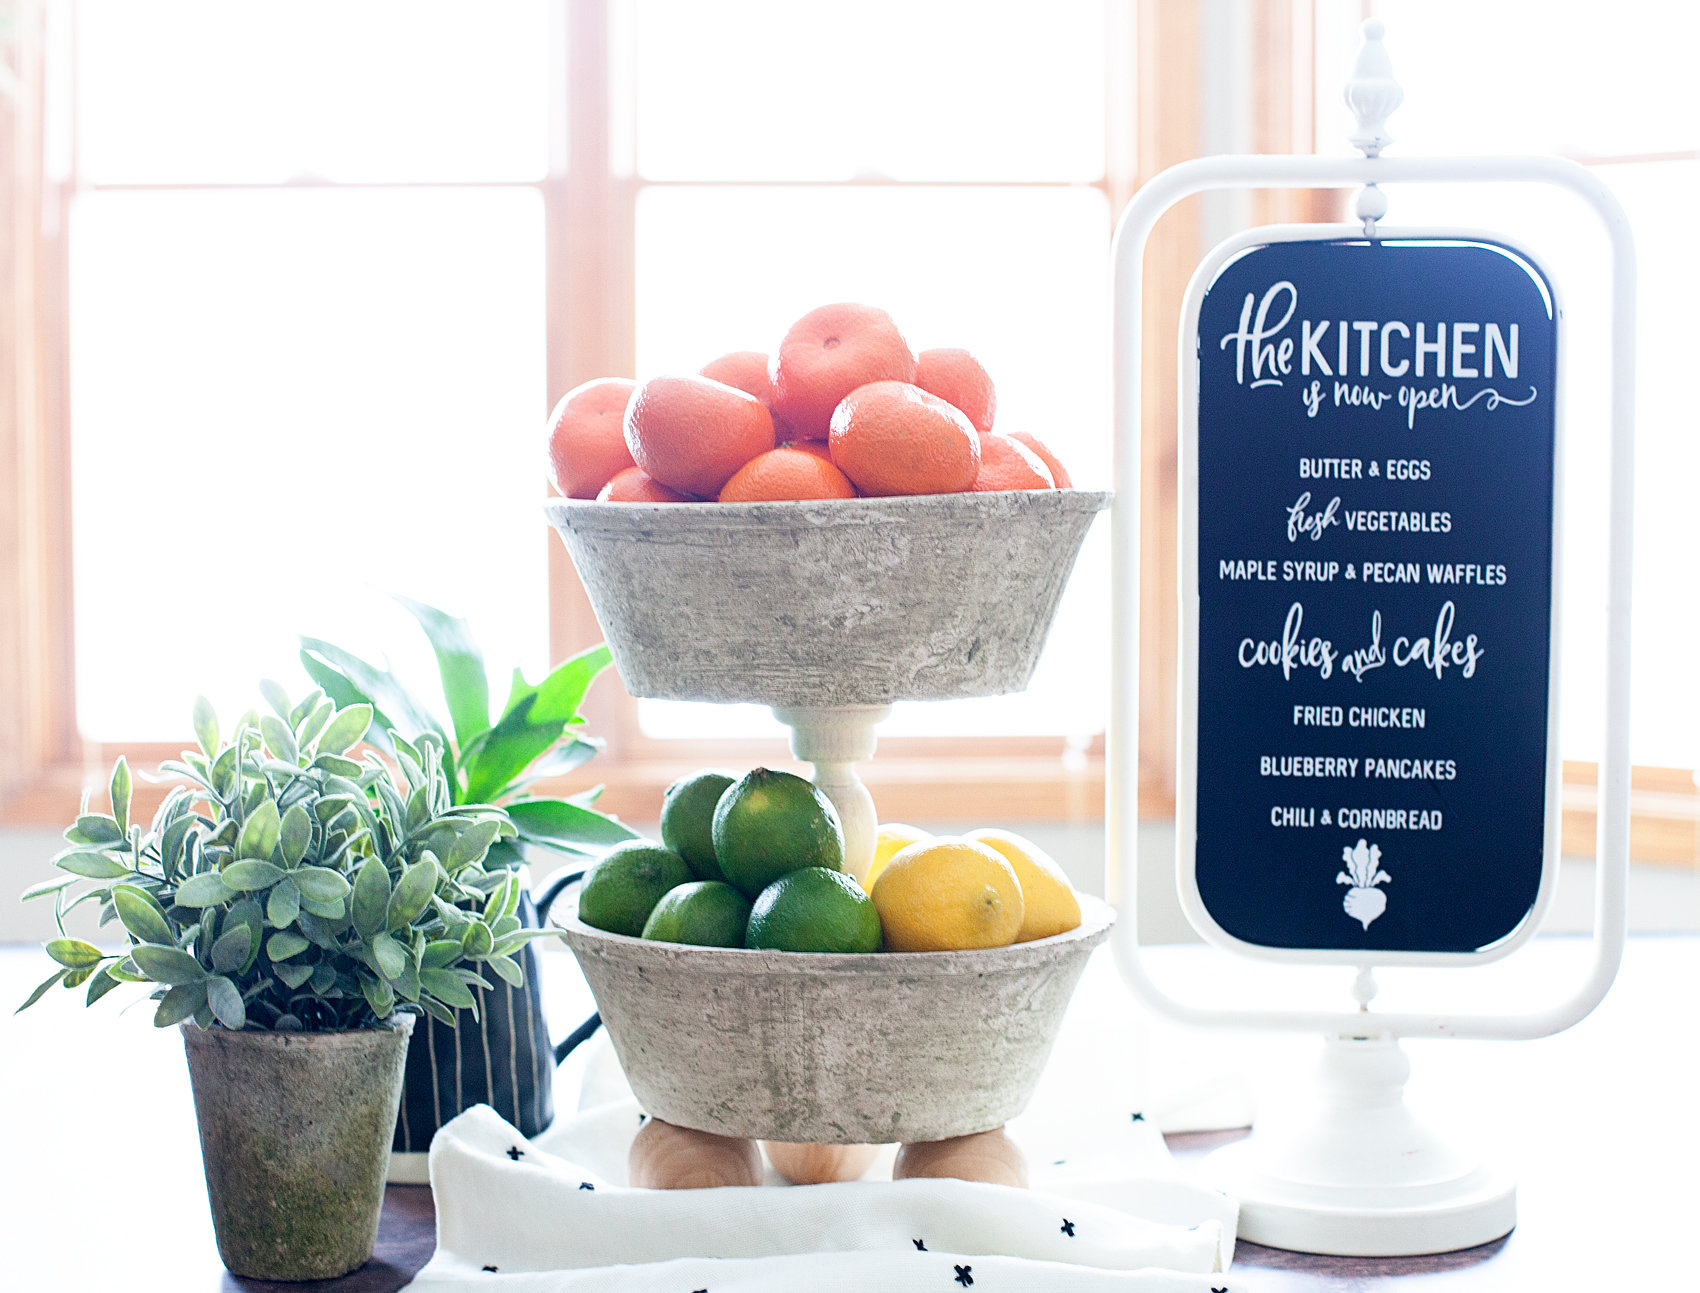
Normally a costly buy, these farmhouse tiered bowls are a stylish storage option for either the kitchen, office or craft room. Rather than breaking the bank, you can grab a few items at Michaels to make one of your own.

+ This DIY Farmhouse Tiered Bowls post brought to you by Michaels +DIY Farmhouse Tiered Bowls are easy as pie to make thanks to @michaels. Normally a costly buy, these tiered bowls won’t break the bank and they are super easy to make. A great storage option for either the kitchen or the office! Come on over to WhipperBerry to learn how to make one for your home.

I will fully admit, I love the farmhouse trend. I’ve slowly been gathering home decor pieces that help to transform my spaces into cute little farmhouse nooks.

One piece that everyone loves right now is tiered trays or tiered bowls, you see them everywhere. I’ve looked and sometimes these gems have a hefty price tag which stinks because they are great for organizing in the home. They are handy in the office to organize office supplies, pens, pencils, scissors. You can even add in some decor to dress up your office. The same is true for the craft room. Tiered bowls are great for story craft supplies; paints, brushes, markers, your Cricut tools and so much more. In the kitchen they are super handy as well. You can use them to keep healthy fruits and vegetables on the counter so that your kiddos reach for the healthy snacks that are close at hand.In need of a set of tiered bowls for the kitchen, I thought rather than purchasing one, maybe I could make one of my own.

Of course, I ran over to Michaels to see what I could find. Their isles are packed full of great storage and organization goodies this time of year. Well, all year, but this time of year especially. The cool thing about looking for storage solutions at Michaels, you can think “outside of the box” and CREATE your own storage solution from the isles there.

DIY Farmhouse Tiered Bowls Supplies

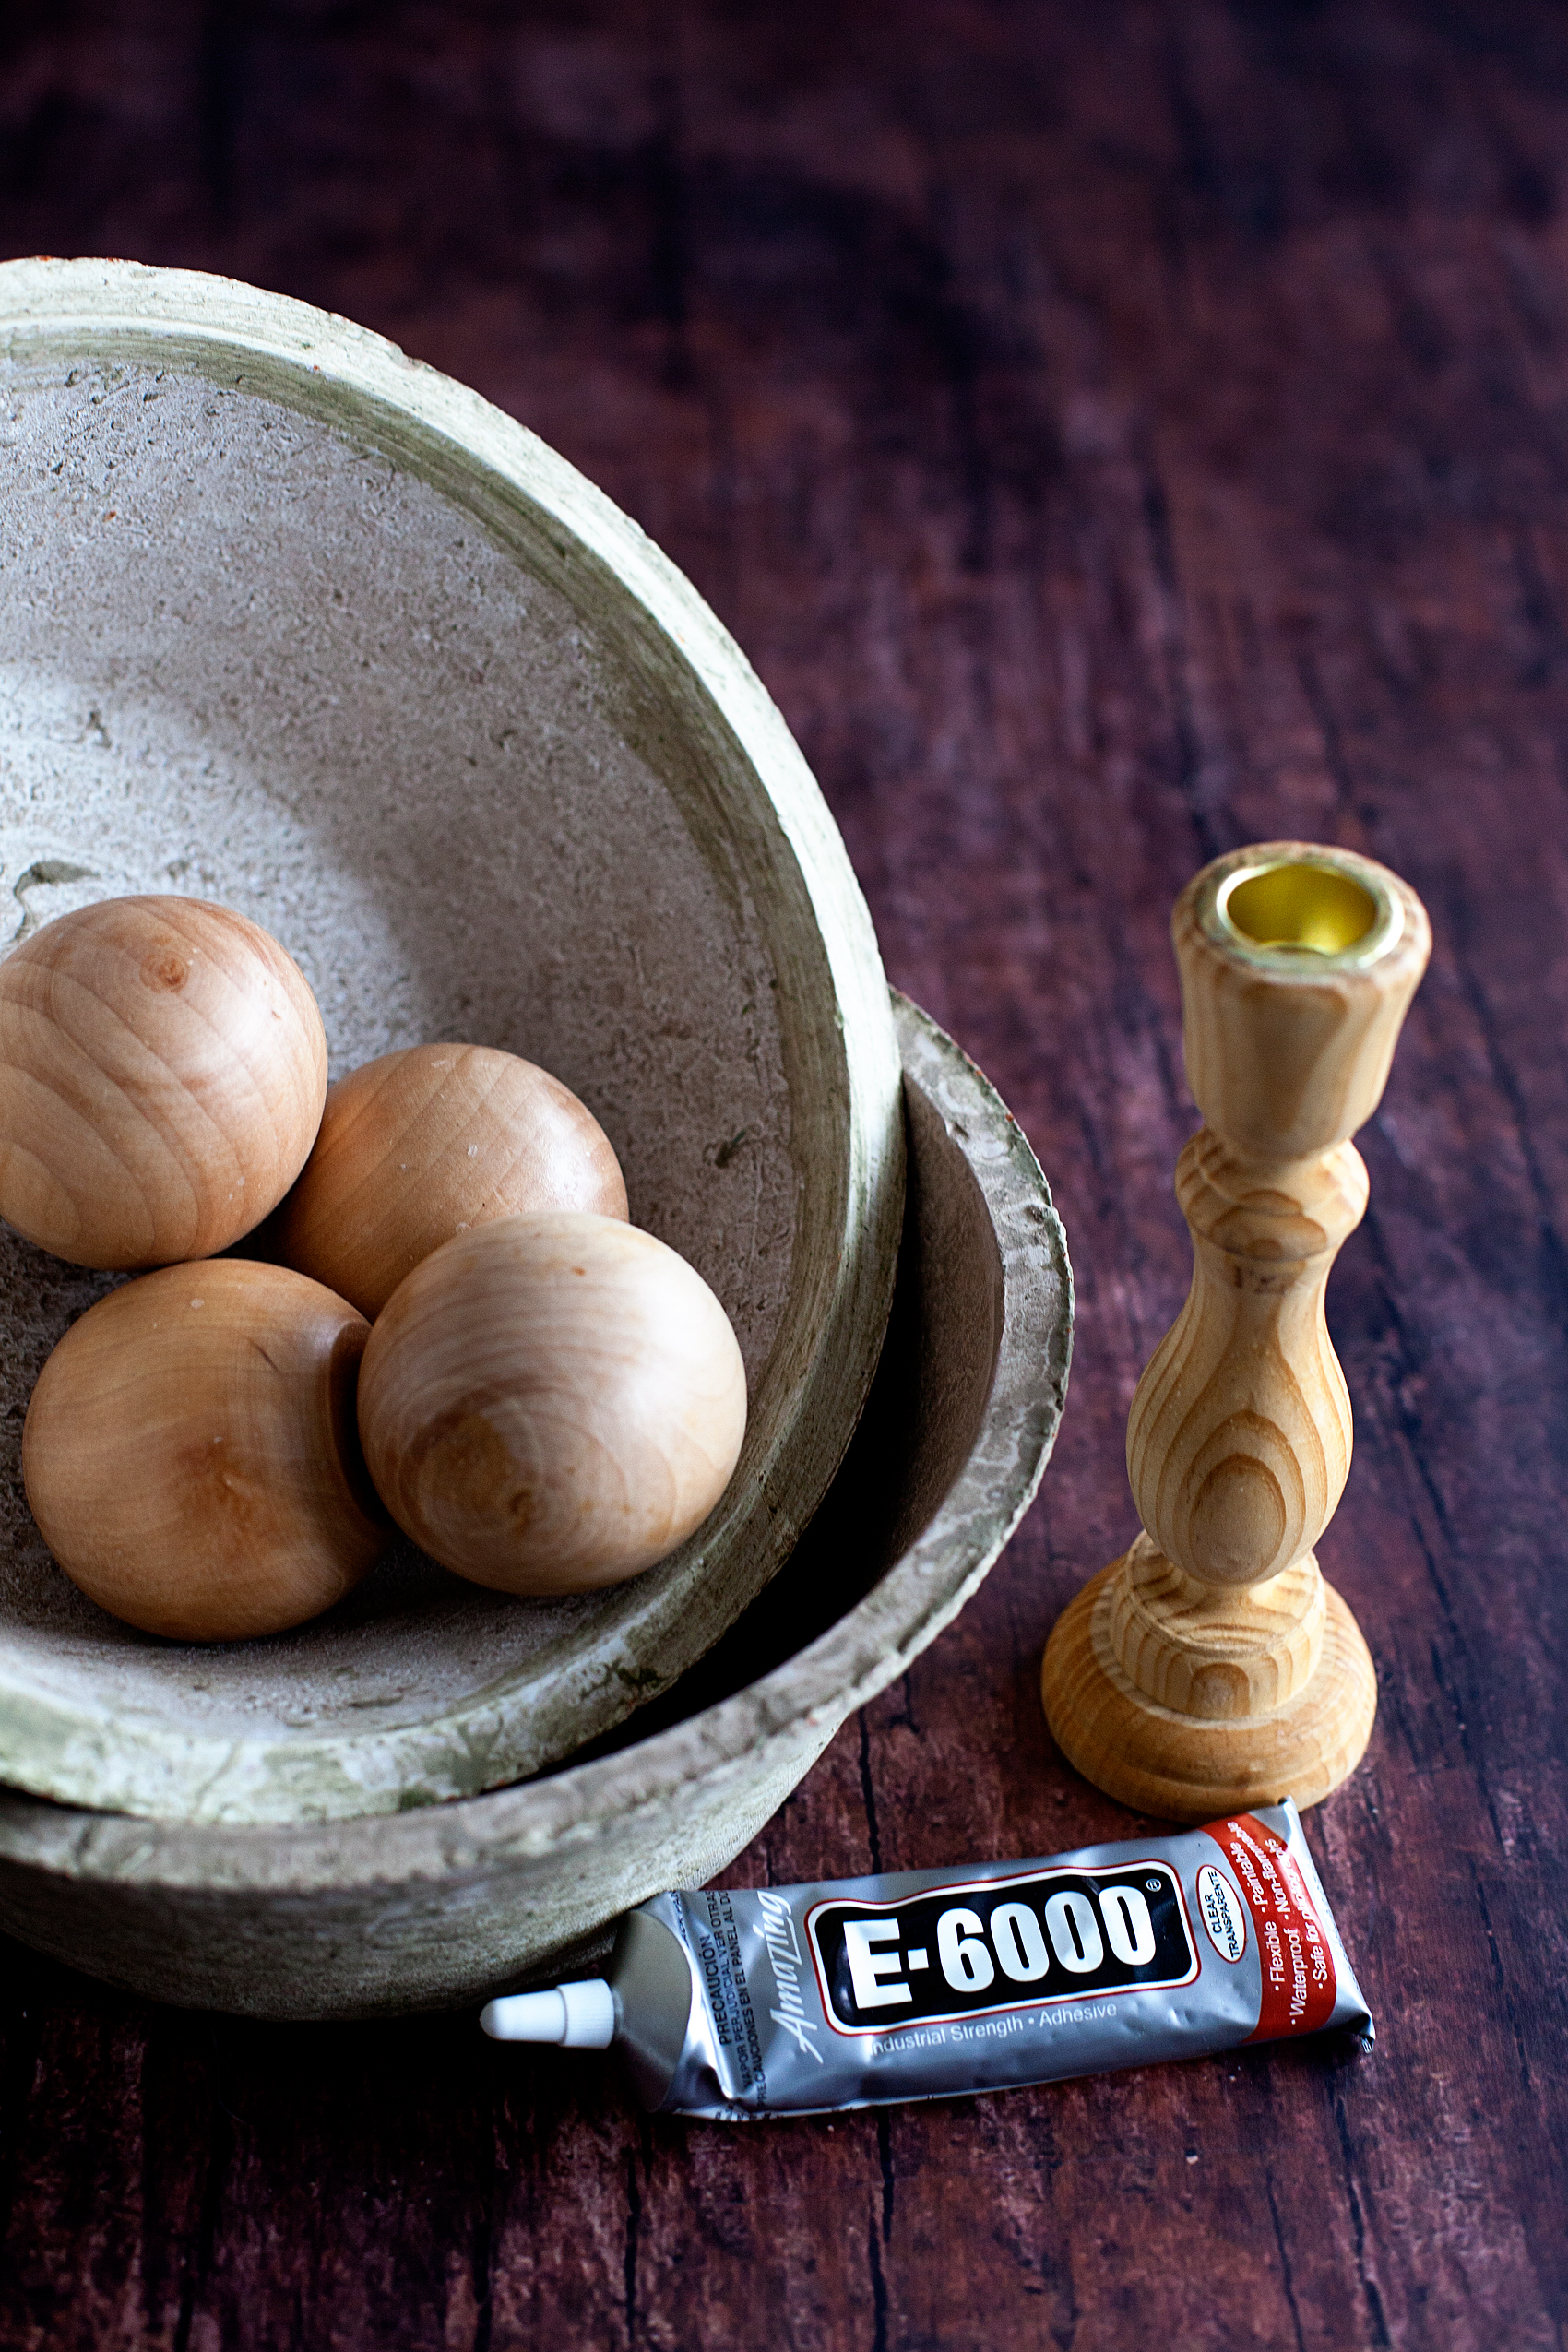
Rustic clay pots have always been a favorite of mine. I found these beautiful clay pots in the floral section at Michaels. They have that farmhouse or even old world look that I just love and, they are large… Perfect for tiered bowls.

DIY Farmhouse Tiered Bowls are easy as pie to make thanks to @michaels. Normally a costly buy, these tiered bowls won’t break the bank and they are super easy to make. A great storage option for either the kitchen or the office! Come on over to WhipperBerry to learn how to make one for your home.

• large clay pots in the floral section at Michaels (I would provide a link however, they aren’t listed online yet)

• ArtMinds™ Wood Decorative Candle Holder, 6 3/4″

• Wood Doll Head by ArtMinds®, 2.5″

• E6000® Permanent Craft Adhesive, 2.0 oz.

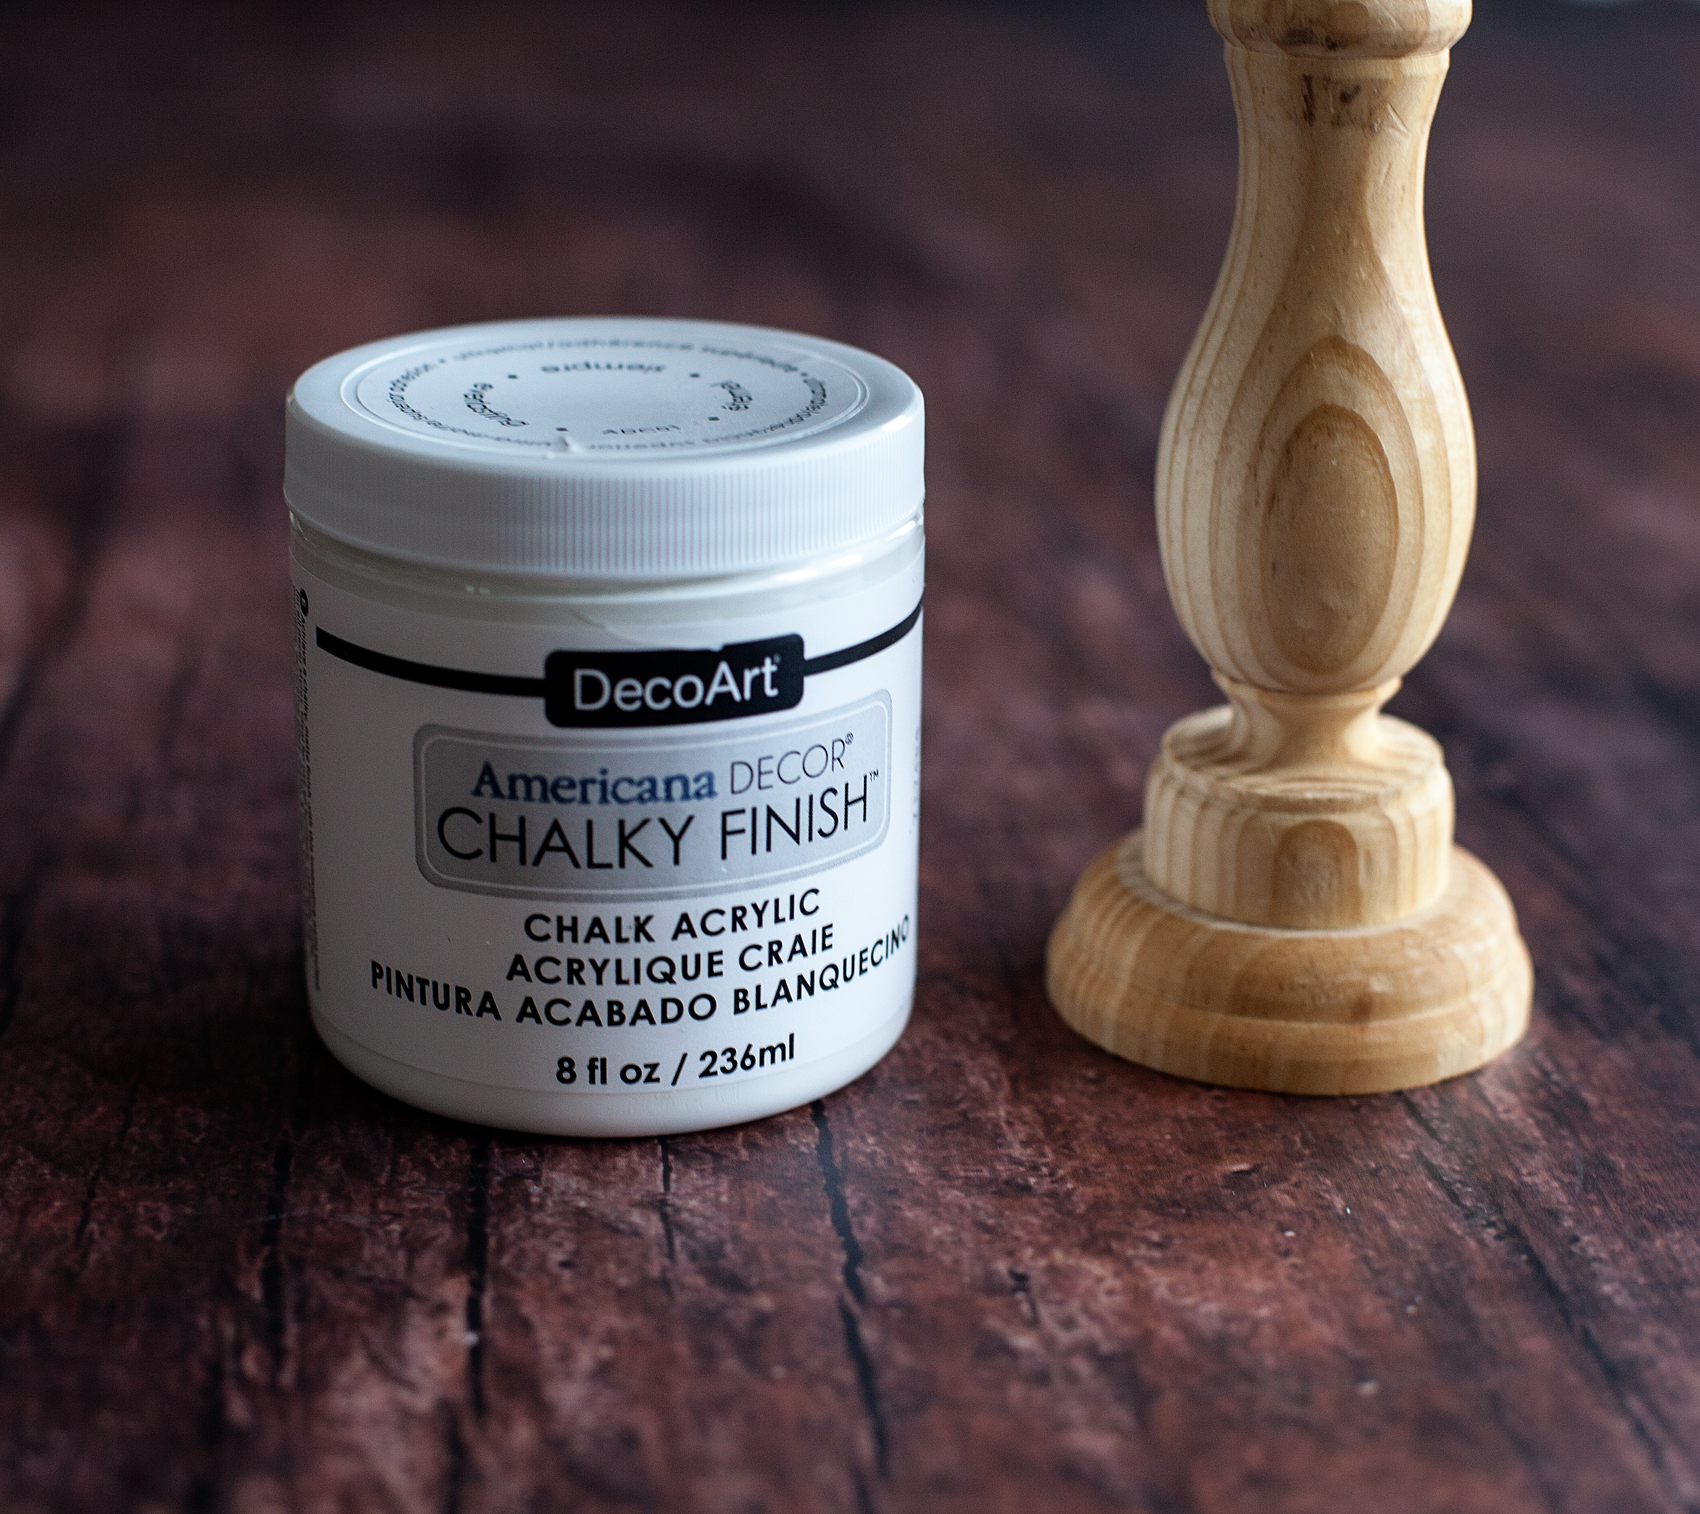
• Americana® Decor™ Chalky Finish Paint, 8oz. – white

Instructions

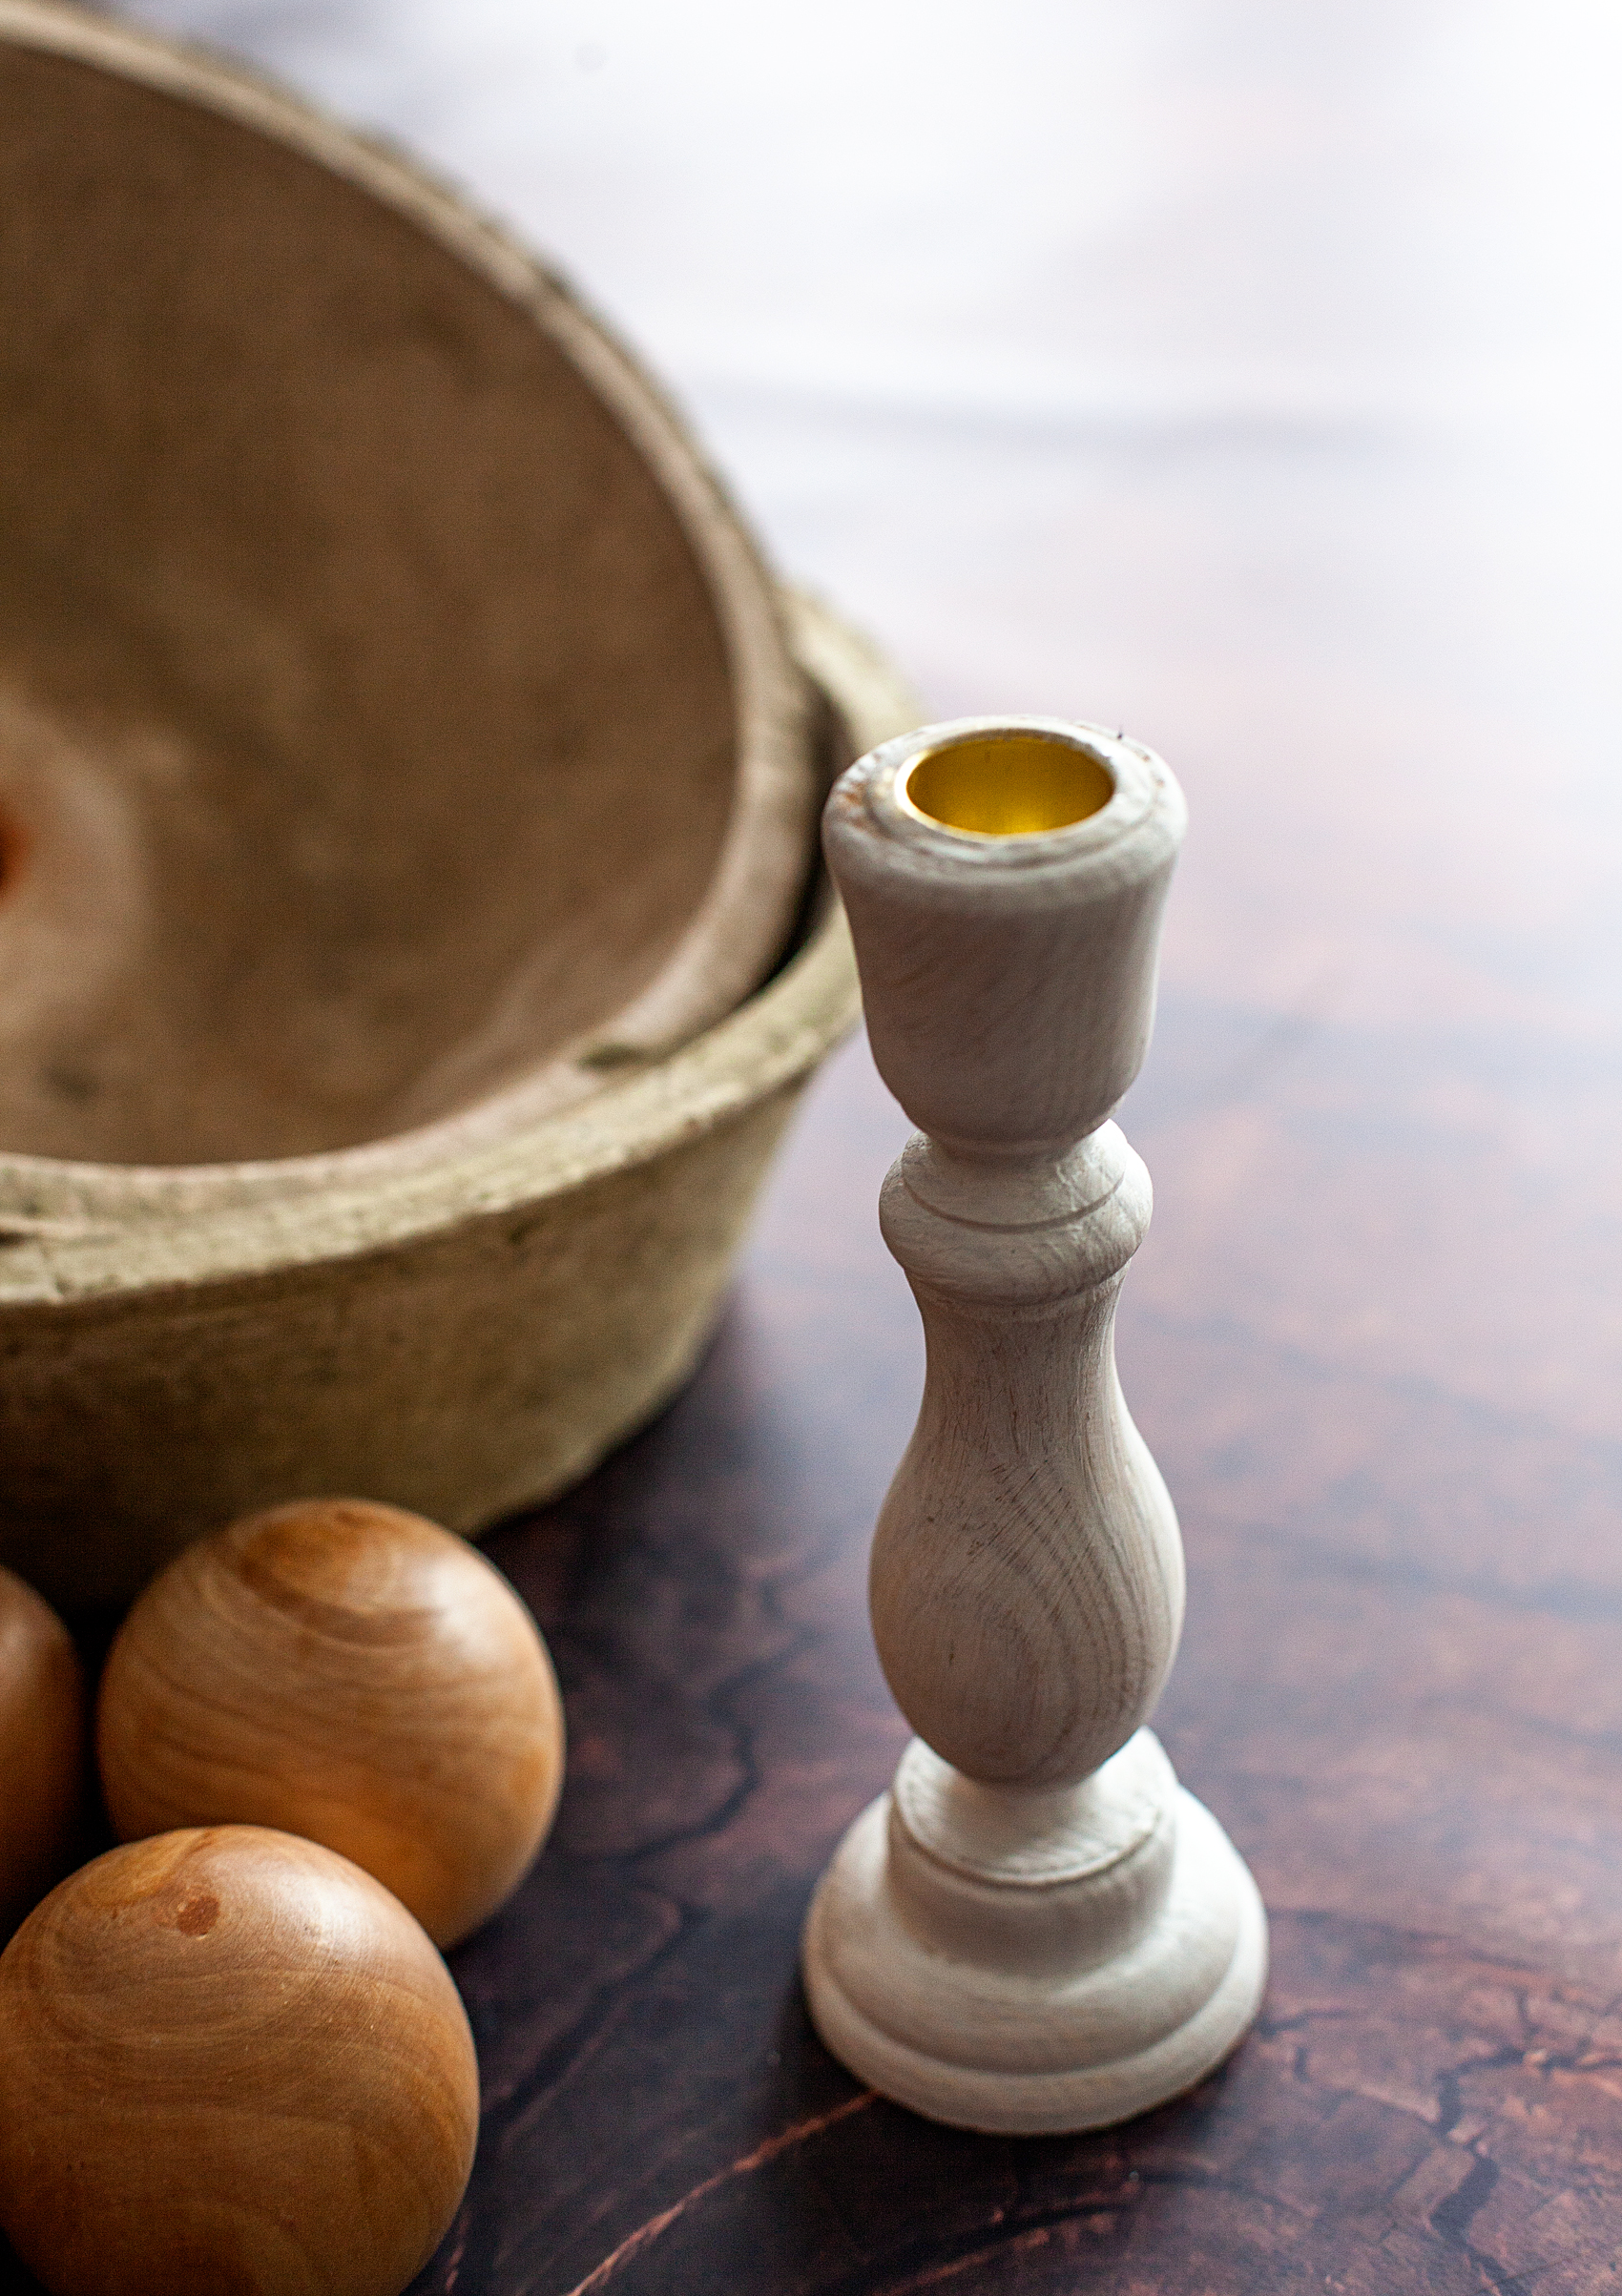
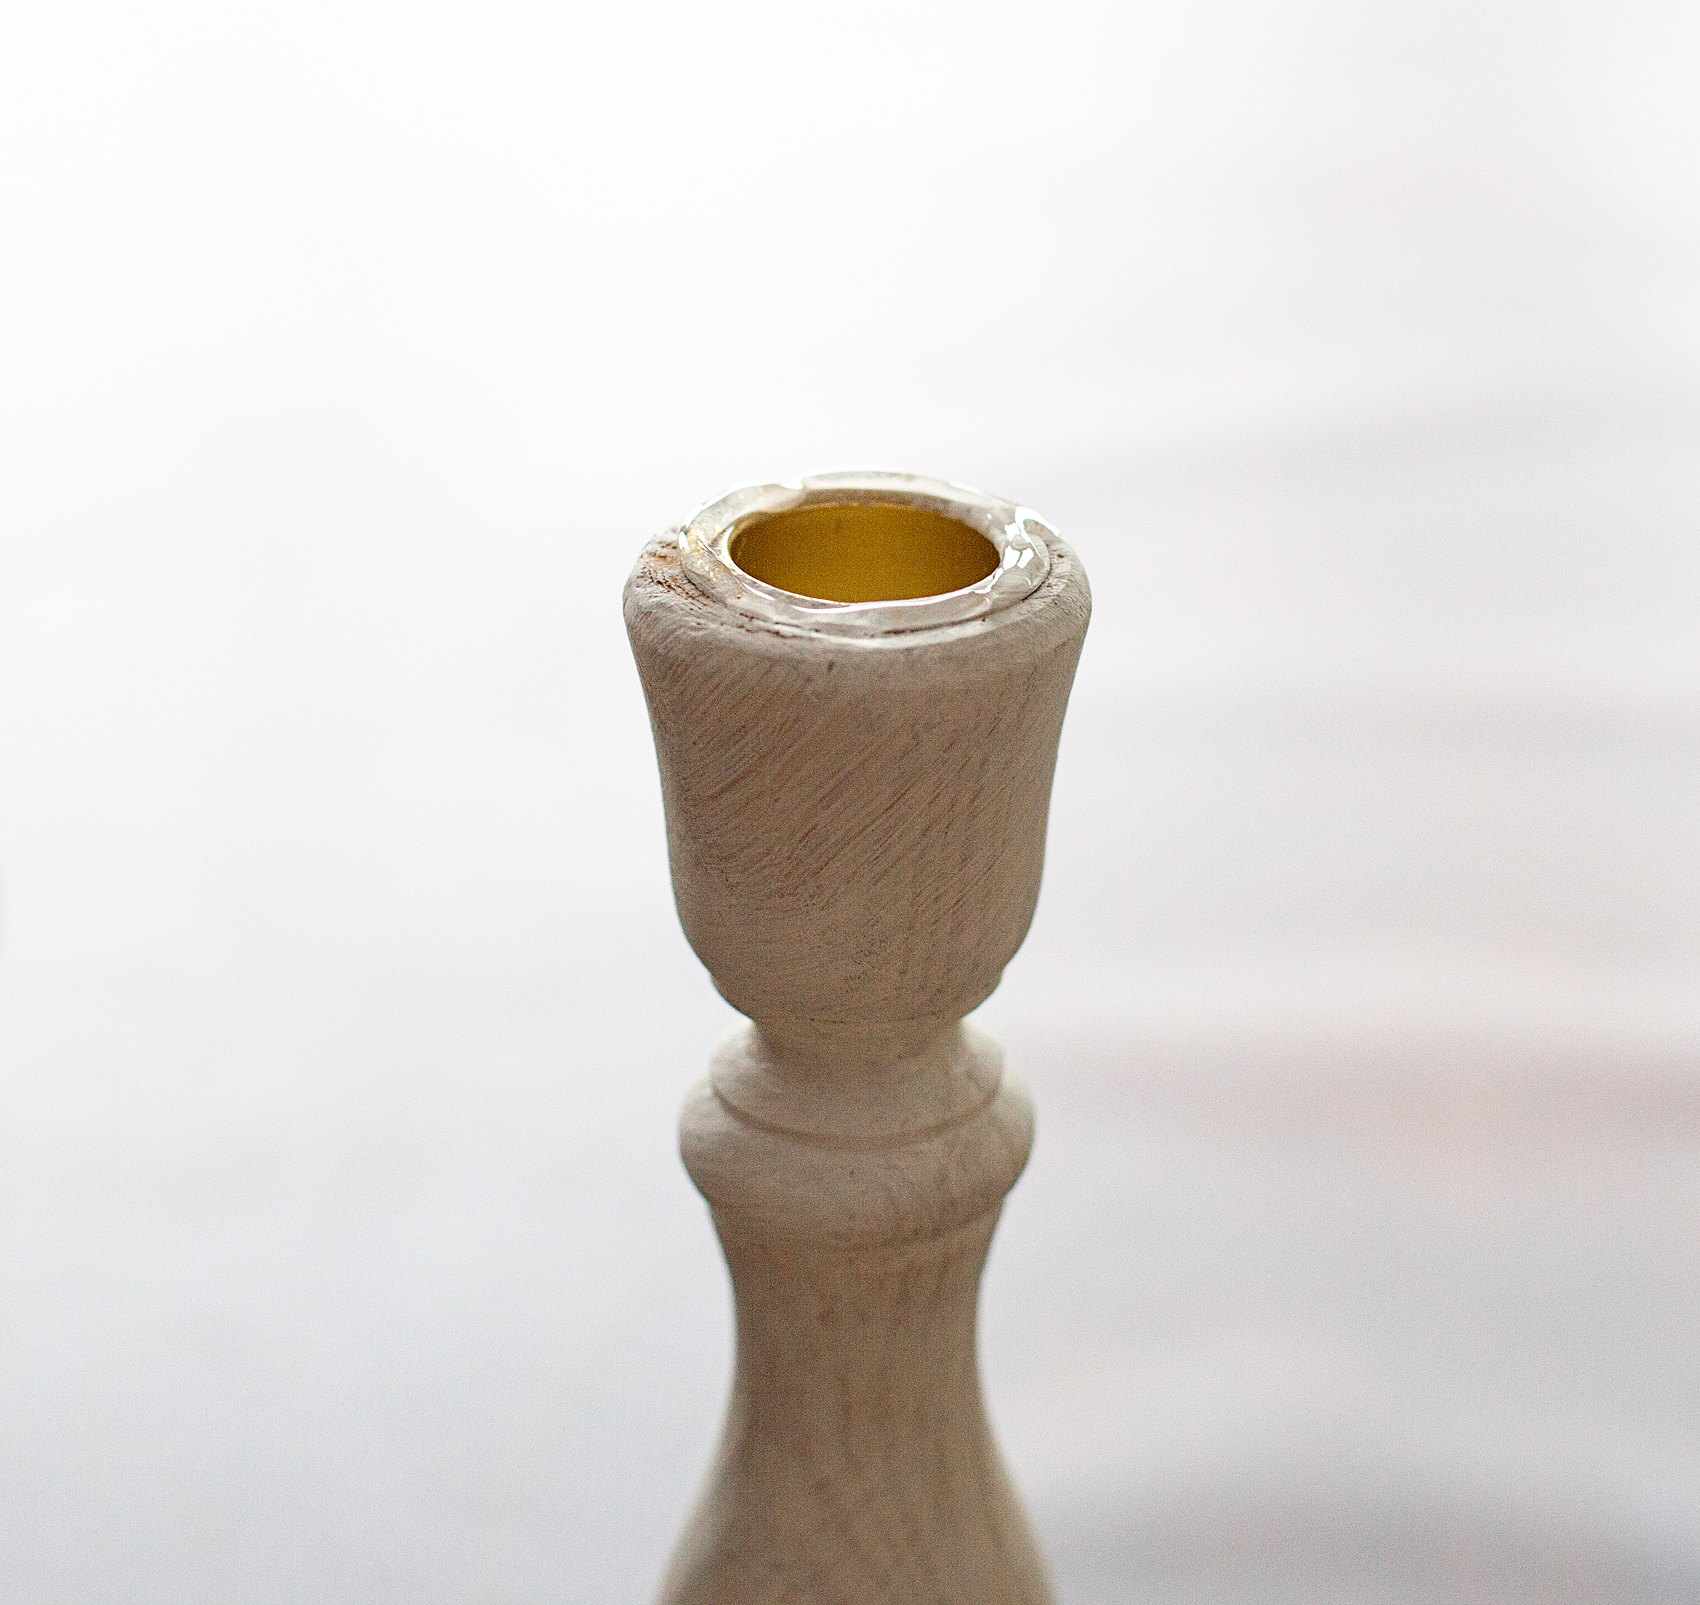
Now, this part couldn’t get any easier. To begin, I painted the candle stick with a light coat of the chalky finish paint.

DIY Farmhouse Tiered Bowls are easy as pie to make thanks to @michaels. Normally a costly buy, these tiered bowls won’t break the bank and they are super easy to make. A great storage option for either the kitchen or the office! Come on over to WhipperBerry to learn how to make one for your home.

DIY Farmhouse Tiered Bowls are easy as pie to make thanks to @michaels. Normally a costly buy, these tiered bowls won’t break the bank and they are super easy to make. A great storage option for either the kitchen or the office! Come on over to WhipperBerry to learn how to make one for your home.

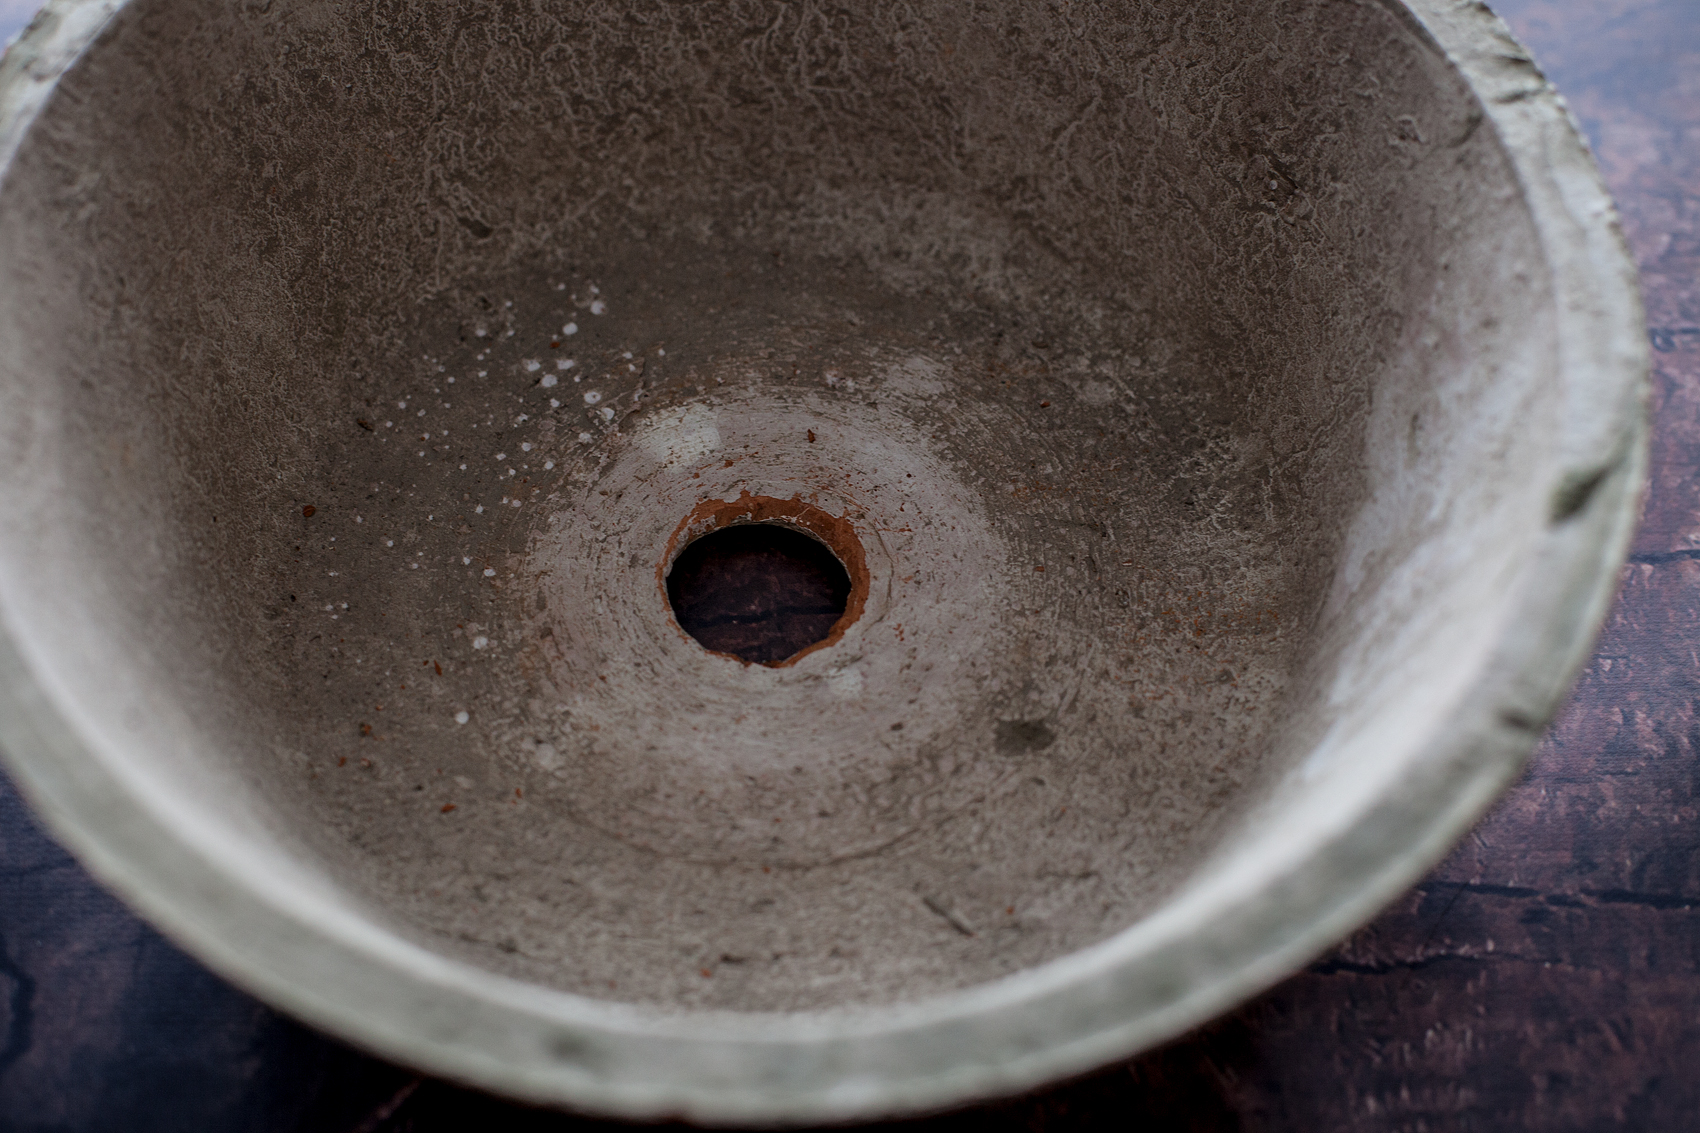
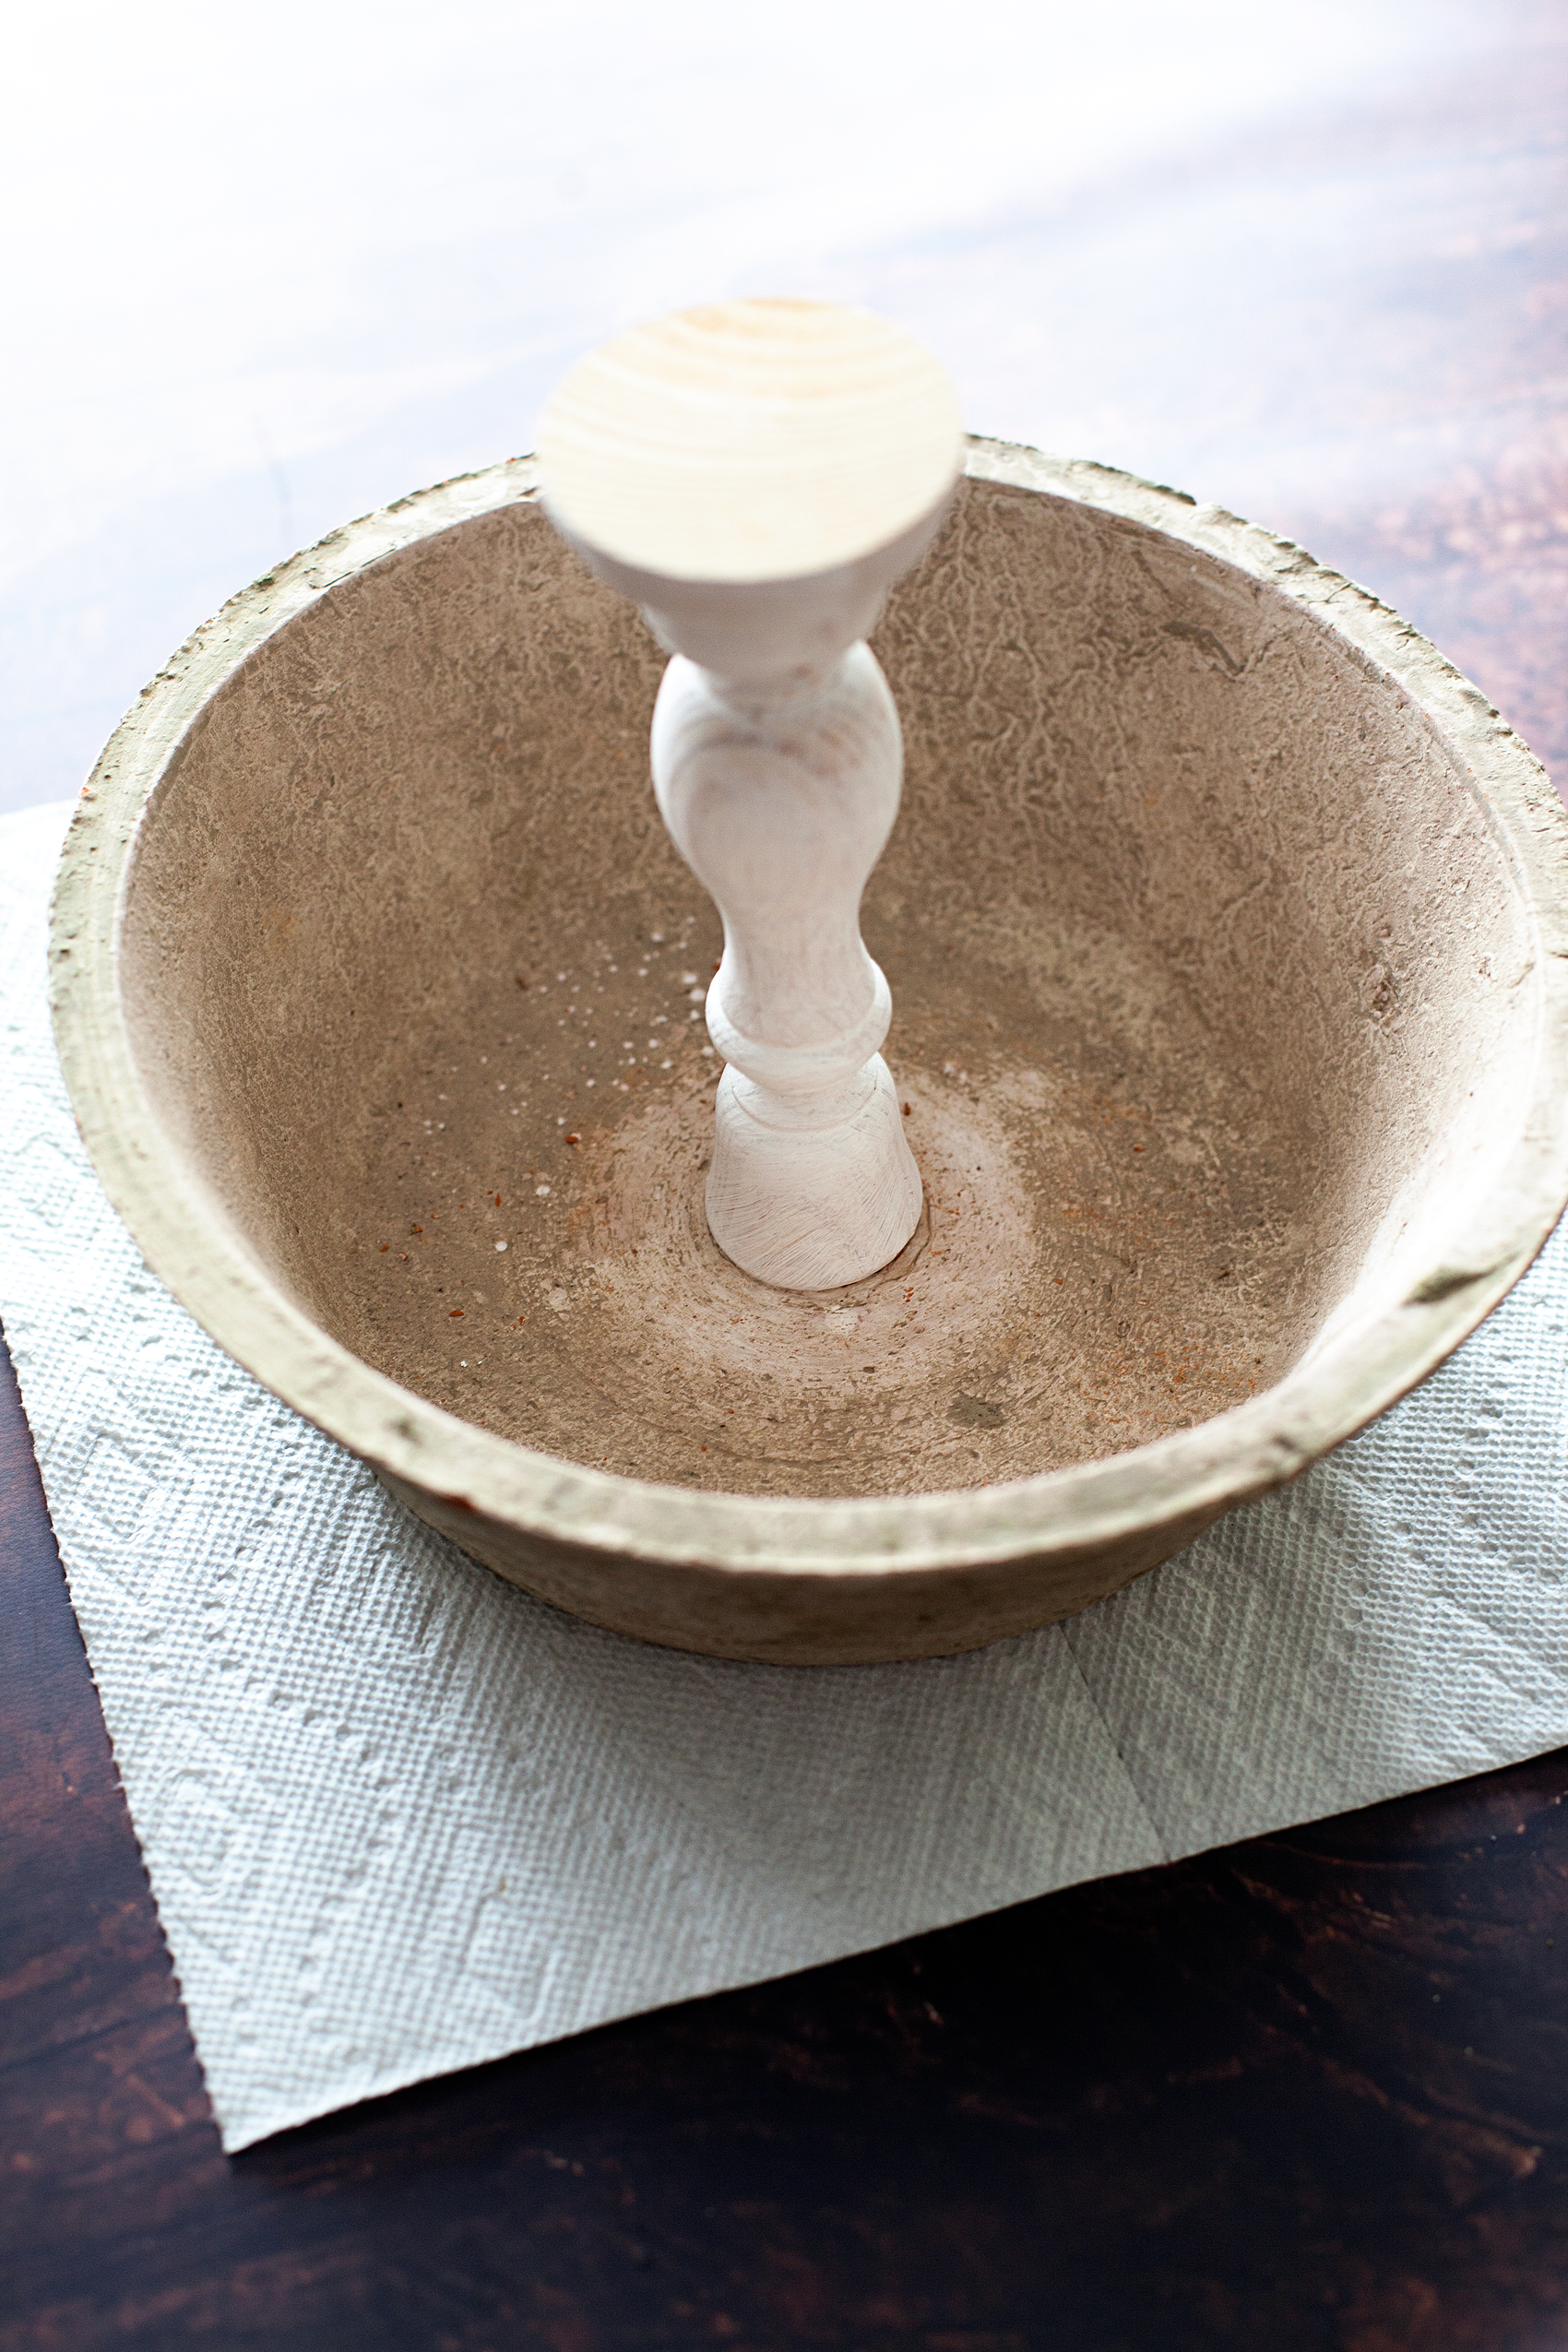
That will dry in just a few minutes. While you’re waiting for that to dry, check the center point of your bowls. The bowl on that will be on the bottom may need to be sanded down a bit in order for your candle holder to sit straight.

DIY Farmhouse Tiered Bowls are easy as pie to make thanks to @michaels. Normally a costly buy, these tiered bowls won’t break the bank and they are super easy to make. A great storage option for either the kitchen or the office! Come on over to WhipperBerry to learn how to make one for your home.

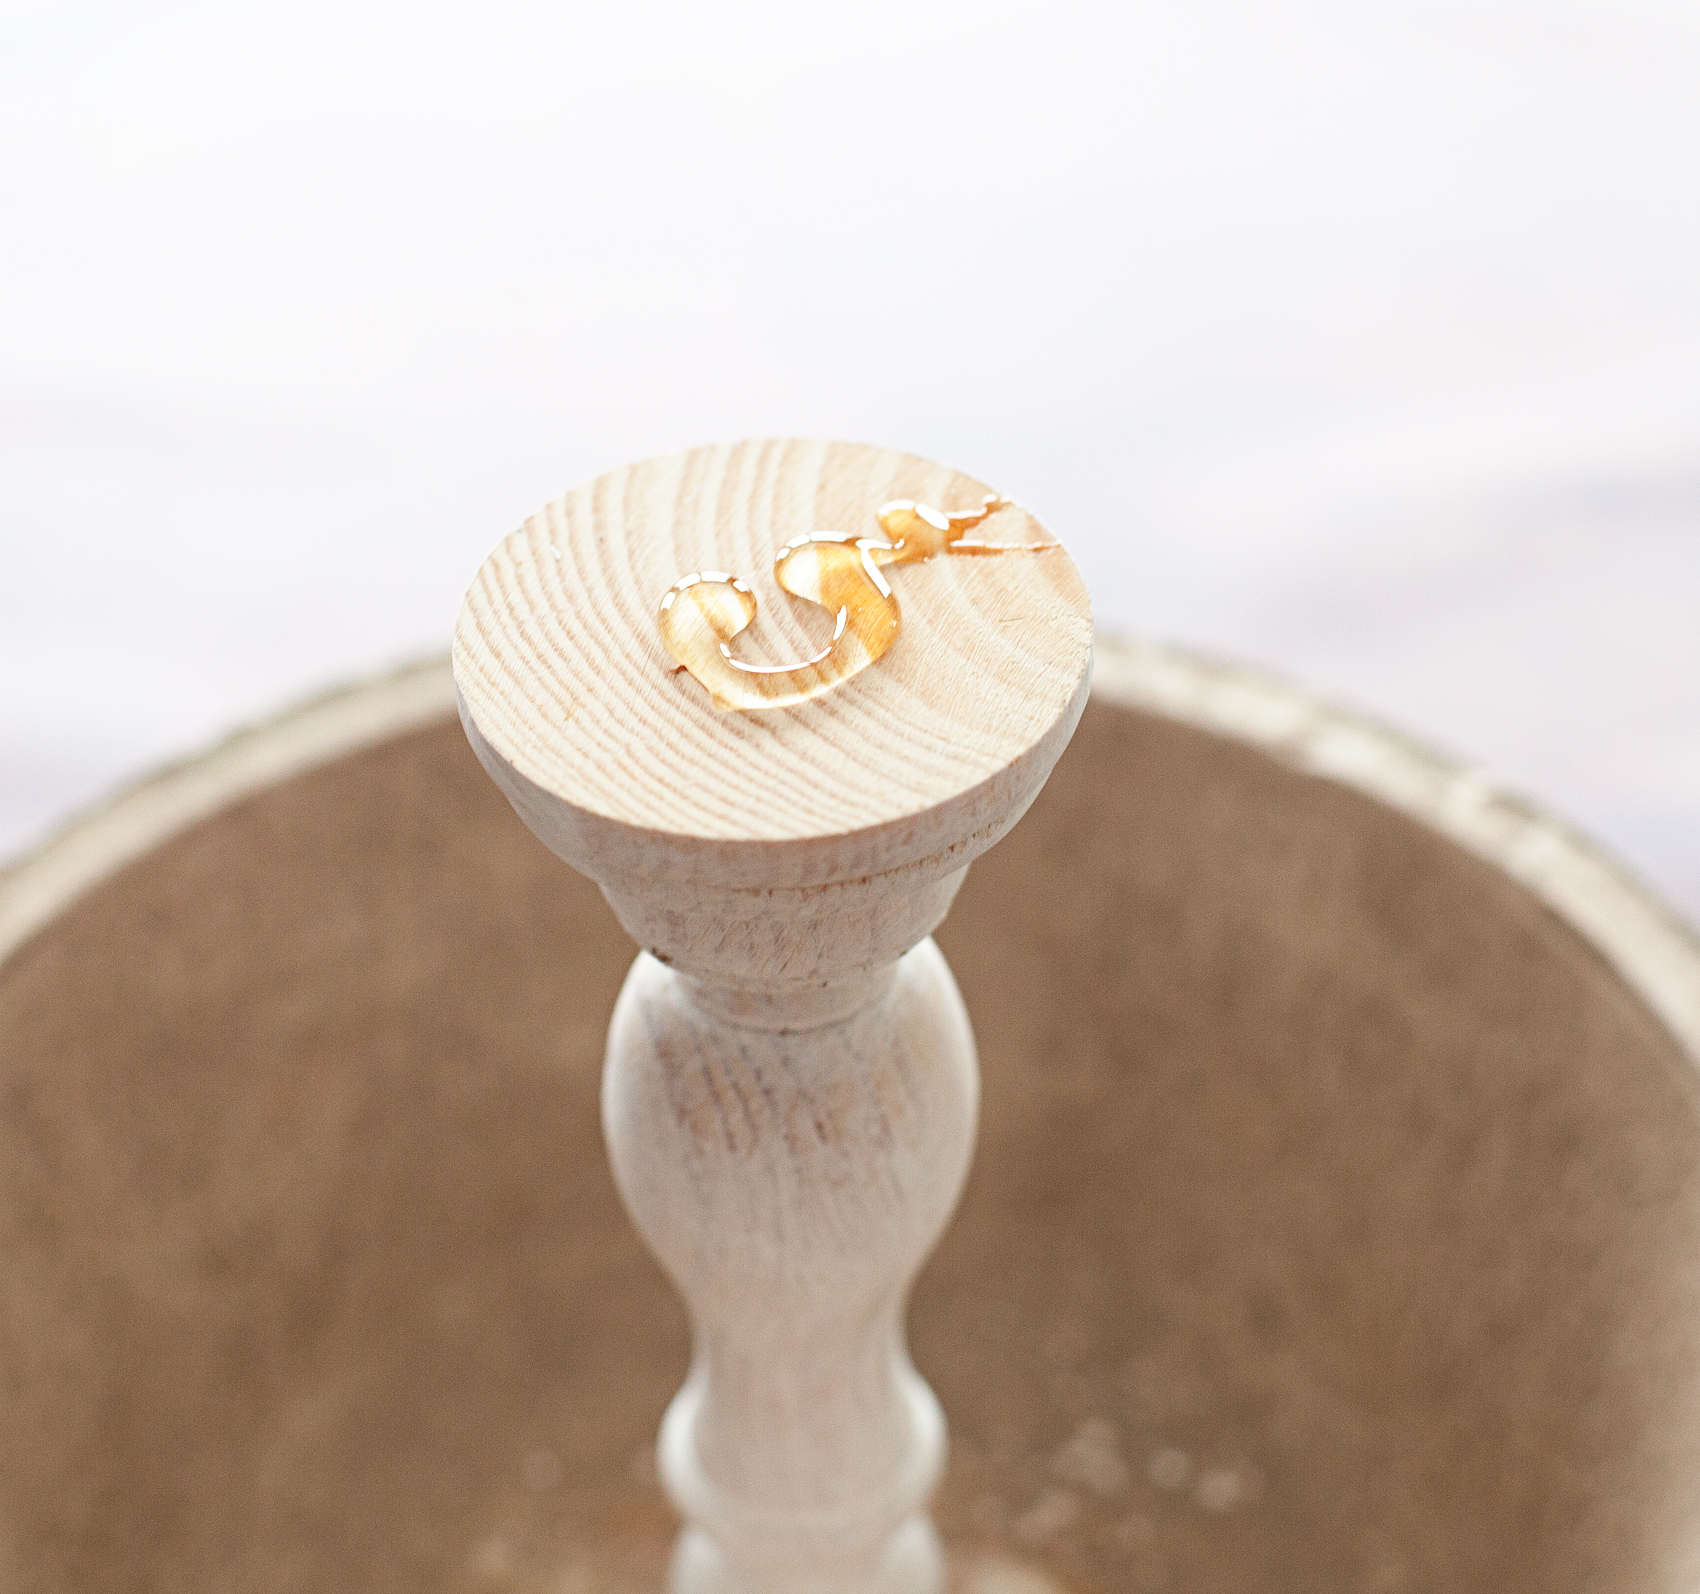
Once your candle holder is dry, add your E-600 to the top and follow the package directions for adhering it to the center of the clay pot. Keep in mind, you’re going to glue the TOP of the candle holder to the bottom bowl so that the the wider BOTTOM of the candle holder will hold-up the top bowl.

DIY Farmhouse Tiered Bowls are easy as pie to make thanks to @michaels. Normally a costly buy, these tiered bowls won’t break the bank and they are super easy to make. A great storage option for either the kitchen or the office! Come on over to WhipperBerry to learn how to make one for your home.

DIY Farmhouse Tiered Bowls are easy as pie to make thanks to @michaels. Normally a costly buy, these tiered bowls won’t break the bank and they are super easy to make. A great storage option for either the kitchen or the office! Come on over to WhipperBerry to learn how to make one for your home.

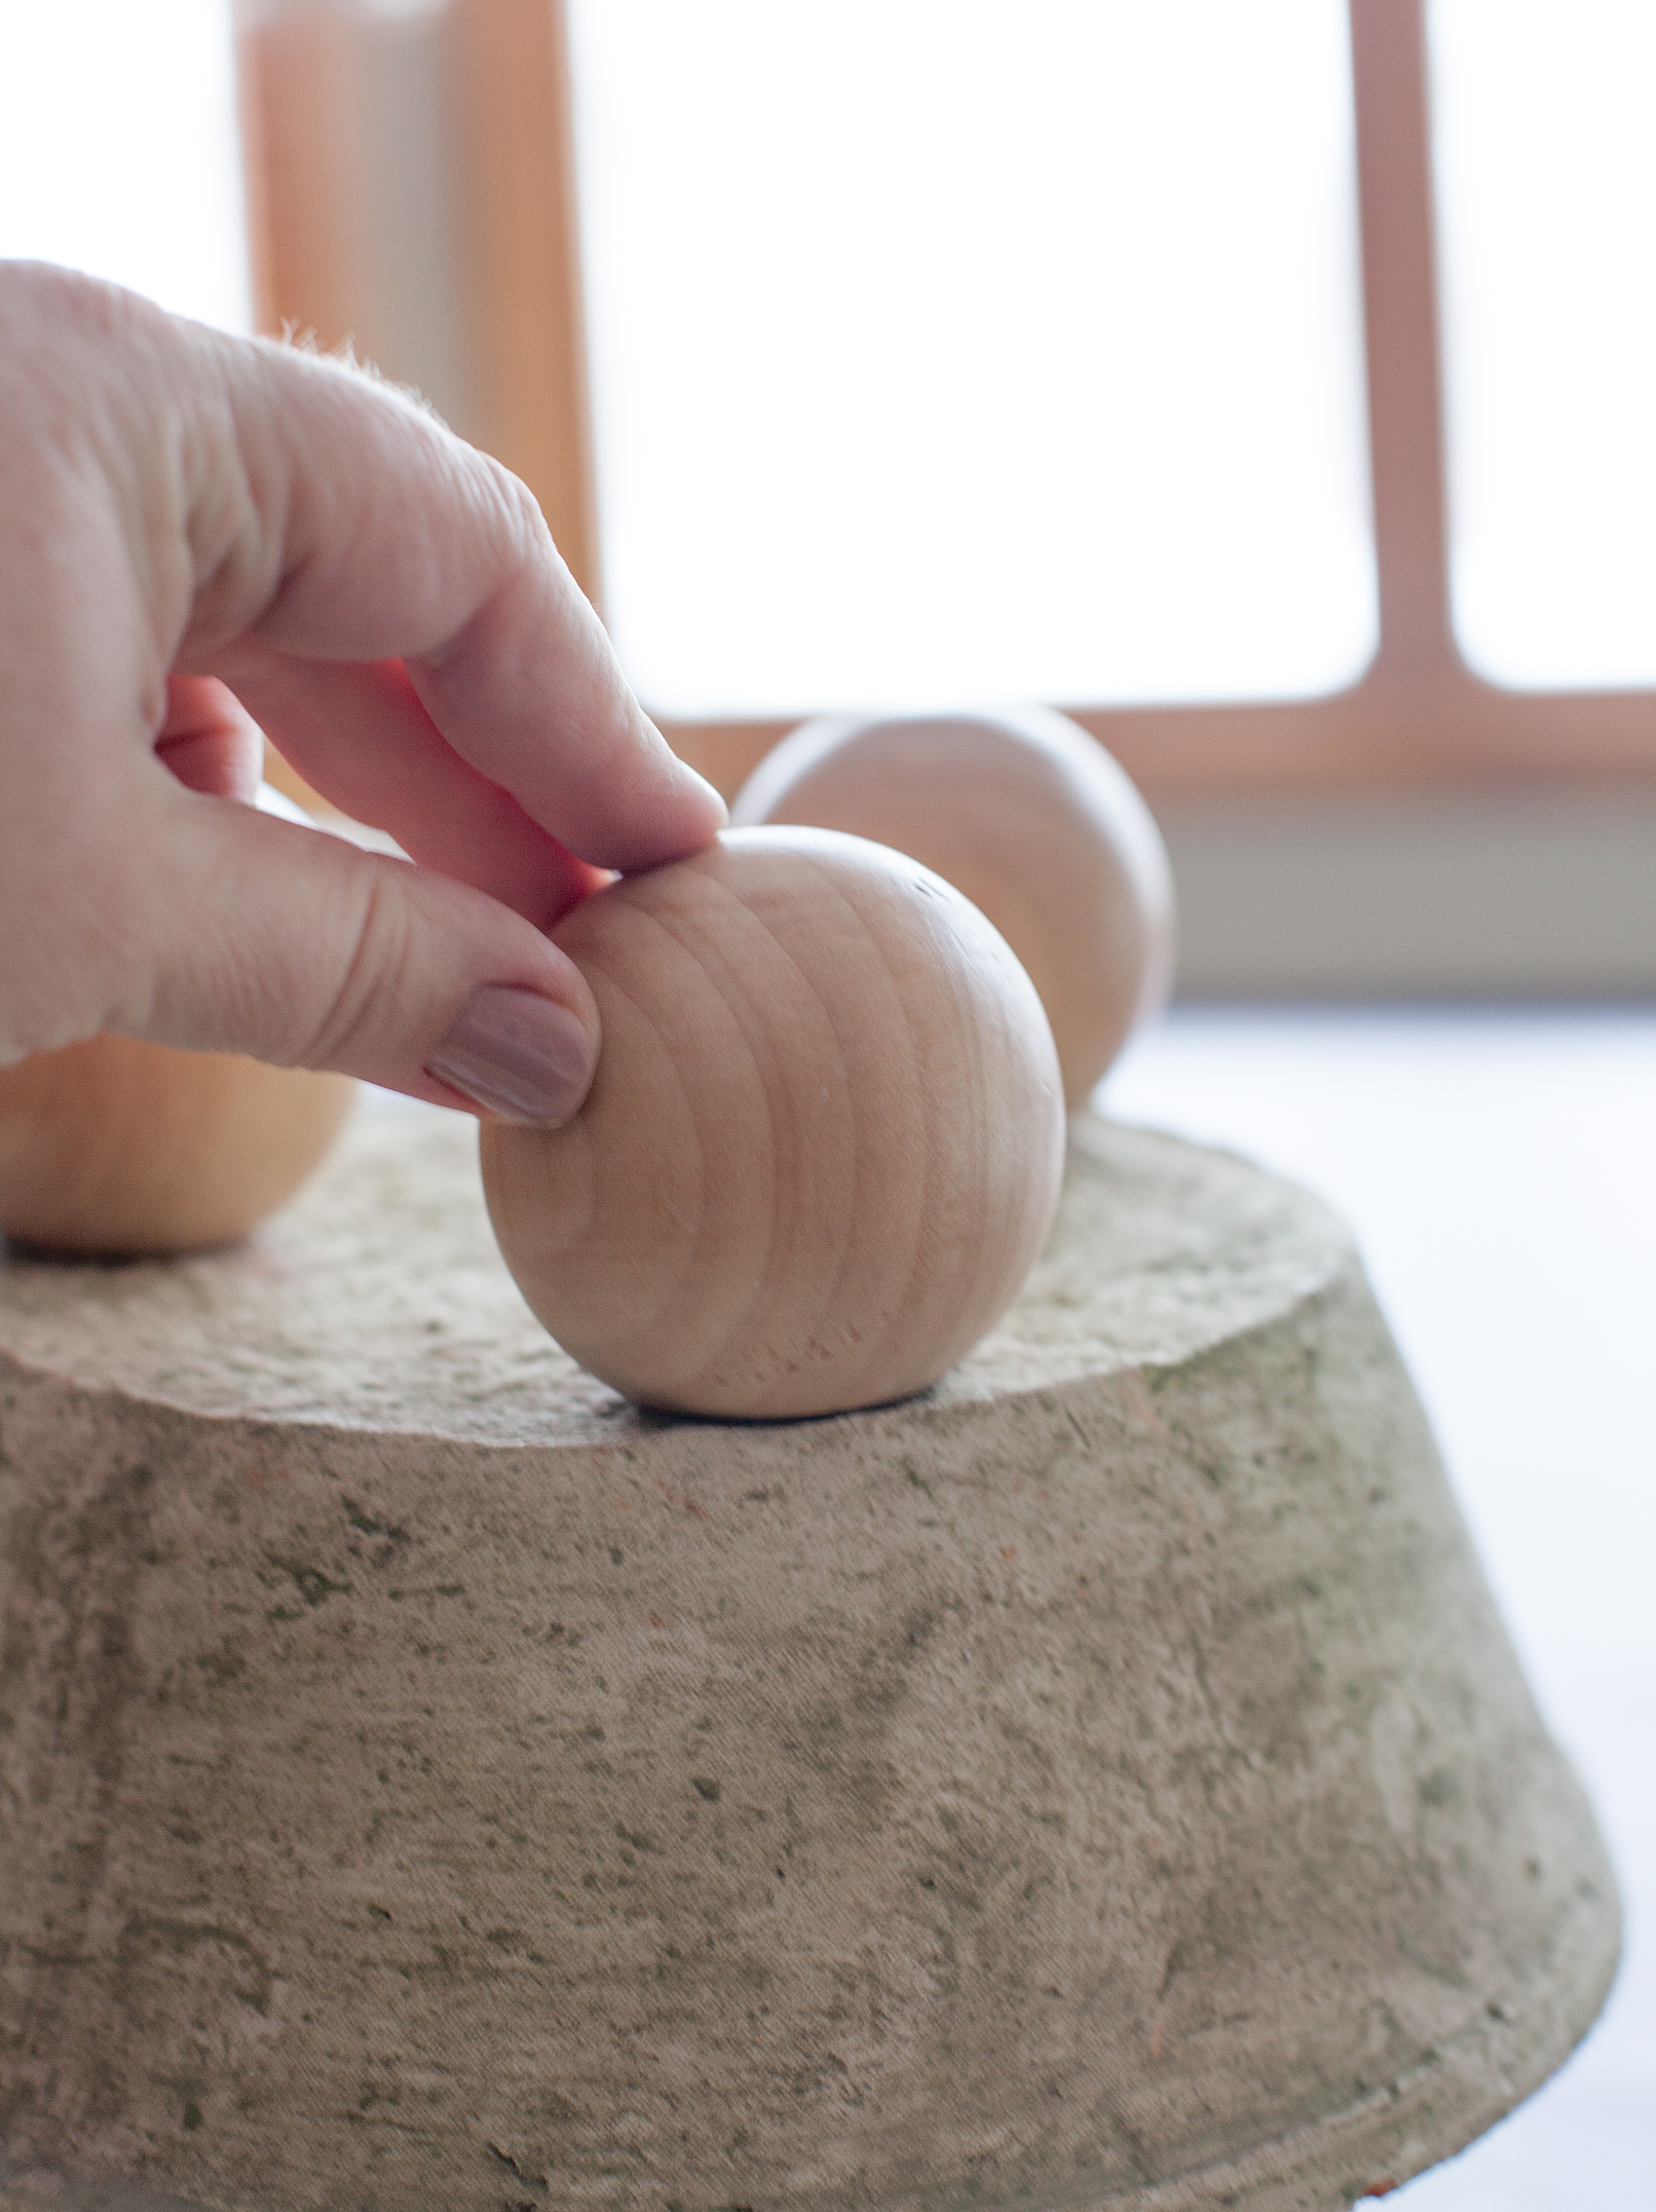
I placed a paper towel underneath to protect my surface from any glue drips. Once that is nice and secure, you can glue the wood feet i.e. doll heads, to the bottom of the bowl again, with the E-6000.

DIY Farmhouse Tiered Bowls are easy as pie to make thanks to @michaels. Normally a costly buy, these tiered bowls won’t break the bank and they are super easy to make. A great storage option for either the kitchen or the office! Come on over to WhipperBerry to learn how to make one for your home.

Let those cure according to package directions and then do the same with the top bowl.

DIY Farmhouse Tiered Bowls are easy as pie to make thanks to @michaels. Normally a costly buy, these tiered bowls won’t break the bank and they are super easy to make. A great storage option for either the kitchen or the office! Come on over to WhipperBerry to learn how to make one for your home.

Once that has properly cured, you’re all finished! You now have farmhouse tiered bowls!

I’m using mine to hold fruit in my kitchen. It fits perfect on my counter tops right under my cabinets.

DIY Farmhouse Tiered Bowls are easy as pie to make thanks to @michaels. Normally a costly buy, these tiered bowls won’t break the bank and they are super easy to make. A great storage option for either the kitchen or the office! Come on over to WhipperBerry to learn how to make one for your home.

I love the look of these pots so much, I stocked up on some smaller ones for all of my plants this spring.

What are you looking to organize? Do you need a creative storage solution? Michaels has everything you need to get organized for the new year! From washi storage to lexington carts, you can MAKE your year the most organized one yet!

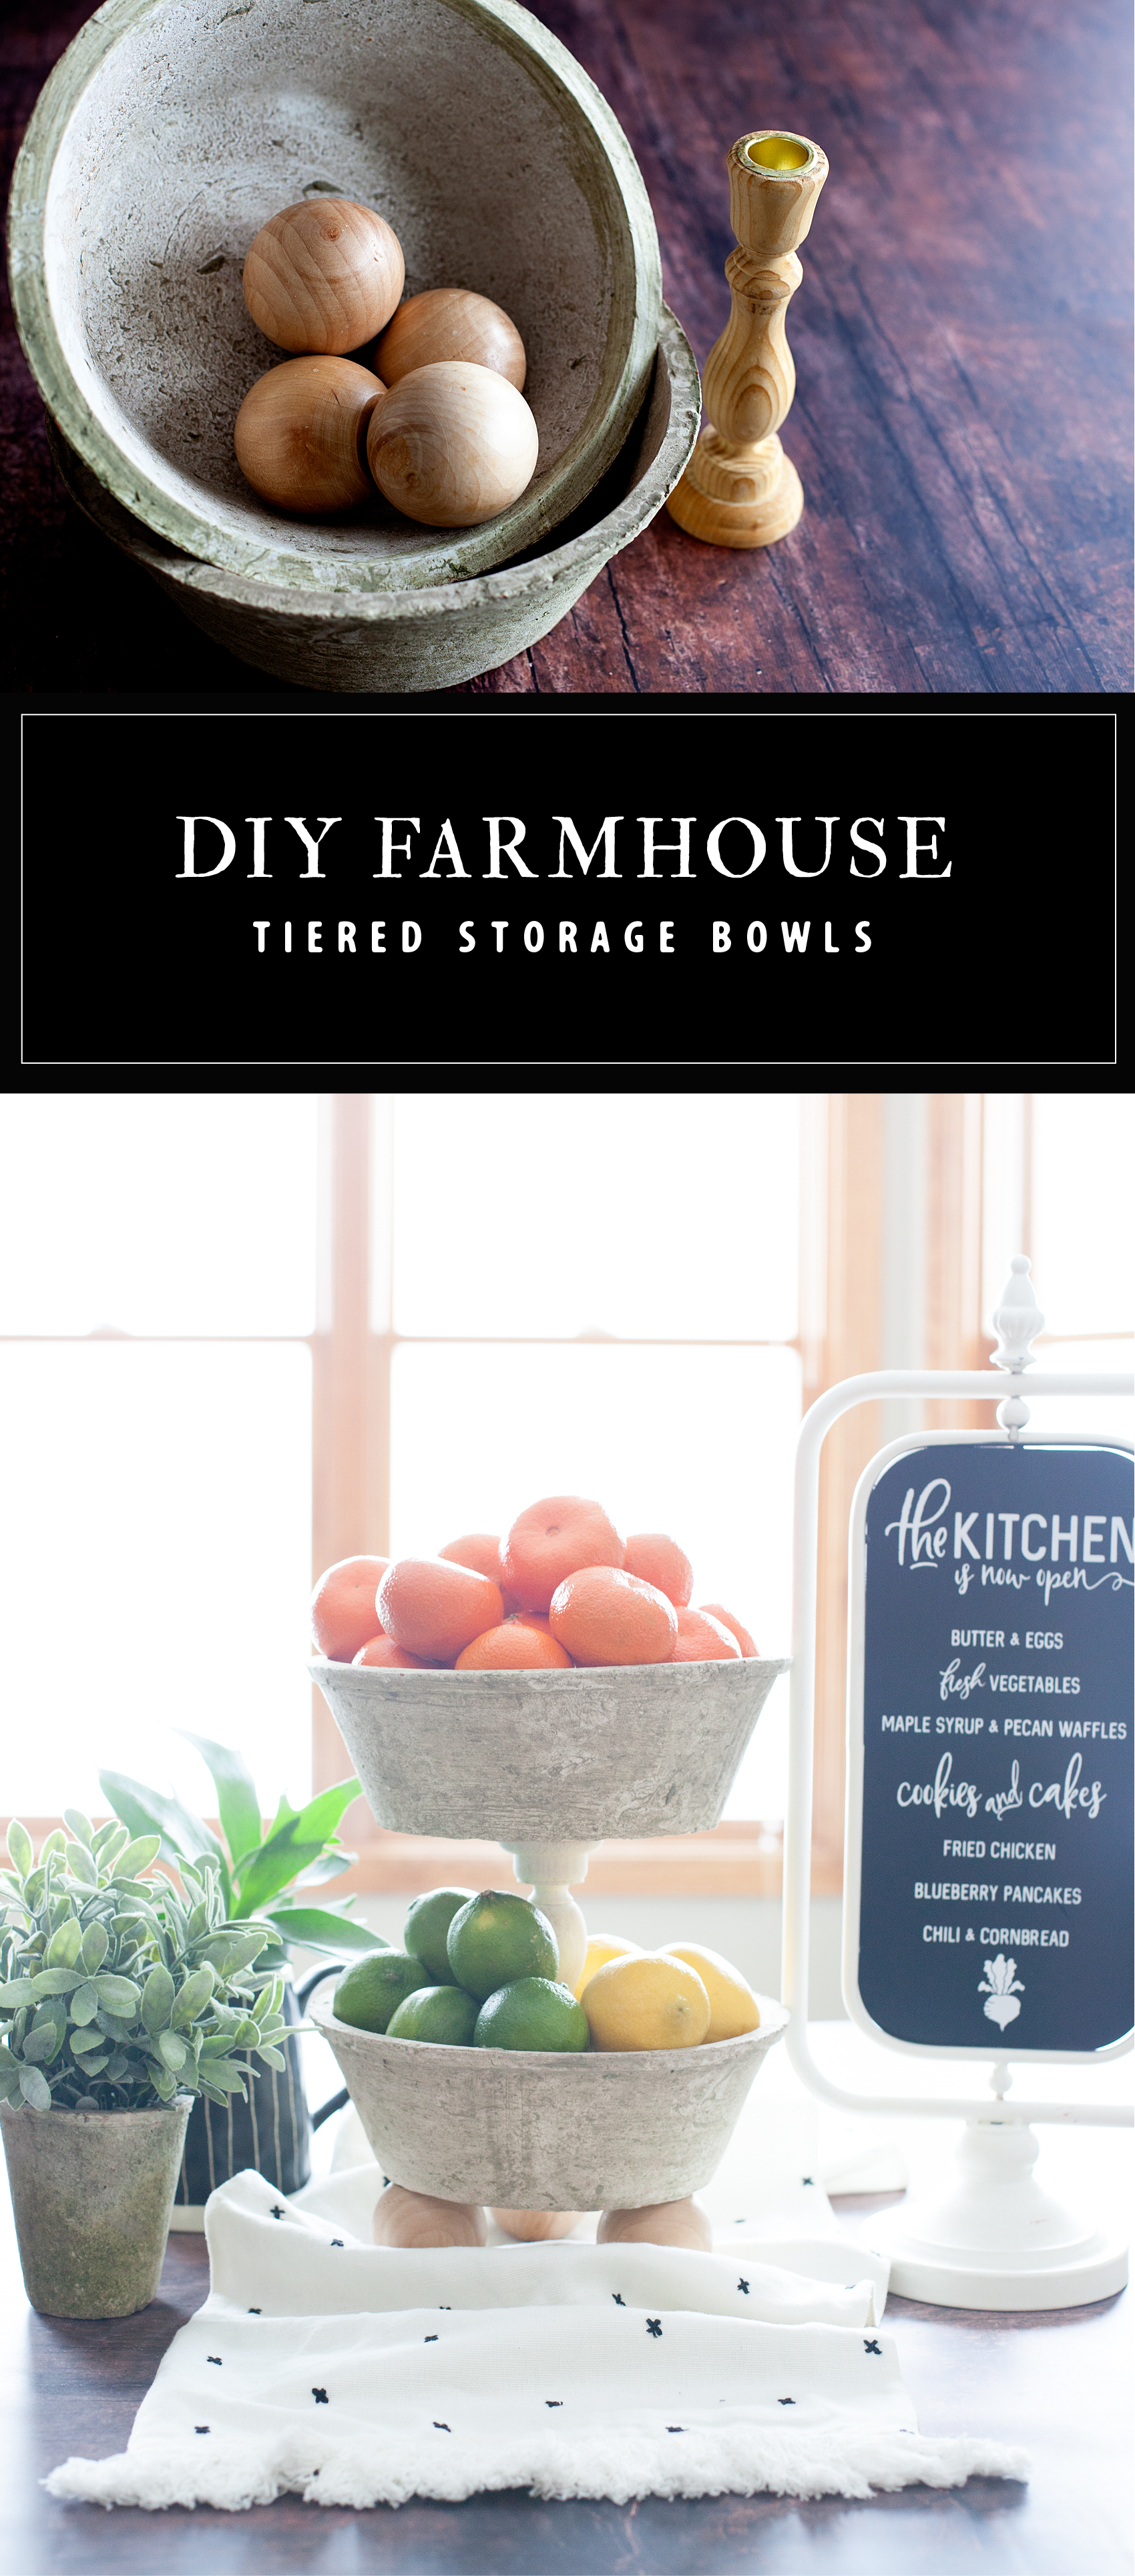
What to keep this project idea close at hand? Feel free to pin the image below to your favorite DIY board so that you can find it later.

DIY Farmhouse Tiered Bowls are easy as pie to make thanks to @michaels. Normally a costly buy, these tiered bowls won’t break the bank and they are super easy to make. A great storage option for either the kitchen or the office! Come on over to WhipperBerry to learn how to make one for your home.

SaveSave

SaveSave

SaveSave

SaveSave

SaveSave

SaveSave

SaveSave

SaveSave

SaveSave

SaveSave

SaveSave

SaveSave

Painted Nautical Signal Flags for Boys Room Decor

6 · Jul 13, 2017 · Leave a Comment

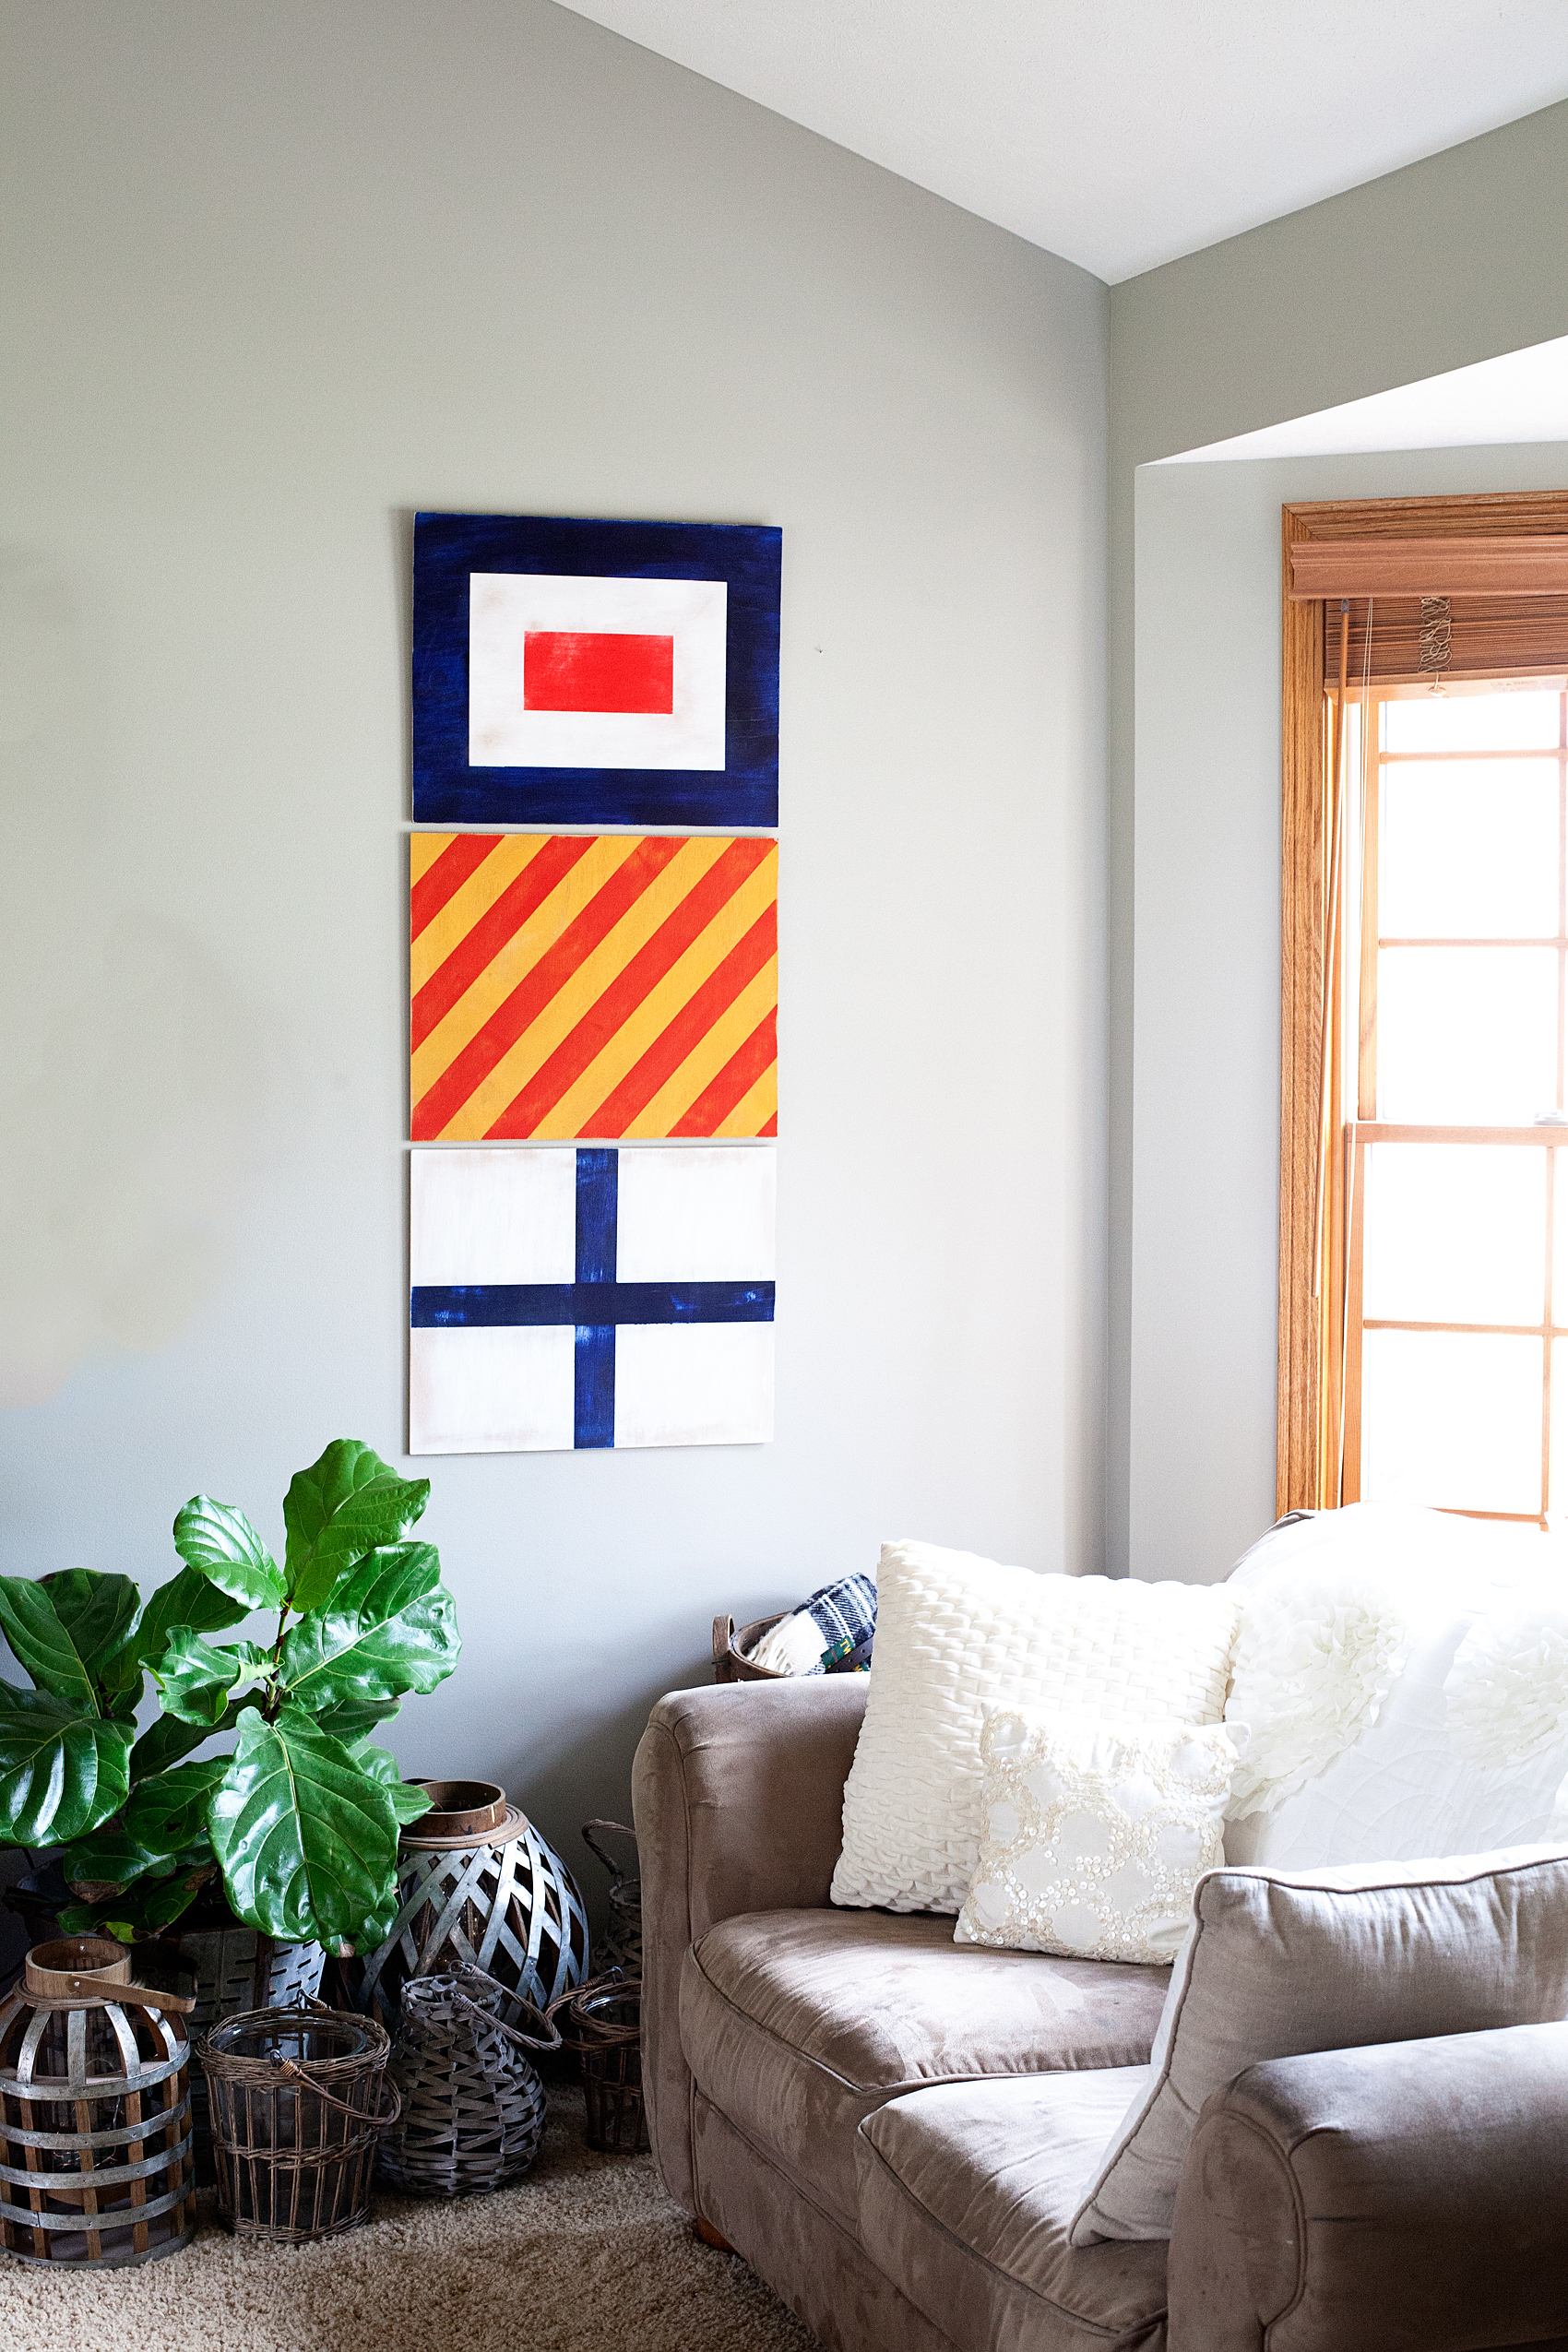
Looking for a fun way to dress-up your boys room? Vintage Nautical is one of my favorite ways to decorate for my little guy. Come learn how I created these painted nautical signal flags for our little guy’s room…

Looking for a fun way to dress-up your boys room? Vintage Nautical is one of my favorite ways to decorate for my little guy. Come learn how I created these painted nautical signal flags for Gage's room... WhipperBerry

• This post brought to you by Michaels •

I’ve always been inspired by vintage nautical pieces. All of the fun gadgets and gizmos, the style of the ships, the anchors and I especially love vintage nautical signal flags.

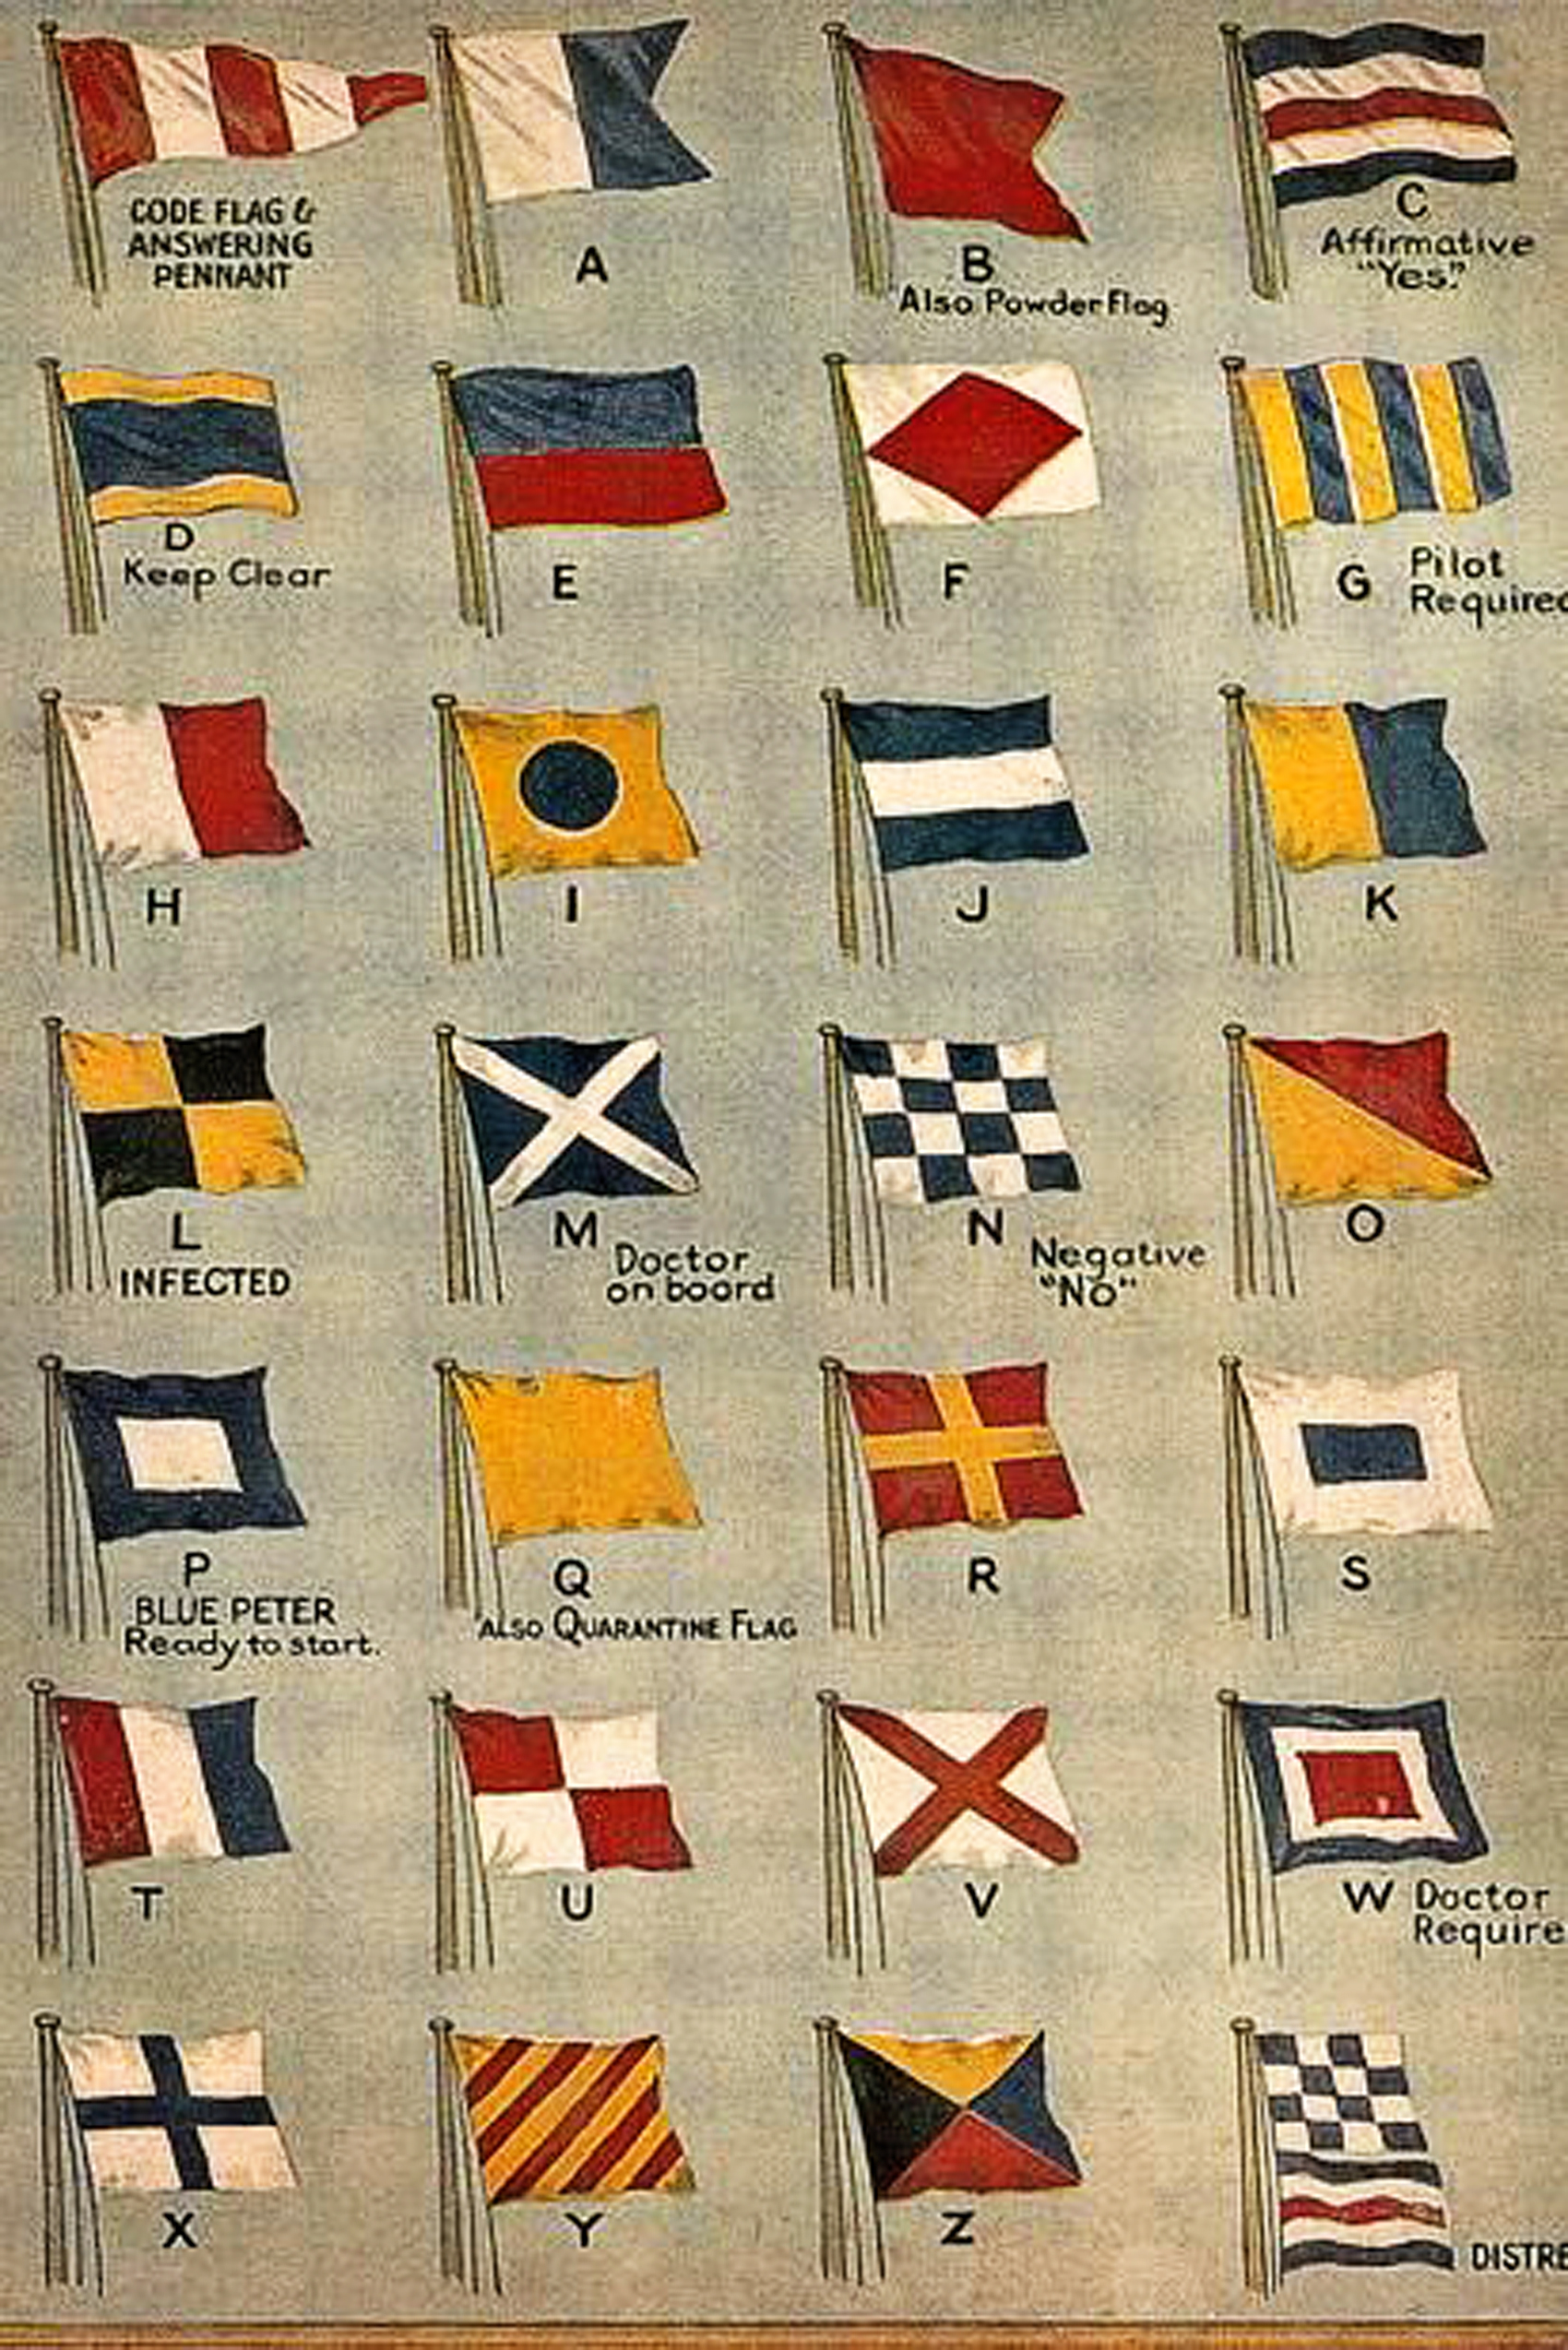
Vintage nautical signal flags

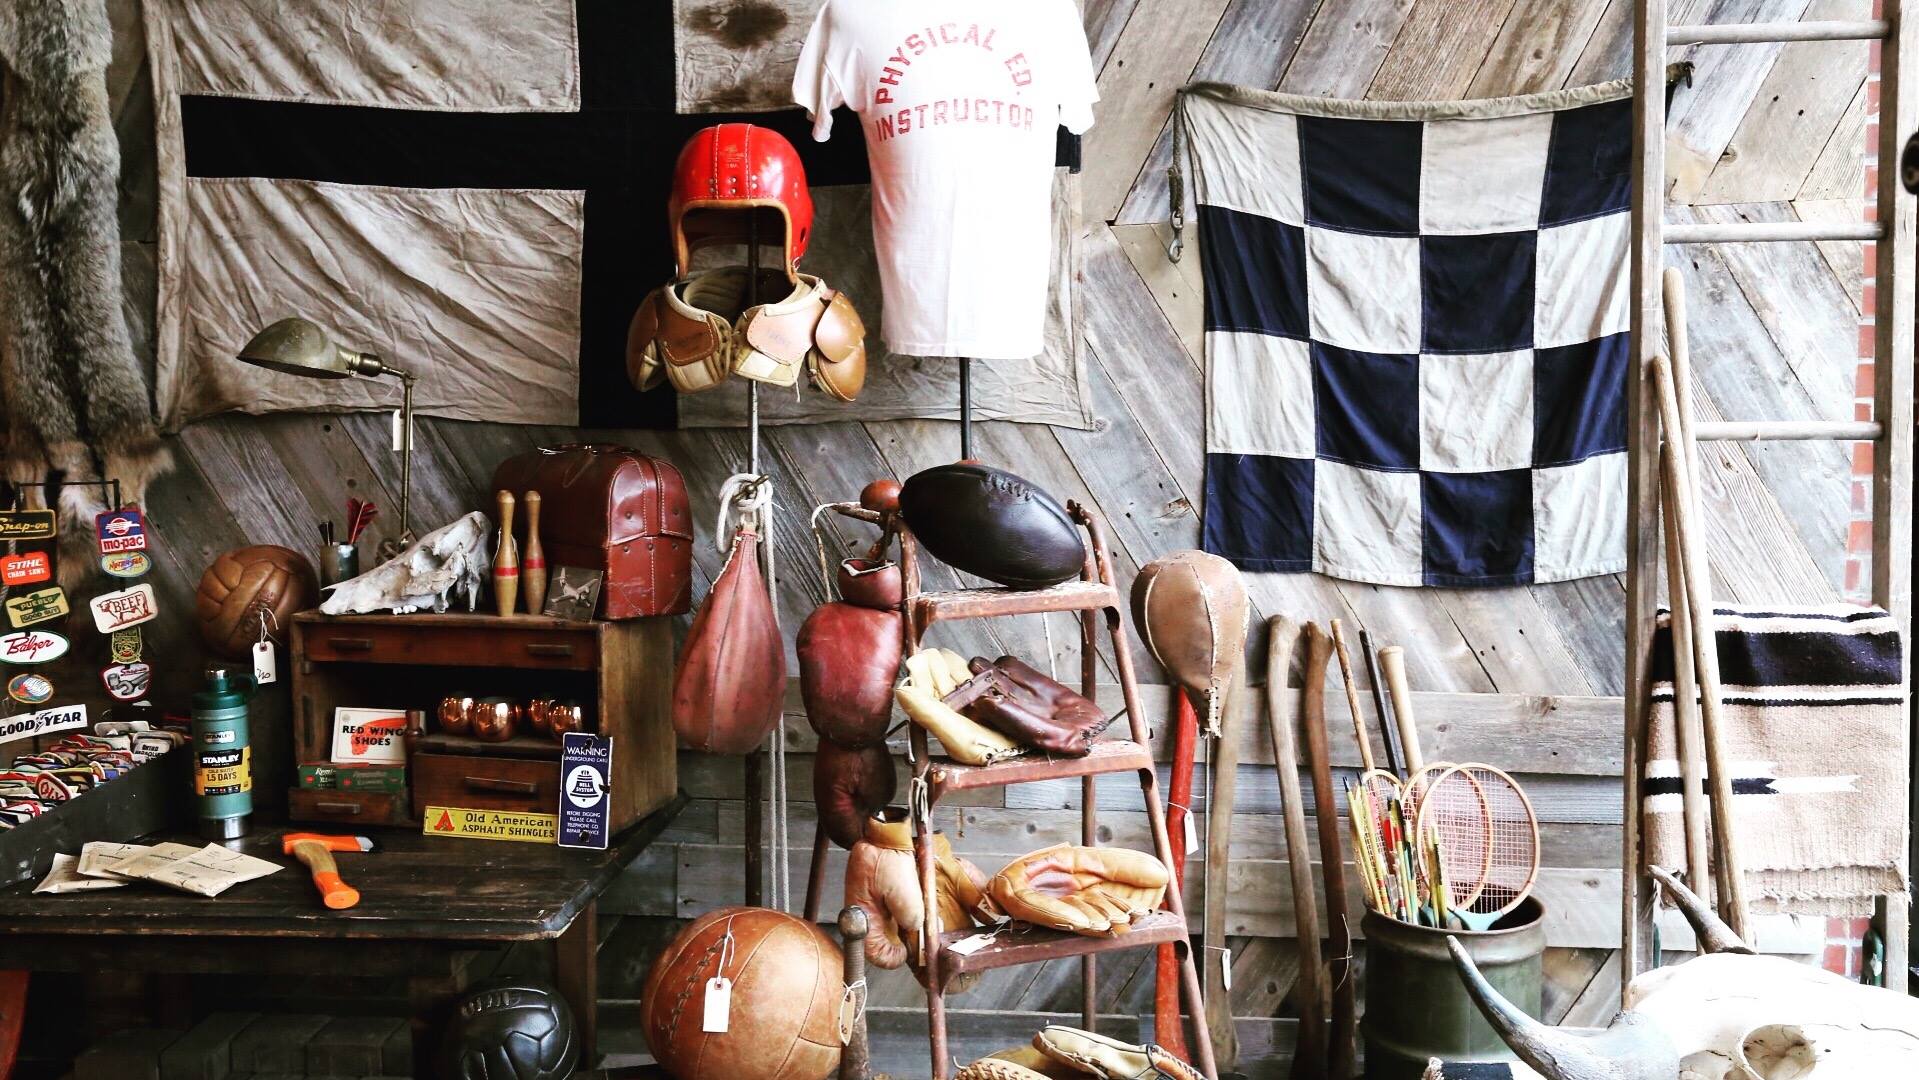
One of my picker friends here in Nebraska does a fabulous job collecting vintage nautical items. Here are a few of Cody’s from The West Place, vintage nautical flags among other items.

Cody from the West Place

Aren’t they cool?! I purchased a flag from him about a year ago with the intention of using it for my little boy’s room in our new house. The one that I have is (if you look at the chart above) the letter “Z”. It’s colors are amazing! The perfect red, blue, mustard yellow and black. I’m using that as my inspiration for Gage’s room.

If you’re following along, Gage and I introduced you to Davy Jones, Gage’s new octopus wall art for his room…

Create this fun DIY Octopus Wall art for your favorite nautical themed room. This one is going into my son’s vintage nautical room and it’s going to look fabulous! Created by WhipperBerry via @decoArt

24137_SO_July_MarthaPaint_B

I thought it would be fun to create a few more nautical signal flags to go along with Davy Jones. I was thrilled to find out that the Michaels Maker challenge for July is craft paint! Of course this is a perfect opportunity to create these fun flags using a wood canvas that I found at Michaels and the NEW DecoArt Americana Premium Acrylic Paints.

DIY-Octopus-Wall-Art-3

If you don’t already know, Michaels has all kinds of new craft paints in-store now. You need to check it out! They have acrylics, milk paint, chalk paint… All kinds of specialty paints. Not to mention stencils, canvases, brushes and more. Painting with stencils makes things really easy so definitely pick those up. I actually just painted my front door with paint that I purchased at Michaels, the new DecoArt Curb Appeal paint. Who knew you could find that kind of paint at Michaels!

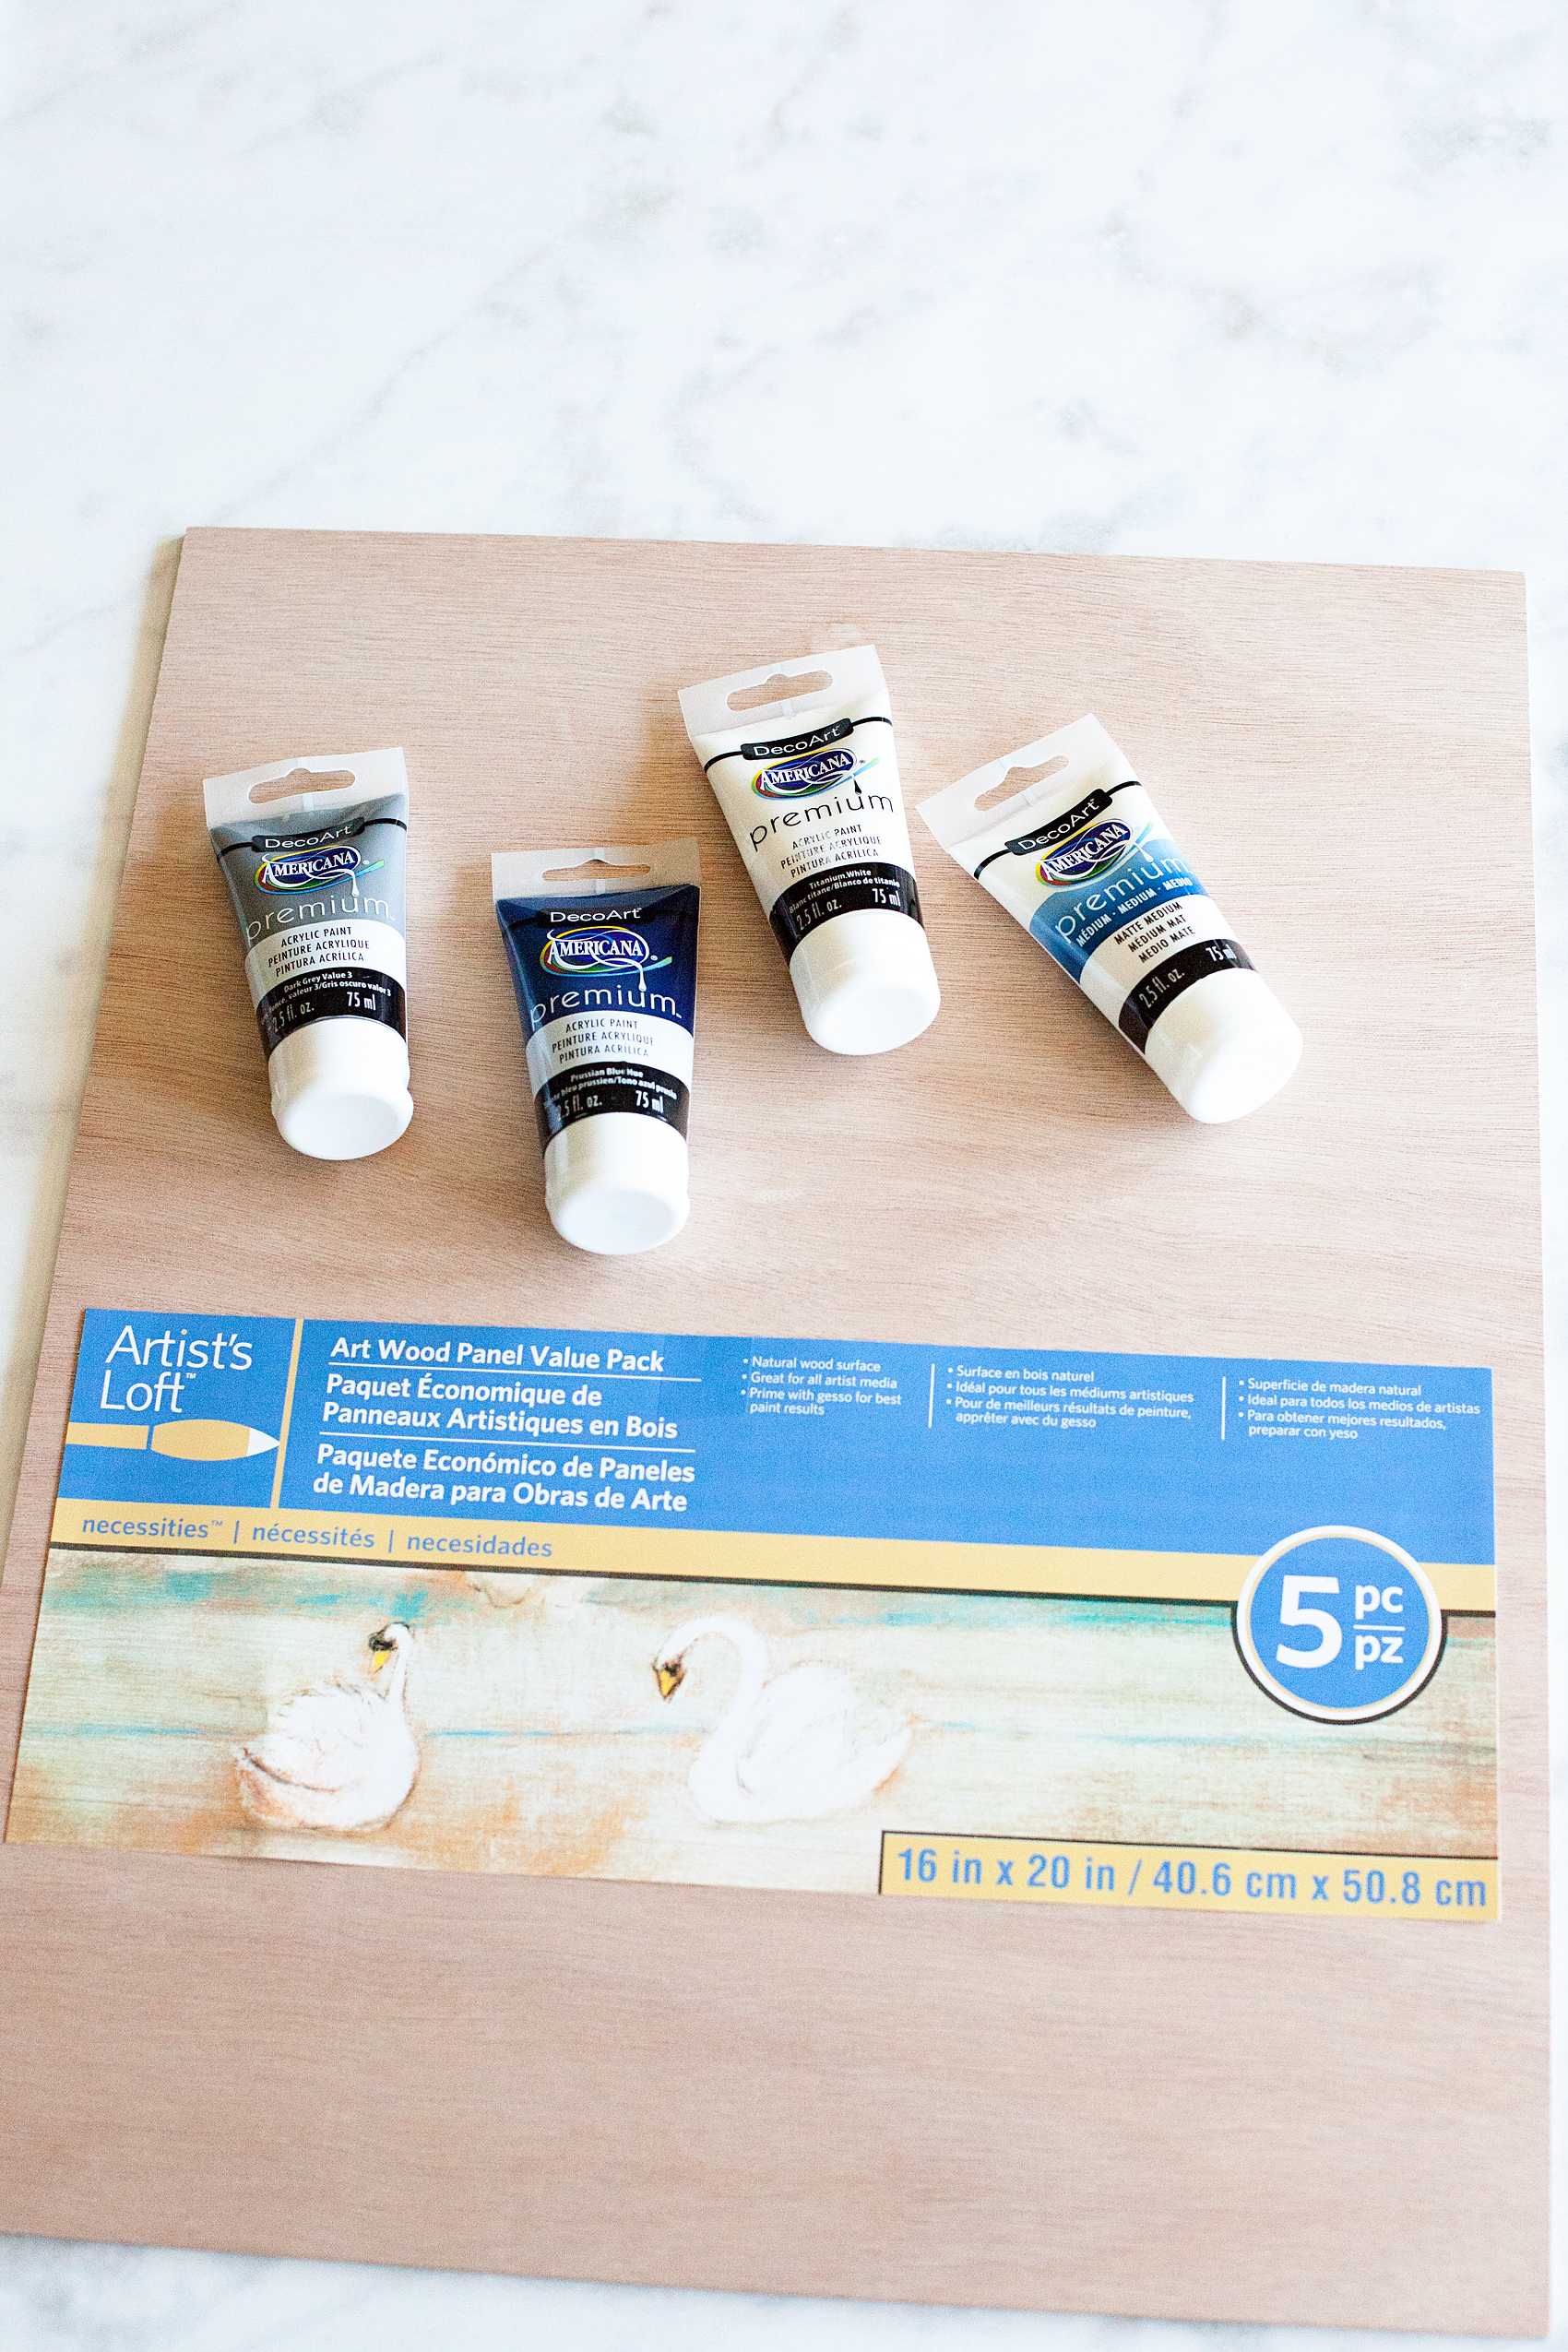
I’m also totally in love with these Art Wood Panels that you can find at Michaels. I wanted my flags to look vintage and a normal canvas wouldn’t be able to create the kind of look I was going for. Nor could I find wood that would look somewhat like a flag. Other wood options would add a lot more bulk and I didn’t want that. This wood canvas is perfect.

Gage and I talked it over and decided that we would create flags for the letters W-X-Y to go with our actual Z flag.

Looking for a fun way to dress-up your boys room? Vintage Nautical is one of my favorite ways to decorate for my little guy. Come learn how I created these painted nautical signal flags for Gage's room...

Supplies for the Painted Nautical Signal Flags

DecoArt Premium Acrylic Paint

  • Prussian Blue Hue
  • Yellow Oxide
  • Titanium White
  • Cadmium Red Hue

DecoArt Premium Medium • Matte

Artist Loft Art Wood Panel Value Pack

Painter tape

Sponge Brushes

Painted Nautical Signal Signs Instructions

Each flag is going to have a different process due to the designs of the signal flags. You will have to figure out how to best create the design for the letters you create. I’ll show you how I created the letter “Y” flag.

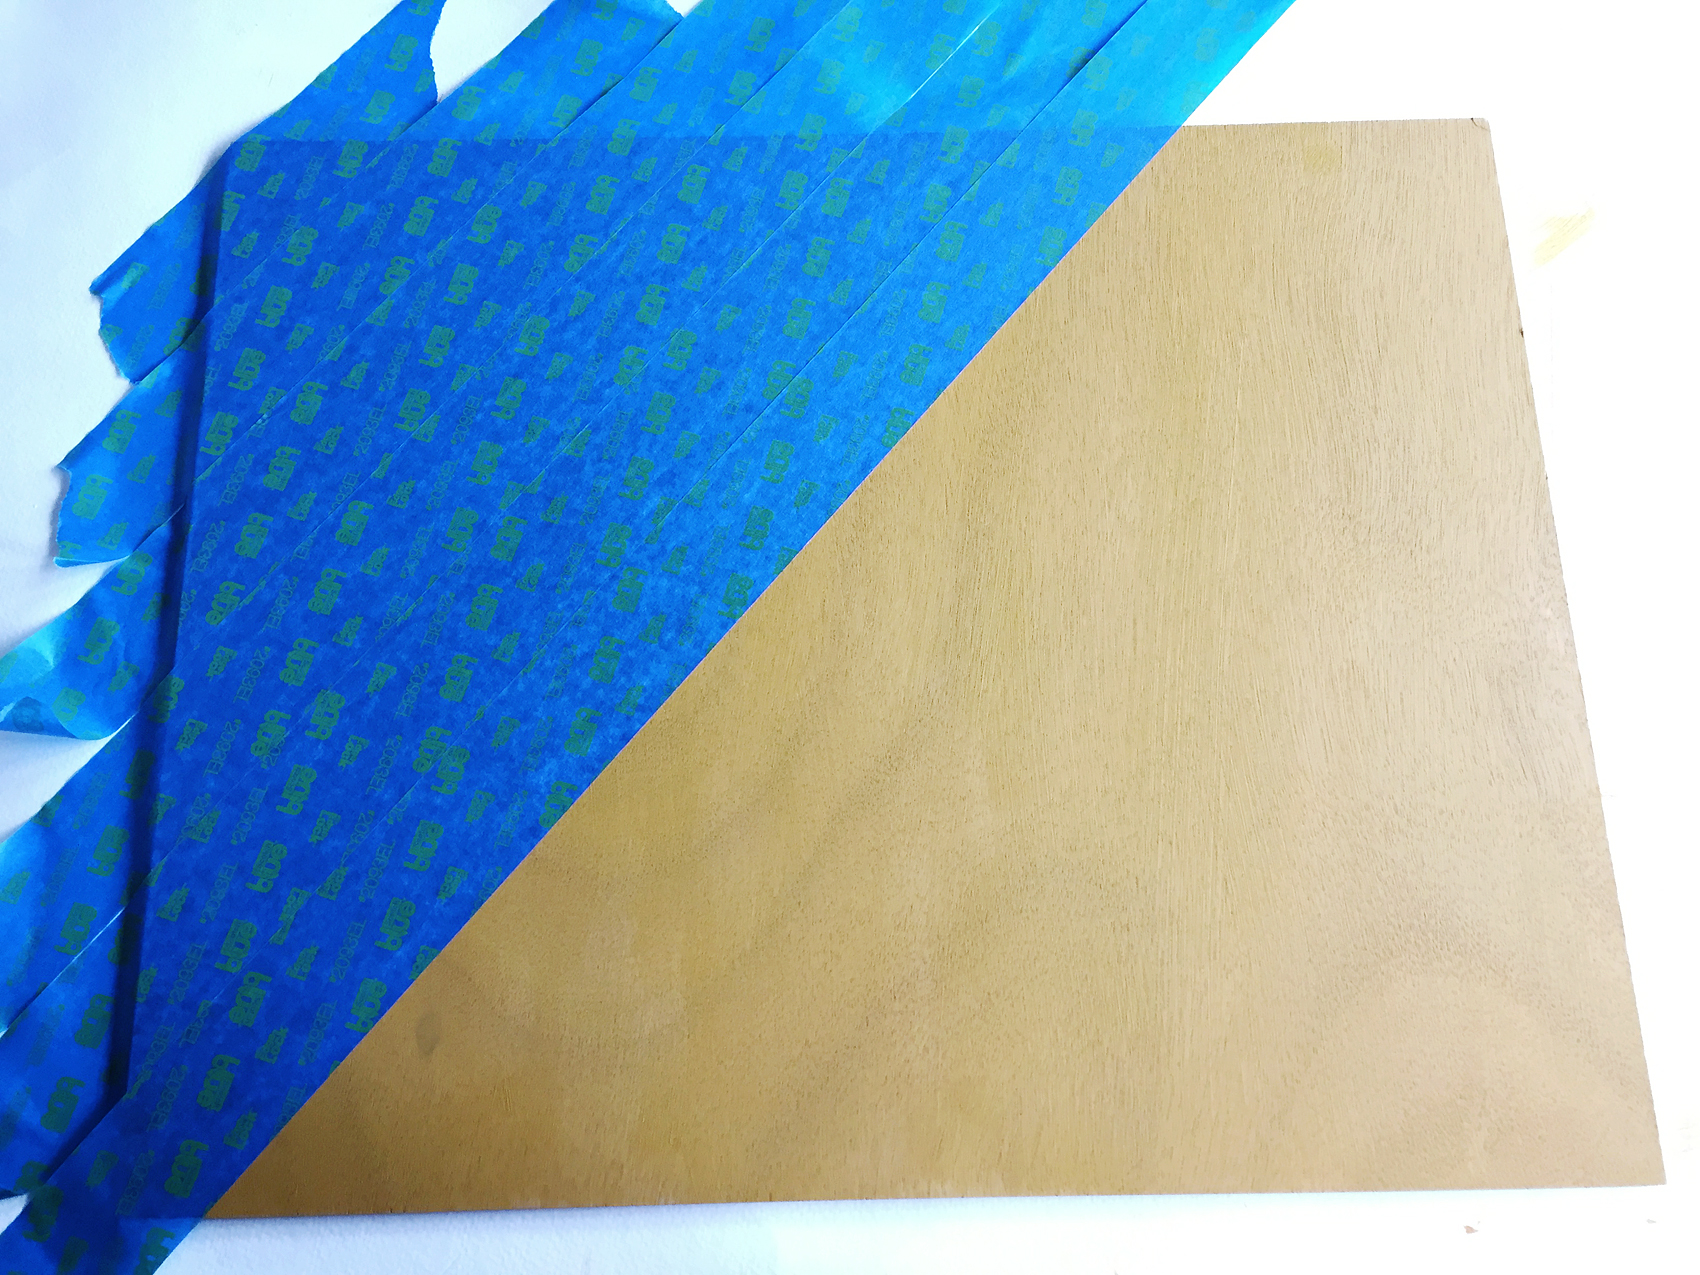
First, I painted the base layer in Yellow Oxide and let it dry. I only did one coat of paint because I was planning on distressing the sign so why make my job harder with an extra layer of paint.

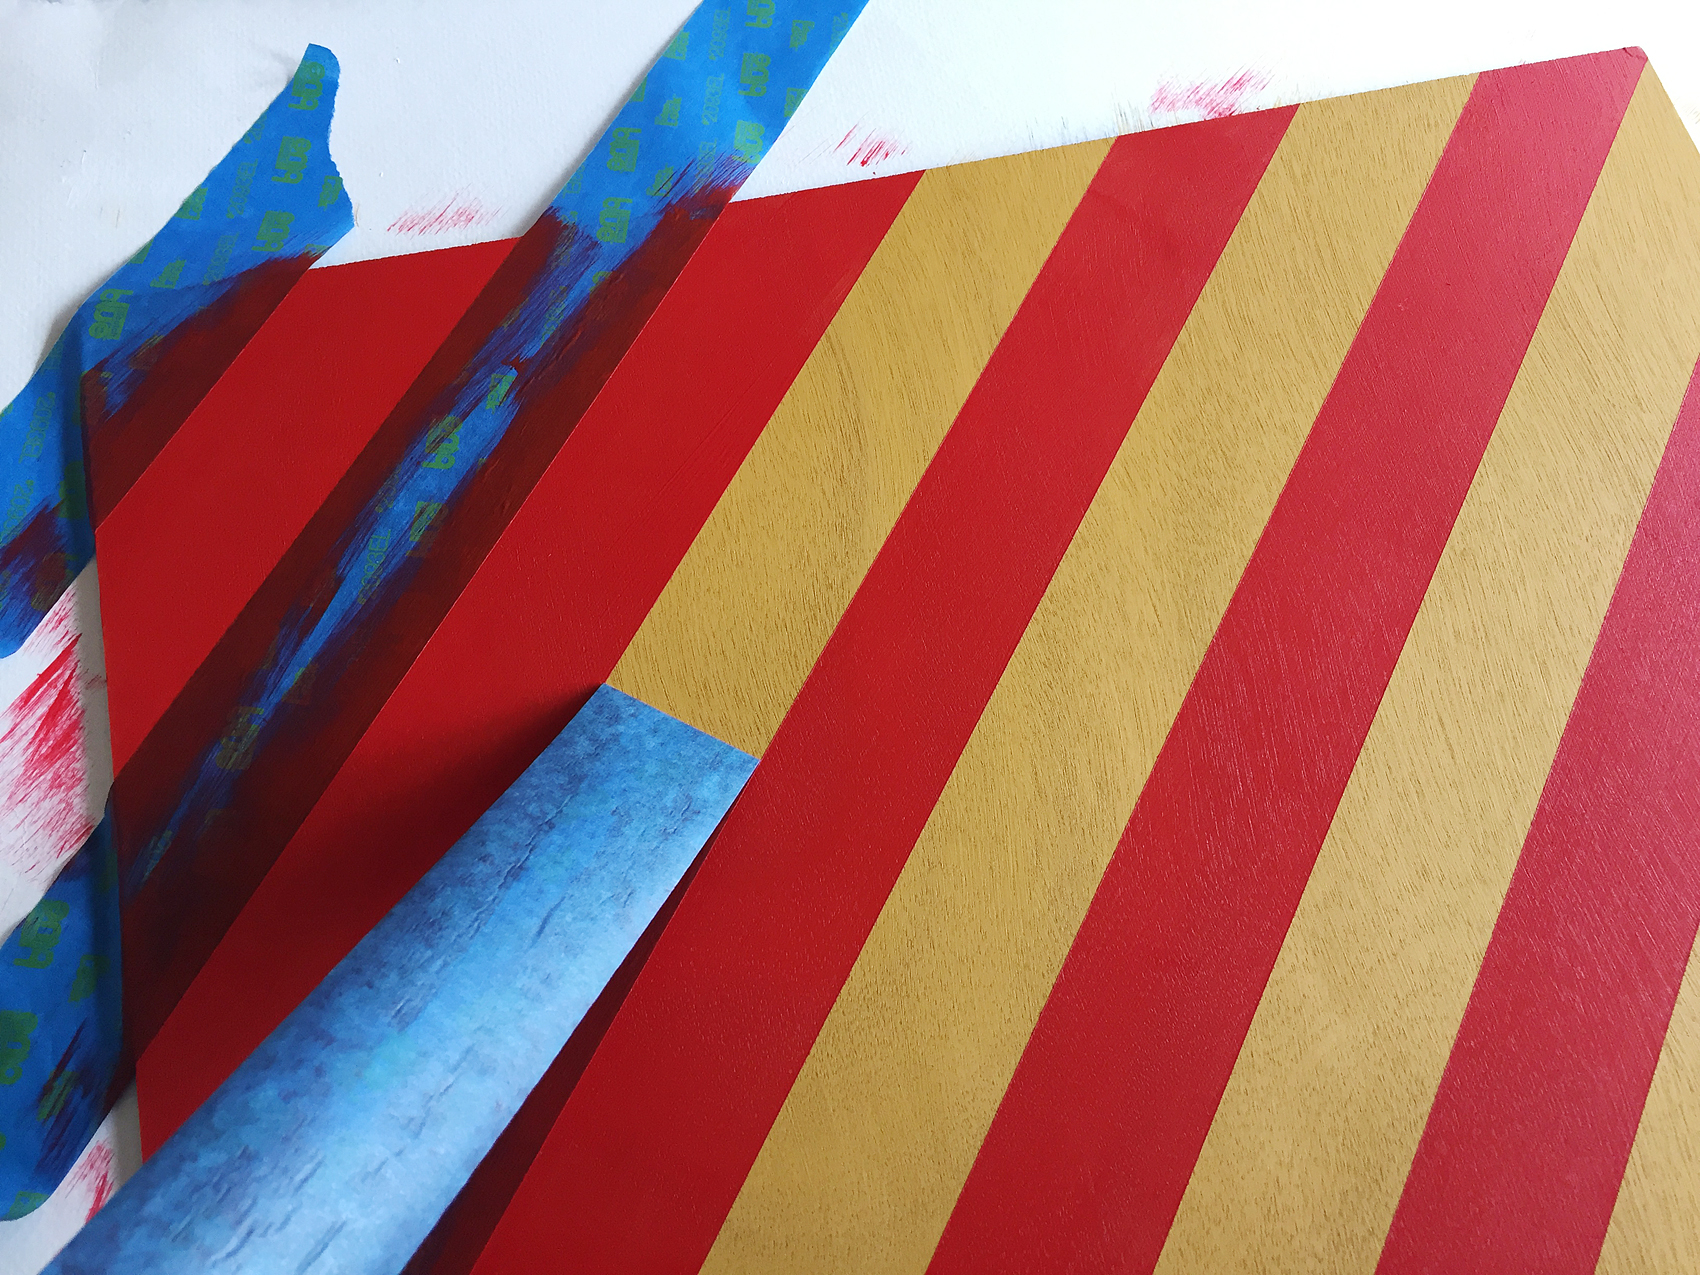
Next, rather than busting out my mad math skills (of which I have none) I layed 2 inch painters tape diagonally across the entire board with the tape bumping right up to the base of the other tape.

Looking for a fun way to dress-up your boys room? Vintage Nautical is one of my favorite ways to decorate for my little guy. Come learn how I created these painted nautical signal flags for Gage's room...

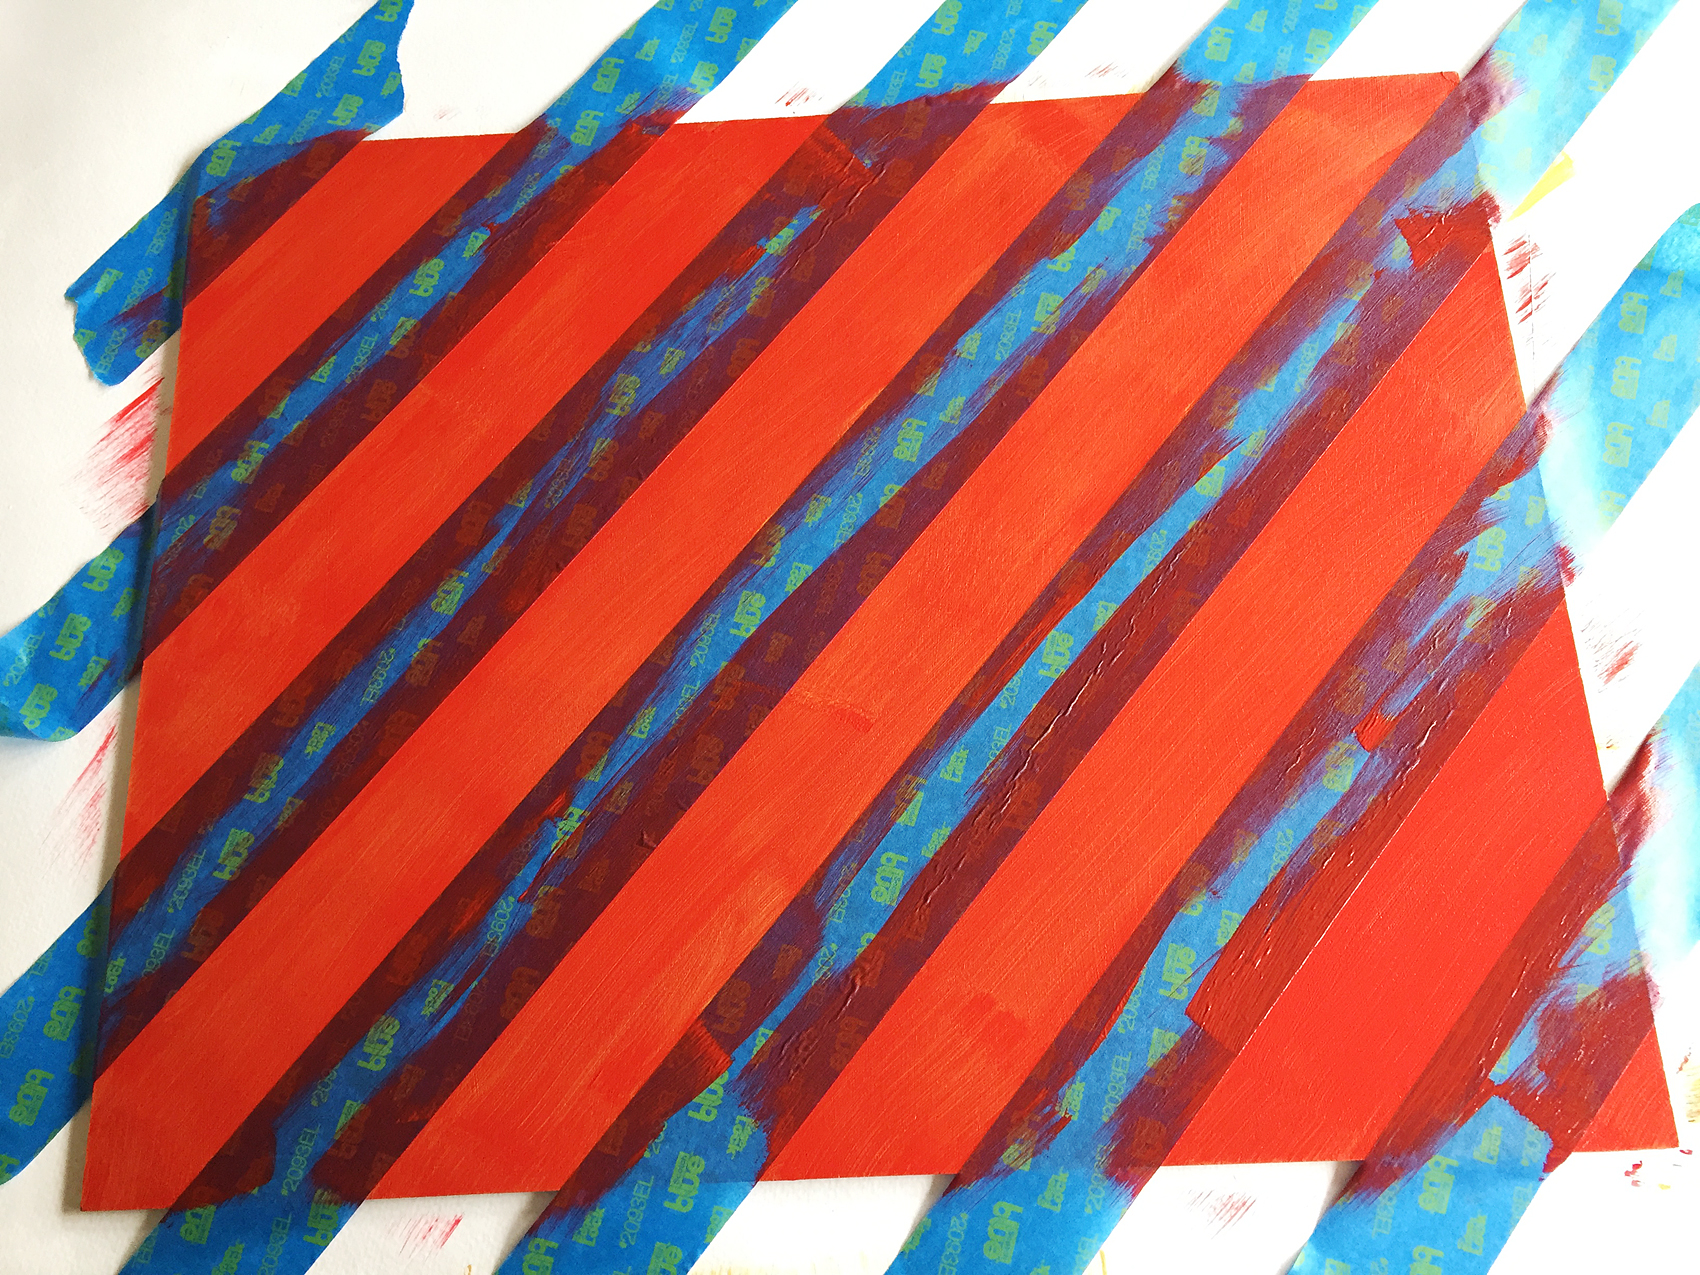
Then, I removed every other strip of tape to then create perfect diagonal stripes. I then painted the red stripes on the board. For this stripe, I did paint two light layers of paint. I wanted a truly bold color even though I was still going to be distressing the board.

Looking for a fun way to dress-up your boys room? Vintage Nautical is one of my favorite ways to decorate for my little guy. Come learn how I created these painted nautical signal flags for Gage's room...

After the paint was dry, I pulled the tape to reveal the PERFECT stripes!

Looking for a fun way to dress-up your boys room? Vintage Nautical is one of my favorite ways to decorate for my little guy. Come learn how I created these painted nautical signal flags for Gage's room...

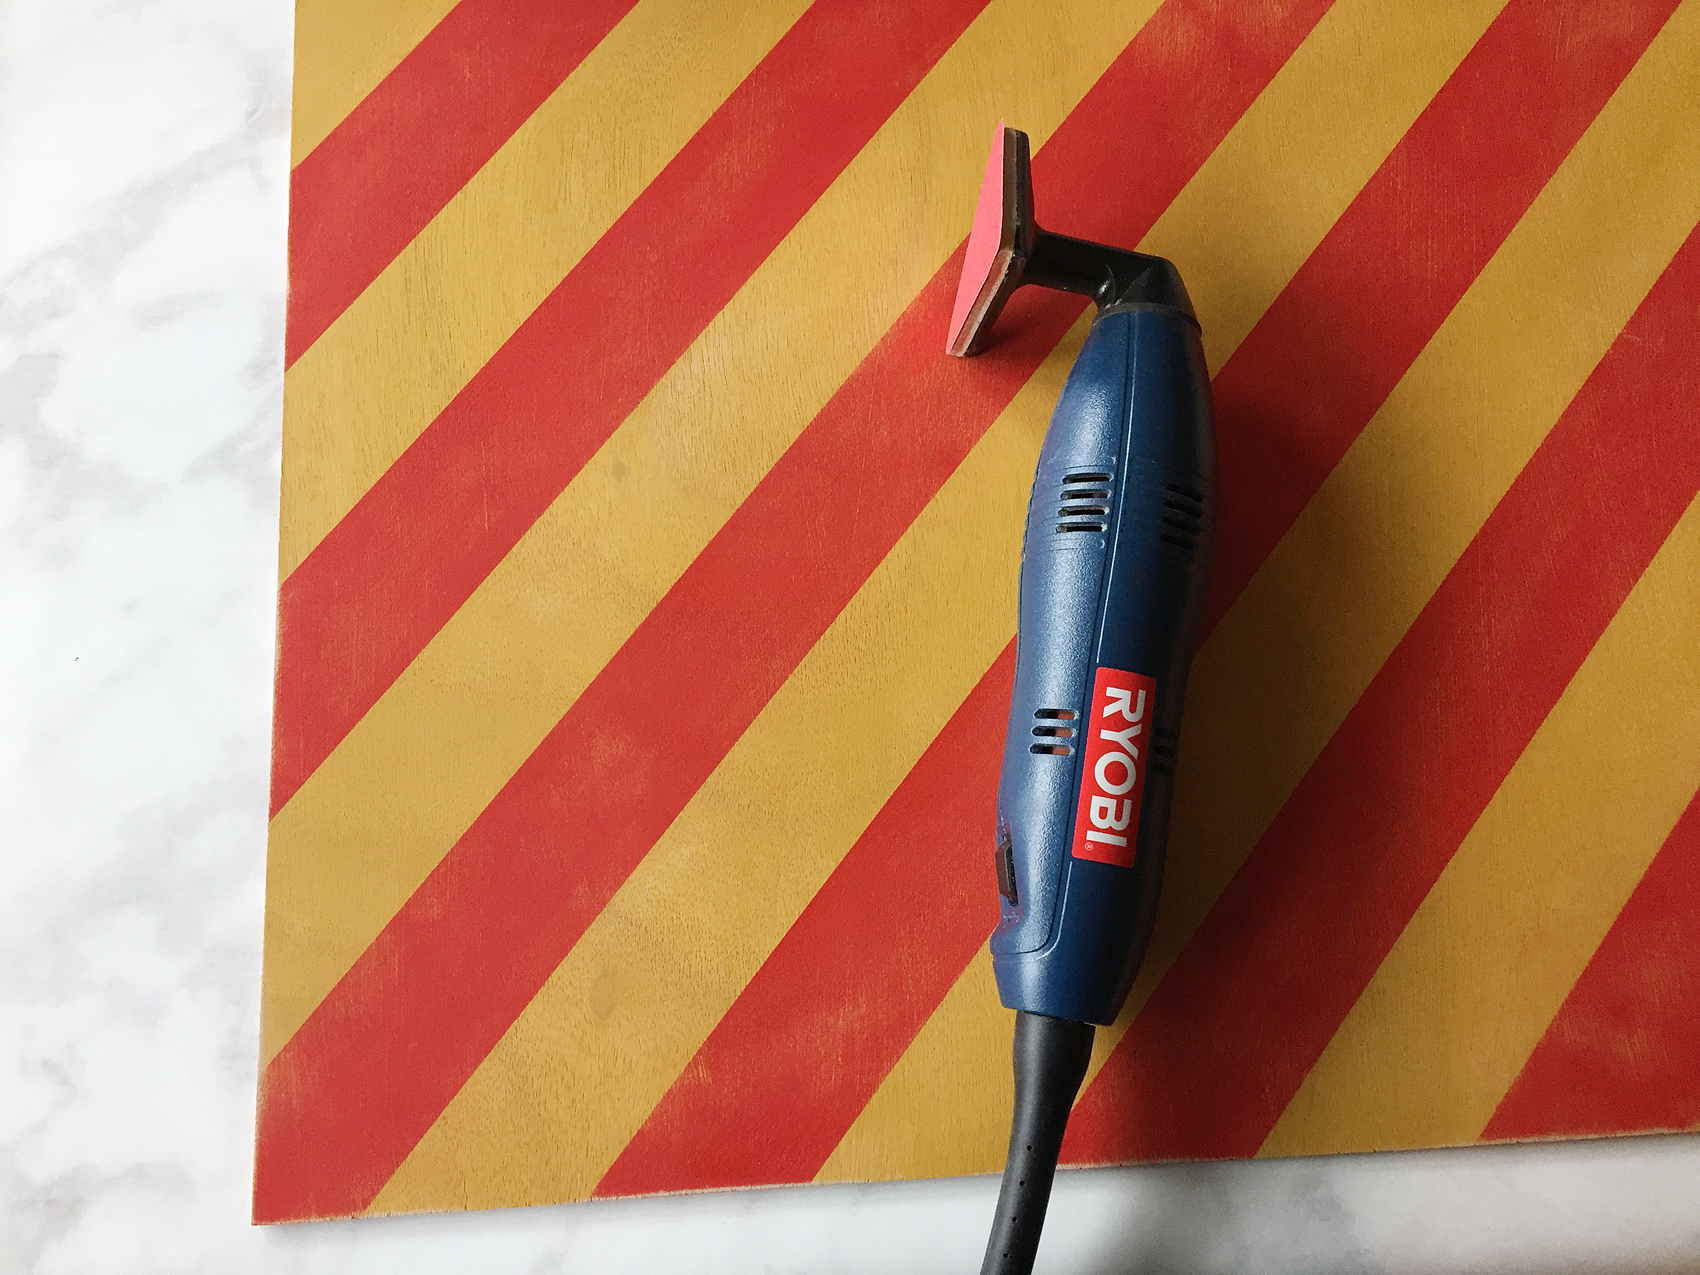
I love how you can still see the wood grain on these art boards. Not to mention, look at those beautiful bold colors. I love this paint! Next, I used my detail sander to distress the board a bit to give this faux flags the vintage look.

Looking for a fun way to dress-up your boys room? Vintage Nautical is one of my favorite ways to decorate for my little guy. Come learn how I created these painted nautical signal flags for Gage's room...

I LOVE how they turned out. I can’t wait to see how they look in Gage’s room when it’s finished.

Looking for more painting inspiration? Michaels has you covered. You can follow along on The Glue String (the Michaels blog) OR, checkout these other projects from the other Michaels Makers…

An InLinkz Link-up

  • Go to page 1
  • Go to page 2
  • Go to page 3
  • Go to Next Page »

Primary Sidebar

Heather from Whipperberry
Hello... my name is Heather and I'm the creator of WhipperBerry a creative lifestyle blog packed full of great recipes and creative ideas for your home and family. I find I am happiest when I'm living a creative life and I love to share what I've been up to along the way... Come explore, my hope is that you'll leave inspired!

Footer

  • Privacy Policy

Copyright © 2023 · Seasoned Pro