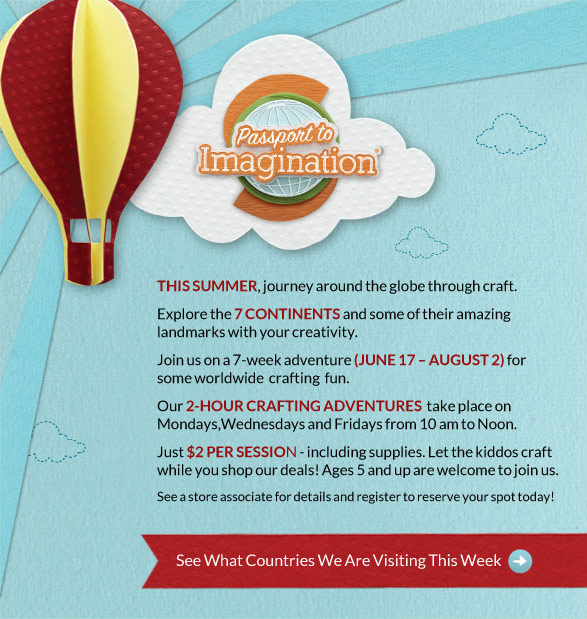
This post brought to you by Michaels // This summer has been a blast so far. I’ve been having a ball coming up with fun projects and activities for the kiddos while they are home. Emily has been going to Michaels Passport to Imagination Craft Camp for the last couple of weeks, and she has been having a ball. She’s made some fun new friends and has really enjoyed learning about North & South America through some fabulous hands on activities.
In the next couple of weeks, they will be traveling to several other parts of the world. Don’t worry if you haven’t had a chance to head over to your local Michaels stores, The Passport to Imagination runs for several more weeks and is only $2 for each class. Come on over your kiddos will love it!
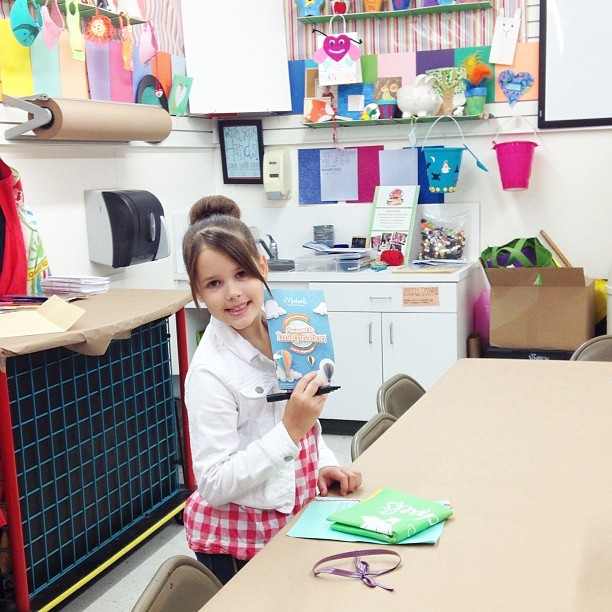
Emily enjoying Michael’s Passport to Imagination Craft Camp
Emily decided we wanted to come up with a project that would be perfect for your kiddos over the summer. After class we went and wandered Michaels and she decided that we needed to make a DIY Children’s Chalkboard. She has been around for all of my chalkboard projects and has developed a love for the slate & chalk just like her Mom.
We decided that kiddos need to have a chalkboard of their very own that they can play around with, but if it’s loved a little too much, it won’t be a big deal. Here is what we came up with…

Here are the supplies that we gathered…
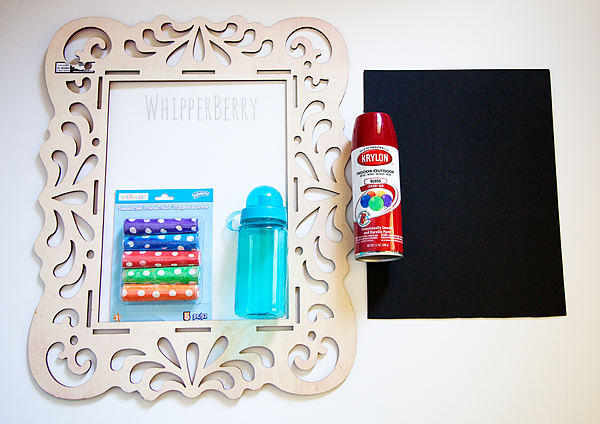
- Stylish wood frame
- Krylon Cherry Red spray paint
- Ultra black mounting board
- Chalk
- Water bottle
This DIY is so easy and fun to do with your kiddos. First, you need to spray paint your frame, let it dry completely. Cut your ultra black mounting board down to size and then hot glue onto the back of the frame. You should probably take care of the hot glue part, rather than the kiddos. But, this is a great beginners spray paint project. Take them outside and teach them the finer points of spray paint.
Next, all you have to do is rub white chalk all over the board and rub it off with a paper towel. Your chalkboard seasoned and ready to go!!
Emily thought it would be cool to have a special spot for her chalk as well, so we found and inexpensive water bottle at Michaels and used it as a chalk keeper.
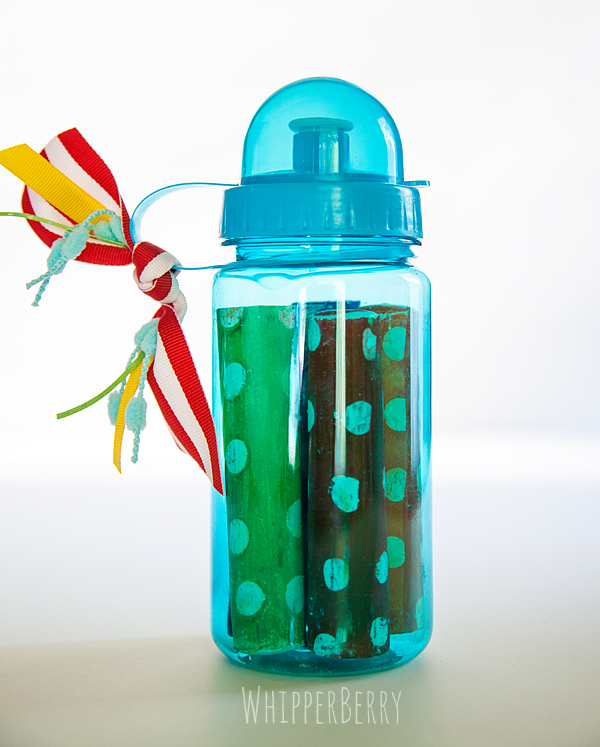
We just dressed it up with some ribbon and yarn that we had laying around and voila… You have a fun chalk keeper for your kiddos to go along with their chalkboard! Now they can make all kinds of lists or play games on their board and after it’s loved a little too much you can replace the mounting board and it’s as good as new!! Total Rock Star Mom Move!!
Come on over to Michael’s this week and check out the Passport to Inspiration along with Emily. After class you can grab some chalkboard supplies and go home and make your very own children’s chalkboard.
Disclaimer // This is a post sponsored by Michaels Crafts. I received free product for this post, however… all thoughts, ideas and opinions are my very own.
0
PLEASE Heather I am trying to make your Candy Cane Wreath. Is there anyway you can help me. The directions do not seem clear enough about how to fold the fabic. when I fold it in half and half again, it does not look at all like what you posted. Also do I need more white than red? its says 2 rows of white and one of red, it calls for the same amount of fabric for both.
Thank you very much
I hope to hear from you soon
Phyllis July 1st 2013