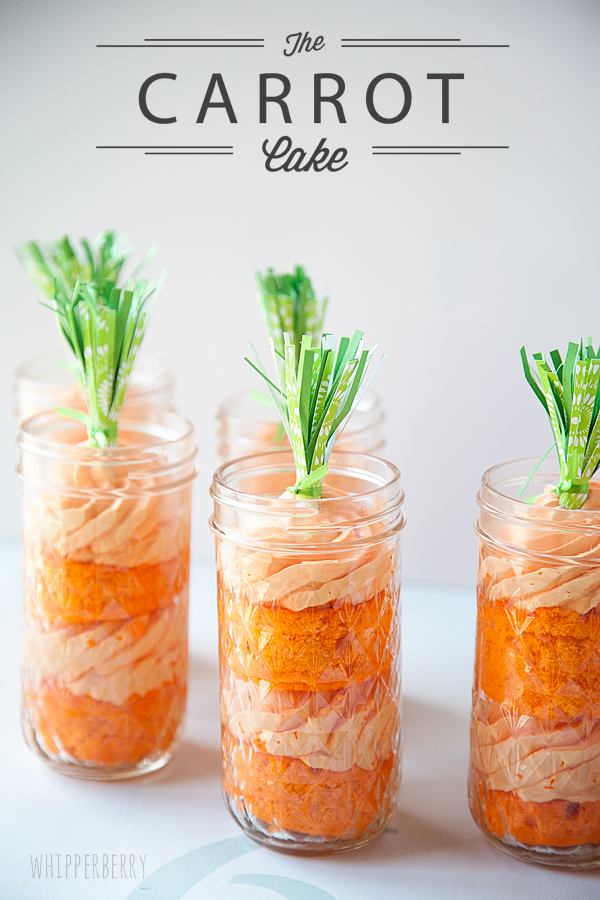
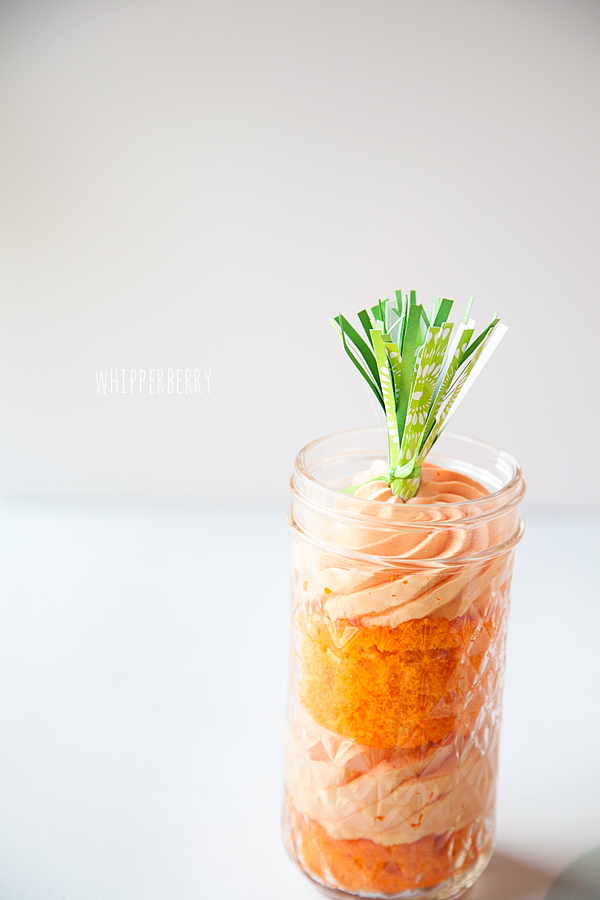
Looking for a fun spring dessert? The other day I was trying to come up with a fun idea for a dessert auction for a fund raiser at church and I came up with The Carrot Cake!! It’s a SIMPLE yet very fun dessert idea that is great for Easter or any other spring time activity. I was thinking it would look really cute with a fun sign that said, “Mr. McGregor’s Garden” for a spring baby shower or birthday party.
All you need is some Pillsbury Funfetti Orange All-Star Cake Mix and some Orange Funfetti Frosting. With a few little additions to the frosting you have a tasty little treat that is super easy to bake and put together.
How to make The Carrot Cake
- Mix-up the cake according to package directions but bake it on a baking sheet so that it’s stays a thin layer. Bake for 15-19 minutes at 350˚. I actually made up a double batch of cake mix to almost fill one baking sheet. Make sure to spray your baking sheet with Pillsbury Baking Spray.
- Using a biscuit cutter, cut circle cake rounds that will fit in your jars once the cake has cooled.
- Mix up the frosting the recipe for that is below
- Layer your jars with one cake round, a layer of frosting, another cake round and some additional frosting. If you are feeling a little fruity, you can add some mandarin oranges into the layers. I didn’t have any on hand or I would have done that with mine!
- Make your carrots stems…
How to make The Carrot Cake Stems
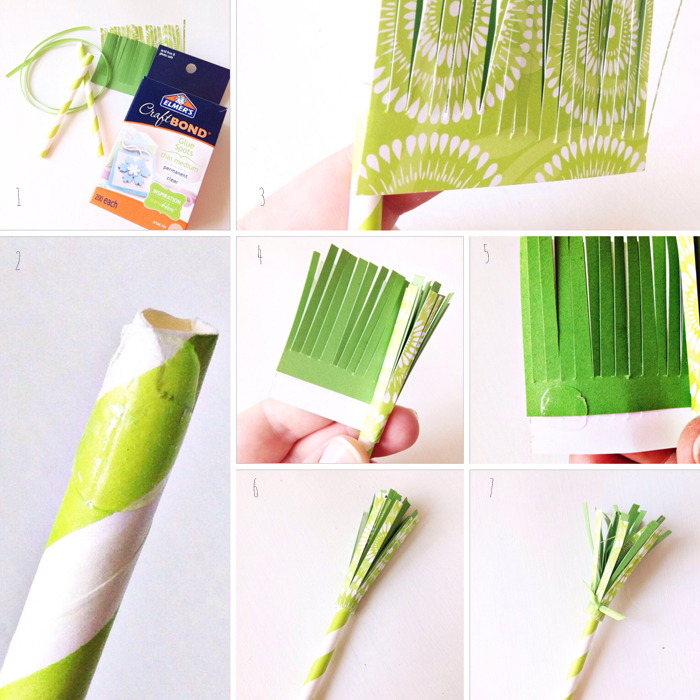
You will need two types of green paper, scissors (fringe scissors if you have them), Elmer’s Glue Spots, straws (it doesn’t matter what color, they will hide in the cake) and some thin green ribbon.
- Cut your straw in half. Cut your green paper fringe, paper needs to be at roughly 3 1/2 inches wide and 2 inches tall.
- Place a glue spot on the tip of the straw
- Layer your two green papers and attach to the top of the straw.
- Carefully wrap around the straw making sure to keep it tight.
- Place a glue spot on the outer edge of the fringe
- Secure the fringe to the straw.
- Tie with the ribbon to keep it secure. Rough up the paper a little to help it look like a stem.
Add your stem to the top of the cakes and serve!
- 2 cans of Pillsbury Funfetti Orange Frosting
- 3-4 tablespoons of milk
- ½ tsp. citric acid
- 16 oz. of Cool Whip
- Use a stand or hand mixer.
- In a large mixing bowl add the two jars of frosting, milk and citric acid. Mix on high until the frosting lightens up.
- Fold in the Cool Whip until completely combined.
- Place in a large piping bag with a large cupcake tip.
- Layer the cake and frosting.
Disclaimer // This is not a sponsored post. I just highlighted products that I use all the time in my everyday creating!
22


Leave a Reply