• Skip to primary navigation
  • Skip to main content
  • Skip to primary sidebar
  • Skip to footer

Whipperberry

WhipperBerry • Your Home For Creative Inspiration

  • Home
  • About
    • Terms
  • Recipes
    • Starters
    • Easy Weeknight Dinners
    • Main Dish
    • Salads
    • Side Dish
    • Soups & Stews
    • Desserts
    • Breakfast
    • Miscellaneous
  • Tutorials
    • Creative Crafts
    • DIY Decor
    • Fabric Crafts
    • Food How-To
    • Jewlery
    • Paint Projects
    • Paper Art
    • Party Styling
    • Photography and Graphic Design
    • Silhouette
  • Holidays
    • St. Patrick’s Day
    • Easter
    • Mother’s Day
    • Father’s Day
    • 4th of July
    • Halloween
    • Thanksgiving
    • Christmas
    • New Years
    • Valentine’s Day
  • Gift Ideas
    • Gifts For Everyone
    • Gifts for Dad
    • Mother’s day
    • For The Girls
    • For The Kids
    • Teacher Gift Ideas
    • Christmas
  • Printables
    • Holiday
    • Gift Idea
    • LDS Primary
  • Travel
  • Contact
  • Nav Social Menu

    • Facebook
    • Instagram
    • Pinterest
    • RSS
    • Twitter

Cricut Easy Press

Vintage Canvas Christmas Tree Cart

47 · Nov 28, 2018 · 2 Comments

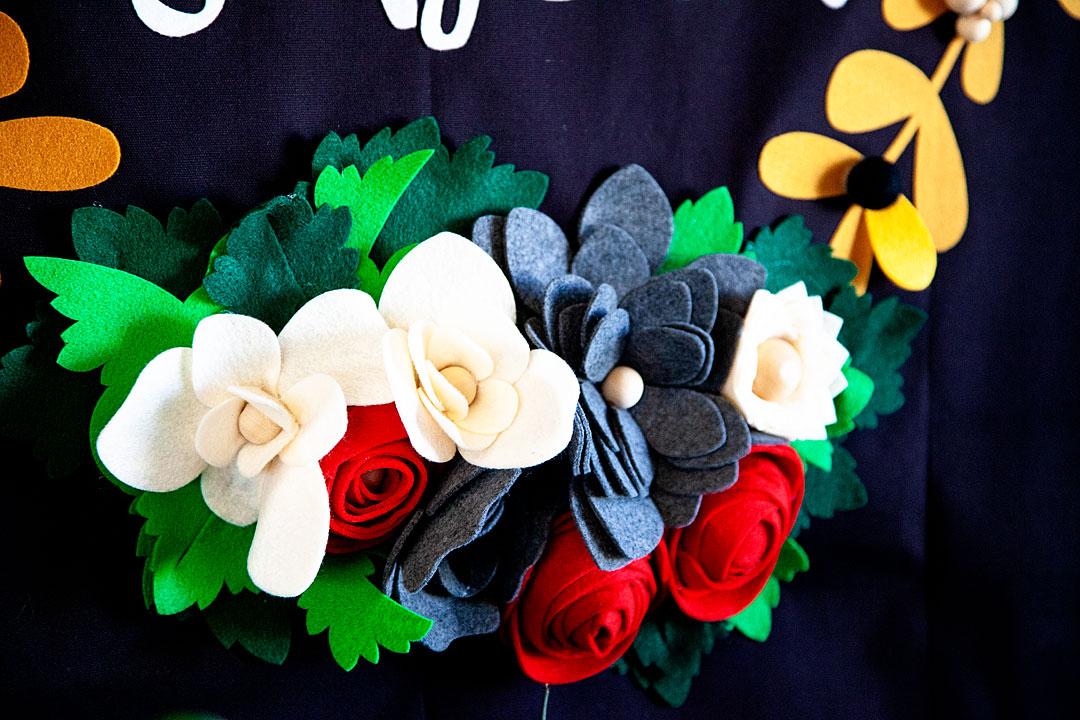
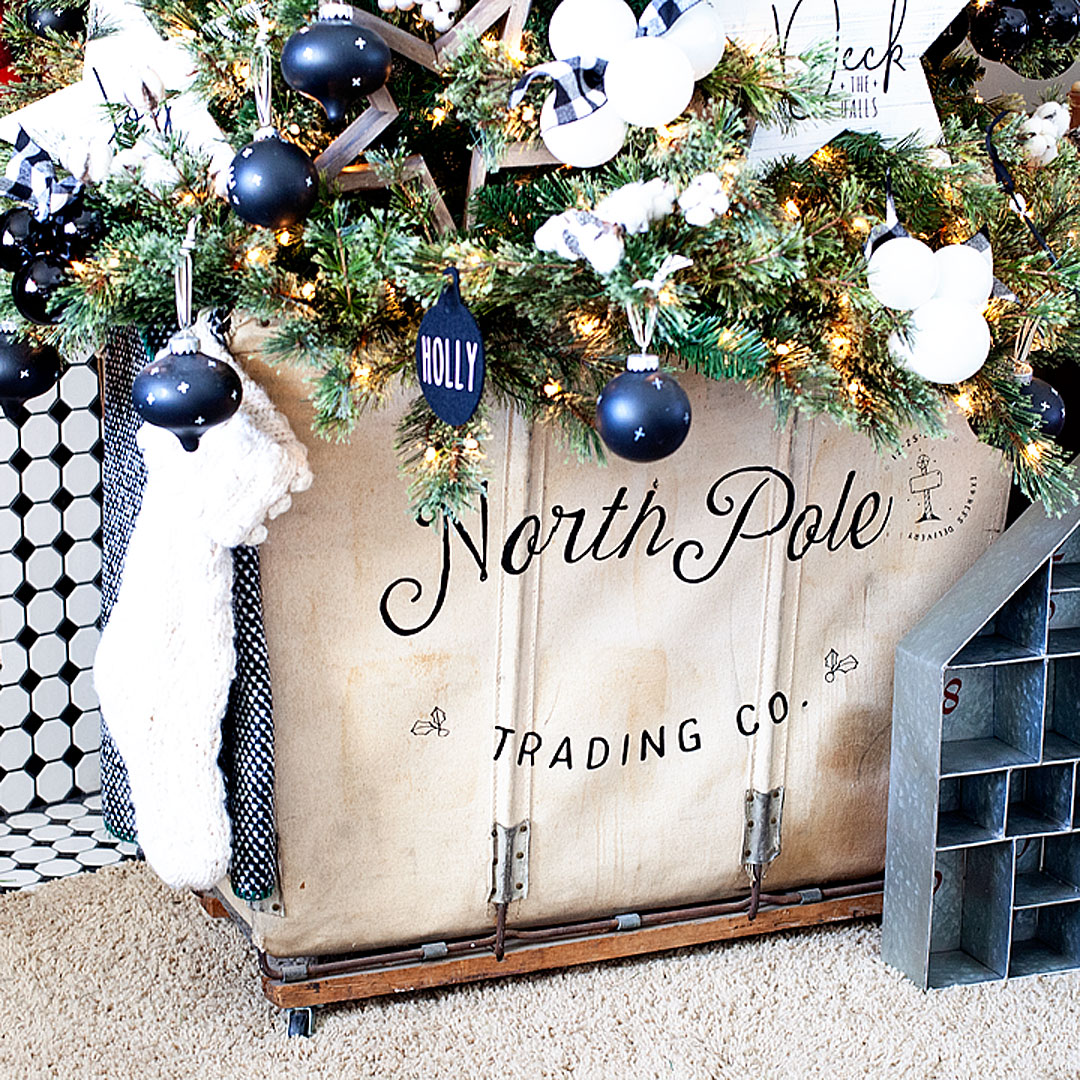
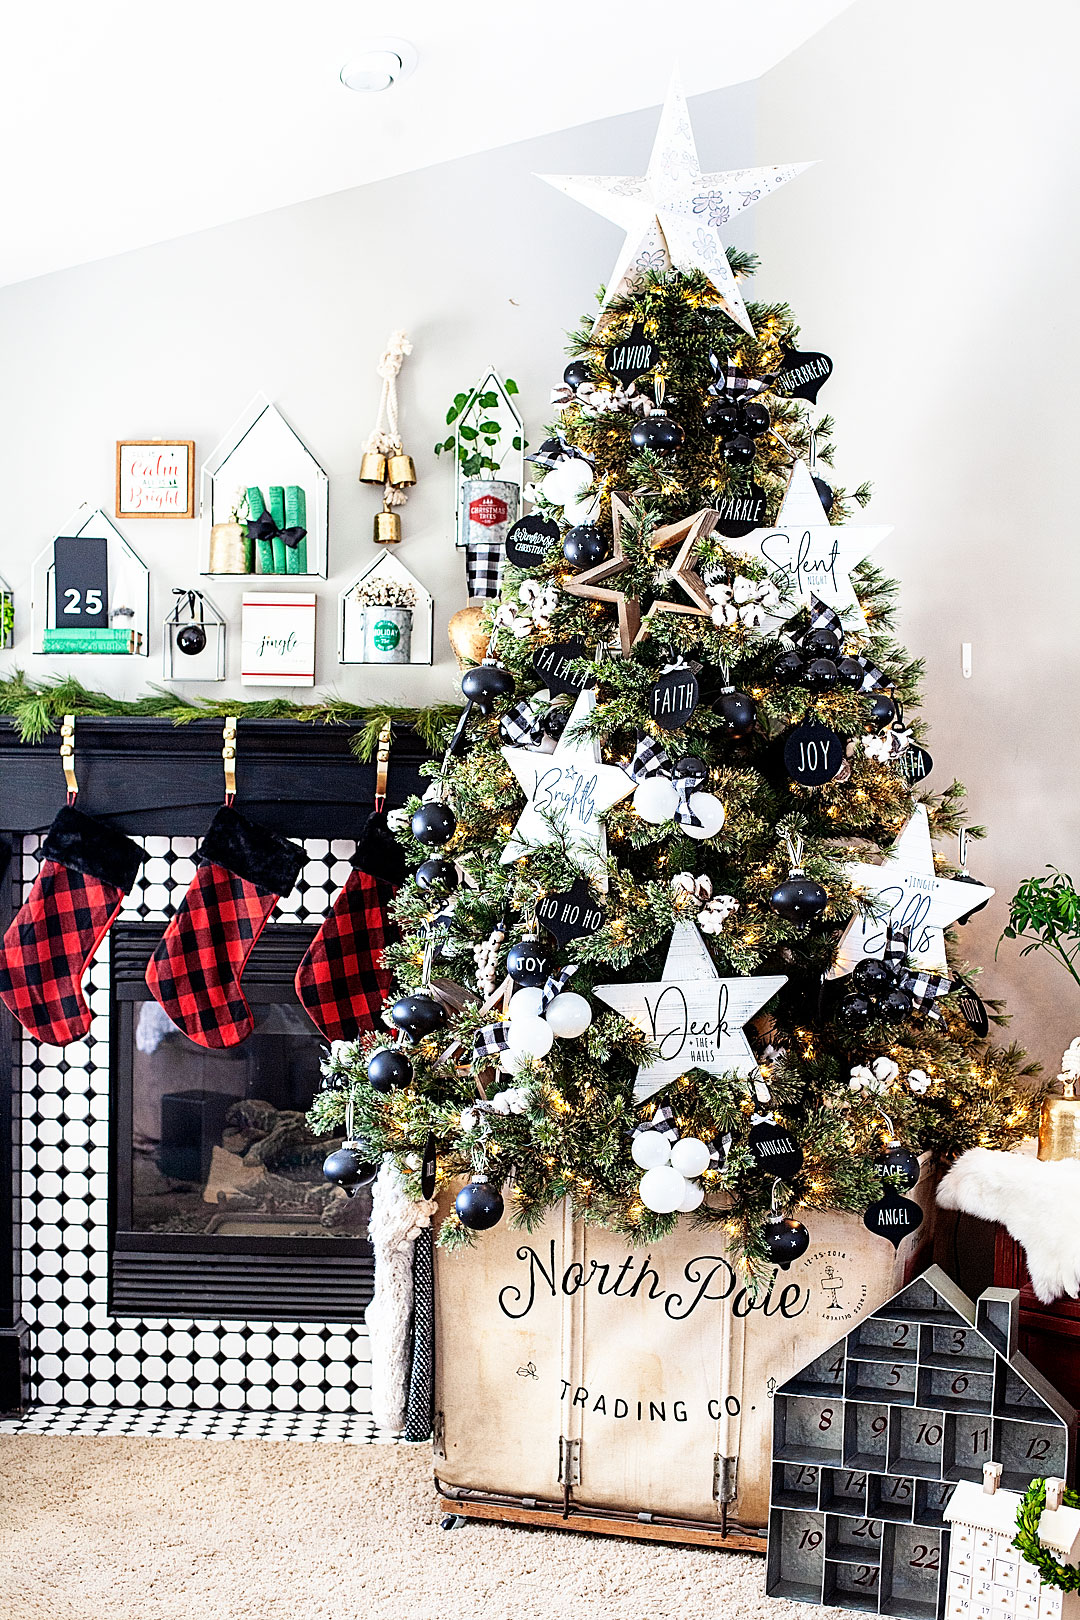
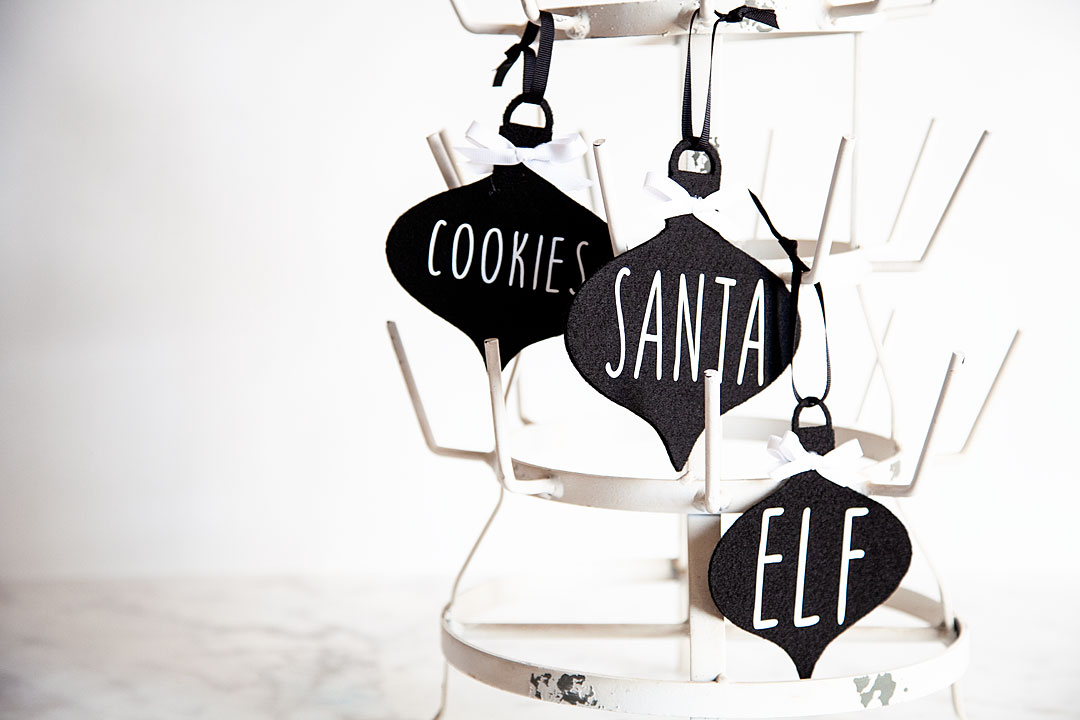
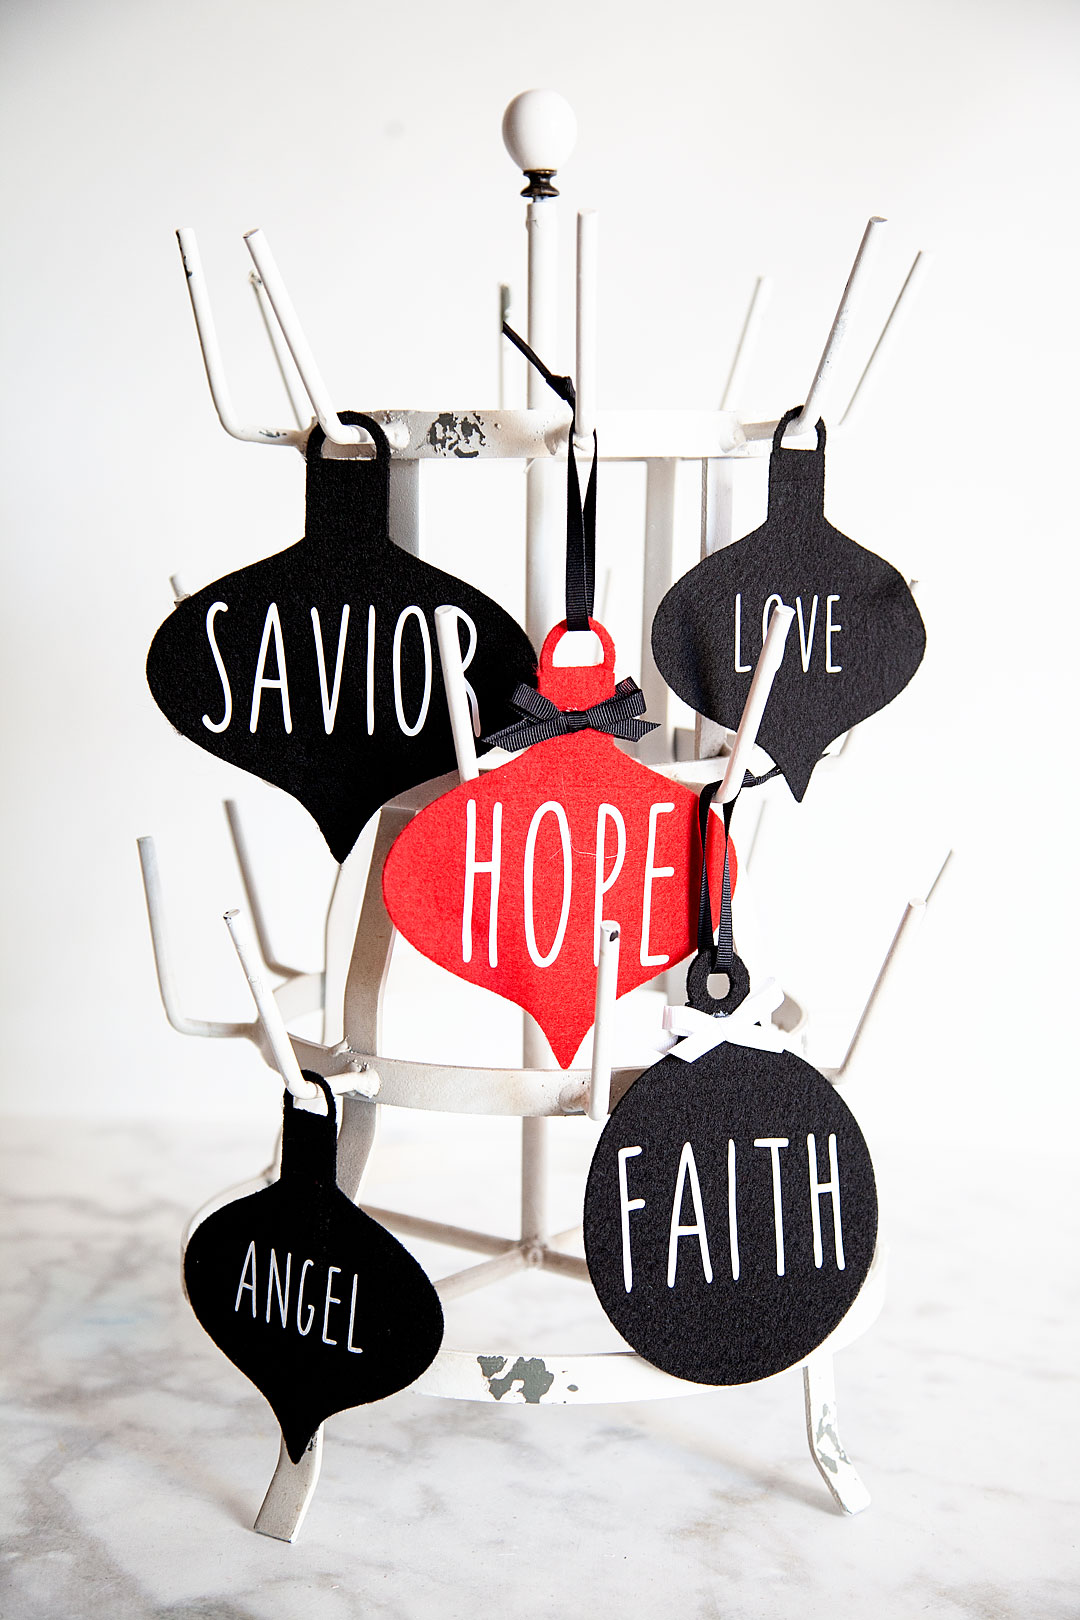
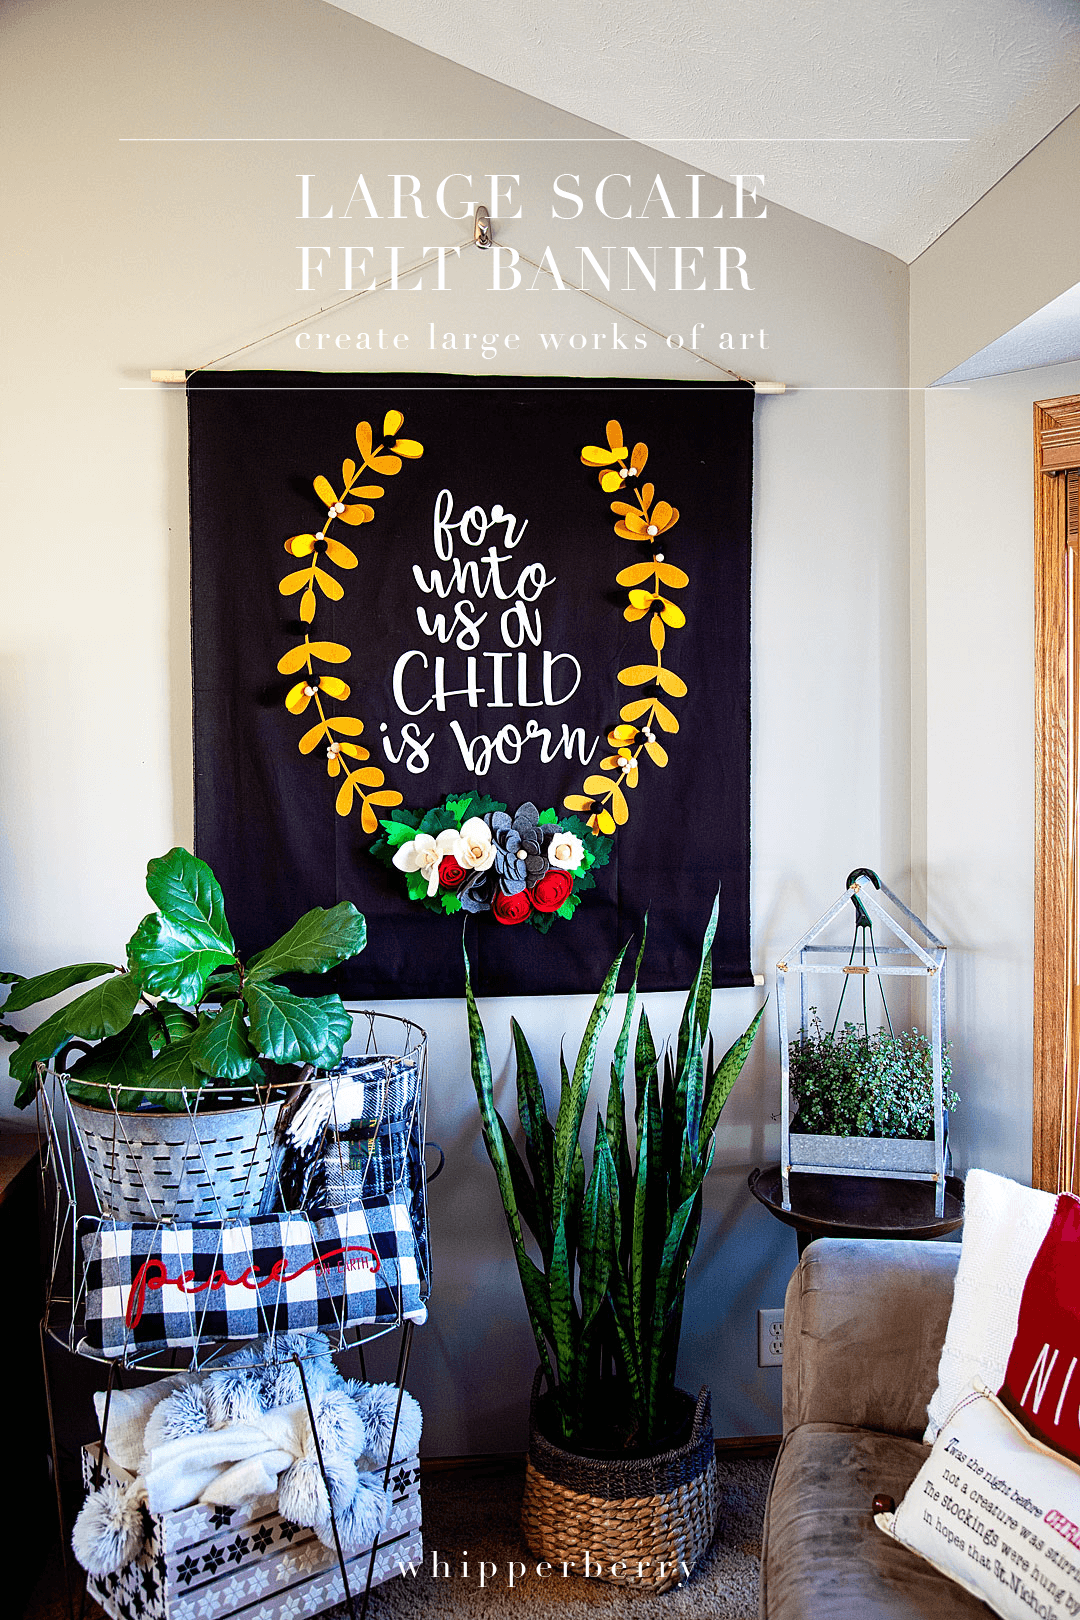
You guys, this project has been a long time coming! I’ve made all kinds of ornaments for my Christmas tree using my favorite Cricut tools like these felt ornaments or my farmhouse stars from last year. Now, I have something extra special for you! I have some good friends here in Nebraska, Brent & Leah from Old Cotton Wood, who are master pickers. They find all kinds of goodies and then travel the country selling at vintage markets. A few years ago Leah texted me about a vintage canvas mail cart that she thought I might like. The instant I saw it, I knew I needed it for my Christmas tree. My family hated me and begged me to get rid of it as we were moving to our new house and I held firm. I have plans for this beauty and you are all just going to have to wait and see what I create. Finally this year, I had the tools to create a beautiful canvas Christmas Tree Cart using my new, absolute favorite tools my Cricut Easy Press 2 mini & my new Sunflower Cricut Explore Air 2!! Now my family LOVES it and will be far more tolerant of my crazy hoarding of vintage finds. Come see how you can make one for your Christmas Tree.

+ this post brought to you by the amazing folks at Cricut +
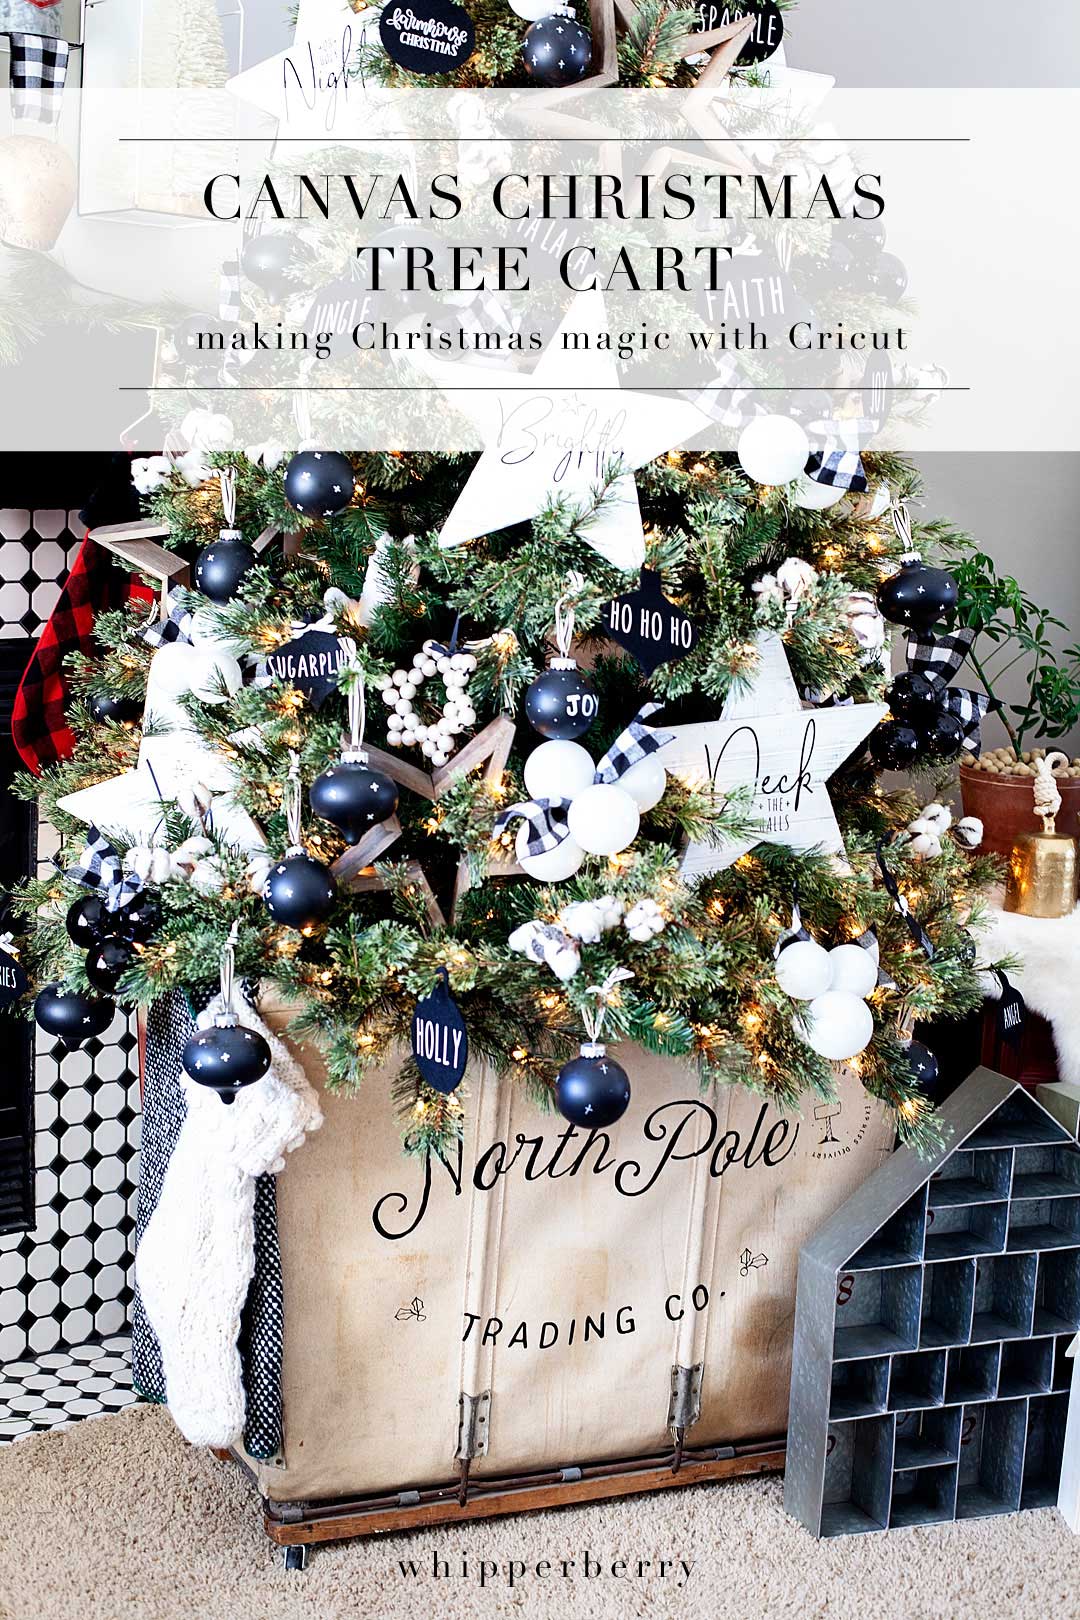
create a beautiful canvas Christmas Tree Cart with @cricut • WhipperBerry

The Canvas Cart

I know, I know, I know… You guys don’t have a Leah looking out for you, finding fabulous vintage canvas carts for you. I get it. However, you do have ME and I have found a fabulous new canvas cart that will be perfect for this project. It’s from one of my favorite (new to me) companies, Steele Canvas. They have a perfect canvas cart that will become a family favorite for the Holidays I’m sure! Plus, when it’s not holding up your Christmas tree, you can use it as a laundry cart or for storage. You guys, I crush hard on basically anything they make… I love canvas in all shapes and forms.

steel canvas cart

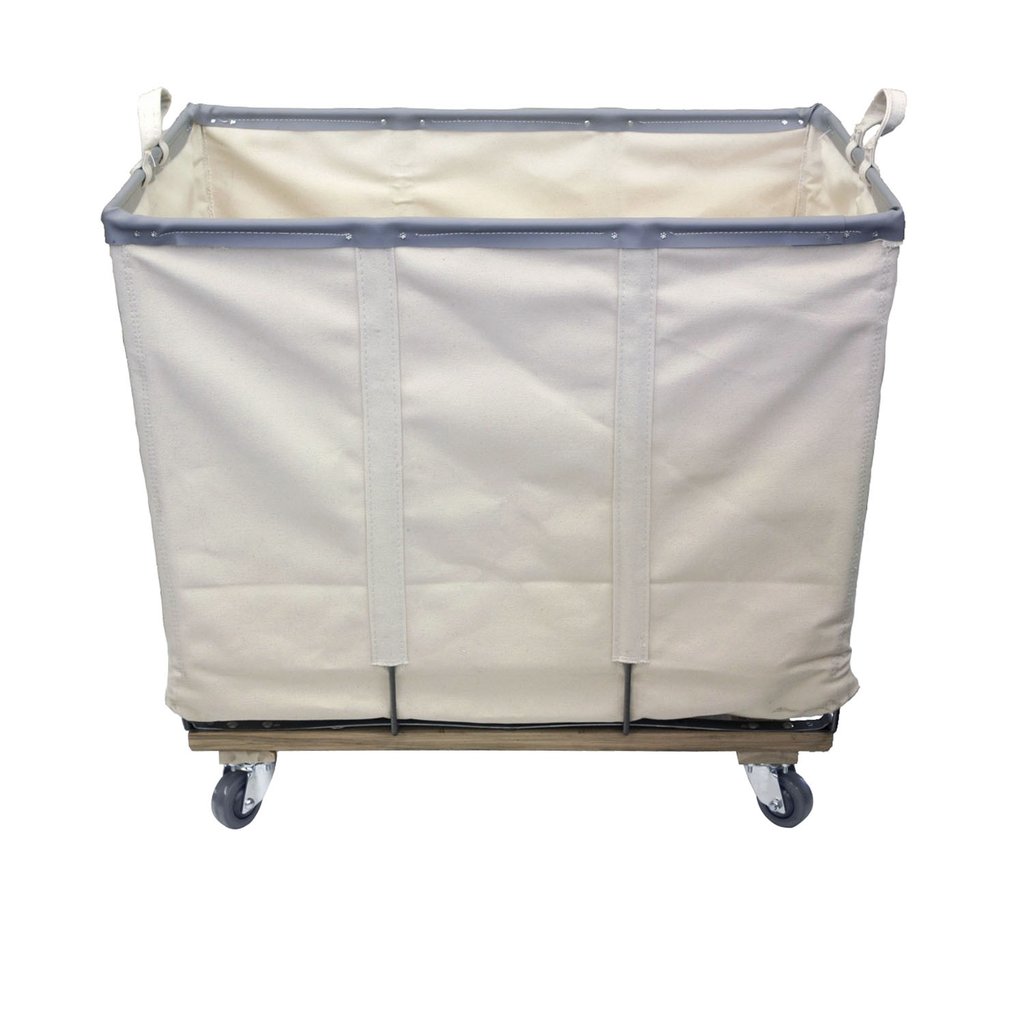
Now, your canvas cart won’t have that vintage patina but, it will look amazing either way… Old or New!

The Design

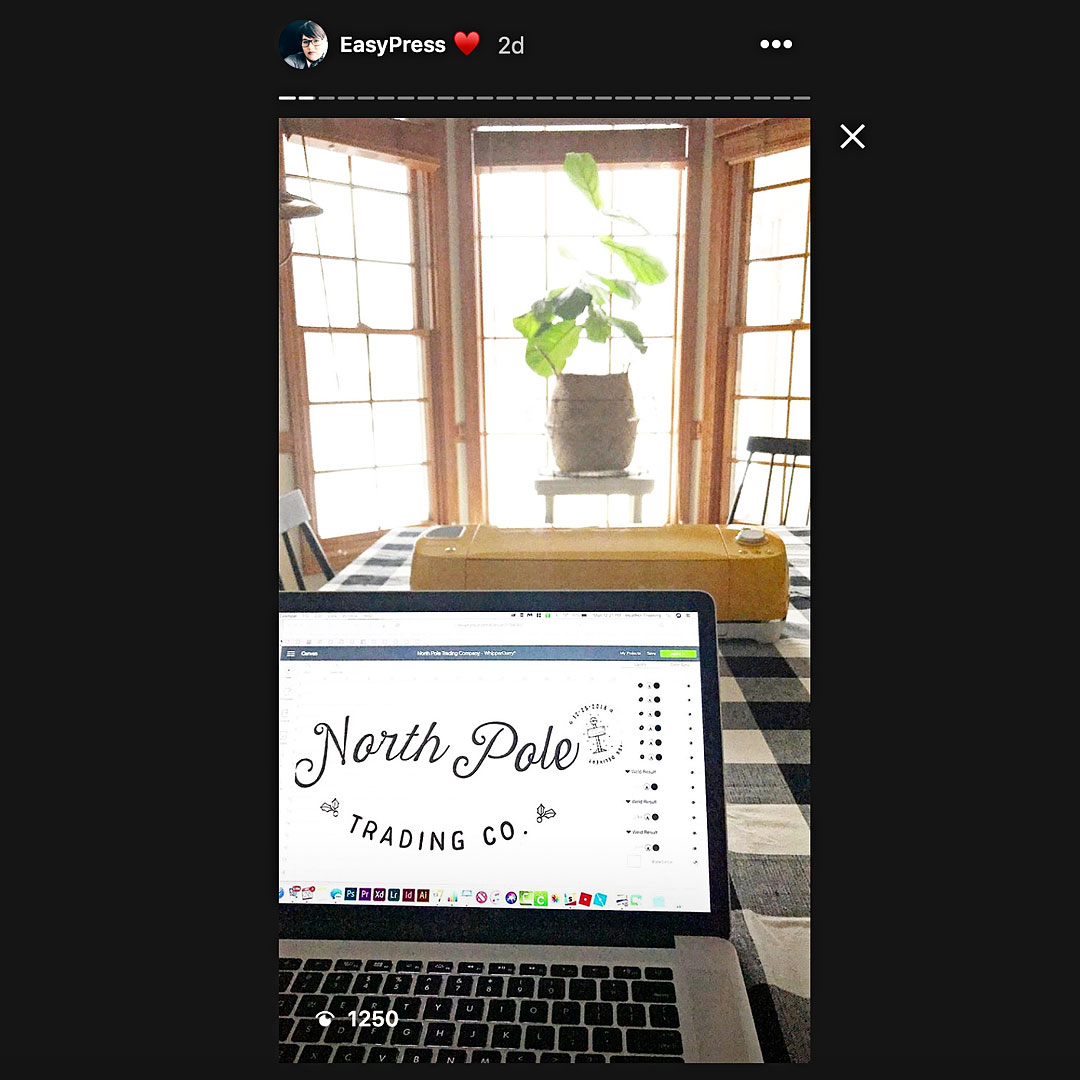
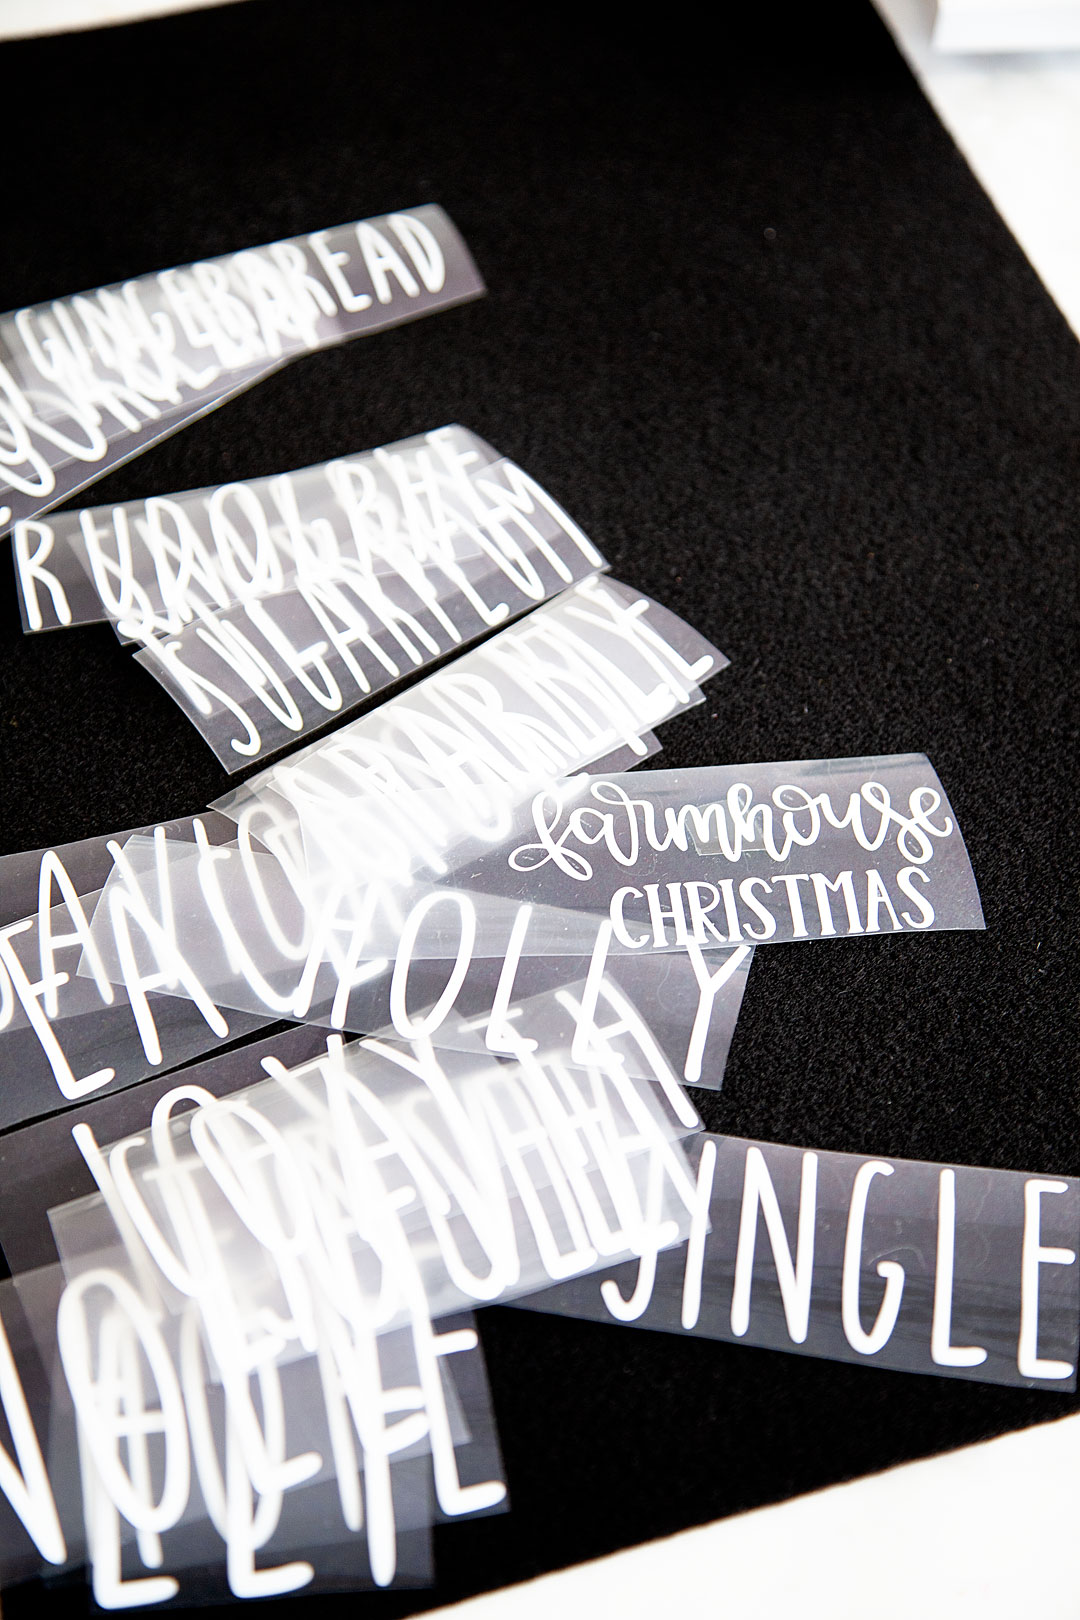
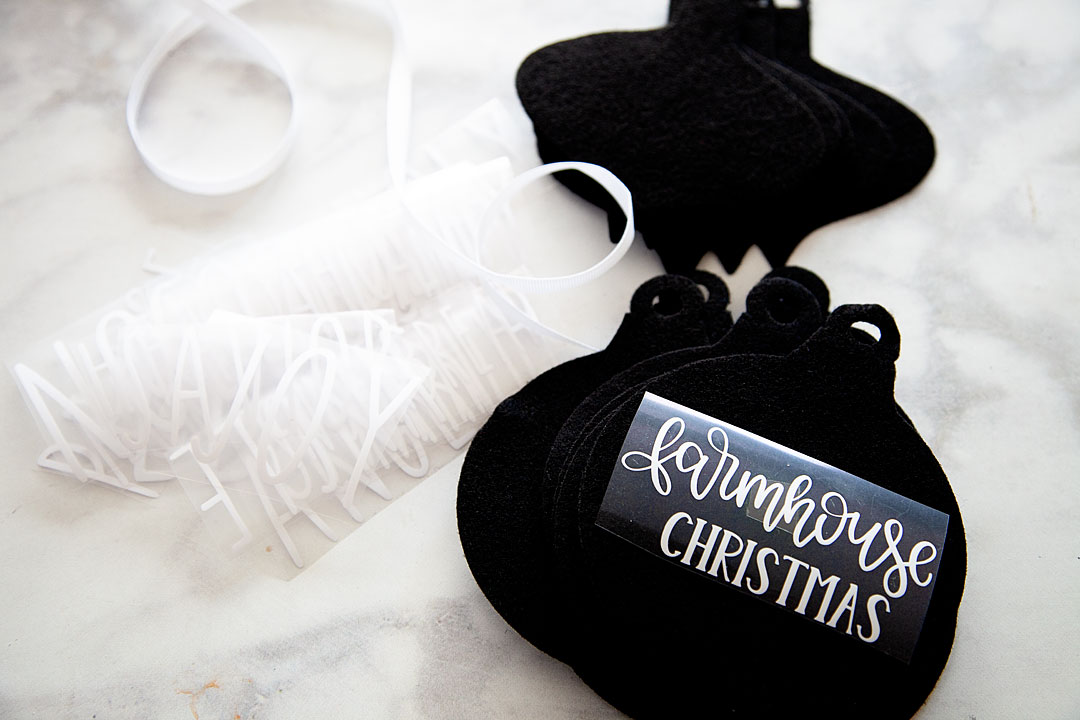
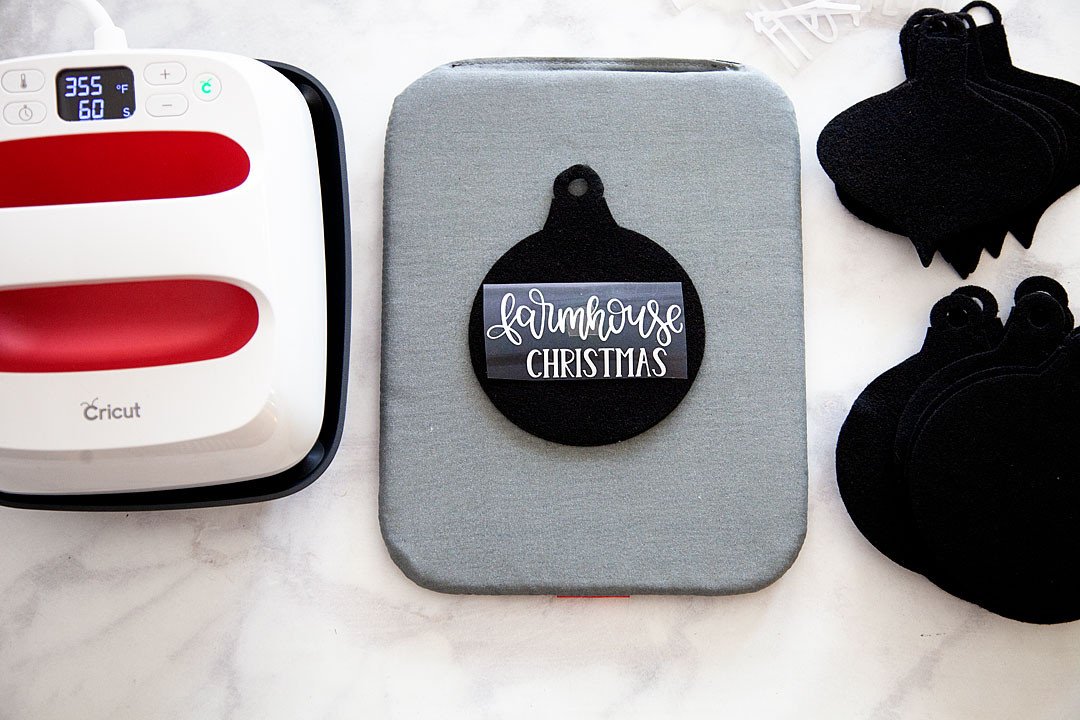
I do my best to create all of my designs within Cricut Design Space but, this one I had to design on my own in Illustrator. However, I’m sharing the SVG file for you guys to use on your own cart. Click on the image below to download the SVG file or click HERE to access it in Design Space.create a beautiful canvas Christmas Tree Cart with @cricut • WhipperBerry

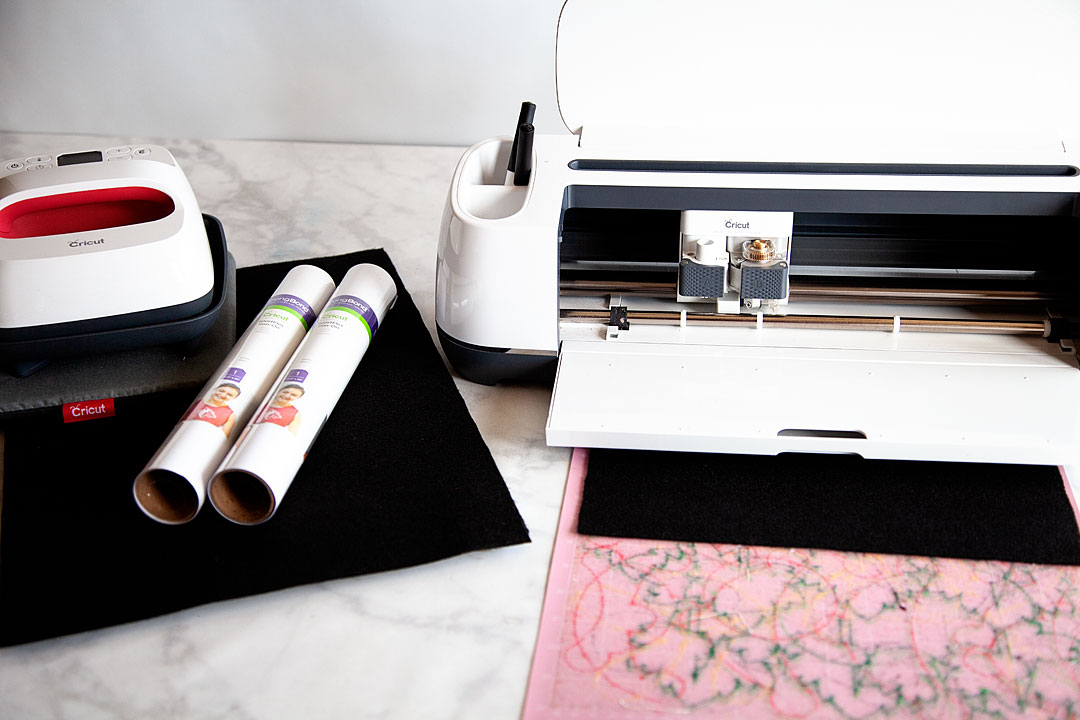
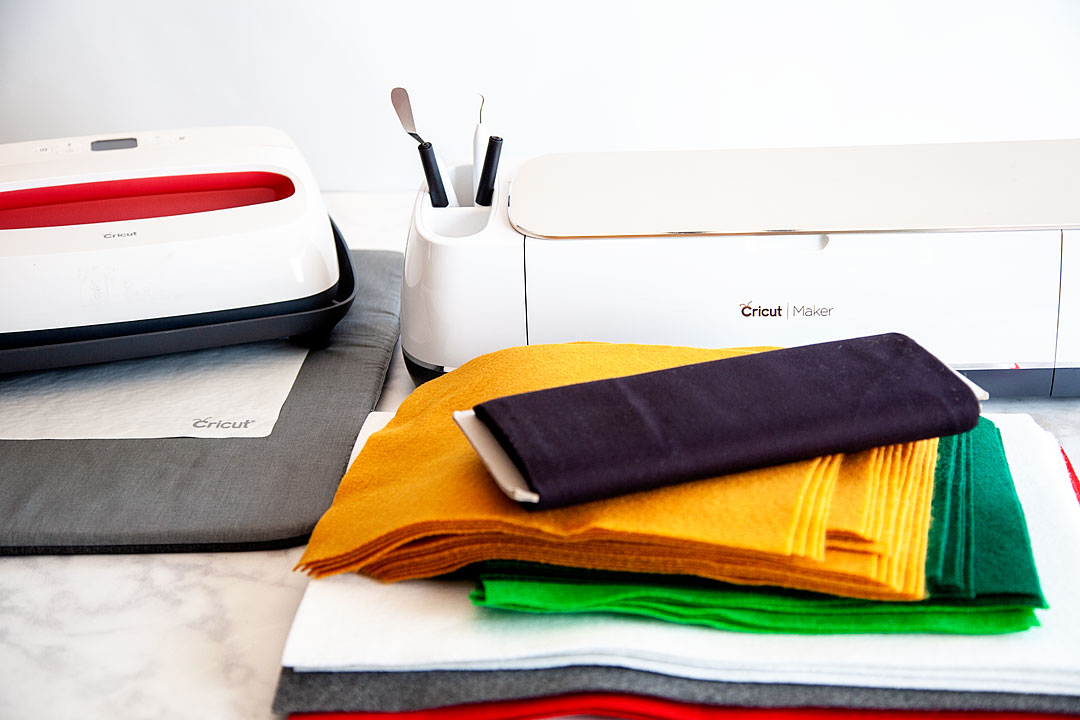
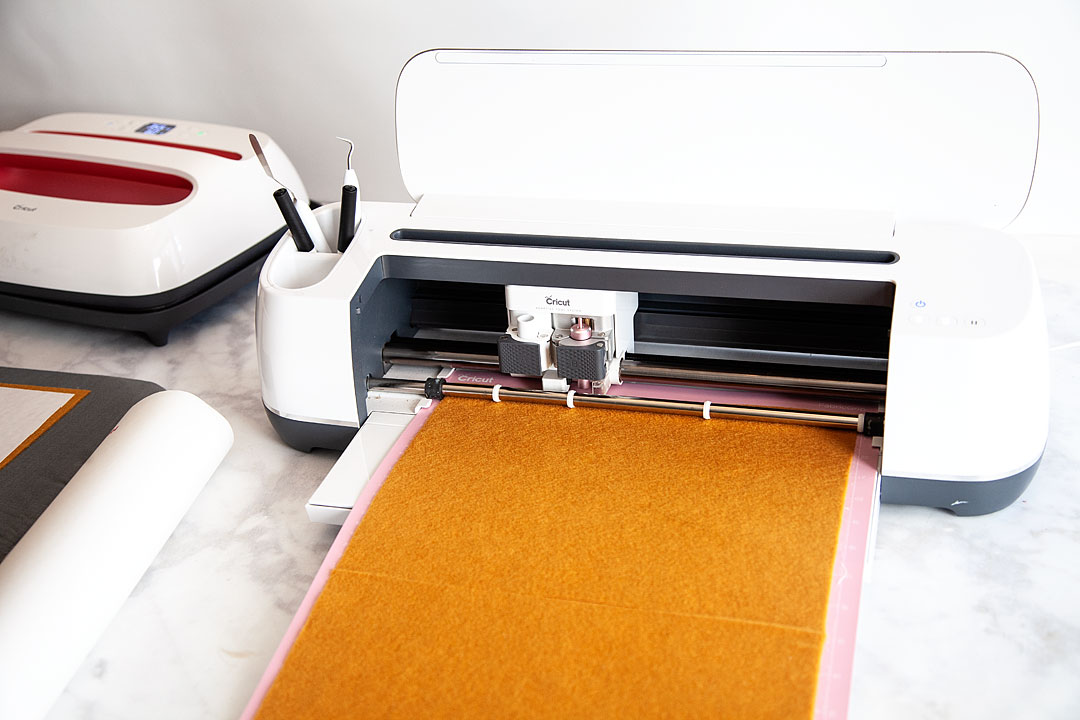
Canvas Christmas Tree Cart Supplies

create a beautiful canvas Christmas Tree Cart with @cricut • WhipperBerry

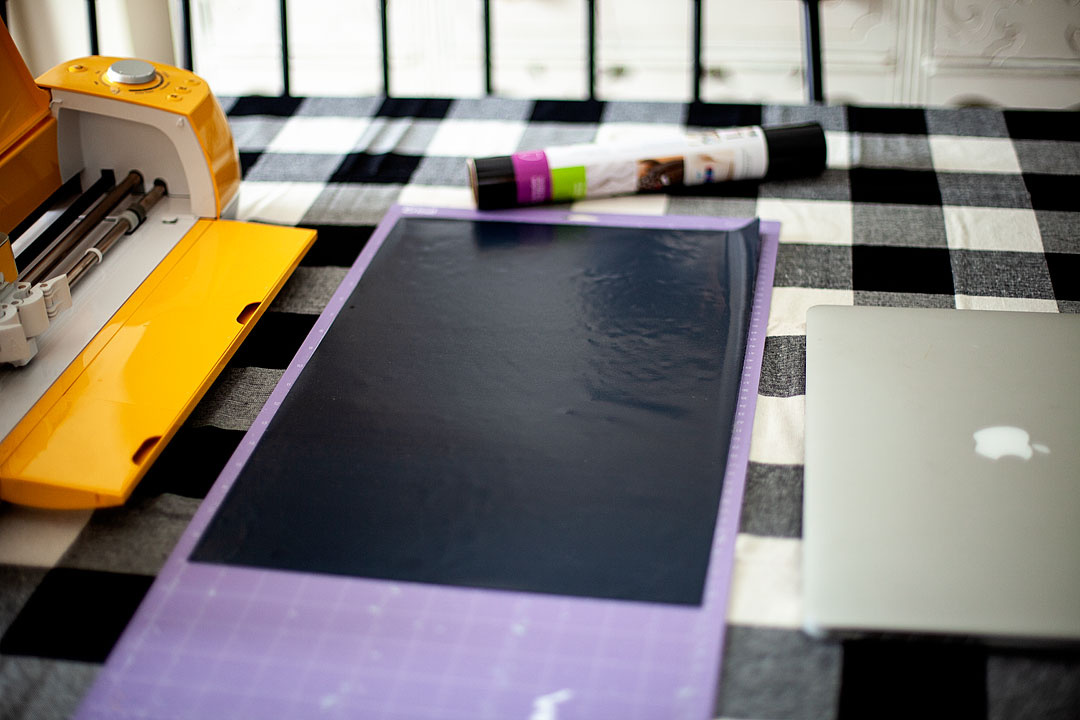
Now, when you are cutting Iron-On material like Cricut Iron-On Lite or my new favorite Everyday Iron-On you can use any of the Cricut cutting machines; the Explore Air, Explore Air 2 or the Maker. Any of these fabulous machines cut iron material just fine. BUT… if you want the Sunflower Explore Air 2 you need to grab it at Michaels AND they are on a crazy awesome sale this week for Cyber Monday!

The new Sunflower @Cricut Explore Air 2 from @michaelsstores • WhipperBerry

Here’s what else you will need…


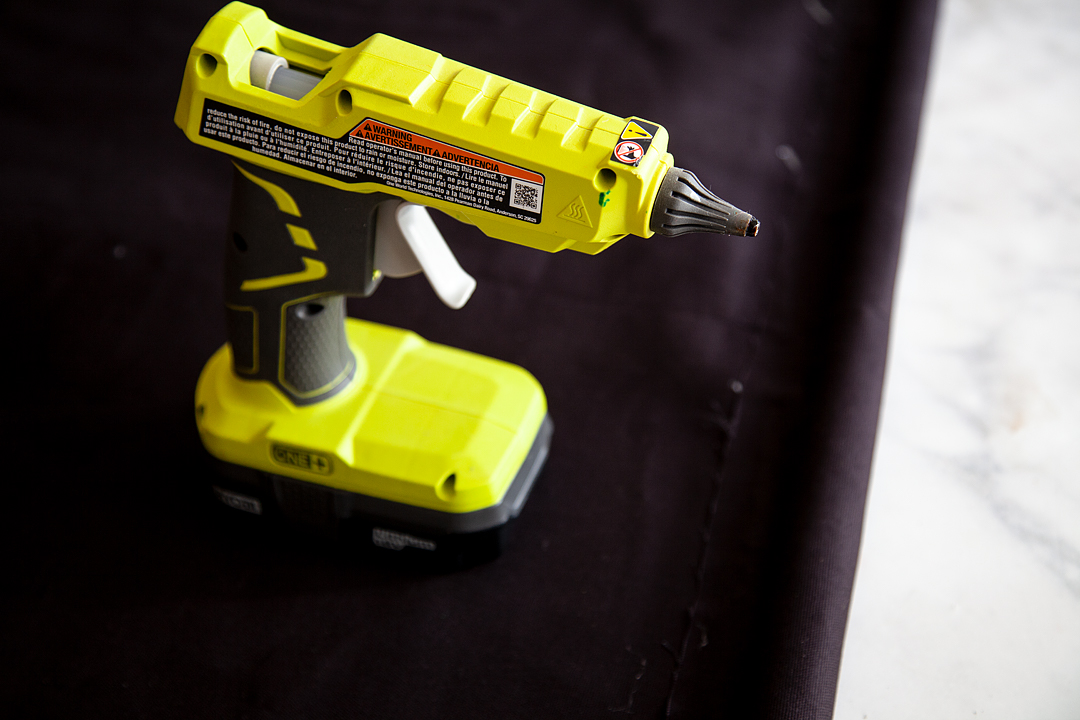
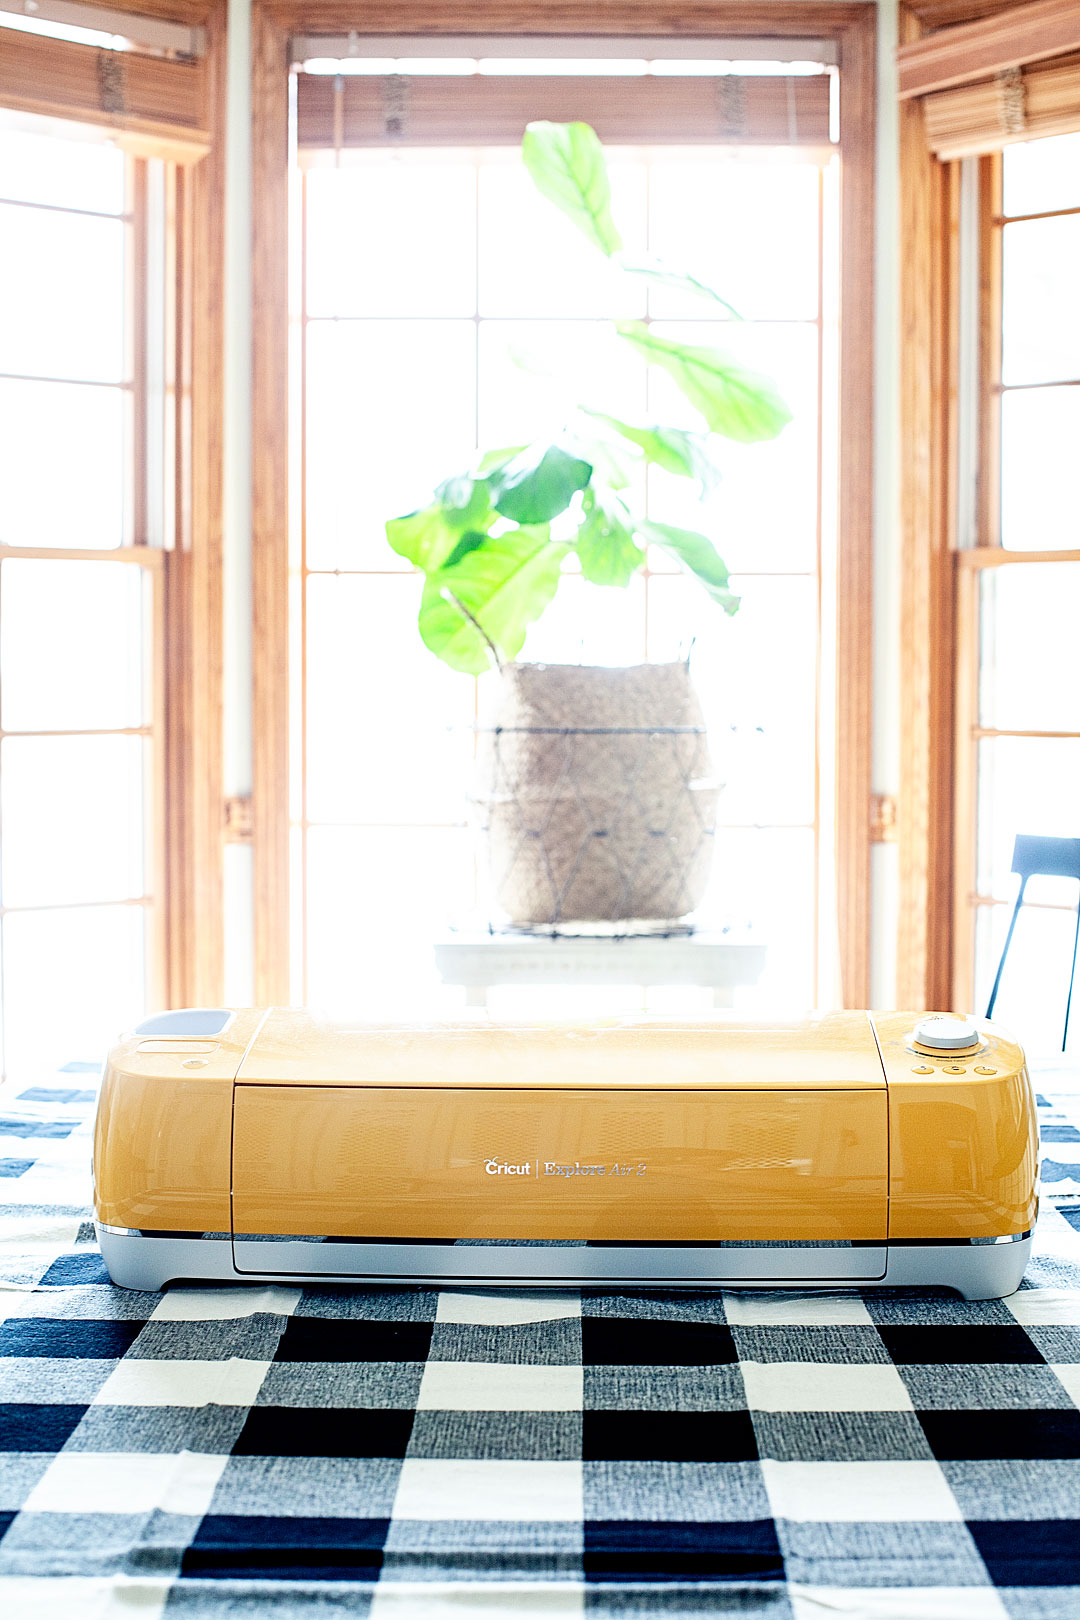
  • Cricut Machine • the Sunflower one will make you HAPPY
  • Cricut Everyday Iron-On OR Iron-on Lite  • black
  • 12×24 cutting mat • green or purple
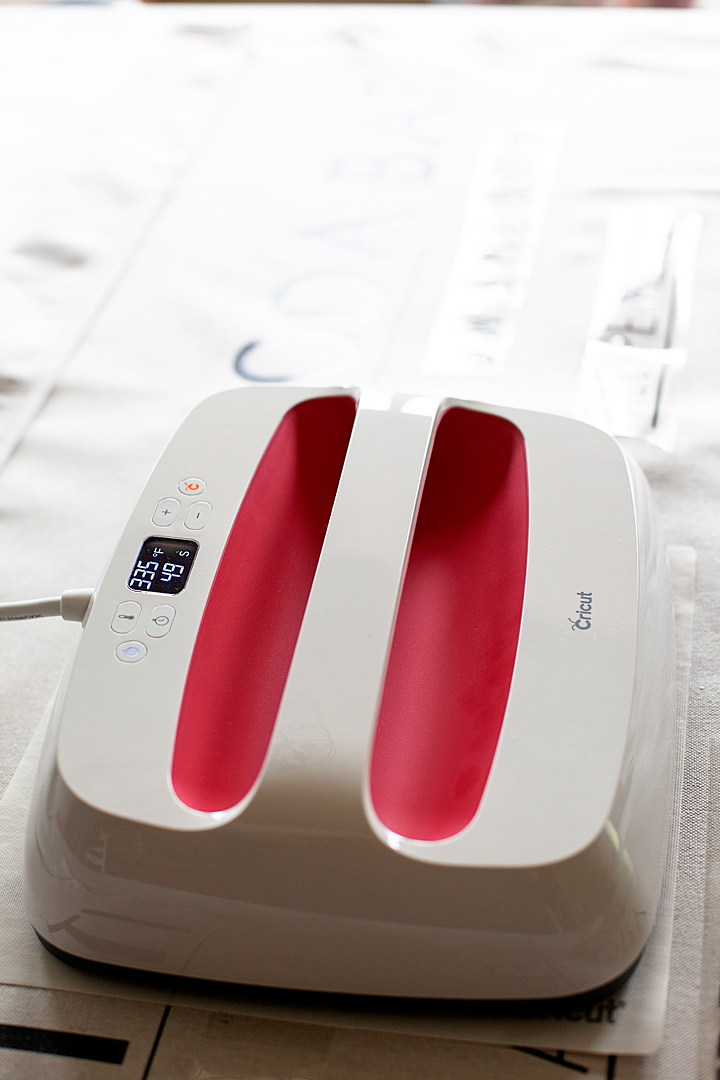
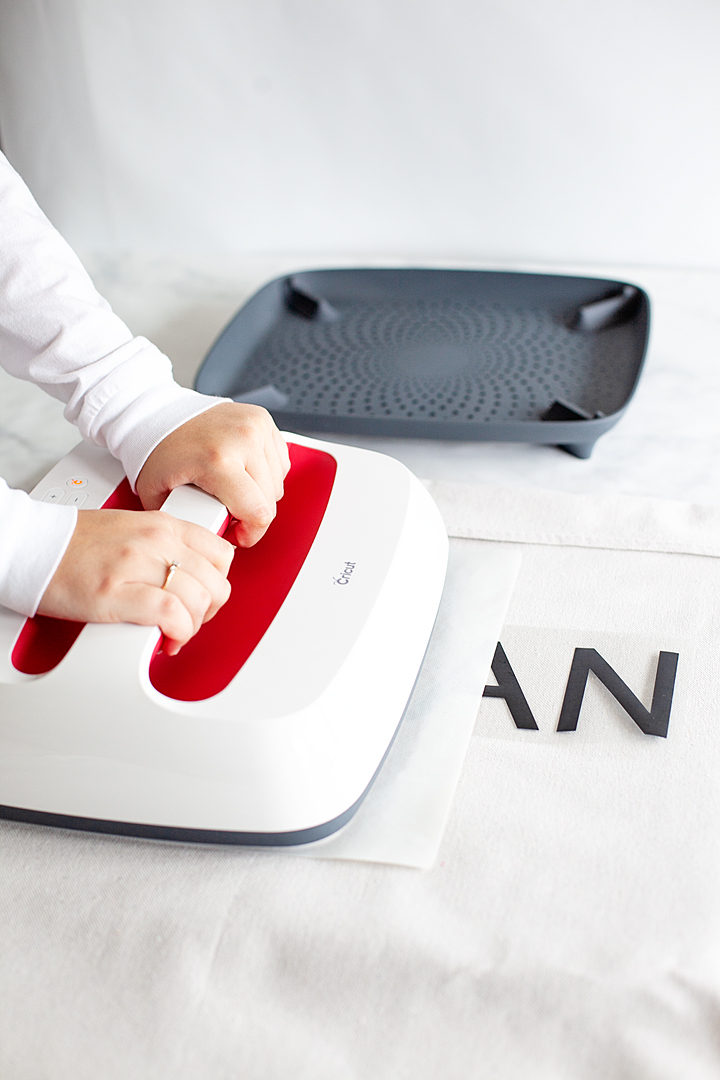
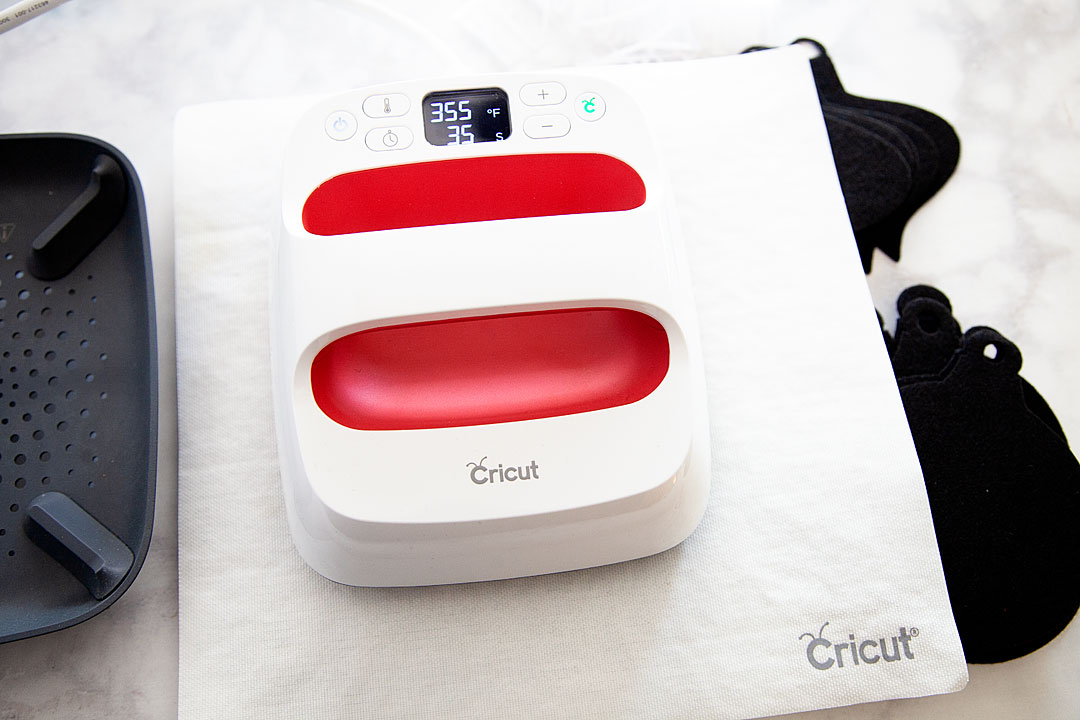
  • Cricut Easy Press 2 • small
  • Canvas Cart
  • North Pole Design in Design Space

Instructions

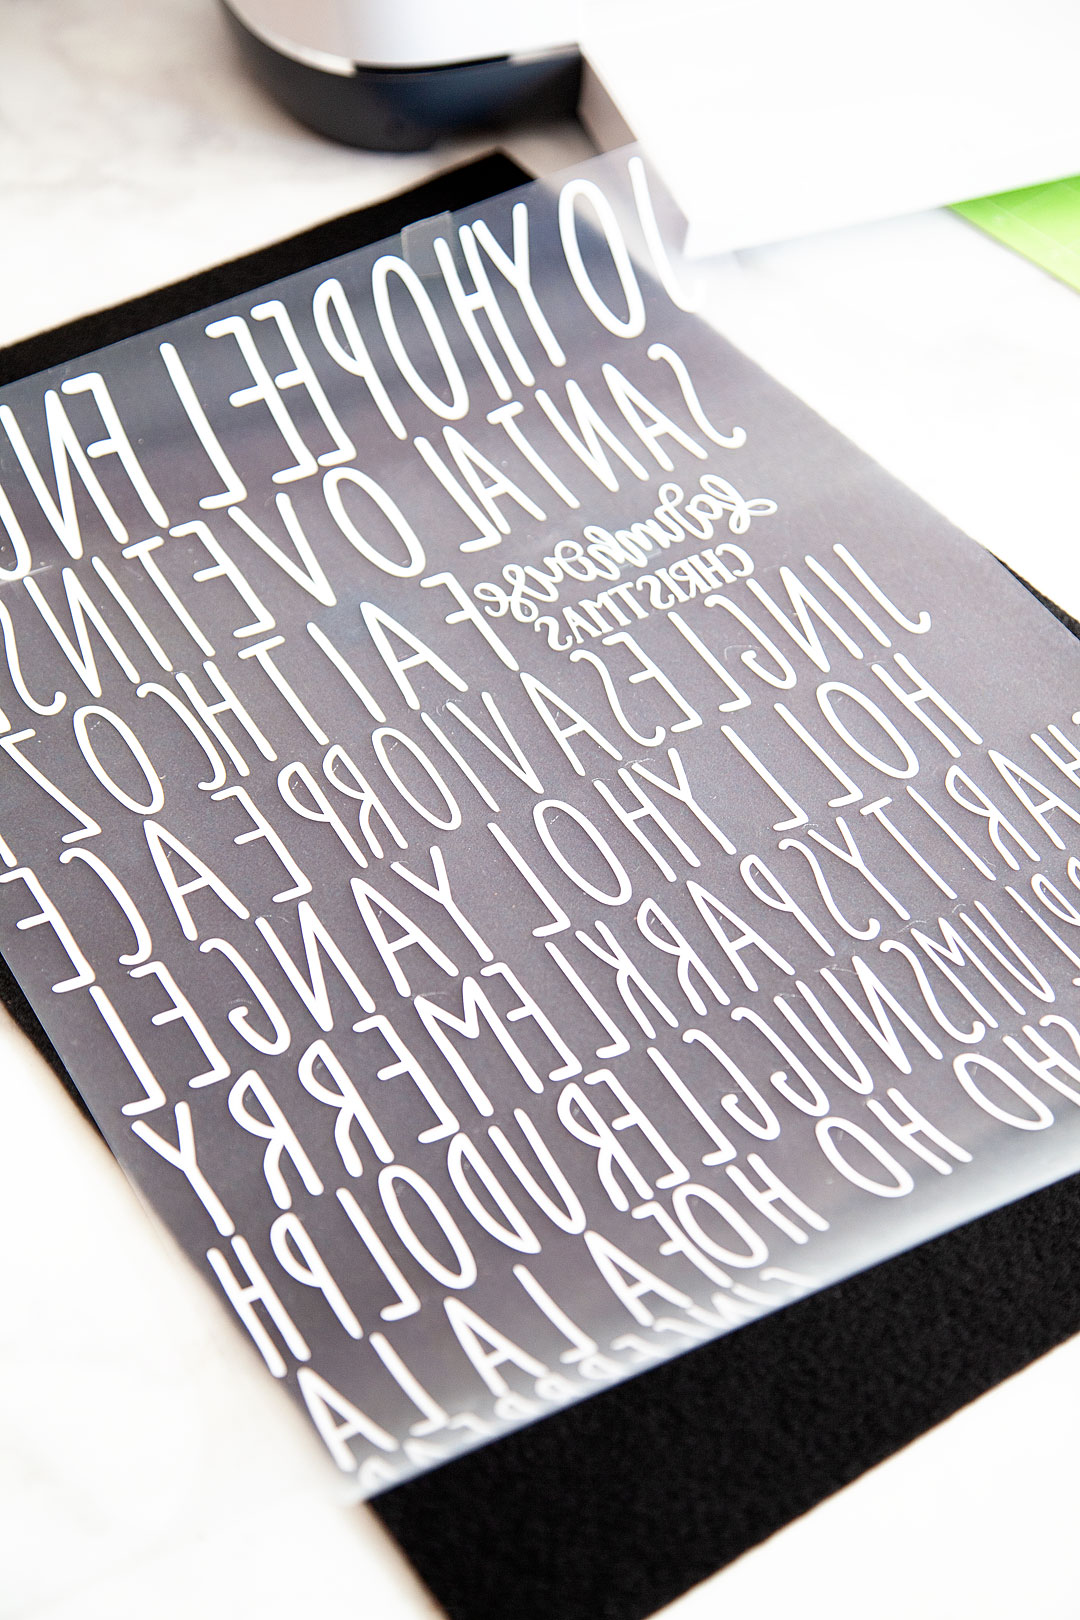
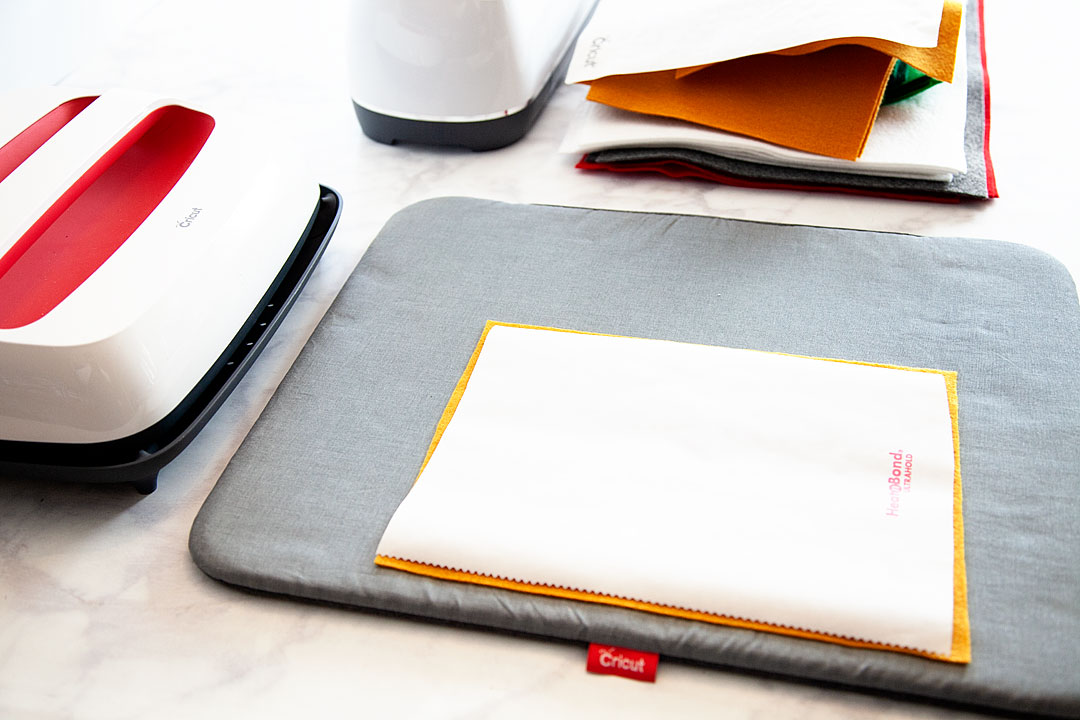
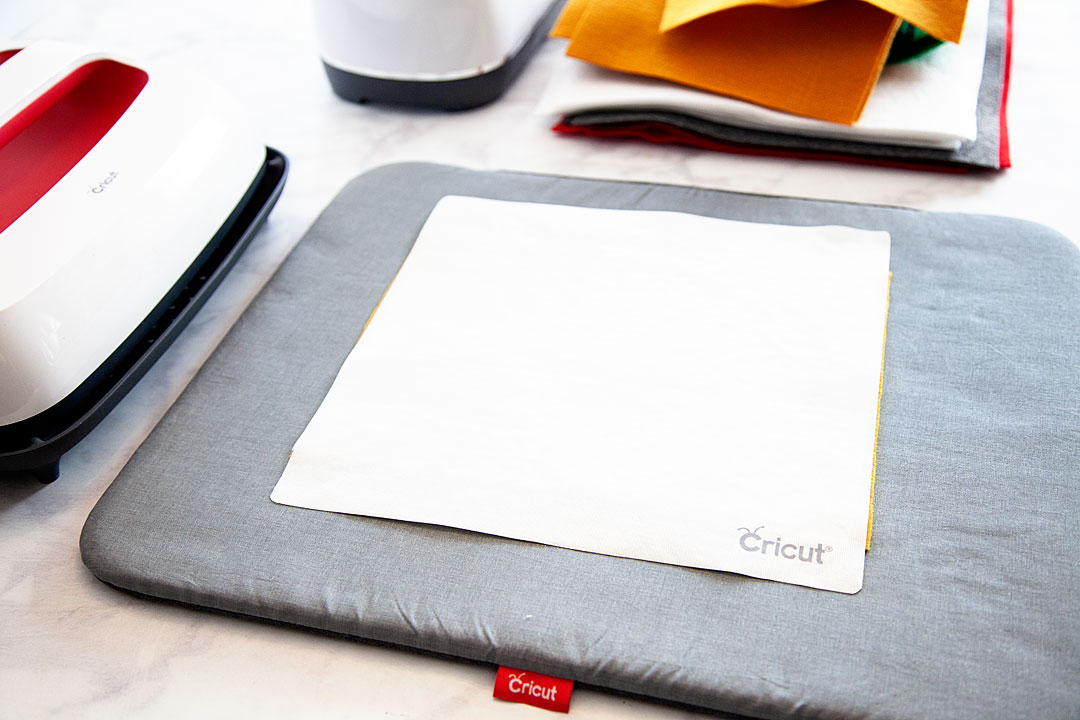
  1. You’ll need to cut the design in Design Space which is sized for a large canvas cart right now. However, you can resize as needed. I’m sharing several tips and tricks in my STORY that help with all kinds of things for this project. Go check it out before you start anything. DO NOT FORGET TO MIRROR YOU DESIGN BEFORE YOU CUT! Also, remember the shining side of the iron-on material goes face-down on your cutting mat.
  2. In my Instagram Story, I share how to get all of your design onto ONE cutting mat, therefore, saving MONEY by not wasting iron-on material. I also talk about using more than one piece of iron-on for this LARGE design. 
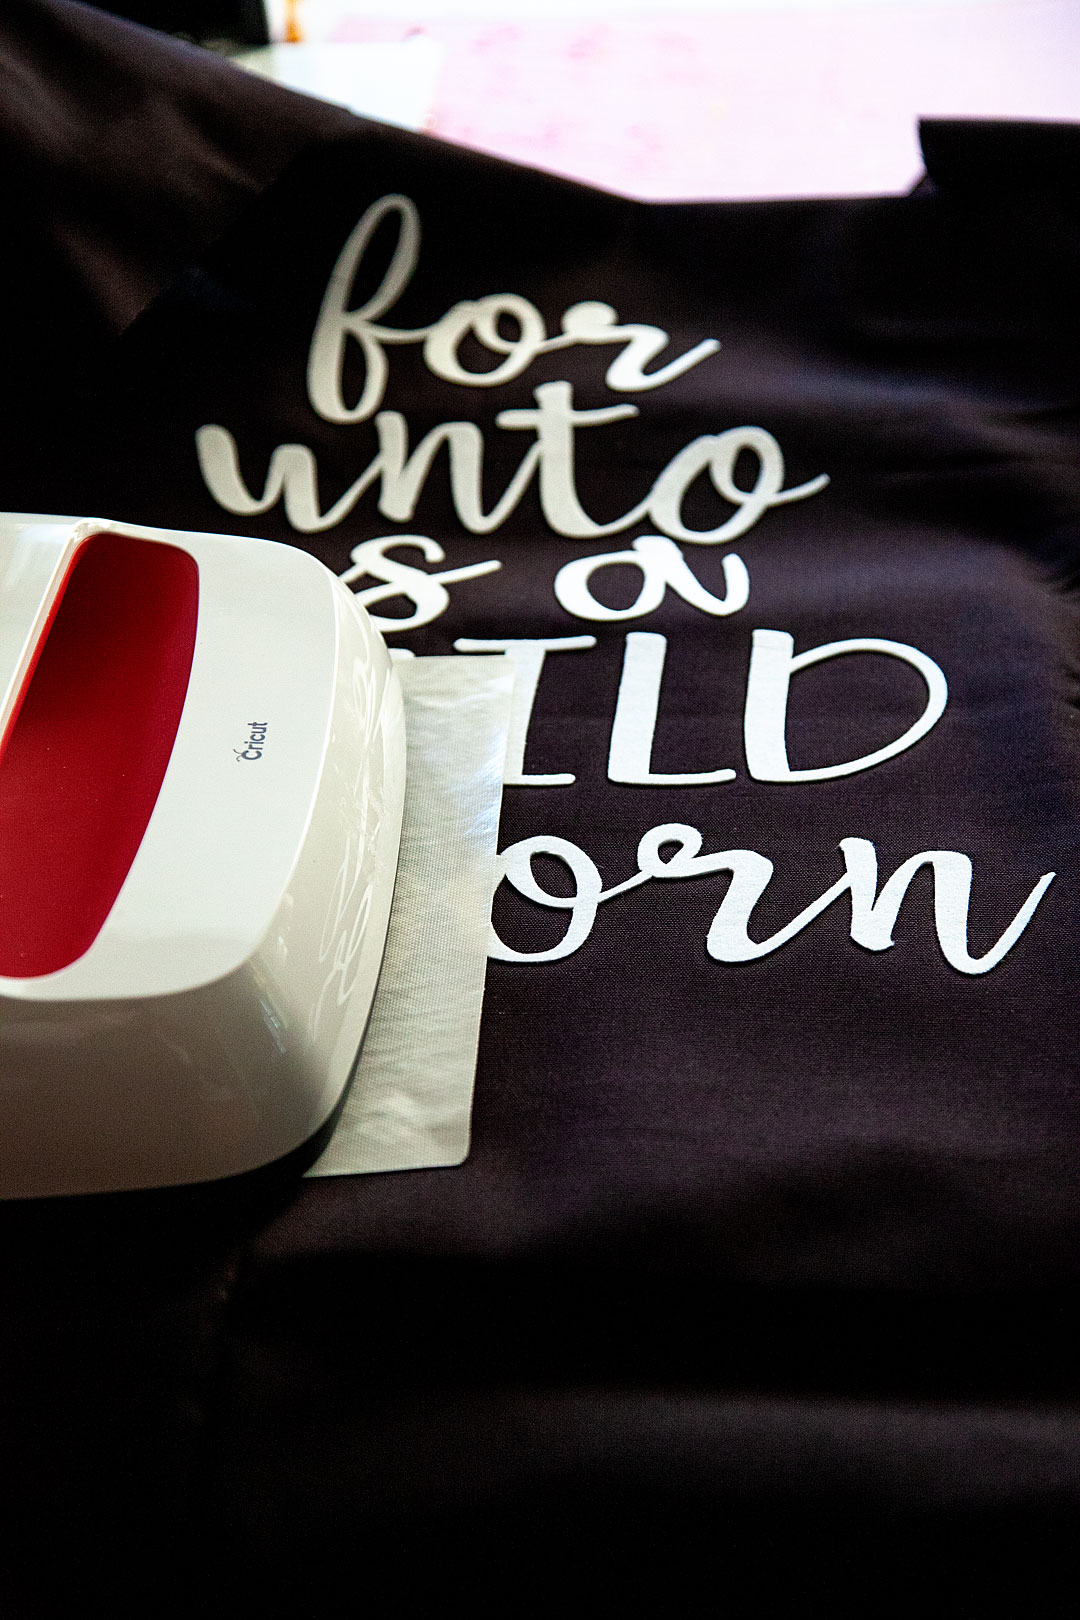
  3. Weed your design and grab your Easy Press 2 (small) and get ready to iron on your design onto your cart. I recommend starting by centering the  Trading Co. part first and pressing it onto your cart. If you are smart, you will do with before you load your tree into the cart and lay the cart on its side. It’s totally do-able pressing your iron-on vertical, it’s just a good arm workout. 😉 Again, watch my story to get all of the tips and tricks for this process. 
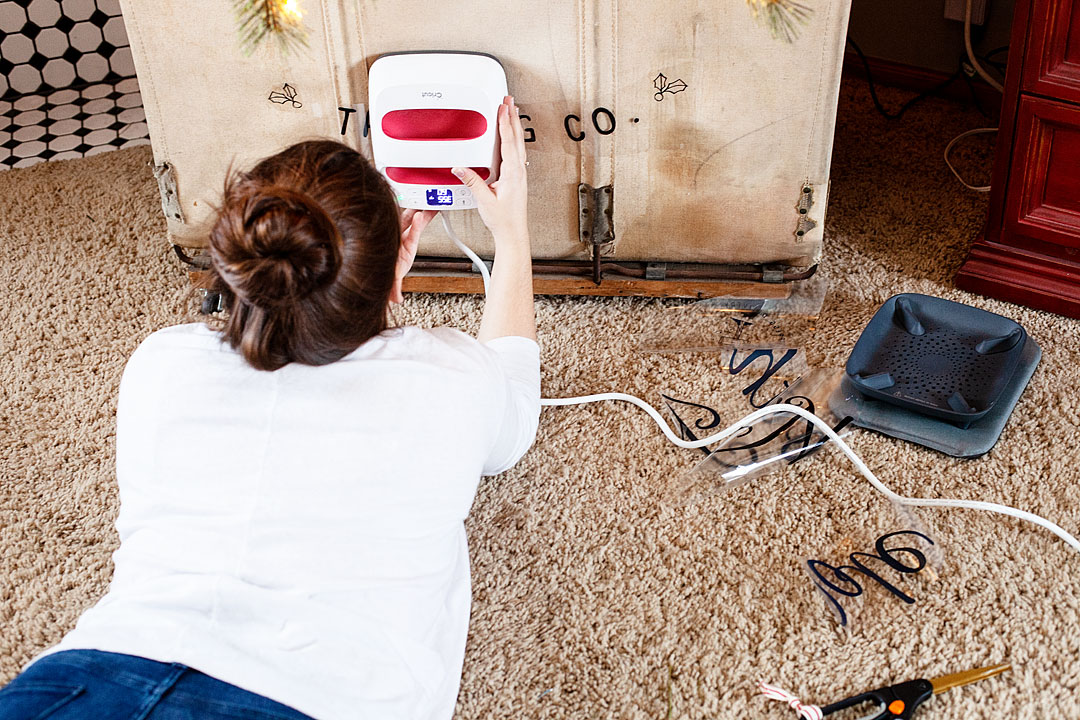
  4. Set your Easy Press to 375˚ and start pressing your design onto the cart. It helps to use the Cricut spatula tool to press the Cricut Iron-On lite or Everyday Iron-on onto the canvas surface. Not having a hard work surface, you do have to baby this project a little bit. Work in sections until the whole design is complete.

create a beautiful canvas Christmas Tree Cart with @cricut • WhipperBerry


DIY Farmhouse Felt Christmas Ornaments

56 · Nov 14, 2018 · Leave a Comment

I am going to label this season at WhipperBerry the felt season. I LOVE all things felt and I love being able to cut and customize my felt designs using my Cricut Maker & my cute little Cricut EasyPress 2. I have been wanting to create a farmhouse style tree that is all black & white so I thought some simple and elegant felt ornaments are a perfect addition to the tree. Farmhouse felt Christmas ornaments are sure to be a classic staple for years to come as you decorate for the holidays, plus they are super easy to store and won’t break! I love it!! Here’s how you can make a set of your own.

+ This post is sponsored by my favorite folks at Cricut +Farmhouse felt Christmas ornaments are sure to be a classic staple for years to come as you decorate for the holidays, plus they are super easy to store and won't break! I love it!! Here's how you can make a set of your own.

What I love about these ornaments is that you can tell your Christmas story right on your tree with these simple word ornaments. If you love Santa and would like to have a tree dedicated to words that evoke fond memories of all things Santa, you can create that!

Farmhouse felt Christmas ornaments are sure to be a classic staple for years to come as you decorate for the holidays, plus they are super easy to store and won't break! I love it!! Here's how you can make a set of your own.

If you would like to tell the story about the birth of our Savior, Jesus Christ you can do that as well. I know that each family is different but that’s what’s beautiful about these simple ornaments. You create your own story.

Farmhouse felt Christmas ornaments are sure to be a classic staple for years to come as you decorate for the holidays, plus they are super easy to store and won't break! I love it!! Here's how you can make a set of your own.

Not to mention the fact that YOU can select the colors. If you are like me and would like to stick with black & white, great. If you want to have a rainbow tree, awesome! It’s all up to you and I LOVE that. Here, let me show you what you need and how to make these simple but elegant ornaments for your tree.

Farmhouse Felt Christmas Ornaments Supplies

Farmhouse felt Christmas ornaments are sure to be a classic staple for years to come as you decorate for the holidays, plus they are super easy to store and won't break! I love it!! Here's how you can make a set of your own.

  • Cricut Maker with Rotary Blade
  • Cricut EasyPress 2  –  6×7 
  • Cricut EasyPress Mat – small
  • Cricut Protective Mat
  • Cricut Fabric Cutting Mat
  • Cricut Everyday Iron-on – white
  • Felt
  • ribbon
  • scissors
  • hot glue gun
  • hot glue

Instructions

First, what you’ll need to do is to click on this LINK to my project in Cricut Design Space.  My design will let you add your own words and customize it how you would like OR, open Design Space and create some ornament designs of your own.

Farmhouse felt Christmas ornaments are sure to be a classic staple for years to come as you decorate for the holidays, plus they are super easy to store and won't break! I love it!! Here's how you can make a set of your own.

Now, if you are using my design, everything is sized and ready to go for you. If you are creating some ornaments of your own design, double check the sizes and make sure everything is prepped and ready to cut. If you don’t know how to do that you can visit this post that has a full video tutorial on how to prep your design for cutting in design space.

Once you are ready to cut, all you need to do is load your felt onto your Fabric cutting mat and follow the directions on the Design Space screen.

Now for cutting the felt, I have been more successful using the rotary blade than the deep cut blade so, you’ll have to manually change that when you’re ready to cut.

How to change the cutting tool in Cricut Design Space • Cricut 101 with WhipperBerry

Here are a couple of VERY IMPORTANT RULES…

  • When cutting felt on the Fabric Cutting Mat, DON’T worry about the fuzz that is left behind. I have been cutting all kinds of felt on just one cutting mat with fuzz and all and it’s not a problem. The more you play around with the cutting mat and try to scrape or wash that felt fuzz off, the more you are damaging your mat. Just keep going and ignore the fuzz. Of course, test to make sure that your felt is secure on the mat. It will after quite a few cuts become difficult to use and at that point, it’s a better idea to dispose of that mat and start using another one.
  • DON’T FORGET TO MIRROR YOUR IMAGES! I’ve done it more than I would like to admit which drives me CRAZY! When you are cutting your designs when using the iron-on vinyl, make sure to mirror your images. Remember, the design is cut on the back side of the Everyday Iron-On. You will flip it over and iron on your design onto the surface of your project.

Farmhouse felt Christmas ornaments are sure to be a classic staple for years to come as you decorate for the holidays, plus they are super easy to store and won't break! I love it!! Here's how you can make a set of your own.

It looks like a crazy bunch of backward letters but, flip it over and cut out your words and it looks just fine.

Farmhouse felt Christmas ornaments are sure to be a classic staple for years to come as you decorate for the holidays, plus they are super easy to store and won't break! I love it!! Here's how you can make a set of your own.

Now that your words are all cut along with your felt ornaments now, it’s time to press the EveryDay Iron-on onto the felt.

Farmhouse felt Christmas ornaments are sure to be a classic staple for years to come as you decorate for the holidays, plus they are super easy to store and won't break! I love it!! Here's how you can make a set of your own.

HANDS-DOWN the best tool to press any type of iron-on material is any of the Cricut EasyPress tools. I love these gems and don’t know what I would do without them in my crafting arsenal. The EasyPress and the EasyPress 2 machines are far superior to a regular iron. If you love to create anything with an iron-on element you need to invest in one or more of these great machines. The heat plate holds a consistent temperature all throughout the plate. With irons, you will have hot and cool spots. Also, the EasyPress 2 heats up super quick! I LOVE all three of the EasyPress 2 sizes. For this project, I’m using the small 6×7 size. CUTEST LITTLE EASYPRESS EVER!!

Farmhouse felt Christmas ornaments are sure to be a classic staple for years to come as you decorate for the holidays, plus they are super easy to store and won't break! I love it!! Here's how you can make a set of your own.

Now, all you need to do is to lay your felt down on your EasyPress Mat, place your words on the felt in the proper place, cover your ornament with the Cricut Protective Mat or a cotton tea towel and press with the small Easypress 2 set to 35o˚ for 60 seconds.

I use the remover tool to save my heat sensitive fingers from the Easy Press Mat and let it cool for about 1 minute.

Then I carefully pull the protective sheet from the top of the Everyday Iron-on material. Always start slow and pull carefully. If you see any lifting, stop and give it another run under the EasyPress 2.

Now, all you need to do is add some ribbon bows if you’d like and some ribbon for the ornament to hang from.


And, that’s it! You have some great non-breakable ornaments for your tree or to use as gift tags or even for a simple gift for neighbors!

Farmhouse felt Christmas ornaments are sure to be a classic staple for years to come as you decorate for the holidays, plus they are super easy to store and won't break! I love it!! Here's how you can make a set of your own.

Farmhouse felt Christmas ornaments are sure to be a classic staple for years to come as you decorate for the holidays, plus they are super easy to store and won't break! I love it!! Here's how you can make a set of your own.

This is a sponsored conversation written by me on behalf of Cricut. The opinions and text are all mine.

How To Make A Large Scale Felt Banner for Christmas

58 · Nov 9, 2018 · 3 Comments

Boy-oh-Boy… I LOVE large scale projects! Sometimes bigger really is better in my book. There are times when you really need to make a statement and a large scale felt banner or large drop cloth sign created to wow your guests or to really make a room POP! I wanted to create a large felt sign for the Christmas season to add to my living room and to also use for a Christmas party that I’m planning this year. Let me show you what I made and how YOU can make one yourself!

• This post is brought to you by the amazing folk at Cricut •

Boy-oh-Boy... I LOVE large scale projects! Sometimes bigger really is better in my book. There are times when you really need to make a statement and a large scale felt banner or large drop cloth sign created to wow your guests or to really make a room POP! I wanted to create a large felt sign for the Christmas season to add to my living room and to also use for a Christmas party that I'm planning this year. Let me show you what I made and how YOU can make one yourself! - WhipperBerry #feltsign #largescalesign #christmassign #christmasdecor #christmasdecoration

Many of you might say that a project of this size is impossible, especially with the Cricut cutting machines. You can really only cut 12 inches by 24 inches, right?  Technically, yes. However, if you have learned to master the Slice & Contour tools in Cricut Design Space, it’s actually very do-able. Especially now, with the Cricut Maker & the new larger Easy Press 2… Projects like this are a DREAM! The Maker can handle all kinds of materials like the most delicate paper and fabric to the tough stuff like matboard, leather, and balsa wood. What I especially love is that you can use it to cut FELT! One of my favorite materials to create with. Now, you can do it on a much LARGER scale with the help of some tips and tricks that will follow.

Boy-oh-Boy... I LOVE large scale projects! Sometimes bigger really is better in my book. There are times when you really need to make a statement and a large scale felt banner or large drop cloth sign created to wow your guests or to really make a room POP! I wanted to create a large felt sign for the Christmas season to add to my living room and to also use for a Christmas party that I'm planning this year. Let me show you what I made and how YOU can make one yourself! - WhipperBerry #feltsign #largescalesign #christmassign #christmasdecor #christmasdecoration

How to Use the Slice and Contour Tools

I have heard a few people who have complained about the lack of freedom in Design Space and I’m here to tell you… That’s not true! You have a ton of freedom when designing in Cricut Design Space if you are good friends with your Slice and Contour tools. These are the two tools that help you customize either your own graphics or graphics from the huge library of designs in the Design Space library. Here is a quick video to show you how I break this large design ( it’s roughly about 4 feet wide and a little over 4 feet tall) into smaller pieces so that they will fit on my 12×24 cutting mat for the Cricut Maker.

Isn’t that cool! I love that with a little knowledge and some imagination, you can truly create something incredible with the Cricut tools.

Supplies for Large-Scale Felt Banner

  • 1 1/2 yards of black canvas fabric
  • 24 – gold felt 9×12
  • 8 – white premium felt 12×18
  • 5 – antique white felt 9×12
  • 3 – red premium felt 12×18
  • 5 – heathered gray premium felt 12×18
  • 3 – dark green felt 9×12
  • 3 – light green felt 9×12
  • 24 – large wood beads of various sizes 1 inch, 1 1/4 inch
  • 10 – black wool felt balls – 2.5cm
  • Cricut Maker with Rotary Blade
  • 1 – Fabric Grip Cricut Cutting Mat
  • Heat n’Bond
  • Cricut Easy Press 2 – 12×10
  • Cricut Easy Press Mat-20×16
  • Cricut Iron-On Protective Sheet
  • hot glue gun
  • hot glue sticks
  • 2 – 4 ft. wood dowels
  • cotton rope
  • measuring tape

Instructions

  1. You will want to set-up your Easy Press 2 and the Easy Press Mat and iron-on the Heat n’Bond on one side of each of the felt pieces. I LOVE the Easy Press 2 for this!! Seriously way easier than using a small iron and the consistency of the heat plate make this a breeze.
  2. Jump into Cricut Design Space via this LINK HERE to get access to my design file. I have this project all ready to go for you. It’s sized to create a LARGE 3 1/2 x 4 foot banner. The design is already sliced and contoured so that you don’t have to worry about that step. All you need to do is follow the on-screen prompts and load the mat with the color of felt that it corresponds with and you’ll be good to go. 
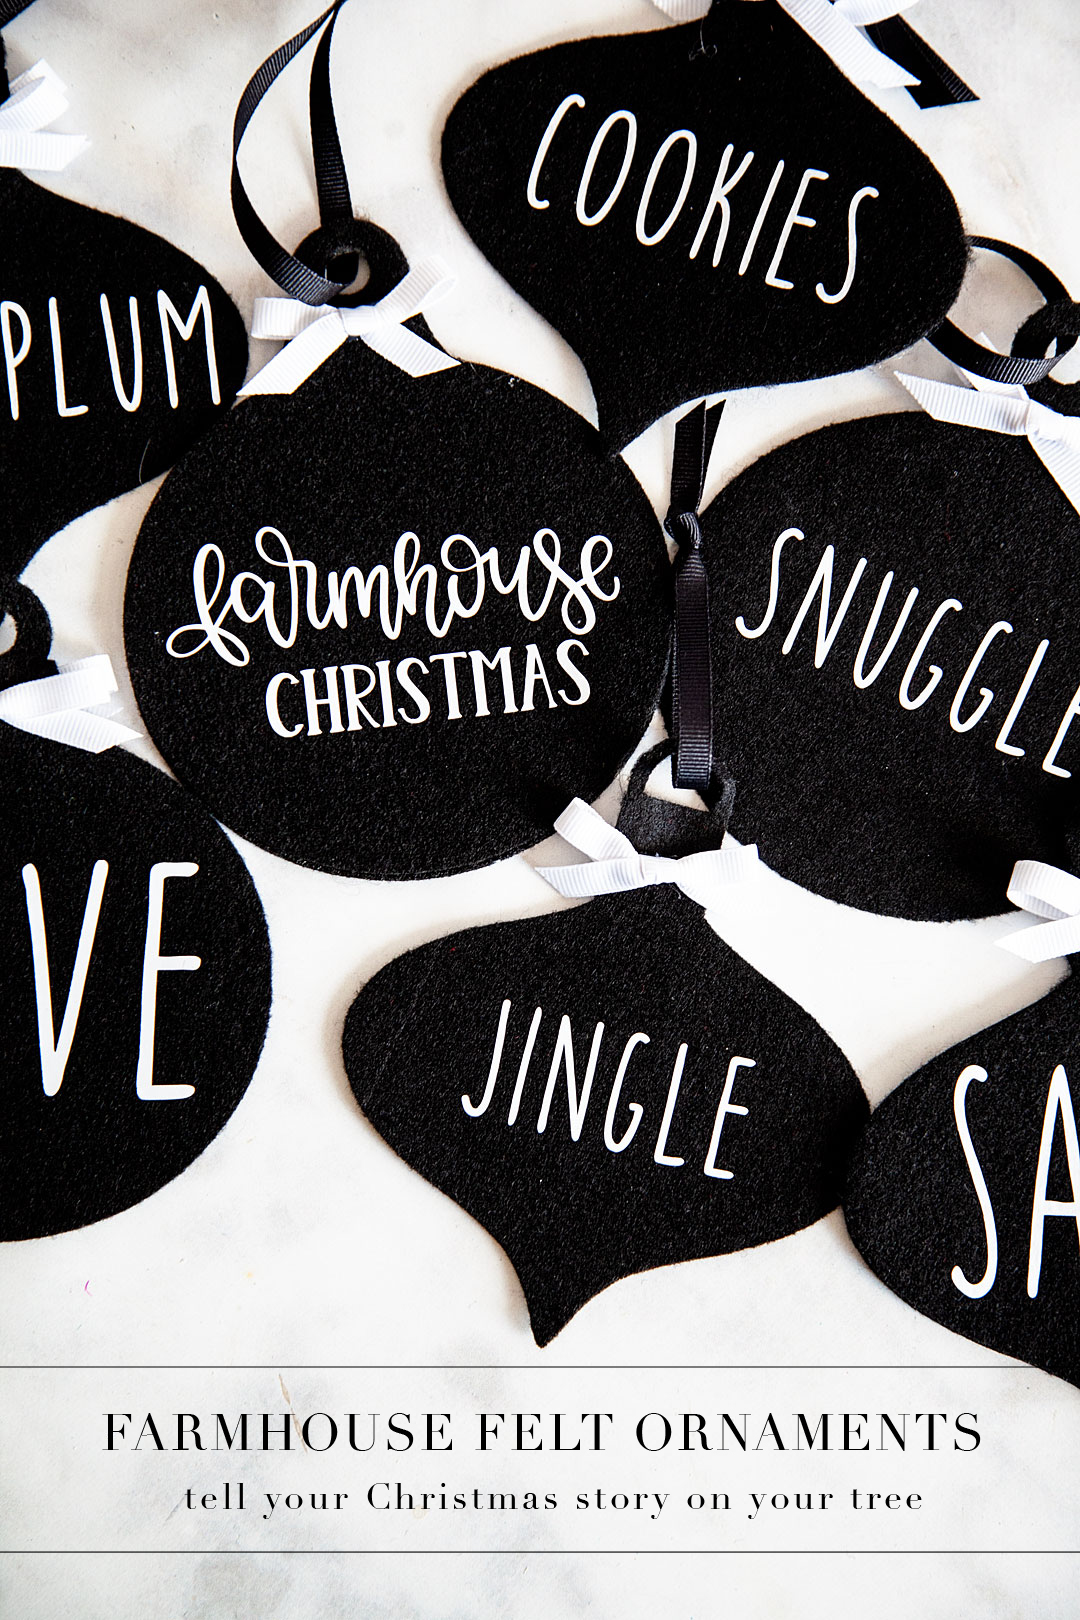
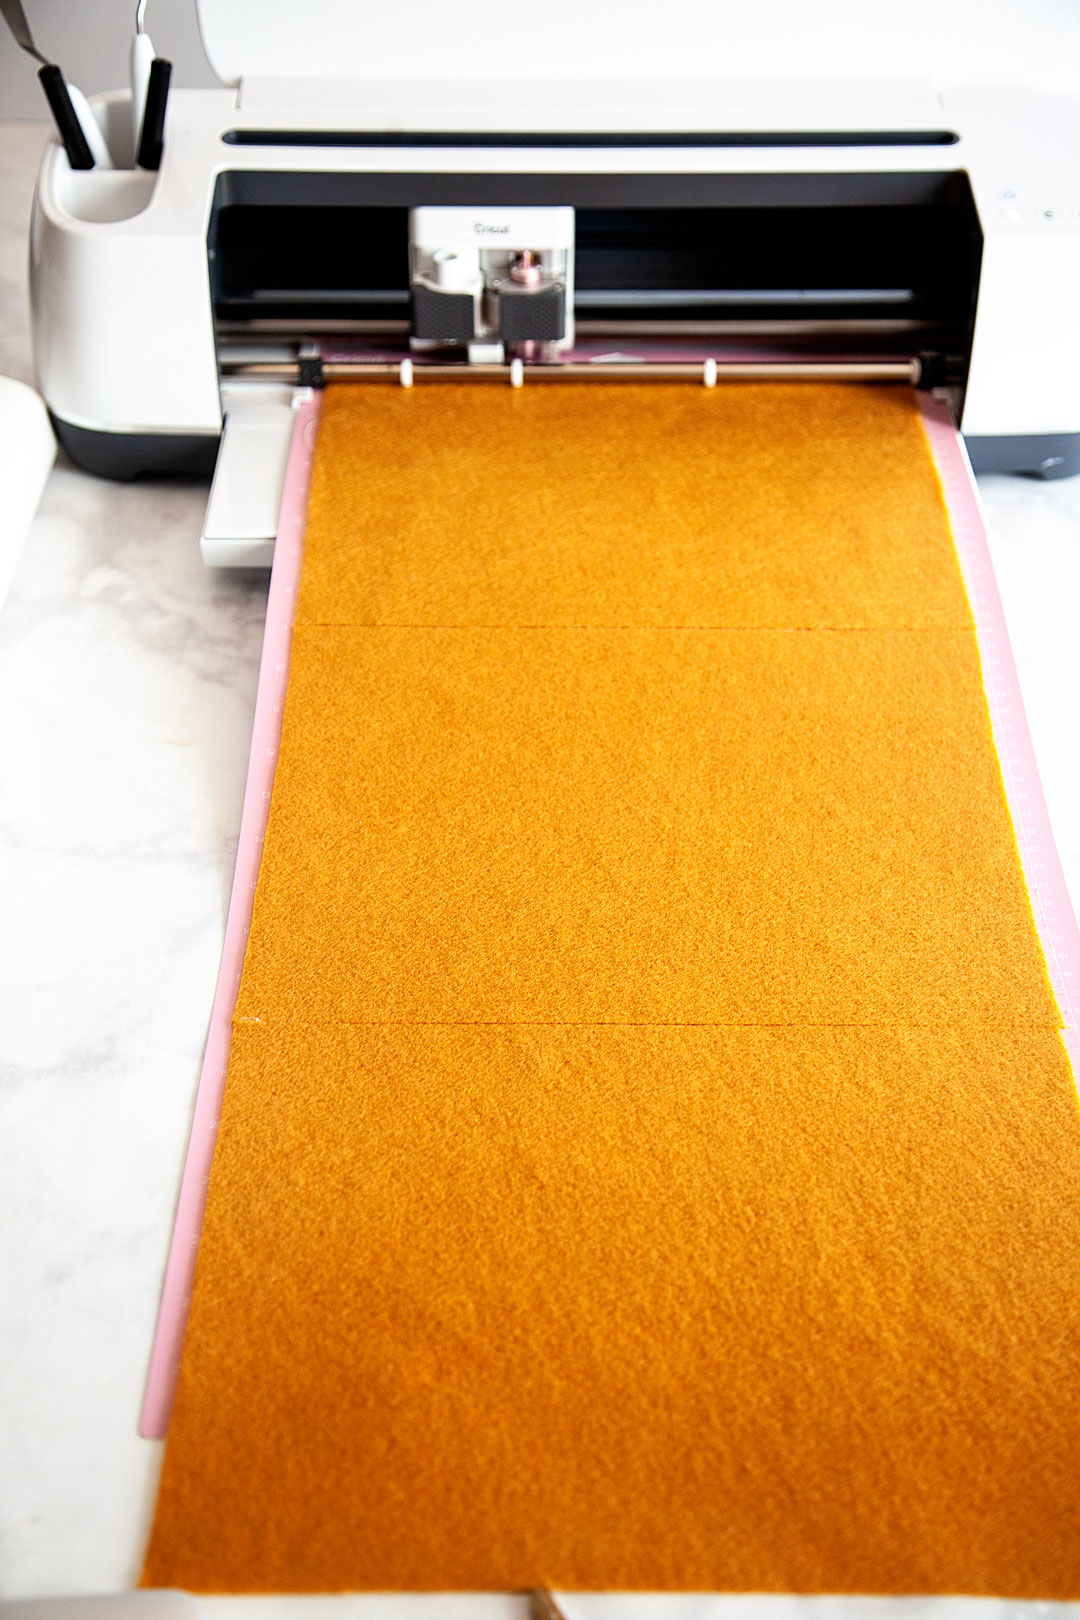
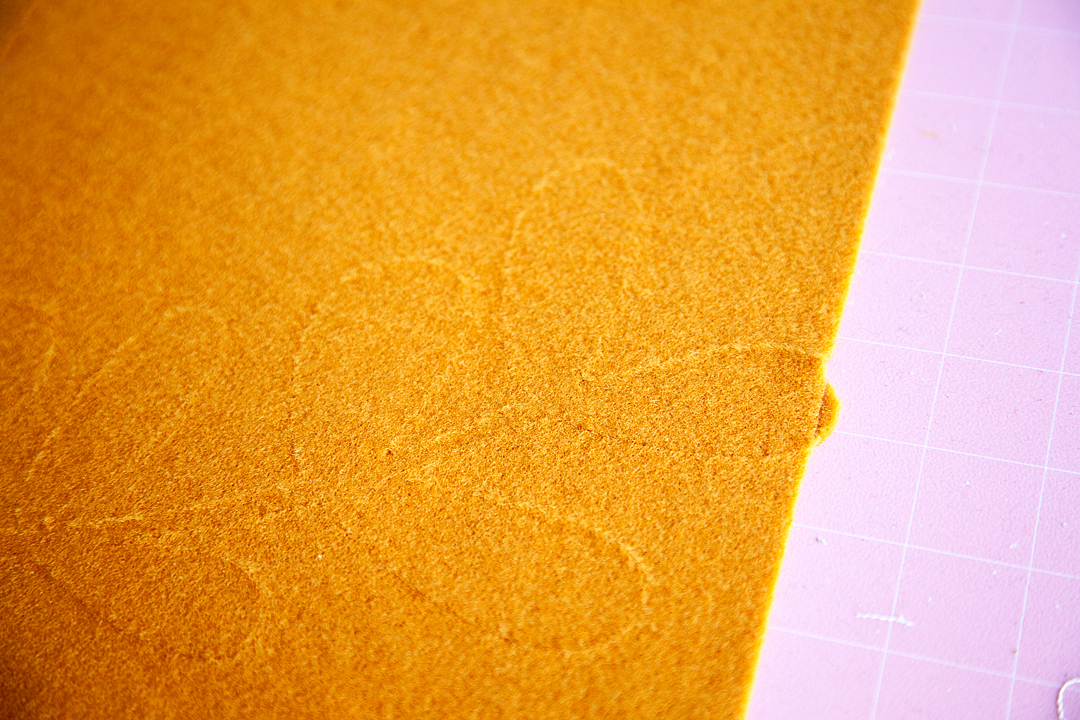
NOW, the felt that I had was smaller than the designs, not to worry though. I placed my felt onto the cutting mat and easily pieced them together while I was pressing them onto the fabric. If you’re careful you won’t even see the seam.
  3. You will find that some of the designs don’t all fit onto one sheet of felt. Don’t worry about that. Just keep all of your pieces organized with where they need to go. Then when you’re ready to iron them on, you’ll do just that with even the little pieces and you’ll never know there was a cut there.
  4. Once everything is cut, press your black canvas. You don’t want to have any wrinkles. I just use my Easy Press 2 for this process. WAY EASIER!
  5. Now, I have you cutting 2 sets of the gold wreath section of the banner. That’s not a mistake, I wanted the wreath section to pop out so that it’s 3D rather than a flat design.
  6. Lay out your wreath & quote on the black canvas and make sure that it is placed in the center and spaced according to the photo below. This is when you will want to make sure you have kept any small pieces and have placed them in the right spot.Boy-oh-Boy... I LOVE large scale projects! Sometimes bigger really is better in my book. There are times when you really need to make a statement and a large scale felt banner or large drop cloth sign created to wow your guests or to really make a room POP! I wanted to create a large felt sign for the Christmas season to add to my living room and to also use for a Christmas party that I'm planning this year. Let me show you what I made and how YOU can make one yourself! - WhipperBerry #feltsign #largescalesign #christmassign #christmasdecor #christmasdecoration
  7. Once you have placed the design the way you would like it. Place the Easy Press Mat under the first section and set your Easy Press 2 to 350˚. Lay the Iron-On Protective Mat on top of the first felt section and then lightly press the Easy Press 2 for 60 seconds on that first section.
  8. Continue over the entire design until it is all ironed onto the canvas.Boy-oh-Boy... I LOVE large scale projects! Sometimes bigger really is better in my book. There are times when you really need to make a statement and a large scale felt banner or large drop cloth sign created to wow your guests or to really make a room POP! I wanted to create a large felt sign for the Christmas season to add to my living room and to also use for a Christmas party that I'm planning this year. Let me show you what I made and how YOU can make one yourself! - WhipperBerry #feltsign #largescalesign #christmassign #christmasdecor #christmasdecoration
  9. Next, you assemble the flowers with hot glue. I used a wood bead in the center of each flower because I like the look and it stabilizes the flower a little more. 
  10. Once the flowers are assembled, start laying them out on the canvas until you get the look that you like. Then section by section, hot glue the flowers and leaves onto the banner.
  11. At this point, you have two choices. You can finish off the banner by sewing the pocket for the dowel OR, you can faux sew like me and just hot glue the pocket.  I fold the top of the fabric down about 2 1/2 – 3 inches and then hot glue or sew across the bottom of the fold leaving a pocket to feed the dowel through. 
  12. Repeat the last step at the bottom of the banner as well. This is needed to add some weight at the bottom of the banner. If you don’t have this the banner will hang a little wonky.
  13. Tie the cotton rope onto the top dowel so that you can hang the banner.Boy-oh-Boy... I LOVE large scale projects! Sometimes bigger really is better in my book. There are times when you really need to make a statement and a large scale felt banner or large drop cloth sign created to wow your guests or to really make a room POP! I wanted to create a large felt sign for the Christmas season to add to my living room and to also use for a Christmas party that I'm planning this year. Let me show you what I made and how YOU can make one yourself! - WhipperBerry #feltsign #largescalesign #christmassign #christmasdecor #christmasdecoration

Now, you’re all finished! You have an amazing work of art that you will treasure for years. What other large-scale signs are you wanting to make? I just finished creating all kinds of large-scale projects for my daughter’s wedding and I can’t wait to show you what I created for that amazing event.

This is a sponsored conversation written by me on behalf of Cricut. The opinions and text are all mine.

Italian Soda Bar Menu Created with Cricut EasyPress 2

24 · Aug 15, 2018 · Leave a Comment

You guys, I’m so excited! I’ve been madly working on a fun project this summer… Creating for my oldest daughter’s wedding. Seriously, there is nothing more fun than to create for a wedding. One thing that is needed when creating for a wedding are LARGE scale displays, that’s how to create WOW factor. Anyone can create small scale stuff but, when you have the tools to create something larger than life, that’s when things go from typical to magical! I’ve been creating with my Cricut machines for years and with my inaugural Cricut EasyPress for over a year now but, I’m excited to introduce you to the Large Cricut EasyPress 2… A true makers dream! I’ve used the NEW Large Cricut EasyPress 2 to create a huge canvas sign for Haley’s wedding reception. We are going to have an Italian soda bar and I wanted to create a larger than life menu to place next to the bar. Here she is… Let me show you how to make this large scale canvas sign!

+ This post brought to you by the talented folks at Cricut +

HUGE Canvas Italian Soda Bar Menu Sign create with my favorite Cricut Maker & the NEW Cricut Large Easy Press 2 • WhipperBerry

THE ITALIAN SODA BAR Menu

Early on in our wedding planning, Haley expressed that she would love to have an Italian Soda Bar as one of the elements to the reception. I was totally on board because I LOVE Italian sodas. If you aren’t familiar with an Italian soda, it’s a sparkling water with some added syrup and possibly added creamer or half & half depending on your taste. They are super scrumptious and fun to play around with.

Peach Melba Italian Soda • WhipperBerry
peach melba italian soda • whipperberry

I thought it would be a great idea to create a stylish life-size menu to place next to the soda bar to draw peoples attention to our drink options at the reception. I, of course, turned to my favorite creative tools, my Cricut Maker and the NEW Large Cricut EasyPress 2! I loaded up an arm full of Cricut Everyday Iron-On™in black and set to work.

The Cricut EasyPress 2

What makes the EasyPress so cool? Well… First of all, the original EasyPress is still a total rockstar and will work just perfect for this project as well if you already have one. If you don’t already own an EasyPress, you love the features on the THREE NEW EasyPress 2 machines…

  • Three unique sizes (6×7, 9×9, and 12×10) to suit every project you can dream up
  • Professional iron-on success in 60 seconds or less
  • Easy to learn and simple to use
  • Ceramic-coated heat plate means dry, even heat for flawless transfers
  • Faster heat-up time
  • Precise temperature control up to 400˚ F (The old EasyPress only goes to 350˚)
  • Insulated, streamlined Safety Base keeps EP2 in protected resting position while also protecting the pressing surface
  • Easy to read digital display
  • Scrumptious raspberry color
  • USB port for firmware updates
HUGE Canvas Italian Soda Bar Menu Sign create with my favorite Cricut Maker & the NEW Cricut Large Easy Press 2 • WhipperBerry
the NEW large EasyPress 2

The Design

I created my design in Cricut Design Space…

You can use my exact design by clicking HERE and heading to Cricut Design Space

Then measured the “secret” material that I was going to use. It is 4 feet wide, so I then sized it appropriately within the software so that it would cut at the right size. Because of the size of the design, I knew that I was going to have to piece some things together like the underline in the title but, that wasn’t an issue at all.

Large Canvas Sign Supplies

Large Canvas Sign Supplies • WhipperBerry
  • Cricut cutting machine – I used the Cricut Maker
  • 12×24 light grip cutting mat
  • EasyPress Protective Mat
  • Cricut EasyPress 2 – large with the 10×12 plate
  • Cricut Everyday Iron-On – black, I used 10 rolls for this project
  • EasyPress Mat 12×60
  • canvas drop cloth – I found a 4 ft wide drop cloth at Home Depot for about $9
  • 2 wood dowels
  • 1 1/2 yards cotton rope

That’s right, I used a DROP CLOTH as my canvas for this life-sized menu sign and it turned out great. What I am loving more than anything is the NEW Cricut EasyPress 2, especially for a project of this size.

The NEW @cricut Easy Press 2 with the large 10x12 inch plate. Great for large scale projects • WhipperBerry

This menu sign is as tall as I am! Having the large EasyPress 2 made all of the difference. Not to mention the improved design and heat plate. This new EasyPress is a dream! I’ve longed for days when I could easily and cost-effectively made large-scale projects like this without spending an arm and a leg, I love how Cricut works to understand what makers are looking for and then work their little behinds off to create tools that are inspired by US!

Instructions

Now, this project may seem daunting, it’s really not. It’s your typical sign making but, on a larger scale. You have to click on my Italian Soda Bar sign in Design Space and then size it to the size you would like your sign to be. This is the beauty of design space. We can easily share projects and then customize it for our needs. Then, all you need to do is click the MAKE IT button. Design Space does all of the work when it comes to making sure you don’t waste your precious Everyday Iron-On material by placing your welded groups into sections that utilize the materials the most efficient way.

IMPORTANT | Make sure that BEFORE you cut your vinyl you select the MIRROR button when preparing your cutting mats for final cutting.

Here’s how to make your Italian Soda Bar sign,

  • Cut Everyday Iron-On Material on Cricut Maker or Explore Air 2 machine. DON’T FORGET TO MIRROR YOUR IMAGES.
  • Your sign will be jumbled up a little bit on your cutting mats but, don’t worry. You will cut them into sections after you weed the iron-on and place them on your drop cloth in the right order.
  • Weed material. This means to remove the excess iron-on material around your words to then discard. Make sure to weed carefully so that you don’t remove or tear any letters or numbers. You also want to make sure that you don’t accidentally remove punctuation and those little dots on top of the “i” and other letters.
  • Prepare your drop cloth. Layout your drop cloth on a large flat surface and make sure it is wrinkle free and ready to go.  TIP | Use the EasyPress to iron your drop cloth to prepare it to add the Everyday Iron-On™.
  • Cut and arrange your sign sections on your drop cloth. Now, I did this a little bit at a time starting with the title once I had the title pressed then I move down and work on another smaller section.
  • Measure – Now, I’m not really a measuring type of person but, (I should be) if eyeballing isn’t your thing. You may want to take out your measuring tape and to make sure everything is lined up appropriately.
HUGE Canvas Italian Soda Bar Menu Sign create with my favorite Cricut Maker & the NEW Cricut Large Easy Press 2 • WhipperBerry
  • Turn-on your EasyPress 2 and set it to the following settings,
    • 340°F / 171°C
    • Pre-heat your surface: 5 sec
    • Press: 60 sec
    • Warm Peel (leave for 30-60 seconds and then gently peel)
  • Place the EasyPress Mat under the first section to press and cover with the protective cover and press the 1st section according to the guidelines above.
  • Repeat for the remaining sections.
HUGE Canvas Italian Soda Bar Menu Sign create with my favorite Cricut Maker & the NEW Cricut Large Easy Press 2 • WhipperBerry

The Cricut EasyPress 2 will be available this Fall from Cricut. What HUGE project would you like to make with an EP2? Stay tuned I have all kinds of goodies that I’m working on for the wedding that are going to look amazing thanks to the EP2.

This is a sponsored conversation written by me on behalf of Cricut. The opinions and text are all mine.

  • Go to page 1
  • Go to page 2
  • Go to Next Page »

Primary Sidebar

Heather from Whipperberry
Hello... my name is Heather and I'm the creator of WhipperBerry a creative lifestyle blog packed full of great recipes and creative ideas for your home and family. I find I am happiest when I'm living a creative life and I love to share what I've been up to along the way... Come explore, my hope is that you'll leave inspired!

Footer

  • Privacy Policy

Copyright © 2023 · Seasoned Pro