Growing up in my house, one could no more refuse a good dill pickle than one could refuse an ice cream sundae. We were most certainly fans. As kids, my sisters and I would argue over who got to drink the pickle juice at the end of the jar of pickles. Kind of weird, I know! I’m sure we weren’t the only ones with a love of pickles that extended past the pickles themselves. We also had a love of a good sausage paired with our favorite pickles. Naturally, I love to share these fun summer traditions with my family now, all wrapped up together in a tasty dill pickle and sausage rolls.
• This post is brought to you by Ball® Fresh Preserving Products by Newell Brands •
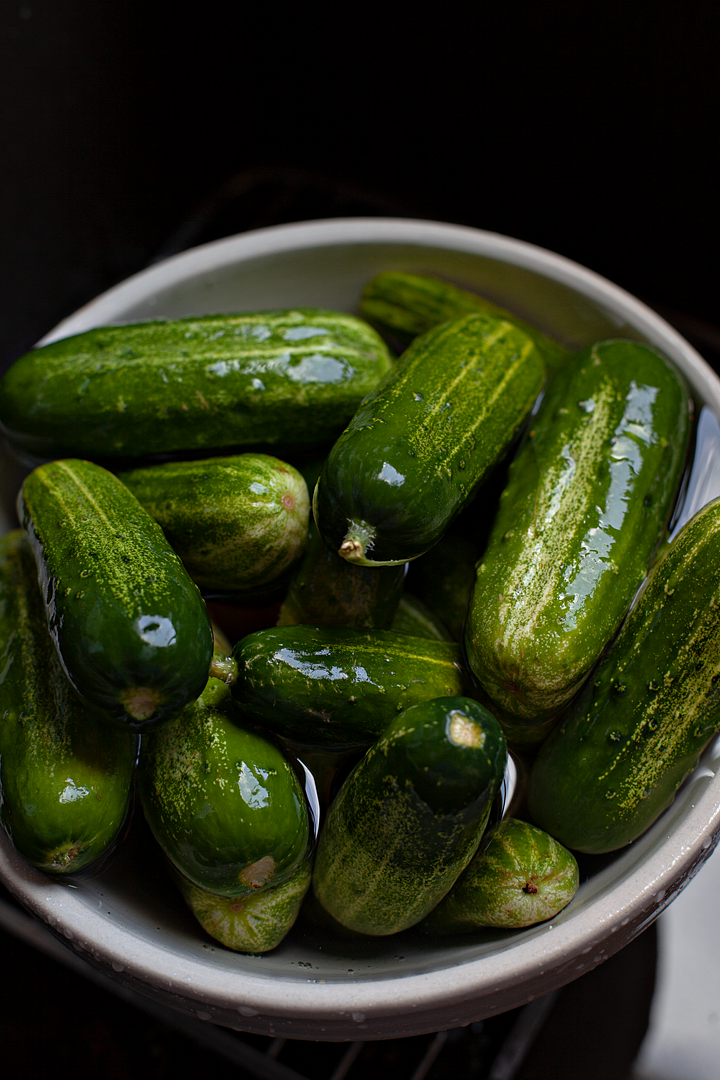
Picking the Right Cucumbers for Pickles
I remember as a kid when my Mom would pickle cucumbers, I was always so leery of those poky cucumbers that she assured me would turn into pickles. They sure didn’t look like the cucumbers I was used to. Mom was right of course, a few weeks later her silly looking cucumbers were the best dill pickles I had ever had the chance to eat.
When it comes to pickling cucumbers there are a few different things to keep in mind.
- The right variety – in all reality any cucumber can be pickled. However, you may not be too thrilled with the results. Small to medium size Kirby cucumbers are typically the best. They have a thicker skin that can stand up to the brine and will remain crunchy after they have been pickled.
- The right size – the key here is to find cucumbers that are close to the same size. For this recipe, we are looking for a small to medium size that ranges between 3-4 inches. Try to find cucumbers within that size range to have a consistent final product.
- The right age – Yes, your cucumbers have an age. Too young and thin-skinned, and they will not hold up to the pickling process. Too old, and they’ll have tough, fibrous skin and large, bitter seeds. How can you tell a cucumber’s age? Size is an indicator (again, go for small-medium), and also, taste. If it’s sweet, with a good crunch when you bite into it, it’s a keeper.
Kosher Dill Pickle Recipe
A “kosher” dill pickle is not necessarily kosher in the sense that it has been prepared in accordance with Jewish dietary law. Rather, it is a pickle made in the traditional manner of Jewish New York City pickle makers, with a generous addition of garlic and dill to a natural salt brine.
To me, a kosher dill is exactly what I think of when it comes to a nice crunchy pickle paired with my favorite sandwich. Luckily, it’s also an easy recipe perfect for beginning picklers.
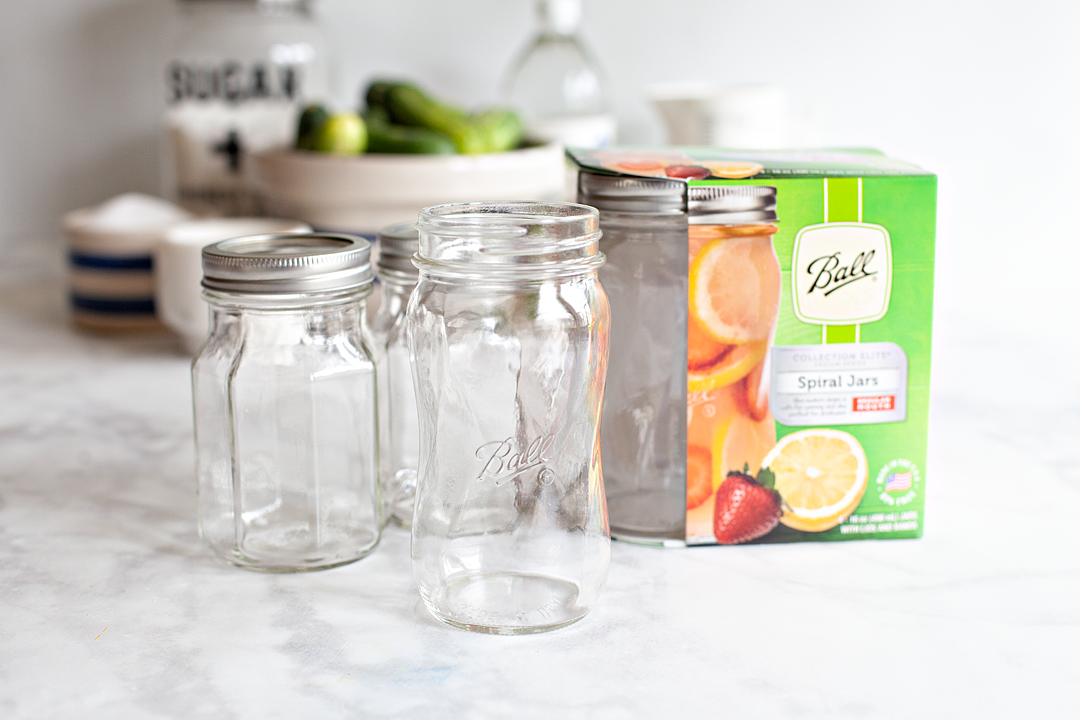
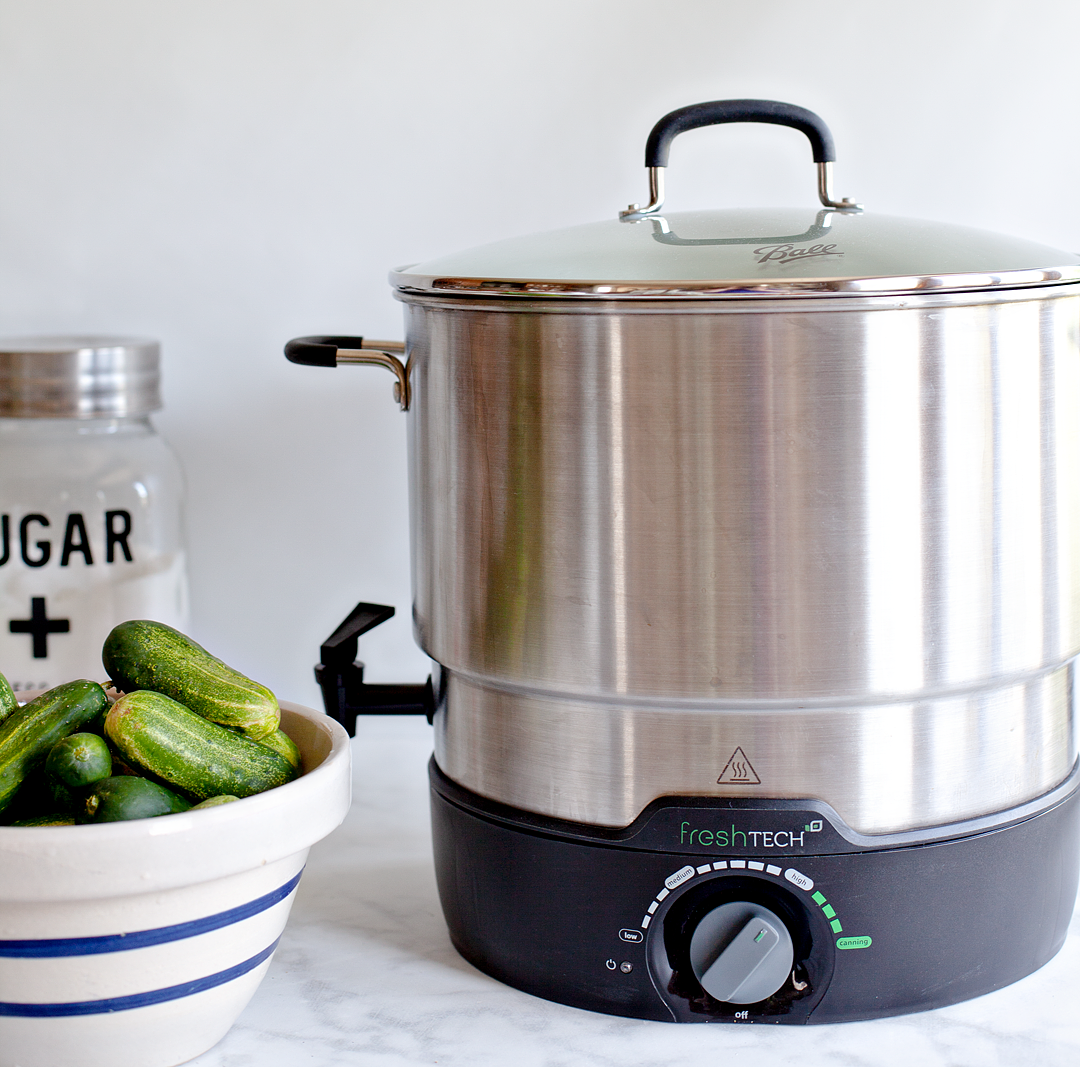
Before you get started, make sure you have 4 of my favorite pint jars from Ball® Canning. I’m loving the new fancy jars that are so fun to share with family and friends.

Kosher Dill Pickles
Yield 4 (16 oz.) pint jars
A classic dill pickle full of robust flavor, this a great place to start if you are new to canning pickles. A pinch of Ball® Pickle Crisp will help keep the crunch.
Ingredients
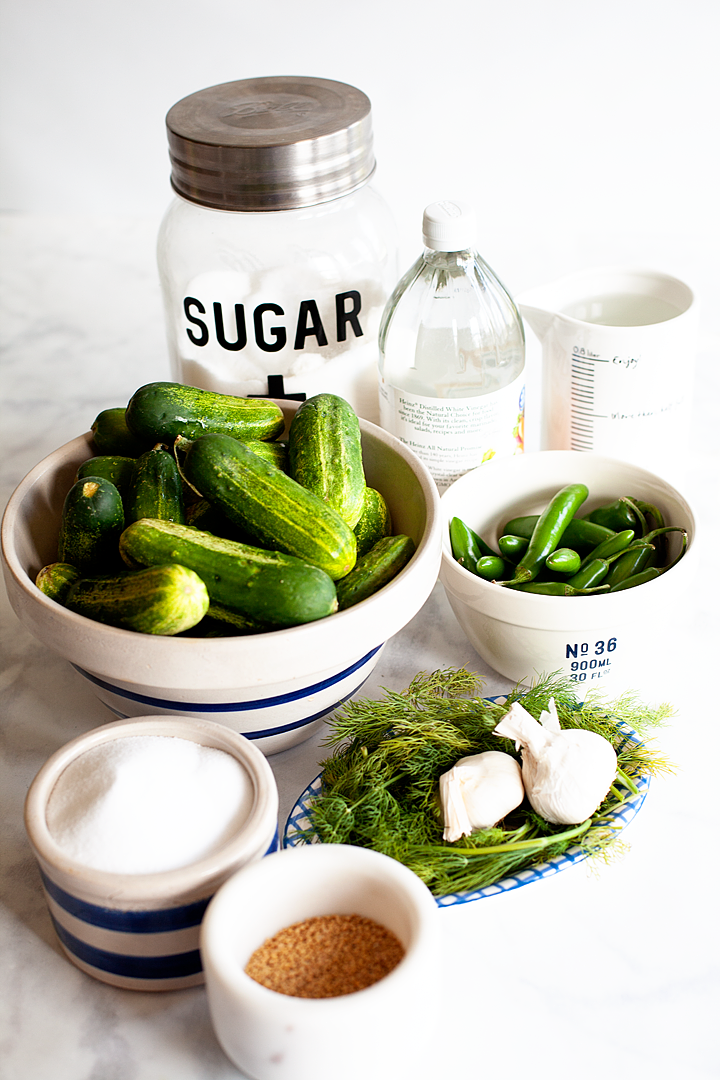
- 2 ½ lbs 3-4 inch pickling cucumbers
- 2- ½ cups water
- 2 cups white vinegar
- 1/4 cup sugar
- 1/4 cup Ball® Salt for Pickling and Preserving
- 4 cloves garlic
- 4 small bay leaves
- 12 dill sprigs
- 2 tsp yellow mustard seeds
- 4 small hot peppers (optional)
- Ball ®Pickle Crisp (optional)
Instructions
- Prepare boiling water canner. Heat jars in simmering water until ready to use, do not boil. Wash lids in warm soapy water and set aside with bands.
- Wash cucumbers and hot peppers in cold water. Slice 1/16 of an inch off the blossom end of each cucumber; trim stem ends so cucumbers measure about 3 inches. Cut cucumbers into quarters lengthwise.

- Combine water, vinegar, sugar, and salt in a small stainless saucepan. Bring to a boil over medium heat. Lower heat to simmer.
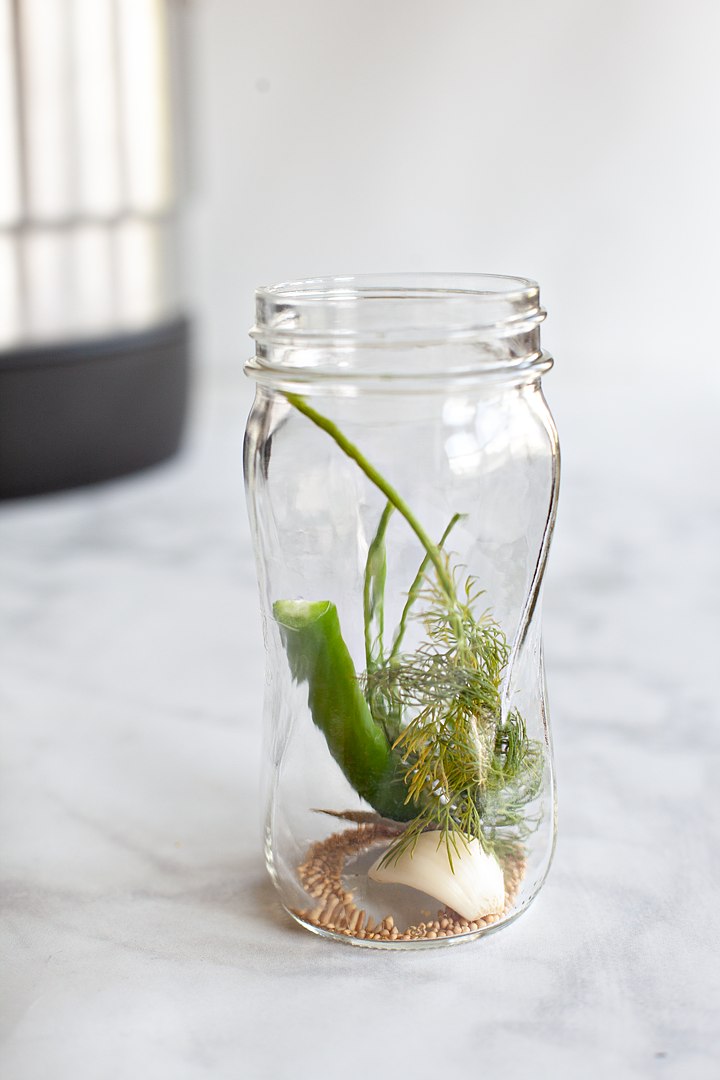
- Place 1 garlic clove, 3 dill sprigs, ½ tsp mustard seed, 1 bay leaf and 1 red pepper and Ball® Pickle Crisp (if desired) into a hot jar that is sitting on a towel (not directly on the counter.) Pack cucumber spears into the jar, leaving a ½ inch headspace. Trim any cucumbers that are too tall.
- Ladle hot brine into a hot jar leaving a ½ inch headspace. Remove air bubbles. Wipe jar rim. Center lid on the jar and apply the band, adjust to fingertip tight. Place jar in boiling water canner. Repeat until all jars are filled.
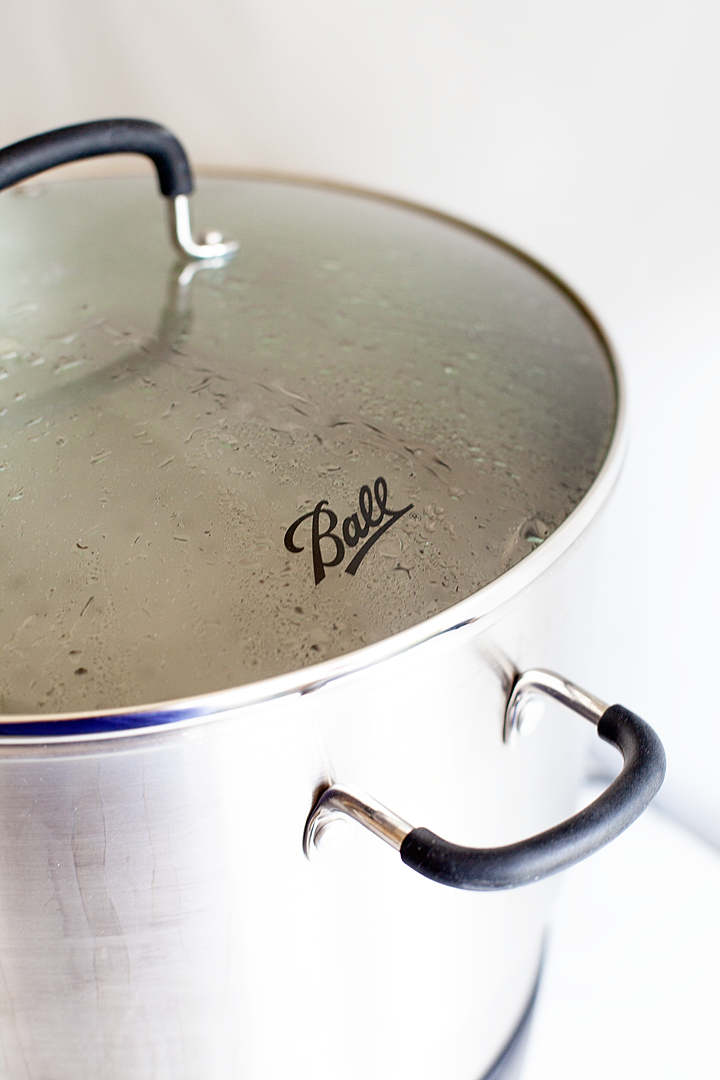
- Process jars 15 minutes, adjusting for altitude. Turn off heat, remove the lid, let jars stand 5 minutes. Remove jars and cool 12-24 hours. Check lids for a seal, they should not flex when the center is pressed.

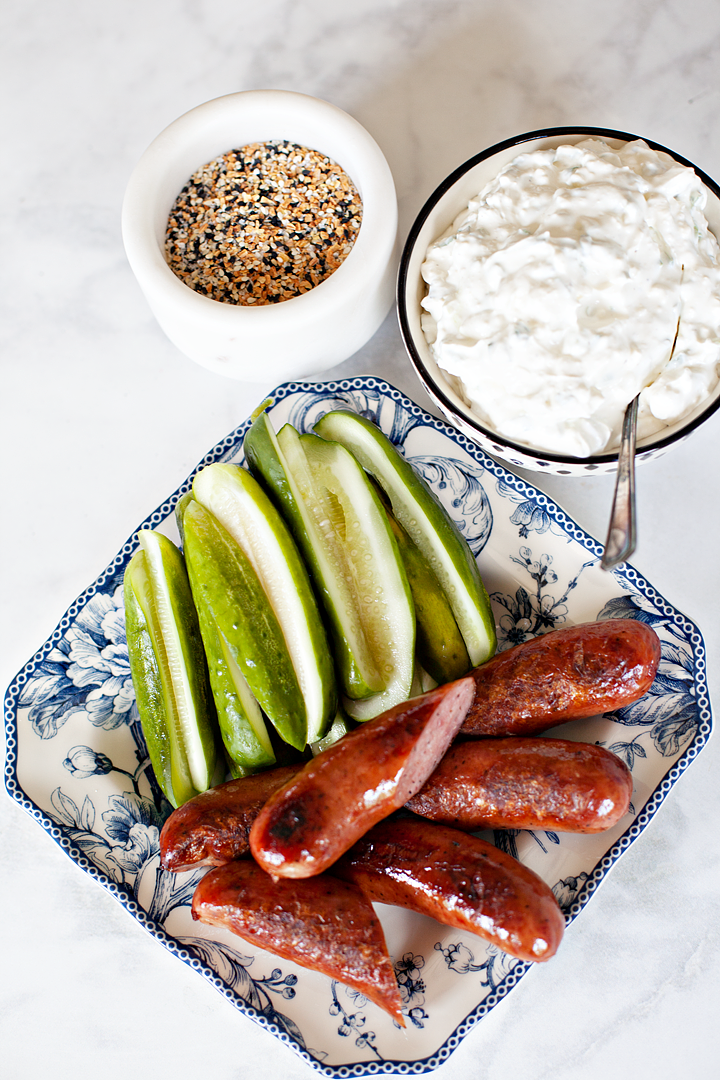
Kosher Dill Pickle and Sausage Rolls
This is where this simple kosher dill pickle becomes extra scrumptious! I’ve created a cheesy pickle spread that is perfect for the inside of the sausage roll or, on its own as a dip for veggies and chips.
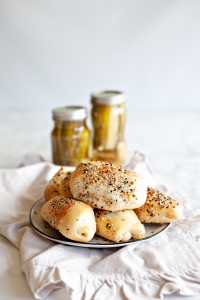
Kosher Dill Pickle and Sausage Roll Recipe
Yield 8 rolls
Ingredients
- 8 oz cream cheese at room temperature
- 1/2 cup sour cream
- 1 cup of diced kosher dill pickles
- 1/4 cup of diced green onion
- 1/2 tsp. garlic salt
- 1/4 tsp. onion salt
- salt and pepper to taste
- 4 polish sausages cut in half
- 8 kosher dill pickle spears
- 8 large freezer roll dough balls brought to room temp and allowed to rise
- everything but the bagel seasoning blend (optional)
Instructions
- Preheat oven to 350˚ F
- In a medium bowl combine softened cream cheese, sour cream, diced kosher dill pickles, green onion, garlic salt, onion salt, salt and pepper. Whisk together and set aside.
- On a clean surface roll out the risen roll dough ball until about 5 inches across but, make sure not to roll the dough too thin.
- Place a piece of sausage, pickle spear & about 2 tablespoons of the cream cheese mixture in the center of the dough.
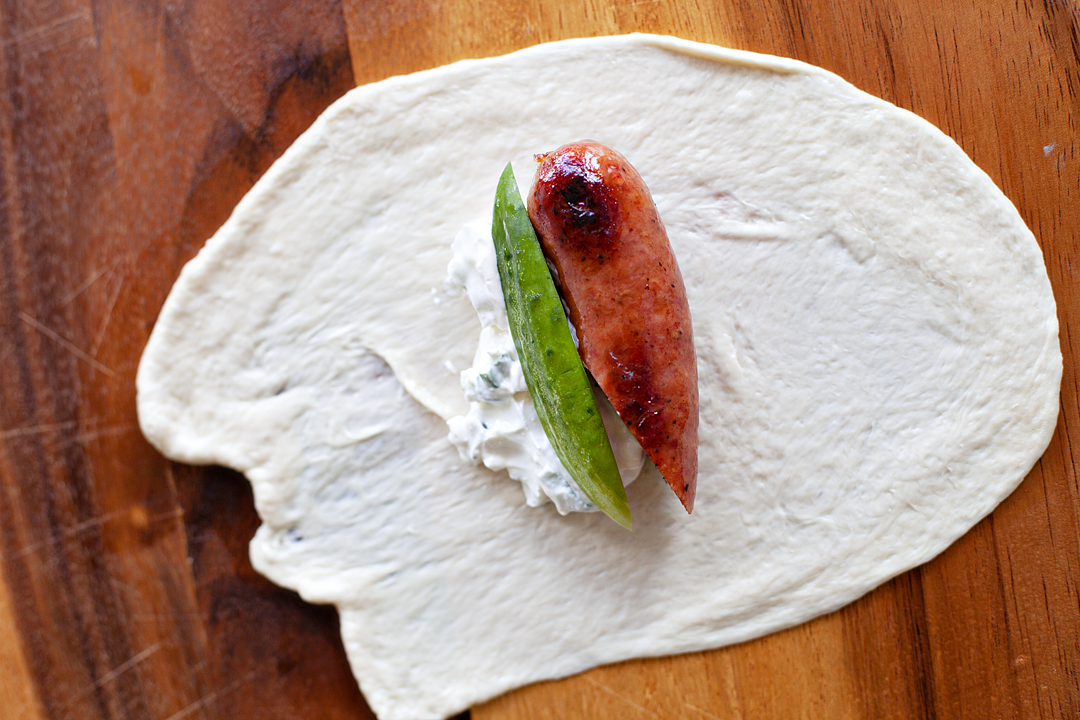
- Roll the ingredients up into the dough and secure the seams by pinching them together.
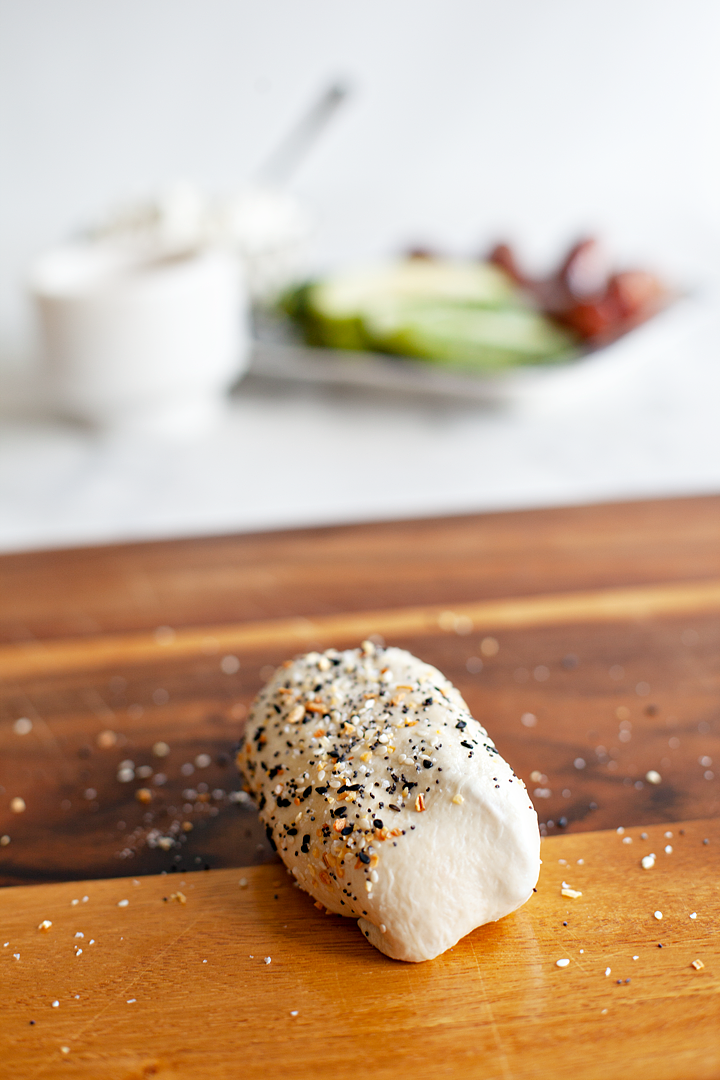
- If using the seasoning bled, place a 1/4 tsp. of the blend on your surface and roll the sausage roll through the seasoning blend to imbed the s easoning into the dough.
- Place the roll on a parchment lined baking sheet. Repeat the process for the remaining ingredients.
- Place baking sheet into the oven and bake for 20-25 minutes or until the top of the roll is a nice golden brown.
- Remove from oven and let cool for 10 minutes.
- Serve with the remaining dill pickle and cream cheese dip.