Hey Whipperberry fans, it's Jenn from My Fabuless Life and today I'm going to show you a super simple way to actually take those beautiful life moments sitting in your Instagram feed and put them to good use!
I get some grief about what an Instagram addict I am, buuutttt…this is why! It's such an easy way to capture those day to day moments, when you wouldn't normally be carrying your camera or you just don't want to mess with getting it out. Basically, for me, Instagram is a photo journal, and I don't have to mess with editing all of those pictures at once, because I've already done it, easily, before the pictures are posted, which also makes them perfect for displaying. This is one of the ways I decided to display mine and it's super easy.

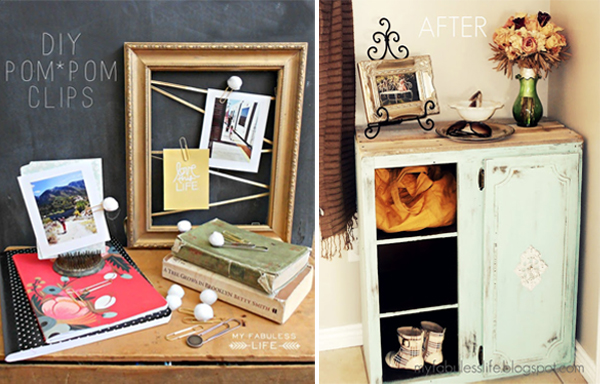
I picked up a large frame at a local home decor store (it was on crazy clearance because it was missing the glass) and spray painted it with Krylon's Gold (I also love Valspar's gold spray paint). Then, I actually picked up the "chicken wire" from the trash pile at a house being built in my neighborhood–it's the wire mesh they put under stucco. I'm pretty sure my neighbors think I'm nuts, because I can be seen on a regular basis pushing a stroller and carrying handfuls of scrap wood, tree branches, and other treasures. Am I embarrassed about it? A little (my husband a lot), but I can suck up a lot of pride for free stuff ; ). Anyway, if you don't have a local construction site to borrow from, I think you can buy chicken wire at any local farm supply. And it probably goes without saying, but don't go stealing the stuff. I pulled this out of a pile that was clearly trash–no one wants to see you on an episode of Cops. Now that the legal stuff is out of the way back to our regularly scheduled project: Lay the mesh over the back of the frame. Don't cut it down to size yet! It's much easier if you do it after it's attached.
With a staple gun, just staple the mesh on around the back of the frame. If you don't have a staple gun (it's totally worth the $10 purchase) you can use brass thumb tacks and some hot glue. Put some glue on the back of the tack and then press it into the frame to hold the mesh (the glue will keep the tack from popping out). Then go around and cut all of the excess off with some wire cutters. BE CAREFUL! This stuff is sharp! And that's about it. Time for hanging.

I hung my pictures with some embellished paper clips, and some Basic Grey cards I scored at SNAP!.

Then to add a little more variety and color, I added some free Project Life-sized printables I found here & here, and a miniature version of one of my own prints.

I know Instagram printing can be pretty pricey, so as a bonus, I've created a few templates and a tutorial on how to print your own at home, or wherever you normally have your photos printed. You can find the free downloads and tutorial over at My Fabuless Life.
This is so smart! I have a huge $1 frame from a yard sale that would look perfect in our entry way like this!
That's exactly where I hung mine! 😀
What an awesome idea and funny blog! I blog about tips for displaying Instagram photos and I just wanted to let you know I love this idea. I love crafty displays.!!
biedronka polska ilosc