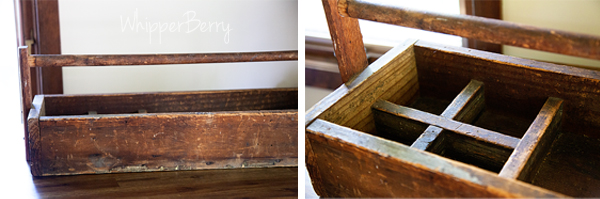
This post brought to you by DecoArt // I am always keeping my eyes peeled for fun items that I can dress-up with a little paint. Fun little finds that have some character, but with a little zip of color make them the star of the show! I found this great "Junk Shop" here in Lincoln called Simply Bungalow and it's FULL of all kinds of goodies. Heidi and her Mom do a fabulous job of curating a wonderful shop and I have fallen in love with it. The other day I stopped in a found a rustic caddy that I thought would make a fabulous picnic caddy…

Isn't it fun how a little paint can really add some pizzaz to an item? The contrast between the wood and the ombre paint is just lovely. It's going to be perfect to carry out our plates and utensils outside into our backyard oasis this summer. You can make one for your table as well.
Keep an eye out for a great wood caddy. This one was made with old reclaimed wood, but you can find newer ones and stain them the color that you like, it's super easy.
If you're handy you can even make one of your own. Ana White has a great reclaimed wood caddy with all the plans, that would be perfect for this project.
Supplies
- Wood caddy
- DecoArt Americana Acrylic Craft Paint – I used Whispering Turquoise, Sea Breeze and Bahama Blue

- Some type of graphic stencil – You can find all kinds of stencils at any of the craft stores out there or you can make your own out of vinyl with your Silhouette or Cricut craft cutting machines. I made mine with my Silhouette CAMEO using the 12×24 cutting mat. It was perfect for making the large stencil that I needed.
- Painters tape
- Sponge brush
Instructions
Clean and dry your wood before you apply your stencil. This just makes sure any dirt or dust is removed before you try and paint. Apply your stencil to the wood if you are using vinyl, or tape any other type of stencil onto your surface.
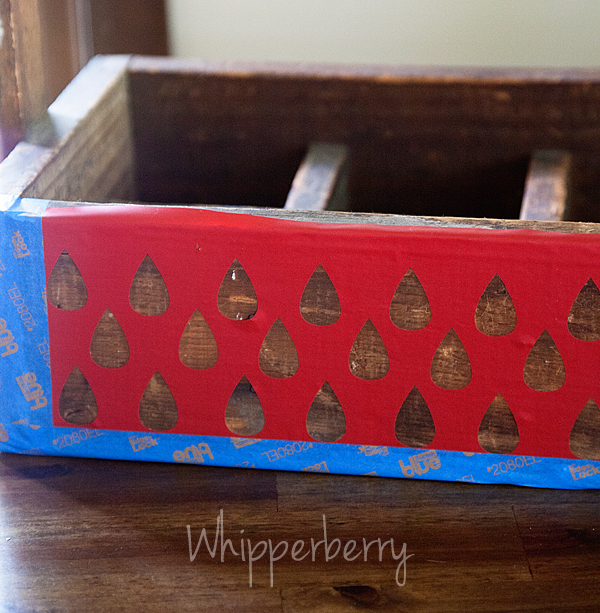
I even added an edge of painters tape around the vinyl just to make sure I didn't have any over paint issues.
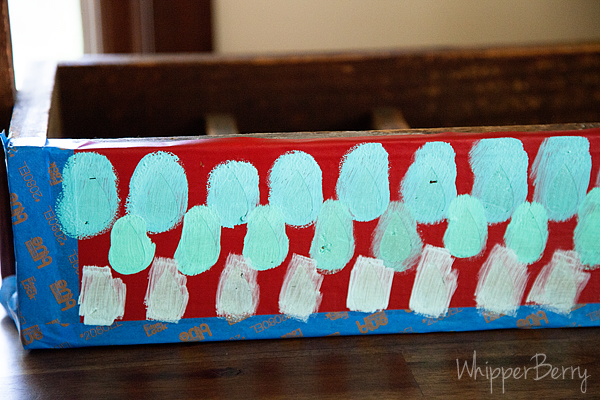
Next, I started at the top and added one color of paint (Bahama Blue) on the top row, the second color (Sea Breeze) on the middle row and the third (Whispering Turquoise) on the bottom row. This creates a subtle ombre effect.
Let that dry for just a few minutes and then carefully remove the stencil. Let it completely dry and then turn and start your next section. I used a chevron stencil for the sides and the raindrop stencil for the front and back of the caddy. I distressed it just a bit to have it look a little more rustic and then I was finished! Isn't it cute?
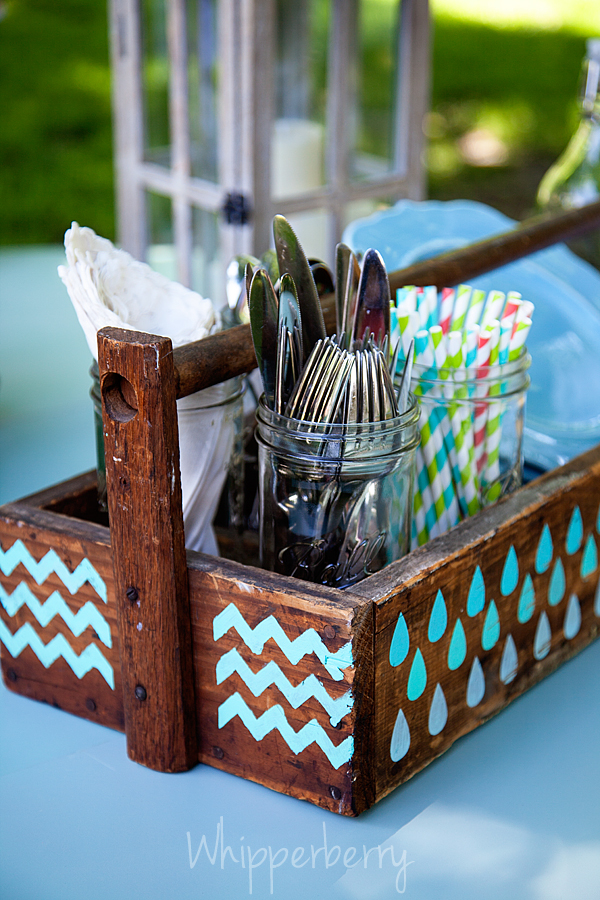
My kiddos love to load it up and take it out to our picnic table outside to get things set for our breakfast, lunch or dinner…

You won't need a center piece anymore! You'll have a beautiful and functional caddy for your table. No ones needs to know how easy it is to make!!
Disclaimer // I am a member of DecoArt's Core Blogger group and received free product along with compensation for this post. However, all thoughts, ideas and opinions are my very own!
2
I love this project…big fan of the ombre rain drops!
Have a great week!
Anne
I love the little water drops on it!
I love the ombre rain drops! The power of paint & stenciling so great! (and what a great find that caddy is!)
This is SO cute Heather!! Great caddy to being with but oh so much better now! 🙂