• Skip to primary navigation
  • Skip to main content
  • Skip to primary sidebar
  • Skip to footer

Whipperberry

WhipperBerry • Your Home For Creative Inspiration

  • Home
  • About
    • Terms
  • Recipes
    • ZipList
    • Starters
    • Easy Weeknight Dinners
    • Main Dish
    • Salads
    • Side Dish
    • Soups & Stews
    • Desserts
    • Breakfast
    • Miscellaneous
  • Tutorials
    • Creative Crafts
    • DYI Decor
    • Fabric Crafts
    • Food How-To
    • Jewlery
    • Paint Projects
    • Paper Art
    • Party Styling
    • Photography and Graphic Design
    • Silhouette
  • Holidays
    • St. Patrick’s Day
    • Easter
    • Mother’s Day
    • Father’s Day
    • 4th of July
    • Halloween
    • Thanksgiving
    • Christmas
    • New Years
    • Valentine’s Day
  • Gift Ideas
    • Gifts For Everyone
    • Gifts for Dad
    • Mother’s day
    • For The Girls
    • For The Kids
    • Teacher Gift Ideas
    • Christmas
  • Printables
    • Holiday
    • Gift Idea
    • LDS Primary
  • Travel
  • Contact
  • Nav Social Menu

    • Facebook
    • Instagram
    • Pinterest
    • RSS
    • Twitter

Crafts

Chalk Paint Recipes – How to Make Homemade Chalk Paint

12 · Sep 29, 2022 · Leave a Comment

Chalk paint is a wonderful medium to transform old furniture into new and stylish pieces. It’s also great for painting small home accent pieces and holiday decorations. Even though there are many manufacturers of chalk paint, with a wide variety of colors, sometimes it can be a challenge to find just the right color you want. It’s also hard to know which are the best chalk paints. One option is to make your own chalk paint. This post has three homemade chalk paint recipes for you.

There is also a “commercial” way to make chalk paint. You can use BB Frosch paint transformer powder to mix with normal acrylic paints. This is by far my favorite type of chalk, too. It lets you choose your own color and it’s just as high quality as the commercial chalk paints.

Jump to Recipe

Making your own homemade chalk paint is easier than you might think. It can be a fun activity to do with your kids, too. In fact, you can transform many household paints into chalk paint simply by mixing them with some common household ingredients. 

What Ingredients Are In Chalk Paint?

Depending on the brand of commercially sold chalk paint, ingredients can vary a little bit. However, one constant for all brands is the addition of some kind of mineral. Mineral additives are what give chalk-style paint that distinctive chalky matte finish. Additives vary, but they are often quartz, silica, talc, or more commonly, calcium carbonate. In fact, calcium carbonate is a key ingredient if you want to make your own chalk-style paint. Do you know what the more common name for calcium carbonate is? It’s chalk; just ordinary chalk!

Ingredients for homemade chalk-style paints will vary slightly, but in most basic recipes you’ll need your chosen paint, a little bit of water, and an additive of some kind to give the paint the distinctly chalky texture.

For recipes that call for using calcium carbonate (chalk), you have a couple of choices on how to add it to your paint. Calcium carbonate powder is readily available from grocery stores, health food stores, and online. It’s commonly sold as a nutritional supplement to help with bone health. The advantage to using already powdered calcium carbonate is that it will be a very fine, consistent texture that will be easier to mix into your paint.

If you have ordinary white chalk at home and want to try that for your chalky paint recipe, you’ll need to crush it into as fine a powder as possible. The best way is to place several pieces of chalk in a zippered plastic bag and smash it into a powder with a small hammer or rolling pin. After you have it smashed into as small pieces as possible, it is helpful to take an additional step of grinding those pieces into powder in a food processor or even a spice grinder. The finer you can get the powder, the easier it will be to mix into your paint, and you’ll have more professional-looking results. When grinding or crushing chalk pieces, you might want to wear a mask to cover your nose and mouth so you don’t breathe in the chalk dust.

How To Make DIY Chalk Paint

For making your own chalky paint, you should be aware that some recipes are better suited to work with latex paint, while you’ll get better results using acrylic paints with other recipes. No matter if you choose a recipe that uses latex or acrylic paint as the base, be sure your paint has a matte or flat finish. You definitely don’t want to try this with any paint that has a gloss finish.

Other than the ingredients for specific recipes, you’ll need measuring cups and spoons, paint stirring sticks, and bowls or cups to mix your paint. Because homemade chalk-style paint might get lumpy or thicken up if it’s stored for too long, try not to mix up more than you’ll need for your project. It’s better to mix smaller quantities than to have too much leftover paint. 

Chalk Paint Recipes

Here are a few easy recipes to make your own chalk-style paint. Let’s start with one of the easiest recipes, that also gives some of the best results:

Calcium Carbonate DIY Chalk Paint

Just two simple ingredients are needed. Pour your paint into a container, then mix the calcium carbonate powder in. Mixing it a little at a time will be easier. It will take a lot of stirring to get the paint to a nice smooth consistency. This recipe should apply just as nicely and even as commercial brand chalk paints. If the paint seems too thick, you can add a little bit of water to thin it out. This chalk paint recipe dries very quickly. If you want to sand it for a “distressed” finish, it will take a little more sanding effort than you’ll need when using commercial paints. This recipe will last a bit longer than other recipes, as long as any leftover paint is stored in an airtight container.

For this recipe, you will need:

  • 2 parts latex or acrylic paint
  • 1 part calcium carbonate powder

That’s it!

Plaster of Paris DIY Chalk Paint

Print Pin

DIY Homemade Chalk Paint

This chalk paint recipe is perfect for you to make at home. It's safe, easy, and effective!

Ingredients

  • 3 Tablespoons Cornstarch
  • 1/4 Cup Water
  • 1 ¾ Cup Acrylic paint

Instructions

  • In a plastic container or bowl (preferably one with a lid so you can store any leftover paint),  measure 3 tablespoons of cornstarch, then add 1/4 cup of water. Stir this together until it’s completely smooth. Now add your acrylic paint; stirring as you pour it into the container.  Mix this together for a few minutes, and you’re ready to paint! This paint might be a little thinner than other chalk paints, and sometimes it doesn’t seem to “stick” as well. If you’re painting a larger item, a little bit of light sanding beforehand will help the paint go on easier. 


Pour your latex paint into a container that has enough room for you to stir the ingredients together. In a separate small container, stir together the cold water and Plaster of Paris. It’s important to use cold water for this, so the plaster doesn’t immediately begin to harden! Once the mixture is a smooth consistency, pour the plaster and water mixture into the paint and stir it together. It might take quite a bit of stirring for it to all mix together.  Make sure there are no lumps! When it’s all mixed, the paint won’t look much different than before you added the Plaster of Paris. However, once the paint begins to dry the results are impressive. This recipe will create paint with a very “chalky” finish, although it can have a noticeably more grainy texture than other chalk-style paints.

This recipe probably isn’t the best choice if you want to sand your project for a “distressed” appearance. Sanding for this recipe is more likely to just scuff and dull the paint instead of highlighting fine details and texture. If distressing your project isn’t what you intended, the Plaster of Paris in this recipe makes this a very durable paint. Don’t mix more of this recipe than you think you might need; this won’t store well. After a day or two, the Plaster of Paris will begin to solidify.

Cornstarch DIY Chalk Paint

In a plastic container or bowl (preferably one with a lid so you can store any leftover paint),  measure 3 tablespoons of cornstarch, then add 1/4 cup of water. Stir this together until it’s completely smooth. Now add your acrylic paint; stirring as you pour it into the container.  Mix this together for a few minutes, and you’re ready to paint! This paint might be a little thinner than other chalk paints, and sometimes it doesn’t seem to “stick” as well. If you’re painting a larger item, a little bit of light sanding beforehand will help the paint go on easier. 

For this recipe, you will need:

  • 3 Tablespoons cornstarch
  • 1/4 Cup water
  • 1 ¾ Cup acrylic paint

Unsanded Grout DIY Chalk Paint

Unsanded grout is readily available in most hardware and home improvement stores. It’s best to use white or off-white colored grout for this paint recipe, so it won’t noticeably affect the color of your paint. If you use “sanded” grout, the paint will turn out with a texture that looks similar to wet sand or dirt.

For this recipe, you will need:

  • 2 Tablespoons of unsanded grout (be sure the label says “unsanded” or  “non-sanded”)
  • 1 teaspoon of water
  • 1 Cup acrylic or latex paint

In a disposable plastic container, stir together the two tablespoons of unsanded grout and one teaspoon of water. Be sure to break up any clumps of the unsanded grout mixture. Pour in one cup of acrylic paint, and stir until smooth. This recipe takes a lot of stirring to get it smooth. The end result is very durable chalk paint. It will feel dry in about a day, but it takes two to three days for it to fully dry. This paint doesn’t work well for distressed finished projects. It’s better for items that you want to have a smooth, even coat of paint.

It’s crucial to take the time to mix the grout and paint together really well. If not, your painted project could have a rough, bumpy texture once it’s fully dried. For this recipe, you shouldn’t mix up more than you plan to use at one time. Unfortunately, the paint doesn’t keep and after just a day it will become lumpy and impossible to use.

Can You Use Baking Soda To Make Chalk Paint?

If you’ve searched online for chalk paint recipes, you probably found one or two that use baking soda as the main additive. You can absolutely use baking soda to create your own chalk paint, but the results will be very grainy in appearance. It’s not necessarily a bad look, but you probably won’t get velvety smooth finishes with baking soda chalk paint.

To use baking soda for DIY chalk paint, simply mix together ½ cup of baking soda with three tablespoons of cold water. Stir this together with one cup of latex paint. The result will look and feel very grainy. This method is a good choice if you want something to look very “distressed” or “antiqued”, without having to do a lot of sanding.

Is Homemade Chalk Paint As Good As Buying It?

Making your own chalk paint can be fun, and economical if you’re planning to paint a smaller object. It’s a great creative activity to try with kids, or if you are just curious to see how it turns out for yourself. The methods in this article will give you custom chalk paint that is perfectly good to use and will be in whatever color you want it to be. But, how does homemade chalk paint really compare to the commercially available brands?

Both homemade and commercial chalk paints require little to no prep before painting, and they can all be sealed with a nice wax finish. Some of the homemade paint recipes are easy to achieve the popular distressed look on a piece of furniture.

I actually prefer to use BB Frosch, even over the actual chalk paint brands. BB Frosch is a powder that you mix with any kind of acrylic paint and it makes the perfect chalk paint.

Besides BB Frosch, I’d say commercial brands have a distinct advantage in several key areas. When you buy chalk paint from a trusted brand, you will always have a consistently smooth paint that has a long shelf life if properly stored. Commercial chalk paints also clean up easily with just soap and water. While it’s fun to try to create your own chalky paint, there is a bit of trial and error to get it just the way you want it to look. You can be confident you’ll always have a good product as soon as you open a can of brand name chalk style paint.

The Best Shrinky Dink Craft Ideas

18 · Sep 24, 2022 · Leave a Comment

Get some of the best Shrinky Dink craft ideas that can be found online. I’ve compiled the best ones I can find and I even have one or two on my site you can try! Jump to the ideas if you already know what Shrinky Dinks are. If not, you’ll want to read the whole post!

What are Shrinky Dinks?

If you were a child in the 1970s or 1980s who enjoyed arts and crafts, you probably remember Shrinky Dinks. They were sheets of thin plastic printed with cartoon characters or other designs that you colored with colored pencils, cut out with scissors, then baked in the oven. The plastic shrunk and hardened while baking, leaving you with a fun piece of plastic artwork!

They may have lost popularity for a while, but you can still buy Shrinky Dink plastic sheets to make all kinds of fun crafts! There are several brands available for purchase from most craft stores and online.

How To Make Shrinky Dink Crafts

If you’re unfamiliar with how to make crafts with shrink plastic, here are the basic steps:

Step One: Draw or trace your design on a sheet of shrink plastic. You can draw your design lightly with a pencil then go over it with a permanent marker or colored pencils. It’s important to note that you should make your design much larger than you want your finished product to be. The shrink plastic will shrink to approximately a third of its original size while it’s baking. Also, keep in mind whatever colors you use will appear darker after the plastic shrinks.

Step Two: Once your design is all colored in, cut around your artwork with scissors. Again, keep in mind that this will shrink to about a third of the original size. If you need a hole to use your Shrinky Dink art as a piece of jewelry or keychain, use an ordinary hole punch to make a hole. The hole will shrink along with the rest of the plastic, so if you don’t punch a large enough hole at this point you’ll need to drill a small hole after it’s done baking and has cooled off.

Step Three: It’s time to bake!  On a flat cookie sheet lined with foil or parchment paper, lay your cut out plastic pieces with the colored side facing up. Preheat your oven according to the instructions on the brand of shrink plastic you are using; usually this is 325 to 350 degrees. Then you bake for the amount of time according to the brand of plastic you’re using. It usually only takes two to three minutes!  While your plastic art is baking, you’ll see the edges curl up, but don’t panic! As they continue to bake, they should flatten out.

That’s it! Just three easy steps, and you’ll have an original piece of plastic artwork. When you take them out of the oven, let them cool completely before trying to touch them. The plastic will be hot! Now that we’ve explained the basic steps, here are some fun Shrinky Dink crafts you and your family will love.

Shrinky Dink Jewelry

Custom jewelry is fun and easy to make with shrink plastic! When you make your own jewelry, you can create something that perfectly matches a specific outfit. You can also design fun pieces to wear for holidays and special events. Just create your design, punch a hole with a hole punch, bake, and then attach to a chain or earring bases. A standard size hole punch created the perfect sized hole for jewelry after it shrinks.

The possibilities for fun jewelry designs are unlimited; let your imagination run wild! You can make an assortment of themed charms for a one of a kind charm bracelet. Trace snowflake or snowman designs for fun holiday pendants and earrings. Flowers and eggs colored in pastel shades can be made into pretty Easter jewelry.

You can find literally hundreds of examples of shrink-plastic jewelry designs online. Jewelry-making accessories (jump rings, clasps, necklace cords, bails, chain, earring bases, etc.) are readily available online, or at most craft stores or bead stores. 


Shrinky Dink Pet Tags

Shrink plastic is great for making fun “jewelry” for your pet’s, too! Create your design in the shape of a dog bone, heart, of even a puppy or kitten silhouette. Keep in mind when designing that whatever you draw will shrink to roughly one third of its original size, and you might want to make smaller tags for smaller pet collars. 

For best design results, color the tag in lighter colors, then write your pet’s name with a black permanent marker over the colored design. Another method would be to color the pet tag, then use your printer or a cutting machine such as a Cricut to create a small vinyl sticker of your pet’s name. Then apply the sticker after your tag is finished baking and has cooled off.  Remember when choosing your colors that they will darken as your pet tag bakes!

When you cut around the shape for your pet tag, leave some space to punch a hole before baking. Once the tag is completely cool, use a jump ring to attach to your pet’s collar.


Shrinky Dink Handprints

What is it about children’s handprints that are so incredibly cute? You can use shrink plastic and acrylic paint to create keychains or even holiday ornaments of your little ones’ handprints. Here are the easy-to-follow steps:


  • Using acrylic paint in a bright color, paint over your child’s palm and fingers in one even coat. Be sure to use acrylic paint with a gloss finish for this. Acrylic paints with matte or satin finishes won’t stick well to the shrunk plastic. It doesn’t have to be expensive paint, any craft paint will work as long as it is acrylic.  Make sure their hand is evenly coated, but not so heavy that the details won’t show up. Carefully help your child press their palm and fingers flat on a piece of shrink plastic. Make sure they press their fingers down all the way. Hold on to the shrink plastic, and help them lift their hand slowly off the plastic. If it doesn’t have enough details for you, or if it smears a little bit, don’t worry. You can easily wipe the acrylic paint off with a paper towel and some rubbing alcohol, then try again.  Let the acrylic paint completely dry before moving on to the next step. Fortunately, acrylic paint dries quickly.


  • Once your paint is dry, carefully cut around the handprint, being sure to leave a place to punch a hole. You can cut around the fingers a little bit, but if you cut all the way around each individual finger they are more likely to curl up and get stuck to each other while baking. Punch a hole if you’re going to attach to a keyring or ribbon.


  • Turn your handprint over, and write the child’s name and maybe their age in permanent marker.  Or have your child write their name and age themselves!


  • Place your handprint pieces on a parchment lined baking sheet, with the painted side facing up. Then bake according to the directions for the brand of shrink plastic you’re using. Once the pieces have cooled completely, brush on a layer of gloss finish Mod Podge or other clear sealant. This will prevent the acrylic paint from chipping. All that is left to do is to attach to a keyring, or add a festive ribbon to create an heirloom Christmas tree ornament.

    Shrinky Dink handprints make wonderful gifts for Father’s Day or Mother’s Day. They’re also perfect for Grandparents. Creating a new handprint ornament each year to hang on a Christmas tree creates a collection of family heirlooms that will be cherished for years to come.

Shrinky Dink Photo Crafts

Did you know you could print digital photos onto Shrinky Dink plastic? Shrinky Dink brand sells Inkjet shrink plastic sheets that you can use in your computer printer. There are so many fun possibilities with this product!

Before printing any photo onto the inkjet sheet, you’ll need to make a small adjustment first. Using any basic photo editing program, you should reduce the transparency (often referred to as opacity) of your photo to 70%. This will make it look a little washed out when you print it, but as your project shrinks while it’s baking the colors will intensify. If you don’t reduce the transparency, your final product will look too dark after baking. Otherwise, the process is the same as for any other Shrinky Dink craft.

With photos printed on shrink-plastic sheets, you can make keychains of favorite family vacation photos, or a whole charm bracelet full of family portraits. You can attach a pin/brooch back with strong adhesive to make flair pins of your photos. Gluing magnets or push pins to the back of your Shrinky Dink photo creates a fun way to decorate your refrigerator or corkboard. Of course, family photos are alway sweet to hang on a Christmas tree.

Shrinky Dink Bookmarks

Bookmarks might be one of the easiest Shrinky Dink projects, but it might be one of the most fun, especially for children! Simply cut your shrink plastic into rectangles, with a hole punched in the top. Remember that before baking your piece should be approximately three times the size of what you want your finished piece to be. Decorate your bookmarks with fun colors, traced drawings of book characters, or personalize with someone’s name. This is easy for kids to do, and they make nice gifts to give to their teachers. These bookmarks are also a nice addition if you’re giving someone a book for a gift.

Once your shrink plastic bookmark is done baking and has cooled off, attach a bright-colored ribbon or cord through the hole on top, so it can hang out of the book.

Shrinky Dink Tips and Tricks 

There are so many fun craft possibilities when using Shrinky Dink sheets! We’ve outlined just a few in this article, but here are some tips that are useful no matter what you’re making:

Shrinky Dink, and other brands of shrink plastic sheets, are perfectly safe to use. However, sometimes you’ll notice the smell of “hot plastic” while your projects are baking. Try to have a window cracked open or a fan blowing while doing this craft.

Always keep in mind that your project will shrink down to approximately one-third of its original size after baking. Don’t make your pieces too small before baking; it’s better to start out a little larger at first.

Shrink plastic will curl up in the oven, but it should flatten out as it bakes. Longer, narrow pieces are more likely to curl up and stick to themselves. If this happens, you can take scissors and snip the ends apart while the piece is still hot. Be careful, the plastic will still be very hot at that point!

Sometimes, a piece will still have a little bit of a curl on the edges when you take it out of the oven. If that happens, press it flat with a spatula while it’s still hot. It should only take a few seconds to get it to flatten out nicely.

Colored pencils and permanent markers (such as Sharpies) are the best for drawing and coloring Shrinky Dink designs. Crayons won’t work, because they’ll melt in the oven. The only paint that works well is acrylic-based paint, but be sure it dries completely before putting your project in the oven.

Some brands of shrink plastic have a smooth shiny side, and a slightly rough side. Generally, permanent markers work best on the shiny side. Colored pencils work best on the slightly rough side. If the shrink plastic you’re working with only has smooth shiny surfaces, you can use light sandpaper to gently scuff the surface if you’re using colored pencils.

Online Sewing School Reviews

3 · Aug 28, 2022 · Leave a Comment

Looking for online sewing classes? It can be really confusing which sewing school to sign up for. Lucky for you, I’ve been a member of around 10 different online sewing schools and taken a lot of classes, so I’m going to review them here for you and link to the full reviews.

Short on time? Check out these Key Takeaways

  • Craftsy offers the best online sewing classes for  most people
  • Vintage Sewing School is amazing if you like Evelyn Wood
  • Avoid Sew it Academy completely
  • Creativebug is ok but isn’t as good as Craftsy

Get Craftsy Now

What Makes Good Online Sewing Classes?

I think the things you need for good online sewing classes are a fair price, new classes every week or month, good instructors, and sewing classes related to your current ability.

If you’re a beginner in sewing most of the online classes would be helpful. But, which one would actually be the best? Most of the time this is really up to you.

Best Sewing Classes for Beginners

I have to go with Craftsy as the number one and the Vintage Sewing school as the number two. The reason for this is that Craftsy just has SO many classes for beginners that are easy to follow. The second would be Evelyn Wood’s Vintage Sewing School. She is great for beginners and goes into a lot of depth on the basics. In fact, she probably has over 50 hours dedicated to just the extreme basics of sewing.

Which Online Sewing Classes are the Best?

This is a bit subjective but I can give you my answers below based on your needs. Do you like a specific instructor? Do you want the cheapest course because money is tight? It really depends on what you want out of your sewing classes. Are you a beginner in sewing or are you looking for advanced classes? Anyways, you understand what I mean by it being subjective. Below are my opinions on some of the more popular sewing schools.

Craftsy

I think Craftsy is the best overall online sewing school and offers the best classes for most people. They have so many different classes and options of instructors. The only way I’d suggest signing up for anything else is if you just truly like some other online personalities and want to take their classes instead. You can read the full Craftsy Review here.

Get Craftsy Now


Vintage Sewing School

Evelyn Wood is a great person and her classes are awesome too. She is bubbly and fun and makes learning a breeze. Her online school is priced well but she’s not for everyone. If you like her personality as I do, then you’ll find her classes amazing. You can read the full Vintage Sewing School Review here.

Sew It Academy

I really can’t recommend Sew it Academy to anyone. I think it’s just a thrown-together business that focuses all of its energy on marketing. The owner, Mimi G, seems more caught up in being a famous business person that makes a lot of money instead of having the best sewing classes. You can read the full Sew it Academy Review here.

CreativeBug

Creativebug sewing classes are great overall. The only problem is that I think Craftsy is better and Craftsy has more classes and options. If you just want more content than Craftsy has to offer then I’d definitely sign up with Creativebug too. You can read the full CreativeBug review here.

How Much Are Online Sewing Classes?

The prices for online sewing classes are all similar. Most are between $10 per month and $20 per month. If you really like sewing and it’s a great hobby for you then the price is very cheap. Where else can you get 20 hours of entertainment for so cheap? Craftsy and Creatviebug are probably the cheapest online courses if you buy the monthly membership. Their one-off classes are a little more expensive though.

Final Verdict

All online sewing classes aren’t created equally. Taking a local class may be hit or miss but there’s no reason to limit your options to local if you want to do it online. As you can tell I think Craftsy is probably the best online sewing school for most people out there but you can also go with Evelyn’s school if you like her personality.

Get Craftsy Now


BB Frosch Reviews – Is it Worth it or Worthless?

30 · Aug 21, 2022 · Leave a Comment

I used to travel the country as a BB Frosch representative. But, not anymore. Now I can finally give an honest review of BB Frosch and their entire lineup.

I think most of the products are high-quality, but will they work for exactly what you need it for? Scroll to the product you’re looking for a review of and see what the verdict is.

Key Takeaways

  • BB Frosch Paint transformer is great
  • If you’re thinking about buying it then get it!

Get BB Frosch Here

What is BB Frösch?

BB Frösch is a company that sells paint-transforming products and accessories. They offer painting kits, brushes, wax, and powders that you can add to regular paint. What they really specialize in is the paint transformers. The paint transformers are powders you add to regular paint to get chalk paint or mineral paints. In this BB Frosch review, I’ll be covering the paint transformers the most.

BB Frosch Paint Transformer  Powder Review

There are quite a few benefits to using BB Frosch chalk paint powder. This product makes it so you can turn any kind of paint into chalk paint. This means you can use any color you want. There are no health hazards with it either like the homemade powder that some people promote online. Do NOT make your own chalk paint powder at home because it can be very dangerous for your health.

Get BB Frosch Here

Is BB Frosch Chalk Paint Transformer Worth the Cost?

It’s cheaper than pre-mixed chalk paint. The cost of the powder to mix up to one gallon is under $40. A gallon of normal chalk paint is around $160 and you can mix your own chalk paint by using BB Frosch for under $60. That’s $100 of savings!

The price of it fluctuates sometimes because of how crazy the economy is right now so I don’t want to say exactly how much it is. Their paint transformer will leave you with more chalk paint for a lower price. All of the pre-made chalk paints are so expensive! There’s not really a benefit of using the premade chalk paint either. Why not get more for less?

One of the main questions people are always asking about BB Frosch is…

Does BB Frosch Chalk Paint Powder Really Work?

Short answer, yes. There aren’t really any problems with using this paint transformer to create your own. The purpose of using chalk paint in the first place is to avoid prep work. This means no priming, no sanding, and no stripping. Then, you want a nice chalk-paint-looking finish too, right? Well, this is exactly what you get with BB Frosch. As I mentioned before, I used to travel around the country as a representative for the company. I would NOT have done this if their products didn’t work.

Get BB Frosch Here

Want to see some BB Frosch projects that I’ve done over the years? Yes? I thought you might! I’ve painted so many things with chalk paint powder and I’m going to share some photos with you below.

I have so many more photos that I could share with you but I’m having a hard time finding them. These should be enough to give you an idea that BB Frosch does actually work!

Get BB Frosch Here

What about the BB Frosch Wax?

Well, this is how you know I’m being honest and not getting paid to say this. The BB Frosch Premium Wax is not really for me. It kind of gave me a headache because the smell is strong. The product itself is good but I don’t use it anymore.

I would recommend using Jolie Wax instead. It was cheaper and it didn’t give me a headache.

Get BB Frosch Here

The premium wax is eco-friendly and does a good job. You probably won’t ever have to re-wax anything that you use it on again. I really just can’t get over the headaches from the smell.


BB Frosch – The Final Verdict

Their products are great overall. I would definitely get the BB Frosch Chalk Paint Powder but I’d skip out on the wax if you’re sensitive to smell. The paint transformer is such a game-changer when it comes to painting furniture or any DIY project at home. Not having to prep everything to paint it is great. The paint powder helps cover everything evenly and you don’t have to put a protective coat over it if you don’t want to.

How To Seal Chalk Paint

9 · Aug 16, 2022 · Leave a Comment

chalk paint sealant


Chalk paint is a popular choice for home decor. It comes in a variety of brands and colors; something to suit anyone’s decorating style. If you want your chalk-painted pieces to last without chipping or staining, applying a sealant coat is recommended. If you’ve been a reader for a while you know I LOOOOVE using chalk paint for my craft projects. So, I want to share with you how to actually seal chalk paint.

What Is A Seal Coat?


A seal coat is a thin, usually transparent coating that protects your painted surface. Chalk paint is a little bit more fragile than acrylic or latex-based paints. Chalk paint on any “high touch” surface is more likely to chip or get scratched. Chalk paint also has a tendency to stain easier, especially chalk-painted table tops and cupboards. Fortunately, applying one or two coats of a clear sealant can prevent these things from happening. 

The Best Ways to Seal Chalk Paint

The best way to seal your chalk-painted projects depends on what type of item you’re going to seal, and what you want the final appearance to be. It’s important to keep in mind that if you like the “chalky” smooth appearance of your painted objects, you don’t want to apply a glossy sealant on top of them. Look for sealant with a matte or satin finish. Matte finish sealant won’t change the overall appearance of your chalk paint. A satin finish sealant will add a soft, very subtle shine to your piece, but isn’t glossy. 


The Best Seal Coats for Chalk Paint


No matter what type of sealant you choose for your chalk-painted projects, be sure to read the label thoroughly. Make sure it will work for whatever your object is made of; some sealants that are great for wood might not work as well on glass or metal pieces.  Also check the drying or curing time, so you can estimate how long it will take you to complete your project. Look online for video tutorials if you are curious about the application process for any sealants. Checking online reviews can be helpful, too. 

You can find all kinds of sealants for sale, but when it comes to sealing chalk paint these three types of sealant are the most popular.

Wax Finish For Chalk Paints


A wax sealant is the best choice for any chalk-painted furniture that you want to finish with an “antiqued” look. Chalk paint sealed with wax beautifully transforms an ordinary piece of furniture to look like a treasured heirloom. Wax sealant will give your surface a smooth, satiny finish. It does take a little more work to apply than other sealants. For best results, you should also reapply the wax sealant periodically.

To apply a wax sealant to your chalk-painted furniture, use a stiff paintbrush or a soft, lint-free cloth. Spread the wax evenly over the entire surface, in a thin layer. Let this dry, then take a clean lint-free cloth and buff the wax finish. An old t-shirt works great for buffing.

After you’ve buffed the wax to a nice satiny finish, it can take anywhere from several days to several weeks for the wax finish to be fully cured. During this time, be gentle with your painted piece to keep the wax finish free from scuffs or scratches.  After the wax sealant is fully cured, you can apply a second coat if you want a little more protection for your piece. One coat is usually enough, though.

Different brands of wax will require different curing times. It’s always best to check the instructions on whatever brand you buy to get the best results. Some brands manufacture furniture wax that is specifically formulated as a chalk paint sealer.

In addition to clear finish wax sealants, you can buy tinted wax to add some depth to your finished piece. Once your initial clear wax finish is completely dry, you can brush on a second coat of tinted wax in a dark or contrasting color. Let the darker wax sit for just a few minutes, then gently wipe it off with a clean, lint-free cloth.  This method easily achieves a “distressed” or “antiqued” appearance on your chalk-painted piece. The darker wax will highlight any carved or textured surfaces.

Wax sealants over chalk paint can make painted furniture look great, but it’s not the best choice for kitchen cabinets or anything that is in the bathroom. In the kitchen, grease and tiny bits of dust and crumbs will show up noticeably on chalk-painted surfaces. Humidity from being in a bathroom will eventually make the wax finish chalk painted piece look a little bit cloudy. For these rooms, using a polycrylic finish is a better choice. 

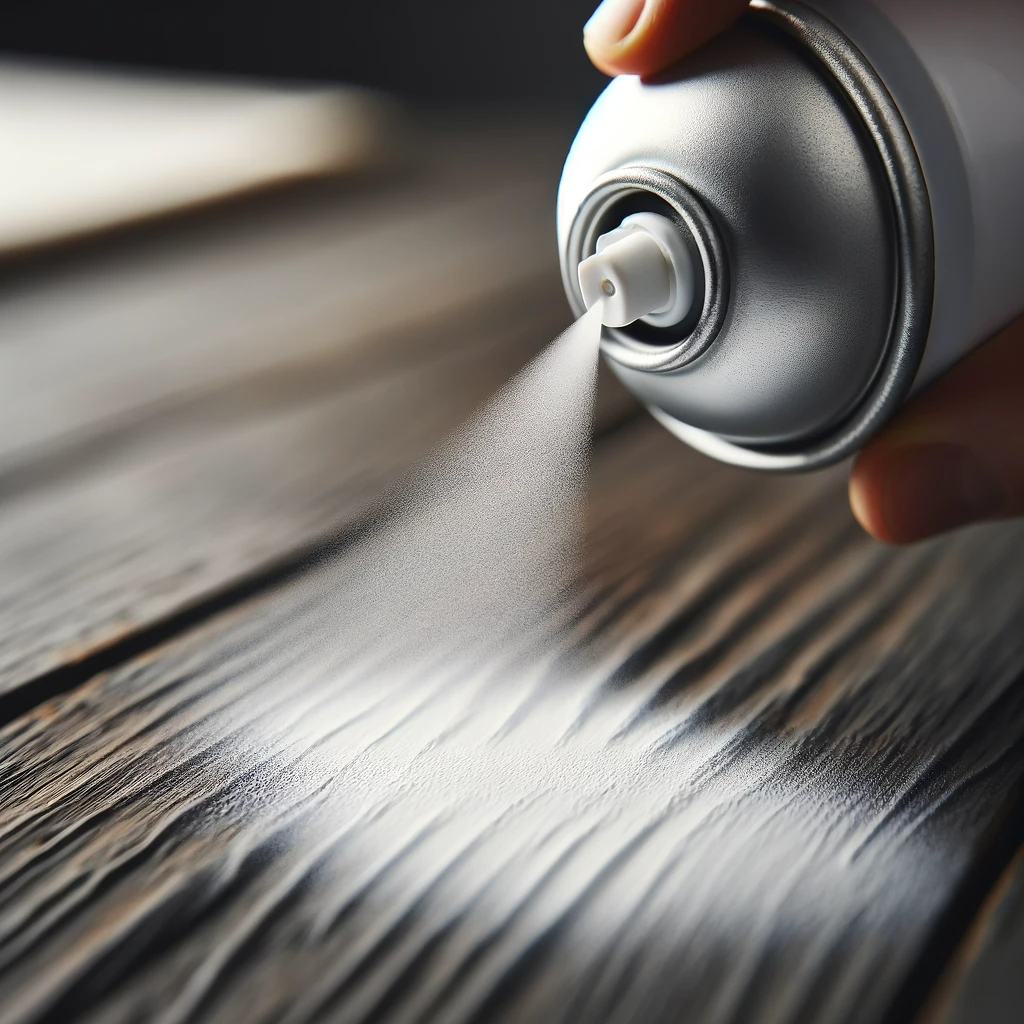
Spray Clear Coat For Chalk Paints


Just about any company that makes spray paint also makes various spray clear coats. Some even have products that are formulated especially for protecting chalk painted surfaces. When choosing a spray clear coat to go over chalk paint, you should look for one with a matte or satin finish. A matte finish will work the best if you want to preserve the lovely smooth, chalky look of your unsealed chalk paint. A satin finish will look similar to the finish achieved with furniture wax, with less work involved.

When using any spray sealant, you should work in a well-ventilated area, or outdoors. Be sure to have a drop cloth to protect your home or backyard from any overspray. Be sure to shake the can of sealant vigorously to get the sealant thoroughly mixed. Spray your painted piece in light even coats, using a back and forth motion.  You can apply a second coat after the first layer is completely dry. Two coats is usually perfect for optimal protection.

When your painted piece is drying, be sure it is in a place that will be free from wind and dust. Even the tiniest specks of dust that get blown on to your drying piece will show up in the sealant. 

Brush On Polycrylic Sealant For Chalk Paints


Polycrylic sealant or varnish is the most durable choice for sealing your chalk-painted projects. This is the best option for anything that will come in frequent contact with water, food, or people touching it on a regular basis. This finish is also the easiest to clean. Usually, all you will need to do is wipe it down with soapy water. 


Polycrylic sealant is sold in cans similar to paint, and just like with a can of paint, you’ll need to stir it thoroughly before applying. To keep the smooth appearance of your chalk paint, choose a sealant with a matte or satin finish. To apply, make sure your surface is clean and dry. Moving your paintbrush in one direction, brush on a thin coat of polycrylic sealant. Make sure the sealant gets into any small spaces. Let it cure fully before applying a second coat. Different brands will require different curing times, so always check the label on the product you are using. 

The polycrylic sealant provides the strongest coating of the three sealants in this article. It’s very resistant to scratches and scuffing. This is the best option for any chalk-painted surface that is going to come in frequent contact with other objects, or that will be handled by people. It’s ideal for table tops and cabinet doors. Because polycrylic cures to a smooth surface, it can be easily wiped clean with just a damp cloth. 

Be sure to work in a well-ventilated area or outdoors when working with polycrylic sealant. Protect your work surface with a drop cloth.  Your paint brushes should clean up easily with mineral spirits.

Polycrylic shouldn’t be confused with polyurethane sealant. Polyurethane is durable, but it has a stronger odor and has a tendency to yellow as time goes on. Even a piece of indoor furniture sealed with polyurethane can yellow from sunlight shining through a window. 

Is There Any Reason to Not Seal Chalk Paint?

You don’t have to apply a seal coat to some chalk-painted items. Anything that isn’t going to be handled frequently, or that won’t come into contact with other objects probably doesn’t need to be seal coated if you don’t want to. Smaller items such as vases, jars, picture frames, and desk accessories will still look nice if they haven’t had a sealant applied. If you have a chalk-painted piece of furniture, you could opt to apply a wax or polycrylic sealant only on the top surface where there will be frequent contact.

For any smaller chalk-painted item, you should apply at least two coats of paint if you aren’t going to apply a sealant. This will make the paint less likely to get scratched or to start chipping.  

Whether you choose to use a seal coat on your projects or not, chalk paint is a simple way to add distinctive accents to your home decor. Adding sealant gives an extra layer of protection to some chalk-painted objects and helps to ensure that they will look great for years to come. 

  • « Go to Previous Page
  • Go to page 1
  • Go to page 2
  • Go to page 3
  • Go to page 4
  • Go to page 5
  • Interim pages omitted …
  • Go to page 256
  • Go to Next Page »

Primary Sidebar

Heather from Whipperberry
Hello... my name is Heather and I'm the creator of WhipperBerry a creative lifestyle blog packed full of great recipes and creative ideas for your home and family. I find I am happiest when I'm living a creative life and I love to share what I've been up to along the way... Come explore, my hope is that you'll leave inspired!

Footer

  • Privacy Policy

Copyright © 2023 · Seasoned Pro