• Skip to primary navigation
  • Skip to main content
  • Skip to primary sidebar
  • Skip to footer

Whipperberry

WhipperBerry • Your Home For Creative Inspiration

  • Home
  • About
    • Terms
  • Recipes
    • Starters
    • Easy Weeknight Dinners
    • Main Dish
    • Salads
    • Side Dish
    • Soups & Stews
    • Desserts
    • Breakfast
    • Miscellaneous
  • Tutorials
    • Creative Crafts
    • DIY Decor
    • Fabric Crafts
    • Food How-To
    • Jewlery
    • Paint Projects
    • Paper Art
    • Party Styling
    • Photography and Graphic Design
    • Silhouette
  • Holidays
    • St. Patrick’s Day
    • Easter
    • Mother’s Day
    • Father’s Day
    • 4th of July
    • Halloween
    • Thanksgiving
    • Christmas
    • New Years
    • Valentine’s Day
  • Gift Ideas
    • Gifts For Everyone
    • Gifts for Dad
    • Mother’s day
    • For The Girls
    • For The Kids
    • Teacher Gift Ideas
    • Christmas
  • Printables
    • Holiday
    • Gift Idea
    • LDS Primary
  • Travel
  • Contact
  • Nav Social Menu

    • Facebook
    • Instagram
    • Pinterest
    • RSS
    • Twitter

Crafts

Chalk Paint On Metal – Everything You Need To Know

0 · May 18, 2023 · Leave a Comment

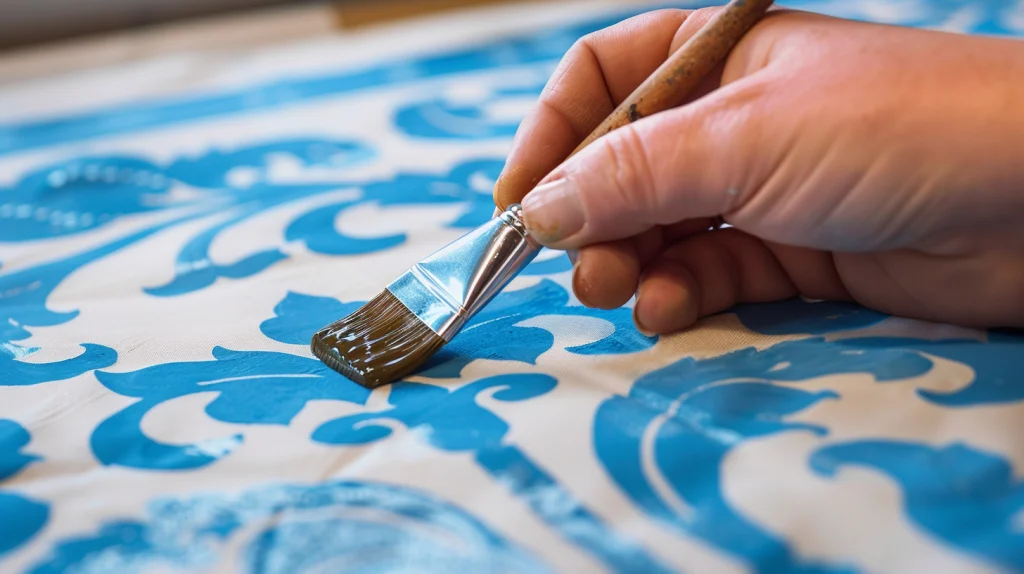
Did you know you can use chalk paint on metal surfaces? It’s true! Not only is chalk paint easy to use on anything made of metal, but it’s a fun way to bring new life to patio furniture, plant stands, shelves, and office furniture.

Let’s explore some tips and ideas for painting metal objects with chalk paint.

Does Chalk Paint Work On Metal?

Yes. Chalk paint works beautifully on metal. In fact, there aren’t many surfaces where chalk paint won’t work. It takes a little bit of prep of course, but not nearly as much as painting wood furniture with chalk paint. It’s key to make sure you use the best quality chalk paint to avoid chipping.

What are some of the metal objects that look great painted with chalk paint? Here’s a short list:

  • You can use chalk paint to transform metal plant stands to bring some color to a garden or patio.
  • Plain metal shelving is usually inexpensive, but not particularly attractive. Paint it with a bright chalk paint shade to transform it into something eye-catching!

  • Search yard sales and thrift stores for old metal office furniture. Once upon a time, metal desks and file cabinets were the norm in many offices. Now they’re showing up in thrift stores for reasonable prices. The problem with these nondescript pieces of furniture is that they’re usually found in shades of dull gray or “putty” (should that truly be considered a color?).  Chalk paint in fun colors can make boring metal furniture seem like something modern and trendy!

  • Upcycle metal cans and containers! You can use chalk paint to decorate clean, empty cans and containers. Painting cans in fun colors is an easy project, and the painted cans are great for organizing craft supplies, pens, or kitchen utensils. This is the perfect project to use up smaller amounts of “leftover” chalk paint from big projects. Painting empty cans is also fun for kids to help with!

  • Add a pop of color to your home decor by chalk-painting metal accents such as curtain rods, cabinet handles, and drawer pulls.

  • Last but certainly not least, chalk paint is great for painting metal outdoor furniture. Patio tables and chairs can look brand new with a couple coats of chalk paint, and maybe some updated cushions. 

How Do You Prepare Metal For Chalk Paint?

Preparing metal objects to be painted with chalk paint is very easy. In fact, it takes less prep work than chalk painting wood furniture. First and foremost you want to make sure whatever you’re going to paint is clean. This should be simple to do with just some soap and water.

The next thing you want to do is look over the piece you are about to paint for chipping paint or rust. If there are significant areas where old paint is chipping, you should go ahead and chip/scrape off as much as you can. It should come off easily enough using a putty knife, coarse sandpaper, or a bit of steel wool.  If there is rust, you should remove any loose pieces the same way.

You can paint right over any chalk paint, or any rust spots, or apply a clear sealant over them if you want to leave the rust showing. A little bit of rust can add character to whatever you’re painting, especially if you are a fan of the distressed aesthetic.

Metal is non-porous, so the paint will sit right on top of it instead of being absorbed into the piece. You don’t have to apply a primer coat, but the first coat of paint should be applied very thinly. This will act as a base coat. It will look streaky and maybe a little uneven, but it will be okay. By the second or third coat of chalk paint, it will have that beautifully smooth appearance that chalk style paints are known for.

Can I Use Chalk Paint On Metal Outdoor Furniture?

Yes. You can use chalk paint on metal outdoor furniture. Chalk paint is a fabulous way to give new life to metal outdoor furniture!

It’s fairly easy to do, and the results are so satisfying. Here is a quick rundown of the steps for chalk painting outdoor metal furniture:

  • First, you want to remove any furniture cushions and tape off anything that you don’t want to paint (glass or tile tabletop, for example).  If you’re completely changing the color scheme of your outdoor space, getting new cushions to match your new paint job will make it seem like you have brand new furniture.

  • It’s cleaning time! Use soapy water to clean the furniture, then wipe it dry with a lint-free cloth. Remove any big pieces of chipping paint and loose rust. If you want any of the rust to show, now is the time to cover it with a clear coat. It’s not necessary to clear coat the entire piece of furniture; you can just apply enough to cover the rusty areas.

    You can use a chalk paint brush-on polycrylic sealant, or a spray clear coat over any rusty spots. Whatever clear coat sealant you choose, look for one with a matte finish. A smooth matte finish will blend in the best with the chalk paint. Allow the clear coat to completely dry before you begin painting.

    Of course, if you don’t want any of the rust to show, you can simply clean away any loose rusty bits and then paint your chalk paint right over the top of it.

  • It’s time to start painting! You can either apply the chalk paint with a brush or spray it on. The key thing to keep in mind is that multiple thin coats of paint are going to give you the best results. Apply the first coat of chalk paint thinly, and keep in mind that this is the base coat. It’s going to look uneven and streaky and to be honest, not that great. It’s okay, though! This first coat of paint is just the base for the next layers of paint to “grab” onto. Each subsequent coat of chalk paint will look better than the one before it!

    Be sure to let each layer of paint fully dry before applying the next coat. Since you’re applying nice thin coats of paint, you will probably want three or maybe even four layers before you’re finished.

  • If you want, the next (optional) step is to add “distressed” areas to your metal furniture. It should be just as easy as distressing wood furniture. It’s as simple as taking some medium sandpaper and gently sanding areas where you want the metal to show through. This looks especially nice on areas with texture or along edges.

  • The last step (if you’re not applying a sealant coat)  is to peel off any painter’s tape, replace any furniture cushions, and begin enjoying your gorgeous “new” outdoor furniture.

Do You Have To Seal Chalk Paint On Metal?

No, you don’t have to seal chalk paint on metal. It turns out much better if you do seal it though.

There is a lot of disagreement over whether or not you really need to seal chalk paint on metal; especially when it pertains to metal outdoor furniture. A good number of websites will state that sealing isn’t necessary.

My thoughts on this are that it is better to seal the chalk paint than to not do so. Keep in mind that chalk paint is water soluble. If your painted metal furniture will be outdoors where it will be directly exposed to the elements (especially rain and humidity), eventually that exposure will start to wear at your paint job. This is especially true if you’ve distressed any areas of your furniture. Visible wear and tear won’t happen quickly, but you might find yourself wanting to touch up the paint after just a year or so.

Both Krylon and Rust-Oleum produce spray-on clear coats with a smooth matte finish. They’re perfect for protecting chalk-painted furniture. Spray the sealant in one or two light coats after the chalk paint is completely dry. Allow the clear coats to completely dry before spraying the next layer, of course.

Does Annie Sloan Chalk Paint Work On Metal?

Annie Sloan chalk paint is the original chalk paint, and it works wonderfully on metal surfaces! It applies easily, and can either be brushed on or used in a paint sprayer. Annie Sloan’s color selections work perfectly with most decorating schemes, too.

There is a video tutorial on Annie Sloan’s website that shows how to paint a metal room radiator with chalk paint. What a great idea!

Can I Use Rust-oleum Chalk Paint On Metal?

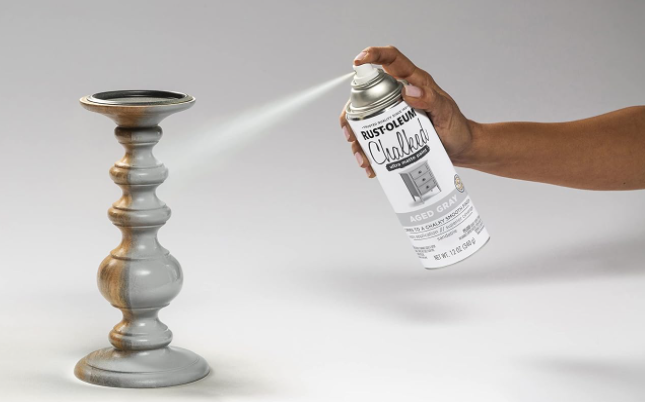
Rust-Oleum brand “Chalked” paint is a great choice for painting metal, especially outdoor metal furniture. It is available in either cans of paint that can be applied with a brush, or an easy-to-use spray paint. There are several color choices available with either type of these paints, and they will both dry to a beautiful chalky matte finish.

Rust-Oleum is a trusted brand that is known for being durable as well as attractive.

Can I Use Krylon Chalk Paint On Metal?

Krylon is another brand of paint known for durability and quality. Their Chalky Finish spray paint is another outstanding option for painting metal furniture. It’s made to stand up to the elements and is available in a wide variety of eye-catching colors.

Some online reviewers have noted that this paint dries to more of a satin finish than a true chalky matte finish. The sheen of a satin finish is very subtle, so anything you paint with this paint will still have a smooth, non-glossy appearance.

I hope this has inspired you to try chalk paint on metal furniture or other objects around your home. It’s a fun and easy way to bring some unique style into your home! 

How To Easily Remove Chalk Paint

1 · Apr 23, 2023 · Leave a Comment

If you painted something with chalk paint and have decided it didn’t look as great as you hoped it would, or if you’re just in the mood to make some home decor changes, it’s not too difficult to remove the old chalk paint.

In most situations, you can remove chalk paint by scraping it or sanding it off. Sometimes you may need to use some chemicals, and there are a few things to consider. Make sure you read this full article so you don’t make any mistakes.

How Do You Strip Chalk Paint Off Furniture?

There are a couple of ways you can strip chalk paint off furniture. If you’ve used good quality chalk paint this will actually be a little easier. The first method, one that will work the quickest, is to use a chemical paint stripper to break down the paint so you can just scrap it off.

This works well on broad, mostly flat surfaces. It saves some labor, even if you have to do a couple of applications.

If your furniture has any kind of upholstery on it, I would not recommend using a paint stripper. If even a small amount of the paint stripping product gets on the fabric, it will change the color permanently.

If you’re working on a piece of furniture with a lot of intricate carving or small spaces, you probably want to use the most common method of paint removal: solvent and sanding.

This is a pretty easy method, but it does take a lot of “elbow grease”.

You’ll need some old t-shirts or soft cloths, a solvent such as mineral spirits or turpentine, and sandpaper. Here are the basic steps to remove chalk paint with this method:


  • Put a drop cloth or tarp down around your work area. You might want to wear disposable gloves if your skin is sensitive to solvents. Be sure to work in a well-ventilated area.
  • Remove or use painter’s tape to cover any hardware on the furniture.
  • Pour a little bit of whatever solvent you’re using onto a cloth or a sponge, and begin rubbing it into the area where you want to remove paint. If there is a polycrylic or chalk paint wax topcoat, it’s going to take quite a bit of “scrubbing” at first. You might have to go over the same area more than once. Once the topcoat is removed, the chalk paint underneath should wipe off easily.
  • Once you’ve removed the paint with the solvent, you can use sandpaper to lightly sand to make sure there are no tiny bits of paint or primer left anywhere.

What Is The Fastest Way To Remove Chalk Paint?

The fastest way to remove old chalk paint from wood or furniture is to use a paint stripper (also known as simply paint remover).

Paint stripper is a chemical-based product that softens all types of paint, primer, varnish, and sealant. It’s especially useful if you’re trying to remove several layers of paint down to the original surface.

There are many brands of paint strippers available, and you should read the directions carefully for the brand you decide to purchase.

However, here are some basic steps that will apply to most paint-stripping products:


  • Before you begin, lay down a cloth or plastic under and around your work area. You don’t want to get paint remover any place except where you want to remove paint! It will alter the appearance of tile, metal, countertops, as well as wood. Remove any hardware from the piece you’re working on.
  • Be sure to wear gloves and eye protection. Even though there are several brands of paint stripper with little to no odor, it’s still a good idea to work in a well-ventilated space.
  • Use disposable brushes. The cheap foam brushes are great for this, or pick up some cheap brushes at a discount store.
  • Most paint removers are really thick, with an almost gel-like consistency. You’ll want to brush it in an even layer over the area you want to remove paint. At this point, covering with a layer of plastic wrap can be helpful. The plastic wrap will help keep the gooey paint remover moist. If you let it dry out, it will be difficult to remove.
  • Check the directions for the brand of paint remover you’re using. Most brands suggest leaving the paint remover to sit for anywhere from one to 24 hours. Check it periodically to make sure it doesn’t dry out. You might notice the paint will start to “bubble” a little bit.
  • After it’s sat for a while, it’s time to strip! Using a putty knife, you should be able to simply scrape away all the old chalk paint and sealant. If there are several layers of paint, you might need to repeat the process, though. You can use a disposable kitchen scrubber, sandpaper, or a bit of steel wool to remove paint from intricately carved areas.

How Do You Remove Chalk Paint Without Damaging Wood?

Whether you use a solvent or chemical paint stripper to remove chalk paint, you want to be careful that you don’t scratch or gouge the wood.

This is especially true if you plan to simply stain the wood once all the chalk paint has been removed, instead of painting over it again.

When sanding or peeling off paint with a putty knife, you want to be sure to do so in the same direction as the wood grain. This will minimize the chance that any scratches or scuffs in the wood will be visible.

If you’re using a putty knife with a metal blade to scrape old chalk paint off, be gentle with it. Don’t angle it too much or it will gouge into the wood.

There are heavy plastic putty knives available that are less likely to damage the wood underneath the paint.

Can You Wash Chalk Paint Off With Water?

Chalk paint is water soluble. This means that unless there is a sealant topcoat on your painted object, you should be able to “wash” the paint off with water and maybe a little bit of soap!

If you have a power washer or a hose with a strong sprayer, you might be able to use that to remove chalk paint from larger painted objects.

After getting your chalk-painted piece very wet, use a kitchen sponge or scrub brush to remove the old chalk paint.

However, if there is a top coat of any kind, you’ll need to use either solvent or paint remover to take off the paint.

Also, the longer something has been painted with chalk paint, the less likely it is to wash off easily. Something that was painted several years ago will take more work to wash the paint away with soap and water.

Does Chalk Paint Wash Off Easily?

How easily chalk paint can be washed off with water depends mostly on one thing: whether or not it has a top coat.

If you have something painted with chalk paint with no sealant, washing it with water is a fairly easy way to remove the paint.

If the paint isn’t completely washing away, a very small amount of dishwashing liquid will help.

Does Vinegar Remove Chalk Paint?

You’ve probably seen websites that recommend white vinegar as a non-toxic paint solvent. Believe it or not, it works quite well!

Vinegar is acidic, so it will soften the chalk paint in a similar way that a commercial solvent will. It’s not as efficient as commercial solvents or paint removers, but it’s an inexpensive and environmentally friendly way to remove chalk paint.

Using vinegar to remove chalk paint might take longer than using a commercial solvent or paint remover.

It can also discolor some surfaces, so do a small “test spot” in an inconspicuous place before spraying the entire painted piece with the vinegar solution.

If you’re going to use vinegar, be sure to work in a well-ventilated space. Vinegar has a very strong odor and can irritate your eyes.

To use vinegar to remove chalk paint, you should mix equal parts vinegar and water together in a spray bottle.

White vinegar works best because it has the highest acidity, but cider vinegar works well, also. Spray this mixture all over the paint you want to remove, and then let it sit for at least 15 to 20 minutes.

At this point, you should be able to scrape the paint away with a putty knife, or a stiff scrub brush. If there are any stubborn spots, you can spray it again, or you can increase the amount of vinegar in the solution.

After you’ve removed the paint, wash the surface with soap and water to remove any residue and get rid of the vinegar odor. If there’s still a little bit of odor after you’ve cleaned the surface it should go away in a day or two.

Removing Chalk Paint From Glass

Removing chalk paint from glass surfaces is easy, especially if the paint doesn’t have a sealant coat on top of it.

Glass is extremely smooth and non-porous, so the paint just sits on top of the surface instead of curing into it. This makes it really easy to remove.

If you painted the frame of a mirror or window with chalk paint and need to remove some small splatters from the glass, it’s very easy to do.

All you need is a razor blade or craft knife. Working very carefully, just scrape the paint splatter away with the blade. It should remove very easily.

If you have a glass object like a vase or mason jar that you want to remove all of the chalk paint from, it’s not hard to do but will take a little more work.

You’ll need a bucket of warm soapy water, paper towels, a kitchen scrubber or steel wool, and a soft cloth.

Lay down some paper towels to soak up any excess water. Then dip the cloth in the soapy water and wipe down the glass object.

While the glass is wet, use your scrubber or steel wool to carefully scrape away the chalk paint. You want to keep the area wet to help prevent the glass from getting scratches on it and to make the chalk paint easier to scrape away.

If you have a glass object that has a sealant coat on top of the chalk paint, you can try sanding the top coat off, or rub it with a solvent like mineral spirits.

Once the top coat has been removed, you can use the above method (warm soapy water & a scrubber) to remove the chalk paint.

Removing Chalk Paint From Fabric


If you spilled chalk paint on your clothes, or on upholstered furniture, don’t panic! If you clean it up as soon as possible, it can look as good as new.

You’ll need some rubbing alcohol, a hand towel or rag, and some laundry stain remover.

There are a lot of good laundry stain removers available in easy-to-use spray bottles or even “pens” for small stains. Whether you’re trying to clean paint from clothing or upholstery, the process is basically the same.

Pour some of the rubbing alcohol on the hand towel or rag and blot the paint stain. Don’t wipe or rub; you only want to blot! Wiping or rubbing the paint will rub it into the fibers of the fabric. Keep applying more alcohol and blotting until the paint is gone.

If you can’t get all of the paint removed by blotting with alcohol, use the laundry stain remover according to the directions.

Usually, you simply apply it and let it sit for at least 15 to 20 minutes, then wash the fabric. If you’re removing paint from a piece of clothing, wash it in hot water, but do not put it in the dryer.

Any heat from the dryer will cause a stain to permanently set in the fabric. If you’re removing paint from upholstery, wash it with hot soapy water and a clean towel once the stain remover has had time to work. You can repeat these steps until all the paint is gone.

Why Wax Chalk Paint? Everything You Need to Know

1 · Apr 7, 2023 · Leave a Comment

If you’re new to painting with chalk paint, you probably have read a lot of different opinions about the best way to protect your chalk-painted surface. There are several choices, but if you want to maintain the smooth matte appearance of chalk paint, using a wax sealant is, in my opinion, a great choice.

Using wax as a protective coating on wood furniture isn’t a new concept. In fact, wax (usually beeswax) has been used as a top coat on furniture since the mid-1700s to early 1800s. 

Due to the fact that varnishes were expensive, wax finishes were commonly used on early American furniture. If you’re trying to achieve a somewhat authentic “antique” appearance, chalk paint wax is the perfect choice for this. 

Do You Need to Wax Chalk Paint?

Whether or not you need to wax chalk paint is really a matter of preference on your part. The short answer to this question is that you don’t need to apply a wax sealant, but your painted piece will look better and the paint job will last much longer.

Chalk paint is a less durable paint when compared to latex or alkyd-hybrid paints. It’s easier for it to get scratched, and temperature changes and moisture will degrade your paint job.

For these reasons, it just makes sense to apply a protective sealant over your painted furniture, especially on chalk-painted furniture or cabinets that will be touched or moved frequently.

Chalk paint wax is an excellent choice, both for its protective qualities and for the refined appearance of the end result.

It should be mentioned here that a wax coat needs to be refreshed every couple of years. You don’t have to apply several coats, but a good cleaning followed by a fresh wax coating will keep your furniture looking great.

As an alternative to applying wax, you could use a polycrylic sealant, or leave the paint without any top coat at all.

But ultimately, I think chalk paint wax gives the perfect “vintage” look while providing a strong protective finish to your chalk-painted furniture.

What does Chalk Paint Wax do?

Chalk paint wax provides a protective top coat over any chalk-painted surface. It will give the paint a very subtle, satiny sheen, but it isn’t super-glossy. 

It’s a nice choice to use if you want to preserve the look of a completely matte finish as much as possible. It also deepens the color of chalk paint a bit and will help prevent the color from fading over time.

Wax will prevent chalk paint from chipping or getting scratched. This is particularly important to use on any distressed furniture.

If you don’t have a sealant coat over your distressed furniture, you risk unintentional chipping and scuffing occurring around the distressed areas.

A little bit of distressing looks great, but if it starts getting chipped unintentionally the look will be much more “shabby” than “chic”.

Chalk paint wax is water-resistant. This is important because chalk paint is water soluble. If you have a chalk-painted surface that isn’t covered with a sealant coat, any moisture will eventually damage the paint. 

Another thing that chalk paint wax can “do” is to give the appearance of an antique patina to your painted furniture.

Many brands of chalk paint wax offer tinted or darker-colored waxes. These are applied to give a sheer wash of color over the paint, creating the look of an aged antique.

While the wax offers excellent protection against moisture and chipping, it isn’t heat resistant. It’s important to remember that you shouldn’t place hot items (such as hot food dishes or hot beverages) directly on a waxed wood surface.

Hot items will degrade or possibly melt the wax coat.

Can You Paint Over Chalk Paint That Has Been Waxed?

It’s fairly easy to paint over anything that has already been painted with chalk paint, It with a little prep work, of course. You can paint over chalk paint, but you really can’t paint directly on top of something that was previously waxed.

I explain in more detail here, but essentially you’ll need to remove any prior wax finish before you can repaint. Chalk paint, or any other type of paint, simply won’t stick to a wax finish.

A bit of scrubbing with mineral spirits, followed by cleaning with a good degreaser should remove an existing chalk paint wax coating. It’s important to remove all the wax, so pay attention to corners and any carved surfaces.

What Happens If You Don’t Wax Chalk Paint?

If you don’t want to apply wax over your chalk paint, that’s fine. Your paint might look good for a long time.

However, there’s no guarantee of that, and you’ll definitely have to be careful not to expose your chalk-painted project to excess moisture. Because chalk paint is water soluble, moisture will eventually wear away your paint job.

You’ll also have to be careful to limit repetitive touching or placing anything heavy on your chalk-painted piece if it doesn’t have a protective coating.

The main thing that will probably happen if you don’t apply wax (or another protective coat) on your chalk paint is that it’s going to start showing wear and tear.

This could take the form of chipping, scratches, and scuff marks. This is especially true near any place you distressed the chalk paint.

Chalk paint is very porous, so without a protective wax coat it’s going to be much more challenging to keep your painted surface clean.

Anything that is painted with chalk paint is more likely to absorb dirt and pick up small stains. A wax coating helps to repel most dirt and shouldn’t be as susceptible to staining. 

How To Wax Over Chalk Paint – A Quick Guide

It’s not difficult to apply wax over chalk paint! It takes patience, and a little “elbow grease”, but the results are worth it!

Here is the process, broken out into a few simple steps:

  • The first thing to keep in mind, before even opening your can of chalk paint wax, is to make sure your chalk-painted surface is completely dry. Chalk paint dries quickly, but it’s recommended to let the paint dry for at least 24 hours before applying wax. If the paint isn’t fully dry, you could end up with some of the paint coming off when you buff the wax finish.


  • First things first, gather your materials! You will need your chalk paint wax, a wax brush and/or lint-free cloths, and a paper plate.


  • Make sure your painted surface is completely clean. You can remove any dust or dirt with a damp cloth.


  • To apply the wax, first, take your wax brush or a lint-free cloth (old t-shirts are perfect for this!) and scoop out a small amount of wax onto a paper plate. You can apply directly from the can of wax, but having it on the paper plate will make it easier to avoid using too much wax.

    If you’re using a wax brush, you want to get a small amount of wax spread just on the tips of the bristles. It’s really important to not use too much wax at one time; thin coats will give you the best results! If you’re using a cloth, “scoop” a small amount onto the cloth. You want to wipe the wax across your painted furniture in even strokes. At this point, you’re just applying the wax, as evenly as possible, to get all of the painted surface covered. Take the time to make sure corners and any intricately carved areas are fully waxed.

    If you’re working on a large piece of furniture, it will be better to apply and buff the wax in sections instead of trying to cover it all at once.

    When you’re applying the wax, think of it like rubbing lotion onto your skin. If you use too much, it’ll just feel greasy and won’t absorb!


  • Once you’ve got the wax applied all over, it’s time to buff! You’ll need a clean, dry lint-free cloth for this. All you do at this point is lightly “buff” the wax, using circular motions. The goal here is to remove any excess wax, leaving a nice thin coat of wax all over. If you use too much wax, or don’t remove all of the excess, it could look cloudy once you’re done. A good way to determine if you’ve removed all of the excess wax is by touch. If the surface feels a little bit sticky or tacky, you still need to buff some more. Once the wax coating feels “dry”, you’re done. 
  • You need to let each coat of chalk paint wax cure for about 24 hours before applying a second and/or third coat. If you’re using a tinted wax, you apply it the same way but the first coat should be a clear wax layer, then apply the tinted wax as your second and/or third coat. 
  • Once you’re done with as many coats of chalk paint wax as you want, let it cure for at least three to four days before using. The full cure time for chalk paint wax is actually several weeks, but after a few days, you can put your painted furniture in place and enjoy it. Just be careful not to put anything heavy on top of it or touch it too much for a couple of weeks. 
  • If you used a wax brush, you’ll want to clean it as soon as you’re done applying the wax. An easy method for this is to first massage some canola oil into the bristles of the brush, then (without rinsing) rub some dish detergent into the brush. You should be able to use your hands to remove the wax from the bristles. This is kind of messy, so you might want to wear gloves. The final step is to rinse the brush with hot water, and hang it up or lay it flat to dry. 

The Best Chalk Paint Wax

There are so many brands of chalk paint wax available! It’s hard to choose which are the best to use, but we have a helpful post on this website specifically about the best chalk paint wax brands. Here’s a quick recommendation if you’re short on time and don’t want to view the full article.

Annie Sloan Chalk Paint Wax – $16 for 120ml

Annie Sloan’s chalk paint wax has a soft buttery texture that makes it very easy to use. It is sold in 120ml, 500ml, and 2.5-liter quantities, which means you don’t necessarily have to buy more than you’ll need.

In addition to clear wax, she also makes white, dark, and black tinted wax. Another great wax from Annie Sloan is her selection of “Gilding Wax” products, which gives a slight metallic sheen; it’s lovely on carved details and raised textures.

Wrapping This Guide Up

Hopefully, this answered any questions about why you should apply chalk paint wax over your chalk-painted projects. After you take the time to create a beautifully painted piece of furniture, making the effort to apply a protective wax coat will ensure your project will look its best for a long time. 

Can You Paint Over Chalk Paint? – A Quick How-To Guide

5 · Apr 3, 2023 · Leave a Comment

Yes, you can paint over chalk paint. I wanted to create a quick guide on how to paint over it though. I have some old furniture I painted over and there were definitely some things I needed to figure out. Now I want to share it with you so you don’t make the same mistakes most people make.

Chalk paint has been very trendy for several years now. You might want to paint over an old piece of chalk-painted furniture if you’re just bored with how it looks, you’re changing the color scheme in your home, or you know you can do a better job of painting now. Or maybe you found a piece of chalk-painted furniture at a yard sale or thrift store, and you love the furniture but aren’t crazy about the paint job. No matter the reason, you can change it into something you’ll love!

If you only want the how-to, you can skip to the bottom of this article for that. If you have some other questions make sure to read the whole post.

First, Can you paint over chalk paint?

Yes, you absolutely can paint over chalk paint! However, it takes a little bit of work to do it effectively so that your new paint job will look great for a long time.

Painting over chalk paint really isn’t much different than painting over any other type of paint. You’ll need to do some cleaning and sanding before applying any paint or primer, of course. If you want to try to paint over a piece that has been sealed with a wax sealant, you’ll have to do a little extra work (more details on that are below).


What kind of Paint Goes Over Chalk Paint? Let’s Explore all the Options

If you want to completely transform your chalk-painted furniture, you aren’t limited to working with chalk paint again. It all comes down to prepping your furniture to get the best results. Making the effort to do a thorough job on the prep work ensures that you can use a wide variety of paints and finishes with success.

If you are painting over chalk paint that doesn’t have any sealant coat on it, you can get away without using a primer. The matte finish of the chalk paint will act as a great primer on its own. If the chalk paint has a sealant over it, you’ll need to do a little bit of sanding and possibly priming before applying the new paint.

Can You Paint Over Chalk Paint With Regular Paint?

Yes, but the type of paint matters. The most common paints used to paint anything in the home are latex and hybrid alkyd paints. You can use either of these paints to cover chalk paint, but be aware that they have a thinner consistency than chalk paint so you might need to paint several coats.

If you’re painting over a dark color of chalk paint with latex or hybrid alkyd paints, you will have the best results if you apply a primer coat over the chalk paint.

Can you Paint Over Chalk Paint With Gloss Paint?

Yes, you can use a glossy paint over your chalk paint. However, you need to make sure that any sealant coat on the old chalk paint has been sanded off. This is especially true if the chalk paint was sealed with a wax coat. Gloss finish paint won’t stick well to wax or a shiny polycrylic sealant.

Can You Spray Paint Over Chalk Paint?

Spray paint is a great option to paint over chalk paint. It’s inexpensive, and there are so many fun colors to choose from!

One thing to keep in mind if you plan to spray paint over chalk paint is to make sure you’ve thoroughly sanded (and cleaned) the furniture. Spray paint will show any rough spots or imperfections more than other paints will. It will also look best if you apply a primer coat first.

Be sure to spray the paint in light coats, using long, even motions. Don’t hold the sprayer too close to your furniture to avoid drips.

Can You Paint Over Chalk Paint With Satin Paint?

Paint with a satin finish is a nice choice to cover chalk paint. The satin finish has very little sheen, so it’s not a big deviation from the appearance of chalk paint. Satin finish paint does have enough shine to help it resist stains and scuffing better than chalk paint does.

Can You Paint Over Chalk Paint Without Sanding?

Technically you can paint over chalk paint without sanding, but the real question here is should you be doing that?

Unless you are painting over chalk paint that has absolutely no sealant coat on it, you really need to do some sanding before you paint. Paint just isn’t going to stick well to any type of protective coat. If you try to paint over it without sanding, it might look like the paint went on okay, but it’s going to chip or even bubble up in a short amount of time.

If you’re trying to paint over a polycrylic or polyurethane sealant, you don’t necessarily have to sand away every bit of it. Just sand it enough to get it scuffed up; this should be enough for your primer and/or paint to adhere well.

If you’re trying to paint over chalk paint that has been sealed with was, it’s going to take more prep work than a light sanding to get it ready for the new paint.


What If You Used Chalk Paint Wax? Can You Still Paint Over It?

If your chalk-painted furniture was sealed with wax, you can still paint over it. However, it’s going to take a little bit of work and a few extra steps to get it ready for painting.

Paint won’t adhere to wax. Not just chalk paint; this is true no matter what kind of paint you plan to use. So you will need to remove all of the wax finish before you can apply primer or paint. The best way to do this is to scrub the wax finish away with an abrasive kitchen sponge (like a Scotch-Brite brand kitchen scrubber) and some mineral spirits. The mineral spirits should break down the wax so it will start flaking off. This is going to take some “elbow grease”, and you’ve got to take the time to get all of the wax removed. Be sure to pay extra attention to corners and any carved areas.

Once you’ve scrubbed away all the wax, wipe your furniture piece with a damp cloth.  There’s one more step to getting it clean enough to paint: you should clean it really well with a trisodium phosphate (TSP) degreaser. Even after you’ve scrubbed away the wax, there will probably be a bit of residue left on the wood. TSP will remove any leftover residue from the wax sealant, as well as any dirt that has accumulated over time. 

Supplies You Need To Paint Over Chalk Paint

Before getting into the details of how to do this painting project, you should gather all the necessary materials. Here is a basic list of what you will need:

  • Painter’s Tape, Drop Cloths, and Rags: These are just the basic items you’ll need to help keep your work area clean. A bucket filled with soapy water is also a good idea to have on hand to clean up any drips or spills. 
  • Sandpaper, Scrubbers, Mineral Spirits, TSP Degreaser: These are the supplies you’ll need to prep the surface before you can prime or paint. If you don’t have to remove a wax sealant, you can get away with just using sandpaper. 
  • Paint Brushes and Paint Rollers: Rollers are great for applying paint to broad, flat surfaces. Brushes will do a better job on surfaces with any carving or textures. I recommend getting a medium-width brush and a small brush. The small brush will make it easier to paint corners and detailed areas cleanly and quickly. You can learn more about brushes for chalk paint or other types of brushes in other posts I’ve written. 
  • Primer, Paint, and Sealant: Once you have your furniture prepped, have your primer and paint ready to go! Be sure to thoroughly stir your paint before you start applying it. 

How to Paint Over Chalk Paint

Other than some extra effort to remove old finishes, the process of painting over chalk paint isn’t much different from any other furniture painting project. Spread out your drop cloth, gather your supplies, and get ready for some DIY fun!

The first thing you should do is thoroughly clean the furniture, and remove any hardware. If you don’t want to bother removing the hardware, you can try to cover it with painter’s tape to protect it. You could use the TSP Degreaser at this point if dirt and grime have built up over time. Why should you clean if you’re going to sand the surface? The answer to that is simple. First, cleaning away any heavy dirt will make the sanding process easier. Also, paint will apply more smoothly on a perfectly clean surface.

Once you’ve done the initial cleaning, it’s time for sanding and priming. If the furniture has a shiny sealant, such as polycrylic or polyurethane, you’ll need to sand it all over. You don’t need to remove every bit of this sealant, but you want to scuff it up pretty well so the paint will “grab” onto it. Medium-grit sandpaper works best for this.

If the furniture has a chalk paint wax sealant, this is the point where you’ll have to work on removing that wax coat. As mentioned above, it’s a bit of extra work, but it’s necessary.

Once the sanding and/or wax removal is done, you need to clean everything again. Just wipe the piece of furniture down with some soapy water, then dry it thoroughly. The goal is to wash away all of the sanding dust and debris.

Let’s “talk” for a moment about the next step: applying primer. If you’ve read other articles on this website, you know that I’m a fan of using primer even if the paint says it is “paint and primer in one”. I know that many brands of chalk paint say that don’t need to use a primer with them. This works for most brands, but you just end up applying more coats of paint than you normally would. The exception to my “rule” of always using a primer is if for some reason you will be painting over chalk paint that doesn’t have any sealant on it. In this case, the existing unsealed chalk paint will work great as a primer coat; just be sure it’s nice and clean.

Once your primer coat is completely dry, it’s time to start painting! No matter what type of paint you use, several thin coats of paint are the way to get a great result, and it will reduce the amount of drips and streaks that might occur. Be sure to let the paint dry completely between each coat. For broad surfaces, try to roll or brush the paint in the same direction as the wood grain (if you can see it). If you’ve applied several coats of paint and are happy with the appearance, now you need to decide if you’re going to use a sealant top coat.

If you used latex or hybrid alkyd paint, you probably won’t need to apply a sealant coat if you don’t want to. It can’t hurt, but it’s not as crucial as it is to seal chalk paint. If you’ve painted with a new color of chalk paint or milk paint, you should apply a protective sealant once the paint is completely dry. Polycrylic sealants are great for glossy or satin finishes, and they apply as easily as brushing on paint. Wax sealants are lovely for chalk paint, but they are a bit more labor-intensive to apply.

Once you’re finished, you’ll need to clean your paintbrushes as soon as possible. If you used chalk paint, milk paint, or latex paint you can clean your brushes with soap and water. For hybrid alkyd paint and polycrylic or polyurethane sealant, you should use mineral spirits to get your brushes clean. If you used a wax brush to apply a wax sealant, it should be cleaned by rinsing under hot water, then massage some dishwashing detergent into the bristles to clean off the wax residue. If it still doesn’t seem clean, use a small number of mineral spirits.

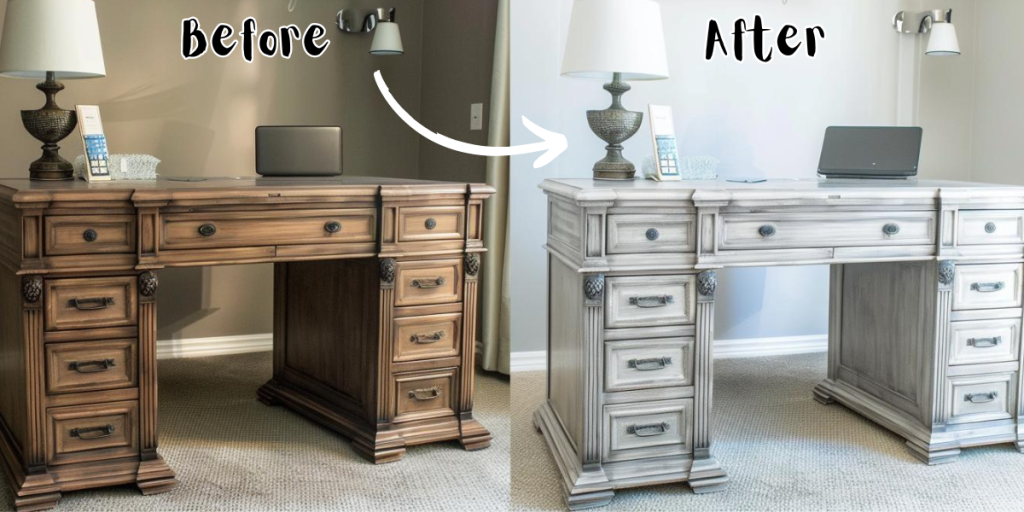
Finally, I want to remind you to take some before and after pics of your project! It’s fun to compare them and see what an amazing transformation can be achieved with a new paint job!

How to Distress Furniture with Chalk Paint

0 · Apr 3, 2023 · Leave a Comment

Want to know how to distress furniture with chalk paint? It’s one of the more popular looks these days and I’m going to tell you everything you need to know about distressing furniture with chalk paint! A little bit of background if we haven’t met yet… I was a BB Frosch chalk paint rep years ago and have been sharing crafts and home projects on my blog for over 10 years! Have a look around.

What Is Distressing?

You’ve probably seen online articles and episodes of home design TV shows that talk about methods for “distressing” furniture, or about the popularity of the “distressed” look in the home. But what exactly is “distressing”?

Simply put, distressing is a way to take an ordinary piece of furniture and give it the appearance of being a well-used cherished antique. Why would you want to do that? Well, I think there’s something sweet and nostalgic about the appearance of furniture that looks like it’s been around a while. It looks like a piece that is well-loved and has a lot of fond memories associated with it. It’s humble, but somehow also a bit elegant.

There are several ways to achieve this look, but the most common is to give any piece of wood furniture a distressed look by painting and then lightly sanding away some of the paint. This is usually done with chalk paint. The matte finish of chalk paint is perfect to give your furniture an antique appearance, and it sands easily to create a distressed finish.

You can also create an aged distressed look by applying tinted wax finishes over painted wood furniture, or by painting your furniture with a light color stain so the paint looks old and faded. 

Is There A Chalk Distressing Paint?

There isn’t really chalk-distressing paint. Chalk paint will give you a distressed look. I see a lot of people online mentioning distressing paint but it’s really just referring to the finished look. You can make the paint look distressed but there’s no specific brand or type of paint called distressed paint.

What Is The Chalk Paint Distressed Look?

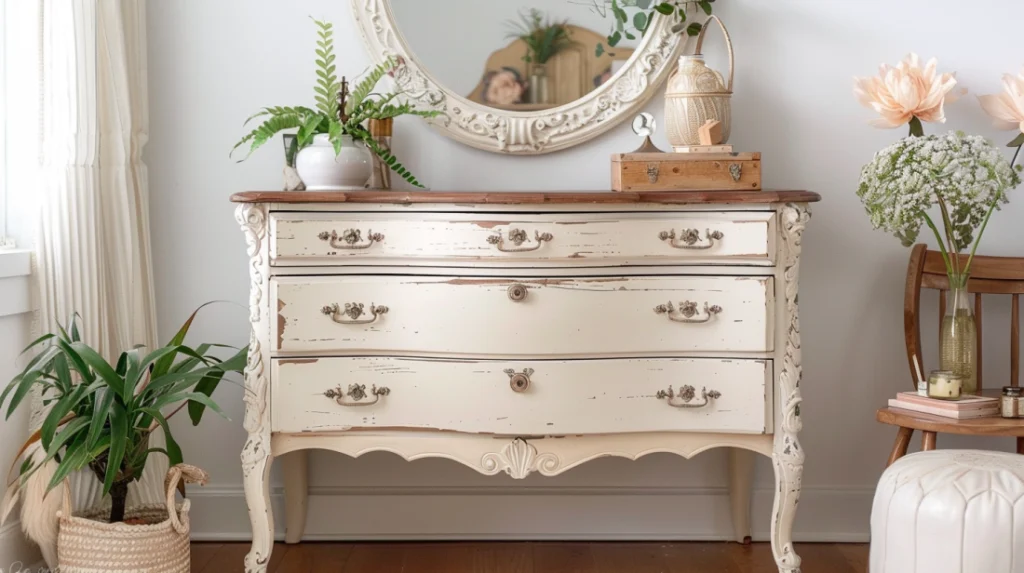
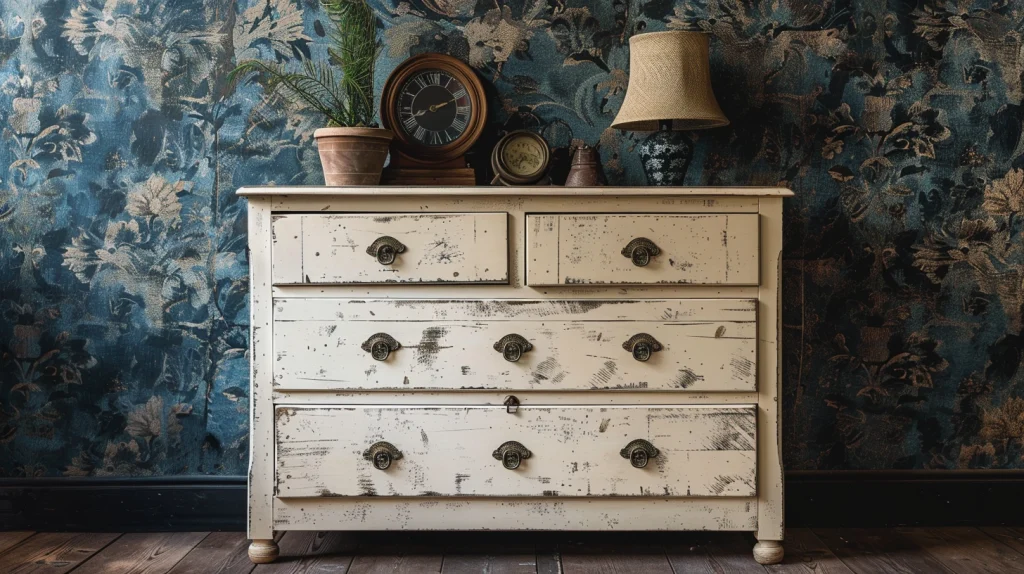
The chalk paint distressed look is utilized to give furniture the appearance of having some wear and tear, or of being aged to look like an antique. This is most commonly achieved by painting the wood furniture with chalk paint for a velvety matte finish, then lightly sanding away some of the paint to reveal the wood or even a contrasting painted layer underneath.

This look is also described as being part of the “shabby chic”, “farmhouse”, or “cottage core” home decorating styles. It can bring a cozy, nostalgic vibe to your home, and is a relatively easy and affordable DIY project.

The distressed look is great for furniture, but it’s also a fun way to change the look of other home accent pieces such as wooden picture frames, trays, signs, and even accent pieces like wood baskets and candle holders.

Chalk Paint Furniture

Why Use Chalk Paint for Distresses?

Technically, you can distress wood furniture after painting with almost any kind of paint. Some paints will be more challenging to control the distressing, and some will be quite difficult to remove the paint once it’s dried. Chalk paint is the best choice for a distressed look for a few reasons, not the least is that is it very easy to distress.

Chalk paint is a water-based, non-toxic paint that contains mineral additives for an absolutely matte finish. It is easy to use and provides nice smooth coverage, but also chips and scuffs easily, which makes it perfect for distressed and “antique” DIY projects.

Once the chalk paint dries, all you really have to do for a basic distressed look is lightly sand it with light to medium grit sandpaper. The chalk paint will remove very easily without having to use a lot of effort. It’s easy to control where you want the distressing to appear.

The other reason that chalk paint is a great choice for distressing has to do with the unique appearance of chalk paint. It has a smooth, velvety matte finish with absolutely no shine at all. This helps to give the appearance of your painted furniture being an older piece. While many chalk paints are available in modern paint colors, the matte finish still evokes the illusion of your painted furniture piece being a cherished heirloom with color that has mellowed with time. 

How To Distress Wood With Chalk Paint

There are several methods to distress wood furniture with chalk paint. The most common method is also one of the easiest. It’s done simply by sanding the areas you want to distress after your chalk paint has dried. Here are the basic steps:

  • First, clean your furniture with mild soap and water. You don’t want to paint over any dust or built-up grime. To protect any hardware on your furniture, either cover it with painter’s tape or remove it before painting. Put a dropcloth on the floor, and keep a bucket with soapy water handy to clean up any paint drips. Since chalk paint is water-soluble, you can use soap and water to clean your brushes when you’re done with your project.
  • If the furniture has any type of shiny finish, you’ll need to do some sanding. You don’t have to completely strip the finish down to all the bare wood. What you’re trying to accomplish is simply to scuff up the surface thoroughly so the paint will adhere better. If you don’t do this, your chalk paint (and primer if using) won’t cling to the furniture and it will look streaky; probably peeling right off once it dries.


  • After sanding, you’ll need to clean again. Using a damp cloth, just wipe off the furniture so there is no sanding dust anywhere.
  • If you have any deep scratches or holes, now is the time to take a little bit of wood putty and fill those in. Allow enough time for the wood putty to completely dry before painting.
  • It’s time to apply the first coat of paint, or primer if you’ve decided to prime. Even though many brands of chalk paint say they don’t require a primer, it’s never a bad idea to use one. Primer will help the chalk paint apply smoothly, and it’s going to help your paint job last longer.  If you’re using white, cream, pale yellow, or other neutral colors of chalk paint, priming first will definitely give you better results, especially if you’re painting over dark-colored wood.
  • Allow enough time to dry between coats of paint. For the best results, apply two to three coats of paint, using very thin layers. You can use a dense foam roller on broad flat surfaces, and brushes on smaller or more intricate areas.  You can find a full post about the best chalk paint brushes to use here.
  • Once your final coat of paint is dry, it’s time to distress! Use a medium grit sandpaper and lightly sand over the areas you want to look distressed. It’s up to you where you want your paint to look distressed, but sanding along corners or over carved areas looks great. A little bit of distressing around knobs or handles is also a nice look. Once you’re satisfied with the amount of distressing, brush or wipe away any sanding dust.
  • At this point, you need to decide if you want to seal your painted furniture or not. If it’s a piece that will be frequently touched or moved, a sealant is recommended so your carefully distressed chalk paint won’t chip or scratch any further. You don’t want to use a sealant with a glossy or even semi-glossy finish to preserve the beautiful matte finish of chalk paint. Instead, you can use a top coat sealant with a matte or satin finish. I wrote another blog post detailing how to seal chalk paint here.

    There are a few options of sealant that work great over chalk paint, but I recommend using a polycrylic sealant. Polycrylic will have less odor than polyurethane, won’t “yellow” over time, and dries a little bit faster than other sealants.

    Another method of sealing your chalk paint furniture is with a chalk paint wax. A wax finish will leave a very subtle sheen. Wax sealant should be applied in very thin layers, allowing plenty of time for the wax to dry between coats. There are even tinted wax sealants that will give your wood furniture a lovely aged appearance. It’s important to note that wax sealants will probably need a light touch-up application every few years.

How To Lightly Distress Chalk Paint

If you only want a bit of distressing on your furniture, or you want it to look very lightly distressed, it’s easy to do. Use a fine-grit sandpaper so you have better control over how much chalk paint you want to sand away. Don’t use much pressure at first, so you can get a feel for how much paint will be removed.

For a lightly distressed look, you might want to sand only along the edges of your furniture, or maybe just along the legs of a table. You can always remove more if you like the way it’s going. If you do find yourself wishing you hadn’t removed quite so much paint, it’s easy to touch up chalk paint with a small brush. Just be sure to do any touch-ups before you apply a sealant coat.

How To Distress Chalk Paint And Make It Look Rustic

Rustic generally means something that looks a little bit rough or unrefined, that would be found in a country home or farmhouse. This look is easy to achieve with chalk paint and a little patience.

If you want to achieve a rustic look with larger areas of paint removed, you can do this on your chalk-painted furniture with nothing more than a damp rag. This method is called “wet distressing”. It will remove larger areas of paint, making your chalk-painted furniture look like its been worn over many years.

Here’s the basic way to achieve a rustic, time-worn look by wet distressing: Once you’ve finished painting your final coat of chalk paint, immediately dip a cloth rag in water, ring out the excess, and start wiping away the areas that you want to look distressed. It’s important to do this before your final chalk paint coat is dry. Since chalk paint dries so quickly, you probably want to do this as soon as you’ve finished painting. You might have to dip the rag in the water a couple of times, depending on how much of the wood you want to show through.

This method takes a little more practice than using sandpaper. It might be a good idea to try practicing this method by painting a piece of scrap wood or an old pallet before trying it on furniture. Chalk paint is pretty forgiving, though. Even if you unintentionally remove more of the paint than you meant to, you can easily touch it up before applying any top coat.

If you want your furniture to appear even more rustic, don’t bother to fill in any holes or scratches with wood putty. Slight imperfections only add to the rustic charm you’re trying to achieve. If you want, you can even add some “imperfections” yourself! Before priming and painting, you can take pieces of chain, wood screws, or even small stones and lay them out on the surface of your wood furniture. Then, using a rubber mallet or small hammer, hit the items into the wood just enough for them to make indentations. You’re not trying to embed these items into the wood, just using them to make interesting dents and scratches.

Depending on how hard the wood is, you might have to hit them several times. There are home interior designers that are doing this to wood pieces and charging a lot of money for it. It’s something you can do for little to no cost, and it can be a bit cathartic as well!

Hammering in some intentional “imperfections” does take a little practice, though. Again, try this out on some scrap wood before bashing into the furniture you’re transforming.


How To Distress Chalk Paint With Stain

You can apply wood stain over top of your chalk paint to create the appearance of an aged patina on your painted furniture. This technique is called glazing. If you’re going to try this, be sure to wear gloves and clothes that you don’t mind getting messy; it’s called “stain” for good reason! Be sure to work in a well-ventilated area, and put a drop cloth or tarp underneath the furniture you’re working on.

Glazing with wood stain works best if your furniture is painted with a lighter color of chalk paint. Darker colors won’t provide enough contrast to achieve a nice patina look.

Once your final coat of chalk paint is dry, brush a very light coat of wood stain over top of the area(s) you want to glaze. You don’t want to apply too much; this is definitely a time where “less is more” should be your thoughts. You can always brush on a little more if you don’t think it’s dark enough.

You’ll have to work quickly here, working before the stain dries too much! As soon as you’ve got the stain brushed over the area you’re working on, take a soft, lint-free rag and begin wiping off as much of the stain as you can. For large areas, be sure to wipe in one direction, with the wood grain, to avoid a streaky finish. This will take some elbow grease to get the stain wiped enough for it to become somewhat translucent.

For an interesting look, you can apply the wood stain/glaze on only part of your painted furniture. It might look nice to leave the tabletop showing the chalk paint, but with a darker glaze only on the table legs.

Once the glaze is completely dry, you can apply a sealant coat just as you would over chalk paint. You’ll need mineral spirits or a solvent of some kind to clean your brushes.

Distressing White Chalk Paint

I love the look of white or cream-colored chalk paint.  I think it transforms an ordinary piece of furniture into something elegant. However, distressing a piece of furniture that is painted in any shade of white or a light neutral tone can be a little bit challenging.

The biggest challenge with distressing something painted with white chalk paint is that sometimes the wood underneath the paint doesn’t show through very well. If the original wood is very dark, it will probably look great once you sand the white paint in a few areas. But your carefully distressed areas might not show up as well if the underlying wood is light or medium in tone.

A fun way to bring some attention to white-painted furniture is to paint a layer of contrasting color underneath the white. You can paint it a dark brown, to simulate wood, or paint it in a dark or jewel-toned color to match the room where it will be displayed. 

For instance, paint one or two layers of navy blue chalk paint, then apply one or two coats of white chalk paint over the top of the blue. When you’re ready to distress, sand away the white chalk paint to reveal the striking navy blue underneath. It’s a fun and striking way to highlight distressed areas. 

What About Distressing Cabinets With Chalk Paint?

There is a lot of information online about painting cabinets with chalk paint, and whether you should distress them or not. Honestly, it’s a matter of personal preference. However, there are some things you should keep in mind before deciding to transform any cabinets with distressed chalk paint.

If you’re thinking about painting and distressing all of your kitchen cabinets, keep in mind that even with a sealant coat over the paint, distressing might not be the best idea. Distressing means that you’re chipping paint away, and even with a sealant, chalk paint might eventually chip further on something that is touched or moved frequently (like cabinet doors). You don’t want tiny bits of paint chipping in your kitchen! If you really want to distress your kitchen cabinets, maybe only do so lightly and on areas that won’t be touched frequently.

If you’re thinking of creating a distressed look on a freestanding cabinet, or on something like a china cabinet, you’ll probably have better luck preventing too much-unintended chipping of your paint. These pieces probably won’t be opened on a daily basis, several times a day. Try not to sand away too much of the paint near hinges or door hardware, so that the paint won’t be weakened too much. Some light distressing on the edges or along textured areas can look great on a wood cabinet. You should still seal your paint with a polyacrylic or wax sealant.

  • Go to page 1
  • Go to page 2
  • Go to page 3
  • Interim pages omitted …
  • Go to page 257
  • Go to Next Page »

Primary Sidebar

Heather from Whipperberry
Hello... my name is Heather and I'm the creator of WhipperBerry a creative lifestyle blog packed full of great recipes and creative ideas for your home and family. I find I am happiest when I'm living a creative life and I love to share what I've been up to along the way... Come explore, my hope is that you'll leave inspired!

Footer

  • Privacy Policy

Copyright © 2023 · Seasoned Pro