• Skip to primary navigation
  • Skip to main content
  • Skip to primary sidebar
  • Skip to footer

Whipperberry

WhipperBerry • Your Home For Creative Inspiration

  • Home
  • About
    • Terms
  • Recipes
    • ZipList
    • Starters
    • Easy Weeknight Dinners
    • Main Dish
    • Salads
    • Side Dish
    • Soups & Stews
    • Desserts
    • Breakfast
    • Miscellaneous
  • Tutorials
    • Creative Crafts
    • DYI Decor
    • Fabric Crafts
    • Food How-To
    • Jewlery
    • Paint Projects
    • Paper Art
    • Party Styling
    • Photography and Graphic Design
    • Silhouette
  • Holidays
    • St. Patrick’s Day
    • Easter
    • Mother’s Day
    • Father’s Day
    • 4th of July
    • Halloween
    • Thanksgiving
    • Christmas
    • New Years
    • Valentine’s Day
  • Gift Ideas
    • Gifts For Everyone
    • Gifts for Dad
    • Mother’s day
    • For The Girls
    • For The Kids
    • Teacher Gift Ideas
    • Christmas
  • Printables
    • Holiday
    • Gift Idea
    • LDS Primary
  • Travel
  • Contact
  • Nav Social Menu

    • Facebook
    • Instagram
    • Pinterest
    • RSS
    • Twitter

Crafts

The 5 Best Chalk Paint Brushes (2023)

5 · Jan 11, 2023 · Leave a Comment

Hey there! I’ve been using chalk paint for over 15 years now. It’s one of the things that I know more than anything. One thing is for sure… you need to get the right brush to make the final chalk paint projects come out right.

If you’re short on time I’ll go ahead and give you my favorite brush so you can go pick it up and then I’ll give you the top 5.

The best chalk paintbrush for most projects is the Country Chic Chalk Paint Brush.

Get It Here

This chalk paintbrush is great because it’s so versatile and very high quality. It leaves the least amount of brush strokes possible. The cost for this is on the higher side but it’s not the most expensive. You know what they say – you get what you pay for. This brush will last you for years to come and for many other chalk paint projects.

Top 5 Best Paint Brushes For Chalk Paint

In a hurry? I’ll give you the top 5 that you can investigate for yourself.

  1. Country Chic Chalk Paint Brush
  2. Modern Art Supplies Set
  3. Bristello Set
  4. FolkArt Home Decor Chalk and Wax Brushes
  5. Brossum 2 in 1

Should You Use A Different Brush For Chalk Paint?

Yes. In short, you should get the right kind of brush to make sure you get the best end results for your home projects.

Refinishing furniture and home accents with chalk paint is one of the most popular home decorating trends right now.

If you’ve read other articles on this website, you know that there is a large variety of chalk paint brands on the market, with a large selection of colors and price points. You want to make sure you’re selecting the best chalk paint for the project.

When you’re choosing your materials for a chalk paint project, selecting your brushes is just as important as choosing your paint.

Using the best brush for your chalk-painted piece will ensure you get the best possible results on your finished project. 

What To Look For In A Brush For Chalk Paint

Chalk paint is a bit different from oil-based or latex paints. It’s a thicker texture, and in order to get that lovely matte finish it needs to be applied evenly and smoothly. Also, chalk paint is very similar to milk paint. I wrote a whole post about the difference between chalk paint vs milk paint.

Not all paintbrushes will give the best results. The best brushes for chalk paint should have a few key features.

Whether you choose a brush with synthetic or natural bristles, you want to make sure to use a brush with dense, stiff bristles. Soft bristles won’t hold up to the thick texture of most chalk-style paints.

A brush with a sturdy, wooden handle will make it easier to spread the paint evenly. If the handle has a little bit of a curved shape, it will feel more comfortable in your hand.

When painting a large piece of furniture, using a comfortable brush will reduce any strain on your hands or wrist.

Look for a brush with a stainless steel or nickel-plated ferrule. The ferrule is the metal piece that connects the bristles to the handle on a paintbrush.

Stainless steel is the best choice, as it is strong and resistant to corrosion or contamination. The strength of stainless steel helps to hold the bristles securely enough that the brush shouldn’t shed very much, if at all. 

Nickel-plated steel is another good choice for a brush ferrule. The nickel plating is still corrosion-resistant, but it’s not quite as sturdy as stainless steel.

You’ll have to be careful that the edges of the ferrule don’t become bent.

The final consideration when choosing a brush for your chalk painting project is the size and shape. You don’t want to use too large a brush for smaller projects, or for painting smaller areas.

Round or wide brushes are great for large, flat areas. Smaller, oval-shaped brushes are a good choice to paint smaller items or to paint corners or tight areas. 

Types Of Brushes For Chalk Paint for Furniture & Projects

Now that we’ve outlined some of the key features to look for in a good quality paintbrush for chalk-style paints, below are some details on the different types of brushes available.

Synthetic brushes

Synthetic brushes have bristles that are made of nylon, polyester, or a   combination of the two. These brushes work well with the thicker texture of chalk paint.

They easily give a smooth finish with little to no visible brush strokes. Another benefit of synthetic brushes is that they clean up easily and keep their shape.

Natural Brushes

Natural paintbrushes have bristles that are made of animal hair or bristles.     Most commonly, they are made from boar, ox, or goat hairs. The natural bristles hold a larger quantity of paint, so you won’t have to reload your brush quite as often.

 The downside to using a natural bristle brush is that they tend to shed, especially during the first use. Be sure to look for brushes that are described as “low shedding”.

Another disadvantage is that when using water-based paints (like chalk paint) on natural bristles, the brush can lose its shape. The natural bristles sometimes soak up more of the paint and swell, leading to the bristles spreading and not staying dense.

Oval Brushes

Oval brushes are great for painting narrow spaces or trim. The dense bristles provide excellent coverage and make it easy to achieve a perfectly smooth appearance. The bristles on oval brushes usually have a “domed” surface. This gives you better control when painting over carved or textured surfaces, or in narrow spaces.

Flat Brushes

Flat brushes typically can be found in two varieties: the “paddle-shaped”   brushes with a wooden handle, and “wide chip” brushes with a broad piece of wood for the handle.

Either style has a wide group of bristles, with a flat brush edge. These brushes hold a large quantity of paint and are great for covering wide smooth surfaces.

A flat brush makes it easy to achieve a perfectly smooth finish free of brush strokes or streaks.

If flat brushes are your brush of choice, it’s a good idea to buy them in different sizes to make it easier to paint smaller areas.

Round Brushes

Round brushes are the brush of choice for many crafters who do a lot of chalk paint projects. The rounded shape with densely packed bristles makes it especially easy to control how and where you apply your paint.

These brushes will easily give you a flawless finish with minimal effort.

They’re comfortable to hold, and smaller sizes are perfect for painting over carved or textured areas.

Using a round brush effectively takes a little bit of getting used to, but they are a popular choice for chalk painting with good reason. They hold a large load of paint, so you can spread more paint at one time over an area.

This is the secret to how a round brush always produces those amazingly smooth finishes with no streaks or visible brush strokes.

How Much Are Chalk Paint Brushes?

Brushes for chalk paint can vary in price from around $9 up to $35, depending on the size, the material it’s made of, and the brand name.

There are so many varieties of brushes available, it can be overwhelming to choose one. 

Here are some recommendations on good quality chalk paint brushes.

As with any craft tool or supply you’re considering buying, it’s a good idea to read customer reviews to see what ordinary people think of the product. 

Synthetic Brush – Chalk Paint Oval Brush, by Country Chic

Country Chic brand makes a variety of chalk-style paints and brushes at reasonable prices. This one retails for $21.95 to $26.95, depending on which size you buy. This oval brush with synthetic bristles is ideal for chalk paints. It comes in two sizes, so you can use it on smaller areas as well as large pieces.

Pros:

  •  Densely packed bristles hold a lot of paint, enabling you to get smooth coverage.
  •  The curved handle is easy to hold and control.
  •  Advertised as “non-shedding”, and user reviews back up that claim.

Cons:

  •  It’s priced a little bit higher than other similar brushes.
  •  The largest size available is two inches wide. A larger option would be nice for big projects.
  •  Because the bristles are so dense, it takes a little more effort to clean.

Natural Brush – Professional Chalk Paint & Wax Premium Brush Set

Modern Arts is a small company that makes quality paint brushes and accessories at affordable prices. This three-piece set sells at a very reasonable price of $19.97.  They are suitable to use with both chalk paint and wax finishes.

Pros:

  •  The wooden handles are lightweight and ergonomically designed to reduce strain on your wrists while painting.
  •  The round brush can be loaded with a good amount of paint to make the job go more quickly
  •  This is a great price for three different-sized brushes at a price similar to what you might pay for one brush of another brand.

Cons:

  •  Some user reviews mention that there is some shedding. This isn’t unusual for any brush with natural bristles.
  •  Natural bristles can be harder to clean.
Get it Here

Oval Brush – Oval Brush for Chalk Paint by Bristello

Bristello brand brushes are known for being some of the best available for any water-based paints. Their synthetic bristles hold their shape better than other brands and are easy to clean.

This brush is a bit more expensive at a price of $24.95, but these brushes are impressively durable.

Get it Here

Pros:

  • The bristles are specially treated and dyed for easy clean-up and shape retention.
  • Designed by a professional painter
  • No shedding
  • This brush applies chalk paint with no brush marks or streaks.

Cons:

  •  The handle is straight and thin, so it might not be as comfortable as curved wood handles.
  •  It’s a pricier brush, but this brand is known for its quality.

Flat Brush – FolkArt Home Decor Wide Brush

FolkArt makes a variety of home decor paints and brushes at budget-friendly prices. This four-inch wide “chip style” flat brush is great for applying chalk paint to large surfaces. Priced at $14.00, it’s an affordable specialty brush.

Pros:

  •  The broad handle makes it easier to control the brush; perfect for smooth application and blending different colors of paint.
  •  Nylon bristles clean up easily with mild soap and water.
  •  Wide surface makes large painting projects go quickly.
  •  It’s a decent brush at a budget-friendly price.

Cons:

  • The broad handle might not be as comfortable as an ergonomically designed handle.
  • Some user reviews mention that this brush has a tendency to shed when first used.
Get it Here

Round Brush – Brossum Large 2-in-1 Round Paint and Wax Brush

Brossum Brushes were designed to be an affordable alternative to expensive chalk paint brushes made by designer companies. The results are budget-friendly brushes that give results comparable to many of the pricier options. This round brush is priced at only $12.50 and is perfect for achieving a flawlessly smooth finish with any chalk style paint.

Get It Here

Pros:

  •  The natural bristles are attached with “ridiculously high-grade epoxy glue” for maximum retention and minimum shedding.
  •  The comfortable curved handle has an attached cord to hang the brush after washing. This will help the bristles maintain their shape.
  •  This brush can be used with chalk paint or wax sealants.

Cons:

  •  While it sheds much less than other natural brushes, some minimal shedding might occur with the first use.
  •  Some user reviews mention the bristles have a slight smell when wet.

Wrapping This Up

When choosing a chalk paint brush it’s best to get one that’s specific for chalk paint. It’s also a good idea to get the best quality brush that’ll last you a while and make your projects come out great.

As you’ve read, you should also make sure to get a paintbrush that’s specific for chalk paint.

If there are any questions leave a comment and I’ll do my best to get back to you!

Milk Paint vs Chalk Paint – What’s the Difference?

13 · Dec 30, 2022 · Leave a Comment

Milk paint and chalk paint seem very similar and it can be hard to tell the difference. I’m going to clear this up for you in the quickest way possible and also provide some more in-depth information for you.

If you’re a fan of the “farmhouse” or “country chic” home decor styles like me, you’ve undoubtedly noticed the trend of refinishing furniture and home accessories with colorful matte finish paints.

Chalk paint and milk paint are the two most popular products to achieve this look. One may be better than the other depending on what you’re painting. The best paint for cabinets may be different than the best paint for furniture.

Have you wondered what the difference is between these two paint products? They’re very similar but have some significant differences. 

Key Takeaways:

Chalk paint and milk paint are very similar but with a few key differences. However, milk paint can leave brush strokes and add texture. Chalk paint is thicker and covers textured surfaces better. Use milk paint if you want the outcome to look aged or rustic because it keeps textures. The brand I recommend is Rust-Oleum Milk Paint.

Get it Here

What Is Milk Paint?

Modern milk paint is still made with milk protein (casein). It is sold in a powdered form, instead of a ready-to-use liquid. To use it, you’ll need to mix the powder with an equal amount of water.

Then, you need to let the paint sit for a few minutes to allow any bubbles to dissolve. Freshly mixed milk paint might have a slight odor that is described as “milky” or even “grassy”, but the scent completely vanishes once the paint dries.

You shouldn’t mix up too much milk paint at one time, as it has a relatively short shelf life once mixed. It will only be good for a few days to a week if kept in a sealed container.

You can extend the shelf life a little bit by keeping your mixed paint in the refrigerator. The milk paint powder, however, should be good for years as long as it is kept dry.

Milk paint is one of the most environmentally friendly paints you can buy. It is water-based, non-toxic, and completely free of volatile organic compounds (VOCs).

It’s also easy to create custom colors with milk paints, as you can easily combine the different pigments and then mix them with water.

Milk paint is a little bit thinner than chalk paint, so it can be used as a “wash” to allow wood grain details to show. To achieve a smooth, opaque finish, two or even three coats (depending on your surface) are needed.

Fortunately, milk paint dries very quickly so it doesn’t take much time to cover something with multiple coats of paint. The end result is a mostly matte finish with a very slight velvety sheen.

Brief History of Milk Paint

Milk paint has been around in some form for literally thousands of years. In fact, when the ancient Egyptian tomb of King Tutankhamun was discovered in 1924, some of the artifacts recovered were found to have been painted with milk paint.

The earliest forms of milk paint were made simply of milk, lime, and natural pigments made from plants or minerals.

What Is Chalk Paint?

Chalk paint is a decorative paint first invented by designer Annie Sloan in 1990. In fact, the term “chalk paint” is a registered trademark for that company. Since 1990, many other paint companies have created their version of chalk paints.

Chalk paint is a water-based, non-toxic paint that dries to a smooth, completely matte, “chalky” finish. Once it dries, there is absolutely no sheen to it at all.

This finish is achieved by the addition of minerals to a basic paint formula. It’s a popular choice for anyone who wants to transform an old piece of wood furniture or to create a “distressed” appearance on an object.

Chalk-style paint is easy to apply and comes ready to use. Other than stirring it a bit like you would any other paint, you can paint with it as soon as you open the can.

It will adhere to just about any porous surface without the need for any sanding. If you want to use it on a shiny or varnished surface, a little bit of light sanding will help the paint stick. The coverage is smooth, and for many projects, only one or two coats of paint are needed.

Much like milk paint, chalk-style paint is very environmentally friendly. It is water-based, non-toxic, and has a very low amount of volatile organic compounds. Some brands of chalk-style paint have a low odor, but it disappears when the paint is dry. 

Something interesting is you can even make your own chalk paint. There are two ways to do it. One is with BB Frosch and the other is your own homemade chalk paint recipe.

Uses For Milk Paint

Milk paint adheres to just about any porous surface. If you want to paint something that has a shiny surface, or wood with varnish on it, just lightly sand it and the milk paint should adhere with no problem.

Milk paint is a great choice for furniture, glass, and metal pieces. It is more difficult to get a distressed look on furniture than when using chalk-style paint, but it’s durable enough that you don’t necessarily have to use a finish coat with it.

Milk paint is also a good paint to use for cabinet doors, wood trim and framework, or even interior walls in your home. It holds up well to any piece that will be touched frequently.

Because milk paint is thinner than chalk paint, you’ll need to use at least two coats if you want opaque coverage. A single coat of milk paint will be semi-transparent and can be a lovely way to highlight wood grain and textures. 

Is Milk Paint Durable?

Milk paint is incredibly durable. The casein proteins and lime in the paint dry to form an impressively hard bond to whatever surface they’re in contact with.

Once you complete painting something with milk paint, the finish will stay vibrant for years. It shouldn’t chip (unless you purposely distress it) and the colors won’t fade significantly over time.

It’s a great choice if you want a matte finish on surfaces that will be touched quite a bit.

Usually, it isn’t necessary to apply any top coat to surfaces painted with milk paint, but if you want a top coat, an oil-based product such as tung oil is preferable to a finishing wax. Be sure to let the paint dry for at least 24 hours before finishing with any oil products.

Milk Paint vs Chalk Paint On Kitchen Cabinets

Both milk paint and chalk paint can make your kitchen cabinets look great. If your kitchen has a “farmhouse chic” decorating theme, either of these paints will look fabulous.

However, milk paint has a slight advantage over chalk-style paint if you’re going to paint your cabinets. That advantage comes down to the durability of milk paint. 

Chalk paint on cabinets will look great at first, but it won’t be long before it will start to show some wear and tear. If you choose to use chalk-style paints on cabinet doors, you will definitely need to apply a finishing wax top coat.

This will help your chalk-style paint last longer, but your paint job won’t look quite as perfectly matte on the surface. Even with a wax top coat, the wax will periodically need to be refreshed.

Milk paint is a better choice for cabinet doors. You’ll still have a mostly matte finish with just a slight sheen, but you’ll also have increased durability. Since cabinet doors are something that will frequently be moved and touched, you need paint that can handle a lot of use. 

Milk Paint vs Chalk Paint For Furniture

Deciding whether to use milk paint or chalk-style paint on a piece of furniture really depends on what you want your finished piece to look like. Both paints are good choices for transforming wood furniture into eye-catching vintage-style pieces.

Because milk paint is thinner than chalk-style paint, you can use one or two coats to give furniture a “washed” appearance. This is a good way to highlight any piece with attractive wood grain. If you want a more opaque finish, you can apply more coats of milk paint, allowing time to dry between each coat.

Because milk paint is so highly durable, you can get away with not needing a sealant over your paint. The paint will last for years and the colors stay beautifully vibrant.

It’s possible to get a “distressed” or “chippy” look with milk paint, but it takes a little more work than with chalk-style paint. Because milk paint dries to such a hard finish, it’s more challenging to sand or chip it away.

Try sanding your furniture before the milk paint is fully dry to make it easier.

Chalk-style paint, on the other hand, distresses beautifully with just a bit of light sanding. It’s easy to bring out carved details or wood grain when using chalk-style paints. Chalk paint also goes on smoothly, with even coverage. However, if your painted furniture will be something that gets touched a lot, you will need to apply a wax sealant coat over chalk-style paint to protect it. 

Milk Paint Brands

There are several brands of milk paint available. Some may be better than others so make sure to read the descriptions. I wrote a full post about the best milk paints already but here are some of the most popular brands:

Real Milk Paint Co

The Real Milk Paint Co. has an impressive selection of over 50 colors. It dries quickly and has no odor once dried. It is made of 100% organic materials. It’s easy to mix to a smooth consistency and doesn’t need any primer for most surfaces. However, this gets a bad rep online and I wouldn’t recommend this one.

Rust-Oleum Milk Paint

Rust-Oleum is one of the most popular brands of milk paint. It is also one of the highest-rated. If I had to suggest only one brand of milk paint, this is the one I recommend. It may be priced slightly higher than others but I believe it’s worth it.

Get it Here

Miss Mustard Seed

Miss Mustard Seed’s Milkpaint is another brand with a large selection of colors and non-toxicity. Miss Mustard Seed also produces additives for its milk paint, such as an anti-foaming additive for smooth mixing and hemp seed oil as an eco-friendly finishing product.

Old Fashioned Brand Milk Paint

Old Fashioned Brand Milk Paint has a slightly small selection of colors, but they are especially vibrant. Like other brands, this paint is non-toxic and safe for use on children’s furniture and toys. Old Fashioned Brand is made in small batches, using all-natural earth pigments.

Is Milk Paint Or Chalk Paint Cheaper?

The three brands of milk paint mentioned above range in price from approximately $23 to $28 for enough powder to mix one pint of paint.  Depending on the brand, chalk paints range in price from approximately $16 to $28 for the same amount of paint. While it may seem there’s not a huge difference in price, milk paint might be a better value in the long term. Because the powdered form of milk paint can last for years, you can mix as small a quantity as you need for your project and not have to worry about having wasted leftover paint.

Which is Right for You?

In summary, milk paint and chalk paint are both great but for slightly different purposes. Determining which is right for you is completely dependent on the project and the look you’re going for. Have a look around the website to get some ideas for chalk paint and milk paint projects.

Cricut vs Silhouette – What’s the Difference? (2023)

517 · Dec 25, 2022 · 57 Comments

Just about any crafting enthusiast has heard of Cricut or Silhouette brand cutting machines. These machines have revolutionized the world of DIY crafts, giving anyone the ability to create custom vinyl decals, cards, home and party decorations,  t-shirts, and so much more. They’re invaluable for independent artists and small business owners as well. 

Key Takeaway for Cricut vs Silhouette

Cricut is the winner for me. I’ve been a crafter for 20+ years now and I’ve used both extensively. If you’re short on time then just get the Cricut. If you want to know why then read this full article.

The two main manufacturers of these machines are Cricut and Silhouette. There are numerous similarities and differences between these two brands. Is one brand “better” than the other?

This article is going to take you through a comparison, and hopefully, it will help you decide if one or the other is right for your crafting needs.

Cutting Machines: What Can They Do?

The name “cutting machine” seems like an overly simple description for the capabilities of these machines. Both the Silhouette and Cricut machines cut a variety of materials with precision cutting blades.

You can create decals and labels using vinyl, and make customized cards for any occasion with a variety of card stocks and papers. With heat transfer (iron on) vinyl, you can add your own designs to t-shirts, towels, hats, jackets, and just about any clothing item.

Using sublimation paper or pens, you can transform plain mugs and water bottles that are perfect for yourself or as gifts for your friends and family. Some of the cutting machines can even cut thicker materials like bonded fabric, craft foam, felt, and balsa wood. You can use a machine like the Cricut mug press to put images and labels on mugs.

Really, once you start using a Cricut machine or Silhouette machine, your imagination will go into creative overdrive!

 Cricut vs. Silhouette Machines: A Basic Comparison

Before getting into the details of what makes Silhouette and Cricut so different (or the same) from each other, here’s a brief comparison of the cutting machines available from each company. 

There are currently two Silhouette models of cutting machines being sold on their website: the Cameo 4 and the smaller Portrait 3. 

On the Cricut website, you’ll find more models available; the Cricut Explore Air 2, Cricut Explore 3, the Cricut Maker, Cricut Maker 3, and the smaller Cricut Joy.  

For the purposes of a fair comparison, we’ll compare the Silhouette Cameo 4 against the Cricut Maker 3. Both of these are the top of the line machines, with the widest varieties of cutting capabilities.

Let’s take a more in-depth look at the similarities and differences of these two machines, beginning with the Silhouette Cameo 4.

Silhouette Cameo 4:

The Silhouette Cameo 4 is available in three sizes; 12 inch width, 15 inch width, and a large 24 inch wide machine. It’s nice to be able to choose machine size based on your crafting space and project needs. The larger sizes are marketed more towards professional designers and small business owners. The features on all three sizes are basically the same.

When you purchase a Silhouette Cameo, here is what is included:

  •  The Silhouette Cameo 4 machine
  •  power cable and a USB cable
  •  a 12-inch by 12 inch Cameo cutting mat
  •  AutoBlade
  •  Adapters for the standard blade, premium blade, deep-cut blade, 2mm Kraft Blade, and for the Silhouette sketch pens.
  •  One month Silhouette Design Store subscription (once you register your machine
  • Free version of Silhouette Studio software, with 100 free exclusive designs (available for download)
  •  Warranty information: one-year parts and labor, limited to USA and Canada only.

The Silhouette Cameo 4 has a sleek, angular design that is going to look good in any craft room. The controls on the machine are a small touch screen that disappears when not being used. The twelve-inch width Cameo 4 model weighs approximately eleven pounds, which is slightly less than the weight of the comparable Cricut Maker.

Silhouette Cameo 4: Cutting Features 

The Cameo 4 can cut approximately 100 materials, including a variety of specialty papers, cardstocks, adhesive vinyls, heat transfer materials, specialty materials such as magnet sheets, lightweight wood sheets (such as balsa wood and chipboard), vellum, transparencies, fabrics, craft foam, and faux leather.

The maximum cutting depth for this machine is 3mm, which is more than adequate for heavier specialty materials. This machine has an impressive cutting force of 5 kg.

That’s a full kg more than the Cricut Maker 3. While that much cutting force is great if you’re going to primarily use your Cameo 4 for heavier materials such as fabric, craft foam sheets, and faux leather, it really doesn’t make any difference if your projects will primarily involve cutting vinyl, cardstock and iron-on materials.

Keep in mind that having extra cutting force isn’t always a better option. If your project involves cutting complicated designs on thicker materials, using less cutting force with several passes might give you cleaner, more precise cuts. 

It’s important to note that you’ll need to purchase the Kraft Blade or Rotary Blade to successfully cut any thicker materials.

You’ll also need to purchase a separate Pen Holder if you want to use pens or markers to draw or write on any of your projects.

The pen holder is nice, especially since it has adapters that will allow use of pens other than the Silhouette brand. However, the Cricut Maker has a dual carriage feature that doesn’t require the purchase of a separate accessory to use their pens.

The Cameo 4 does have a few nice features that the Cricut Maker doesn’t have. One of the most prominent is the built in roll feeder.

With the roll feeder, you can attach your roll of vinyl directly to the machine, and it will feed directly into the cutting area. This allows you to cut materials such as vinyl, sticker sheets, and heat transfer vinyl without using a  mat. When using the feeder, you have a potential continuous cutting length of 10 feet!

On the back of the Cameo 4 is a built in “cross cutter” that allows you, after cutting your project without a mat, to trim your material right off the roll after the machine is done cutting.

Another nice cutting feature is the “pop out” cutting setting that will allow you to cut cardstock and papers without having to use a cutting mat.

When making “pop out” cuts, the Cameo will occasionally lift the blade, leaving tiny portions of the design uncut so your design will still be connected to your paper or cardstock. Essentially, it creates perforations on your project instead of cutting it out. 

Once you are done cutting, you simply “pop” the cut piece out of your material! Cricut machines also have this capability, but you have to use a separate “Perforation Blade” for this function.

It should be noted here that while the feeder makes cutting large projects much easier, it doesn’t work as well if your project has smaller, more intricate designs.

Cutting on a mat will give you better stability and control for making fine cuts. The “pop out” cuts are also nice for larger, more simple shapes, but the cut lines don’t always turn out perfectly smooth, and again it doesn’t work quite as well for intricate designs. 

There is one more consideration when buying any cutting machine, and it’s something that usually doesn’t come to mind until you’ve already made your purchase and are trying out your new machine.

I’m referring to the noise level. There truly isn’t any such thing as a silent cutting machine. All makes and models will operate with some level of noise. The Silhouette Cameo 4 is loud.

It’s not so loud that you won’t be able to hear a nearby television or music playing, but you’ll probably need to turn up the volume a bit more than you normally would.

The Cricut Maker, comparatively, isn’t silent by any means; but it’s not as noisy as the Cameo 4. If you need a relatively quiet space to do your crafting, this is something you might want to give serious consideration to.

Let’s take a look at the basic functions of the Cricut Maker 3 now, and see how it compares to the Cameo 4.

Cricut Maker 3:

The Cricut Maker 3 is the top-of-the-line model of Cricut cutting machines. It has the ability to cut over 300 different materials, and is compatible with 13 different specialized tools. With the variety of Cricut tools and blades available for the Cricut Maker 3, you can cut, score, deboss, write, draw, and even engrave.

When you purchase a Cricut Maker 3, here is what is included

  • Cricut Maker 3 machine
  • Premium Fine-Point Blade and Housing
  • USB cable and power adapter
  • Welcome card, with instructions on how to register your machine online and get started
  • Free 30-day trial subscription to Cricut Access (for new subscribers)
  • Access to 100 ready-to-make projects with your trial subscription to Cricut Access
  • Sample material to do a practice cut.
  • Information on the One-Year Limited Warranty


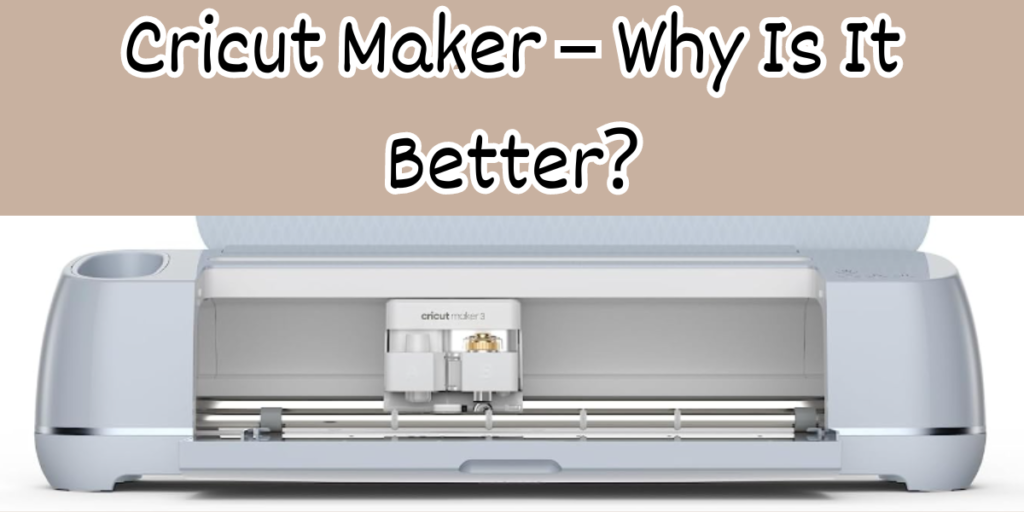
The Maker 3 is a nice-looking machine, with rounded corners and it is available in several colors. The overall design is very “crafter friendly”, with a storage cubby for your small tools such as tweezers, scissors, pens, and the weeding tool. On top, you’ll find a handy slot that acts as a holder for your phone or tablet. The Cricut Maker is a solid machine that weighs 15.4 lbs.

Cricut Maker 3 Cutting Features

The Cricut Maker 3 can cut over 300 different materials. In addition to an assortment of specialty vinyl, cardstock, and iron-on materials, it also easily cuts leather, balsa wood, bonded fabric, foam board, vellum, transparencies, and more. It has a maximum cutting depth of 2mm and a maximum cutting force of 4 kg.

Both of those are slightly less than the power of the Silhouette Cameo 4, but the Cricut Maker 3 still does an outstanding job at cleanly cutting heavier specialty materials.

One thing that makes the Maker 3 stand out against other cutting machines is its versatility. While there are nine specialty tools and blades available for the Cameo machine, there are 13 different blades and tools available for the Maker 3. In addition to the assorted knife blades and pens that both machines feature, with the Cricut Maker 3 you can also purchase a foil transfer tool, a bonded fabric tool, a scoring stylus or wheel, an engraving tool, debossing tool, a wavy blade, and the perforation blade. 

These specialty tools bring so much versatility to your crafting experience, but you will probably find yourself using one of the simpler Cricut tools more than anything else; the scoring stylus.

The scoring stylus, or a scoring wheel if you prefer, really is essential if you use your Maker 3 to make greeting cards or paper crafts of any kind. It’s a blunt tool that creates a slightly creased line anywhere you need to fold on your cut piece. With the scoring stylus, you’ll get a perfectly straight, precision fold without weakening your finished project.

Unfortunately, the Silhouette machines don’t have a comparable scoring tool. Instead, there is a “score” option in their design software, but it doesn’t truly score your paper. Instead, the blade will perform a very light cut, only halfway through your cardstock or paper, anywhere you want a fold line. It works perfectly fine, but because it’s a partial cut it does weaken your material a little bit. 


The Cricut Maker 3 does have the ability to cut some materials without the use of a mat. You can do this by using Cricut brand Smart Materials. Smart Materials come in a roll with a slightly heavier backing on them. It’s easy to load any smart material into the machine, and they cut beautifully.

Because the backing is slightly heavier than Cricut’s “regular” materials, you can successfully cut more detailed designs with Smart Materials. 

Using Smart Materials can save time, also. If you’re making a large number of vinyl decals or custom t-shirts, for example, you can cut them more quickly without having to switch out mats. Just load your roll of vinyl or heat transfer Smart Materials into your Cricut Maker and you can cut them all in no time! 

When using Smart Materials, you can cut a continuous length of up to 75 feet! If you use your Maker 3 for vinyl cutting to create classroom or outdoor decorations, the ability to cut long pieces makes the work so much easier.

While the Maker 3 doesn’t have an attached feeder and cross-cut trimmer like the Silhouette Cameo, you can purchase a roll feeder accessory with an attached trimmer separately. Unless you are cutting Smart Materials in very long lengths, you might not even miss having the feeder.  

Cricut Design Space vs. Silhouette Studio Software

By now, you’ve probably realized that when it comes to basic cutting functions, there are more similarities than differences between the Silhouette Cameo 4 and the Cricut Maker 3. The real differences between these two machines comes down to the software. You can’t operate either brand of machine without the required software or app, and while both Silhouette Studio and Cricut Design Space are good programs, there are some notable differences. 

Silhouette Studio Software

Silhouette Studio Software is Silhouette’s software to create projects & send them to your cutting machine. If you’re familiar with graphic design programs, you probably won’t have much trouble learning to use the Silhouette software.

If you’re unfamiliar with such programs though, you might find it has a steep learning curve at first.

SIlhouette’s software is a desktop-only application; compatible with Windows and Apple operating systems. However, it isn’t compatible with Chromebooks, tablets, smartphones, or any mobile devices. This is a big drawback for crafters who like to use their ipads with their cutting machines. There is a free mobile app called “Silhouette Go”, that allows you to access the designs in your Silhouette library and send them to your cutting machine, but it doesn’t give full access to all the design features.

The Silhouette software has some advanced features available, such as a freehand drawing tool, and a “trace” tool, that isn’t available with Cricut Design Space software. However, you need to purchase one of the paid versions of the software to access these tools.

Silhouette’s software has a total of over 60 design tools, depending on which version of the software you are using. There are four different tiers of Silhouette Studio; let’s take a look at how they compare to each other.

Versions of Silhouette Studio Software
 

The Basic Edition (Free!), gives you access to ready-made images and projects from the Silhouette Design Store, the ability to work with fonts installed on your computer, the ability to import JPG and PNG images and convert them to “cut and print” designs, use of some design tools to create your own projects, and of course you can send your projects directly to your Silhouette machine.

The next tier of Silhouette Studio Software is the “Basic to Designer” Edition, with a cost of $49.99. With this edition, you get all the features in the free software version, plus rulers and grids to help align your design work and (most importantly) the ability to import and work with SVG and PDF files.

The “Basic to Designer Plus” Edition is the next level, with a cost of $74.99. In addition to all the features in the lower tiers, you’ll also be able to import and work with embroidery file types, and have access to even more design tools.

Finally, the highest tier of Silhouette’s software is the “Basic to Business” Edition, with a price of $99.99. This level really is geared towards professional graphic designers or small business owners. In addition to the features of all other software packages, the “Basic to Business” edition allows you to export your SVG, PDF, and JPG designs, import Ai, CDR, and EPS files, and work with multiple cutting machines at once with the multi-cutter support feature.

All of these costs for the Silhouette software are for a one-time purchase. Additionally, there is a subscription option for the Silhouette store. With the service, you pay a monthly fee to purchase “credits” that you can use in the Silhouette store to buy SVG images and project files. 

There are different subscription levels, with the base level being $4.99 per month for 10 credits. Each credit is worth one U.S. dollar, and there is a 60-day credit rollover. After 60 days, any unused credits you have in your subscription will expire. It’s hard to say how many files you can purchase with 10 credits per month since the files vary in price. 

Silhouette Studio Software: Do I Need The Paid Version?

If you’re only an occasional crafter or aren’t familiar with using a graphic design program, you can probably get by with the free or the next tier “Basic to Designer” version. You can always start out with the free version, and upgrade to any of the paid versions later. 

It’s important to note that the free version of Silhouette Studio greatly limits what files you can access and use. Most projects for cutting machines use SVG (scalable vector graphics) files. These files are easy to modify and allow you to resize without losing any clarity. 

There are plenty of great SVG files in the Silhouette Design Store (both free and available to purchase), but you won’t be able to import any SVG files from outside unless you buy the $49.99 software version.

This means that if you create your own SVG custom designs in a drawing program such as Adobe Illustrator, you won’t be able to import them to use with your Silhouette cutting machine using the free software version. There are also a lot of wonderful independent designers who sell their SVG files on websites such as Etsy, and again you’ll need the paid Silhouette Studio software to be able to use these files. 

There is an add-on app called “Silhouette Connect” that will send your artwork from Adobe Illustrator and CorelDraw directly to your Silhouette cutting machine. This makes it easy to create “print and cut” stickers of your own original designs. The Silhouette Connect add-on has a price of $19.99.

The subscription service to purchase files from the Silhouette website is affordable but limiting. There’s no good way to know if you would use all the credits you have in your account before they expire, and it’s hard to say how many files you can purchase each month with varied prices.

Cricut Design Space Software

Design Space is the software program used to create projects for your Cricut cutting machines. It doesn’t have as many of the advanced graphic design elements as Silhouette Studio, but most crafters find it much easier to navigate. Most of the functions are fairly intuitive, and there are also easy tutorials on the Cricut website.

The desktop version of it works well with both Windows and Apple operating systems. Unfortunately, Design Space isn’t yet compatible with Chromebook operating systems. In addition to the desktop software, there is also an app for mobile devices. The Design Space app does more than just send projects to your cutting machine. It can perform almost all the functions of the desktop software!

Design Space is free for all Cricut users. You get all the design tools and features with the free version. This means that you can easily upload any SVG file from an outside source to use with your Cricut machine.. If you use graphic design software, such as Adobe Illustrator, you can upload your artwork to your Design Space library without the need of any add-on applications. 

Versions of Cricut Design Space Software

With the free version of Design Space, you have unlimited access to approximately 1,000 images and over 250 ready-to-make projects, unlimited use of 15 fonts, the ability to purchase SVG files and projects a la carte from the Cricut website, and the ability to create up to 5 collections in your Design Space library.

There is also a monthly subscription option for Cricut’s Design Space, known as Cricut Access. With a reasonable cost of $9.99 per month, the Access subscription gives you unlimited use of over 200,000 images (this includes the images you have to pay for “a la carte” with the free version), unlimited use of 700 fonts, 10% off the purchase of licensed character SVG files, access to thousands of ready-to-make projects, and the ability to create an unlimited number of collections in your Design Space Library.

Additionally, the Access subscription includes a quarterly $10 coupon for purchases made on Cricut.com, 10% discount on purchases made on cricut.com, and Priority Member Care if you need customer service assistance.

Cricut Design Space: Do I Need The Paid Version?

The free version of Design Space will allow you to use all of the software’s functions. You can use the design tools, upload files from outside the Cricut website, and create new designs all for free! 

The only “extra” optional cost would be if you choose to subscribe to Access.

This subscription gives you unlimited use of almost all the images you would have to otherwise pay for individually. 

Even if you choose not to subscribe right away, the images and project files are very inexpensive; usually between $1 and $3.

At the price of $9.99 per month, the subscription is a bargain if you find yourself wanting to purchase many files from the website. You always have the option to upgrade to an Access membership at any time.

The savings benefits are a great perk for Access subscribers, also. In addition to the usual 10% discount from their website, Cricut also offers “Access Exclusive” sale items for subscribers. These deals are great, and it would be hard to find better prices for some items.

Cricut vs. Silhouette: What Do They Cost?

A big deciding factor in choosing to buy a Cricut or Silhouette machine is going to be the cost. Both the Cricut Maker and the Silhouette Cameo are considerable investments in your crafting hobby.

Fortunately, both the Silhouette or Cricut machines can be purchased not only from their respective websites, but also from craft stores and even Amazon.com. It’s worthwhile to check for sales from all of these sources. 

The regular price for the Cricut Maker 3 is $429.99. Of course, you’ll want to purchase materials and accessories to get started crafting right away. Fortunately, you can buy “bundles” on the Cricut website that offer a cutting machine, basic accessories, and an assortment of materials at a discounted price. 

The Silhouette Cameo 4 (12 inch model) has a regular retail price of $299.99. Silhouette does occasionally offer bundles similar to what is sold on the Cricut website, but not on a regular basis. 

Accessories and materials for both machines are comparable in price, and they do frequently go on sale. Fortunately, you can take advantage of sale prices no matter which machine you own.

Cricut materials (with the exception of their “smart materials” will work in a Silhouette Cameo machine, and Silhouette materials work great in Cricut machines. There are a number of third-party brands of vinyl and heat transfer materials that work in any cutting machine, too. 

In addition to the base price of the machines and materials, you should also factor in the cost of software and subscription services offered by Silhouette or Cricut.

Cricut software is free, easy to use, and has a wide variety of design tools. You don’t have to pay any extra to upgrade for more functionality.

Given how very limited the free version of the Silhouette design studio software is, most crafters will need to pay for the $49.99 Designer Edition. If you enjoy creating graphic designs in programs like CorelDRAW, you’ll also need to purchase the add-on app for your Silhouette Cameo.

For $9.99 a month, an Access subscription will give you unlimited use of thousands of files, compared to the basic $4.99 Silhouette store subscription that gives you 10 “credits” (a $10 value) that expire after 60 days. 

Conclusion: Silhouette vs. Cricut

Both the Silhouette Cameo 4 and the Cricut Maker 3 have their strong points.

For overall ease of use, reliability, and versatility, it’s our opinion that the Cricut Maker 3 is the overall better choice in the “Cricut vs. Silhouette” debate. 

The Silhouette Cameo and Cricut Maker cutting machines are both quality additions for your crafting needs. When it comes to basic functionality in the Cricut vs. Silhouette debate, the two cutting machines are more alike than they are different. Either machine is a good choice, but it really depends on the type of crafts you’ll use the cutting machine for, and how comfortable you are with the learning curve to get comfortable with the enclosed software.

Most User Friendly: Cricut!

If you’re investing in a quality cutting machine, ease of use is probably a big priority. No one wants to spend huge amounts of time and materials just learning to use their machine! With its comprehensive software and excellent online tutorials, anyone can start creating with their Cricut cutting machine almost immediately. 

The larger variety of specialty tools available for the Cricut Maker makes this a much more versatile machine when compared with the capabilities of Silhouette’s cutting machines.

Tools like the rotary blade for cutting bonded fabric, or the foil transfer kit to add shiny accents to your project elevate your crafting capabilities far beyond paper crafts and vinyl cutting.

Best Software: Cricut Design Space

The biggest difference between Cricut Maker 4 and Silhouette Cameo 3 really comes down to the software options. Both software are easy to initially set up. They both have Bluetooth connectivity, which means you’ll need a decent internet connection to use them. 

The ability to use any SVG file or even your own images with the free Cricut design software solidifies our preference for the Cricut Maker, especially since you’d have to pay for a premium version of the Silhouette design studio software to do this.

If you’re comfortable with other graphic design programs, you’ll probably love Silhouette Studio. If you’re more of a beginner when it comes to using any design software, you’ll probably feel a little frustrated with the time it takes to learn it, though.

Comparatively, Cricut Design Space has a lot of great functions that are easy to learn. The Cricut software was designed with the home crafter in mind, making it one of the more user-friendly design programs you’ll ever find.

The free Design Space mobile app that allows you to use your machine from a smartphone or tablet gives Cricut a considerable edge over Silhouette. As long as you have your mobile device handy and an internet connection you can work on your craft projects!

Best Overall Value: Cricut

While the Cricut Maker 3 is a more expensive machine than the Silhouette Cameo, it is a sturdy piece of equipment with a reliable reputation. Cricut.com frequently has sales on their machines, and the bundled deals with accessories and materials are a great bargain.

The Silhouette Cameo 4 machine costs slightly less than the Cricut Maker. While Silhouette frequently has sales for their products, usually bundled deals that include tools and materials along with your new Silhouette Cameo machine aren’t available.

By the time you’ve purchased a new Silhouette Cameo and basic tools and materials to get started, and possibly a premium version of their software, you may end up spending the same amount of money (or slightly more) than if you had bought a Cricut Maker.

The Silhouette Cameo isn’t as widely sold in as many craft stores as the Cricut machines, so if you don’t want to buy directly from their website you might have trouble finding one in person. 

If you’ve been mulling over buying a Cricut vs. Silhouette machine, hopefully, this article helped to clear up some of the significant differences between these two machines.

If you’re still undecided, there are of course many online videos and reviews that address the Cricut and Silhouette comparison as well.

Both the Cricut Maker and Silhouette Cameo have their loyal users and deciding which option is right for you really depends on what type of crafter you are, and how you’ll use your machine. With either cutting machine, you’ll find yourself spending many enjoyable hours in your craft room, creating beautiful projects for yourself and others.

Cricut Explore Air 2 Review – Is it Still Good? (2023)

6 · Dec 25, 2022 · Leave a Comment

The Cricut Explore Air 2 is the most popular machine in the Cricut brand of cutting machines, according to their website. It’s a popular choice for crafters, with the capability to create unique greeting cards, party decorations, custom t-shirts, home decor, and so much more. 

This machine can cut over 100 different materials, such as cardstock, adhesive vinyl, iron-on, glitter paper, window cling material, faux leather, and others. It can even cut some fabrics; perfect for anyone who enjoys sewing and quilting.

The Cricut Explore Air 2 is impressive right out of the box. It comes in a variety of attractive colors, in case you want the machine to complement your craft room decor.

It’s a fairly large machine, measuring 24″ wide by 9.5″ tall, with a depth of 9.5″. It weighs approximately 12 pounds.  Because this is a large, somewhat heavy machine, you’ll want to set it up on a strong stable surface. 

Short Verdict of this machine…

Get it instead of the Cricut 3. The Cricut Air 2, especially the bundle, is the way to go.

What Does the Cricut Explore Air 2 Come With?

When you purchase an Explore Air 2, you’ll get the following:

  • The Explore Air 2 machine
  • Premium Fine-Point Blade + Housing to hold the blade
  • A fine-point black Cricut pen
  • 12” X 12” LightGrip Cricut Machine Mat (this is suitable for most cutting projects)
  • USB cable and power adapter
  • Cricut Welcome Book and start-up instructions
  • Materials for a small practice project
  • One Year Limited Warranty information
  • Free trial membership to Cricut Access


The included Welcome Book outlines the basic features of the machine and what it can do. It also has a useful quick reference guide with easy-to-follow instructions and illustrations.

Of course, to start crafting with your machine you’ll need to purchase more materials, and maybe a few basic accessories. Instead of trying to decide what supplies you need to buy separately, Cricut sells this machine in a couple of different bundled packages that include a variety of materials and tools. These bundle packages are a great value, and you’ll have what you need to start creating right away.

Cricut Explore Air 2 Features

The Explore Air 2 is a versatile machine, with wide capabilities. Here are the Explore Air 2’s basic features:

Versatility

The most prominent feature of the Explore Air 2 might simply be how versatile it is! This machine can cut over 100 types of materials. It can also draw, write, score, and add foil accents to paper crafts.

The Explore Air 2 comes with the Premium Fine-Point Blade, made of German carbide steel, which is good for most card stock, vinyl, and iron-on materials. This long-lasting blade provides potentially dozens of precision cuts. You can purchase replacements when the original blade gets dull, and they’re easy to replace in the blade housing.

Additionally, you can purchase specialty blades, such as the Deep Point Blade for cutting faux leather, cardboard, and craft foam, or the Bonded-Fabric Blade to cut fabric pieces. Another accessory that adds to this machine’s versatility is the foiling tool. With this tool and foil sheets, you can add eye-catching metallic accents to your crafts.

Easy To Use Smart Set Dial

In order to set the blade to the proper pressure for different materials, all you have to do is turn a dial. It’s that easy! The Smart Set Dial on the Explore Air 2 has settings for the most commonly used materials, as well as a “custom” setting.  When you load your materials into the machine, just adjust the dial for whatever material you are cutting.

The custom setting on the dial is used in conjunction with Cricut Design Space software to create your own material descriptions and settings.

The custom setting is especially useful if you’re using non-Cricut brand materials that might work best with different cutting settings than the standardized Cricut material settings.

2X Fast Mode For Cutting

The Explore Air 2 has a “fast mode” option that works beautifully with thinner materials such as cardstock, paper, and vinyl. It cuts twice as fast as the previous Cricut machine models.

This can be a huge time saver, as large projects can take quite a bit of time to cut. It’s also handy if you’re making multiples of one project. 

Setting the machine to use the fast mode feature is as easy as clicking on a button when you’re setting up your project for cutting in Design Space software.

Fast Mode doesn’t work as well for very intricate cuts. In that case, you’ll get better results by cutting at the normal speed, even if it does take a little bit longer.

Another thing to keep in mind when using Fast Mode is that the machine does sound louder when this feature is used. It’s not an unreasonable noise level, but it’s good to keep in mind if you need a quieter work environment.

Double Tool Clamps

Another useful time-saving feature is the double tool clamps. With two clamps, you can load a Cricut pen in one clamp, and your cutting blade in the other clamp, and the machine will perform the cutting and draw/write functions without interruption. There is no need for you to pause and switch out the tools in the middle of your project.

The double tool clamps can also be used to hold the scoring stylus (sold separately). This is great if you’re making cards or decorations that need to be folded and assembled. The machine will cut your project, and score along any fold lines in one process.

Tool Storage

A small, but useful feature is a compartment on top of the machine to hold your tools. Cricut sells a variety of tools to assist with your Cricut craft projects. The tool storage compartment easily holds tweezers, a Cricut weeding tool, extra pens, small scissors, and more.

Compatibility With Cricut Cartridges

Older Cricut machines had data cartridges to store your projects and image files, instead of utilizing the cloud-based Design Space software. If you had one of these older machines, the Explore Air 2 has a cartridge port, so you can link your old cartridges to Design Space. 

How Does the Cricut Explore Air Work?

To get started with your Explore Air 2, you’ll need Cricut Design Space, their managing software. Design Space is online software that works anywhere you can get an internet connection. 

Software updates are done automatically on a regular basis, both to fix any software bugs and introduce fun new design features.  

Cricut Design Space is very user-friendly, and not at all difficult to learn. If you have a basic familiarity with any designing or graphic software, you’ll be using Design Space like a pro in no time.

Otherwise, new users can go to learn.cricut.com for excellent tutorials on how to use all the features of Design Space. Don’t let the thought of learning new software intimidate you; it is quite intuitive.

In addition to the thousands of files already available on Design Space, you can also upload your own SVG (scalable vector graphics) files to make your own one-of-a-kind projects.

Get the Cricut Air 2 Here

The Design Space homepage is where you’ll find files and project ideas for your machine. The “canvas” page is the workspace where you can customize and make your project, or where you can play around with your own designs. Once you have your design just the way you like it on your canvas, you simply click the “make it” button, then follow the on-screen instructions for your machine.

Buttons on top of the Explore Air 2 control loading the materials, when to begin cutting, and then unloading the materials when done. The buttons light up when you need to press each one; it couldn’t be much easier!

Design Space connects to your machine via a Bluetooth connection, so there is no need to plug the machine into your computer or mobile device. It is compatible with any Bluetooth-enabled desktop computer or laptop, and there is even a version for use with tablets and cell phones.

Design Space is free for any Cricut user.

There are hundreds of free projects and images available, and literally thousands that can be purchased for very low costs. If you don’t want to purchase files individually, there is a subscription service known as Cricut Access.

Subscriptions to Cricut Access start as low as $9.99 a month, and you get access to literally thousands of images, projects, and fonts.  When you purchase a new Cricut machine, new subscribers can get a free 30-day trial membership to Cricut Access. This is a great way to decide if the paid subscription option is something you’ll make good use of.

How Much Does a Cricut Explore Air 2 Cost?

A Cricut Explore Air 2 has a regular price of  $249.99 on the Cricut website. That may seem like a sizeable investment for a hobby, but when you consider all the capabilities this machine has to offer, it is not an unreasonable price. Cricut machines are also available at most major craft supply stores. The Cricut website frequently has these machines on sale, so it’s a good idea to check for good deals.

Cricut also sells the Explore Air 2 in bundles that include a variety of tools and supplies. The “Essentials Bundle” is regularly priced at $383.42, and includes the machine plus various material samples, mats, and tools.

The “Everything Bundle” has a regular price of $497.82, and includes an even larger amount of material samples, mats, and various tools/accessories.

These bundles are only available on the Cricut website, and they do frequently go on sale. While purchasing a bundle is still a sizeable cost, it’s a better deal than separately buying a machine, tools, and materials to get started. 

Cricut Support and Community

Buying a Cricut machine is a sizeable expense, and before you buy one you might be wondering such things as “who can help me if my machine isn’t working properly?”, or “how can I get help with Design Space?”

Fortunately, Cricut has toll-free phone numbers for every region where they sell Cricut products. Although the time on hold can be a little bit long at times, their friendly representatives are very knowledgeable and helpful.

They’ll help troubleshoot any technical issues with the machines or walk you through anything you’re trying to accomplish on Design Space. If the hold times on the phone lines are excessively long, there is an option for a representative to call you back.

In addition to the excellent telephone help, the Cricut website has resources for all their products. There is also a Cricut YouTube channel that is filled with videos showcasing everything from how to use their products, to instructions for specific projects. If you are a visual learner, these videos make it easy to see exactly how to use your machine, as well as how to navigate the Design Space software.

For more useful yet social interactions, there are official Cricut Facebook groups where members can exchange ideas, ask questions and share crafting tips, and show off their creations.

Is The Cricut Explore Air 2 Right for You?

While there are other cutting machines on the market that perform similar functions as the Explore Air 2, and at a comparable price, most of them don’t have the versatility and cutting power of this machine.

Get the Cricut Air 2 Here

If you enjoy making cards and decorations for your home, or maybe want to make custom t-shirts for your friends and family, you’ll be thrilled with the Explore Air 2.

This is also a good choice for teachers to use to create classroom decorations and fun supplies for their students. Small business owners who sell their art and handmade creations can use the Explore Air 2 to make personalized packaging for their products. The Explore Air 2 is an excellent choice for any creative person. Possibilities are only limited by your imagination!

What is Chalk Paint? Everything You Need to Know

3 · Dec 24, 2022 · Leave a Comment

You’ve probably heard of chalk paint if you’re a do-it-yourselfer. It’s a popular choice for anyone who wants to decorate their home with the “modern farmhouse” or “cottage core” aesthetic. But what exactly is chalk paint, and what is it used for?

What is Chalk Paint? Here is Everything you need to know


Chalk paint is basically a primer-free paint that has a chalky-looking finish to it. It’s quick and easy and covers surfaces easier than traditional paint. 

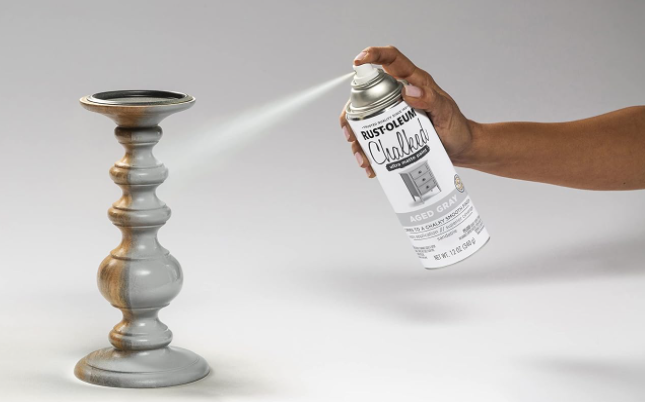
Any brand of chalk paint gives a soft matte “chalky” finish to whatever you’re painting. With a little bit of light sanding, it’s easy to use chalky paint to create a “distressed” appearance on furniture.

It can transform any ordinary household item to give it the look of a cherished antique. For some items, a sealant coat of wax is applied to give your painted item a more velvety matte appearance or to create a soft patina finish. 

What’s The Difference Between Chalk Paint and Regular Paint?

Chalk paint is unique and differs from traditional home paints in many ways. The most obvious difference is in its appearance. Once chalk paint dries, it has a matte “chalky” look. There isn’t even a hint of glossiness. It even has a bit of a chalk-like texture when you touch it.

There are plenty of traditional matte finish paints on the market, but they don’t have quite the same velvety look that you can achieve with chalk paint.

Chalk paint is easy to apply, and unlike traditional home paints, you won’t need to do much preparation and rarely need to use a primer coat. In fact, you can use chalk paint right over existing paint with no problems.

This is especially nice if you want to sand edges and let the prior paint color show through for a distressed style. Chalky paint applies smoothly to most surfaces, even glass, and metal, with little to no preparation.

Sometimes a very light sanding will help the paint stick easier, but that’s only necessary if you’re painting a very glossy surface.

Traditional home paints and chalk finish paints are also different in their consistencies. Chalk-style paint is a bit thicker. Because of this, it’s less likely to drip and run while you’re painting. In fact, for many projects, you can probably get away with only applying one coat of chalk-style paint, whereas you might need two coats of traditional paint.

Chalk paint is much easier to clean up, too. It’s water-based, so you can wash your brushes with a gentle detergent and water instead of mineral spirits.

What Do You Use Chalk Paint For?

Annie Sloan first invented chalk paint because she was frustrated with trying to find furniture paint that she liked. Her efforts definitely started a popular trend, with dozens of chalk-style paint brands in a wide assortment of colors now available! All brands of chalk-style paint have been used primarily for refinishing and upcycling wood furniture to give them a “vintage” look.

A plain piece of furniture, no matter how old, can easily be transformed into an eye-catching focal point of any room when refinished with chalk paint. A coat or two of chalk-style paint applied to used furniture from thrift stores and yard sales is an easy way to bring a designer look to your home.

If you’re a fan of the “distressed” look, chalky paint is the best way to achieve it. A light sanding over chalky paint gives that antiqued distressed look that is popular with so many interior designers.

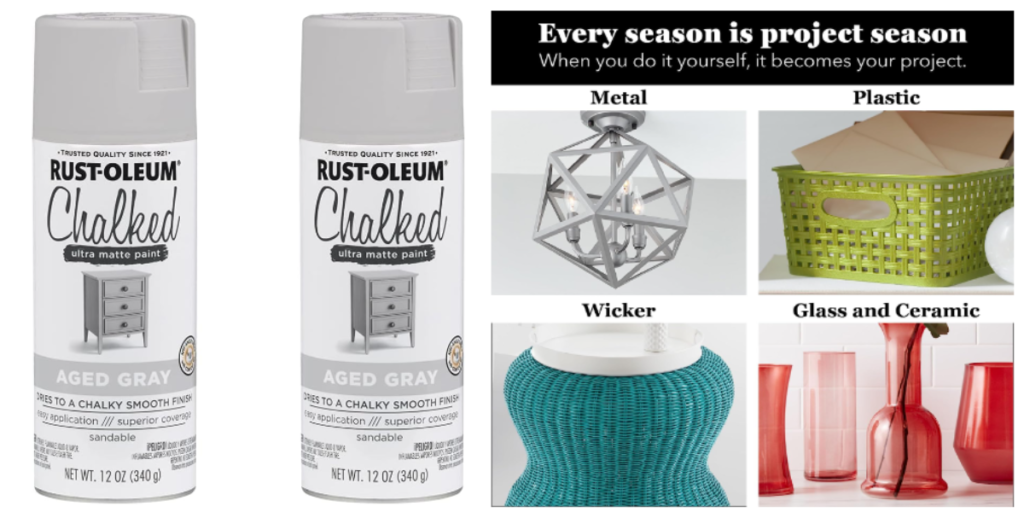
While chalk paint isn’t the best choice for painting entire rooms, you can use it as an accent to your home decor by painting picture frames, shelves, and even light fixtures. Bottles and jars painted with chalk paint become pretty accent pieces in any room of your house. 

Chalk finish paint works well for stenciling projects. You can add chalky paint accents on any piece of furniture, even if the furniture is already stained or painted with traditional paint.

When using chalk paint with a stencil, you’ll want to be sure that your stencil brush or roller has a small amount of paint on it. Because chalk finish paints are thicker than traditional paint, your stencil won’t have nicely defined edges if you use too much paint. You can always add more paint to your design if necessary.

Seasonal craft projects, such as wooden signs or table accents, can be transformed into beautiful vintage-looking pieces with the right colors of chalky paint and a little imagination.

Holiday floral arrangements in a chalky painted container are absolutely charming! 

How Do You Use Chalk Paint?

Chalky Paint is easy to use for any project! If you’re painting furniture or any other large project, most of the time you won’t even need to sand or apply a primer coat. The only time you might want to sand a surface is if you are painting something that is very glossy. Just a light sanding will be enough for the chalky paint to go on smoothly.

Chalky paints are water-based. If your paint seems too thick, you can pour some of the paint into a paper cup, then thin it out with a little bit of water. It won’t take much water, so add it a small amount at a time until it’s the consistency you want.

For smaller projects, one coat of chalky paint is probably enough for smooth, even coverage. For larger projects, one coat will be okay if you plan to “distress” a painted piece. If you want a smooth all-over coverage, it would be best to apply two thin coats of chalky paint. Be sure to allow the first coat to dry completely before applying the second coat of paint. 

If you like the appearance of “distressed” furniture, it’s easy to achieve with chalky paint. Once your painted project is completely dry, go over the areas you want to “distress” with a piece of very fine sandpaper.

You won’t need to sand very long; it should just take a couple of minutes to see results. Lightly sanding along edges, or over uneven places in the wood will turn an ordinary piece of furniture into something special.

The final step for your chalky painted work is to seal it with a wax finish.

For smaller pieces, you probably don’t even need to apply a sealant. However, large items like furniture should be sealed to prevent chipping and scratches. There are almost as many brands of chalked paint waxes available as there are chalked paint choices! It’s easy to apply but does take a little bit of patience. Follow the directions for the specific brand you buy, but the basic steps are to apply a thin coat of the clear wax with a stiff bristle paint brush, let it dry overnight, then use a soft, lint-free cloth to buff the wax. A

second wax coat can be applied if you want a little more protection for your painted object. You don’t want to use a gloss finish sealant on chalk paint; that would completely ruin the beautiful matte finish. There are matte finish spray sealants available, but they’re better suited to smaller painted projects.  

Are Chalk Paint and Milk Paint The Same Thing?

You’ve probably seen milk paint while you’re shopping for the perfect paint to spruce up a unique piece of furniture. While there are many similarities between milk paint and chalk finish paint, they’re not the same thing. You can my full article about chalk paint vs milk paint here.

Both milk paint and chalk finish paint will give you similar results.

They both dry to a soft matte finish and both are easy to create a “distressed” finish. Milk paint does have a very subtle bit of sheen when dried, as opposed to the absolutely matte finish of chalk paints.

They’re also both water-based, and have almost no odors. Those are the primary similarities.

One of the biggest differences between milk paint and chalk paints is that milk paint is usually sold in powdered form that has to be mixed with water. It requires quite a bit of mixing to get a smooth consistency. Chalk paints are ready to use; at most they might need a couple of stirs when you first open the can. 


Both of these paints are similar in their composition, with one of the main ingredients being calcium carbonate. This mineral is what gives milk paint and chalk style paints their soft matte texture.

Milk paint differs in that it contains actual milk proteins (casein) as one of the ingredients. In the powdered form, milk paint lasts a very long time.

However, you should only mix a small amount of milk paint at a time, because once mixed the milk proteins can start to break down.

You can store unused mixed paint in the refrigerator for a couple of days, but not much longer. Milk paint dries very quickly, and once it dries there’s no risk of the milk proteins degrading.

How Much Does Chalk Paint Cost?

How much you spend on chalk paint depends on the quantity you need, and on the brand. Smaller bottles of paint from craft stores cost under $10.

Larger cans usually 30 ounces, can cost between $20 and $45, depending on the brand. When budgeting for your project, don’t forget to include chalk paint wax to protect larger projects. The wax is fairly inexpensive. Depending on the brand you purchase, the price usually averages between $15 to $25 a can.

Which Chalk Paint is the Best?

There really isn’t a best overall chalk paint in my opinion. There are a lot of quality options to choose from but they are in slightly different price ranges.

Some chalk paints are better at one thing and not quite as good at other things. I wrote a whole review post on the best chalk paints that you can find on this site. I’ve tried them all but it depends on the project you’re doing on which one is actually the best.

Where To Buy Chalk Paint

Chalk paints are readily available from many locations. If you want to try designer options, such as the paints from Annie Sloan or Joanna Gaines, you can order directly from their websites. Large home improvement stores carry chalk finish paints made by large paint companies such as Behr and Rustoleum. Craft stores will have chalky paint in smaller quantities, which are perfect if you’re painting smaller objects. 

Chalk Paint Alternatives

Is there anything that makes a DIY project more frustrating than not being able to find the perfect color for your project?

Have you ever tried to match a color you have in mind, with absolutely no luck finding it? I think any home crafter has been there! While there are many chalk-style paints available, there is a way to take any paint and transform it to a chalk finish. 

BB Frosch Paint Transformer Powder is an additive that you can mix into any brand/color of latex or acrylic paint and it will dry to a matte chalky finish. It has 100% all-natural ingredients and is relatively inexpensive with prices ranging from $12 to $34 depending on the quantity.

This can be a very economical option for your painting projects because you can mix up as little or as much paint as you need for any project. The transformer powder has a long shelf life if properly stored, so if you find yourself with leftover powder you can save it for future craft projects. 

BB Frosch Paint Transformer Powder works best on flat finish paints, although you can use it on paints with satin and gloss finishes. They just won’t look quite as chalky once dried. I

t can also be sanded for a distressed appearance and sealed with wax, just like ready-made chalk finish paints. 

Are you ready now to try revitalizing a piece of furniture with chalk paint? Or do you want to create some cute vintage-style home decor items?

Hopefully, this article has given you a good overview of how fun and versatile chalk finish paint can be, as well as inspired you to create something wonderful!

  • « Go to Previous Page
  • Go to page 1
  • Go to page 2
  • Go to page 3
  • Go to page 4
  • Interim pages omitted …
  • Go to page 256
  • Go to Next Page »

Primary Sidebar

Heather from Whipperberry
Hello... my name is Heather and I'm the creator of WhipperBerry a creative lifestyle blog packed full of great recipes and creative ideas for your home and family. I find I am happiest when I'm living a creative life and I love to share what I've been up to along the way... Come explore, my hope is that you'll leave inspired!

Footer

  • Privacy Policy

Copyright © 2023 · Seasoned Pro