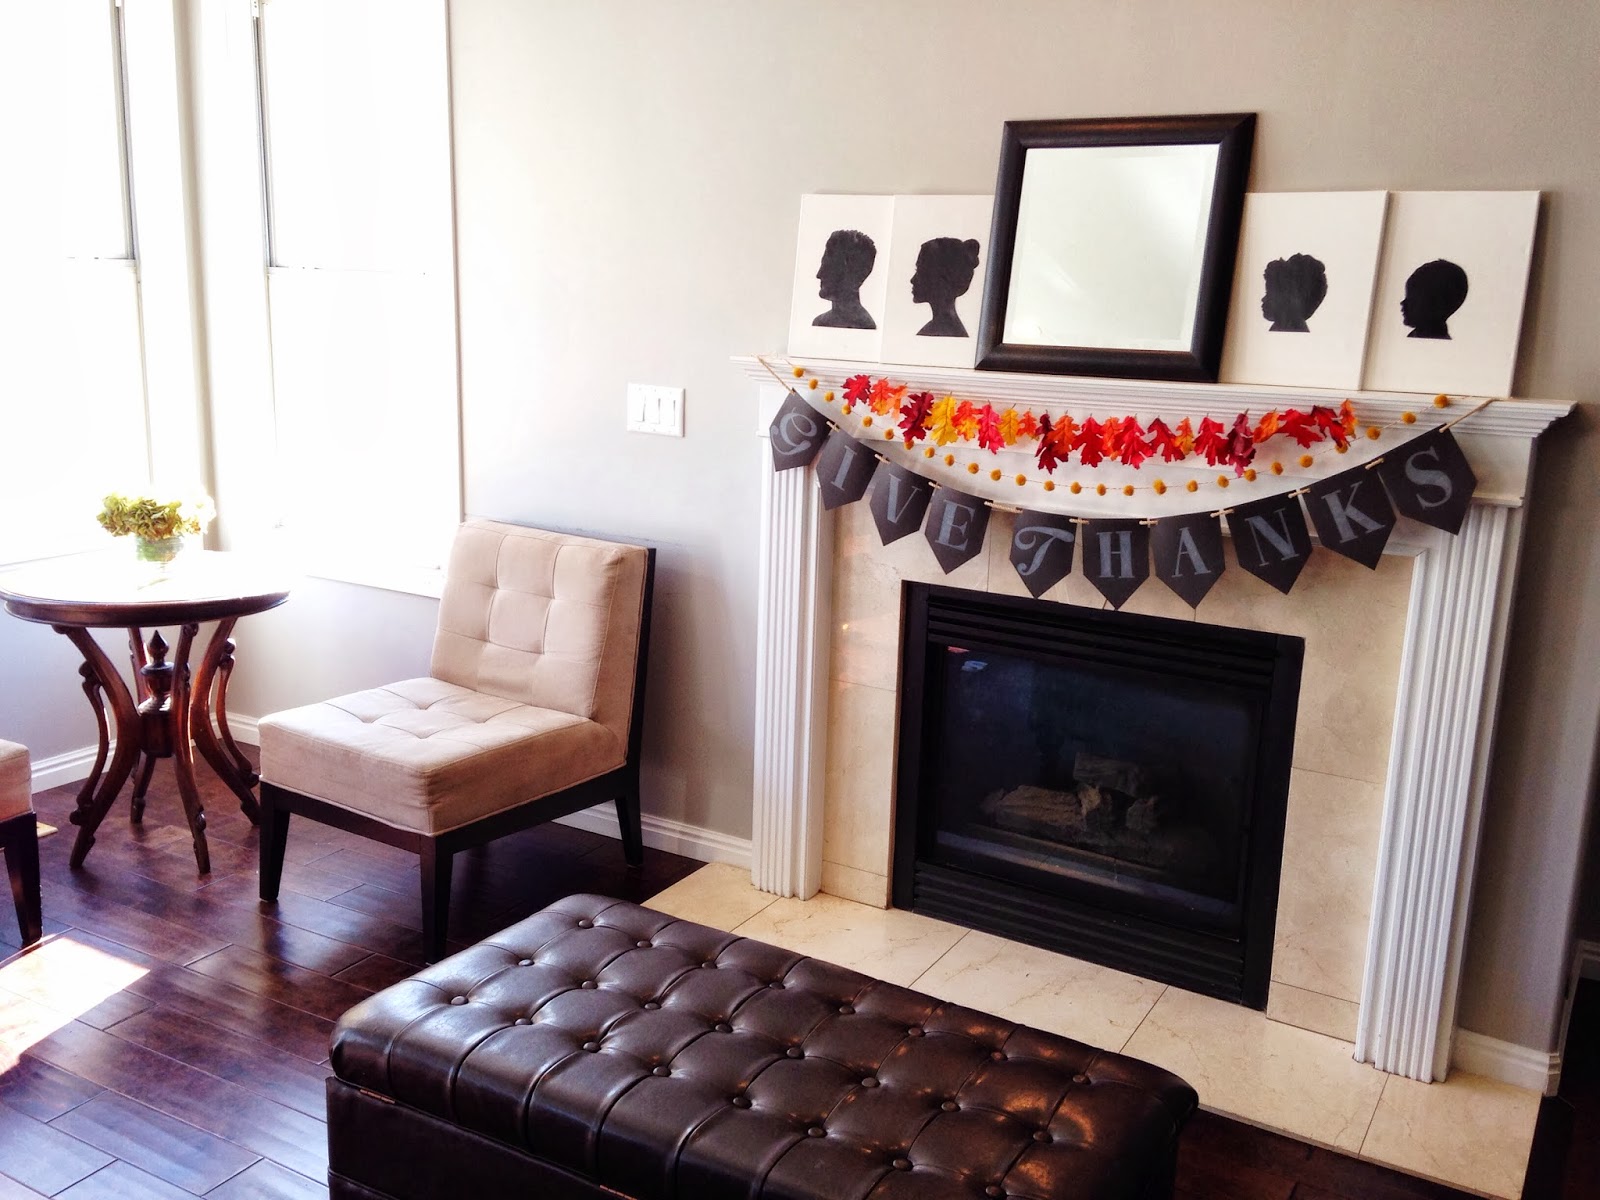
DIY Thanksgiving Garland //
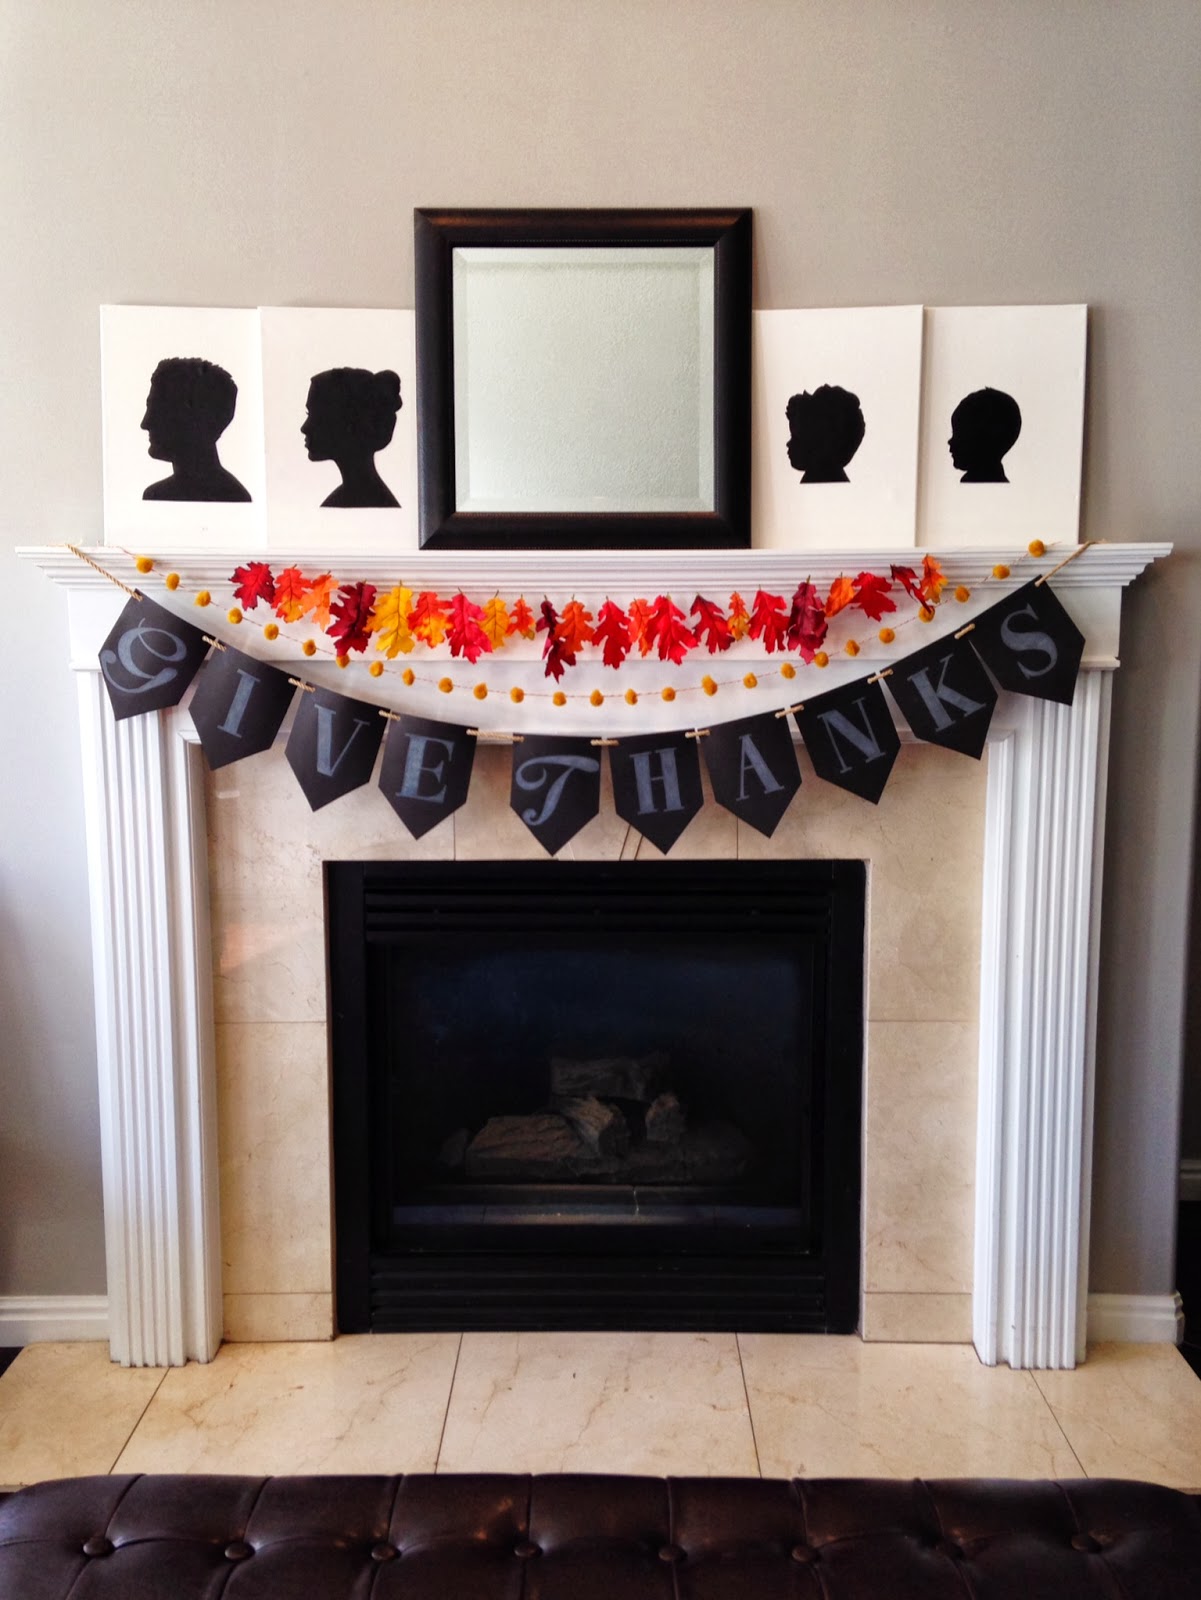
Hi Whipperberry readers! Haley here, from Life Is Sweet. I can't resist festive garlands, and this year I made a few! I'm enjoying them on our mantle, but any of these would be great on bookshelves, windows, railings, or just up on the wall. Two embraced the feeling of autumn and one embraced the wonderful holiday coming up next month, Thanksgiving! Jenn said it perfectly in her post of her fabulous Thanksgiving Centerpiece–it's a beautiful time of year dedicated to expressing gratitude for blessings, surrounding yourself with loved ones, and making and enjoying great food!
The first two garlands I'm sharing how to make are pretty simple. The leaf garland just calls for needle+thread along with leaves bought from the craft store (I've tried displaying real fallen leaves but they shriveled and lost their color within a couple days). The second one calls for needle+string and pompoms. I happened to find my pom balls at a thrift store (cheers to pre-loved nick-nacks!) but you can order felt poms in an array of colors from Hello Maypole. Then string away!

The "Give Thanks" garland takes a little more work, but is still very doable and you can create whatever message you'd like!
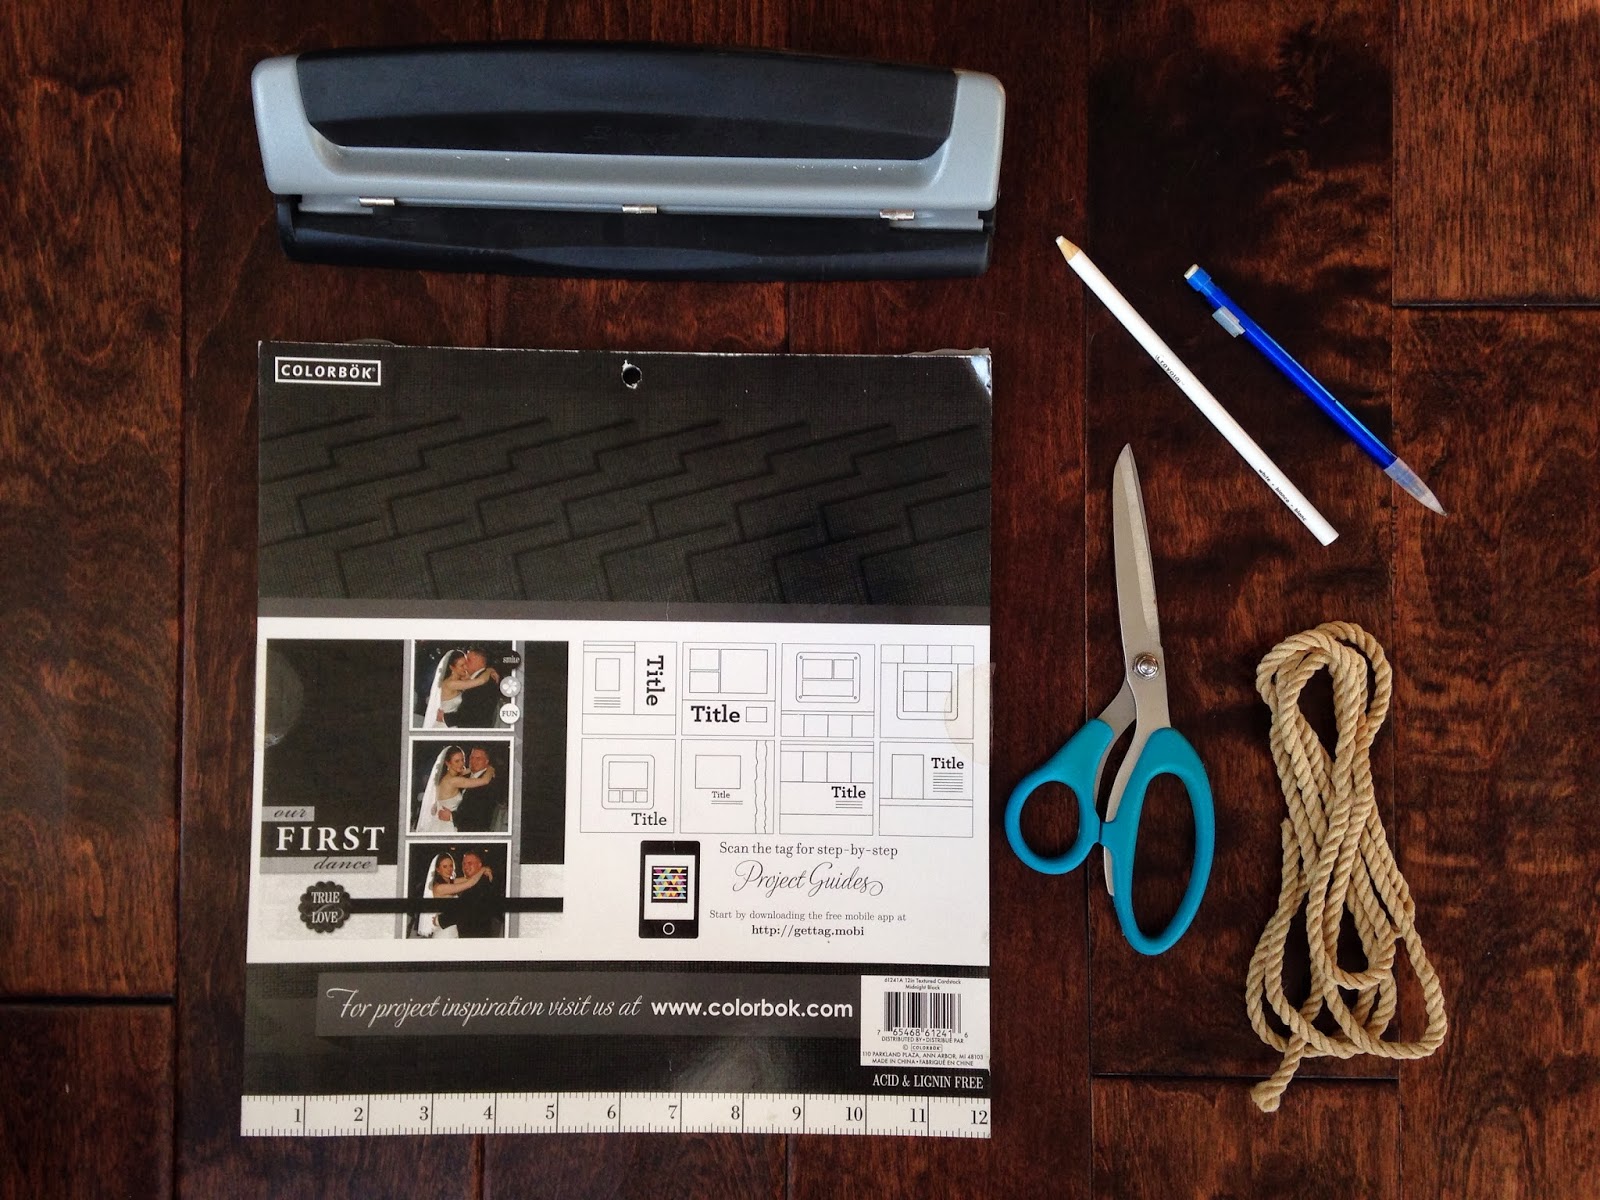
SUPPLIES:
Black cardstock
Scissors
White color pencil
Pencil
Rope/String
Paper hole-punch
Pencil sharpener (not pictured)
Ruler (or Colorbök Scrapbook paper pack has a ruler on the back)
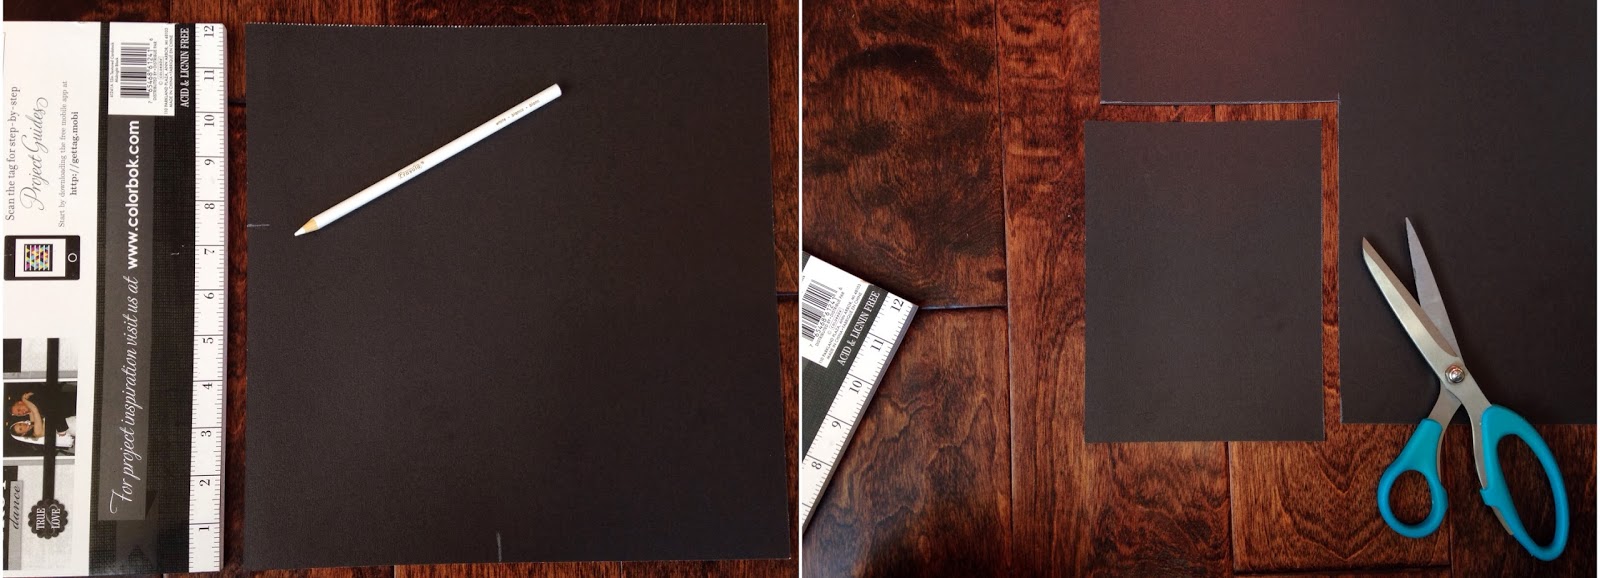
You'll first want to decide the shape and size you want your garland pieces to be–pentagons, triangles, rectangles, circles, etc. Mine are pentagon-shaped that measured out to be 7.5 inches tall and 5.5 inches wide.

For a pentagon shape you cut off two corners–the two short sides of mine measured 2.75 inches and 2.5 inches. Then use that pentagon to trace the rest of the pieces you need–I got two out of each 12×12 inch sheet.

I used a pencil to lightly sketch out the letters (after typing out "GIVE THANKS" in a Word document and chose the two fonts I liked: Snell Roundhand Black and Baskerville Old Face). But stencils would be another great way to get the letters on the garland. You'll then use the white colored pencil to fill in the letters. I loved how it gave it a fun chalk look, without the mess and I was able to be more precise. Now is when the pencil sharpener will come in handy.

You'll use a hole punch to put holes in the top corners of your garland pieces. I used a three-hole punch, and the spacing worked great for me to punch two at a time. Then string them up!
I hung/displayed all three garlands using good ol' scotch tape and, because my mantel is white, colored the tape with a white Painters marker (purchased at Walmart) so it's a bit camouflaged. 😉

Thanks again Heather for having me!
xo, Haley
0
Love this!
i love how simple this is.
So cute Haley! I will be trying this this year! I'm in need of cheap decor since we left all our decorations home 🙁
Very sweeet! Love the pom poms!
I love this! So simple & festive!!
How did you get the letters on the paper? You didn't mention that you used a stencil. Did you print it on? Or freehand?
Thanks, super cute! -Rachael