• Skip to primary navigation
  • Skip to main content
  • Skip to primary sidebar
  • Skip to footer

Whipperberry

WhipperBerry • Your Home For Creative Inspiration

  • Home
  • Recipes
    • Starters
    • Easy Weeknight Dinners
    • Main Dish
    • Salads
    • Side Dish
    • Soups & Stews
    • Desserts
    • Breakfast
    • Miscellaneous
  • Tutorials
    • Creative Crafts
    • DIY Decor
    • Fabric Crafts
    • Food How-To
    • Jewlery
    • Paint Projects
    • Paper Art
    • Party Styling
    • Photography and Graphic Design
    • Silhouette
  • Holidays
    • St. Patrick’s Day
    • Easter
    • Mother’s Day
    • Father’s Day
    • 4th of July
    • Halloween
    • Thanksgiving
    • Christmas
    • New Years
    • Valentine’s Day
  • Gift Ideas
    • Gifts For Everyone
    • Gifts for Dad
    • Mother’s day
    • For The Girls
    • For The Kids
    • Teacher Gift Ideas
    • Christmas
  • Printables
    • Holiday
    • Gift Idea
    • LDS Primary
  • Travel
  • About
    • Terms
  • Contact
  • Nav Social Menu

    • Facebook
    • Instagram
    • Pinterest
    • RSS
    • Twitter

Gifts

Cold and Flu Rescue Kit

48 · Oct 29, 2018 · 1 Comment

This post is brought to you by Ball® Fresh Preserving Products by Newell Brands

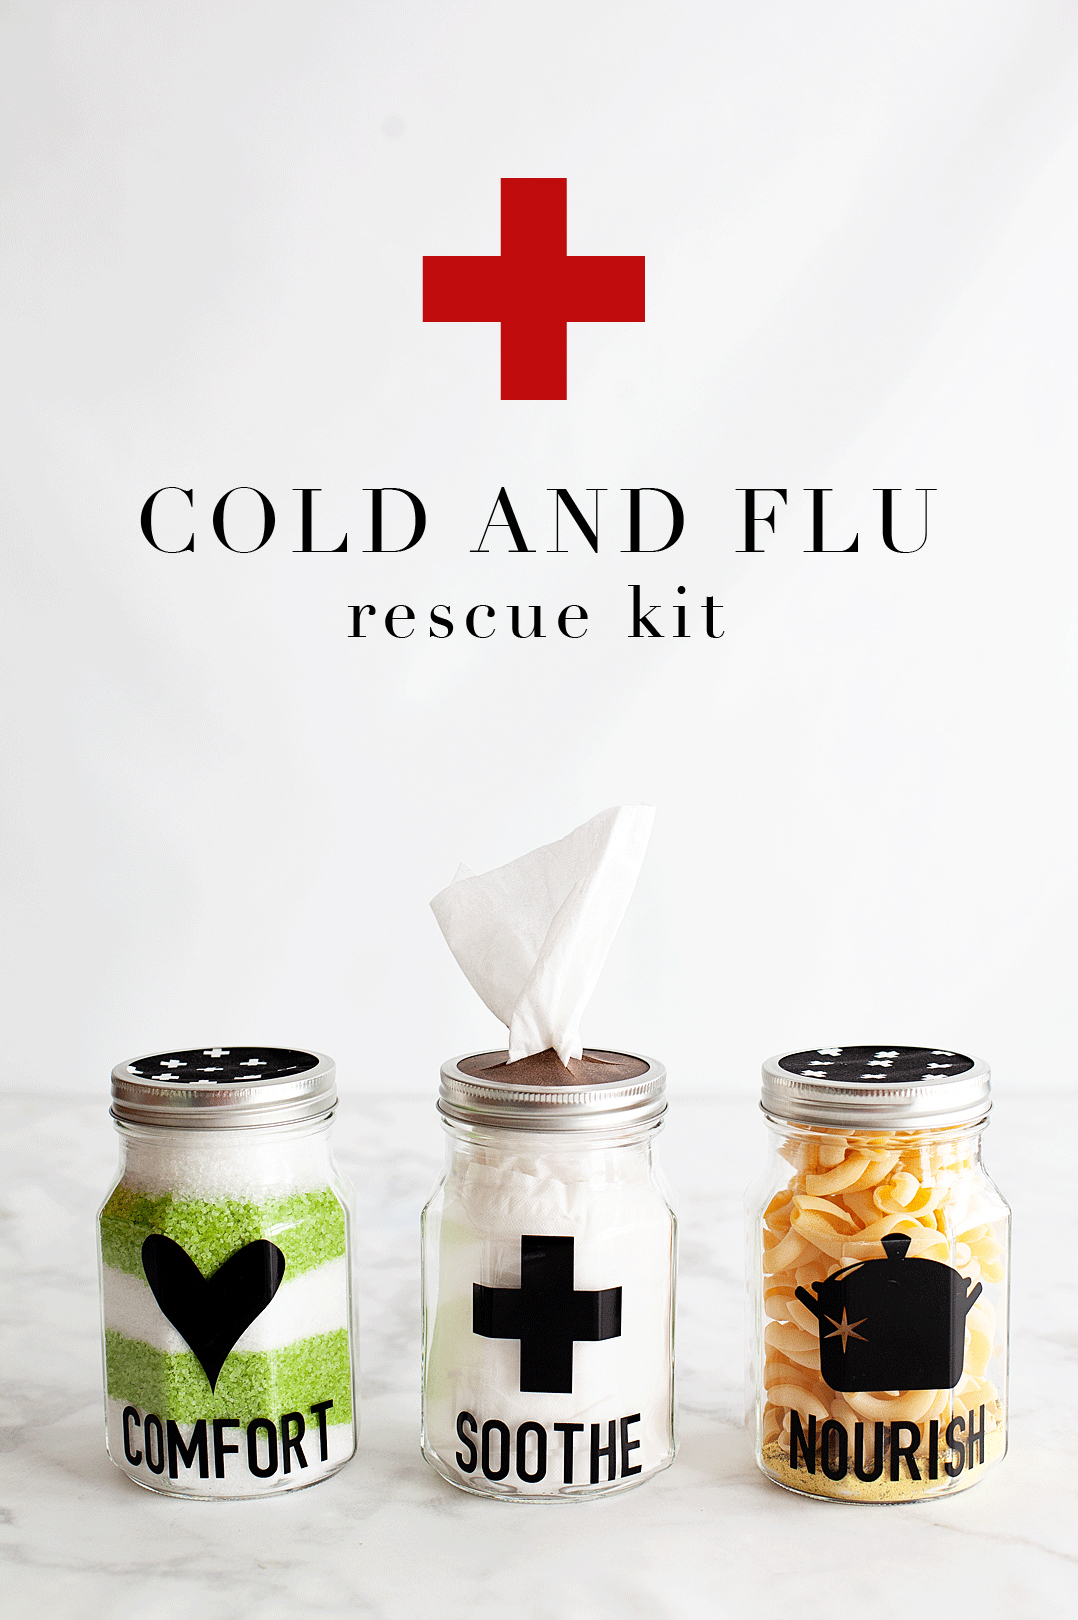
As much as we hate to admit it, cold and flu season is on its way. There is nothing more miserable than one of those lousy winter colds. What’s almost just as bad is watching someone you care for dealing with a cold or, Heaven forbid, the flu! I’m always looking for ways to help cheer them up and let them know that we love them and hope for their better health. That’s when I came up with this idea for a Cold and Flu Rescue Kit to share with those loved ones that are suffering. 
As much as we hate to admit it, cold and flu season is on its way. There is nothing more miserable than one of those lousy winter colds. What’s almost just as bad is watching someone you care for dealing with a cold or, Heaven forbid, the flu! I’m always looking for ways to help cheer them up and let them know that we love them and hope for their better health. That’s when I came up with this idea for a Cold and Flu Rescue Kit to share with those loved ones that are suffering. • WhipperBerry

There is just something special when someone takes the time to put together a simple little gift to let you know that they care when you are feeling down in the dumps. I have been on both ends of this, and it is never taken for granted in my books. So, if you have someone in your life needing a little TLC, I have the ticket for you. 

You all know of my love of all things jars, so of course, I put this little gift set together in my new favorite Ball® Quart Size Wide Mouth Sharing Jars. They are beautiful in their own right and they look even better dressed-up a bit. Here is what you will need for the whole kit.

Cold and Flu Rescue Kit Supplies

  • Ball® Quart Size Wide Mouth Sharing Jars
  • Ball® Home Canning Funnel for Mason Jars
  • Black vinyl (optional)
  • Cricut cutting machine (optional)
  • Cricut transfer tape (optional)
  • Scissors and craft knife
  • WhipperBerry Jar Designs
  • Epsom Salt soothing Eucalyptus and Menthol Mineral Bath
  • Small box of tissues
  • 4×4 piece of leather
  • 2 4×4 pieces of coordinating fabric
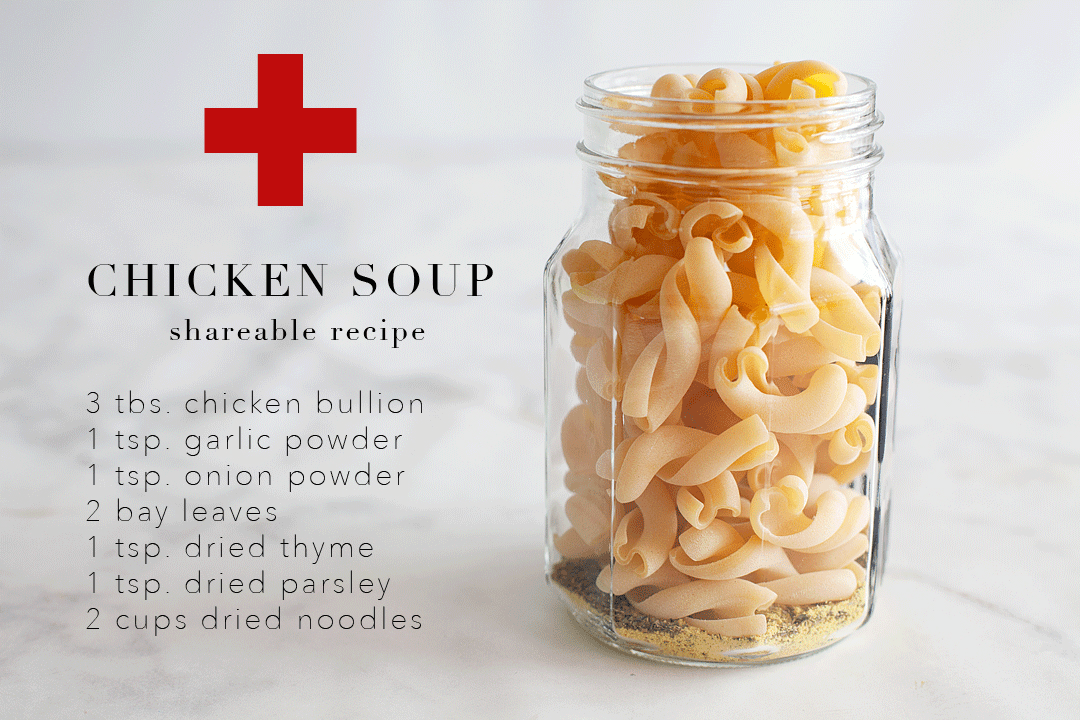
  • 3 heaping tbsp. of chicken bouillon – powdered
  • 1 tsp. garlic powder
  • 1 tsp. onion powder
  • 2 bay leaves
  • 1 tsp. dried thyme
  • 1 tsp. dried parsley
  • 2 cups of noodles

Instructions

As much as we hate to admit it, cold and flu season is on its way. There is nothing more miserable than one of those lousy winter colds. What’s almost just as bad is watching someone you care for dealing with a cold or, Heaven forbid, the flu! I’m always looking for ways to help cheer them up and let them know that we love them and hope for their better health. That’s when I came up with this idea for a Cold and Flu Rescue Kit to share with those loved ones that are suffering. 

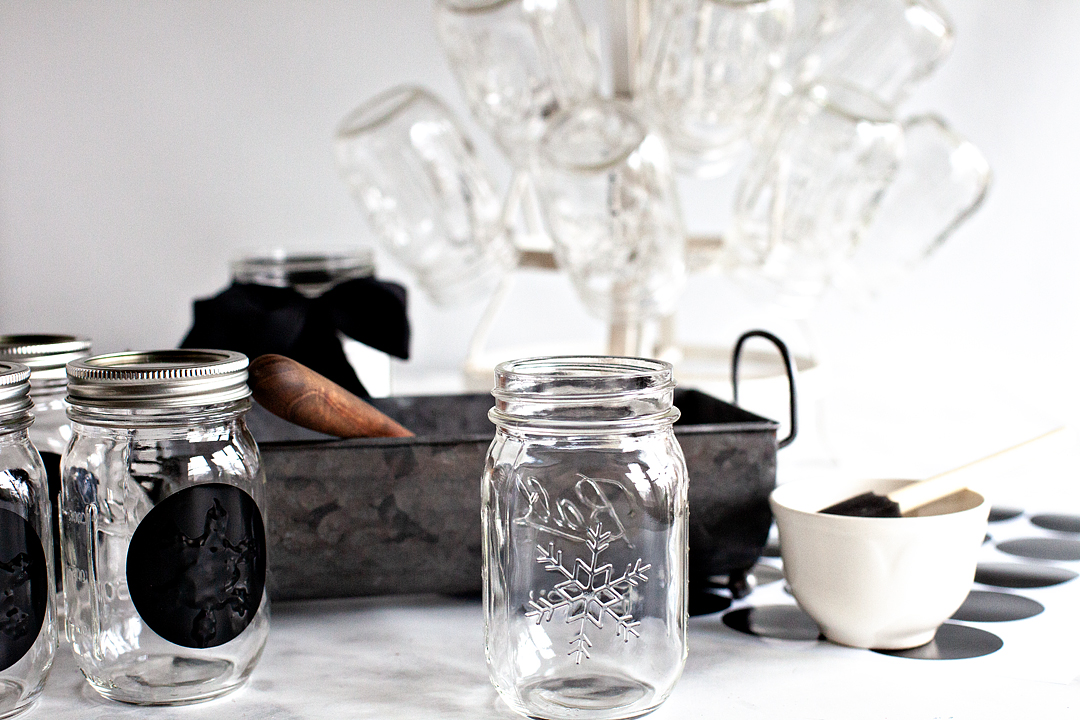
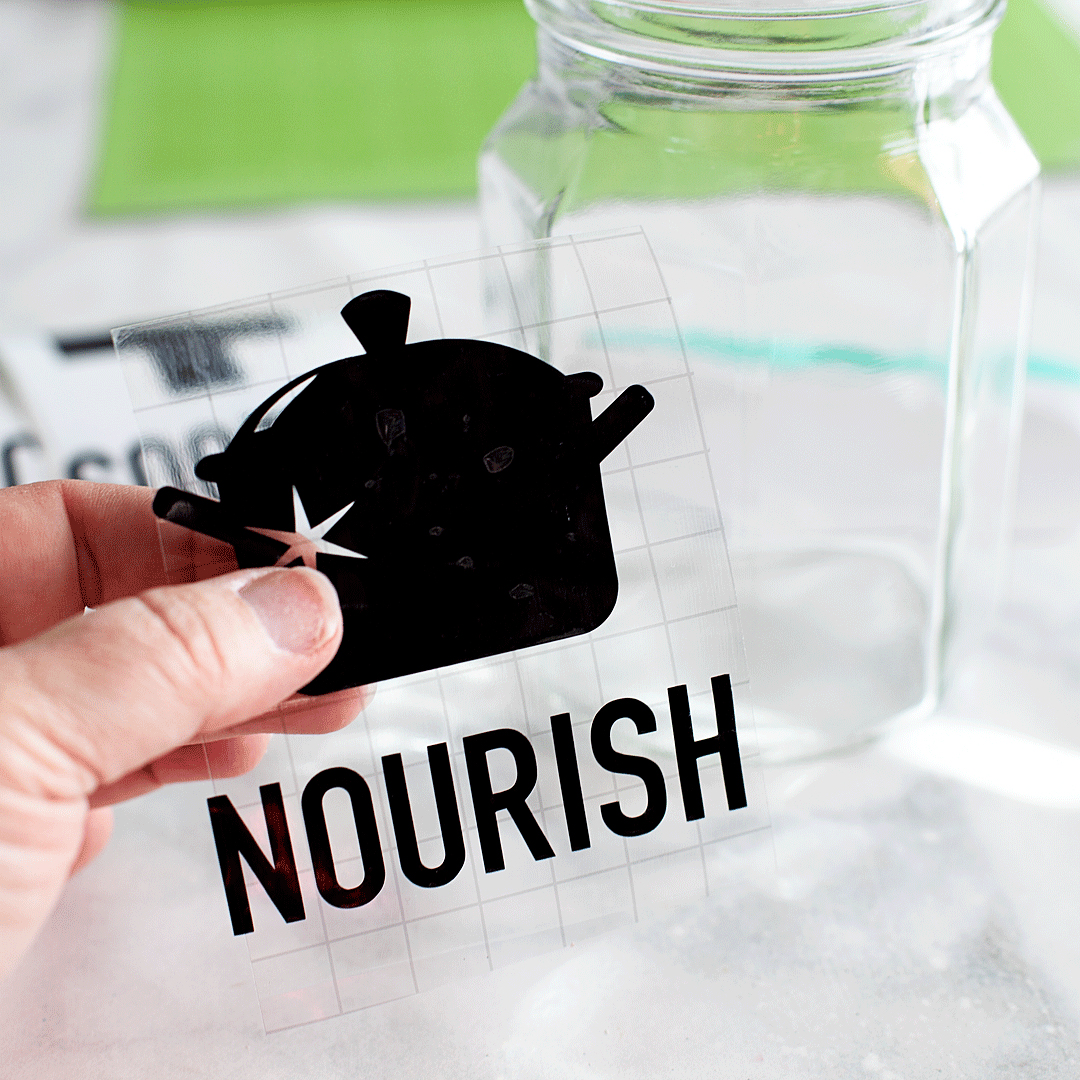
Now, the vinyl decals on the side of the jars are super cute, but if you don’t have a Cricut cutting machine don’t worry, they don’t make or break this project. However, if you do have one and would like to make the decals, you can have access to my project in Cricut Design Space. It’s already all set for you, sized for these jars and everything. Cut out the decals and adhere them to the side of the jar using the transfer tape. If you need a little help applying the vinyl, I have a good tutorial for applying vinyl that you may want to check out first. 
As much as we hate to admit it, cold and flu season is on its way. There is nothing more miserable than one of those lousy winter colds. What’s almost just as bad is watching someone you care for dealing with a cold or, Heaven forbid, the flu! I’m always looking for ways to help cheer them up and let them know that we love them and hope for their better health. That’s when I came up with this idea for a Cold and Flu Rescue Kit to share with those loved ones that are suffering. 

Once your vinyl is applied (if you are doing this step), the next step is to fill the jars and dress-up the lids. 

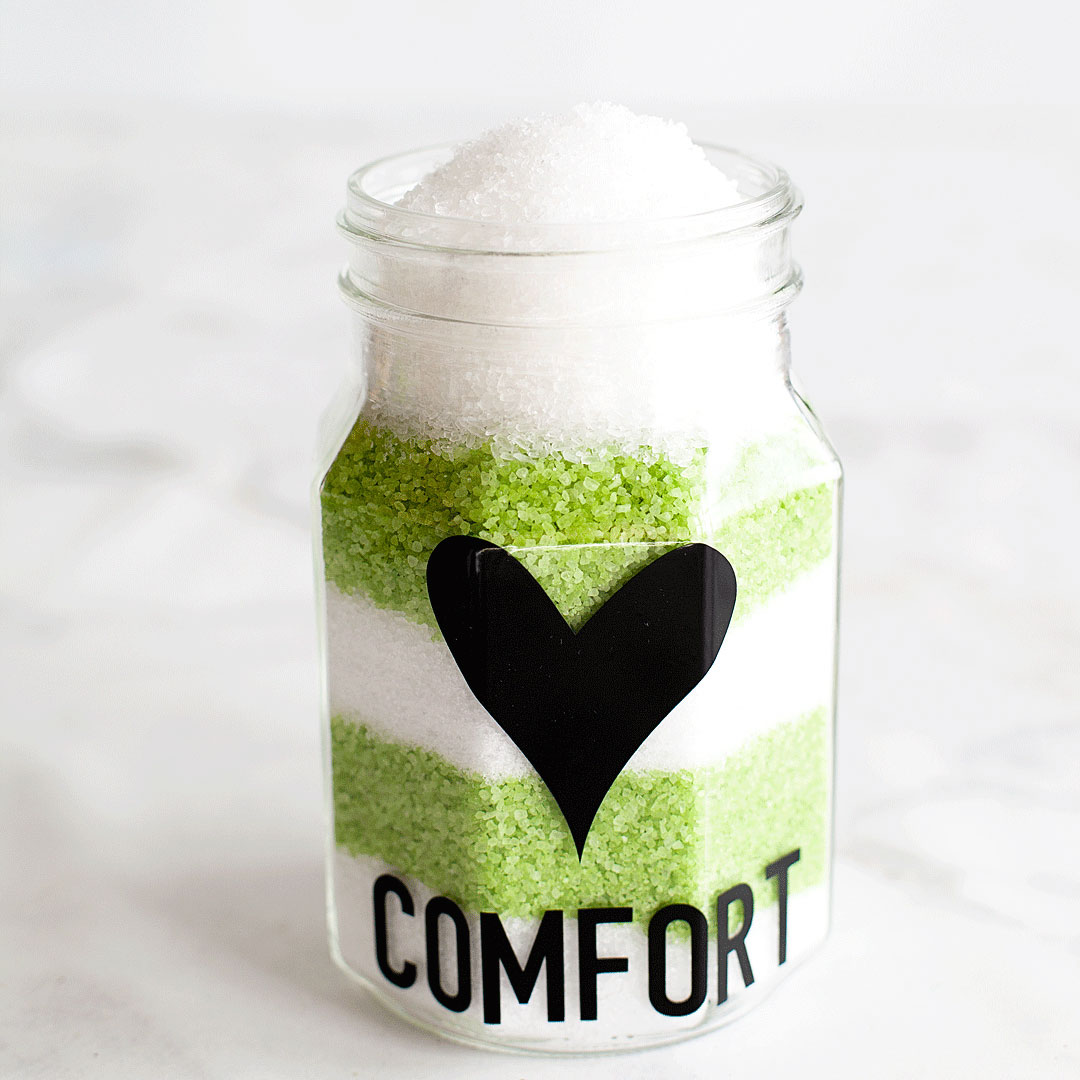
The Comfort Jar

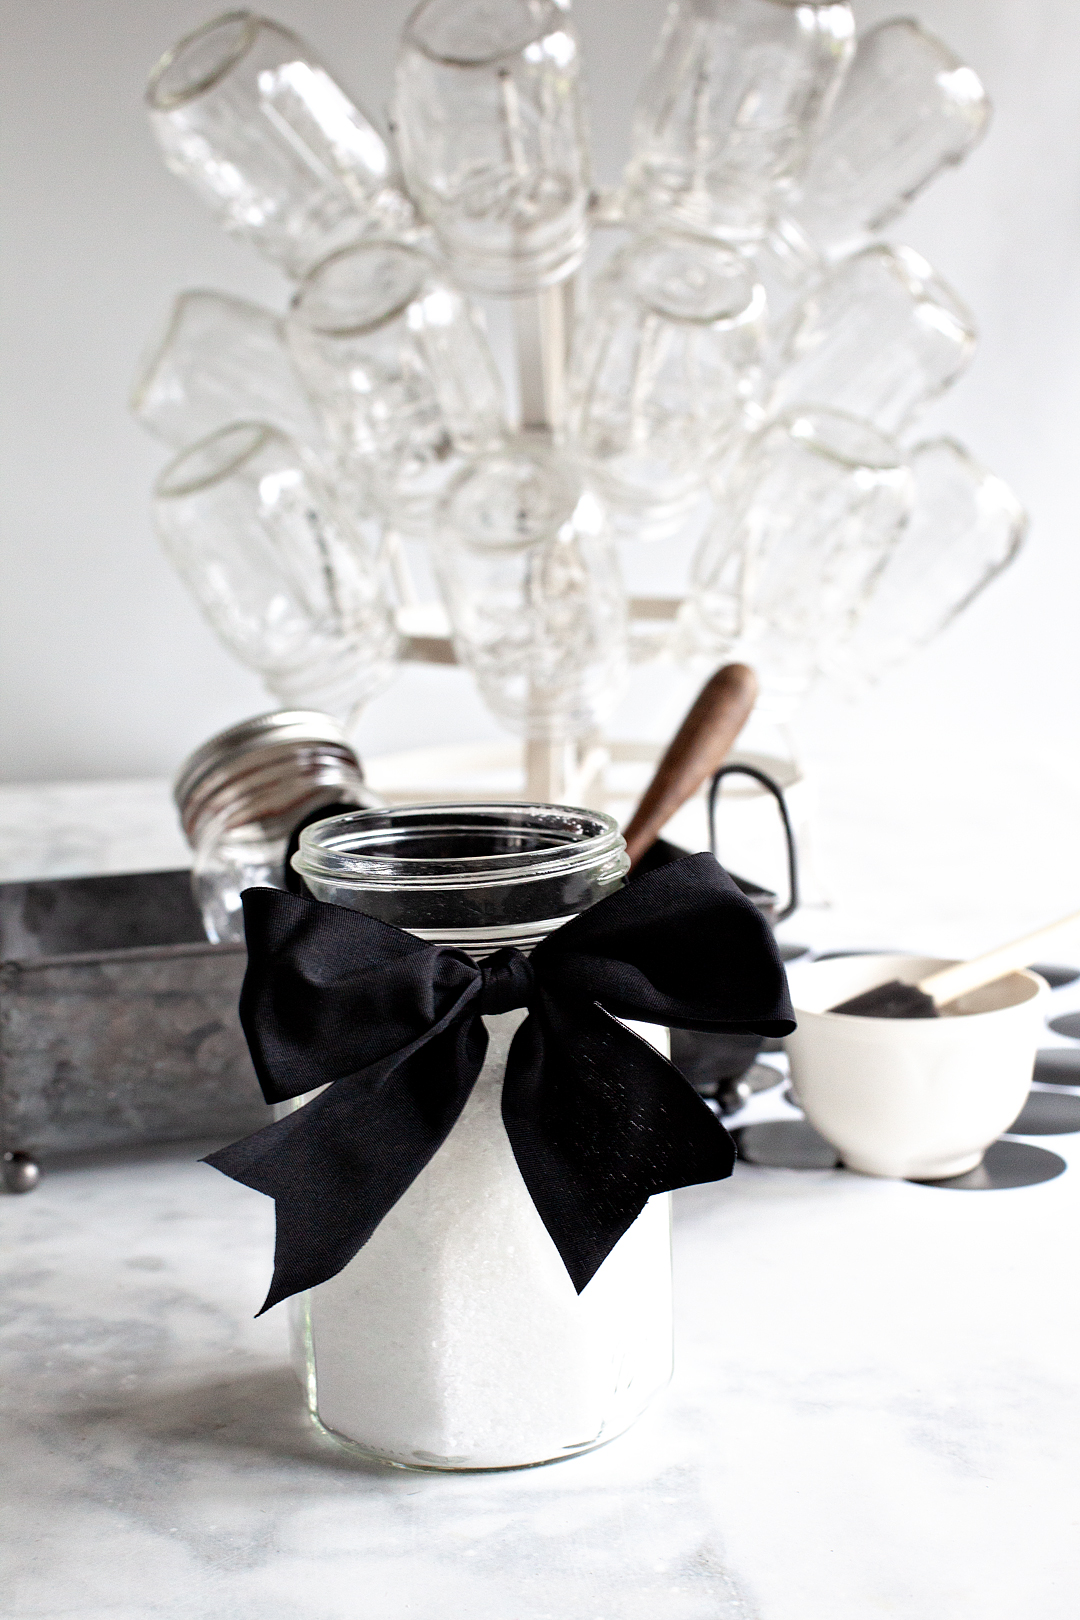
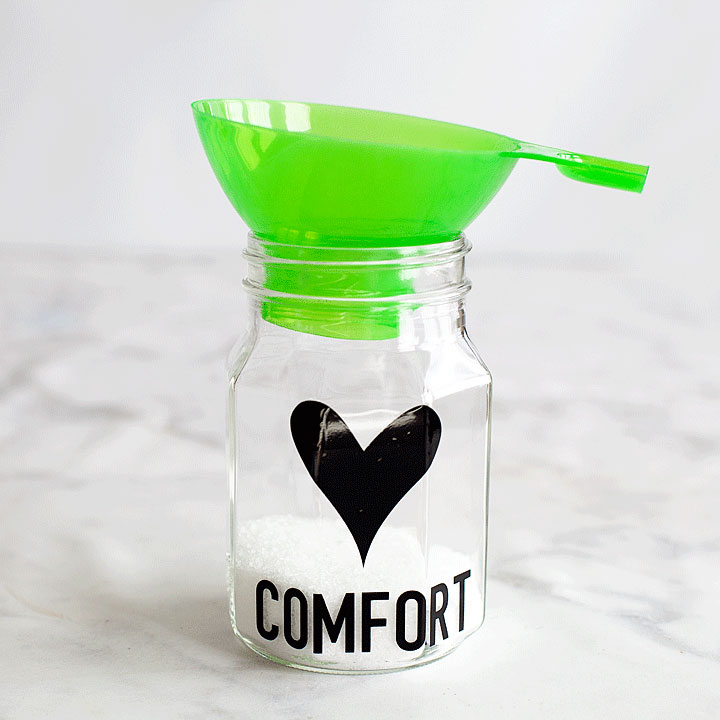
The comfort jar is filled with comforting mineral bath salts. I found two different colored Epsom salt baths that were infused with Eucalyptus, menthol & spearmint and layered it in the jar using the Ball® Home Canning Funnel creating stripes.
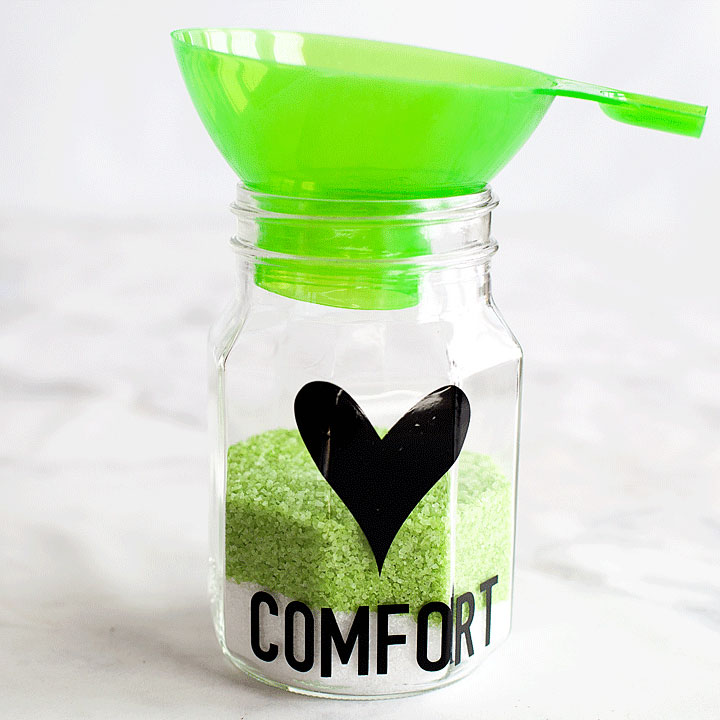
As much as we hate to admit it, cold and flu season is on its way. There is nothing more miserable than one of those lousy winter colds. What’s almost just as bad is watching someone you care for dealing with a cold or, Heaven forbid, the flu! I’m always looking for ways to help cheer them up and let them know that we love them and hope for their better health. That’s when I came up with this idea for a Cold and Flu Rescue Kit to share with those loved ones that are suffering. 

As much as we hate to admit it, cold and flu season is on its way. There is nothing more miserable than one of those lousy winter colds. What’s almost just as bad is watching someone you care for dealing with a cold or, Heaven forbid, the flu! I’m always looking for ways to help cheer them up and let them know that we love them and hope for their better health. That’s when I came up with this idea for a Cold and Flu Rescue Kit to share with those loved ones that are suffering. 

As much as we hate to admit it, cold and flu season is on its way. There is nothing more miserable than one of those lousy winter colds. What’s almost just as bad is watching someone you care for dealing with a cold or, Heaven forbid, the flu! I’m always looking for ways to help cheer them up and let them know that we love them and hope for their better health. That’s when I came up with this idea for a Cold and Flu Rescue Kit to share with those loved ones that are suffering. 

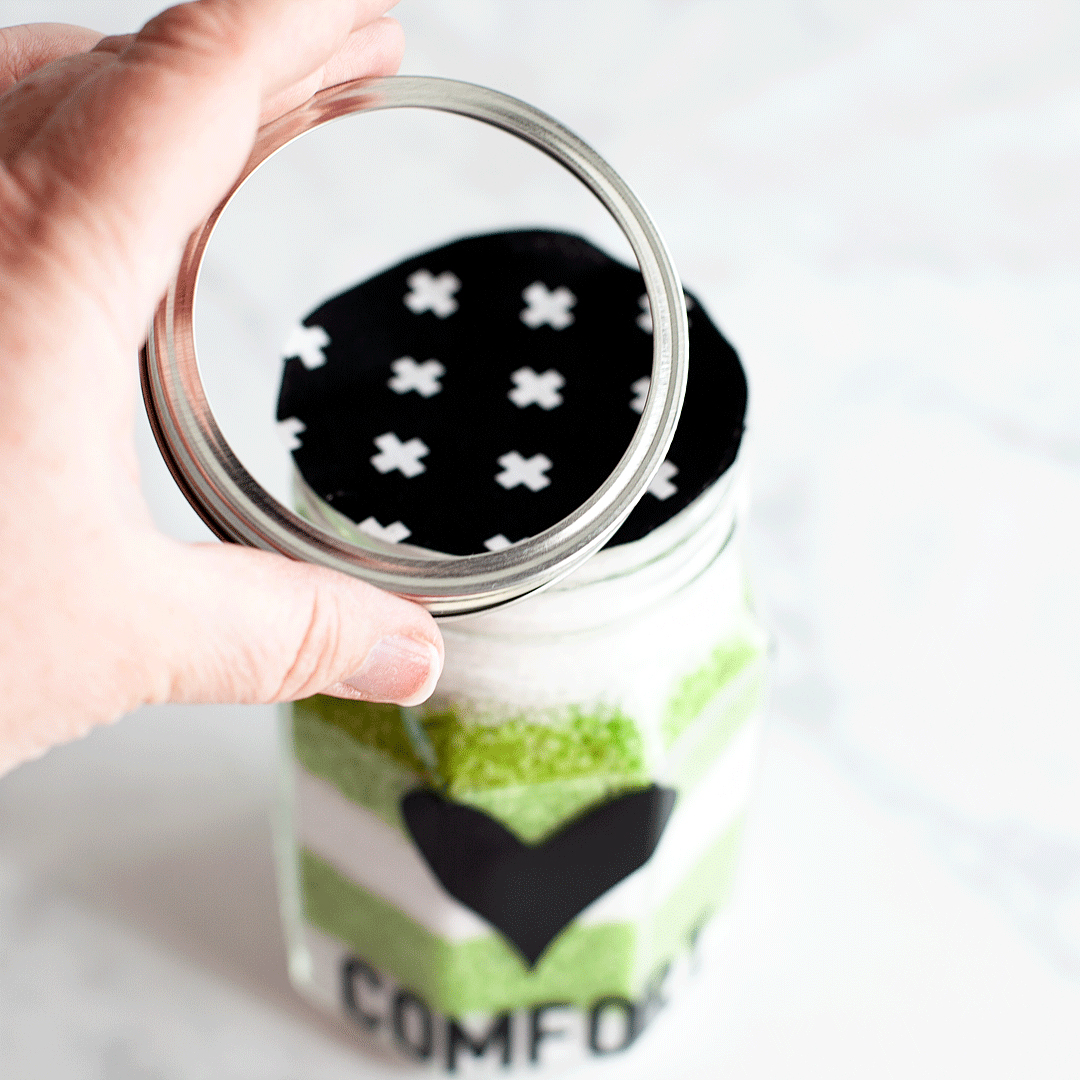
Next, I take a piece of cloth and trace a circle using the lid of the jar with a pencil or chalk pencil. Cut out the fabric and then place it on top of the jar lid and secure it with the band.
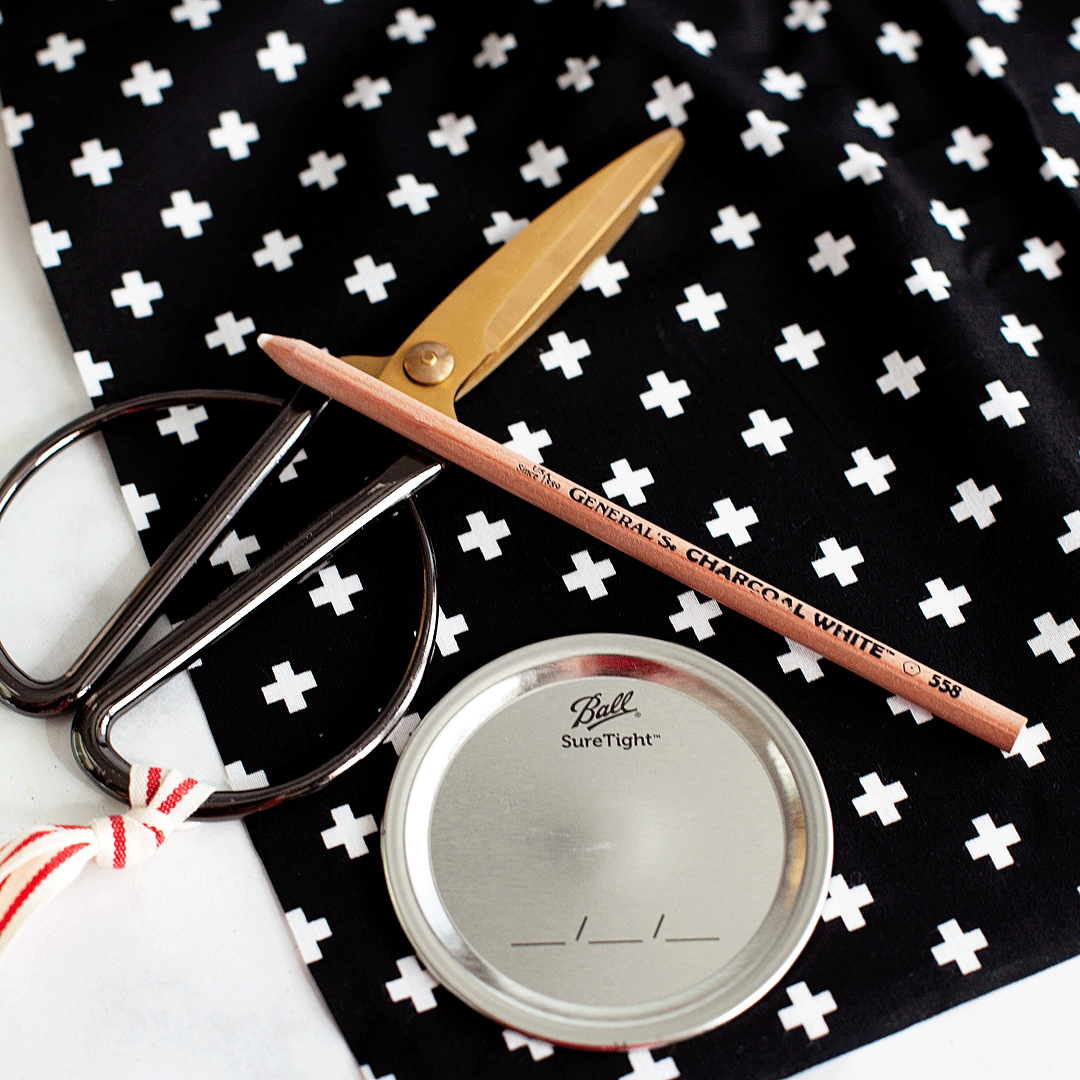
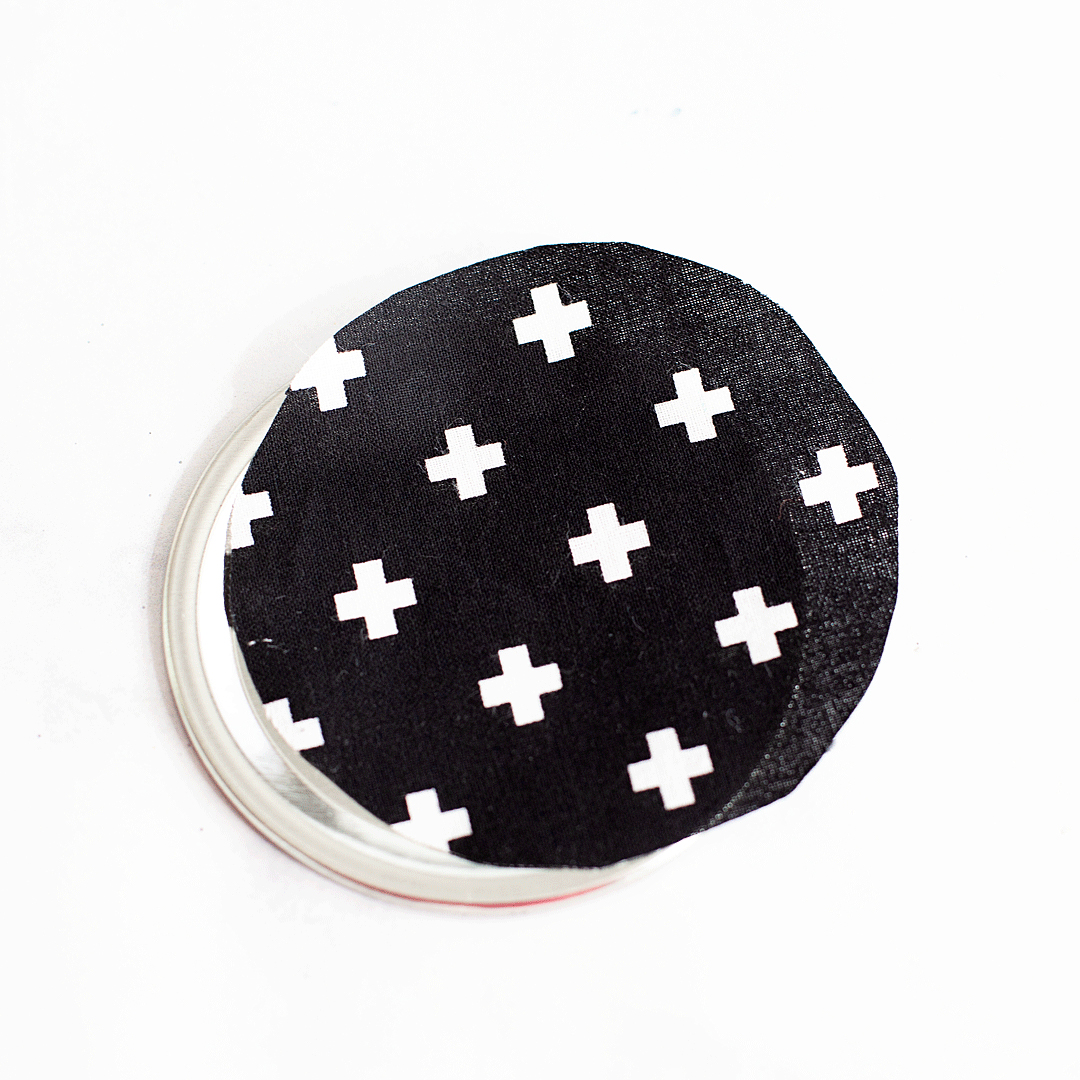
As much as we hate to admit it, cold and flu season is on its way. There is nothing more miserable than one of those lousy winter colds. What’s almost just as bad is watching someone you care for dealing with a cold or, Heaven forbid, the flu! I’m always looking for ways to help cheer them up and let them know that we love them and hope for their better health. That’s when I came up with this idea for a Cold and Flu Rescue Kit to share with those loved ones that are suffering. 

As much as we hate to admit it, cold and flu season is on its way. There is nothing more miserable than one of those lousy winter colds. What’s almost just as bad is watching someone you care for dealing with a cold or, Heaven forbid, the flu! I’m always looking for ways to help cheer them up and let them know that we love them and hope for their better health. That’s when I came up with this idea for a Cold and Flu Rescue Kit to share with those loved ones that are suffering. 

As much as we hate to admit it, cold and flu season is on its way. There is nothing more miserable than one of those lousy winter colds. What’s almost just as bad is watching someone you care for dealing with a cold or, Heaven forbid, the flu! I’m always looking for ways to help cheer them up and let them know that we love them and hope for their better health. That’s when I came up with this idea for a Cold and Flu Rescue Kit to share with those loved ones that are suffering. 

The Sooth Jar

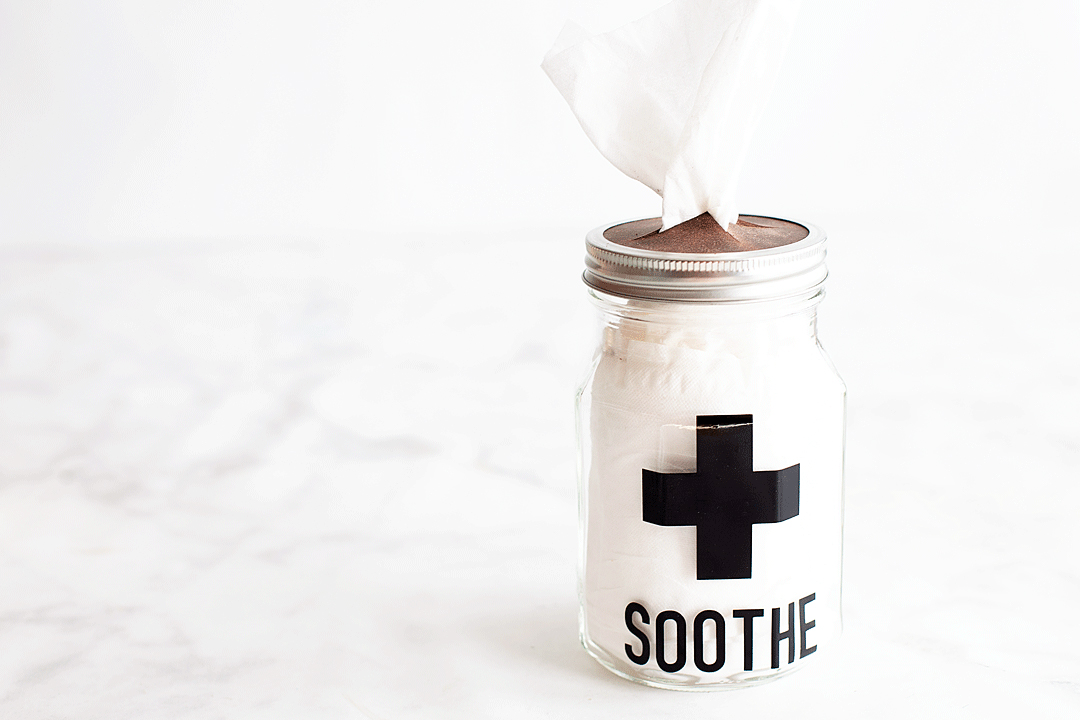
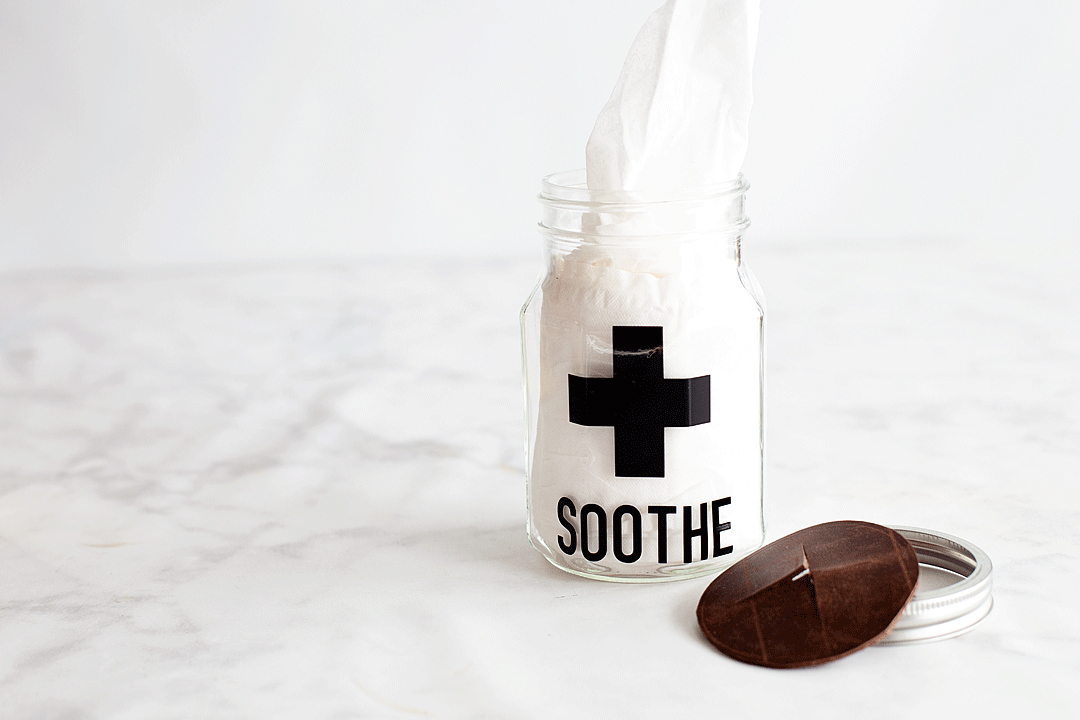
This one is my favorite! It’s a tissue jar with a leather lid!!! How cool is that?  
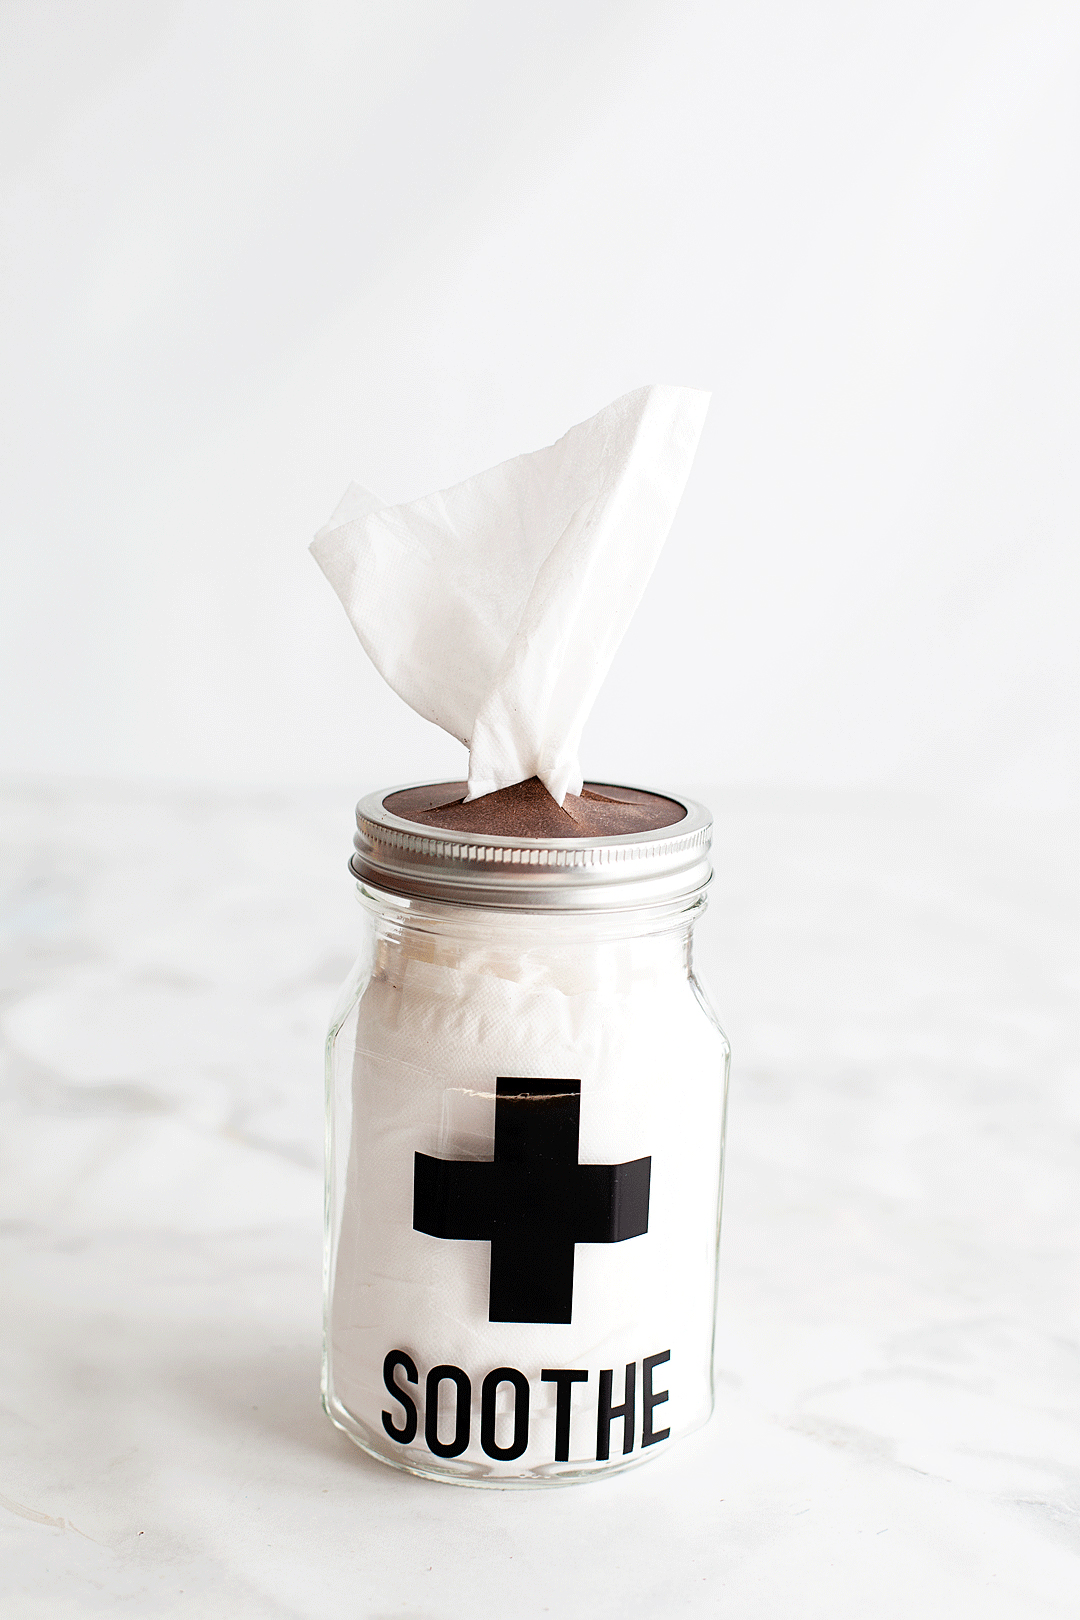
As much as we hate to admit it, cold and flu season is on its way. There is nothing more miserable than one of those lousy winter colds. What’s almost just as bad is watching someone you care for dealing with a cold or, Heaven forbid, the flu! I’m always looking for ways to help cheer them up and let them know that we love them and hope for their better health. That’s when I came up with this idea for a Cold and Flu Rescue Kit to share with those loved ones that are suffering. 

For this one, you will need a cube size box of tissues. Open the box from the side and pull the tissues out of the box. Take a third of the tissues and unfold the first tissue flap. Roll into a loose cylinder shape and place into the jar making sure to keep that tissue flap at the top. This will be the starting tissue once you put the lid on.

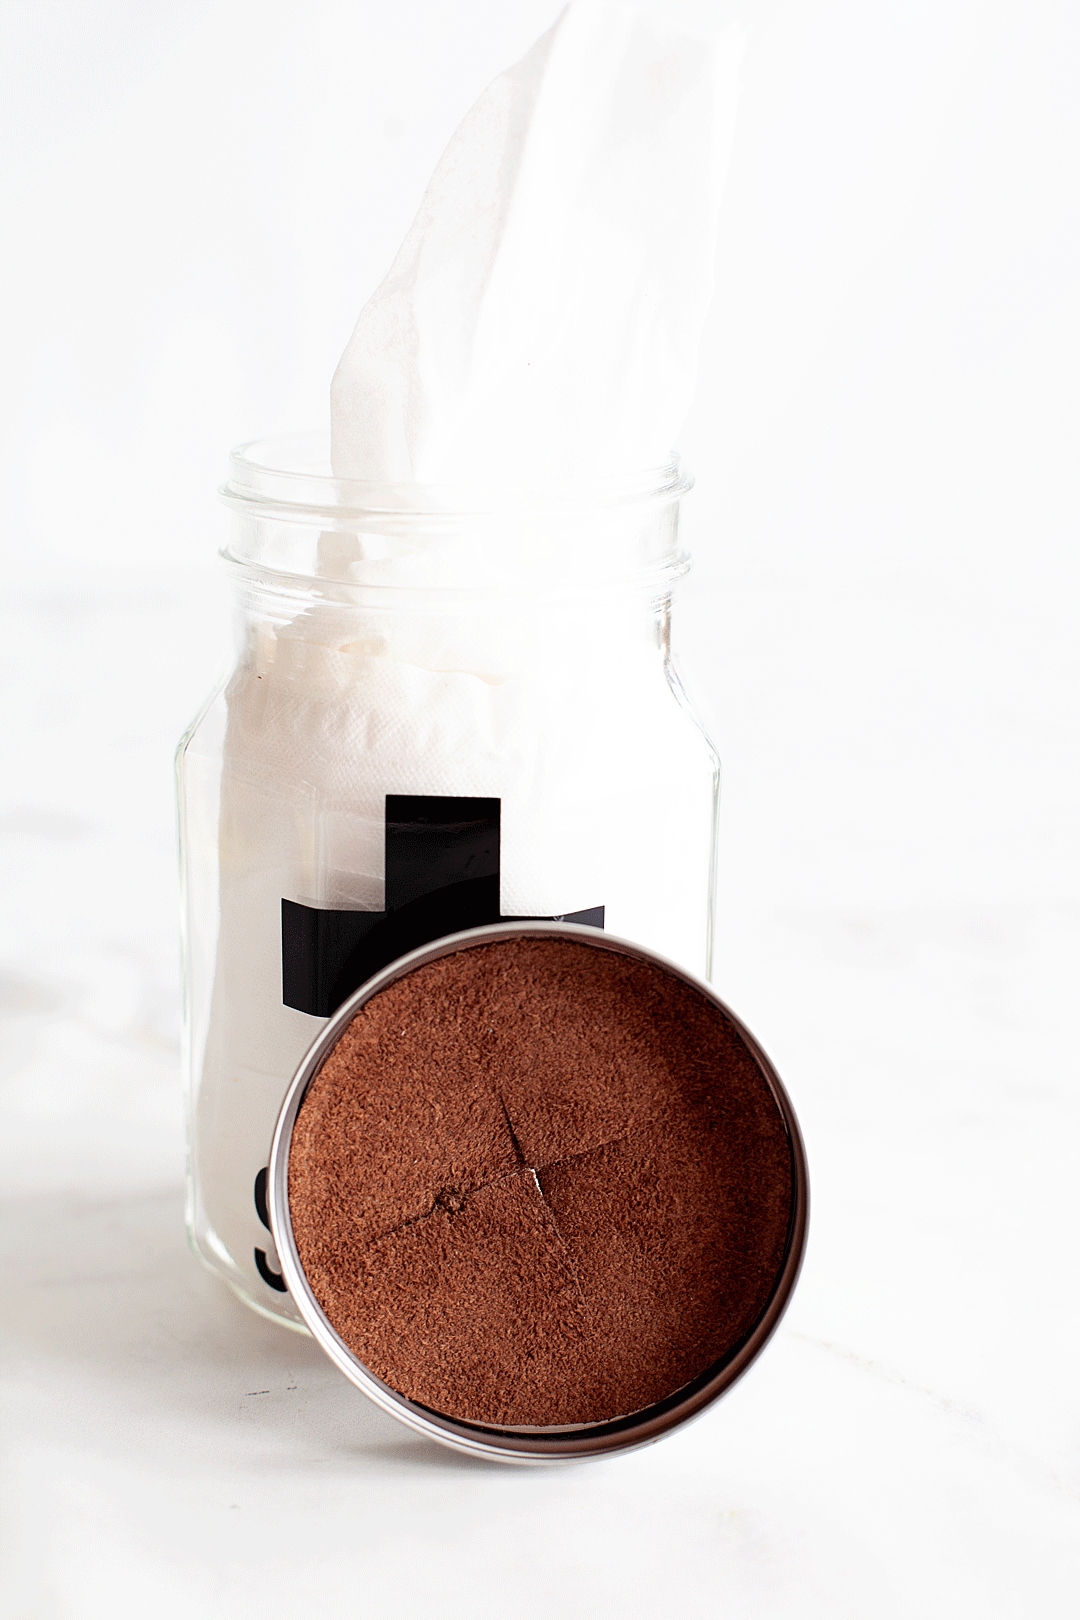
Again, take your leather and trace the lid of the mason jar and cut out the circle with your scissors. Next, cut an “X” with a craft knife into the center of the circle. 
As much as we hate to admit it, cold and flu season is on its way. There is nothing more miserable than one of those lousy winter colds. What’s almost just as bad is watching someone you care for dealing with a cold or, Heaven forbid, the flu! I’m always looking for ways to help cheer them up and let them know that we love them and hope for their better health. That’s when I came up with this idea for a Cold and Flu Rescue Kit to share with those loved ones that are suffering. 

Place the leather inside of the mason jar band and place lid on the tissue jar making sure to pull the lead tissue through the opening in the leather lid. 
As much as we hate to admit it, cold and flu season is on its way. There is nothing more miserable than one of those lousy winter colds. What’s almost just as bad is watching someone you care for dealing with a cold or, Heaven forbid, the flu! I’m always looking for ways to help cheer them up and let them know that we love them and hope for their better health. That’s when I came up with this idea for a Cold and Flu Rescue Kit to share with those loved ones that are suffering. 

I think I will be making one of these for every room in my house!

The Nourish Jar

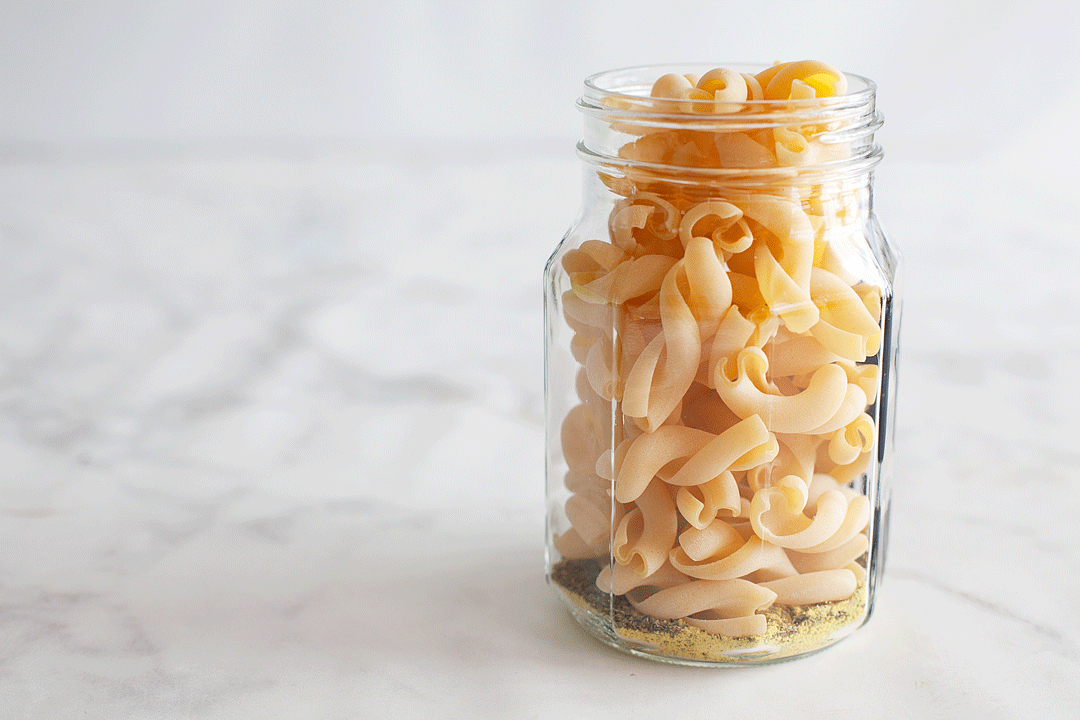
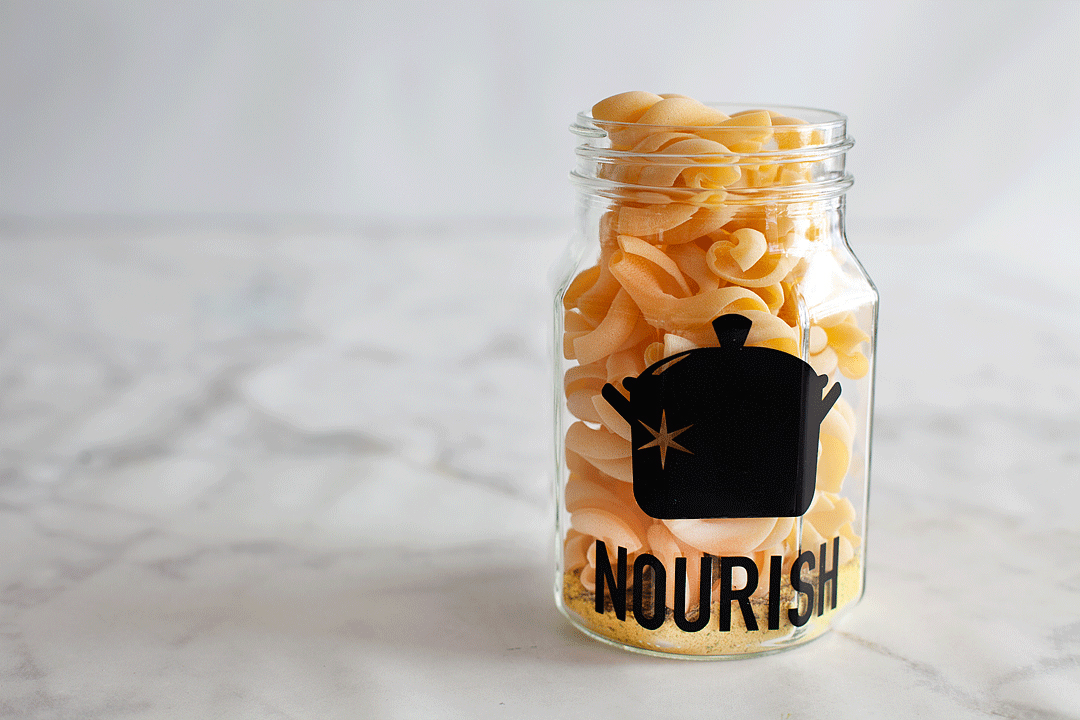
This one is pretty straightforward. It may not be your Mom’s chicken noodle soup but, it’s pretty tasty in its own right. Plus, it’s easy to make and share. 
As much as we hate to admit it, cold and flu season is on its way. There is nothing more miserable than one of those lousy winter colds. What’s almost just as bad is watching someone you care for dealing with a cold or, Heaven forbid, the flu! I’m always looking for ways to help cheer them up and let them know that we love them and hope for their better health. That’s when I came up with this idea for a Cold and Flu Rescue Kit to share with those loved ones that are suffering. 

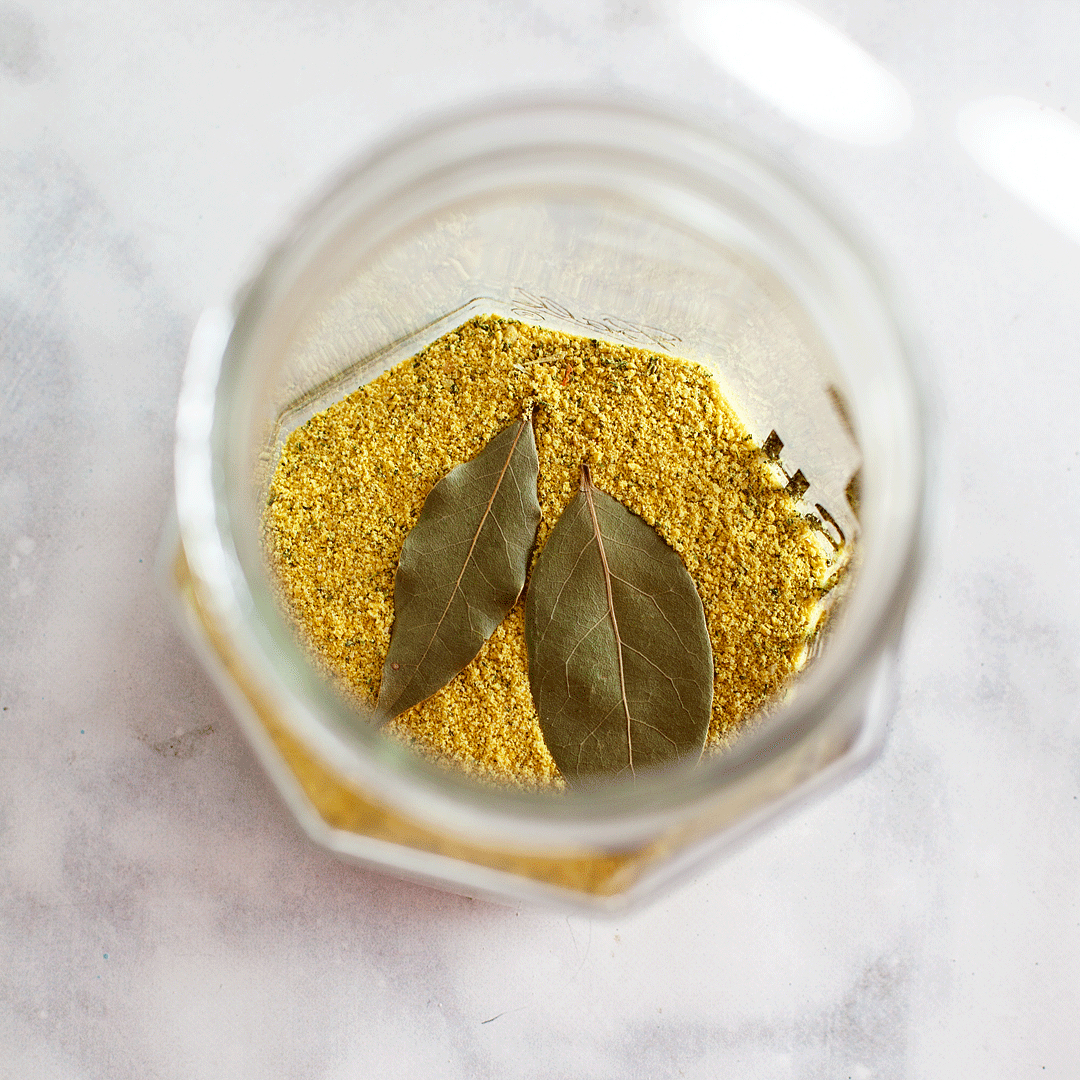
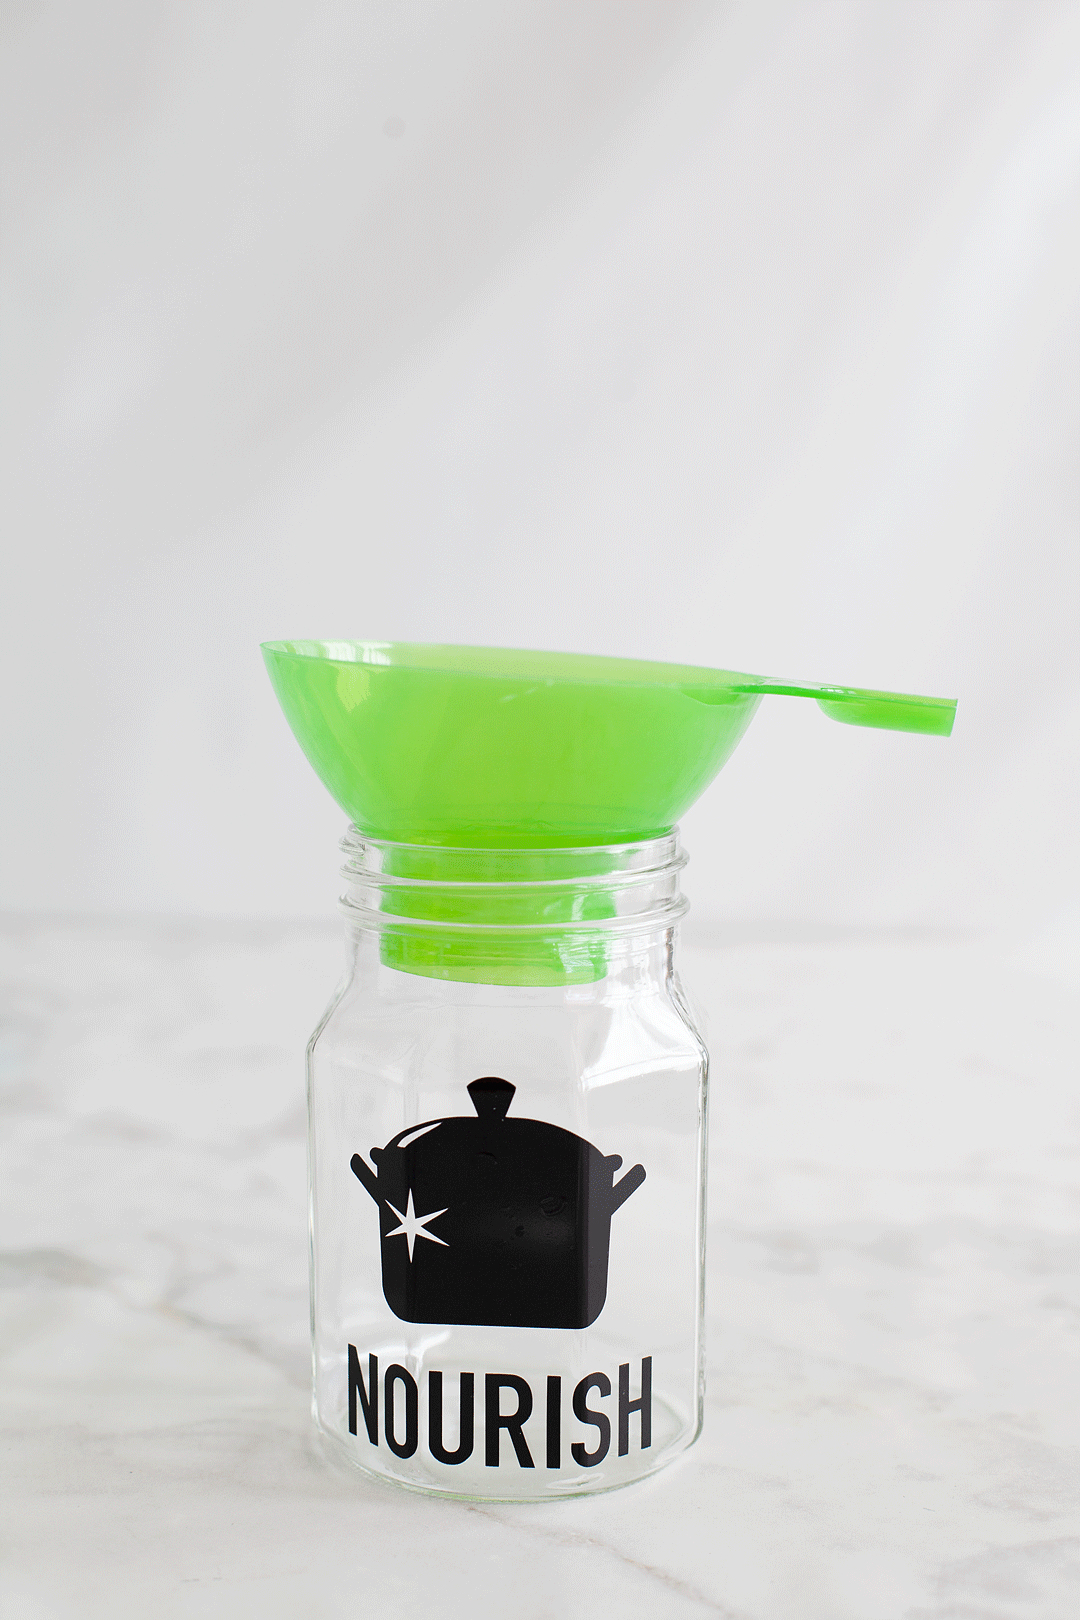
Again, you will be using your funnel to help keep this nice and tidy. Layer your chicken bouillon, garlic powder, onion powder, bay leaves, thyme, parsley, and noodles.
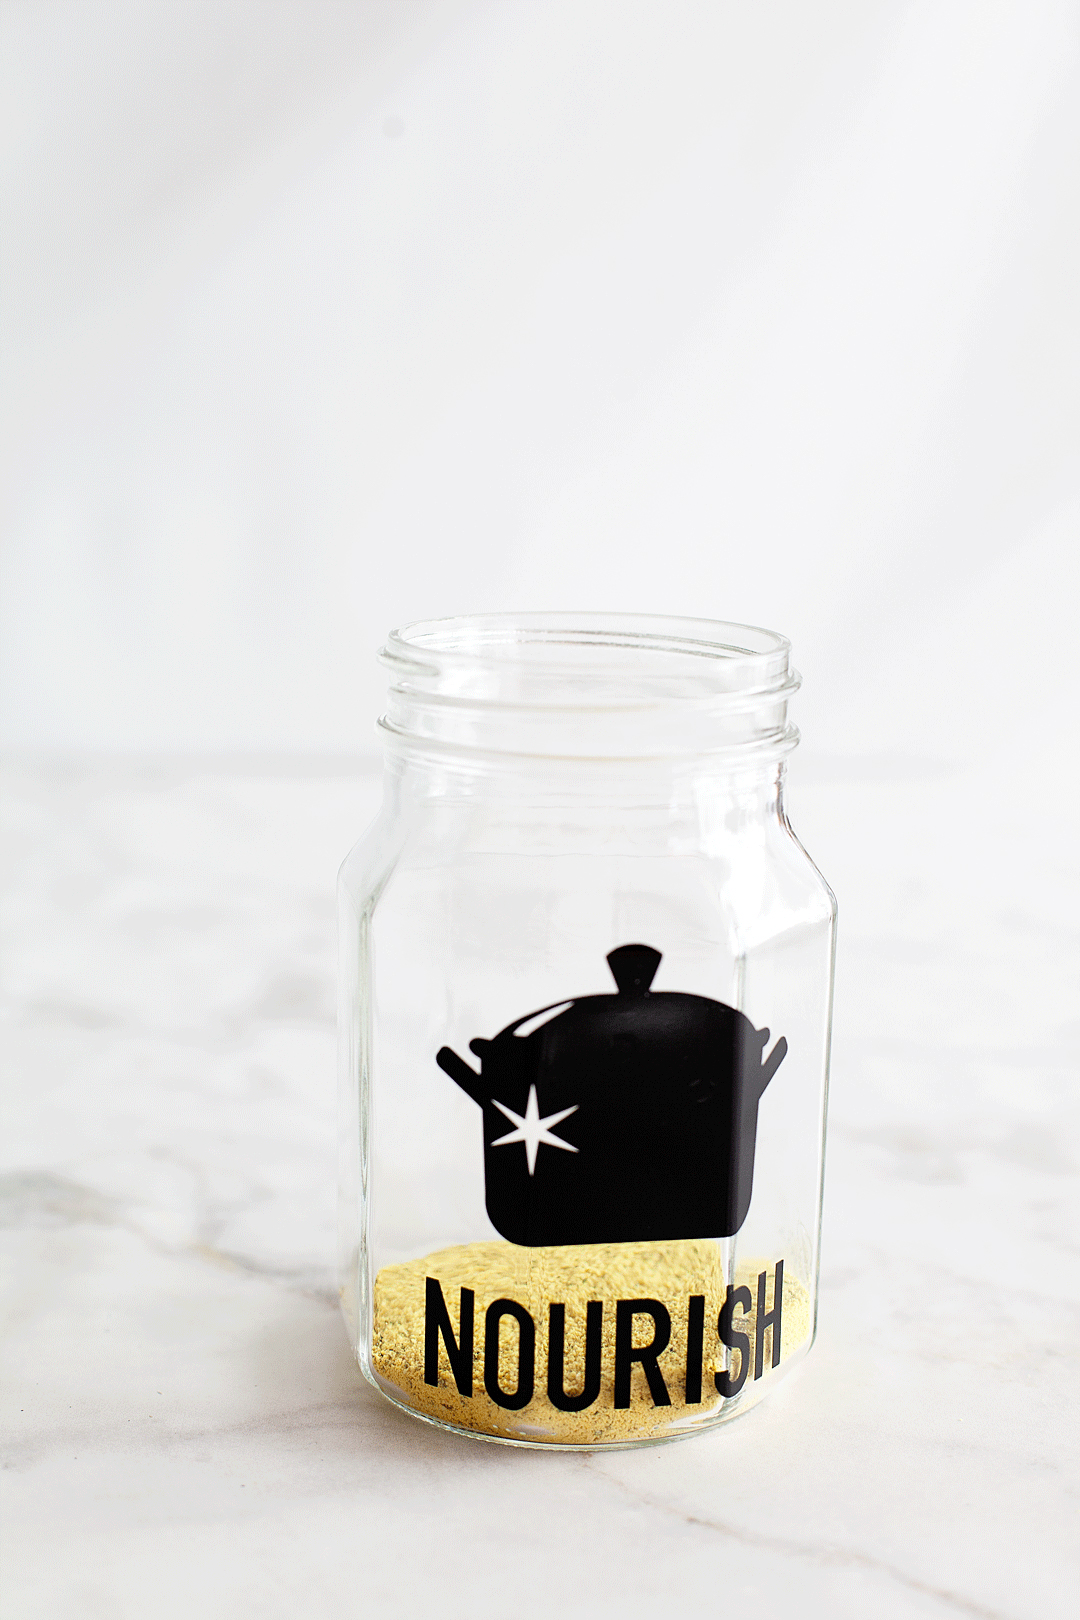
As much as we hate to admit it, cold and flu season is on its way. There is nothing more miserable than one of those lousy winter colds. What’s almost just as bad is watching someone you care for dealing with a cold or, Heaven forbid, the flu! I’m always looking for ways to help cheer them up and let them know that we love them and hope for their better health. That’s when I came up with this idea for a Cold and Flu Rescue Kit to share with those loved ones that are suffering. 

As much as we hate to admit it, cold and flu season is on its way. There is nothing more miserable than one of those lousy winter colds. What’s almost just as bad is watching someone you care for dealing with a cold or, Heaven forbid, the flu! I’m always looking for ways to help cheer them up and let them know that we love them and hope for their better health. That’s when I came up with this idea for a Cold and Flu Rescue Kit to share with those loved ones that are suffering. 

As much as we hate to admit it, cold and flu season is on its way. There is nothing more miserable than one of those lousy winter colds. What’s almost just as bad is watching someone you care for dealing with a cold or, Heaven forbid, the flu! I’m always looking for ways to help cheer them up and let them know that we love them and hope for their better health. That’s when I came up with this idea for a Cold and Flu Rescue Kit to share with those loved ones that are suffering. 

As much as we hate to admit it, cold and flu season is on its way. There is nothing more miserable than one of those lousy winter colds. What’s almost just as bad is watching someone you care for dealing with a cold or, Heaven forbid, the flu! I’m always looking for ways to help cheer them up and let them know that we love them and hope for their better health. That’s when I came up with this idea for a Cold and Flu Rescue Kit to share with those loved ones that are suffering. 

You’ll top this with another fabric circle. 
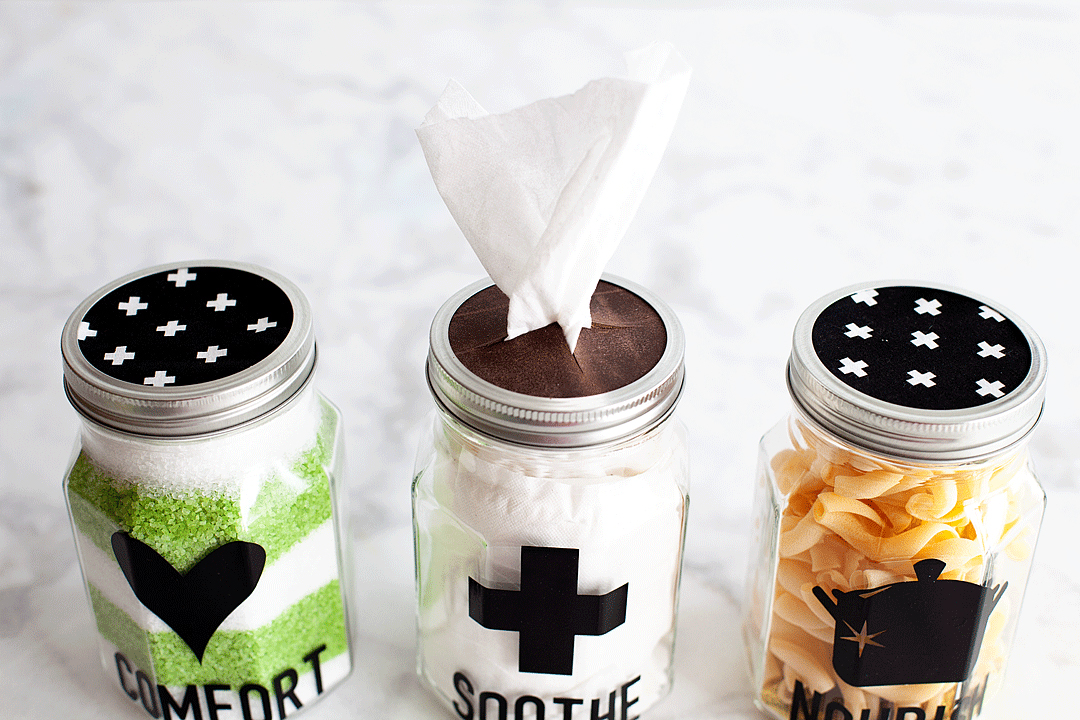
As much as we hate to admit it, cold and flu season is on its way. There is nothing more miserable than one of those lousy winter colds. What’s almost just as bad is watching someone you care for dealing with a cold or, Heaven forbid, the flu! I’m always looking for ways to help cheer them up and let them know that we love them and hope for their better health. That’s when I came up with this idea for a Cold and Flu Rescue Kit to share with those loved ones that are suffering. 


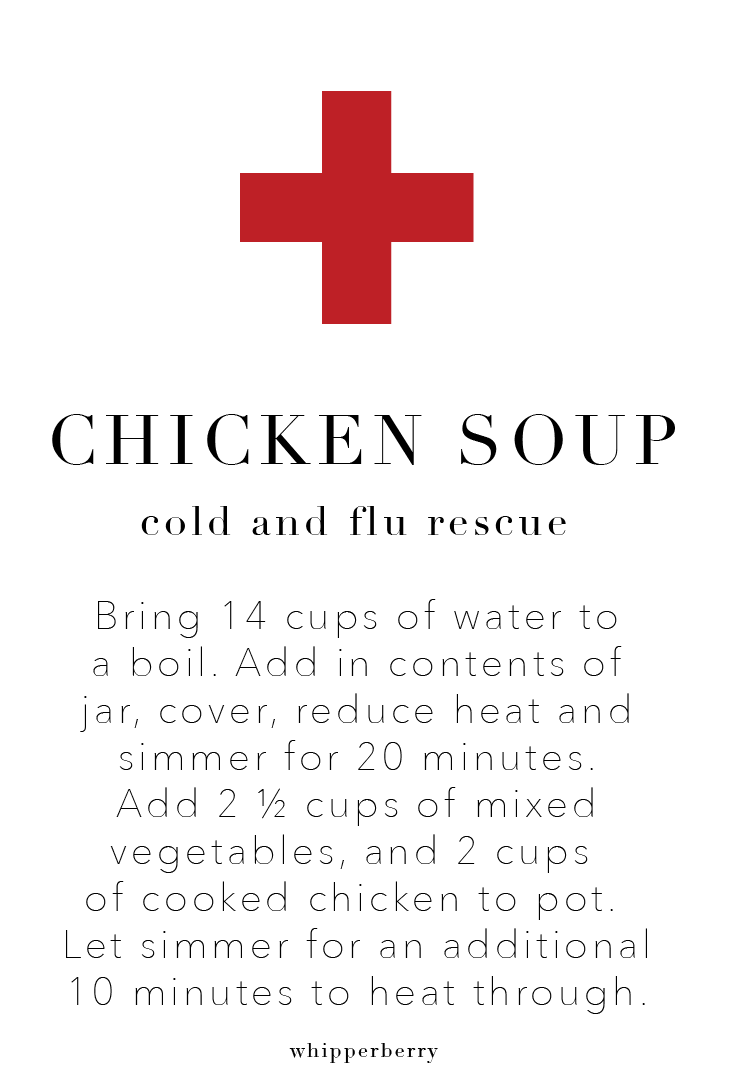
Print out the chicken soup recipe and add that to your kit and then you’re ready to go. Then Pin this one so that you don’t forget what to put in the jars. 
Place the Ball® Sharing Jars into a basket or a bin and run to the rescue of your family member, friend, co-worker or whomever STAT! They will truly appreciate this thoughtful gift as you come to their rescue in their time of need. 
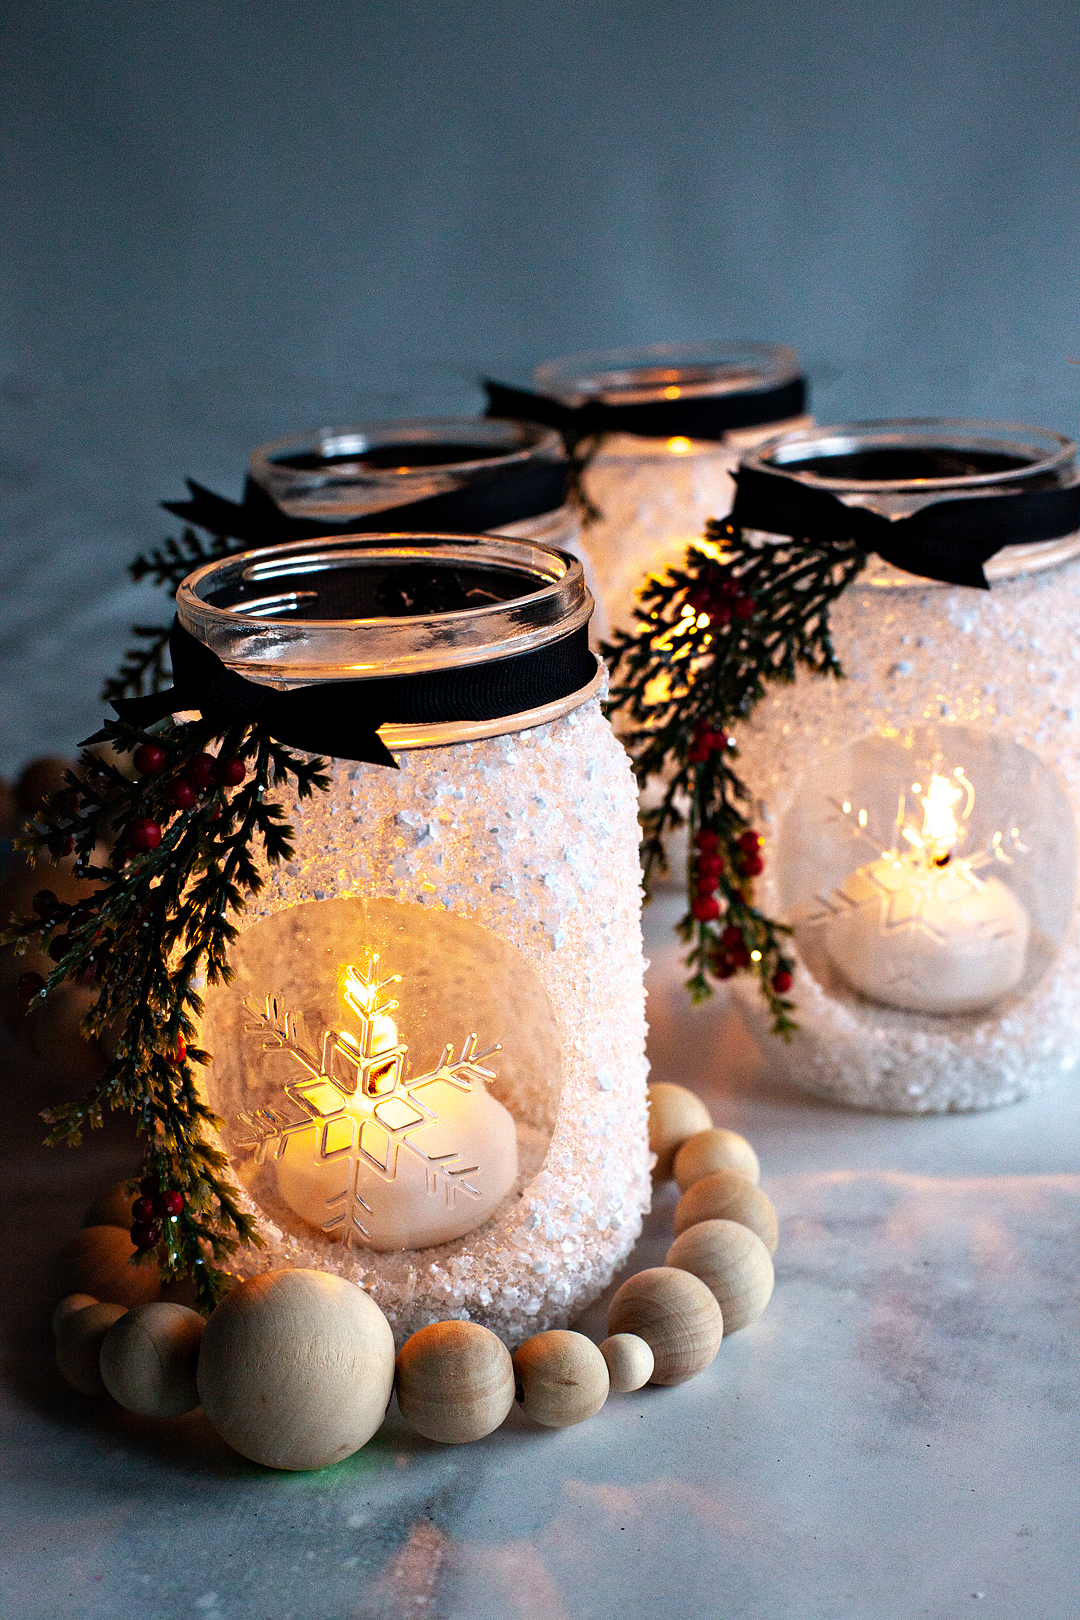
Snowflake Lantern Holiday Gift Idea 

825 · Oct 17, 2018 · 7 Comments

I’m not sure if there is anything more glorious than the thought of the first snow each year. I don’t care if you love or hate snow, the first snowfall of the year is always a fun event.

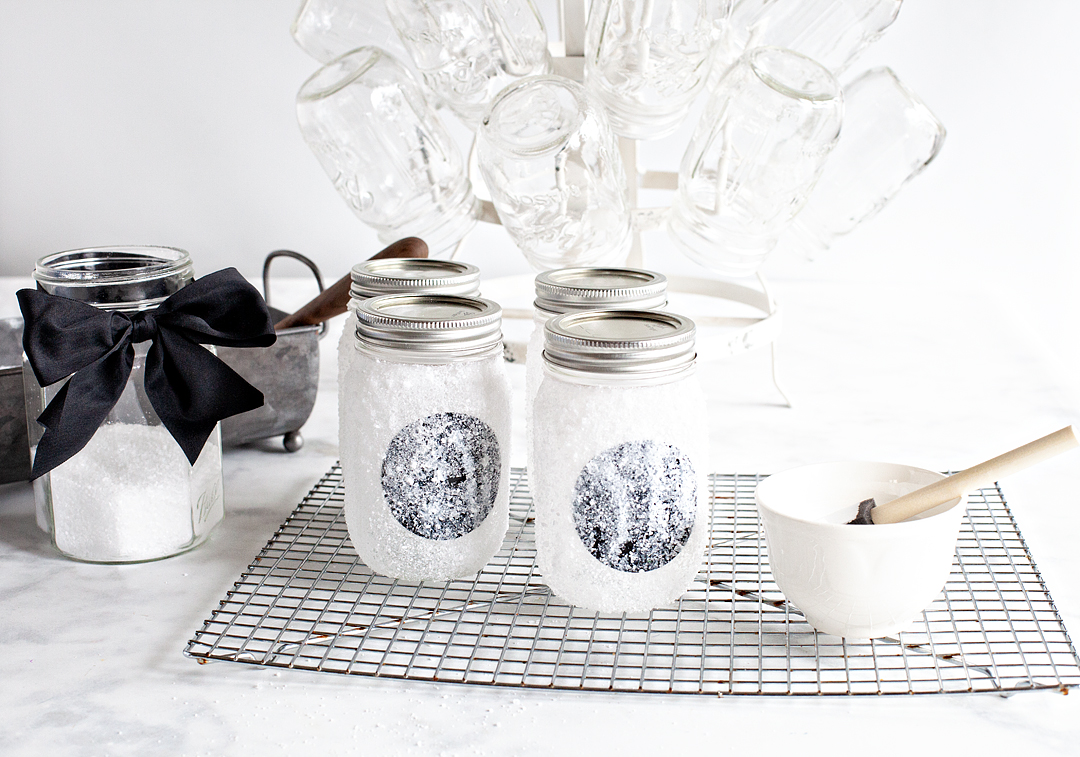
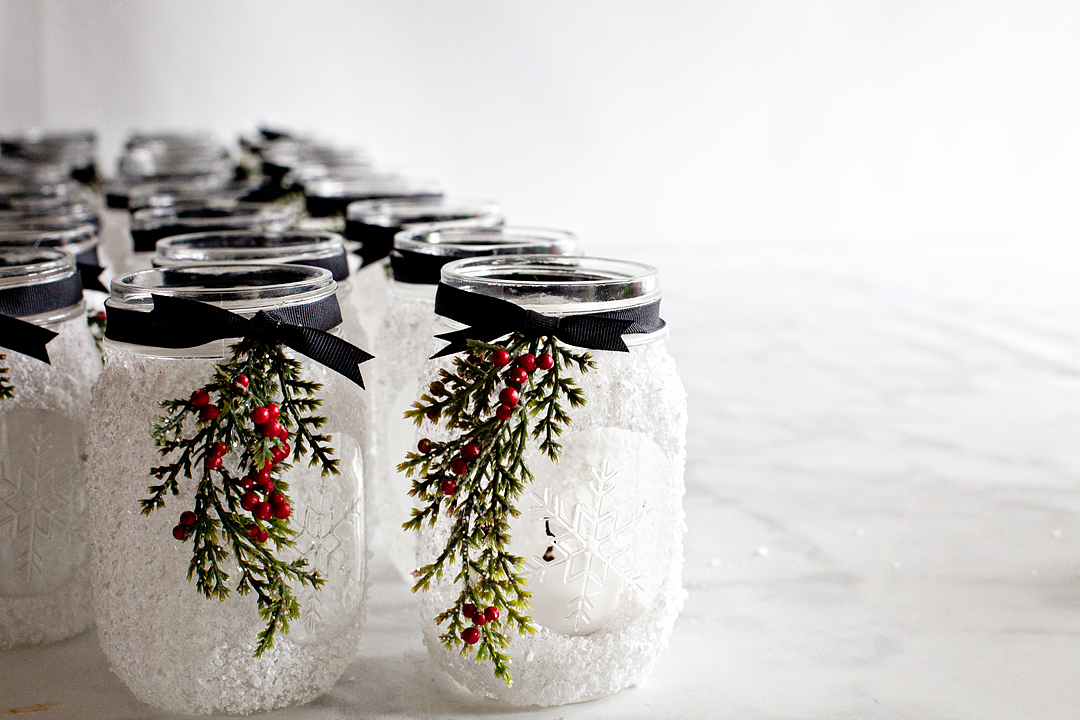
I’m thrilled that this season’s Ball® Keepsake Collectible Holiday Jar is an ode to the stunning snowflake! I decided that a fun way to use this fun collectible jar is to make snowflake lanterns that are perfect for dressing up your home for the winter season or, as a fabulous holiday gift.

The autumn is full of fun treats like all things pumpkin, apple preserves, hayrides through the pumpkin patch and so much more.

Towards the end of the autumn festivities there arrives a great anticipation in the air… when will it snow? I feel like no matter what part of the country you live in, snowflakes are truly magical. I’m thrilled that this season’s Ball® Keepsake Collectible Holiday Jar is an ode to the stunning snowflake!

I decided that a fun way to use this fun collectible jar is to make snowflake lanterns that are perfect for dressing up your home for the winter season or, as a fabulous holiday gift.

I can just imagine an army of these snowflake lanterns lining the walkway up to your home this winter season, warmly inviting your friends into your holiday gathering.

Won’t that be pretty? Let me teach you how to make them.

Snowflake Lantern Supplies

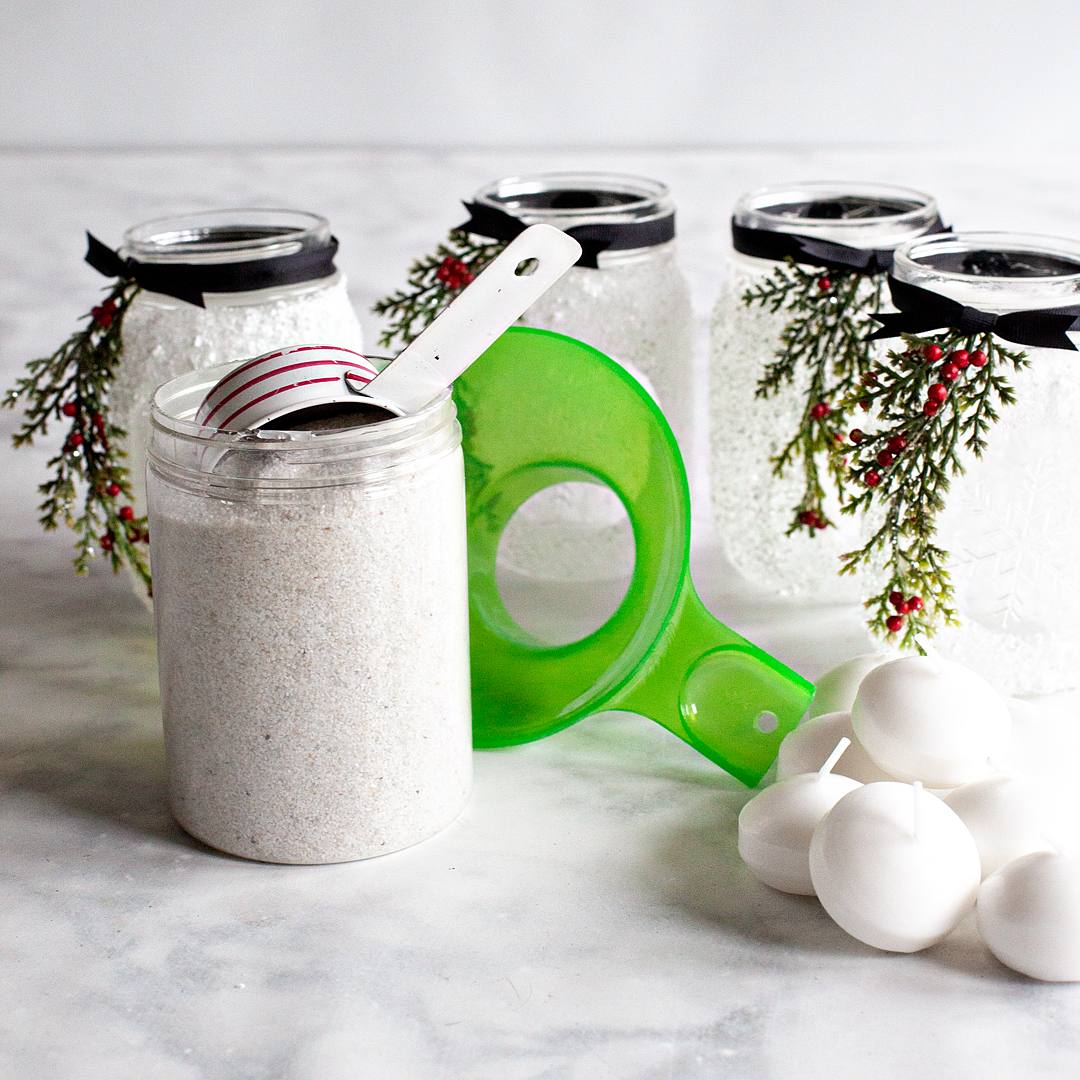
This project is pretty simple and doesn’t really require much in the way of supplies. Here is what you’ll need.

There are three different options for the Ball Mason jars. You can get a 4 pack of Keepsake Ball Mason jars, an 8 pack of regular Ball Mason jars, or a 12 pack of Snowflake Holiday jars. Now that I’ve redone this project a few times, I recommend the Snowflake Jars.

You can make these every Christmas! The snowflake jars add a really nice touch.

  • Ball® Snowflake Holiday Jars (12 Pack) This is the best option!
  • Regular jars in a set of 8
  • Regular jars set of 4
  • decoupage glue & Foam Brush Kit
  • Epsom salt – 1/2 cup for every 4 pack of jars
  • 2 1/2 inch circle vinyl sticker (optional)
  • decorative sand filler (optional)
  • small candles
  • 3/8” black ribbon
  • greenery with small berries
  • hot glue gun with sticks

  I’m thrilled that this season’s Ball® Keepsake Collectible Holiday Jar is an ode to the stunning snowflake! I decided that a fun way to use this fun collectible jar is to make snowflake lanterns that are perfect for dressing up your home for the winter season or, as a fabulous holiday gift.

Snowflake Lantern Instructions

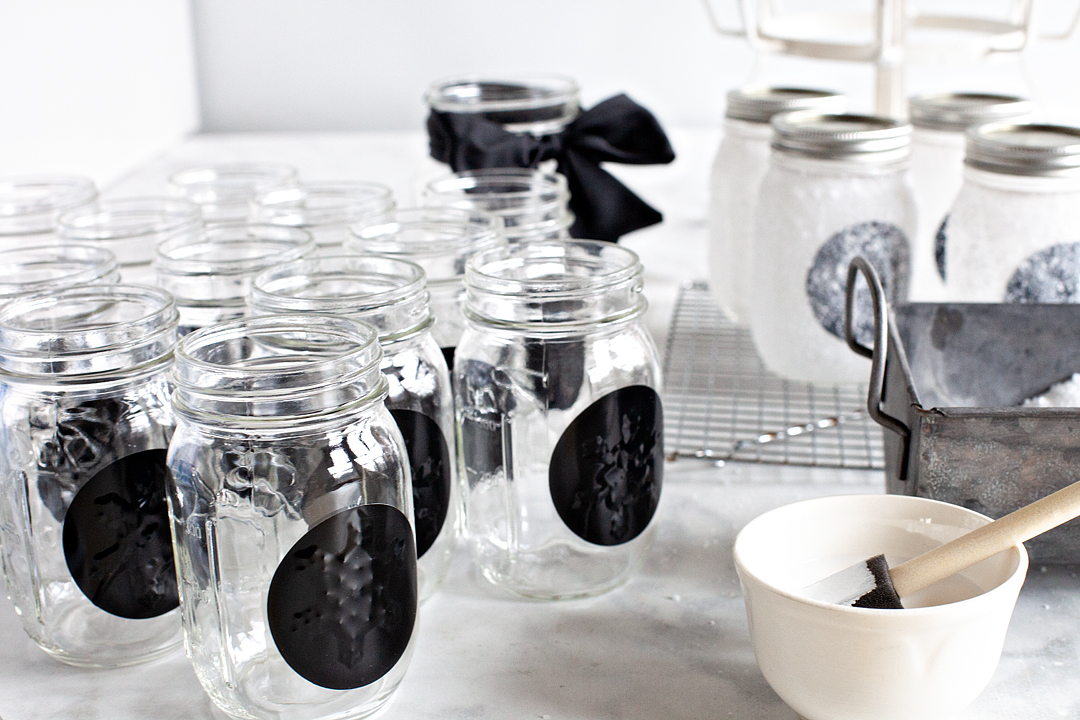
This first part of the project will be super fun to do with your older kiddos. Grab your Ball® Keepsake Collectible Holiday Jars, decoupage glue, foam brush, stickers (if you are using them) and Epsom salt. 

I’m thrilled that this season’s Ball® Keepsake Collectible Holiday Jar is an ode to the stunning snowflake! I decided that a fun way to use this fun collectible jar is to make snowflake lanterns that are perfect for dressing up your home for the winter season or, as a fabulous holiday gift.

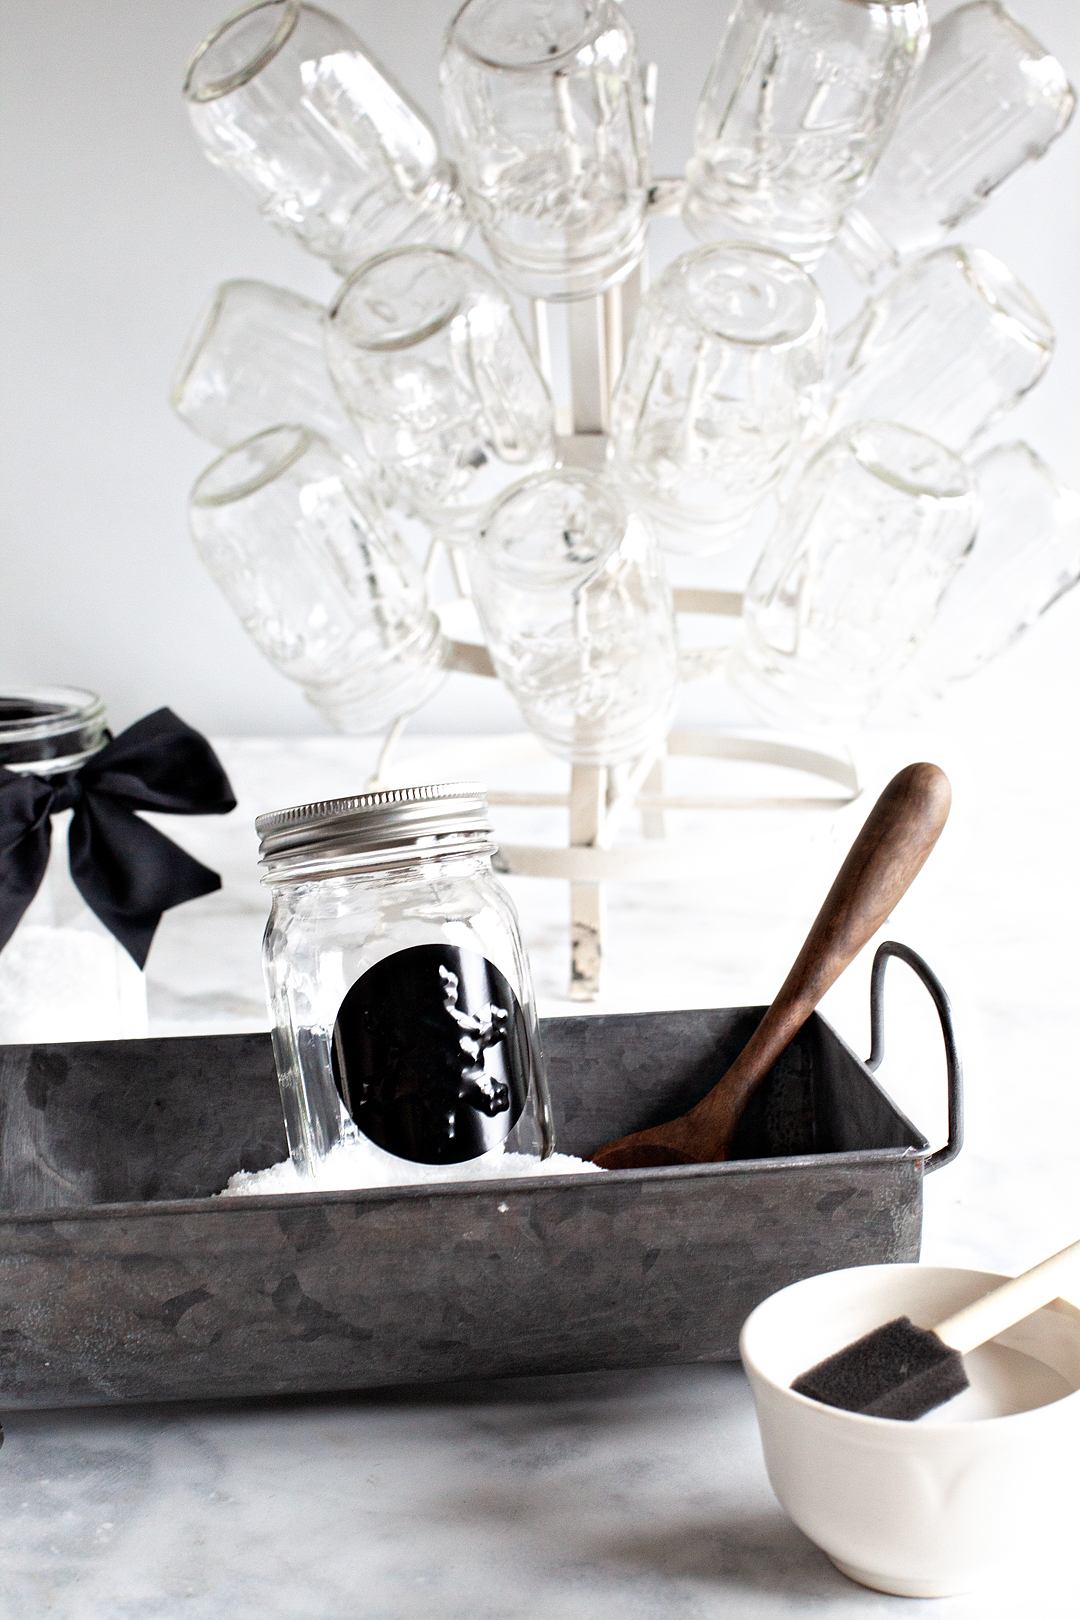
You’ll want to protect your work surface and have some type of container big enough to fit the jar into along with a large spoon at the ready.

ball

Fill your container with the Epsom salt half way.

I’m thrilled that this season’s Ball® Keepsake Collectible Holiday Jar is an ode to the stunning snowflake! I decided that a fun way to use this fun collectible jar is to make snowflake lanterns that are perfect for dressing up your home for the winter season or, as a fabulous holiday gift.

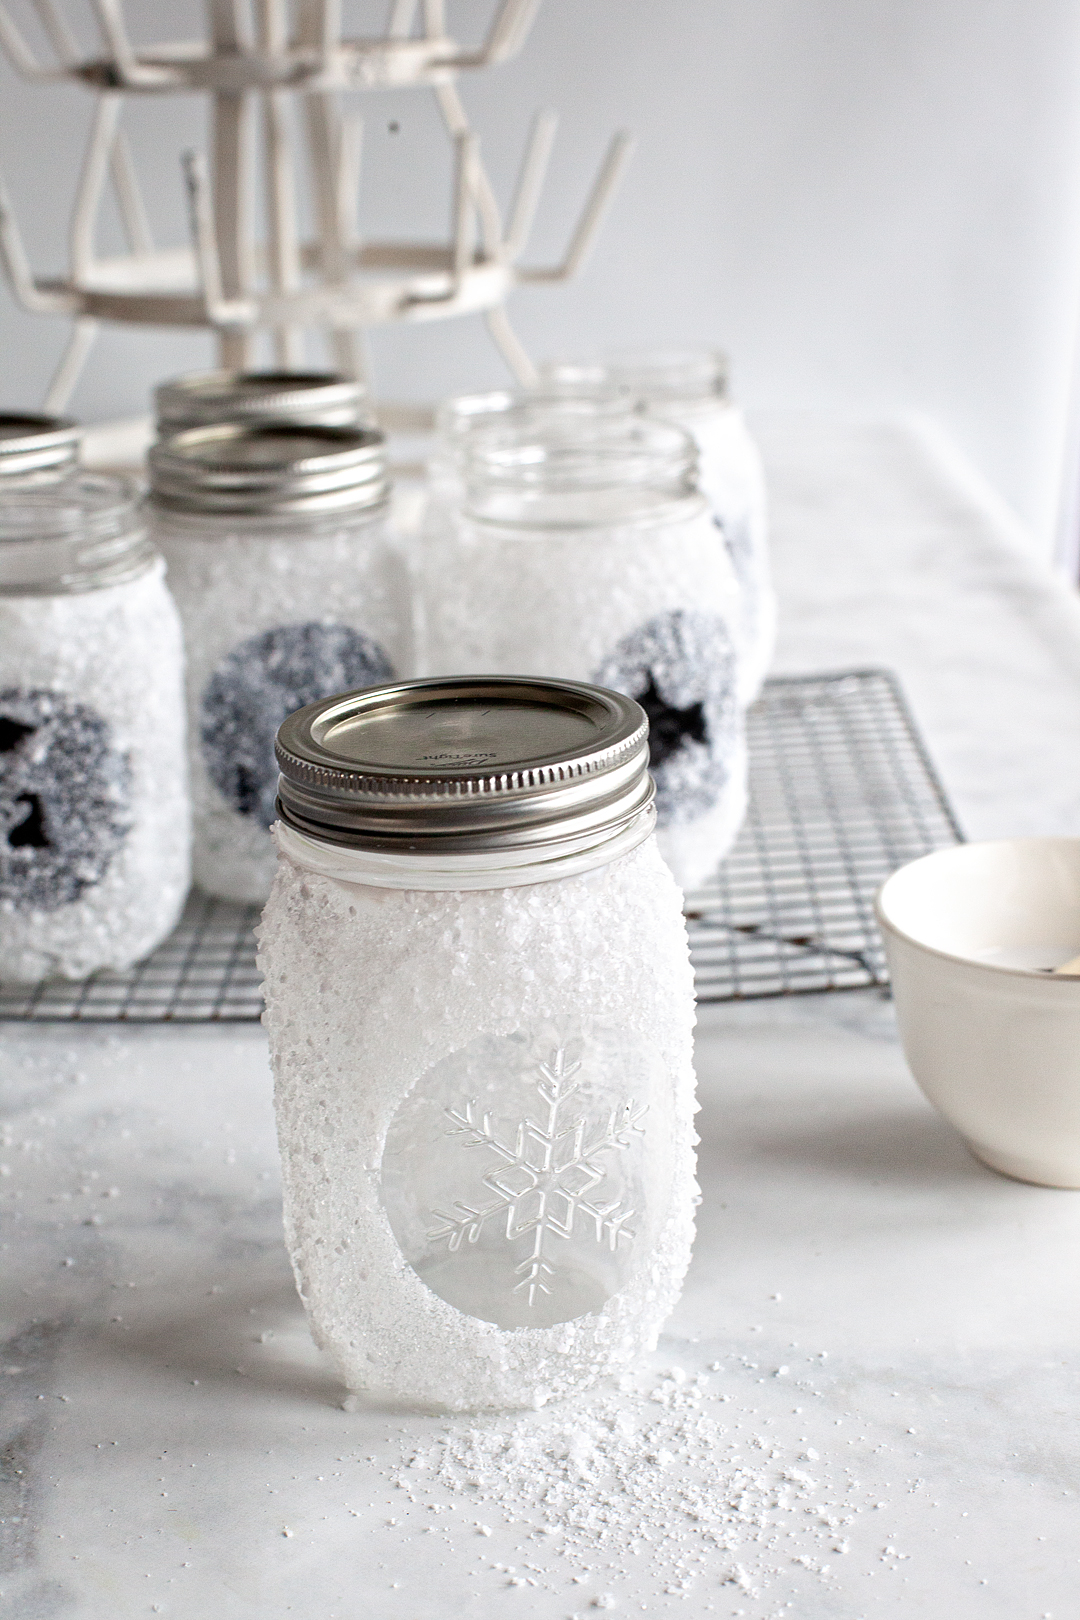
Place your sticker over the snowflake to protect that area from the decoupage glue and Epsom salt.

I’m thrilled that this season’s Ball® Keepsake Collectible Holiday Jar is an ode to the stunning snowflake! I decided that a fun way to use this fun collectible jar is to make snowflake lanterns that are perfect for dressing up your home for the winter season or, as a fabulous holiday gift.

If you don’t want to bother with the sticker, that’s totally fine. I made mine using my Cricut Maker or you can order them online. I prefer the sticker method because it creates a nice crisp line for the circle window of the lantern.

You are more than welcome to freehand a circle around the snowflake with your foam brush. Just know that your lines won’t be as perfect.

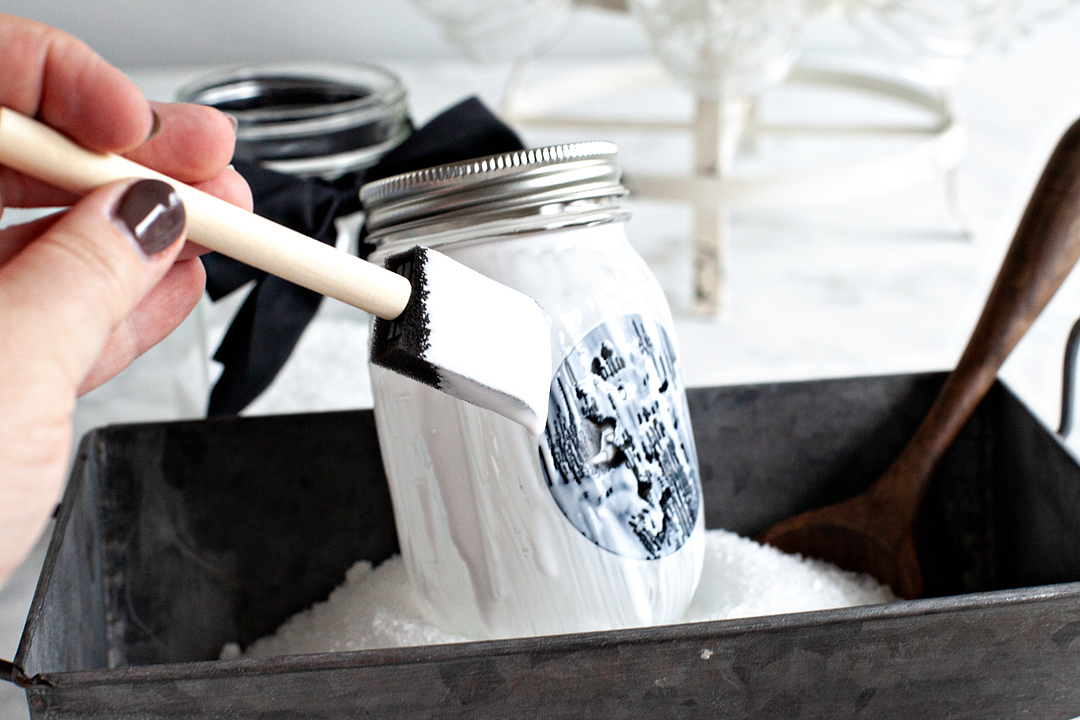
Cover your jar from below the rim down with the decoupage glue. Do not place glue on the bottom of the jar or on the jar threads.

I’m thrilled that this season’s Ball® Keepsake Collectible Holiday Jar is an ode to the stunning snowflake! I decided that a fun way to use this fun collectible jar is to make snowflake lanterns that are perfect for dressing up your home for the winter season or, as a fabulous holiday gift.

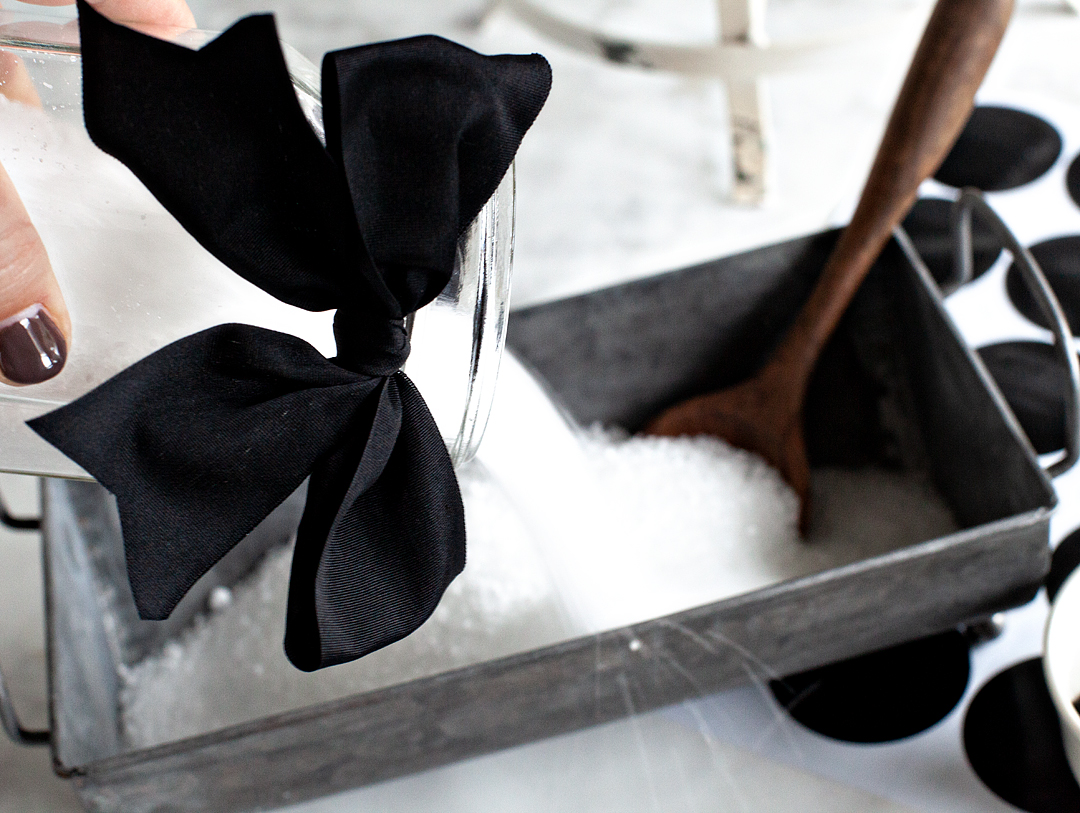
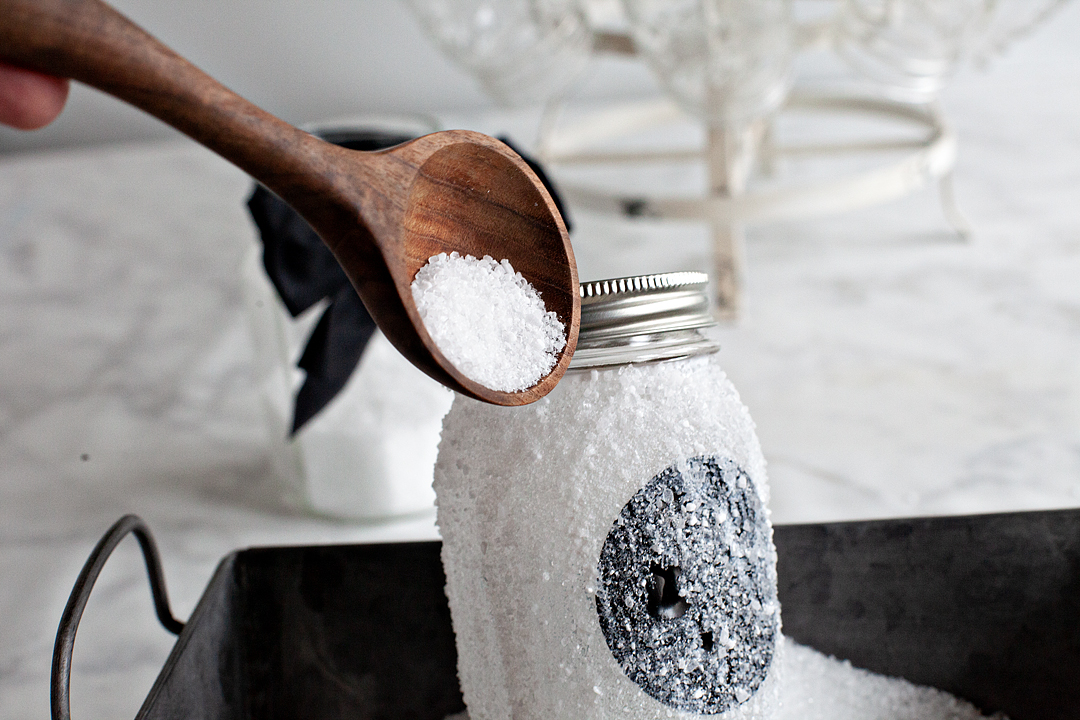
Using your large spoon, carefully cover the jar with the Epsom Salt. Make sure not to touch the surface of the jar with the glue on it. It will make for uneven coverage of “snow” on the jar. I also found that rolling the jar in the Epsom salt really didn’t give the desired effect as well. You really want to pour the “snow” over the decoupaged jar to create the nice snowy effect.

I’m thrilled that this season’s Ball® Keepsake Collectible Holiday Jar is an ode to the stunning snowflake! I decided that a fun way to use this fun collectible jar is to make snowflake lanterns that are perfect for dressing up your home for the winter season or, as a fabulous holiday gift.

Let your jars dry, undisturbed overnight. 

I’m thrilled that this season’s Ball® Keepsake Collectible Holiday Jar is an ode to the stunning snowflake! I decided that a fun way to use this fun collectible jar is to make snowflake lanterns that are perfect for dressing up your home for the winter season or, as a fabulous holiday gift.

This is a great project to make an assembly line. Grab a friend or your older kiddos and go to town and make a bunch of these fun gifts for friends, neighbors, teachers, bosses… I could go on and on. I LOVE that it could be a great holiday gift that doesn’t involve sugar!

I’m thrilled that this season’s Ball® Keepsake Collectible Holiday Jar is an ode to the stunning snowflake! I decided that a fun way to use this fun collectible jar is to make snowflake lanterns that are perfect for dressing up your home for the winter season or, as a fabulous holiday gift.

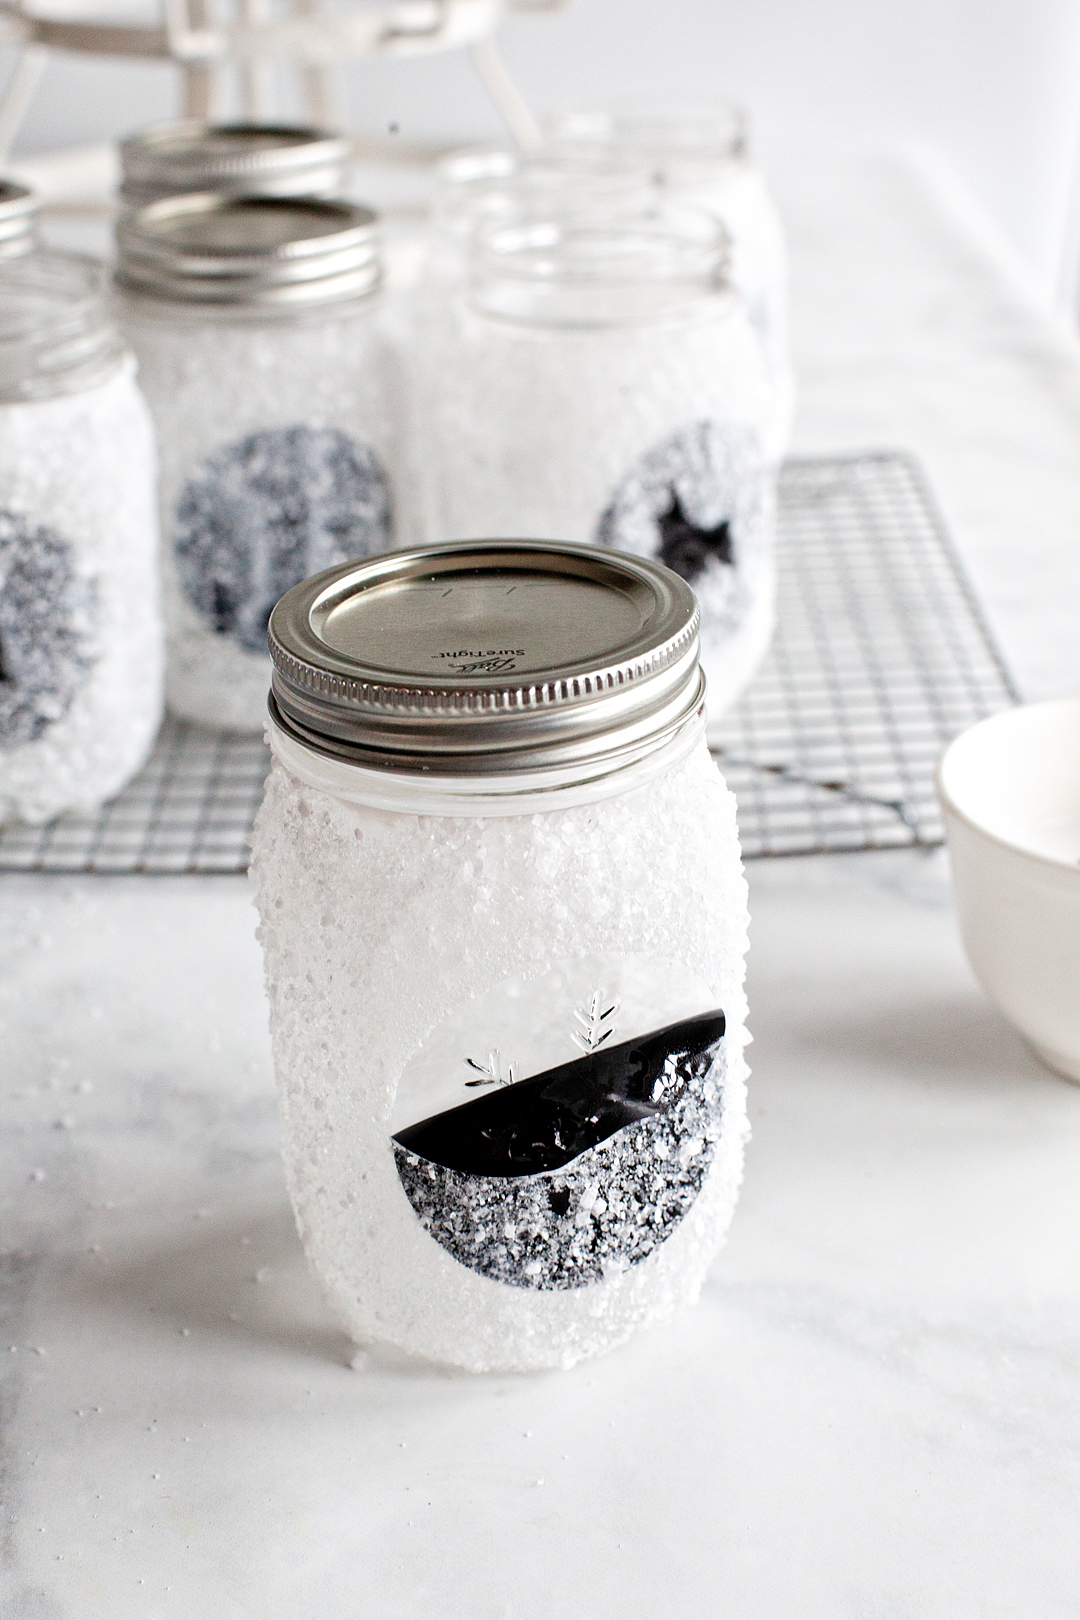
The following day, carefully remove your vinyl sticker. You may want to use a toothpick or tweezers to help get the sticker removal started.

Also, you may want to wear eye protection, the Epsom salt tends to fly in this stage of the process. I managed to have a little piece fly into my mouth and it was NOT tasty. So…eye protection and keep your mouth closed. 

I’m thrilled that this season’s Ball® Keepsake Collectible Holiday Jar is an ode to the stunning snowflake! I decided that a fun way to use this fun collectible jar is to make snowflake lanterns that are perfect for dressing up your home for the winter season or, as a fabulous holiday gift.

I’m thrilled that this season’s Ball® Keepsake Collectible Holiday Jar is an ode to the stunning snowflake! I decided that a fun way to use this fun collectible jar is to make snowflake lanterns that are perfect for dressing up your home for the winter season or, as a fabulous holiday gift.

Now you’re ready to decorate your jar. Fire-up your hot glue gun and prep your ribbon and winter greenery. I found my greenery at Michaels. It was a little wreath that I disassembled, and it worked perfectly.

I hot glued the greenery just above the lip of the jar that leads into the jar threads. I found that a little hot glue dot helped to secure the bottom section of the greenery to the jar creating it a nice frame around one side of the snowflake window.

Next, I tied the ribbon around the top of the jar, covering the hot glued section of the greenery, and tying a little knot. After that, I snipped off the ends using the inverted point technique.

I’m thrilled that this season’s Ball® Keepsake Collectible Holiday Jar is an ode to the stunning snowflake! I decided that a fun way to use this fun collectible jar is to make snowflake lanterns that are perfect for dressing up your home for the winter season or, as a fabulous holiday gift.

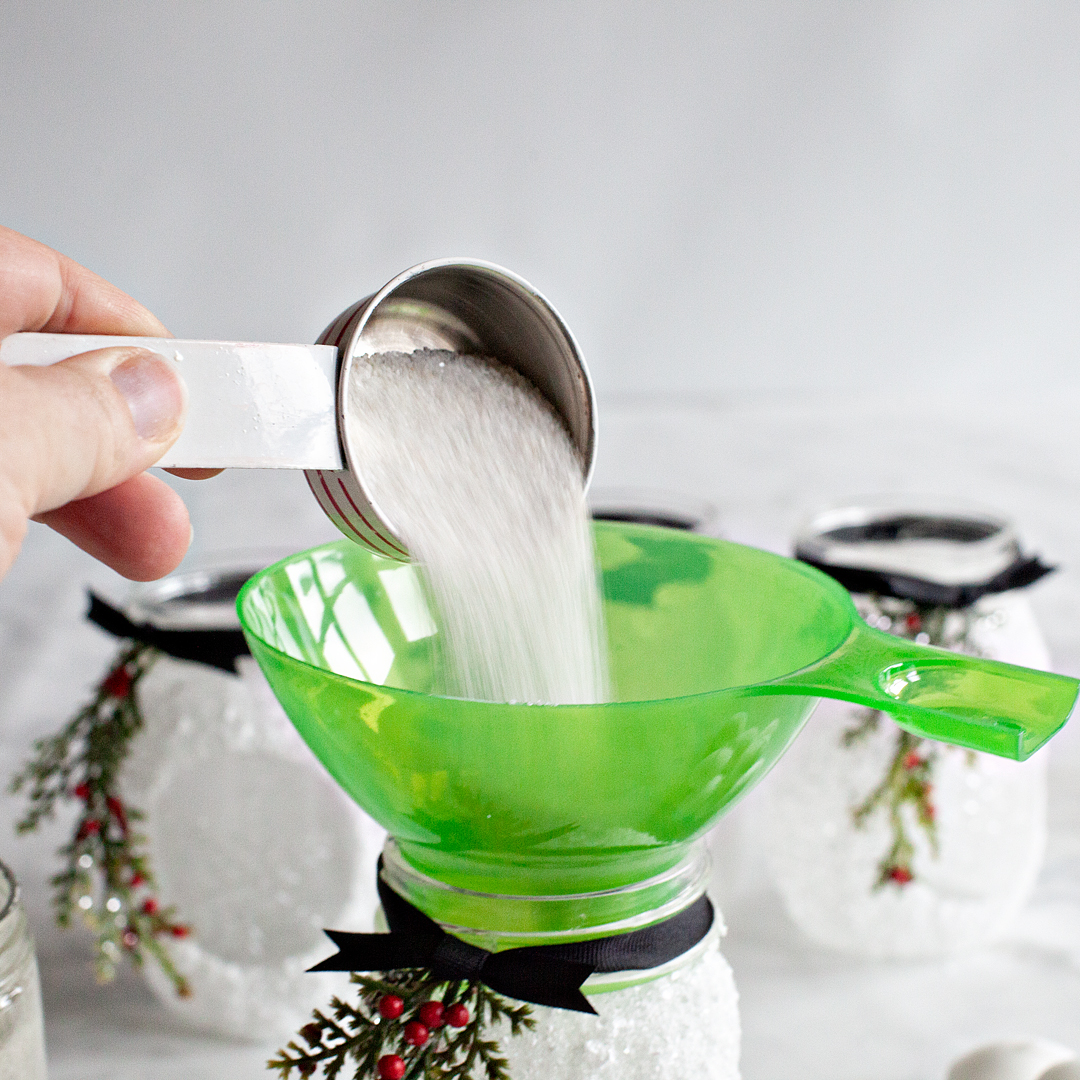
Then, fill the bottom of the jar with a 1/4 cup of either Epsom salt or decorative sand.

I’m thrilled that this season’s Ball® Keepsake Collectible Holiday Jar is an ode to the stunning snowflake! I decided that a fun way to use this fun collectible jar is to make snowflake lanterns that are perfect for dressing up your home for the winter season or, as a fabulous holiday gift.

I found the Ball® preserving funnel came in handy here.  

I’m thrilled that this season’s Ball® Keepsake Collectible Holiday Jar is an ode to the stunning snowflake! I decided that a fun way to use this fun collectible jar is to make snowflake lanterns that are perfect for dressing up your home for the winter season or, as a fabulous holiday gift.

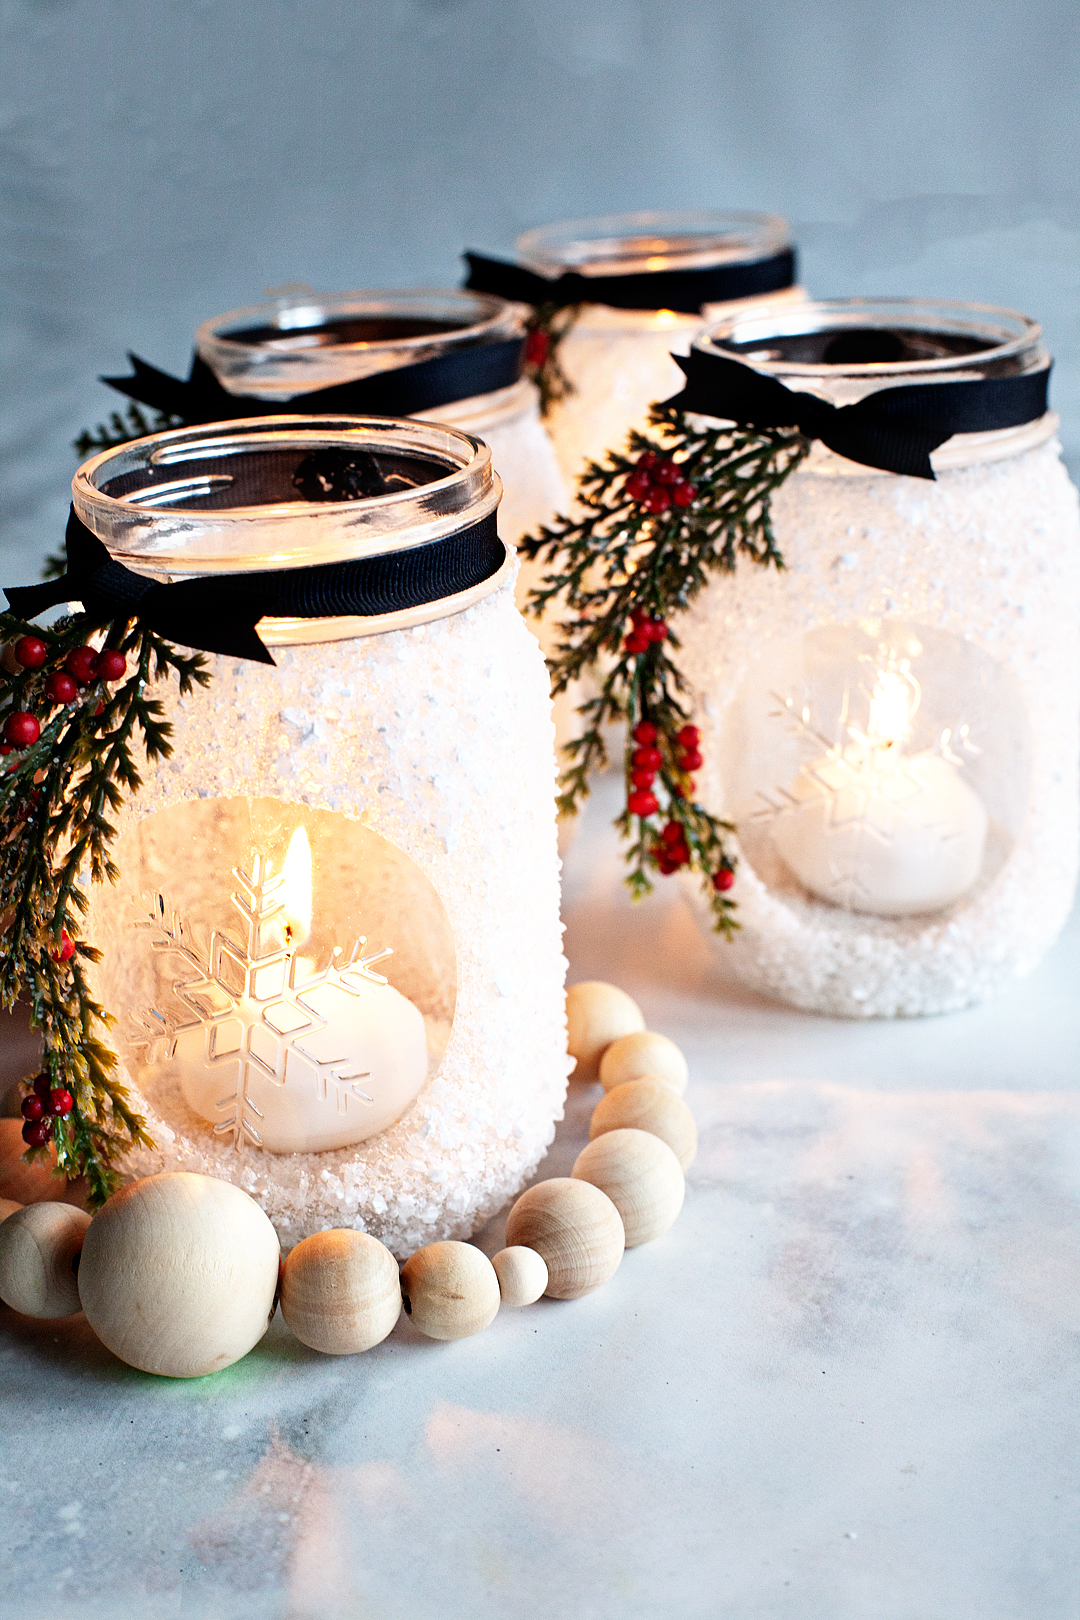
After I placed the little candle into the jar, I lit-her-up!  

I’m thrilled that this season’s Ball® Keepsake Collectible Holiday Jar is an ode to the stunning snowflake! I decided that a fun way to use this fun collectible jar is to make snowflake lanterns that are perfect for dressing up your home for the winter season or, as a fabulous holiday gift.


These snowflake lanterns made from the Ball® Keepsake Collectible Holiday Jars look snowy and beautiful. All ready to usher in those Hygge winter nights! 


I’m thrilled that this season’s Ball® Keepsake Collectible Holiday Jar is an ode to the stunning snowflake! I decided that a fun way to use this fun collectible jar is to make snowflake lanterns that are perfect for dressing up your home for the winter season or, as a fabulous holiday gift.

A Boy and His New Beddy’s Bed

10 · Aug 2, 2018 · 1 Comment

We’re getting ready for school here in these parts. With that comes the resurrection of old routines whether good or bad. Some routines stand the test of time like brushing your teeth, getting dressed and such. Others like making the bed could stand for a little improvement! Let’s be real here… How many of our kiddos or, us even, regularly make our beds? When the back-to-school routines truly kick-in, how many of our kiddos are skipping this one task because it’s just a pain and they would rather move on to bigger and better things? I have one little guy that generally skips this task or takes FOREVER making his bed thus making us late for school each morning. Anyone else in this boat? Yea, I thought so! That’s when I was introduced to Beddy’s Beds by a good friend of mine and my little guy has been using his new bedding all summer and we are super in love with this whole system!!! Come learn all about Beddy’s along with this fun room makeover for Gage.

+ This post brought to you by Beddy’s Beds +Our mornings & nights have been transformed with our favorite new bedding from Beddy's! They look fabulous in my little guy's new adventure room! | WhipperBerry | #childrensbedding #kidsrooms #beddys @beddys #kidsbedding #boysroom #boysroommakeover

Boys Room Makeover

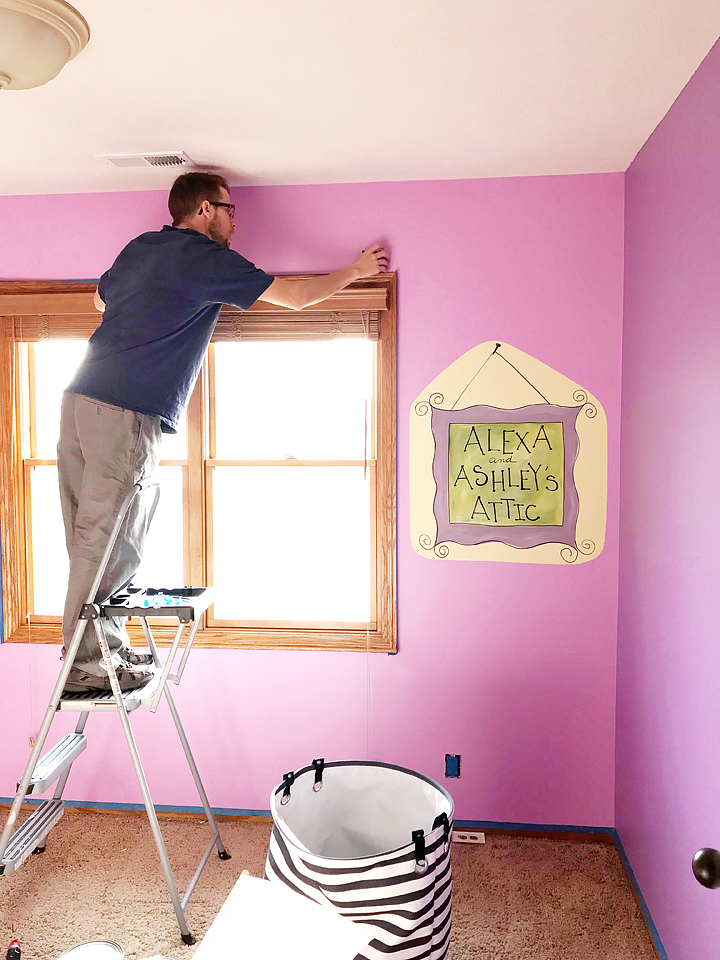
SEVERAL months ago we embarked on a room makeover for our little guy. He had been living in a pink and purple room since our move last year and it was high time to make some changes. An eight-year-old boy will put up with a pink room for only so long. We don’t even know Ashley & Alexa and why they even had an attic!

Easily transform a room by decoupaging paper onto the walls. Easy to install with @decoart Decor-Page matte medium. Vintage little boys adventure room created by WhipperBerry

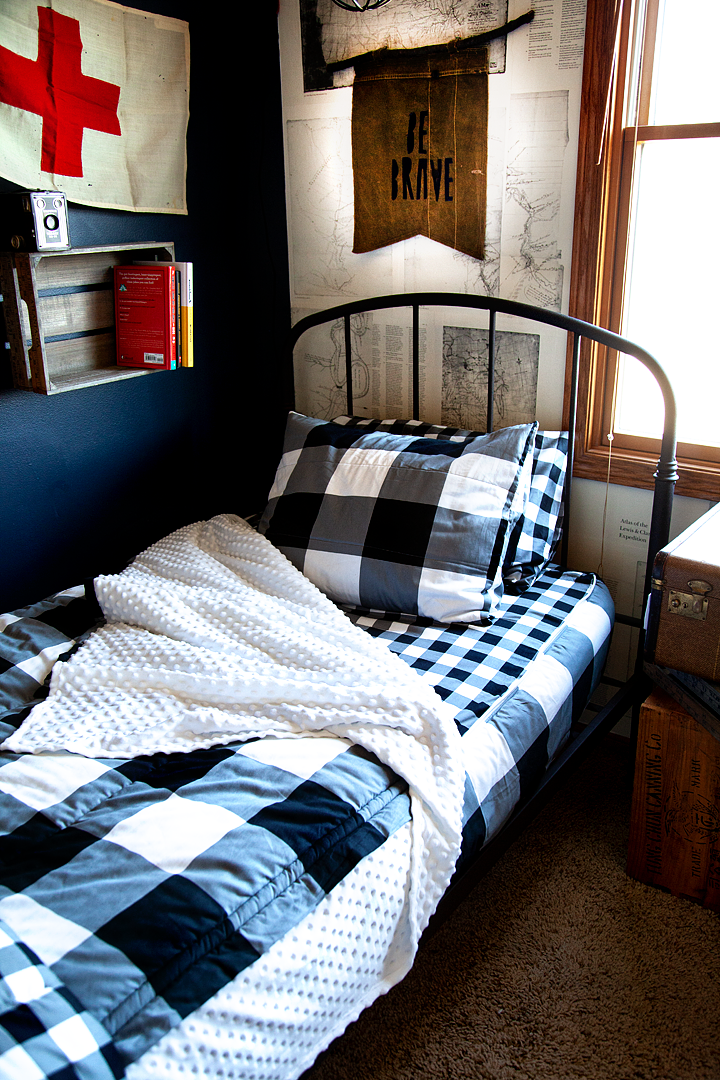
We settled on an Explorer room packed full with all kinds of great inspiration to explore our world. We found an old discarded library book that was filled with copies of the maps from the Lewis & Clark expedition. The library was just throwing it out! We pulled it apart and Decoupaged the pages onto Gage’s wall.

My little guy's new adventure room! | WhipperBerry | #childrensbedding #kidsrooms #beddys @beddys #kidsbedding #boysroom #boysroommakeover

The very last step that needed to be completed was, new bedding! Like I said before… His bed NEVER looks like the photo above. If it is made, it looks like Salvador Dalí made the bed rather than Martha Stewart. Granted, I know… It’s a little boys room but, there has to be something smarter & easier. Check out this video to see the genius of what we found!

The Genius of Beddy’s Bedding

Did you see that? How easy it was for Gage to just zip-up his bed when he got up? This bedding is brilliant! Here are my top 5 reasons why I love Beddy’s bedding…

    1. First off, it’s dang cute! I love the fabric that we selected for Gage’s room. We picked the Checked Out bedding and it looks great in his explorer room. They have all kinds of styles that are perfect for toddlers on up to Mom & Dad, both boys, and girls, along with college-age kiddos. Plus, the options keep expanding each year.
    2. His bed is so easy to make! The bedding is somewhat like a sleeping bag that has a fitted sheet element sewn on the bottom. The whole system fits right onto the bed and grips nicely to the mattress. Now, if you have hot sleepers like Gage is, don’t worry, the top blanket unzips at the bottom if you’d like and down each side, you can even remove the whole top blanket for washing. Gage is a hot sleeper and he likes to keep the side unzipped and then zips it right back up in the morning.
    3. I love that this is a product created by Moms for Moms! You know how Beddy’s came to be? It was out of the frustration of trying to make bunk beds. Have you ever tried to make a bunk bed? It’s impossible even for adults let alone kids. Beddy’s are handmade with fabulous fabric. The top fabric is 100% cotton and the inside is a scrumptious Minky fabric that all kiddos love. Gage has been using his bedding for a few months now and I’m thrilled with the quality of the materials & workmanship.Our mornings & nights have been transformed with our favorite new bedding from Beddy's! They look fabulous in my little guy's new adventure room! | WhipperBerry | #childrensbedding #kidsrooms #beddys @beddys #kidsbedding #boysroom #boysroommakeover
    4. Beddy’s bedding is easy to wash! I’ll be honest, when I first saw a Beddy’s system I thought it looked like a bear to wash. I was so wrong! Gage who struggled to gather all of his bedding on wash days in the past now has no problem stripping his bed and loading it into the washer all by himself.
    5. I love that his product empowers everyone to start their day on the right foot! When I was a kiddo, I received a pillowcase that said, “Start each day in a happy way.” It was actually a Strawberry Shortcake pillowcase. The first morning I used it, I was 6 or 7,  I read the quote and it really hit me. I did need to start each day in a happy way! That morning I felt empowered to make my bed (the old fashioned way) starting my day on the right foot and then moving forward with confidence that I could handle whatever came my way that day. It sounds silly, right? Can making your bed empower you, of course it can. If you aren’t a bed maker, give it a go. Commit to making your bed for a week and see how that little change will change your day. We need to give that gift to our kiddos. A good breakfast and a made bed, that’s a good recipe for a great start to the day!

What are you going to do this new school year to help your kiddos to feel successful right from the start? I highly recommend investing in some Beddy’s bedding for the kiddos. I’m thrilled with how Gage loves his new bedding and how his room looks with the bedding.

+ Disclaimer – This post has been sponsored by Beddy’s Beds. They sent product for my family to review however, I was not paid for my review or for this post. Remeber, I only share what I love and truly use in my everyday life. +

SaveSave

SaveSaveSaveSaveSaveSave

SaveSave

SaveSave

SaveSave

SaveSave

SaveSave

SaveSave

How to Personalize Your Yeti Cup • Yeti Tumbler Design Ideas

43 · May 21, 2018 · Leave a Comment

Personalized Yeti

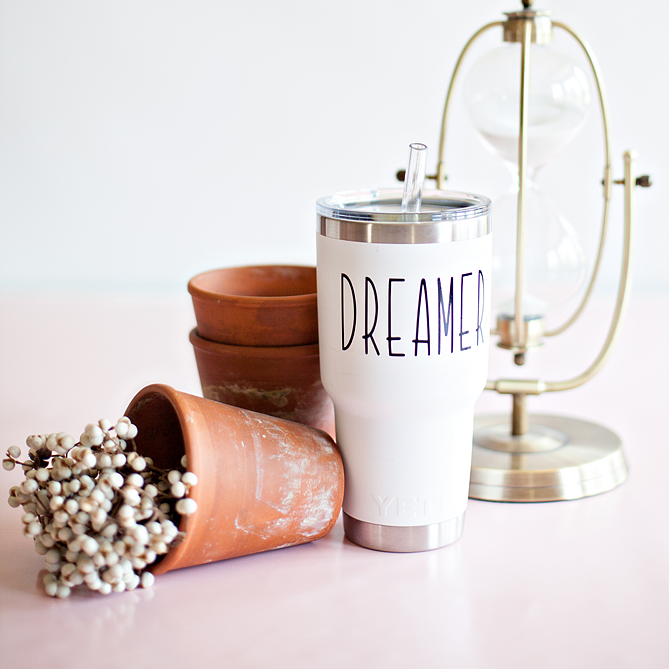
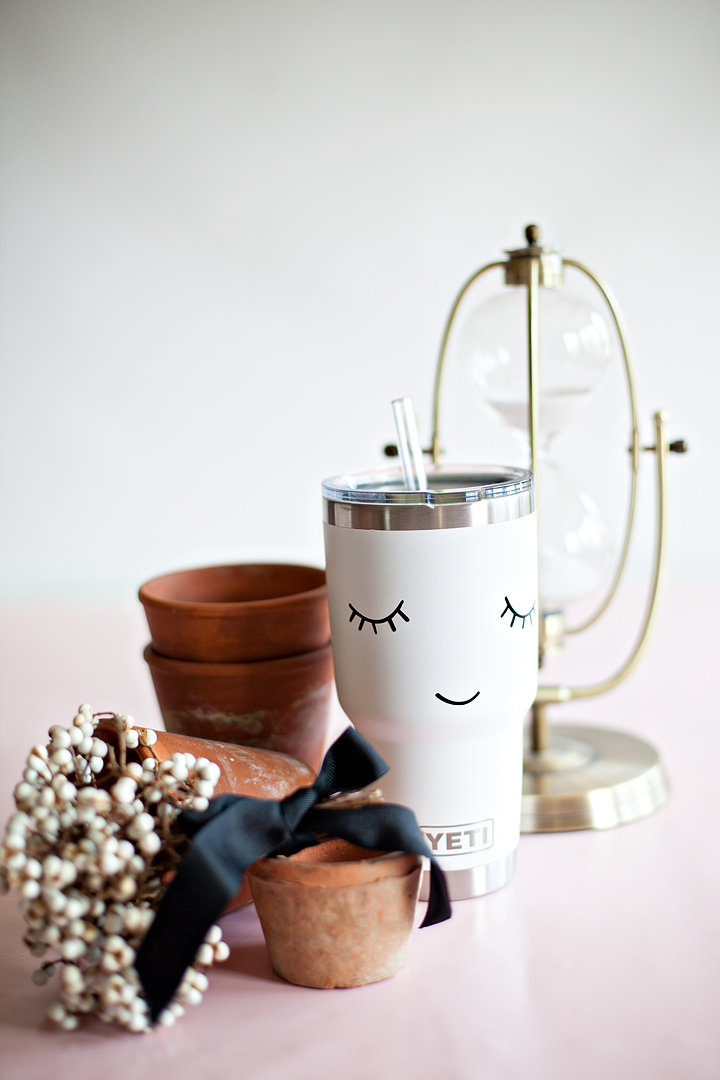
I’ve become a little obsessed with my Yeti cup to help me do just that. I’m also a HUGE believer in making everything look as fabulous as possible. Yeti has these WHITE Yeti 30 oz. Tumblers and I ran out and grabbed a few. I knew that it would look amazing when I dressed it up with a stylish design cut out of Cricut Premium Outdoor vinyl. I took off to Michaels to grab some of my favorite vinyl and set to work. Let me show you how to personalize your Yeti.

Here are Some Ways to Personalize Your Yeti Tumbler

This is so fun! Obviously, you can do this with any type of cup, I’m just a huge Yeti fan. I’m also a huge Cricut Fan so if you don’t have one, grab a friend who does and offer to make her a cup as well!

Supplies Needed for This Cricut Yeti Cup Design

  • Your favorite cup
  • Dreamer • Farmhouse Yeti Design
  • Cricut Premium Outdoor vinyl
  • Cricut Transfer Paper
  • Cricut Explore 3

Instructions to Get Cricut Vinyl on Your Yeti

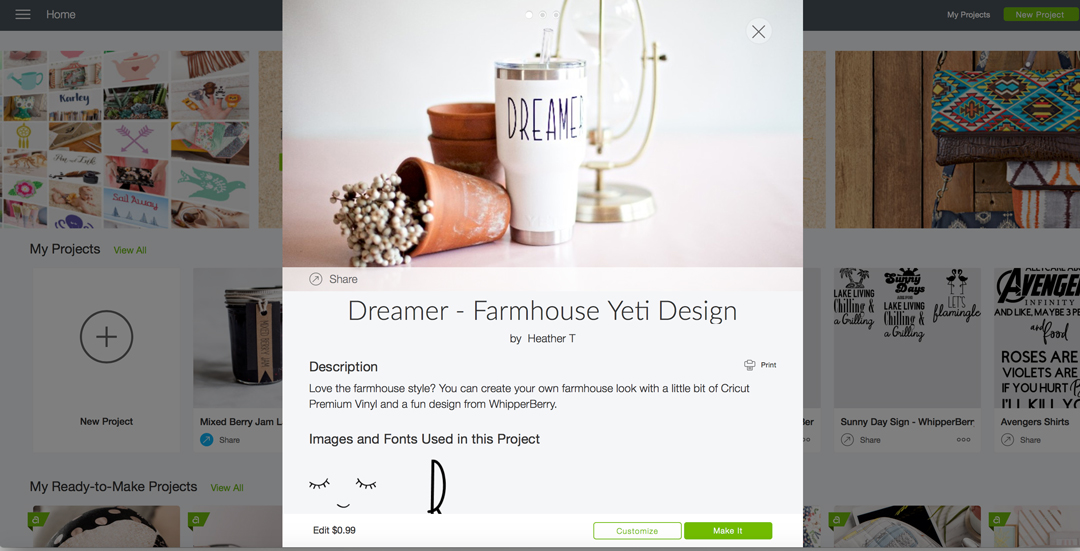
First, you’ll need to open Cricut Design Space with the link provided above to access my design. If you are working with the same type of tumbler all you need to do is click the MAKE IT button on the bottom right of the screen and follow the steps on your machine.

If you are using a different size cup, you’ll need to measure your cup and decide what size to make your vinyl and then resize it in Design Space. Click on the CUSTOMIZE button also in the bottom right. Size the design to fit your cup and then follow the directions in Design Space to cut the design. Keep in mind… Either way, You’ll have to pay 99¢ to have access to the cute face in Cricut Design Space.

Next, you’ll need to apply your vinyl on your tumbler by following these HOW TO APPLY VINYL instructions that I posted not too long ago. Once you apply your vinyl, you’re all set to look FABULOUS this summer carrying around your white Yeti that has been customized just for you!

Are you a @Yeti lover like me? I love to personalize my Yeti Tumblers with my @cricut Maker and some simple Premium Outdoor Vinyl. It works in the dishwasher just great and is my favorite way to Say hydrated this summer! -WhipperBerry


Other Yeti Cup Designs for Ladies

Using a Circut Maker is the best way to personalize your Yeti tumbler. There are so many different designs that you can make. You definitely don’t have to make the farmhouse design but I wanted to show you how it works and well, I liked this design!

Please browse around the website here at WhipperBerry for other Cricut ideas.

Good luck personalizing your yeti cup!

SaveSaveSaveSaveSaveSave

SaveSave

SaveSave

  • « Go to Previous Page
  • Go to page 1
  • Go to page 2
  • Go to page 3
  • Go to page 4
  • Interim pages omitted …
  • Go to page 24
  • Go to Next Page »

Primary Sidebar

Heather from Whipperberry
Hello... my name is Heather and I'm the creator of WhipperBerry a creative lifestyle blog packed full of great recipes and creative ideas for your home and family. I find I am happiest when I'm living a creative life and I love to share what I've been up to along the way... Come explore, my hope is that you'll leave inspired!

Footer

  • Privacy Policy

Copyright © 2023 · Seasoned Pro