• Skip to primary navigation
  • Skip to main content
  • Skip to primary sidebar
  • Skip to footer

Whipperberry

WhipperBerry • Your Home For Creative Inspiration

  • Home
  • Recipes
    • Starters
    • Easy Weeknight Dinners
    • Main Dish
    • Salads
    • Side Dish
    • Soups & Stews
    • Desserts
    • Breakfast
    • Miscellaneous
  • Tutorials
    • Creative Crafts
    • DIY Decor
    • Fabric Crafts
    • Food How-To
    • Jewlery
    • Paint Projects
    • Paper Art
    • Party Styling
    • Photography and Graphic Design
    • Silhouette
  • Holidays
    • Easter
    • Mother’s Day
    • Father’s Day
    • 4th of July
    • Halloween
    • Thanksgiving
    • Christmas
    • Valentine’s Day
  • Gift Ideas
    • Gifts For Everyone
    • Gifts for Dad
    • Mother’s day
    • For The Girls
    • For The Kids
    • Teacher Gift Ideas
    • Christmas
  • Printables
    • Holiday
    • Gift Idea
    • LDS Primary
  • Travel
  • About
    • Terms
  • Contact
  • Nav Social Menu

    • Facebook
    • Instagram
    • Pinterest
    • RSS
    • Twitter

Chalk Paint

Why Wax Chalk Paint? Everything You Need to Know

77 · Apr 7, 2023 · Leave a Comment

If you’re new to painting with chalk paint, you probably have read a lot of different opinions about the best way to protect your chalk-painted surface. There are several choices, but if you want to maintain the smooth matte appearance of chalk paint, using a wax sealant is, in my opinion, a great choice.

Using wax as a protective coating on wood furniture isn’t a new concept. In fact, wax (usually beeswax) has been used as a top coat on furniture since the mid-1700s to early 1800s. 

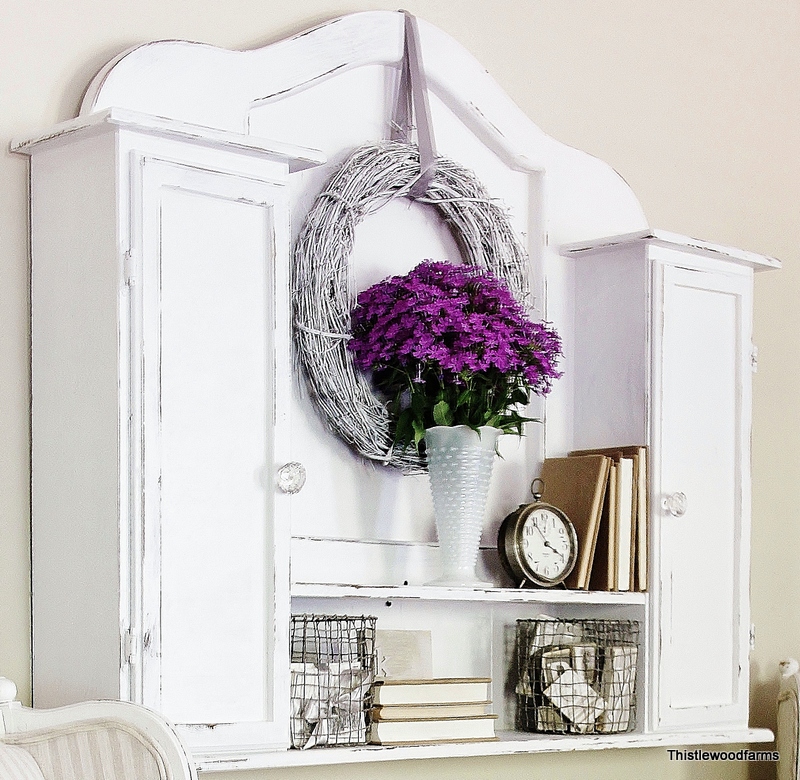
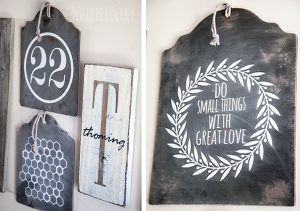
Due to the fact that varnishes were expensive, wax finishes were commonly used on early American furniture. If you’re trying to achieve a somewhat authentic “antique” appearance, chalk paint wax is the perfect choice for this. 

Do You Need to Wax Chalk Paint?

Whether or not you need to wax chalk paint is really a matter of preference on your part.

The short answer to this question is that you don’t need to apply a wax sealant, but your painted piece will look better and the paint job will last much longer.

Chalk paint is a less durable paint when compared to latex or alkyd-hybrid paints. It’s easier for it to get scratched, and temperature changes and moisture will degrade your paint job.

For these reasons, it just makes sense to apply a protective sealant over your painted furniture, especially on chalk-painted furniture or cabinets that will be touched or moved frequently. You can see my suggestions for the best paint for furniture here.

Chalk paint wax is an excellent choice, both for its protective qualities and for the refined appearance of the end result.

It should be mentioned here that a wax coat needs to be refreshed every couple of years. You don’t have to apply several coats, but a good cleaning followed by a fresh wax coating will keep your furniture looking great.

As an alternative to applying wax, you could use a polyacrylic sealant, or leave the paint without any top coat at all.

But ultimately, I think chalk paint wax sealer gives the perfect “vintage” look while providing a strong protective finish to your chalk-painted furniture.

What Does Chalk Paint Wax do?

Chalk paint wax provides a protective top coat over any chalk-painted surface. It will give the paint a very subtle, satiny sheen, but it isn’t super-glossy. 

It’s a nice choice to use if you want to preserve the look of a completely matte finish as much as possible. It also deepens the color of chalk paint a bit and will help prevent the color from fading over time.

Wax will prevent chalk paint from chipping or getting scratched. This is particularly important to use on any distressed furniture.

If you don’t have a sealant coat over your distressed furniture, you risk unintentional chipping and scuffing occurring around the distressed areas.

A little bit of distressing looks great, but if it starts getting chipped unintentionally the look will be much more “shabby” than “chic”.

Chalk paint wax is water-resistant. This is important because chalk paint is water soluble. If you have a chalk-painted surface that isn’t covered with a sealant coat, any moisture will eventually damage the paint. 

Another thing that chalk paint wax can “do” is to give the appearance of an antique patina to your painted furniture.

Many brands of chalk paint wax offer tinted or darker-colored waxes. These are applied to give a sheer wash of color over the paint, creating the look of an aged antique.

While the wax offers excellent protection against moisture and chipping, it isn’t heat resistant. It’s important to remember that you shouldn’t place hot items (such as hot food dishes or hot beverages) directly on a waxed wood surface.

Hot items will degrade or possibly melt the wax coat.

Can You Paint Over Chalk Paint That Has Been Waxed?

It’s fairly easy to paint over anything that has already been painted with chalk paint, It with a little prep work, of course. You can paint over chalk paint, but you really can’t paint directly on top of something that was previously waxed.

I explain in more detail here, but essentially you’ll need to remove any prior wax finish before you can repaint. Chalk paint, or any other type of paint, simply won’t stick to a wax finish.

A bit of scrubbing with mineral spirits, followed by cleaning with a good degreaser should remove an existing chalk paint wax coating. It’s important to remove all the wax, so pay attention to corners and any carved surfaces.

What Happens If You Don’t Wax Chalk Paint?

If you don’t want to apply wax over your chalk paint, that’s fine. Your paint might look good for a long time.

However, there’s no guarantee of that, and you’ll definitely have to be careful not to expose your chalk-painted project to excess moisture. Because chalk paint is water soluble, moisture will eventually wear away your paint job.

You’ll also have to be careful to limit repetitive touching or placing anything heavy on your chalk-painted piece if it doesn’t have a protective coating.

The main thing that will probably happen if you don’t apply wax (or another protective coat) on your chalk paint is that it’s going to start showing wear and tear.

This could take the form of chipping, scratches, and scuff marks. This is especially true near any place you distressed the chalk paint.

Chalk paint is very porous, so without a protective wax coat it’s going to be much more challenging to keep your painted surface clean.

Anything that is painted with chalk paint is more likely to absorb dirt and pick up small stains. A wax coating helps to repel most dirt and shouldn’t be as susceptible to staining. 

How To Wax Over Chalk Paint – A Quick Guide

It’s not difficult to apply wax over chalk paint! It takes patience, and a little “elbow grease”, but the results are worth it!

Here is the process, broken out into a few simple steps:

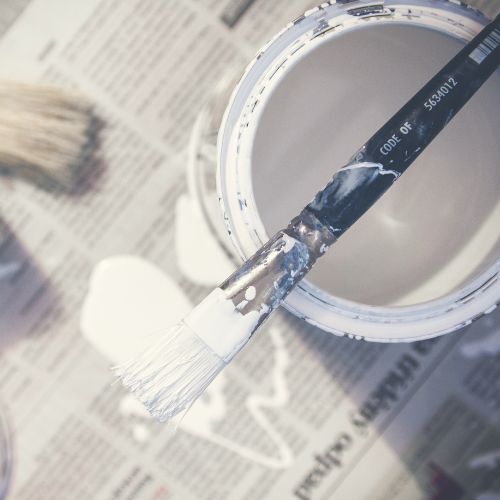
  • The first thing to keep in mind, before even opening your can of chalk paint wax, is to make sure your chalk-painted surface is completely dry. Chalk paint dries quickly, but it’s recommended to let the paint dry for at least 24 hours before applying wax. If the paint isn’t fully dry, you could end up with some of the paint coming off when you buff the wax finish.


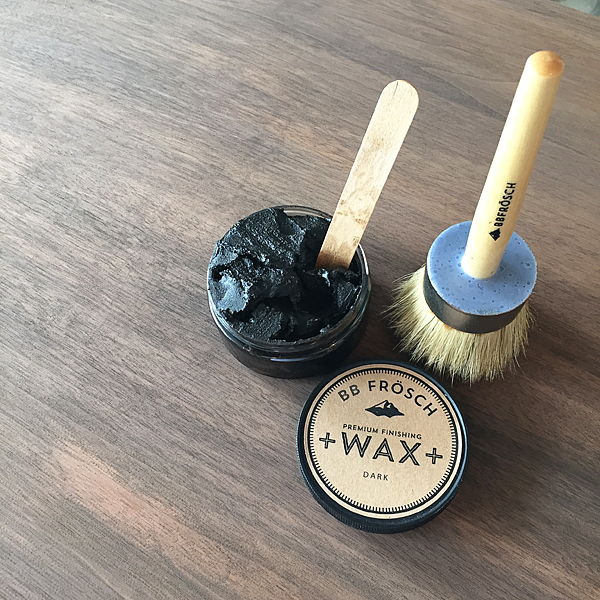
  • First things first, gather your materials! You will need your chalk paint wax, a wax brush and/or lint-free cloths, and a paper plate.


  • Make sure your painted surface is completely clean. You can remove any dust or dirt with a damp cloth.


  • To apply the wax, first, take your wax brush or a lint-free cloth (old t-shirts are perfect for this!) and scoop out a small amount of wax onto a paper plate. You can apply directly from the can of wax, but having it on the paper plate will make it easier to avoid using too much wax.

    If you’re using a wax brush, you want to get a small amount of wax spread just on the tips of the bristles. It’s really important to not use too much wax at one time; thin coats will give you the best results! If you’re using a cloth, “scoop” a small amount onto the cloth. You want to wipe the wax across your painted furniture in even strokes. At this point, you’re just applying the wax, as evenly as possible, to get all of the painted surface covered. Take the time to make sure corners and any intricately carved areas are fully waxed.

    If you’re working on a large piece of furniture, it will be better to apply and buff the wax in sections instead of trying to cover it all at once.

    When you’re applying the wax, think of it like rubbing lotion onto your skin. If you use too much, it’ll just feel greasy and won’t absorb!


  • Once you’ve got the wax applied all over, it’s time to buff! You’ll need a clean, dry lint-free cloth for this. All you do at this point is lightly “buff” the wax, using circular motions. The goal here is to remove any excess wax, leaving a nice thin coat of wax all over. If you use too much wax, or don’t remove all of the excess, it could look cloudy once you’re done. A good way to determine if you’ve removed all of the excess wax is by touch. If the surface feels a little bit sticky or tacky, you still need to buff some more. Once the wax coating feels “dry”, you’re done.


  • You need to let each coat of chalk paint wax cure for about 24 hours before applying a second and/or third coat. If you’re using a tinted wax, you apply it the same way but the first coat should be a clear wax layer, then apply the tinted wax as your second and/or third coat.


  • Once you’re done with as many coats of chalk paint wax as you want, let it cure for at least three to four days before using. The full cure time for chalk paint wax is actually several weeks, but after a few days, you can put your painted furniture in place and enjoy it. Just be careful not to put anything heavy on top of it or touch it too much for a couple of weeks.


  • If you used a wax brush, you’ll want to clean it as soon as you’re done applying the wax. An easy method for this is to first massage some canola oil into the bristles of the brush, then (without rinsing) rub some dish detergent into the brush. You should be able to use your hands to remove the wax from the bristles. This is kind of messy, so you might want to wear gloves. The final step is to rinse the brush with hot water, and hang it up or lay it flat to dry. 

The Best Chalk Paint Wax

There are so many brands of chalk paint wax available! It’s hard to choose which are the best to use, but we have a helpful post on this website specifically about the best chalk paint wax brands. Here’s a quick recommendation if you’re short on time and don’t want to view the full article.

Annie Sloan Chalk Paint Wax – $16 for 120ml

Annie Sloan’s chalk paint wax has a soft buttery texture that makes it very easy to use. It is sold in 120ml, 500ml, and 2.5-liter quantities, which means you don’t necessarily have to buy more than you’ll need.

In addition to clear wax, she also makes white, dark, and black tinted wax. Another great wax from Annie Sloan is her selection of “Gilding Wax” products, which gives a slight metallic sheen; it’s lovely on carved details and raised textures.

How Many Coats of Wax on Chalk Paint?

You need anywhere between one and five layers of wax on chalk paint. The number depends on how thick you apply the chalk paint. My suggestion is to use more coats but to make them thinner. This usually gives the best results but it takes longer.

How Soon Can You Wax After Chalk Paint?

You can start applying wax after one hour. This is the shortest time frame I’d recommend if you’re in a hurry. I’d suggest waiting two hours to make sure it’s dry enough to start waxing over it. Depending on your climate and the humidity where you live it may take a little less time or a little more time for it to dry fully.

How Long Should Chalk Paint Dry Before Applying Wax?

Chalk paint should dry before for an hour or more before you start applying wax. As mentioned before, your climate can pay a large role in how fast the chalk paint dries so I’d suggest waiting a little longer.

Wrapping This Guide Up

Hopefully, this answered any questions about why you should apply chalk paint wax over your chalk-painted projects. After you take the time to create a beautifully painted piece of furniture, making the effort to apply a protective wax coat will ensure your project will look its best for a long time. 

Can You Paint Over Chalk Paint? – A Quick How-To Guide

142 · Apr 3, 2023 · Leave a Comment

Yes, you can paint over chalk paint. I wanted to create a quick guide on how to paint over it though. I have some old furniture I painted over and there were definitely some things I needed to figure out.

Now I want to share it with you so you don’t make the same mistakes most people make.


Chalk paint has been very trendy for several years now. Chalk paint may not be the best paint for furniture so you may want to paint over it.

You might want to paint over an old piece of chalk-painted furniture if you’re just bored with how it looks, you’re changing the color scheme in your home, or you know you can do a better job of painting now.

Or, maybe you found a piece of chalk-painted furniture at a yard sale or thrift store, and you love the furniture but aren’t crazy about the paint job.

No matter the reason, you can change it into something you’ll love!

If you only want the how-to, you can skip to the bottom of this article for that. If you have some other questions make sure to read the whole post.

First, Can You Paint Over Chalk Paint?

Yes, you absolutely can paint over chalk paint! However, it takes a little bit of work to do it effectively so that your new paint job will look great for a long time.

Painting over chalk paint really isn’t much different than painting over any other type of paint. You’ll need to do some cleaning and sanding before applying any paint or primer, of course.

If you want to try to paint over a piece that has been sealed with a wax sealant, you’ll have to do a little extra work (more details on that are below).

What kind of Paint Goes Over Chalk Paint? Let’s Explore all the Options

If you want to completely transform your chalk-painted furniture, you aren’t limited to working with chalk paint again. It all comes down to prepping your furniture to get the best results.

Making the effort to do a thorough job on the prep work ensures that you can use a wide variety of paints and finishes with success.

If you are painting over chalk paint that doesn’t have any sealant coat on it, you can get away without using a primer. The matte finish of the chalk paint will act as a great primer on its own.

If the chalk paint has a sealant over it, you’ll need to do a little bit of sanding and possibly priming before applying the new paint.

Can You Paint Over Chalk Paint With Regular Paint?

Yes, but the type of paint matters. The most common paints used to paint anything in the home are latex and hybrid alkyd paints.

You can use either of these paints to cover chalk paint, but be aware that they have a thinner consistency than chalk paint so you might need to paint several coats.

If you’re painting over a dark color of chalk paint with latex or hybrid alkyd paints, you will have the best results if you apply a primer coat over the chalk paint.

Can you Paint Over Chalk Paint With Gloss Paint?

Yes, you can use glossy paint over your chalk paint. However, you need to make sure that any sealant coat on the old chalk paint has been sanded off. This is especially true if the chalk paint was sealed with a wax coat.

Gloss finish paint won’t stick well to wax or a shiny polycrylic sealant.

Can You Spray Paint Over Chalk Paint?

Spray paint is a great option to paint over chalk paint. It’s inexpensive, and there are so many fun colors to choose from!

One thing to keep in mind if you plan to spray paint over chalk paint is to make sure you’ve thoroughly sanded (and cleaned) the furniture. Spray paint will show any rough spots or imperfections more than other paints will.

It will also look best if you apply a primer coat first.

Be sure to spray the paint in light coats, using long, even motions. Don’t hold the sprayer too close to your furniture to avoid drips.

Can You Paint Over Chalk Paint With Satin Paint?

Paint with a satin finish is a nice choice to cover chalk paint. The satin finish has very little sheen, so it’s not a big deviation from the appearance of chalk paint. Satin finish paint does have enough shine to help it resist stains and scuffing better than chalk paint does.

Can You Paint Over Chalk Paint Without Sanding?

Technically you can paint over chalk paint without sanding, but the real question here is should you be doing that?

Unless you are painting over chalk paint that has absolutely no sealant coat on it, you really need to do some sanding before you paint. Paint just isn’t going to stick well to any type of protective coat.

If you try to paint over it without sanding, it might look like the paint went on okay, but it’s going to chip or even bubble up in a short amount of time.

If you’re trying to paint over a polycrylic or polyurethane sealant, you don’t necessarily have to sand away every bit of it. Just sand it enough to get it scuffed up; this should be enough for your primer and/or paint to adhere well.

If you’re trying to paint over chalk paint that has been sealed with was, it’s going to take more prep work than a light sanding to get it ready for the new paint.


What If You Used Chalk Paint Wax? Can You Still Paint Over It?

If your chalk-painted furniture was sealed with wax, you can still paint over it. However, it’s going to take a little bit of work and a few extra steps to get it ready for painting.

Paint won’t adhere to wax. Not just chalk paint; this is true no matter what kind of paint you plan to use. So you will need to remove all of the wax finish before you can apply primer or paint.

The best way to do this is to scrub the wax finish away with an abrasive kitchen sponge (like a Scotch-Brite brand kitchen scrubber) and some mineral spirits. The mineral spirits should break down the wax so it will start flaking off.

This is going to take some “elbow grease”, and you’ve got to take the time to get all of the wax removed. Be sure to pay extra attention to corners and any carved areas.

Once you’ve scrubbed away all the wax, wipe your furniture piece with a damp cloth.  There’s one more step to getting it clean enough to paint: you should clean it really well with a trisodium phosphate (TSP) degreaser.

Even after you’ve scrubbed away the wax, there will probably be a bit of residue left on the wood. TSP will remove any leftover residue from the wax sealant, as well as any dirt that has accumulated over time. 

Supplies You Need To Paint Over Chalk Paint

Before getting into the details of how to do this painting project, you should gather all the necessary materials. Here is a basic list of what you will need:

  • Painter’s Tape, Drop Cloths, and Rags: These are just the basic items you’ll need to help keep your work area clean. A bucket filled with soapy water is also a good idea to have on hand to clean up any drips or spills.


  • Sandpaper, Scrubbers, Mineral Spirits, TSP Degreaser: These are the supplies you’ll need to prep the surface before you can prime or paint. If you don’t have to remove a wax sealant, you can get away with just using sandpaper.


  • Paint Brushes and Paint Rollers: Rollers are great for applying paint to broad, flat surfaces. Brushes will do a better job on surfaces with any carving or textures. I recommend getting a medium-width brush and a small brush. The small brush will make it easier to paint corners and detailed areas cleanly and quickly. You can learn more about brushes for chalk paint or other types of brushes in other posts I’ve written.


  • Primer, Paint, and Sealant: Once you have your furniture prepped, have your primer and paint ready to go! Be sure to thoroughly stir your paint before you start applying it.

How to Paint Over Chalk Paint

Other than some extra effort to remove old finishes, the process of painting over chalk paint isn’t much different from any other furniture painting project. Spread out your drop cloth, gather your supplies, and get ready for some DIY fun!

The first thing you should do is thoroughly clean the furniture, and remove any hardware. If you don’t want to bother removing the hardware, you can try to cover it with painter’s tape to protect it.

You could use the TSP Degreaser at this point if dirt and grime have built up over time. Why should you clean if you’re going to sand the surface? The answer to that is simple. First, cleaning away any heavy dirt will make the sanding process easier. Also, paint will apply more smoothly on a perfectly clean surface.

Once you’ve done the initial cleaning, it’s time for sanding and priming. If the furniture has a shiny sealant, such as polycrylic or polyurethane, you’ll need to sand it all over. You don’t need to remove every bit of this sealant, but you want to scuff it up pretty well so the paint will “grab” onto it. Medium-grit sandpaper works best for this.

If the furniture has a chalk paint wax sealant, this is the point where you’ll have to work on removing that wax coat. As mentioned above, it’s a bit of extra work, but it’s necessary.

Once the sanding and/or wax removal is done, you need to clean everything again. Just wipe the piece of furniture down with some soapy water, then dry it thoroughly. The goal is to wash away all of the sanding dust and debris.

Let’s “talk” for a moment about the next step: applying primer. If you’ve read other articles on this website, you know that I’m a fan of using primer even if the paint says it is “paint and primer in one”.

I know that many brands of chalk paint say that don’t need to use a primer with them. This works for most brands, but you just end up applying more coats of paint than you normally would.

The exception to my “rule” of always using a primer is if for some reason you will be painting over chalk paint that doesn’t have any sealant on it. In this case, the existing unsealed chalk paint will work great as a primer coat; just be sure it’s nice and clean.

Once your primer coat is completely dry, it’s time to start painting! No matter what type of paint you use, several thin coats of paint are the way to get a great result, and it will reduce the amount of drips and streaks that might occur.

Be sure to let the paint dry completely between each coat. For broad surfaces, try to roll or brush the paint in the same direction as the wood grain (if you can see it). If you’ve applied several coats of paint and are happy with the appearance, now you need to decide if you’re going to use a sealant top coat.

If you used latex or hybrid alkyd paint, you probably won’t need to apply a sealant coat if you don’t want to. It can’t hurt, but it’s not as crucial as it is to seal chalk paint.

If you’ve painted with a new color of chalk paint or milk paint, you should apply a protective sealant once the paint is completely dry. Polycrylic sealants are great for glossy or satin finishes, and they apply as easily as brushing on paint. Wax sealants are lovely for chalk paint, but they are a bit more labor-intensive to apply.

Once you’re finished, you’ll need to clean your paintbrushes as soon as possible. If you used chalk paint, milk paint, or latex paint you can clean your brushes with soap and water.

For hybrid alkyd paint and polycrylic or polyurethane sealant, you should use mineral spirits to get your brushes clean. If you used a wax brush to apply a wax sealant, it should be cleaned by rinsing under hot water, then massage some dishwashing detergent into the bristles to clean off the wax residue. If it still doesn’t seem clean, use a small number of mineral spirits.

Finally, I want to remind you to take some before and after pics of your project! It’s fun to compare them and see what an amazing transformation can be achieved with a new paint job!

How to Distress Furniture with Chalk Paint

62 · Apr 3, 2023 · Leave a Comment

Want to know how to distress furniture with chalk paint? It’s one of the more popular looks these days and I’m going to tell you everything you need to know about distressing furniture with chalk paint! A little bit of background if we haven’t met yet… I was a BB Frosch chalk paint rep years ago and have been sharing crafts and home projects on my blog for over 10 years! Have a look around.

What Is Distressing?

You’ve probably seen online articles and episodes of home design TV shows that talk about methods for “distressing” furniture, or about the popularity of the “distressed” look in the home. But what exactly is “distressing”?

Simply put, distressing is a way to take an ordinary piece of furniture and give it the appearance of being a well-used cherished antique. Why would you want to do that? Well, I think there’s something sweet and nostalgic about the appearance of furniture that looks like it’s been around a while. It looks like a piece that is well-loved and has a lot of fond memories associated with it. It’s humble, but somehow also a bit elegant.

There are several ways to achieve this look, but the most common is to give any piece of wood furniture a distressed look by painting and then lightly sanding away some of the paint. This is usually done with chalk paint. The matte finish of chalk paint is perfect to give your furniture an antique appearance, and it sands easily to create a distressed finish.

You can also create an aged distressed look by applying tinted wax finishes over painted wood furniture, or by painting your furniture with a light color stain so the paint looks old and faded. 

Is There A Chalk Distressing Paint?

There isn’t really chalk-distressing paint. Chalk paint will give you a distressed look. I see a lot of people online mentioning distressing paint but it’s really just referring to the finished look. You can make the paint look distressed but there’s no specific brand or type of paint called distressed paint.

What Is The Chalk Paint Distressed Look?

The chalk paint distressed look is utilized to give furniture the appearance of having some wear and tear, or of being aged to look like an antique. This is most commonly achieved by painting the wood furniture with chalk paint for a velvety matte finish, then lightly sanding away some of the paint to reveal the wood or even a contrasting painted layer underneath.

This look is also described as being part of the “shabby chic”, “farmhouse”, or “cottage core” home decorating styles. It can bring a cozy, nostalgic vibe to your home, and is a relatively easy and affordable DIY project.

The distressed look is great for furniture, but it’s also a fun way to change the look of other home accent pieces such as wooden picture frames, trays, signs, and even accent pieces like wood baskets and candle holders.

Chalk Paint Furniture

Why Use Chalk Paint for Distresses?

Technically, you can distress wood furniture after painting with almost any kind of paint. Some paints will be more challenging to control the distressing, and some will be quite difficult to remove the paint once it’s dried. Chalk paint is the best choice for a distressed look for a few reasons, not the least is that is it very easy to distress.

Chalk paint is a water-based, non-toxic paint that contains mineral additives for an absolutely matte finish. It is easy to use and provides nice smooth coverage, but also chips and scuffs easily, which makes it perfect for distressed and “antique” DIY projects.

Once the chalk paint dries, all you really have to do for a basic distressed look is lightly sand it with light to medium grit sandpaper. The chalk paint will remove very easily without having to use a lot of effort. It’s easy to control where you want the distressing to appear.

The other reason that chalk paint is a great choice for distressing has to do with the unique appearance of chalk paint. It has a smooth, velvety matte finish with absolutely no shine at all. This helps to give the appearance of your painted furniture being an older piece. While many chalk paints are available in modern paint colors, the matte finish still evokes the illusion of your painted furniture piece being a cherished heirloom with color that has mellowed with time. 

How To Distress Wood With Chalk Paint

There are several methods to distress wood furniture with chalk paint. The most common method is also one of the easiest. It’s done simply by sanding the areas you want to distress after your chalk paint has dried. Here are the basic steps:

  • First, clean your furniture with mild soap and water. You don’t want to paint over any dust or built-up grime. To protect any hardware on your furniture, either cover it with painter’s tape or remove it before painting. Put a dropcloth on the floor, and keep a bucket with soapy water handy to clean up any paint drips. Since chalk paint is water-soluble, you can use soap and water to clean your brushes when you’re done with your project.
  • If the furniture has any type of shiny finish, you’ll need to do some sanding. You don’t have to completely strip the finish down to all the bare wood. What you’re trying to accomplish is simply to scuff up the surface thoroughly so the paint will adhere better. If you don’t do this, your chalk paint (and primer if using) won’t cling to the furniture and it will look streaky; probably peeling right off once it dries.
  • After sanding, you’ll need to clean again. Using a damp cloth, just wipe off the furniture so there is no sanding dust anywhere. If you have any deep scratches or holes, now is the time to take a little bit of wood putty and fill those in. Allow enough time for the wood putty to completely dry before painting.
  • It’s time to apply the first coat of paint, or primer if you’ve decided to prime. Even though many brands of chalk paint say they don’t require a primer, it’s never a bad idea to use one. Primer will help the chalk paint apply smoothly, and it’s going to help your paint job last longer.  If you’re using white, cream, pale yellow, or other neutral colors of chalk paint, priming first will definitely give you better results, especially if you’re painting over dark-colored wood.
  • Allow enough time to dry between coats of paint. For the best results, apply two to three coats of paint, using very thin layers. You can use a dense foam roller on broad flat surfaces, and brushes on smaller or more intricate areas.  You can find a full post about the best chalk paint brushes to use here.
  • Once your final coat of paint is dry, it’s time to distress! Use a medium grit sandpaper and lightly sand over the areas you want to look distressed. It’s up to you where you want your paint to look distressed, but sanding along corners or over carved areas looks great. A little bit of distressing around knobs or handles is also a nice look. Once you’re satisfied with the amount of distressing, brush or wipe away any sanding dust.
  • At this point, you need to decide if you want to seal your painted furniture or not. If it’s a piece that will be frequently touched or moved, a sealant is recommended so your carefully distressed chalk paint won’t chip or scratch any further. You don’t want to use a sealant with a glossy or even semi-glossy finish to preserve the beautiful matte finish of chalk paint. Instead, you can use a top coat sealant with a matte or satin finish. I wrote another blog post detailing how to seal chalk paint here.

    There are a few options of sealant that work great over chalk paint, but I recommend using a polycrylic sealant. Polycrylic will have less odor than polyurethane, won’t “yellow” over time, and dries a little bit faster than other sealants.

    Another method of sealing your chalk paint furniture is with a chalk paint wax. A wax finish will leave a very subtle sheen. Wax sealant should be applied in very thin layers, allowing plenty of time for the wax to dry between coats. There are even tinted wax sealants that will give your wood furniture a lovely aged appearance. It’s important to note that wax sealants will probably need a light touch-up application every few years.

How To Lightly Distress Chalk Paint

If you only want a bit of distressing on your furniture, or you want it to look very lightly distressed, it’s easy to do. Use a fine-grit sandpaper so you have better control over how much chalk paint you want to sand away. Don’t use much pressure at first, so you can get a feel for how much paint will be removed.

For a lightly distressed look, you might want to sand only along the edges of your furniture, or maybe just along the legs of a table. You can draw along pipework-style legs that naturally highlight industrial details and create a more authentic, worn-in finish without overdoing the effect.

You can always remove more if you like the way it’s going. If you do find yourself wishing you hadn’t removed quite so much paint, it’s easy to touch up chalk paint with a small brush. Just be sure to do any touch-ups before you apply a sealant coat.

How To Distress Chalk Paint And Make It Look Rustic

Rustic generally means something that looks a little bit rough or unrefined, that would be found in a country home or farmhouse. This look is easy to achieve with chalk paint and a little patience.

If you want to achieve a rustic look with larger areas of paint removed, you can do this on your chalk-painted furniture with nothing more than a damp rag. This method is called “wet distressing”. It will remove larger areas of paint, making your chalk-painted furniture look like its been worn over many years.

Here’s the basic way to achieve a rustic, time-worn look by wet distressing: Once you’ve finished painting your final coat of chalk paint, immediately dip a cloth rag in water, ring out the excess, and start wiping away the areas that you want to look distressed. It’s important to do this before your final chalk paint coat is dry. Since chalk paint dries so quickly, you probably want to do this as soon as you’ve finished painting. You might have to dip the rag in the water a couple of times, depending on how much of the wood you want to show through.

This method takes a little more practice than using sandpaper. It might be a good idea to try practicing this method by painting a piece of scrap wood or an old pallet before trying it on furniture. Chalk paint is pretty forgiving, though. Even if you unintentionally remove more of the paint than you meant to, you can easily touch it up before applying any top coat.

If you want your furniture to appear even more rustic, don’t bother to fill in any holes or scratches with wood putty. Slight imperfections only add to the rustic charm you’re trying to achieve. If you want, you can even add some “imperfections” yourself! Before priming and painting, you can take pieces of chain, wood screws, or even small stones and lay them out on the surface of your wood furniture. Then, using a rubber mallet or small hammer, hit the items into the wood just enough for them to make indentations. You’re not trying to embed these items into the wood, just using them to make interesting dents and scratches.

Depending on how hard the wood is, you might have to hit them several times. There are home interior designers that are doing this to wood pieces and charging a lot of money for it. It’s something you can do for little to no cost, and it can be a bit cathartic as well!

Hammering in some intentional “imperfections” does take a little practice, though. Again, try this out on some scrap wood before bashing into the furniture you’re transforming.


How To Distress Chalk Paint With Stain

You can apply wood stain over top of your chalk paint to create the appearance of an aged patina on your painted furniture. This technique is called glazing. If you’re going to try this, be sure to wear gloves and clothes that you don’t mind getting messy; it’s called “stain” for good reason! Be sure to work in a well-ventilated area, and put a drop cloth or tarp underneath the furniture you’re working on.

Glazing with wood stain works best if your furniture is painted with a lighter color of chalk paint. Darker colors won’t provide enough contrast to achieve a nice patina look.

Once your final coat of chalk paint is dry, brush a very light coat of wood stain over top of the area(s) you want to glaze. You don’t want to apply too much; this is definitely a time where “less is more” should be your thoughts. You can always brush on a little more if you don’t think it’s dark enough.

You’ll have to work quickly here, working before the stain dries too much! As soon as you’ve got the stain brushed over the area you’re working on, take a soft, lint-free rag and begin wiping off as much of the stain as you can. For large areas, be sure to wipe in one direction, with the wood grain, to avoid a streaky finish. This will take some elbow grease to get the stain wiped enough for it to become somewhat translucent.

For an interesting look, you can apply the wood stain/glaze on only part of your painted furniture. It might look nice to leave the tabletop showing the chalk paint, but with a darker glaze only on the table legs.

Once the glaze is completely dry, you can apply a sealant coat just as you would over chalk paint. You’ll need mineral spirits or a solvent of some kind to clean your brushes.

Distressing White Chalk Paint

I love the look of white or cream-colored chalk paint.  I think it transforms an ordinary piece of furniture into something elegant. However, distressing a piece of furniture that is painted in any shade of white or a light neutral tone can be a little bit challenging.

The biggest challenge with distressing something painted with white chalk paint is that sometimes the wood underneath the paint doesn’t show through very well. If the original wood is very dark, it will probably look great once you sand the white paint in a few areas. But your carefully distressed areas might not show up as well if the underlying wood is light or medium in tone.

A fun way to bring some attention to white-painted furniture is to paint a layer of contrasting color underneath the white. You can paint it a dark brown, to simulate wood, or paint it in a dark or jewel-toned color to match the room where it will be displayed. 

For instance, paint one or two layers of navy blue chalk paint, then apply one or two coats of white chalk paint over the top of the blue. When you’re ready to distress, sand away the white chalk paint to reveal the striking navy blue underneath. It’s a fun and striking way to highlight distressed areas. 

What About Distressing Cabinets With Chalk Paint?

There is a lot of information online about painting cabinets with chalk paint, and whether you should distress them or not. Honestly, it’s a matter of personal preference. However, there are some things you should keep in mind before deciding to transform any cabinets with distressed chalk paint.

If you’re thinking about painting and distressing all of your kitchen cabinets, keep in mind that even with a sealant coat over the paint, distressing might not be the best idea. Distressing means that you’re chipping paint away, and even with a sealant, chalk paint might eventually chip further on something that is touched or moved frequently (like cabinet doors). You don’t want tiny bits of paint chipping in your kitchen! If you really want to distress your kitchen cabinets, maybe only do so lightly and on areas that won’t be touched frequently.

If you’re thinking of creating a distressed look on a freestanding cabinet, or on something like a china cabinet, you’ll probably have better luck preventing too much-unintended chipping of your paint. These pieces probably won’t be opened on a daily basis, several times a day. Try not to sand away too much of the paint near hinges or door hardware, so that the paint won’t be weakened too much. Some light distressing on the edges or along textured areas can look great on a wood cabinet. You should still seal your paint with a polyacrylic or wax sealant.

The 5 Best Chalk Paints For Furniture & Projects (2024)

111 · Feb 26, 2023 · Leave a Comment

Key Takeaways

Short on time? Aren’t we all? Here are the key takeaways. I prefer CountryChic Chalk Paint. I think ti’s the best for a number of reasons. It’s reasonably priced and they just get IT! It’s versatile and durable.

Get it Here


In This Article

Toggle
  • Key Takeaways
  • What is Chalk Paint?
  • The Best Overall Chalk Paint
  • Easiest Chalk Paint to Apply – Rust-Oleum Ultra Matte Chalk Paint
  • Best No-Prep Chalk Paint – Kilz Chalk Style Paint
  • Best Value Chalk Paint – Retique – It Chalk Finish Paint
  • Best Eco-Friendly Chalk Paint – Country Chic
  • Best Chalk Paint for Kitchen Cabinets – Annie Sloan
    • Where to Buy Annie Sloan Chalk Paint
  • Tips for Chalk Paint Furniture Projects and Clean Up
  • Where to Buy Chalk Paint?

What is Chalk Paint?

For the newbies to chalk paint, you may want some background. What exactly is chalk paint? Chalk paint, not to be confused with chalkboard paint, is a water-based paint that dries to an attractive matte, “chalky” finish. Chalk paint was first created by the designer paint brand Annie Sloan, and the term “chalk paint” is a registered trademark for that company.

However, there are many paint companies now selling their own versions of this type of paint, often marketed as “chalked paint” or “chalky paint”.

Chalk paint is a popular choice for anyone who is decorating with the “modern farmhouse” or “cottage core” aesthetics.

It can transform an ordinary piece of furniture into a noticeable one-of-a-kind piece with very little effort. The unique finish can make a modern, inexpensive piece look like a treasured heirloom. 

A little light sanding with fine or medium grit sandpaper over chalk paint can give your furniture a distinctive distressed look.

I have done so many projects on this website with chalk paint. Here are a few below:

Chalk Paint Furniture
Love the Buffalo Check trend? Yep, me too! I thought it would be fun to use some of the Ball® Giving Jars to create some Buffalo Check Jars to use as gifts this Holiday Season. Here's how you can make some of your own.
Paint Prep

The Best Overall Chalk Paint

The best overall chalk paint for me is Country Chic Chalk Paint . I use to prefer BB Frosch Chalk Paint Powder but I’ve recently changed my mind over the years. There are so many reasons for this.

Here’s why I like CountryChic Chalk paint the best. I’ll keep it SUPER simple. It’s just better overall.

  • It’s durable
  • It’s not overly expensive
  • They have lots of colors to choose from
  • It’s eco-friendly
  • and they just get IT!

If you’re short on time just pick up your favorite color. No need to shop around.

If you’d like to read more about the BB Frosch powder I mention you can read the full BB Frosch Review here.

View it Here

Easiest Chalk Paint to Apply – Rust-Oleum Ultra Matte Chalk Paint

Most chalk paint is easy to apply. However, you can make the mistake of getting the wrong chalk paint and having to do a lot of prep and sealing. One brand known for ease of use and excellent coverage is Rust-Oleum Ultra Matte Chalked Paint. 

This paint comes in 11 colors and is sold in a 30-ounce can. One can of paint covers up to 150 square feet. This versatile paint will work on wood, glass, and ceramic surfaces.

If you’re applying this paint to any glossy surface, it’s best to scuff it up a little bit with some light sandpaper.

The Rust-Oleum paint is a thicker texture than most paints, so it can potentially cover your furniture in just one coat. It’s better to apply two coats if you want a richer color, or if you don’t plan to distress whatever you’ve painted.

It only takes 30-45 minutes to dry, so you can apply multiple coats in an afternoon.  Because this paint is water-based, cleaning up is easy. You can wash out your brushes with hot soapy water; no solvents are necessary.

One small disadvantage of this paint is that it is rated for indoor use only. So it might not be a good choice if you’re considering chalk paint for your outdoor furniture.


Best No-Prep Chalk Paint – Kilz Chalk Style Paint

The Kilz paint brand is known for providing outstanding coverage with almost no preparation or priming needed. The Kilz Chalk Style Paint is certainly no exception to this. 

It will easily glide onto most clean, dust-free surfaces without priming or heavy sanding. This is a thick paint, but it becomes dry to the touch in about an hour, and you can apply a second coat after two hours. If needed, this paint can be thinned by stirring in up to two ounces of water per quart of paint, until it reaches the consistency you want.

Kilz Chalk Style Paint comes in a variety of colors that are quite complementary to each other. You can achieve an interesting result by painting your furniture in two coats of contrasting colors, then lightly sanding so one of the colors shows through. This distressing technique is especially effective to bring out details in carved wood accents.

In addition to the 13 colors of traditional chalk paint available, Kilz also makes spray versions of their chalk paint in 6 colors. This spray paint gives the same great coverage, with the added ease of being able to just spray it onto your project. This could be a great time-saver if you’re painting a large piece of furniture.


Best Value Chalk Paint – Retique – It Chalk Finish Paint

While there are plenty of inexpensive chalk paints on the market, a low price does not always mean that it’s a good value.

Retique-It Chalk Finish Paint is a high-quality chalk paint that is available in a wide variety of colors. It provides outstanding coverage with just one or two coats.

What makes this paint stand out as being a good value is that it can be purchased in quantities ranging from a half pint (8 ounces) to a quart (32 ounces).

This means that you won’t have to buy more paint than is needed for your project.

According to their website, an 8-ounce container of Retique-It paint is enough to cover a small nightstand or end table.

The 16-ounce container is enough paint for a small dresser or two end tables, and the 32-ounce jar can cover a large dresser, armoire, or a kitchen table with four chairs.

Not having to buy a large can of paint for smaller projects not only saves you money but also keeps leftover paint and packaging out of landfills. 

Retique-It also offers product kits that include the chalk finish paint in your color choice, polycrylic topcoat, and paintbrushes.

This is a nice bundle of products if you’re working on a project that would require sealant or a top coat of some kind.

While not all chalk paint projects need to be sealed, high-traffic surfaces such as a tabletop or door will last longer with a sealant. It is a slightly better value to buy these products as a kit instead of individually.

Best Eco-Friendly Chalk Paint – Country Chic

Country Chic Paint is a company dedicated to manufacturing quality products, inspiring creativity, and being ecologically responsible while doing so.

Their chalk finish paint is available in over 50 eye-catching colors. It’s a clay-based formula that also has a built-in primer and top coat, so the coverage is smooth and durable.

If you are trying to achieve a “distressed” look for your project, Country Chic paints can be distressed without using sandpaper. This cuts down on the risk of breathing in a lot of paint dust while working.

All of their products are formulated so they don’t contain harmful chemicals such as phthalates, formaldehyde, heavy metals, turpentine, and more. Further, Country Chic products are tested to have low-to-zero VOC (volatile organic compounds) levels and the pigments used are also VOC-free. Volatile organic compounds are the gasses that are released by many paints, lacquers, and cleaning products.

If you’ve ever experienced a headache or dizziness while using a particular paint, that was caused by VOC’s.  

Other nice environmental awareness facts about Country Chic Paint Co. are that their brochures are printed on 100% recycled paper from sustainable sources, and they participate in paint recycling programs throughout North America to help keep leftover paint and containers out of landfills.

Best Chalk Paint for Kitchen Cabinets – Annie Sloan

The original creator of Chalk Paint is still one of the best choices, especially for larger projects like kitchen cabinets.

I wrote a full post about the best chalk paint for kitchen cabinets here. Annie Sloan paints are easy to apply, durable, and they come in a wide selection of classic colors.

The paint colors are inspired by 18th and 20th-century decor but are easy to mix together to create your own contemporary custom colors.

The paints can be thinned with a little bit of water if the texture is too thick, or you can simply leave the container sitting with the lid off for a while if you need it to thicken up.

For painting large projects, such as cabinet doors, walls, or large furniture, it is recommended to paint with two coats of chalk paint, then seal with either chalk paint wax or chalk paint lacquer.

Sealing your painted project protects the paint from scratches and chips, and ensures that it will look good for a long time.

The Annie Sloan Paints website has detailed instructions and helpful video tutorials on how to use all of their products. There is also an “Inspiration” section on the website that shares ideas for unique decorating and art projects.

Where to Buy Annie Sloan Chalk Paint

You can buy Annie Sloan chalk paint online from their website.

If you’re searching for “Annie Sloan Chalk Paint Near Me”, just know the best place to buy it is on their website so it’s always just a click away.

Tips for Chalk Paint Furniture Projects and Clean Up

Before painting any furniture with chalk paint, you should first make sure it is clean and dry. If it has a glossy or very smooth finish, a light sanding will help the chalk paint adhere smoothly and evenly.

You don’t have to sand away all of the finish, just a light sanding to “rough up” the surface should be enough. Most brands of chalk paint will feel dry to the touch in an hour or even less.

You can apply a second coat once the paint feels dry, but wait 24 hours after you are done painting to allow it to fully cure.

Sealants, such as polycrylic, wax, or lacquers, are only necessary for projects with “high touch” surfaces. Chalk-painted cabinets, doors, tabletops, and chairs will all last longer with a light sealant coat.

Chalk paints are water-based, so cleaning up is fairly easy! Cleaning brushes, rollers, and trays (and your hands) can be done with warm water and a mild detergent.

It can be washed out of fabric before the paint is fully dry, but it might not launder out fully once the paint has dried. Chalk paint is slightly thicker than other paints, so it doesn’t tend to drip as much.

It’s still a good idea to keep a protective drop cloth under your project, though.

Where to Buy Chalk Paint?

You can buy all chalk paint online. It’s the easiest way to purchase it.

There are many specialty shops online you can buy the paint directly from or, if you’re like me, I prefer to buy it from Amazon if they carry the brand I like. The reason is the fast shipping and all of the reviews you can look through before purchasing.

  • « Go to Previous Page
  • Page 1
  • Page 2
  • Page 3
  • Page 4
  • Go to Next Page »

Primary Sidebar

Heather from Whipperberry
Hello... my name is Heather and I'm the creator of WhipperBerry a creative lifestyle blog packed full of great recipes and creative ideas for your home and family. I find I am happiest when I'm living a creative life and I love to share what I've been up to along the way... Come explore, my hope is that you'll leave inspired!

Footer

  • Privacy Policy
  • Crafts
  • Food
  • Gifts
  • Holidays
  • Home
  • Mom Life
  • Recipes
  • Travel

Copyright © 2026 · Seasoned Pro