• Skip to primary navigation
  • Skip to main content
  • Skip to primary sidebar
  • Skip to footer

Whipperberry

WhipperBerry • Your Home For Creative Inspiration

  • Home
  • Recipes
    • Starters
    • Easy Weeknight Dinners
    • Main Dish
    • Salads
    • Side Dish
    • Soups & Stews
    • Desserts
    • Breakfast
    • Miscellaneous
  • Tutorials
    • Creative Crafts
    • DIY Decor
    • Fabric Crafts
    • Food How-To
    • Jewlery
    • Paint Projects
    • Paper Art
    • Party Styling
    • Photography and Graphic Design
    • Silhouette
  • Holidays
    • Easter
    • Mother’s Day
    • Father’s Day
    • 4th of July
    • Halloween
    • Thanksgiving
    • Christmas
    • Valentine’s Day
  • Gift Ideas
    • Gifts For Everyone
    • Gifts for Dad
    • Mother’s day
    • For The Girls
    • For The Kids
    • Teacher Gift Ideas
    • Christmas
  • Printables
    • Holiday
    • Gift Idea
    • LDS Primary
  • Travel
  • About
    • Terms
  • Contact
  • Nav Social Menu

    • Facebook
    • Instagram
    • Pinterest
    • RSS
    • Twitter

Knife Blade

The Essential Kitchen Knives Every Home Cook Needs

0 · Oct 5, 2026 · Leave a Comment

Open most home kitchen drawers and you’ll find the same story: a block with twelve slots, half of them holding knives nobody has touched in years. The other half get used every single day, and they’re doing all the real work.

That’s the thing about knives. You don’t need a lot of them. You need the right few, kept sharp, and a clear sense of which one to reach for.

You Need Three Knives, Not Twelve

A working kitchen runs on three blades: a chef’s knife, a paring knife, and a serrated knife. Everything else in a twelve-piece set is a specialist tool for a job most people rarely do, and it usually ends up dull and forgotten.

Buying fewer, better knives also changes how you cook. When each blade has an obvious job, you stop hunting through a drawer mid-recipe and start reaching for the right tool without thinking about it.

The Chef’s Knife Does Most Of The Work

If you own one knife, it’s this one. An 8-inch chef’s knife handles chopping, slicing, mincing, and dicing, which covers the bulk of what happens on a cutting board on any given night.

The shape matters more than people expect. A slightly curved blade lets you rock the knife through herbs and onions instead of chopping straight down, which is faster and safer once it becomes second nature.

Weight is personal. Some cooks want a heavier blade that does the work of cutting through denser vegetables on its own. Others prefer something lighter they can control with more precision. Handling a few options before buying is worth the trip.

The handle matters just as much as the blade. A grip that feels secure and comfortable after ten minutes of chopping will feel very different after an hour of prepping a big meal. Cooks with smaller hands often do better with a slimmer handle, while a bulkier grip can feel more stable for someone with a heavier hand.
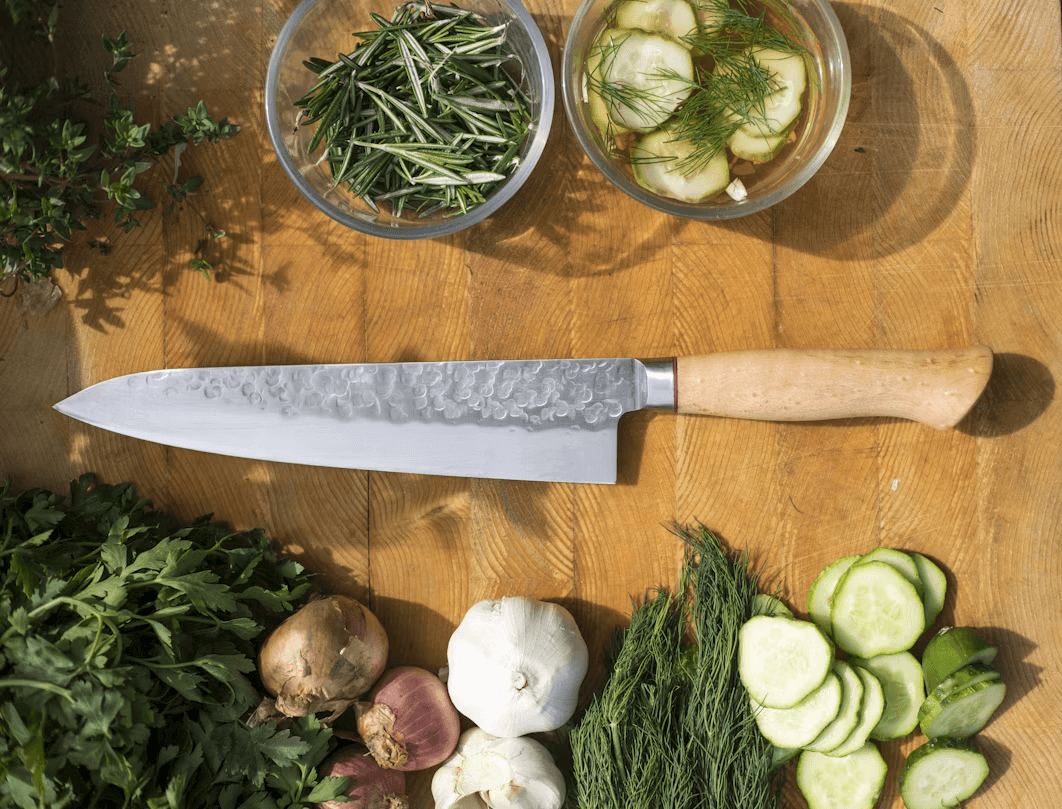
Kitchen knife and vegetables on a table for

Blade length is worth thinking about too. An 8-inch chef’s knife is the standard for a reason: it’s long enough to get through a butternut squash or a whole chicken but short enough to control with one hand. A 6-inch version can feel more manageable for smaller kitchens or smaller hands, though it trades away some reach on bigger cutting jobs.

The Paring Knife Handles The Small Stuff

A paring knife is small on purpose. Its 3 to 4-inch blade is built for tasks where a full-size chef’s knife is clumsy: hulling strawberries, deveining shrimp, peeling an apple, trimming the fat off a small cut of meat.

It’s also the knife most people underuse. Once a paring knife earns a permanent spot next to the cutting board instead of buried in a drawer, it gets reached for constantly.

A Serrated Knife Solves A Problem The Other Two Can’t

Try slicing a ripe tomato or a crusty loaf of bread with a straight-edged chef’s knife and you’ll see the problem immediately: the blade slides across the skin or crust instead of biting into it. A serrated knife’s teeth grip that surface first, so it cuts cleanly instead of crushing.

This is the knife that saves bread, tomatoes, citrus, and delicate cakes from getting mangled. It’s a narrow job, but it’s one the other two knives genuinely can’t do well.

What Separates A Good Blade From A Frustrating One

Not all knives at a given size perform the same. A blade forged from a single piece of steel that runs the full length of the handle, known as full tang construction, holds an edge longer and balances better in the hand than a cheaper stamped blade. German-forged lines built this way, full-tang, high-carbon options such as Wüsthof Classic knives, are a common reference point for what that construction feels like once you’ve used it for a while.

The difference shows up most in the small moments: how the knife feels balanced when you pick it up, how much force it takes to get through a dense squash, whether the edge still feels sharp after a month of regular use.

Keep It Sharp Or It Isn’t Safe

A dull knife is more dangerous than a sharp one, because a dull blade needs more force and is more likely to slip. Most home cooks wait far too long between sharpenings.
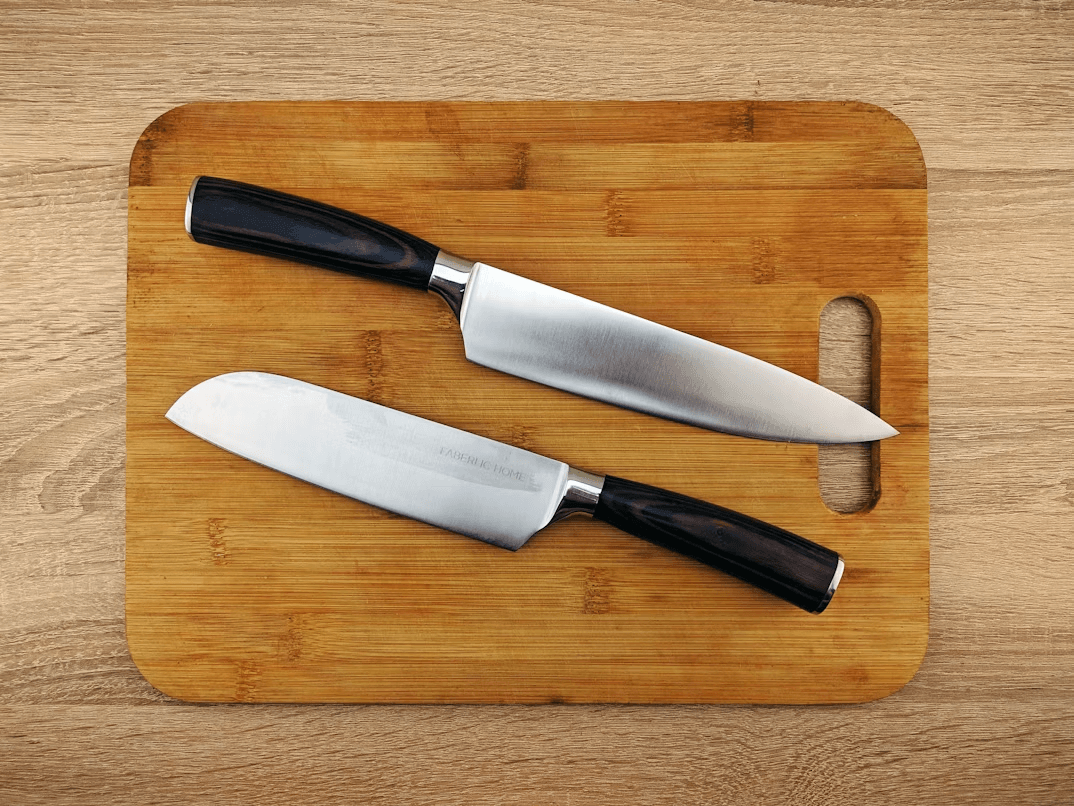
Two essential kitchen knives resting on a wooden cutting

A honing steel, used before or after most cooking sessions, realigns the edge and keeps it working between real sharpenings. Actual sharpening, which removes a thin layer of metal to rebuild the edge, only needs to happen every few months for a knife in regular use, either with a whetstone or through a professional sharpening service.

A simple test tells you which one you need. If a knife glides through a tomato’s skin without pressing down, it’s sharp enough. If it squashes the tomato before it cuts through, it’s time to sharpen, not just hone.

Wash It, Dry It, Store It Right

Good knives deserve basic care. Hand wash them and dry them right away. A dishwasher’s heat and the way blades knock against other items in the rack dulls the edge and can chip it.

Cutting boards matter here too. Using a separate board for raw meat and one for produce, and washing both thoroughly with hot, soapy water between tasks, is a basic step for preventing cross-contamination in a home kitchen.

Storage matters just as much as cleaning. Loose knives in a drawer dull against each other and pose an obvious safety risk when you reach in without looking. A knife block, a magnetic strip, or individual blade guards all keep edges protected and hands safe.

Fewer Knives, Used Well

The home cooks who feel most at ease in their kitchen usually aren’t the ones with the biggest knife collection. They’re the ones who know exactly which three knives to reach for, keep those blades sharp, and store them properly between uses.

Start there. A chef’s knife, a paring knife, and a serrated knife, chosen well and cared for consistently, will outperform a drawer full of knives that never get used.
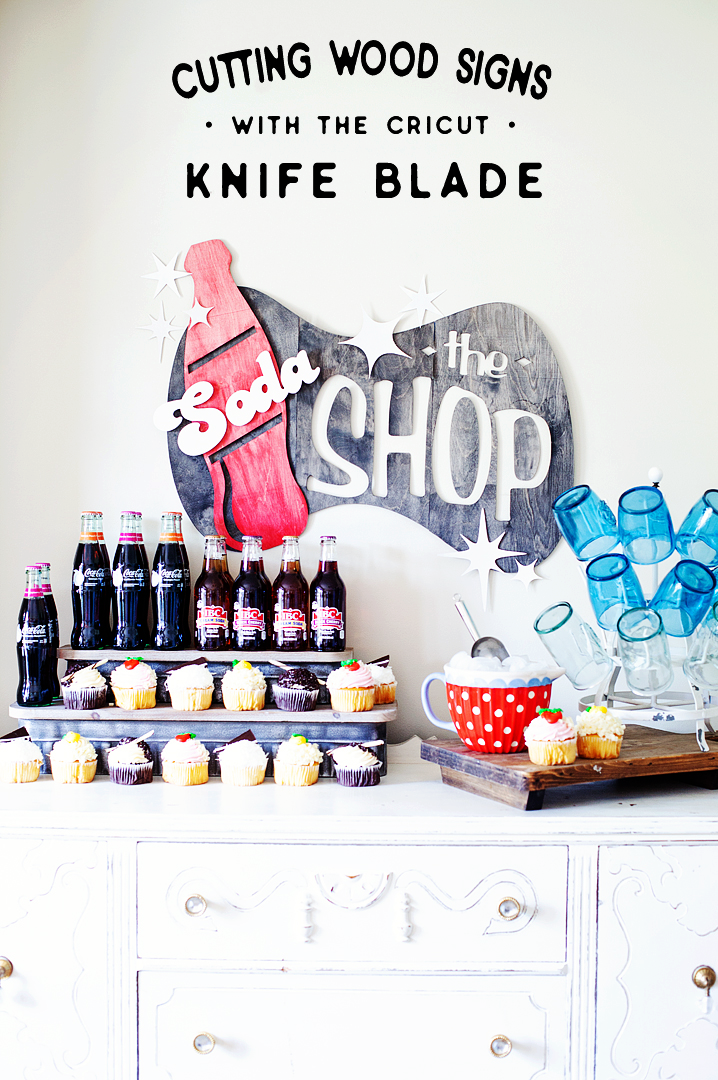

Soda Shop Wood Sign • The BEST 10 Tips for Working with the Cricut Knife Blade

39 · Jun 21, 2018 · 3 Comments

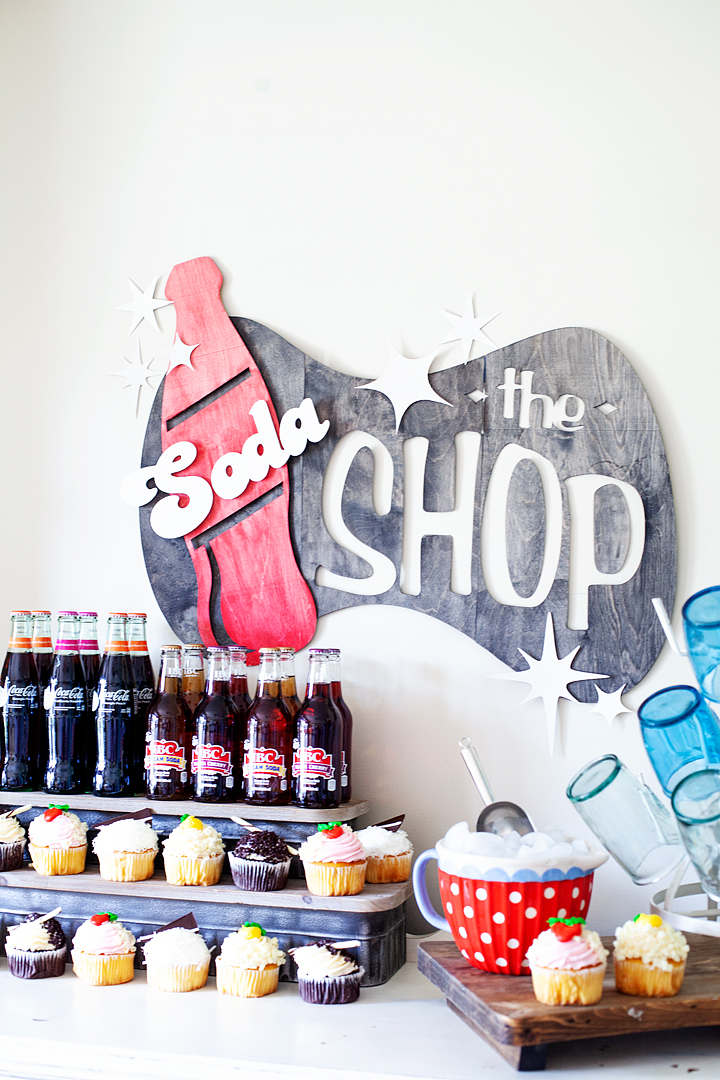
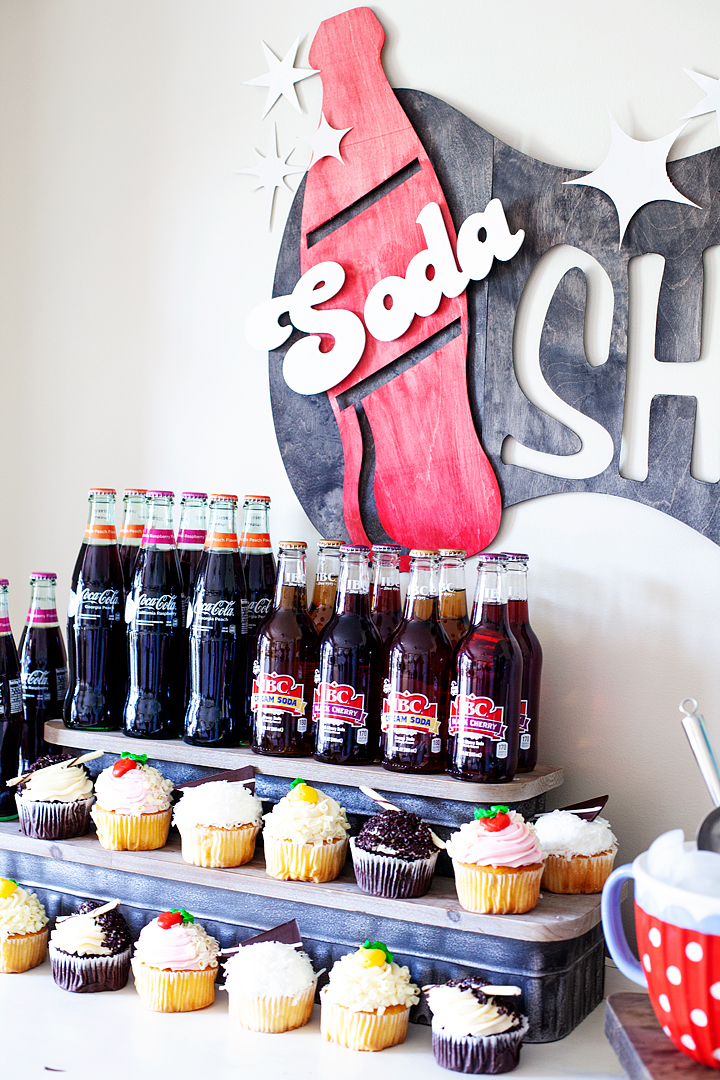
This my friends is one of the most exciting days of my crafting life! I have cut WOOD with my Cricut Maker using their new Cricut Knife Blade. All be it, thin wood but, it’s wood! My daughter Hannah graduated from High School and we made a simple soda bar for one of the elements of her Grad Party. Of course, our soda bar needed a soda shop sign and I thought it would be fun to create a retro style sign out of wood. Here’s how it turned out PLUS, the best 10 tips for working with the Cricut Knife Blade.

+ This post brought to you by the folks at Cricut +Come learn how to make this retro style soda shop sign made out of wood using the @cricut knife blade • whipperberry

When Hannah and I started working on her grad party one of the things she really wanted to have was a mini “soda shop.

Nothing too crazy or too expensive but, cute. I thought it would be fun to test out the Cricut Knife Blade and make a large scale sign out of Birchwood. Now Birch isn’t one of the officially approved woods that can be used with the Cricut Maker. However, I thought I would give it a go and see how it turned out.  It turned out beautiful! It took a little time so, I wouldn’t take on a project of this nature if you were in a hurry. Here is a quick little video along with my best 10 tips for working with the Cricut Knife Blade…

The Soda Shop Sign Design

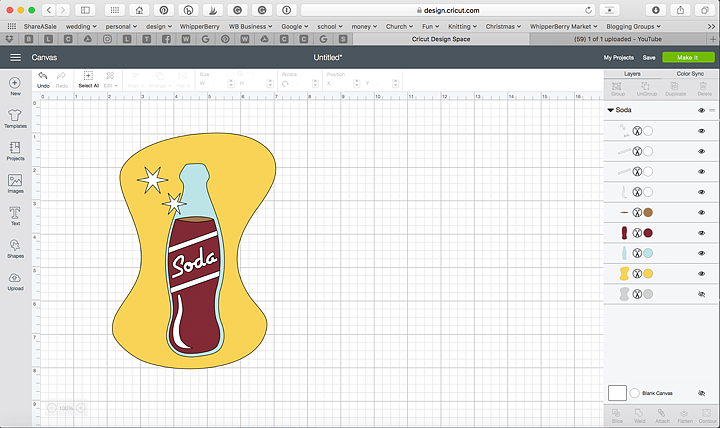
The inspiration for the design was classic retro style soda shop signs. Hannah is a bit of a retro type girl herself so I thought this was fitting. I found a retro looking soda bottle design in Cricut Design Space and thought it would be perfect to use as the base for my project.

Come learn how to make this retro style soda shop sign made out of wood using the @cricut knife blade • whipperberry

I used some of the elements of this design and then made a few tweaks here and there and this is what I eventually came up with…

Come learn how to make this retro style soda shop sign made out of wood using the @cricut knife blade • whipperberry

That’s what’s so cool about Cricut Design Space, you can play around with almost anything and make it your own. Do feel like you are stuck with whatever they have. Be creative and learn how to use the tools that Cricut provides for you to make your own style.

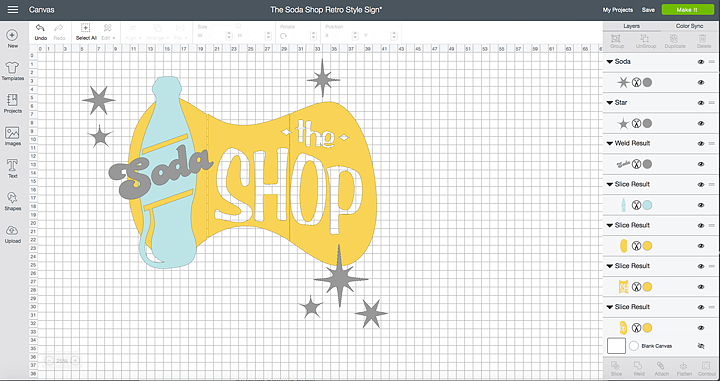
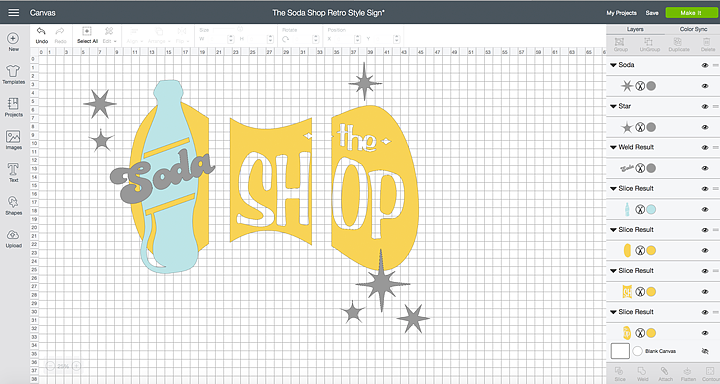
For this sign, I wanted it to be a rather large scale and knowing that with my Cricut Maker, I’m limited to 12 x24 inches I did a little creative troubleshooting. I used the slice tool to slice up my sign so that I could make it as big as I wanted it to be.

Come learn how to make this retro style soda shop sign made out of wood using the @cricut knife blade • whipperberry

I sized the sign to the desired size and then broke it down into thirds by creatively using the square tool along with the Slice Tool. With that, each section of the yellow part of the sign would fit on a 12 x 24 cutting mat and would allow for a much larger sign. Here is how I did that.

How to Create Sections Using the Slice Tool in Cricut Design Space

Cutting the Wood Sign on the Cricut Maker

Like I alluded to in the tips video, working with the knife blade takes more time and patience. However, it is soooo fun to work with (if you know how to use it right) so, don’t let that discourage you from using it. It is WELL WORTH IT!

I did have some frustration when making my sign at times because it wasn’t cutting through my wood at the beginning. After a little grumbling, I figured out that you really do need to calibrate your machine EACH TIME you start a cut with the knife blade. I cut the first section with the basic settings for Basswood and then had to hit the continue cut several more times to get it fully through the Birchwood. You just check each time the Maker finishes a pass (DO NOT REMOVE THE MAT FROM THE MAKER), lift up on the wood to see if it has completely cut through the wood. If it hasn’t, press the cut button and it will take another pass at the design, each time adding more pressure to go deeper through your material. Therefore, you need to keep an eye on things so that you don’t accidentally cut through your mat.

Make sure you watch my 10 tips video above for the rest of my tips for working with the knife blade. They’re pretty handy! You may also want to visit the Cricut blog to learn even more great tips for working with the new Cricut Knife Blade.

Painting and Hanging The Soda Shop Sign

Once the sign was cut, it was time to paint it and get it all dolled up for the party. I wanted to make sure that the wood grain could still be seen through the paint so, I created a wash with some DecoArt Americana Acrylics. All you have to do is add a little water to the paint to create a color wash. You may want to have a rag on hand to wipe off the color wash, almost like you are staining the wood instead of painting it. With this technique, the sign will dry pretty fast and be ready to hang soon after painting.

Come learn how to make this retro style soda shop sign made out of wood using the @cricut knife blade • whipperberry

Hanging the Sign

I wanted the sign to have a bit of a 3D effect and not lay flat on the wall. Typically I use Command Strips but they get pretty pricey so, I opted for some removable mounting putty from 3M to mount the sign on the wall. I could use the putty to create the 3D effects by using more putty to build up the layers. It worked like a charm!

Come learn how to make this retro style soda shop sign made out of wood using the @cricut knife blade • whipperberry

One word of advice… If you have small little pieces of a wood sign, like the center of an “O” for example. Use some painters tape to tape them to the back of the sign so that you don’t lose them in transit. Becuase, that would be a crying shame!

The party turned out great. We had a ball celebrating Hannah and all of her accomplishments. Mom brag time, she graduated a year early! Yea, high school in 3 years! Nice job Hannah.

I’m holding onto the sign to use for her sister Haley’s wedding coming up in September. It just so happens that she is going to have a soda bar as well! Stay tuned… I’m going to have all kinds of Cricut projects coming up this summer for the wedding. You won’t want to miss out!

What do you want to make with a Cricut Maker and the new Cricut knife blade?


SaveSave

SaveSave

SaveSave

SaveSave

SaveSave

SaveSave

SaveSave

SaveSave

SaveSave

This is a sponsored conversation written by me on behalf of Cricut. The opinions and text are all mine.

SaveSave

SaveSave

Primary Sidebar

Heather from Whipperberry
Hello... my name is Heather and I'm the creator of WhipperBerry a creative lifestyle blog packed full of great recipes and creative ideas for your home and family. I find I am happiest when I'm living a creative life and I love to share what I've been up to along the way... Come explore, my hope is that you'll leave inspired!

Footer

  • Privacy Policy
  • Crafts
  • Food
  • Gifts
  • Holidays
  • Home
  • Mom Life
  • Recipes
  • Travel

Copyright © 2026 · Seasoned Pro