Back in October, I ventured out of the sign-making box and tried the idea of making paper rolls signs with heat transfer vinyl. As much as I would love to have mad hand lettering skills, I have come to accept the fact that this is a talent I do not have. I can however, design on the computer and cut my design with my Cricut Maker out of Cricut Iron-On Lite and press the vinyl onto the sign with my Cricut Easy Press. It’s PERFECT!! I decided I wanted to make a meaningful sign for my Jewish friends as they begin their Hanukkah celebrations this week and the paper roll sign is perfect for that. Now, if you don’t have a Cricut, then I’d suggest checking out the Cricut vs Silhouette post to see if we can change that.
+ This post brought to you by Cricut +
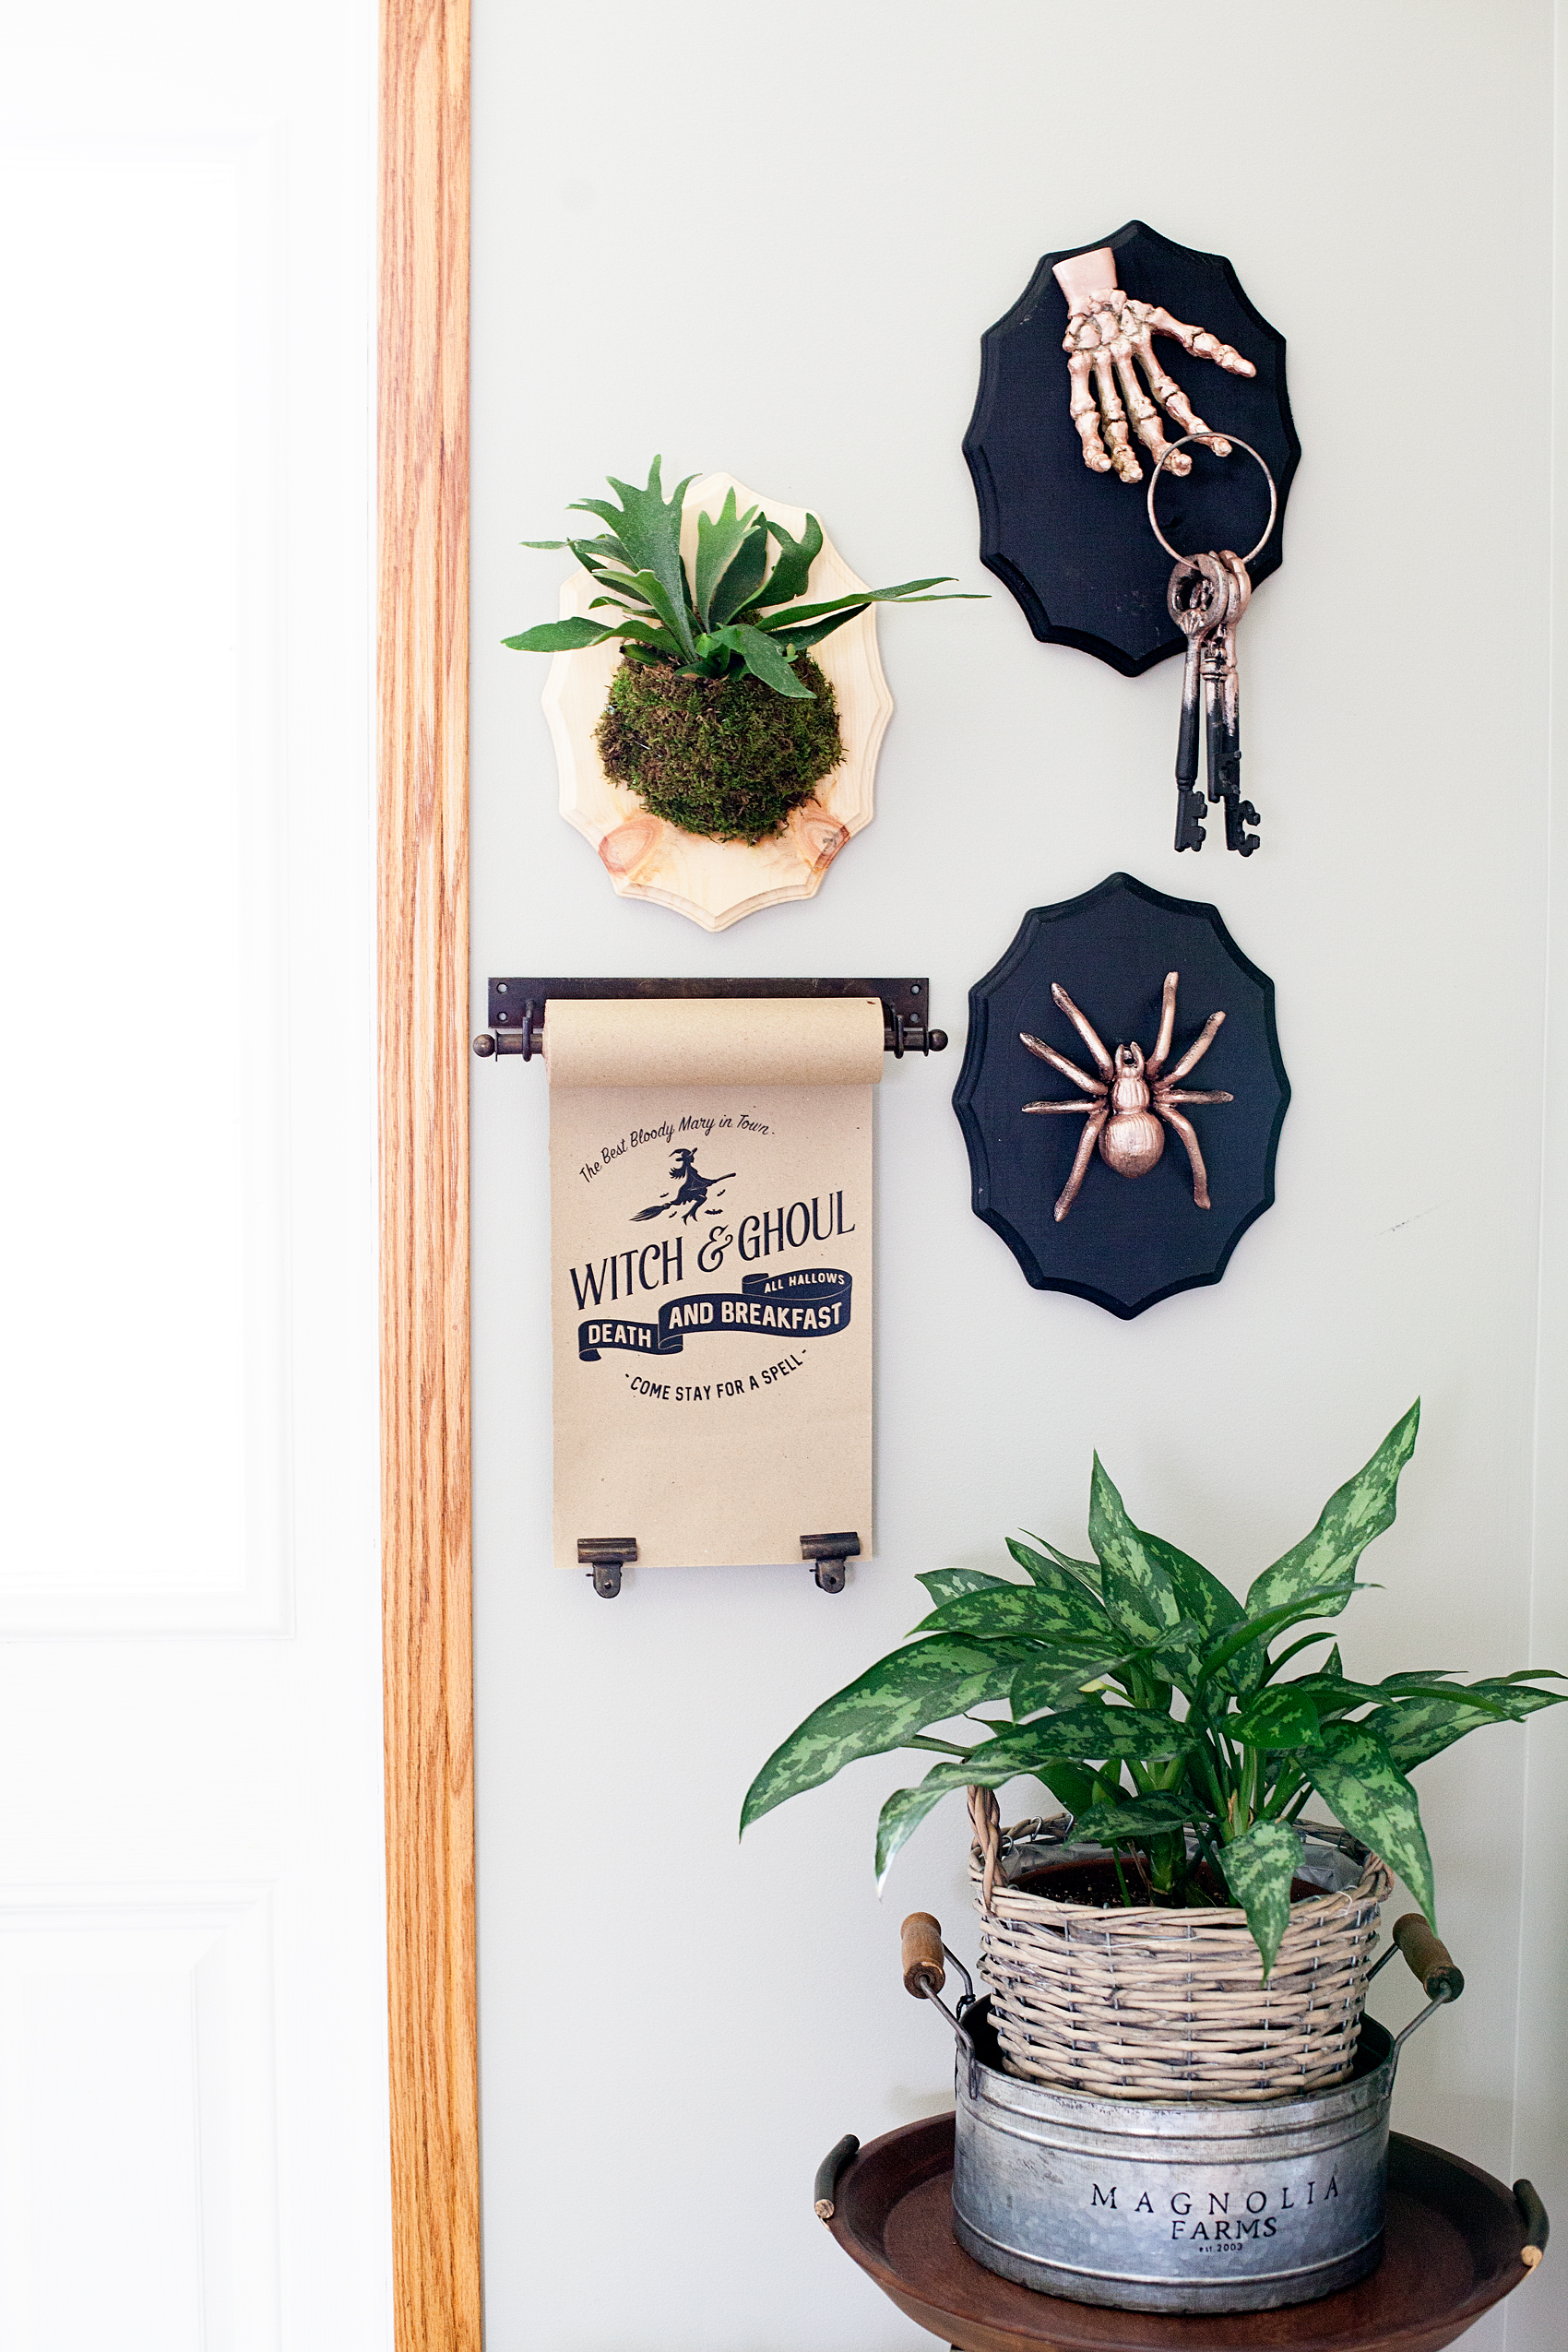
Why a Paper Roll Sign
Now, whether you celebrate Hanukkah or not, this tutorial is fun for all kinds of sign making. My last sign was for Halloween and my next sign will most likely be for the New Year.
I love the concept of the paper roll sign because I don’t typically like to use the same stuff year after year. I want something new for each new season. The paper roll is so much more economical that making the sign out of wood or canvas every time I want to change-up my decor. When I am finished with that sign, I tear off the bottom of the paper with the vinyl on it and start over with a new design. It’s totally the way I like to “roll.”
I found my paper roll (NOT and affiliate) on Amazon. I know that many home decor stores carry them as well. They also come in various sizes. I am using the small size for this project.
Tools and Materials
I am using my trusted Cricut tools again for this project. You just can’t go wrong with them. Even the New York Times feels the same way. They listed the Cricut Explore Air 2 as one of the best gifts this holiday season in The New York Times 2017 Holiday Gift Guide with the Cricut Maker as the upgrade gift. Can’t go wrong there!
For this project you only need a few items…
- vintage style paper roll
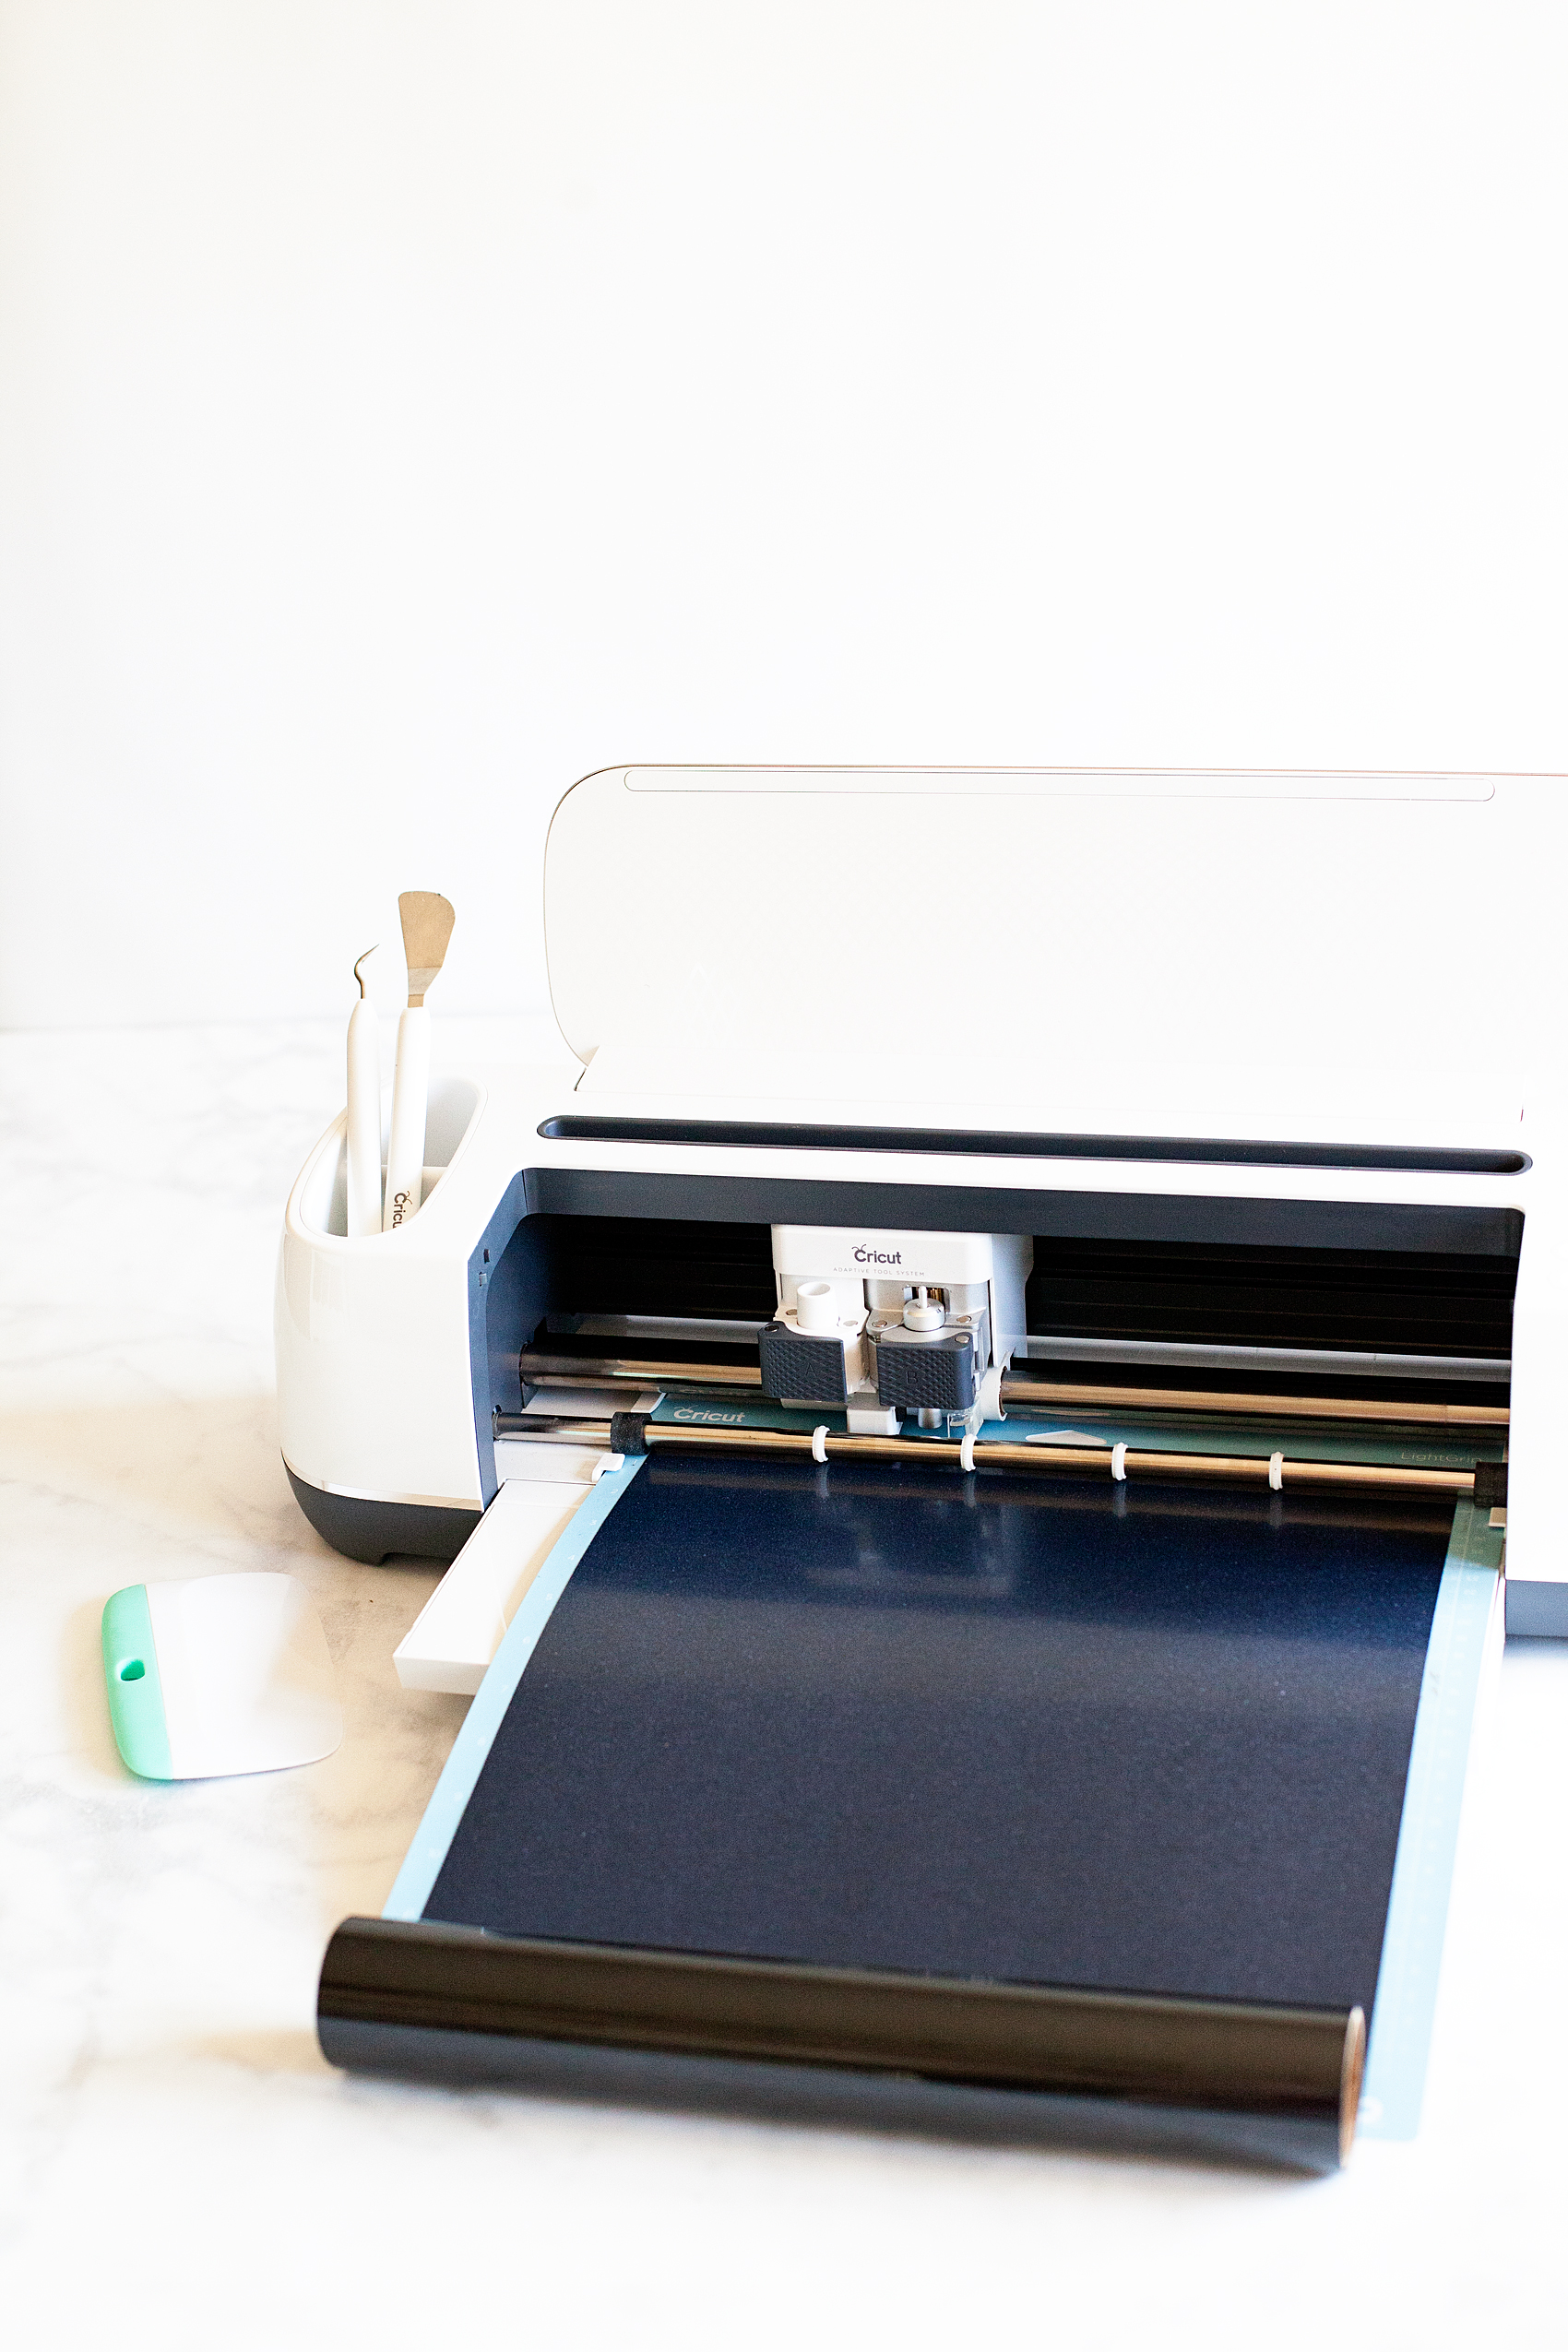
- Cricut Iron-On Lite
- Cricut Machine
- Cricut Easy Press
- Cricut Iron-On Protective Sheet
- towel or heat resistant ironing mat
- Hanukkah Sign SVG file

Instructions
First, you’ll need to download the design file listed above or create your own design in Cricut Design Space. Once you have your design ready in Design Space, you are ready to cut your file and make your sign. Here is a quick video showing you how I created my paper roll sign.
Super easy, right? All you need to do is make sure you have the RIGHT tools and the skies the limit. Here’s a quick recap…
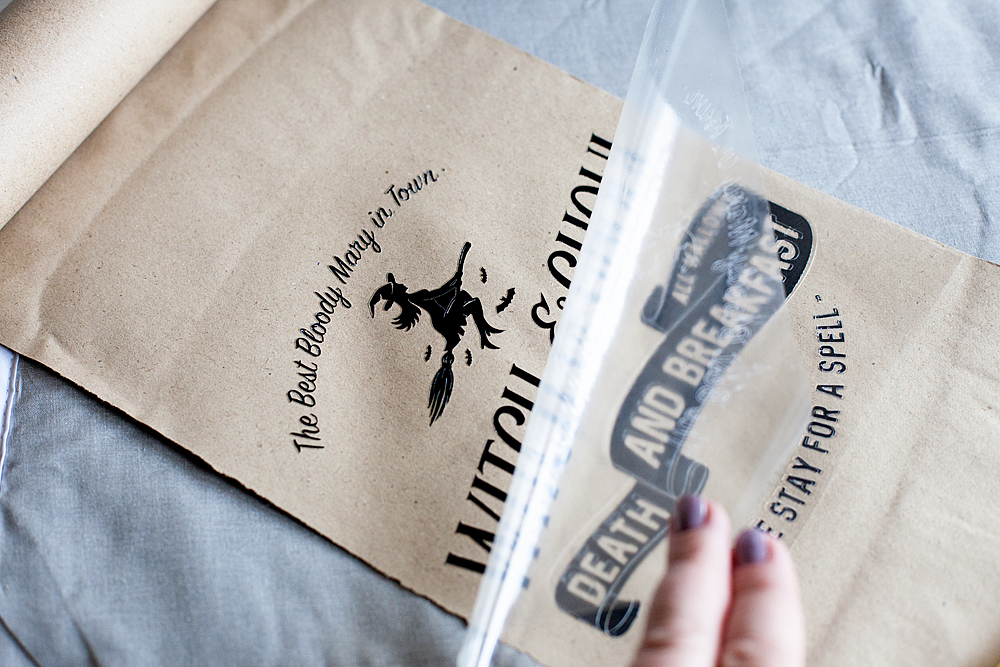
- Cut design on your cutting machine out of Cricut Iron-On Lite. Make sure that you mirror the image so that it will cut right. You will also want to make sure that the shiny side of the heat transfer vinyl is down when cutting out your design.
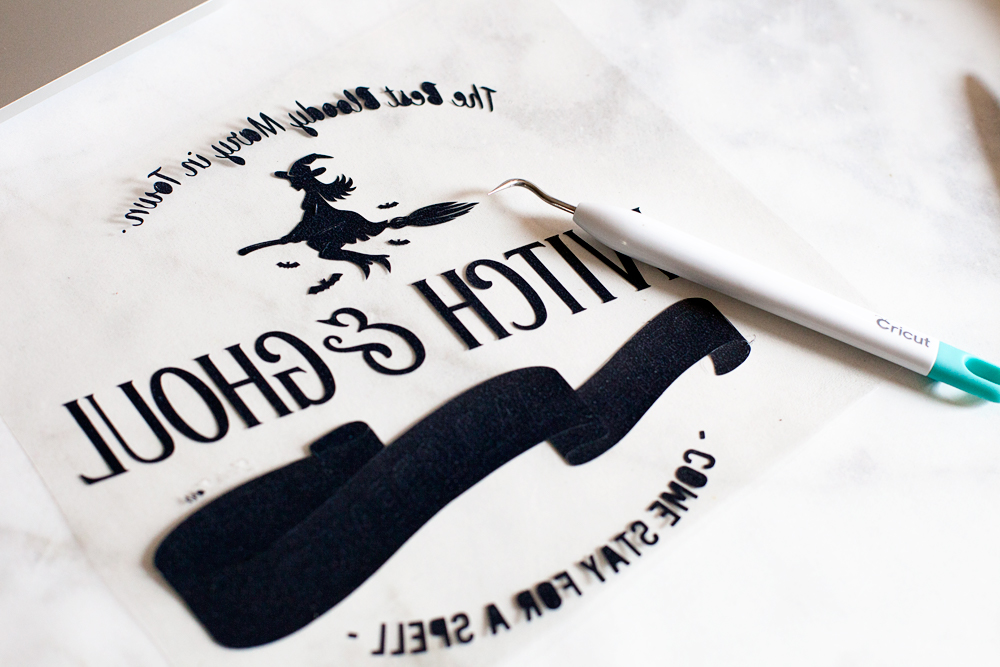
- Weed the vinyl. This means to remove the excess vinyl from your cut vinyl leaving only the design that is mirrored and ready to adhere to your paper roll.
- Lay the design down onto the surface of the paper.
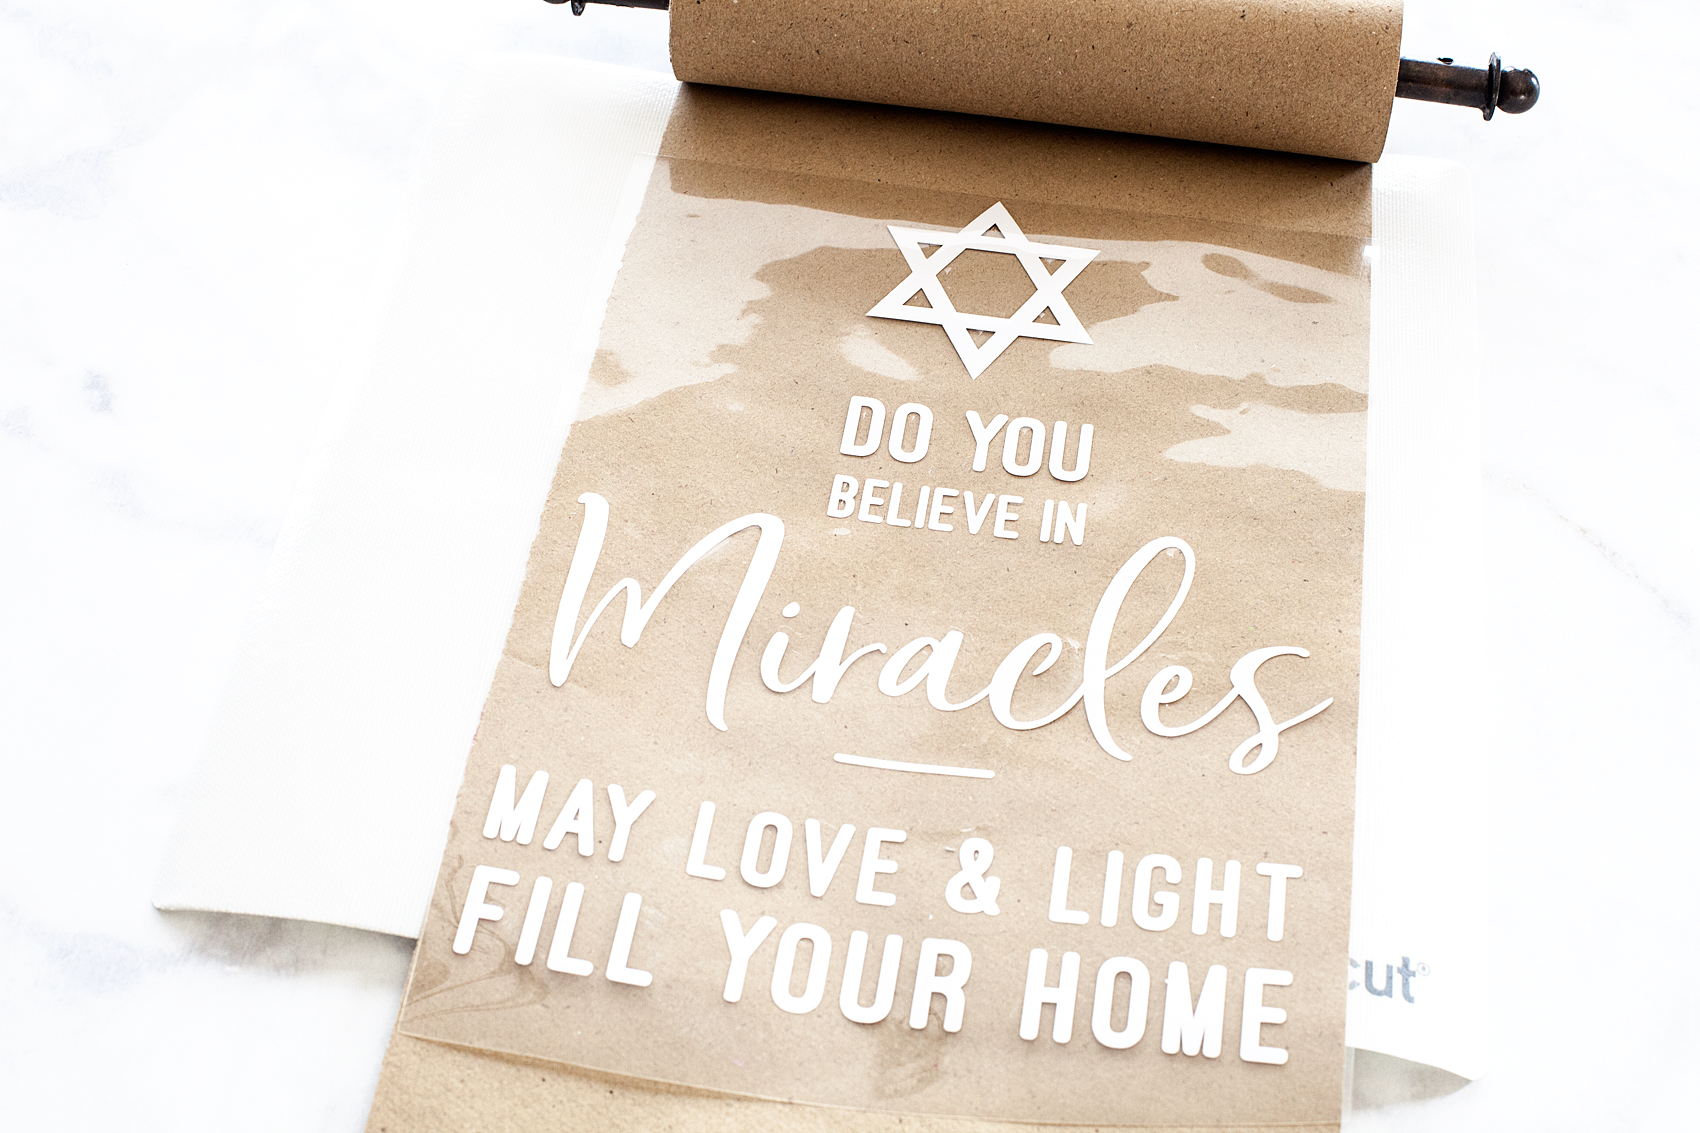
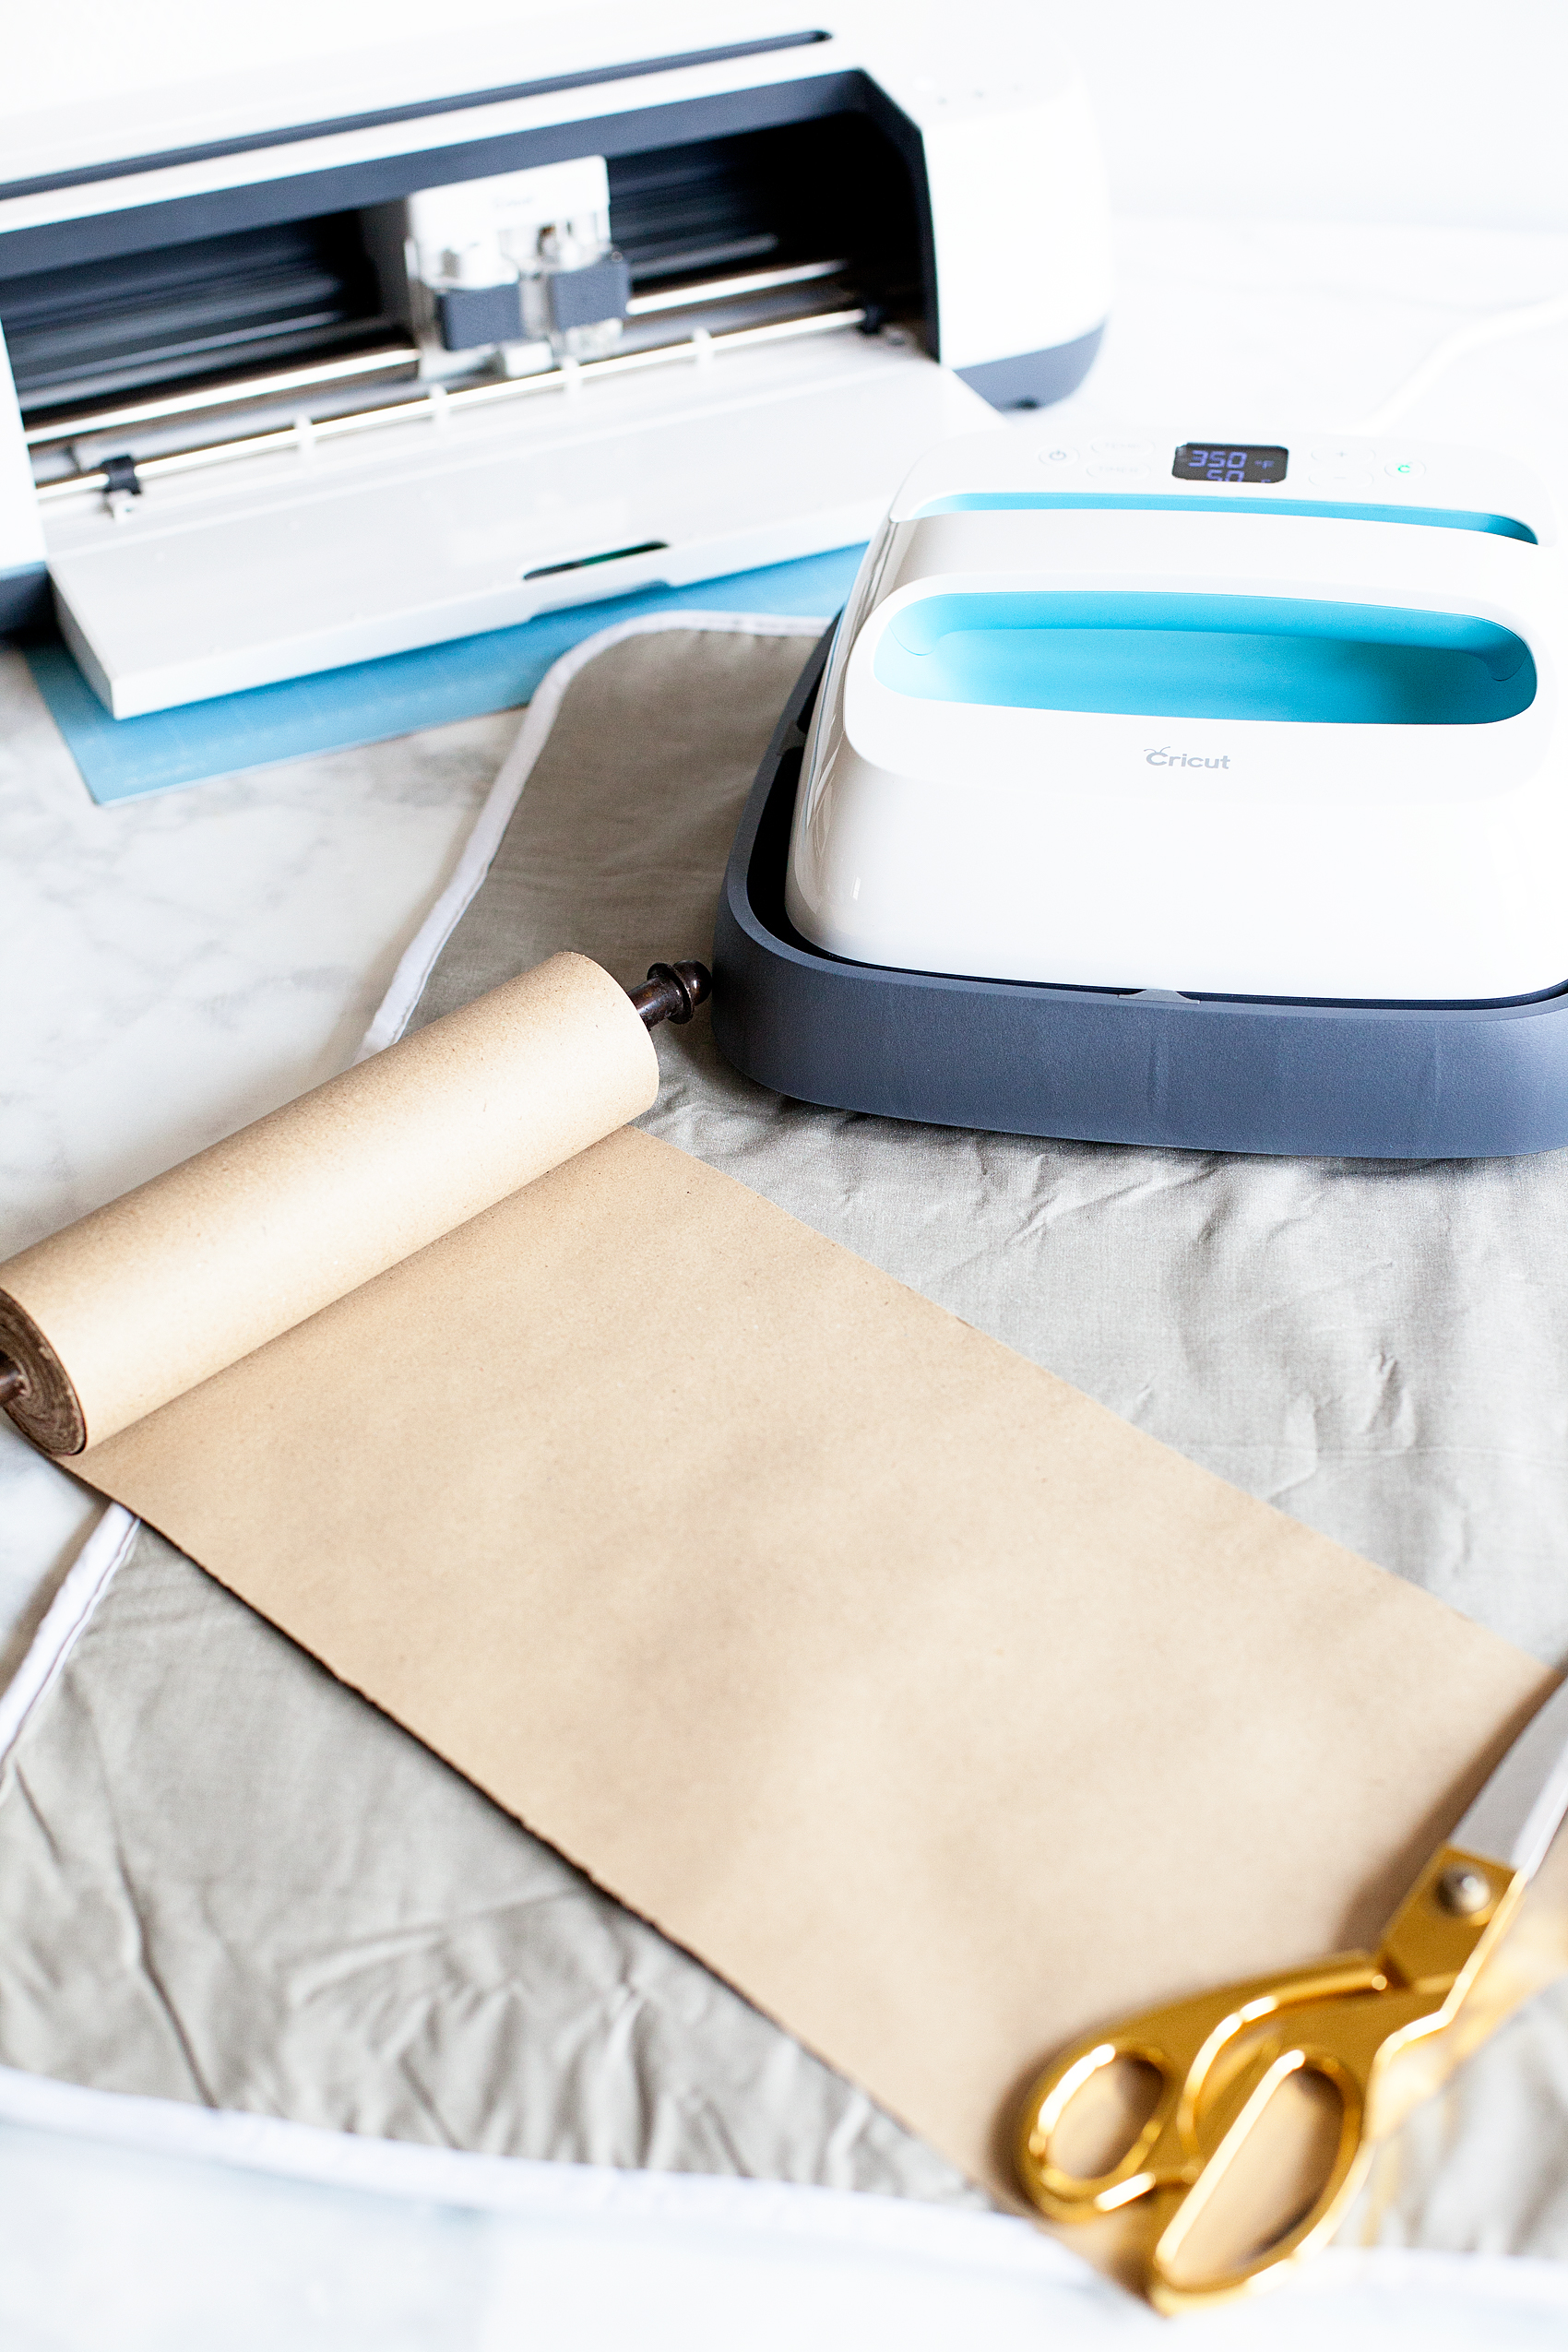
- Cover the design with the Cricut Iron-On Protective Sheet.
- Turn your Cricut Easy Press onto 325˚ and set the timer for 50 seconds.
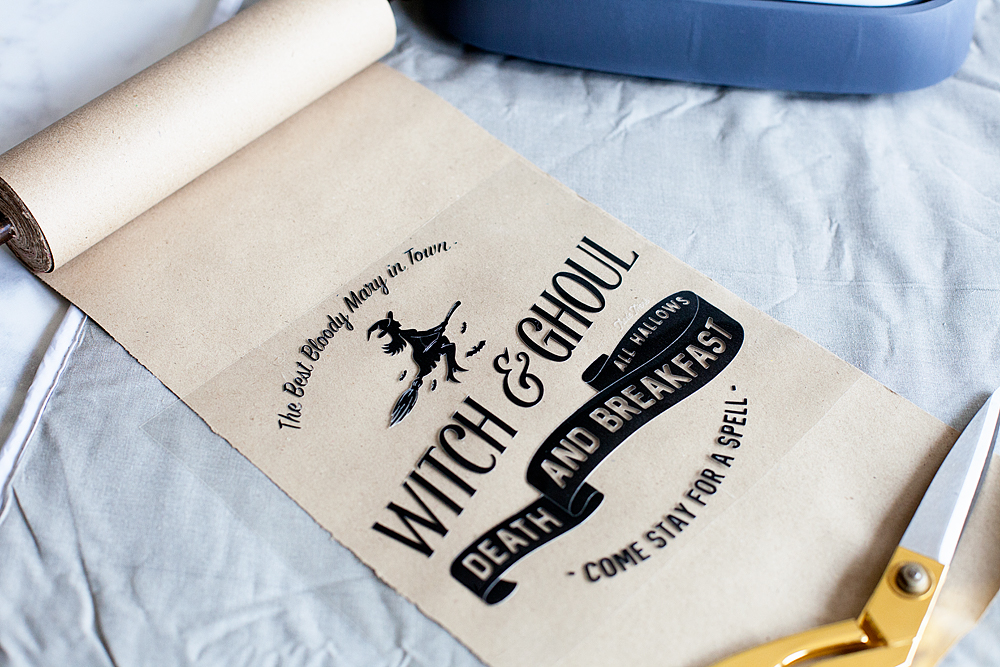
- Place the Easy Press or your iron onto the paper and hold for 50 seconds. Make sure to heat the entire surface of the sign before removing the clear protective sheet on top of the heat transfer vinyl.
- Remove clear plastic sheet.
- Hang your new sign!
For more Cricut inspiration, follow Cricut on Pinterest. They have all kinds of amazing project! Want to make sure you don’t forget this idea and tutorial? Here’s an image that you can pin to make sure you can find it again…

This is a sponsored conversation written by me on behalf of Cricut. The opinions and text are all mine.