• Skip to primary navigation
  • Skip to main content
  • Skip to primary sidebar
  • Skip to footer

Whipperberry

WhipperBerry • Your Home For Creative Inspiration

  • Home
  • Recipes
    • Starters
    • Easy Weeknight Dinners
    • Main Dish
    • Salads
    • Side Dish
    • Soups & Stews
    • Desserts
    • Breakfast
    • Miscellaneous
  • Tutorials
    • Creative Crafts
    • DIY Decor
    • Fabric Crafts
    • Food How-To
    • Jewlery
    • Paint Projects
    • Paper Art
    • Party Styling
    • Photography and Graphic Design
    • Silhouette
  • Holidays
    • Easter
    • Mother’s Day
    • Father’s Day
    • 4th of July
    • Halloween
    • Thanksgiving
    • Christmas
    • Valentine’s Day
  • Gift Ideas
    • Gifts For Everyone
    • Gifts for Dad
    • Mother’s day
    • For The Girls
    • For The Kids
    • Teacher Gift Ideas
    • Christmas
  • Printables
    • Holiday
    • Gift Idea
    • LDS Primary
  • Travel
  • About
    • Terms
  • Contact
  • Nav Social Menu

    • Facebook
    • Instagram
    • Pinterest
    • RSS
    • Twitter

Stenciling

DIY Painted Tray Set

1 · May 19, 2014 · 4 Comments

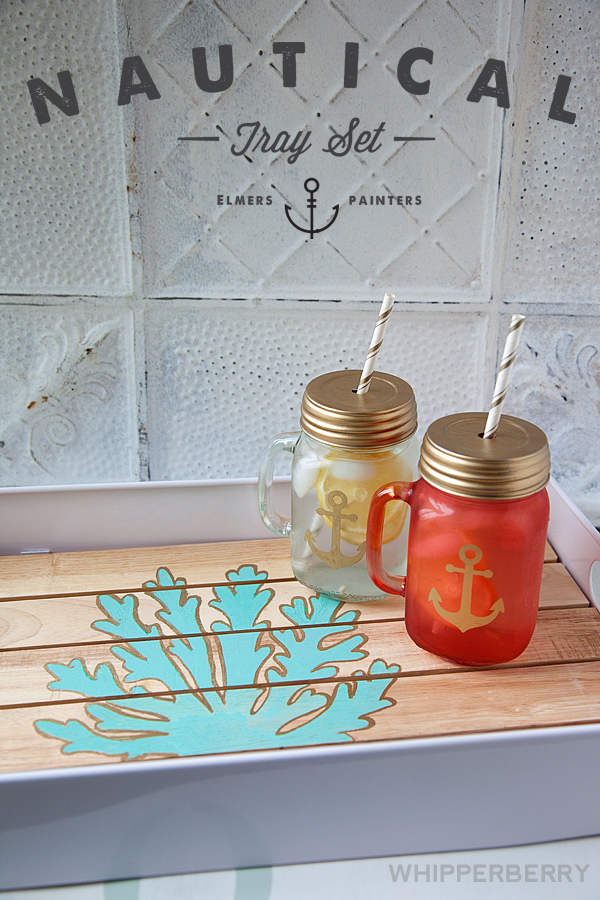
+ This DIY Painted Tray Set post brought to you by the lovely folks at Elmer’s +

Coral-Tray-with-Elmers-Painters-Markers-from-#whipperberry-2

With the spring in full swing and summer fast approaching, my creative spirit has started longing for all things beach. The nautical trend is one that I whole heartedly adopt. I love the colors, the simplicity, the way that it takes me back to slow days on the beach with my family and especially my sweetheart.  Yea, I’m loving it!

Last month I had the chance to meet a couple of the lovely ladies that work at Elmer’s while I was attending SNAP. Now, I’ve worked with Elmer’s products for years and I’m on the Elmer’s Craft It Crew this year and while hanging out in their booth at SNAP, I started to realize the potential of a product that has kind of hung out in the background of the Elmer’s family of products… Their line of Painters Markers!

Coral-Tray-with-Elmers-Painters-Markers-from-#whipperberry-7

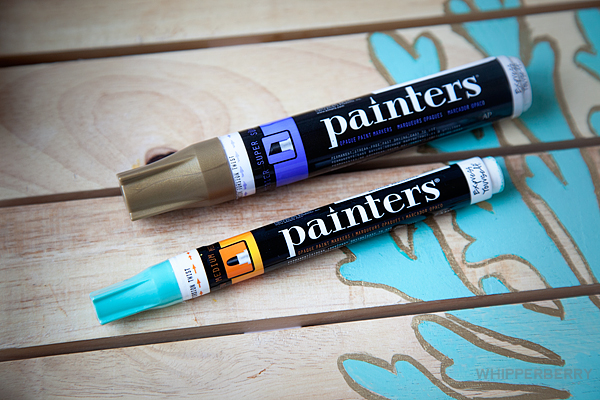
Painters Markers are acrylic paint markers that come in fine, medium or chisel tips. They are easy to use and virtually mess-free. The are permanent on most surfaces and can be used on pretty much any type of surface. Wood, glass, ceramic, tera cotta, plastic, metal, foam board & even fabric. They are streak-free, non-toxic & acid-free.  Yea, they ROCK!!

Recently, I found a fun wood and metal serving tray at Target and thought it would look great with the addition of some coral to give it a bit of a nautical theme. I decided to take these Elmer’s Painters Markers for a spin to see how well they worked!

First, I found a coral image that I like and cut the image out on Stencil Vinyl from Silhouette on my CAMEO.

Coral-Tray-with-Elmers-Painters-Markers

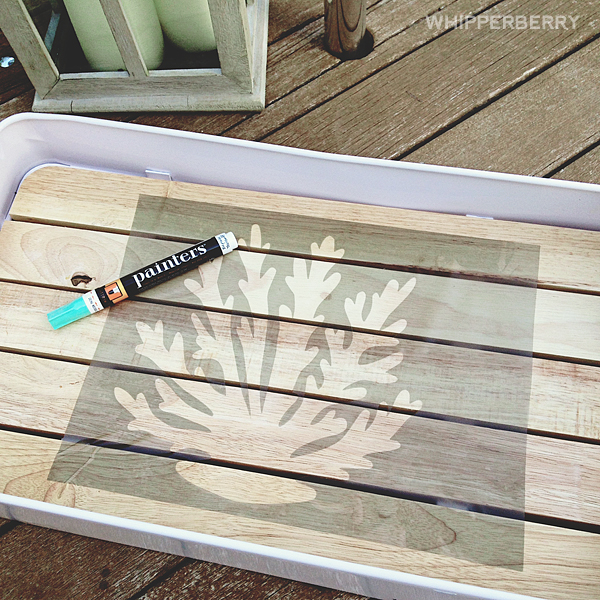
Then I colored in the image with the Elmer’s Painters Marker in Sea Mist Brume.

Tip… I did learn that you need to shake it up really well and draw on another piece a paper for a little bit in order to get the color to regulate.

Once I was finished coloring it in, I removed the stencil and then outlined it with the with Gold Ore Painter’s Marker which is a FABULOUS metallic marker. I LOVE IT!!

The acrylic paint from the markers dries so fast and the ease of being able to “paint” with acrylic paint in marker form just makes my day. No more brushes, and all the mess that comes along with painting. I decided my tray needed some matching glasses to complete the look so I took some jar glasses that I also found at Target, and using the same stencil process, stenciled a gold anchor onto the glass.

Anchor-Glass-with-Elmers-Painter's-Markers-by-#whipperberry

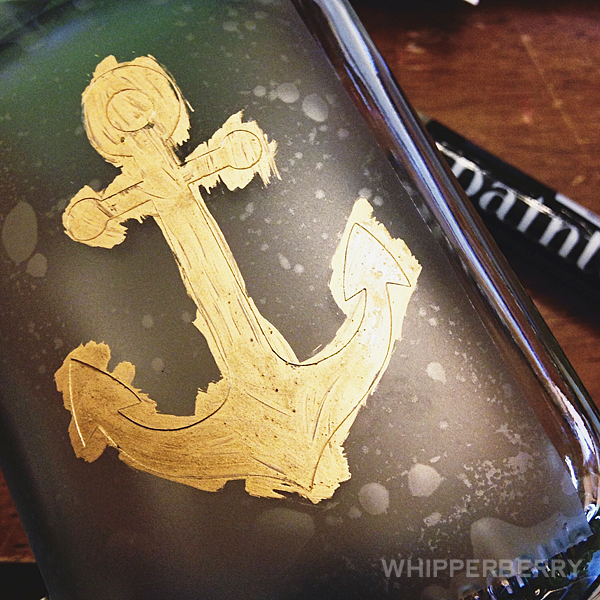
The gold paint goes onto the glass so smooth and looks fabulous.

Tip… I did learn that you need to remove the stencil while the paint is still wet, or you may pull some of the dried paint off when removing the stencil.

Coral-Tray-with-Elmers-Painters-Markers-from-#whipperberry-4

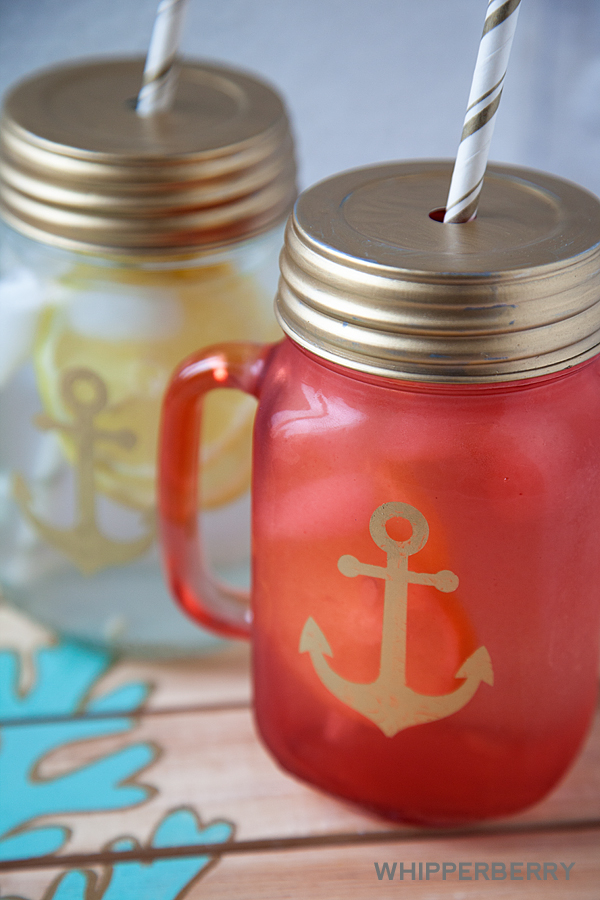
I even painted the silver metal lids that I have for my jar glasses gold with the Painter’s Markers. It was super slick!!

Coral-Tray-with-Elmers-Painters-Markers-from-#whipperberry-3

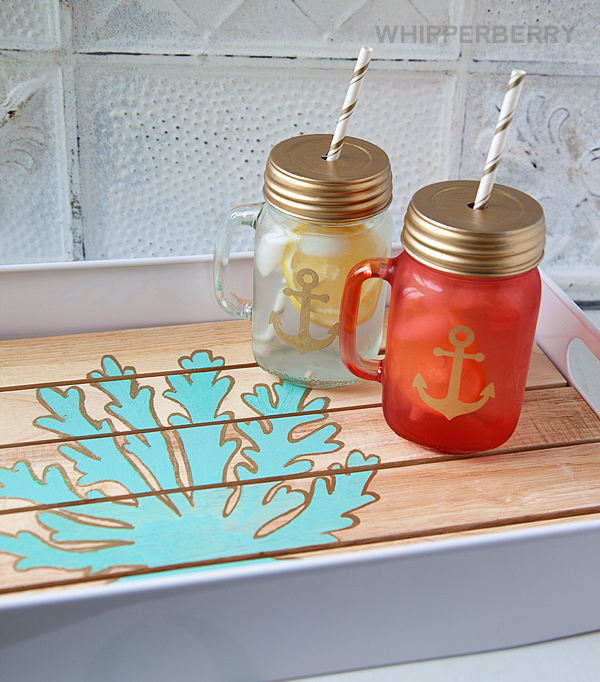
Now, I have a stylish nautical display piece for my house or I can make a few more glasses and I have a fun serving set for a party! I LOVE it!!

The cool thing is that it really only took a few minutes to make all of these creations, less than an hour for sure and the paint was dry within minutes.

As for the anchor glasses… I’m not sure how this paint will react to a trip though the dishwasher and I do think that it could scratch off easily so I would hand wash for sure. I plan on using them mostly for display and not really for everyday use. If you would like to use them everyday I would try to find some type of sealant to make the gold image a little more permanent.

Now, that I’ve hopefully inspired you… What would you like to paint with Elmer’s Painters Markers?

Disclaimer // I am a member of the 2014 Elmer’s Craft It Crew and was compensation for my time while preparing this post. However, all thoughts, idea and opinions are my very own!

Black & White Halloween Pumpkins for The Great Pumpkin Challenge

28 · Sep 4, 2013 · 15 Comments

The Great Pumpkin Challenge brought to you by Michaels Craft Stores // I CAN"T WAIT FOR FALL!! I've thoroughly enjoyed summer, ate it up really but, I'm over the heat and the bugs and I'm ready for those cool crisp fall days. More than anything I'm ready to start decorating for fall and all the fun holidays that come with the cool temperatures. Not too long ago, Michaels sent me some of their famous pumpkins and invited me to participate in The Great Pumpkin Challenge and this is what I came up with…

WhipperBerry Halloween Pumpkins from Michaels

A classic black & white Halloween display. As much as I love color, there is just something stunning about black & white when it comes to Halloween. Here's a breakdown of each pumpkin…

ribbon pumpkin from Michaels

This one is just a simple decorative ribbon that I found at Michaels and wrapped it using small t-pins to secure the ribbon at the top and bottom of the pumpkin. Super easy!!

Clock pumpkin with DecoArt Patio Paint and Mixed Media Stencil

Love, love, love this one that I stenciled using Black DecoArt Patio Paint and their Mixed Media Stencils. This one was a little more challenging. I pinned the stencil to the pumpkin and then carefully laid each section of the stencil down onto the pumpkin using my finger to press each section down.  Going section by section, I used a makeup sponge as a pouncer and carefully went around the clock, making sure not to overload the pouncer and it turned out great.  Slow & steady wins the race on this one.

how to stencil on a pumpkin

I also painted an orange pumpkin black with the Patio Paint. This stuff is amazing!! This was ONE coat…

pumpking with DecoArt Patio Paint

I'm going to be using that paint a whole lot more now that I know how amazing it is.

polka dot pumpkin from Michaels

For my polka dot pumpkin I used the DecoArt Patio Paint again, on the inside of the pumpkin and then a Hot Knife from Micheals to cut out the polka dots. That tool is a must when it comes to working with this type of pumpkin. It cuts like butter!!

ribbon pumpkins

These two are just wrapped in ribbon with a couple of cute bows. For these I used t-pins and a couple of glue dots to secure the ribbon in place. Again, super easy.

What's your favorite way to dress up your pumpkins for Fall or for Halloween? Michaels is hosting a fun Great Pumpkin event on October 5th from 1:00-3:00. For $6 your kiddos can design their very own pumpkin and there will be a face painter on hand for even more festive fun.

A little intimidated to carve you own pumpkin? Not to worry, Michaels is also offering professional carving services at their store. You can choose from 25 designs and then personalize them as well. Prices start at $19.99 and if you want it by Halloween, you need to place your order by October 13th.

So… What are you going to create for The Great Pumpkin challenge this year? Take some photos and tag me on Instagram or Facebook so I can see what you create!

  • « Go to Previous Page
  • Page 1
  • Page 2
  • Page 3

Primary Sidebar

Heather from Whipperberry
Hello... my name is Heather and I'm the creator of WhipperBerry a creative lifestyle blog packed full of great recipes and creative ideas for your home and family. I find I am happiest when I'm living a creative life and I love to share what I've been up to along the way... Come explore, my hope is that you'll leave inspired!

Footer

  • Privacy Policy
  • Crafts
  • Food
  • Gifts
  • Holidays
  • Home
  • Mom Life
  • Recipes
  • Travel

Copyright © 2026 · Seasoned Pro