Converting an existing bathtub into a walk-in shower completely transforms your bathroom layout, but it requires a lot more planning than just ripping out old cast iron, especially as this is a popular option with the over-65 population increasing by 38.6% in just 10 years. Plumbing configurations, waterproofing membranes, and subfloor conditions determine whether your project stays on budget or turns into an expensive nightmare. Here is what you must evaluate before breaking ground on a tub-to-shower conversion.

Understanding Structural and Plumbing Essentials
A standard bathtub footprint measures 60 inches long by 30 inches wide, which provides ample space for a comfortable shower stall. However, the existing plumbing beneath your tub rarely matches what a high-flow shower system requires.
Bathtub drains typically use a 1.5-inch pipe, whereas building codes mandate a 2-inch drain pipe for shower pans to handle standing water volume. Expanding this drain line often involves cutting into the subfloor or slab.
Waterproofing is another non-negotiable step. Water will penetrate tile grout over time, so installing a continuous waterproof barrier like a Schluter-Kerdi membrane or liquid-applied sealant behind backer boards prevents rot.
Inspecting the subfloor for moisture damage as soon as the old unit is removed saves thousands down the road. Addressing hidden water damage early prevents mold growth and ensures a stable base for your heavy shower pan.
Timelines, Budgets, and Contractor Guarantees
Converting a bathtub into a modern walk-in shower generally takes anywhere from three to seven days of active labor. Custom tiled enclosures take longer due to mortar cure times, whereas acrylic wall systems can be installed in as little as two days.
National data from Home Advisor shows that tub-to-shower conversion costs range between $1,500 and $8,000 depending on material choices, structural alterations, and fixture quality. Labor generally accounts for roughly 40% to 50% of the total project budget.
Unexpected issues like outdated galvanized piping or rotting joists can push expenses higher. Upgrading outdated plumbing pipes adds $300 to $2,400 to the final invoice, making contingency funds essential.
Working with experienced professionals ensures your plumbing meets local municipal codes and includes solid labor warranties. When scheduling a full shower remodel in Macomb the hiring of certified specialists based in Michigan prevents costly leaks and guarantees long-term performance, for instance. You’ll need regional pros to tackle jobs like this wherever you’re based for the best results.
Before signing a contract with any bathroom installer, ask these critical questions:
- Do you pull all necessary plumbing and building permits for this project
- What specific waterproofing system do you install behind the wall panels or tile
- Does your written warranty cover both material defects and installation labor
Designing for Long-Term Accessibility
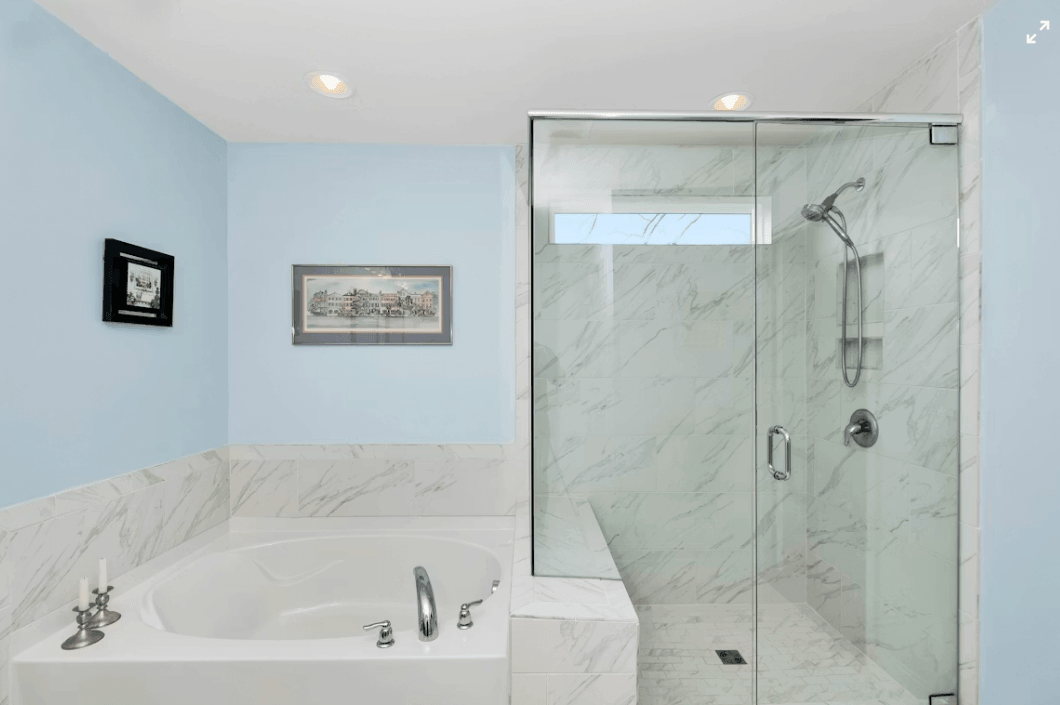
Walk-in showers significantly improve bathroom safety by eliminating the need to step over a high tub wall. Low-threshold pans sit just two to three inches off the ground, while curbless designs blend seamlessly into the floor.
Incorporating safety features during the initial construction phase costs a fraction of retrofitting them later. Pressure-balancing shower valves prevent sudden temperature swings, while built-in benches provide comfort.
Homeowners often choose low-threshold shower bases to boost home resale value. Homebuyers strongly prefer accessible walk-in showers over traditional tub combos in secondary bathrooms, with demand rising 408%.
Grab bar blocking should always be installed behind the drywall during framing, even if you do not mount the bars immediately. Having solid wood backing in place allows easy installation whenever extra stability becomes necessary. Also, be sure to prepare for the renovation work well in advance so you’re not caught off guard by these changes and the disruption involved.
DIY vs Professional Installation
A DIY tub conversion might seem like a great way to save on labor, but waterproofing mistakes often lead to catastrophic home damage. A single missed seam in the pan liner can leak water into lower-level ceilings for months before becoming visible.
Professional installers carry specialized insurance, handle permit processing, and possess the tools needed to level uneven subfloors quickly. They also complete the teardown and installation without leaving your main bathroom out of commission for weeks on end.
If you decide to take the DIY route, stick to prefabricated acrylic shower kit packages that feature pre-pitched bases. For custom tile work, glass enclosures, and drain relocations, hiring seasoned experts protects your home investment.
Reviewing your home layout, setting a realistic budget, and picking durable materials guarantees a smooth renovation. Check our other renovation guides for more tips on upgrading your home.