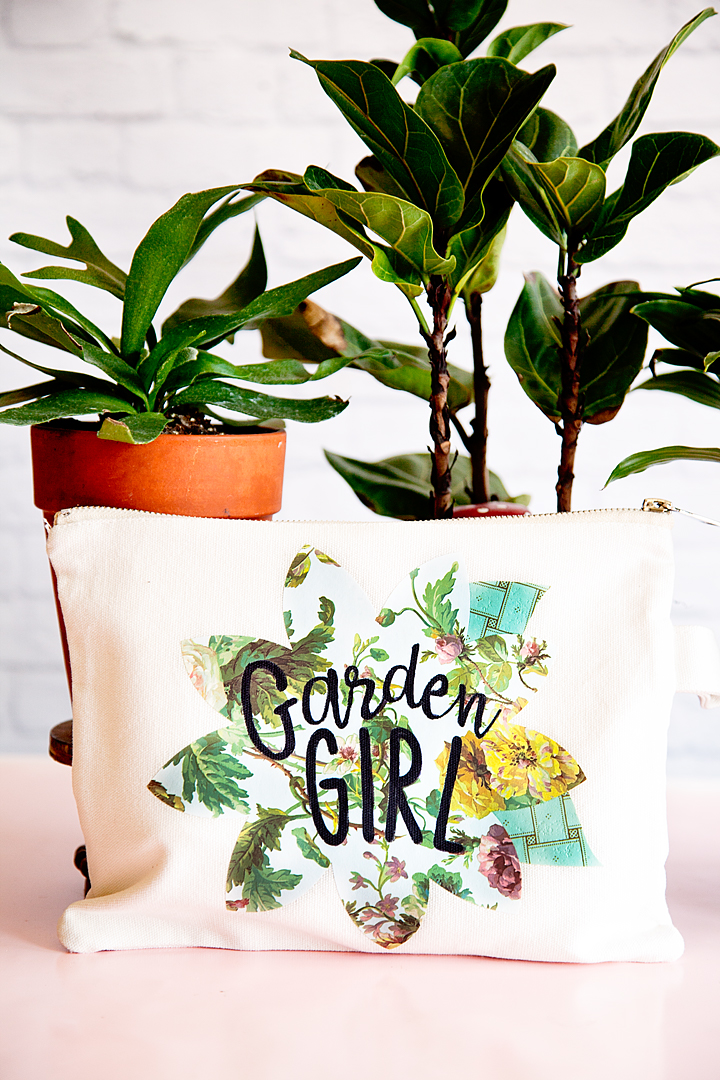
Hello… Mother’s Day is right around the corner, are you getting ready? I always love to create something fun for my Mom and for all the “Mothers” in my life. My Mom is a true garden girl and I thought it would be fun to create a cute garden girl canvas zipper bag using the new Cricut Patterned Iron-On for Mother’s Day. Have you guys seen this? It’s the cutest stuff!
+ This post brought to you by the amazing crew at Cricut +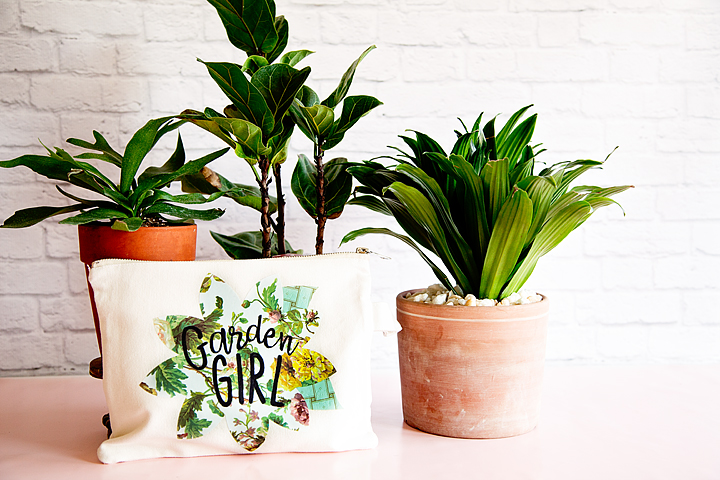
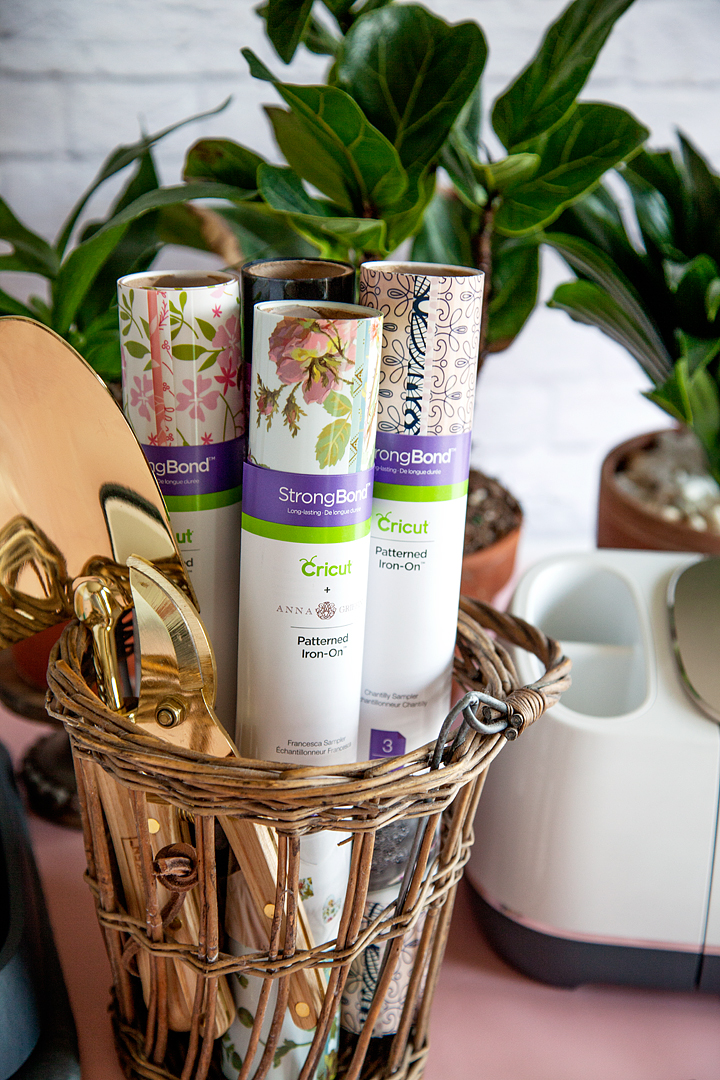
Cricut Patterned Iron-On
You guys… This stuff is so fun to work with! It comes in florals, lace, polka-dots, geometrics, plus more. The Cricut Patterned Iron-On is the next creative wave coming out of the fabulous minds of the crew at Cricut. They are constantly working to make more and even better consumable products for us to use as we create with our favorite crafting machine. This iron-on vinyl is created with the long-lasting Strong Bond™ technology and adheres nicely to many types of fabrics. It works like a dream when using the Cricut EasyPress or even your home iron.
Garden Girl Design
If your mom or a loved one enjoys tending to their garden or sprucing up their home’s exterior, you might want to complement this handmade gift with something unique for the outdoors. Beautiful flower arrangements look wonderful both inside and outside, especially in window displays. Consider exploring options like Custom Made Window Boxes that can be tailored to fit specific styles and window sizes, adding a personalized touch to any garden lover’s home.
Since my Mom loves flowers, I thought the Anna Griffin floral patterns in the Francesca sampler would be perfect. I’ve been crushing on Anna Griffin’s work for years so, this was a natural fit for me as I started to design this Garden Girl bag.
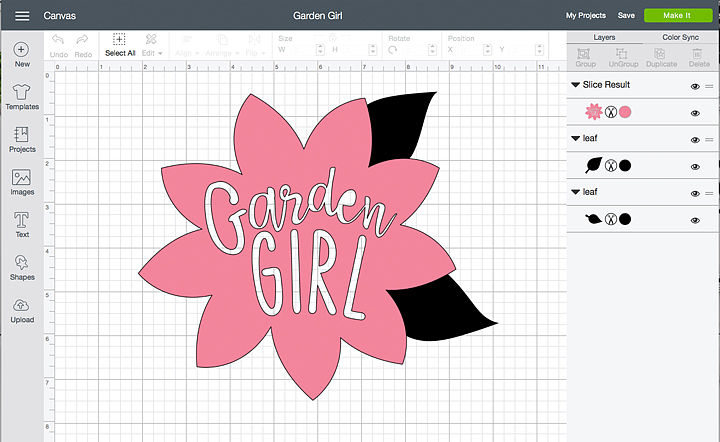
The design is pretty simple, it’s a flower that I found in the Cricut Design Space and then sliced the words into the flower and added a couple of leaves. But, no worries… I’ve got you covered. You can click on the link below, in the project supplies section, it will open this project up for you to use in Cricut Design Space.
Supplies
- canvas zipper pouch
- Cricut Patterned Iron-On
- Garden Girl Cricut Design Space Project
- Cricut machine
- Cricut EasyPress or home iron
- Cricut EasyPress Mat or towel
- Cricut Iron-On Protective Sheet
- Sharpie
Instructions
Now, that you’ve seen the video, here is the step by step instructions.
- Open the project in Cricut Design Space and click on the customize button. You may need to resize the design in order to fit your canvas bag.
- Cut the design on your Cricut machine following the steps that Cricut Design Space will walk you through. Make sure that when working with any iron-on material you need to MIRROR YOUR IMAGE and CUT ON THE WRONG SIDE of the iron-on vinyl.
- Weed your iron-on material. To “weed” vinyl or iron-on material means that you remove any iron-on material that you don’t want on your bag. For this design, you’ll want to remove the outside of the flower and leaves, then remove the letters from the inside of the flower.
- Pre-heat your Cricut EasyPress to 340˚ and set-up your EasyPress Mat.
- Place the canvas bag on the EasyPress Mat and prepare the surface by pre-heating the space where you are going to add the design for 15 seconds. This allows for greater adhesion for the Patterned Iron-On.
- Place your flower down on the surface of your bag then, slide the leaves under the flower and place them where you would like them. I trimmed the bottom of the leaves a bit since they were going to be covered by the flower.
- Remove the flower, cover the leaves with the Protective Iron-On Sheet and press the leaves at 340˚ for 30 seconds and gently pressing down on the EasyPress. First, on one side and then an additional 30 seconds on the other side.
- Remove the Iron-On Protective Sheet and then, peel back the clear protective film on the leaves.
- Place the flower over the leaves. Replace the Cricut Iron-On Protective Sheet and press again, like before. 30 seconds on one side, then 30 more on the other side.
- Let cool for a few minutes and then remove the protective film.
- At this point, you can decide whether you want to fill in the letters with Sharpie. I wanted my Garden Girl to stand out a little more so I decided to fill them in. You may have selected a Patterned Iron-On where the words standout just fine and you won’t need to fill them in. This is your call basically.
With that, your bag is finished and ready to gift to your favorite Garden Girl!
What would you like to create with the new Cricut Patterned Iron-On? Leave a comment and let me know, I love to see what you guys are working on!
This is a sponsored conversation written by me on behalf of Cricut. The opinions and text are all mine.