• Skip to primary navigation
  • Skip to main content
  • Skip to primary sidebar
  • Skip to footer

Whipperberry

WhipperBerry • Your Home For Creative Inspiration

  • Home
  • Recipes
    • Starters
    • Easy Weeknight Dinners
    • Main Dish
    • Salads
    • Side Dish
    • Soups & Stews
    • Desserts
    • Breakfast
    • Miscellaneous
  • Tutorials
    • Creative Crafts
    • DIY Decor
    • Fabric Crafts
    • Food How-To
    • Jewlery
    • Paint Projects
    • Paper Art
    • Party Styling
    • Photography and Graphic Design
    • Silhouette
  • Holidays
    • Easter
    • Mother’s Day
    • Father’s Day
    • 4th of July
    • Halloween
    • Thanksgiving
    • Christmas
    • Valentine’s Day
  • Gift Ideas
    • Gifts For Everyone
    • Gifts for Dad
    • Mother’s day
    • For The Girls
    • For The Kids
    • Teacher Gift Ideas
    • Christmas
  • Printables
    • Holiday
    • Gift Idea
    • LDS Primary
  • Travel
  • About
    • Terms
  • Contact
  • Nav Social Menu

    • Facebook
    • Instagram
    • Pinterest
    • RSS
    • Twitter

Gifts

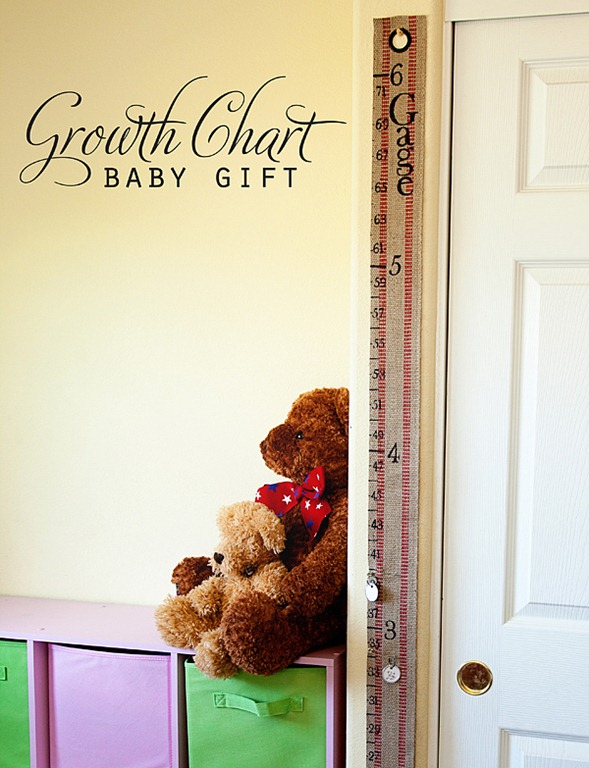
DIY Baby Gift ~ Portable Growth Chart Kit

112 · Aug 3, 2011 · 107 Comments

I grew up with a Mom who religiously made those cute little tick marks inside a door frame every year to mark our growth.  Sadly when we moved we didn’t get to take the door frame with us.  Sooo, I thought I would make a portable growth chart kit for my kiddos that can stay on the wall or be tucked away and taken out on special occasions.  Here is what you need…

Growth Chart 019 copy

…

Read On →

Valentine Cookie Cartons

0 · Feb 2, 2011 · 8 Comments

I am in love with Valentine’s Day this year.  I just can’t get enough of it and all the fun creations that come with it. 

Again… packaging is everything!!  I made some fun heart shaped chocolate chip cookies the other day, and thought this would be a fun Valentine goodie, but what should I put it in?

I found these lovely cartons at a restaurant supply store here in Vegas, they were super-cheap and I knew I could dress them up!

I designed a logo for the front of the carton which I printed on sticker paper,  basically one large label. You can find them at your office supply store. I then created a topper for the lid, and voila, done.  A perfect little container for my sweet little heart shaped delights!

Oh… and just because I {heart} you, I am going to share my printable for the Valentine cartons!! {Click the links below to download.}

Download the sweet label printable here

Download the carton topper printable here

Ribbon Christmas Trees {Tutorial}

288 · Dec 21, 2010 · 81 Comments

I wanted to do something different with my Christmas décor this year to break away from the traditional red and green. I decided to go with black and white.

But in an effort not to break the bank, I tried to make a lot of the new decorations. One thing that caught my eye this season was the ribbon Christmas trees we’ve seen so often. But I wanted to do them a little bit differently.

Ribbon Trees

Instead of folding the ribbon in half (picture on left), I looped it around (picture on right).

p_100576310_1-              ribbon-no-image

First I spray painted my Paper Mache cones black. Then I cut black and white stitched grosgrain ribbon into pieces ranging from 2.5 –4 inches. I started with the longer pieces at the bottom. After looping the ribbon, I secured each piece with hot glue, and finished row by row, shortening the ribbon lengths as I got higher.

Ribbon Trees 018

On one tree I alternated colors every row, and on the other I alternated each piece.

Ribbon Trees 024-

I finished the top with a bit more ribbon wrapped around the tip.

Ribbon Trees 013

Now I have two beautiful trees that go perfectly with my new décor!

Jamie_Signature[4]

whipperberry

12 Days of Christmas–Day One–Paper Wreath {Event}

1 · Dec 1, 2010 · 50 Comments

On the first day of Christmas, my true friend gave to me…

Are you excited? I’m excited!! We at WhipperBerry are all working like busy little bees to bring you… (da ta ta da!)

The Twelve Days of Christmas!

Let me explain. This is a gift giving experience for you and your family to spread some cheer this season. Pick a special person (or family), and secretly deliver a gift-from-the-heart 12 days in a row! If you want to deliver your final gift on Christmas Eve, then start on Dec. 13th.  We will have you all prepared by then! Today we are focusing on day one and our paper wreath.

Wreath 021 - 1

Starting today, and continuing each day through December 12th, we will be bringing you a free printable, a gift idea, and a tutorial as well!!  You can use our ideas or come up with your own, and we will be having a link party on the 13th where you can all showcase your creativity!

Kristin has made a wonderful FREE PRINTABLE  for you to use. You can choose to use our cute poem and gift idea, or fill out the blank one with your own ideas.

12Days1

Click on the picture for the free download!

On the first day of Christmas my true friend gave to me… One wreath to make my door pretty!

Here’s a suggestion of a wreath you can make to give, or you can choose to make or buy your own.

Pretty Paper Wreath Tutorial

Wreath 005 - 1

This paper wreath uses the same Mod Podge twisting method I used with my paper pumpkins.

Supplies:

  • Scrapbooking paper cut into 1 inch strips
  • Original Mod Podge
  • Kraft or packing paper
  • Spray Paint
  • Hot glue gun
  • Ribbon
  • Embellishments of your choice

Twist your kraft paper into a tight cord and form into a circle slightly smaller than you want your wreath to be. Mine measures about 10 inches in diameter. Secure with hot glue. Spray paint the ring black (or another color depending on the colors of your paper).


One at a time, dip your paper strips into Mod Podge, and twist them to form a stick.

After they are mostly dry, bend them into a circle, and wrap each piece around the kraft ring, hot gluing the ends to the back. Keep layering on paper strips until the wreath looks very full and even.


Wreath 010 - 1

Tie ribbon to the top to hang the wreath, and embellish it as you wish!  Heather decorated mine with cute holly berries and a wooden ornament. For more tips and tricks for twisting paper visit my pumpkin tutorial.

Wreath 008 - 1

Join us tomorrow for Day Two!

Signature[5]whipperberry

  • « Go to Previous Page
  • Page 1
  • Interim pages omitted …
  • Page 33
  • Page 34
  • Page 35

Primary Sidebar

Heather from Whipperberry
Hello... my name is Heather and I'm the creator of WhipperBerry a creative lifestyle blog packed full of great recipes and creative ideas for your home and family. I find I am happiest when I'm living a creative life and I love to share what I've been up to along the way... Come explore, my hope is that you'll leave inspired!

Footer

  • Privacy Policy
  • Crafts
  • Food
  • Gifts
  • Holidays
  • Home
  • Mom Life
  • Recipes
  • Travel

Copyright © 2026 · Seasoned Pro