• Skip to primary navigation
  • Skip to main content
  • Skip to primary sidebar
  • Skip to footer

Whipperberry

WhipperBerry • Your Home For Creative Inspiration

  • Home
  • Recipes
    • Starters
    • Easy Weeknight Dinners
    • Main Dish
    • Salads
    • Side Dish
    • Soups & Stews
    • Desserts
    • Breakfast
    • Miscellaneous
  • Tutorials
    • Creative Crafts
    • DIY Decor
    • Fabric Crafts
    • Food How-To
    • Jewlery
    • Paint Projects
    • Paper Art
    • Party Styling
    • Photography and Graphic Design
    • Silhouette
  • Holidays
    • Easter
    • Mother’s Day
    • Father’s Day
    • 4th of July
    • Halloween
    • Thanksgiving
    • Christmas
    • Valentine’s Day
  • Gift Ideas
    • Gifts For Everyone
    • Gifts for Dad
    • Mother’s day
    • For The Girls
    • For The Kids
    • Teacher Gift Ideas
    • Christmas
  • Printables
    • Holiday
    • Gift Idea
    • LDS Primary
  • Travel
  • About
    • Terms
  • Contact
  • Nav Social Menu

    • Facebook
    • Instagram
    • Pinterest
    • RSS
    • Twitter

decor

Change Your Photos, Not Your Walls: 5 Flexible Decor Ideas for Families

0 · Mar 20, 2026 · Leave a Comment

We’ve all been there. It’s your living room, and you see the big, empty wall screaming for some family photos. You’ve got a bunch of amazing photos and a hammer in your hand to make the first hole.

For some reason, however, you can’t seem to do it. You are nervous about getting the nails in the wrong spots. You are paralyzed by the thought of the gallery wall being crooked. You fear you will want to change it again next year after you do a new family portrait session.

You have just found yourself in the world of decor paralysis. Most busy moms and renters want to keep their security deposits, and the idea of so many permanent holes in their pristine drywall is a real fear.

The anxiety of committing to a wall arrangement can leave photos of children, pets, and vacations stuck in the phone, forever.With flexible decor, there is no need to choose between empty walls and drywall riddled with holes.

Seasonal rotational display methods keep homes feeling new and facilitate showcasing recent memories, all without the need to make permanent nail and hammer decisions. These are five decor ideas that allow families to easily change decor.

decor ideas

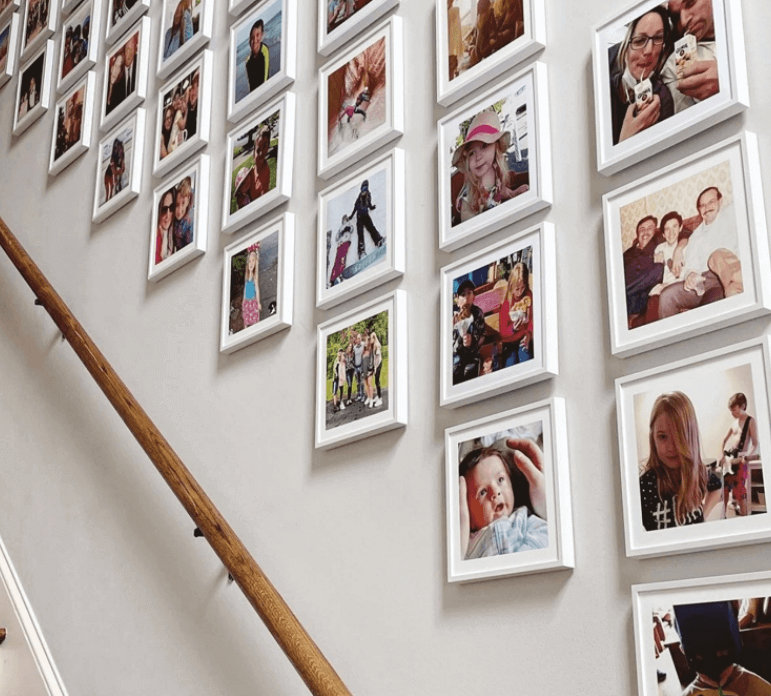
1. Embrace Removable Photo Tiles

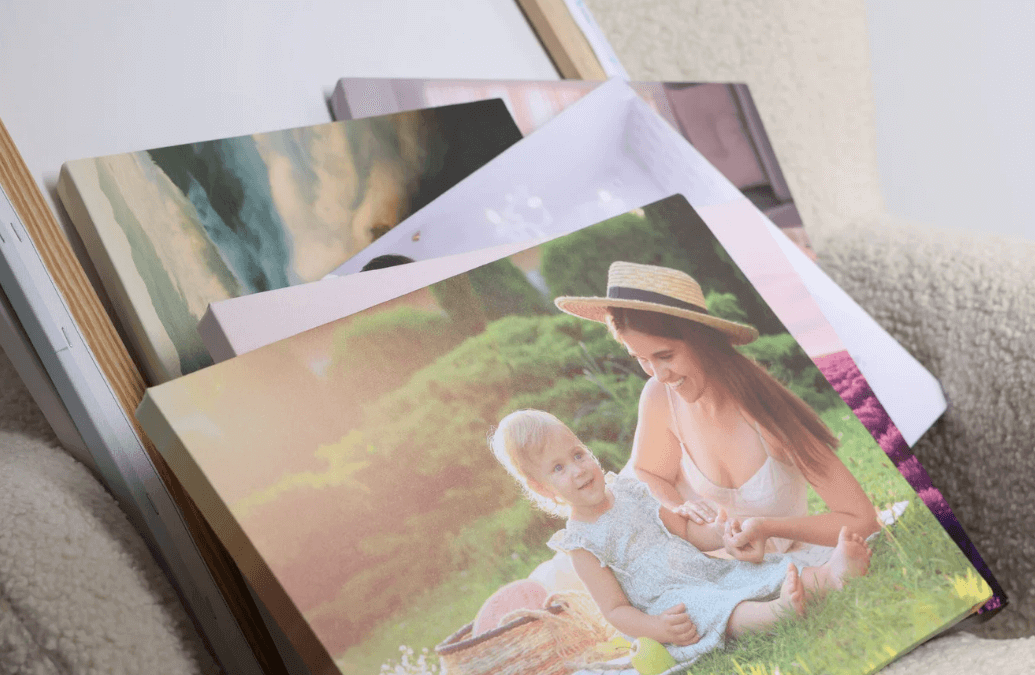
When instant home decor gratification is needed, removable photo tiles are a game changer. These photo blocks with a lightweight adhesive back can stick to your drywall without damaging it, and can be pressed on and pulled off an unlimited number of times.

With the ability to easily update decor seasonally, and for families living in rentals where no nails can be used, this is the ideal solution. It takes less than ten minutes to make an evenly spaced grid in your hallway. If one is unexpectedly too high, it can be peeled and stuck back on.

They provide a fantastic modern look. The sleek edges allow your walls to look clean without the bulk of traditional wooden frames. If you want to learn about the brand visual for your art and photography online and want to keep your design cohesive with your space, integrating your wallpics with your brand or family aesthetic will work seamlessly. It will take the stress out of interior design.

2. Design a Clip-and-Cable Display

For a more rustic, laid-back look clip-and-cable displays work great. This technique uses a length of twine, a slim metal wire, or a cord and crosses a section of wall. Then mini clothespins or metal clips can be used to secure a few of your favorite prints.

This is a great option for imperfect, everyday photographs. If you got a funny, candid picture of your child with spaghetti, clip it up! If your oldest child painted a great watercolor and it came home from school, clip it right up! It will make your wall a living scrapbook of the daily family life and will make it look alive.

You only require two tiny anchor points for hanging the wire, and you do not even need to level separate frames to get the look you are going for. If you are interested in how flexible displays can help narrate your family’s story at home and help with your personal brand, visit the guides for artists and photographers to shine online. Adopting these ideas for displays is not only about enhancing the aesthetic appeal of your space, but it also makes your most cherished memories shareable, and accessible, from anywhere. It’s also quick to update. With the display, you are free to change the prints frequently. Simply unclip the photos for the memories you would like to replace, and clip in the new ones whenever you get new 4×6 photos printed.

Read More: https://www.wallpics.com/blogs/news/boosting-your-brands-visibility-with-youtube-a-guide-for-artists-and-photographers

3. Create a Magnetic Photo Board

For more dynamic areas, such as a child’s play space or a home office, an excellent option is to use magnetic photo boards. Instead of hanging pictures separately, you can create a large, decorative magnetic board as a whole. After this, the space will act as your canvas.Consider using decorative magnets to overlap pictures and create a display that resembles a mood board. This display style creates unique texture and visual excitement to a room and increases interactivity and engagement from children. Each month you can consider a small family project of selecting pictures to add to the display board of family vacations or family pets.

Magnetic boards can range from shiny stainless steel to rustic galvanized metals. There are options that are covered in fabric making the back of the board invisible. These boards are great because you can match them to your furniture while keeping your photos from any thumbtack holes or sticky tape stains.

4. Install Picture Ledge Shelving

If you are fond of the style of ornate and heavy picture frames and complex gallery walls picture ledges are perfect for you. Picture ledges are designed to hold frames and have a small front lip that keeps the frames from sliding off the front.

If you add one or two long ledges in your living room, you will create a permanent stage for a revolving cast of characters. You can arrange some of your framed photos of different sizes against the wall, overlapping them for a casual but professional style. When autumn comes, you can change your bright summer beach photos for warm, autumn family portraits.

You can get picture ledges to add some narrative to your display. This works for those who want a home that reflects their changing family and their creative spirit. In addition to your framed images, you could place a small trailing plant, a favorite hardback book, or a little wooden sign for some extra character. This style reflects how artists and art buyers track interest over time, gauging popularity based on what is loved. Each time you change or add something to your photo ledge, you get a living, quantifiable expression of your family’s style.

Read Also: https://www.wallpics.com/blogs/news/measuring-success-key-email-marketing-metrics-for-artists-and-art-sellers

5. Blend in Digital Gallery Frames

Flexible decor is probably best exemplified by the major breakthroughs in the world of digital frames. Gone are the days of bulky digital frames with low-res displays. Today’s digital gallery frames are smart, high-grade products that look like matted photographs and feature anti-glare technology and high-end wood or metal bezels.

Imagine mixing a large digital frame into your gallery wall. It can offer limitless creative rotation, as you can upload thousands of images to it directly from your phone via Wi-Fi. You can schedule it to change images every few hours, or you can set it to show one stunning family portrait all week.

This is an optimum solution for the thousands of photos we take that may never be printed. By placing a high-end digital frame in a picture ledge or as the focal point of your changeable decor, you finally use all of the photos that live on your device, rather than the thousands of images you never printed. It alleviates all of the guilt of leaving those marvelous photos in the cloud where they’re virtually inaccessible.

framed photos

3 Quick Photography Tips for a Cohesive Look

Changing the photos on your display is great, but frequent changes can make your display look messy. Here are a few tips to make your gallery look cohesive:

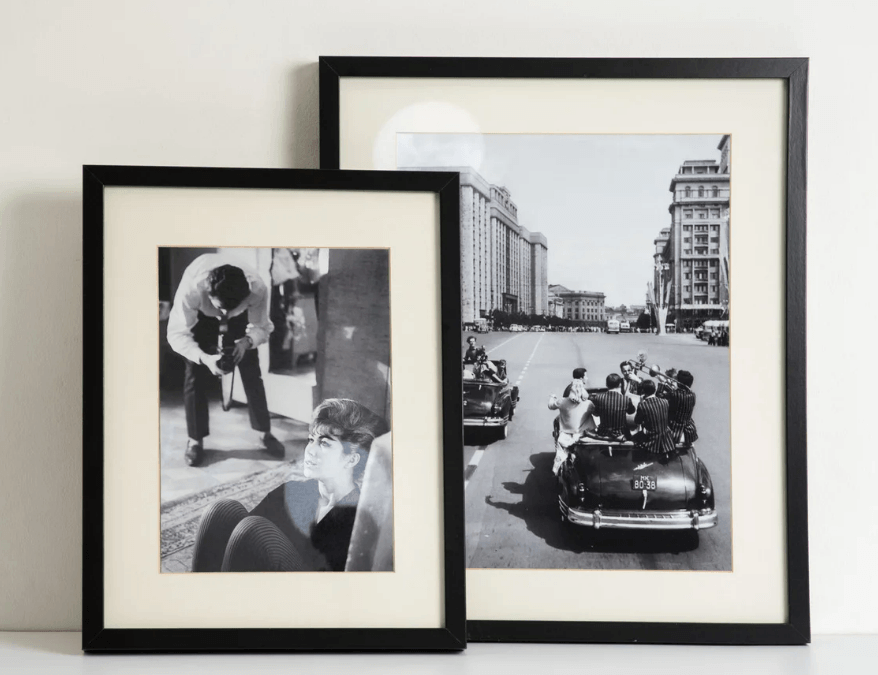
1. Go Completely Black and White

If your photos are colorful and have different lighting and background, you can put on a black and white filter to make your photos look cohesive. Black and white photos are classic and elegant. Most galleries have black and white to add a level of sophistication.

2. Chase the Natural Light

Whenever you are taking photos indoors, try to make sure your family is positioned so that they are in front of a window, especially if they are taking photos in the day. Photos taken in daylight look so much better than photos taken with indoors. Daylight photos look better and of higher quality.

3. Use Consistent White Space

If you are using digital mosaic tiles or thing of a grid display picture, try to have photos with a lot of white space in them, (like a shot of your children at the beach). A wide shot is a good balance to a tight shot and to prevent the wall from looking heavy.

Bring Your Walls to Life

Decorating a home can be a stressful undertaking, but it doesn’t have to be! You can create a beautiful and personal space without needing a level set of power tools, or a degree in interior design. Stress-relieving strategies give you the flexibility to change your space however and whenever you want. Some examples include clip-and-cable systems, pretty removable tiles, and stylish picture ledges.

As your family changes and grows, and as you make new memories, your home decor should be able to do the same. So put the hammer and the power tool down. The time has come to open your phone and stick stunning photos on your walls!

Best Custom Canvas Prints Online: Create Your Own Masterpiece in Minutes

0 · Feb 25, 2026 · Leave a Comment

There is something special about seeing a favorite photo displayed as beautiful wall art. A family vacation, a wedding moment, or even a simple snapshot from your phone can become the centerpiece of a room with the right print. Thanks to modern digital printing, you no longer need an art studio or design experience to create something that looks professionally made.

Today, custom canvas prints make it easy to turn everyday memories into meaningful home décor in just minutes. Whether you love clean gallery walls or cozy, layered spaces, canvas art adds warmth, texture, and personality to your home. By understanding how canvas printing works and what to look for when ordering, you can confidently create a piece that feels both timeless and uniquely yours.

prints on canvas

The Evolution of Canvas as an Art Medium

From Renaissance Origins to Modern Printing

Canvas became a foundational artistic surface during the 14th-century Renaissance, gradually replacing rigid wooden panels thanks to its portability and flexibility. Masters like Leonardo da Vinci and Michelangelo embraced it for larger, more transportable compositions. Early canvases were woven from hemp, though cotton and linen eventually took over as preferred materials for their superior stretchability. Craftsmen learned to prime surfaces with gesso—a chalky compound—that prevented oils from degrading the fabric beneath.

By the 1840s, early photographic processes like cyanotype made image transfer onto canvas possible for the first time, and offset lithography by the late 19th century opened the door to mass reproduction.

Key Innovations in Canvas Reproduction

The most transformative development came in the late 1980s with giclée printing—a high-resolution inkjet technique that uses pigment-based inks to reproduce imagery with remarkable color fidelity. The term derives from the French word for “spray,” a nod to its precise application method. Galleries adopted giclée widely because the reproductions could be nearly indistinguishable from originals. Since then, techniques including dye sublimation and UV printing have expanded what’s possible, producing vibrant, fade-resistant results across a wide range of finishes and materials.

Why Choose Canvas Prints for Home and Office Decor

Canvas offers a compelling combination of durability, aesthetics, and value. Archival-quality inks resist fading for 75 years or more under normal conditions, while the textured surface adds a painterly depth that framed prints behind glass simply can’t match. Canvas works equally well for photographs, panoramic landscapes, and digital artwork, and it scales from compact 8×10-inch pieces all the way to dramatic oversized wraps.

A family vacation photo printed on a 24×36-inch canvas, for instance, can anchor an entire living room—serving as a frameless, ready-to-hang focal point that carries real emotional weight without taking up a single inch of shelf space.

Step-by-Step Guide to Creating Your Canvas Print Online

Selecting and Preparing Your Image

Start with a high-resolution file—300 DPI at minimum—to ensure sharpness at larger sizes. Free editing tools make it easy to crop, adjust brightness, and refine composition before uploading. Applying the rule of thirds helps create visual balance, while converting to black and white can lend a timeless elegance to portraits and landscapes alike.

The Online Creation Process

Most platforms guide users through a straightforward workflow: upload your file, select dimensions and wrap style (gallery wraps fold the image around the edges for a seamless finish), then choose your material and finish. Cotton-polyester blends are a solid choice for budget-conscious buyers, while linen delivers a premium texture. Matte and satin finishes help minimize glare in brightly lit rooms. A 3D preview lets you confirm your choices before submitting—many users complete the entire process in under five minutes, including turning a pet portrait into a ready-to-ship 16×20-inch piece.

Production and Quality Assurance

Behind the scenes, canvas is stretched over kiln-dried wood frames for warp resistance, then sealed with UV-protective coatings that guard against dust and moisture. Pigment-based inks ensure color accuracy aligned with professional Pantone standards, maintaining consistency between what you see on screen and what arrives at your door.

custom canvas prints

Tips for Selecting the Best Online Canvas Print Services

When evaluating services, keep these factors in mind:

  • Print quality: Look for giclée certification or an equivalent standard for reliable color accuracy.
  • Turnaround and shipping: Reputable providers typically deliver within two to seven days; tubed shipping is preferable for large prints.
  • Material options: Linen for authenticity, cotton for affordability, PVC for outdoor use.
  • Eco-conscious practices: Sustainable inks and responsibly sourced materials are a good indicator of overall quality commitment.

Platforms that offer resolution-checker tools and customer photo galleries give you a realistic sense of what to expect before you buy. Prioritizing services with color calibration profiles also helps ensure that the colors on your display translate accurately onto the finished canvas.

Maintaining and Caring for Your Canvas Masterpiece

A little care goes a long way in extending a canvas print’s lifespan. Dust gently with a microfiber cloth and avoid placing the piece in direct sunlight or in rooms where humidity regularly exceeds 60%. Hanging the canvas one to two inches from the wall encourages air circulation, which reduces moisture buildup at the back. Professional cleaning every five to ten years keeps colors looking vibrant—making canvas a genuinely heirloom-worthy investment compared to standard paper prints, and a meaningful way to preserve memories for generations to come.

Bringing Your Memories to Life on Canvas

Custom canvas prints offer more than decoration. They turn personal moments into lasting pieces of art that grow with your home and your family. With today’s easy online tools, creating meaningful wall art takes only a few steps, yet the impact can transform an entire room.

By choosing quality materials, thoughtful sizing, and a trusted service, you can design a canvas that feels polished and personal at the same time. Whether you are refreshing a gallery wall, styling a new space, or preserving a favorite memory, a well-made canvas print adds warmth, texture, and heart to your home for years to come.

The Ultimate Checklist for Perfect Christmas Light Displays

0 · Sep 10, 2025 · Leave a Comment

Want an unforgettable Christmas light display that has neighbors stopping to gawk?

Millions of homeowners have it on their Christmas wish list each year. They dream of big sparkling displays that will amaze and delight families and friends.

Here’s the thing…

Most holiday decorators jump into the decorating season with little or no planning. The result? Explosions of tangled lights, blown fuses, and everything from no displays at all to downright disaster areas.

Yet here’s the real kicker…

According to the Consumer Product Safety Commission, over 18,000 Americans will end up in the emergency room this holiday season due to Christmas decoration related injuries. That’s 18,000 ER visits just in the US due to injuries and accidents from Christmas lights and other decorations.

The good news? We have the perfect Christmas light installation checklist to help you turn out jaw-dropping displays that keep your family safe.

What you will learn:

  • The safety plan before you even install your lights
  • Christmas light installation equipment and tools you need
  • How the pros professionally install outdoor displays
  • Safety protocols that work
  • Expert maintenance and storage tips

Safety First: What Equipment You Need

You can’t set up a safe, successful display without having the right equipment. Just as important, it’s essential that you understand how to properly use every item. Professional christmas light installation in Louisville knows this better than most.

Here’s the thing…

To create safe, stunning displays, you need:

  • Quality ladder with stabilizers. Those wobbly stepladders aren’t stable enough for this job.
  • Non-slip shoes. Those regular sneakers are no good for climbing on icy rooftops, either.
  • GFCI outlets. Essential for all exterior lighting safety.
  • Heavy-duty extension cords. Indoor extension cords are not designed for exterior use.
  • Light clips and mounting hardware. Never use nails or staples for securing lights.

Professional Christmas light installation companies spend a lot of money on training and buying top-notch equipment because they know that safety and quality go hand in hand.

Christmas Light Displays

The Pro Install Process: DIY or Hire a Professional

Ready to learn how the pros design and set up those picture-perfect displays?

It’s a tried-and-true process that eliminates a lot of the guesswork. You can use the same method.

Here’s how it works:

  1. Start from the top and work down. Begin with rooflines, then work your way down.
  2. Follow the 3-to-1 ladder rule. For every 3 feet of height, move ladder base one foot from the wall.
  3. Test everything before installation. You never want to be up on a ladder with a dead bulb and no way to test it.
  4. Install GFCI protection on all electrical connections. These special outlets shut off power if moisture is detected.
  5. Work slowly and carefully. Rushing leads to accidents.

Here’s some perspective…

Professional Christmas light installation services have seen demand increase by 20% in the last five years. Professional companies like Elite Christmas Light Installation have an easy answer as to why. Demand has increased because more and more people are learning that proper installation requires training and the right equipment.

Perfect Christmas Light Displays

Key Safety Protocols to Follow

Safety is more than having the right tools. Safety is following proven procedures.

Here are some you can never overlook:

  • Never work alone when on ladders. Always have someone spot you from the ground.
  • Check the weather forecast. Wet and icy conditions are incredibly dangerous.
  • Inspect all electrical connections before you install. Make sure every connection is secure and moisture-proof.
  • Don’t overload your electrical circuits. Most circuits safely handle 15-20 amps of power.

Fun fact…

65% of severe injuries involving Christmas light installation involves a ladder or roof fall. The vast majority of these accidents can be easily prevented with proper safety protocols.

Common Installation Mistakes (And How to Avoid Them)

There are lots of rookie and even experienced DIY homeowner mistakes when it comes to Christmas light installation. Here are the big ones:

  • Mixing indoor and outdoor lights. Outdoor lights should never be used indoors or vice versa.
  • Using damaged lighting equipment. If you see any frayed cords, throw that entire strand away.
  • Improperly securing lights. Use only light clips and avoid nails and staples.
  • Ignoring manufacturer guidelines. Those little safety pamphlets that come with lights are there for a reason.

The reality is that most installation problems come from rushing or cutting corners on safety.

Power Management: Electrical Safety and Other Tips

Getting the power requirements right is key for both safety and stunning displays.

LED lights draw 80% less power than traditional incandescent bulbs. This means you can go bigger and brighter without stressing your electrical system.

Calculate your electrical load carefully and add up wattage, dividing by circuit voltage (120V) to determine amperage requirements.

Use dedicated circuits when possible. Christmas lights shouldn’t be fighting kitchen appliances for power.

Install timers and other controls to reduce overheating risks.

Remember, Christmas lights are responsible for 40% of Christmas tree fires. Proper electrical management is essential for keeping your home safe.

Checklist for Christmas Light Displays

Professional Christmas Light Installation vs. DIY

Here’s a quick reality check…

90% of Americans put up outdoor Christmas lights. The problem is, a lot of people struggle with complex installations or have safety concerns.

When to DIY

  • Single-story application
  • Simple roofline displays
  • Limited electrical requirements
  • You have the proper equipment and experience.

When to call the Pros

  • Multi-story installations
  • Complex rooflines
  • Large-scale commercial installations
  • You lack the proper equipment and training.

Professional installers have specialized equipment, insurance, and experience to help create stunning displays that avoid unnecessary risks.

Wrapping Up: Light Up the Holidays Safely

To build jaw-dropping Christmas light displays you must focus beyond just bright lights and flashy designs.

Safety planning and execution of the perfect Christmas display bring family happiness without exposing anyone to danger.

We can’t lie to you. Holiday decorating accidents cause thousands of injuries each year. Careful planning and proper equipment along with safety protocols enable you to create incredible displays which transform into lasting family traditions for years to come.

Ensure your Christmas light displays bring joy not injuries whether you handle it yourself or hire professionals.

Budget-Friendly Ways to Decorate Your Home with Homary

0 · Sep 2, 2025 · Leave a Comment

Transforming your living space into a home that reflects your style and personality doesn’t have to break the bank. Homary offers a wide range of stylish furniture and decor solutions to suit every taste and budget. If you’re on the lookout for cost-effective ways to spruce up your space, consider using Homary discount vouchers at Latest Deals.

Finding Your Style

Unearthing your unique decor style can feel akin to embarking on an archaeological dig. Layers must be peeled back to reveal the gems beneath – those gems being your personal preferences. Ever glanced at a rustic log cabin with cozy corners and felt an unusual pull? Or perhaps your heart skips a beat every time sleek, modern lines parade across your Instagram feed.

Start by spending some time identifying what styles truly hook your attention, whether it’s the clean simplicity of modern looks, the warmth of rustic charm, or the unpredictable dynamism of the eclectic. This self-awareness will light your way in the labyrinth of shopping decisions.

House adorned with Christmas lights for budget-friendly decor

But where to gather your thoughts and ideas? Inspiration boards are your best buddies. No need to limit these boards to Pinterest alone. Run to traditional home decor magazines or other visual platforms, and start gathering images of rooms, designs, or items that make you think, “Oh yes, that’s what I want.” This collage of desires morphs into your North Star as you embark on your shopping spree with Homary.

The reward of this small exercise is a home with such a strong resonance with your soul, it pulls a note of contentment from within. You’d be creating a space that’s not just decorated, but steeped in your essence. That’s the real win.

Essentials for Every Room

When beginning your home redecoration journey, start with the basics. Every room has its non-negotiable features, pieces of furniture or decorations that set the tone and serve as the foundation for the rest of the room’s décor. Here’s a snapshot of what to focus on for each of the main rooms:

● Living Room: This is where you and your guests spend much of your time, so comfort is paramount. Begin with a plush sofa, large enough to seat your usual number of guests. Then, find a coffee table that compliments the style of the sofa and is the right size for your space. Finally, illuminate the area with lighting that suits the room’s ambiance but also fulfills your functional needs, be it for reading, watching movies, or socializing. Don’t forget to add décor that reflects your personality, like wall art, throw pillows, or a statement piece. Seasonal touches, such as Halloween art from The GOAT Wall Art or autumn prints, bring festive charm.

● Bedroom: Sleep is one of the most important aspects of our lives, so investing in a quality bed frame and mattress should be a priority. Once these essentials are in place, you can focus on the aesthetics, choosing a headboard and bed linens that match your personal style but also promote a peaceful, calming environment for restful sleep.

● Kitchen and Dining Area: Functionality rules in these areas, but that doesn’t mean compromising on style. Consider multi-purpose furniture like extendable dining tables for adjustable guest seating. Balance out the room with clever storage units that keep common items at easy reach, yet shielded from sight. Modern designs can allow these units to be an appealing component of your décor—think open shelving or stylish cabinetry.

Remember, while setting up these essential items, you’re not just filling space. You’re creating an environment that combines functionality with your personal design preferences. Once you have these central pieces in place, you can then look towards accessorizing and embracing décor trends. Homary provides an expansive selection of stylish, quality essentials that won’t hurt your wallet, helping you establish a home that truly feels like your own.

Embracing Trends

Trends bring freshness to any home, but they should enhance your style rather than replace it. This year it might be bold colors, next year it could be soft pastels. Add these shades through pillows, accent chairs, or wall paint for an instant update.

Cozy living room with furniture and christmas tree decor

Patterns also make an impact. Try geometric prints, stripes, or dots in rugs, curtains, or cushions. For materials, experiment with natural fabrics, velvet textures, or brass finishes.

Keep balance in mind. A single trend piece can transform a room without overwhelming it. Small updates like new throws or updated lighting keep your home current while your core style stays intact.

Making the Most of Discounts

Frugality and style can go hand in hand when it comes to decorating your house. One of the most efficient ways to keep your costs down while still personalizing your space is by taking full advantage of the discounts that Homary offers.

Staying Informed on Deals

To maximize savings, keep an eagle eye on Homary’s website or join their newsletter for the latest deals. New offers pop up regularly and may include:

● Seasonal sales

● Special promotions on specific product lines

By staying attuned to the sales schedule, you’ll be able to anticipate the best time to purchase items like a velvet accent chair or a modern pendant light you’ve been eyeing.

Using Discount Vouchers

● Extra Savings: Discount vouchers can add extra savings, especially when combined with ongoing sales.

● Strategic Usage: Use vouchers to further reduce prices on sale items or to cut costs on higher-ticket pieces.

These vouchers act as a secret weapon, allowing you to elevate your home’s decor without elevating your budget.

Maximizing Savings on Larger Purchases

Some Homary discounts offer percentage savings that increase with the purchase amount. To capitalize on this:

● Group Purchases: Buy in bulk or group smaller purchases together for maximum savings.

● Comprehensive Revamps: Plan larger buys instead of making piecemeal purchases.

By using discounts strategically, you can achieve your desired home transformation without emptying your wallet. Staying informed, timing your purchases, and using tools like vouchers and sales will ensure you get more bang for your buck.

Room-by-Room Guide

Sprucing up your house involves more than buying a few new furniture pieces, it involves creating moods and telling your unique story. Here’s a simple, room-by-room guide to help you do just that:

● Living Room: This is your stage, your most public room, so don’t shy away from making a statement. Consider a unique conversation piece, an abstract sculpture, a bold rug, a large piece of art or an unconventional coffee table book that expresses your distinctive tastes. With Homary, you can explore a vast selection of unique furnishings and décor to bring your living room to life.

● Bedroom: The ultimate private sanctuary. In addition to the bed, invest in adding layers of texture: think along the lines of plush cushions in luxurious fabrics, dreamy throws and drapes, and statement curtains. To further ramp up the potential for relaxation, shop nightstands and lampshades from Homary’s extensive collection.

● Bathroom: Often overlooked during the decorating process, your bathroom is a space of rejuvenation, so treat it as such. Subtle, low-cost upgrades such as fluffy new towels in a coordinated color, the addition of a soft bath mat, a fresh, seasonally themed shower curtain or even a quick-growing indoor plant can add a spa-like aura and spruce up this small, yet important space. Homary’s assortment of bathroom accessories can give you endless ideas.

Taking a room-by-room approach reduces the overwhelming nature of a full-house decorative redesign – and your house, in turn, becomes a compilation of spaces that truly reflect your personal style. And remember, your home should evolve as you do, so feel free to revisit and redefine your décor as regularly as you please. With Homary’s diverse offerings and insightful discounts, you’ll have all the tools necessary to customize your environment. Enjoy the journey!

Incorporating personal touches in your space

It is key in making it feel more like home. After all, your home should reflect not just your style, but also your memories, your experiences, and your personality. Instilling these elements into your living space will undoubtedly create an environment that you not only appreciate but feel deeply connected to.

Displaying family photos

Consider displaying family photos or cherished snapshots from unforgettable vacations to add a nostalgic layer to your home. Combining these with elegantly framed artworks you’ve personally created gives your home a unique artistic touch that can spark conversations with guests or simply serve as pleasant daily reminders of your talents and passions.

Mementos

Don’t forget about mementos – that tiny cactus from your trip to Arizona or the quaint tea set you fell in love with at a market in Tokyo. These pieces bring a world-travelled flare into your humble abode and certainly add depth and a story-telling aspect to your space.

DIYS

Of course, another great way to personalize your home is by diving into some do-it-yourself (DIY) projects. Whether it’s a beautiful macrame wall hanging, a hand-painted vase, or a shabby-chic photo board, these works give your home an even more authentic feel. Plus, they provide a great opportunity to show off your skills and flair.

Cozy living room decorated with christmas tree for budget-friendly holiday ambiance

In conclusion, don’t be afraid to make your house a true reflection of yourself. The more personal elements you include, the more you’d be able to say, with no holds barred, that it’s your home. Homary can provide those essential pieces, but it’s your personal touches that will make them shine in your unique space.

Final Tips for a Cohesive Look

When decorating your home, it’s not just about filling empty spaces with beautiful pieces. It’s about creating a harmonious environment that speaks to who you are. To achieve a cohesive look, there are three key elements to consider: consistency, balance and proportion, and the art of mix and match.

Consistency

First, let’s talk about consistency. Sticking to a consistent color palette and decor style throughout your home can make it feel well thought out and unified. Whether you’ve decided to go minimalist with grays and whites, or you’re a rainbow lover who cannot do without a splash of color, keep your eye on the ball. Decidedly, maintaining a common design thread can be the difference between a house that feels jolked together and a home that exudes a calming energy.

Balance and Proportion

Then there’s balance and proportion; these are the secret sauce to functionality. Have you ever walked into a room and thought, “Something’s off here?” Odds are, the furniture dimensions and their placements didn’t match. A gigantic sofa in a tiny room not only gobbles up all the open space but also makes moving around a chore. On the other hand, a modest-sized chair in a large room may feel lost. Strive for a thoughtful furniture-to-room size ratio and remember everything in its right place; space planning is key.

Mix and Match

Finally, dare to mix and match. It’s a myth that everything has to match. A home brimming with catalog furniture can feel impersonal. So why not mingle your Homary finds with precious heirlooms and quirky flea-market treasures? Pair that sleek modern lamp with your grandma’s vintage table, prop a cutting-edge Homary art piece on a distressed wall for an edgy twist. This strategy instills character into your dwelling.

So, there it is. You don’t need to be an interior design pro to transform your home into an aesthetically pleasant haven. All it takes is a bit of consistency, balance, and a bold spirit to mix and match. Happy Homary redecorating!

  • Page 1
  • Page 2
  • Page 3
  • Interim pages omitted …
  • Page 8
  • Go to Next Page »

Primary Sidebar

Heather from Whipperberry
Hello... my name is Heather and I'm the creator of WhipperBerry a creative lifestyle blog packed full of great recipes and creative ideas for your home and family. I find I am happiest when I'm living a creative life and I love to share what I've been up to along the way... Come explore, my hope is that you'll leave inspired!

Footer

  • Privacy Policy
  • Crafts
  • Food
  • Gifts
  • Holidays
  • Home
  • Mom Life
  • Recipes
  • Travel

Copyright © 2026 · Seasoned Pro