It’s officially Holiday Season! One thing that I LOVE about the Holidays is creating my own custom decor for our home. Love FARMHOUSE decor?
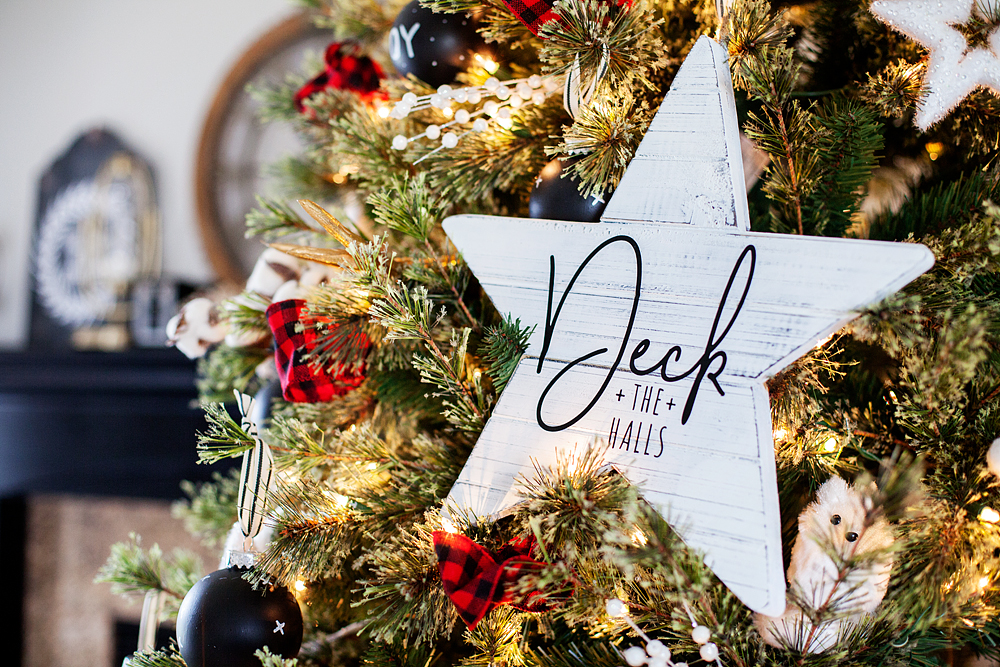
Then you are going to LOVE this Farmhouse-inspired Christmas Carol Star ornament that you can create for your home. This week I’ve teamed-up with DecoArt and Cricut to create some new ornaments for my Christmas tree this year.
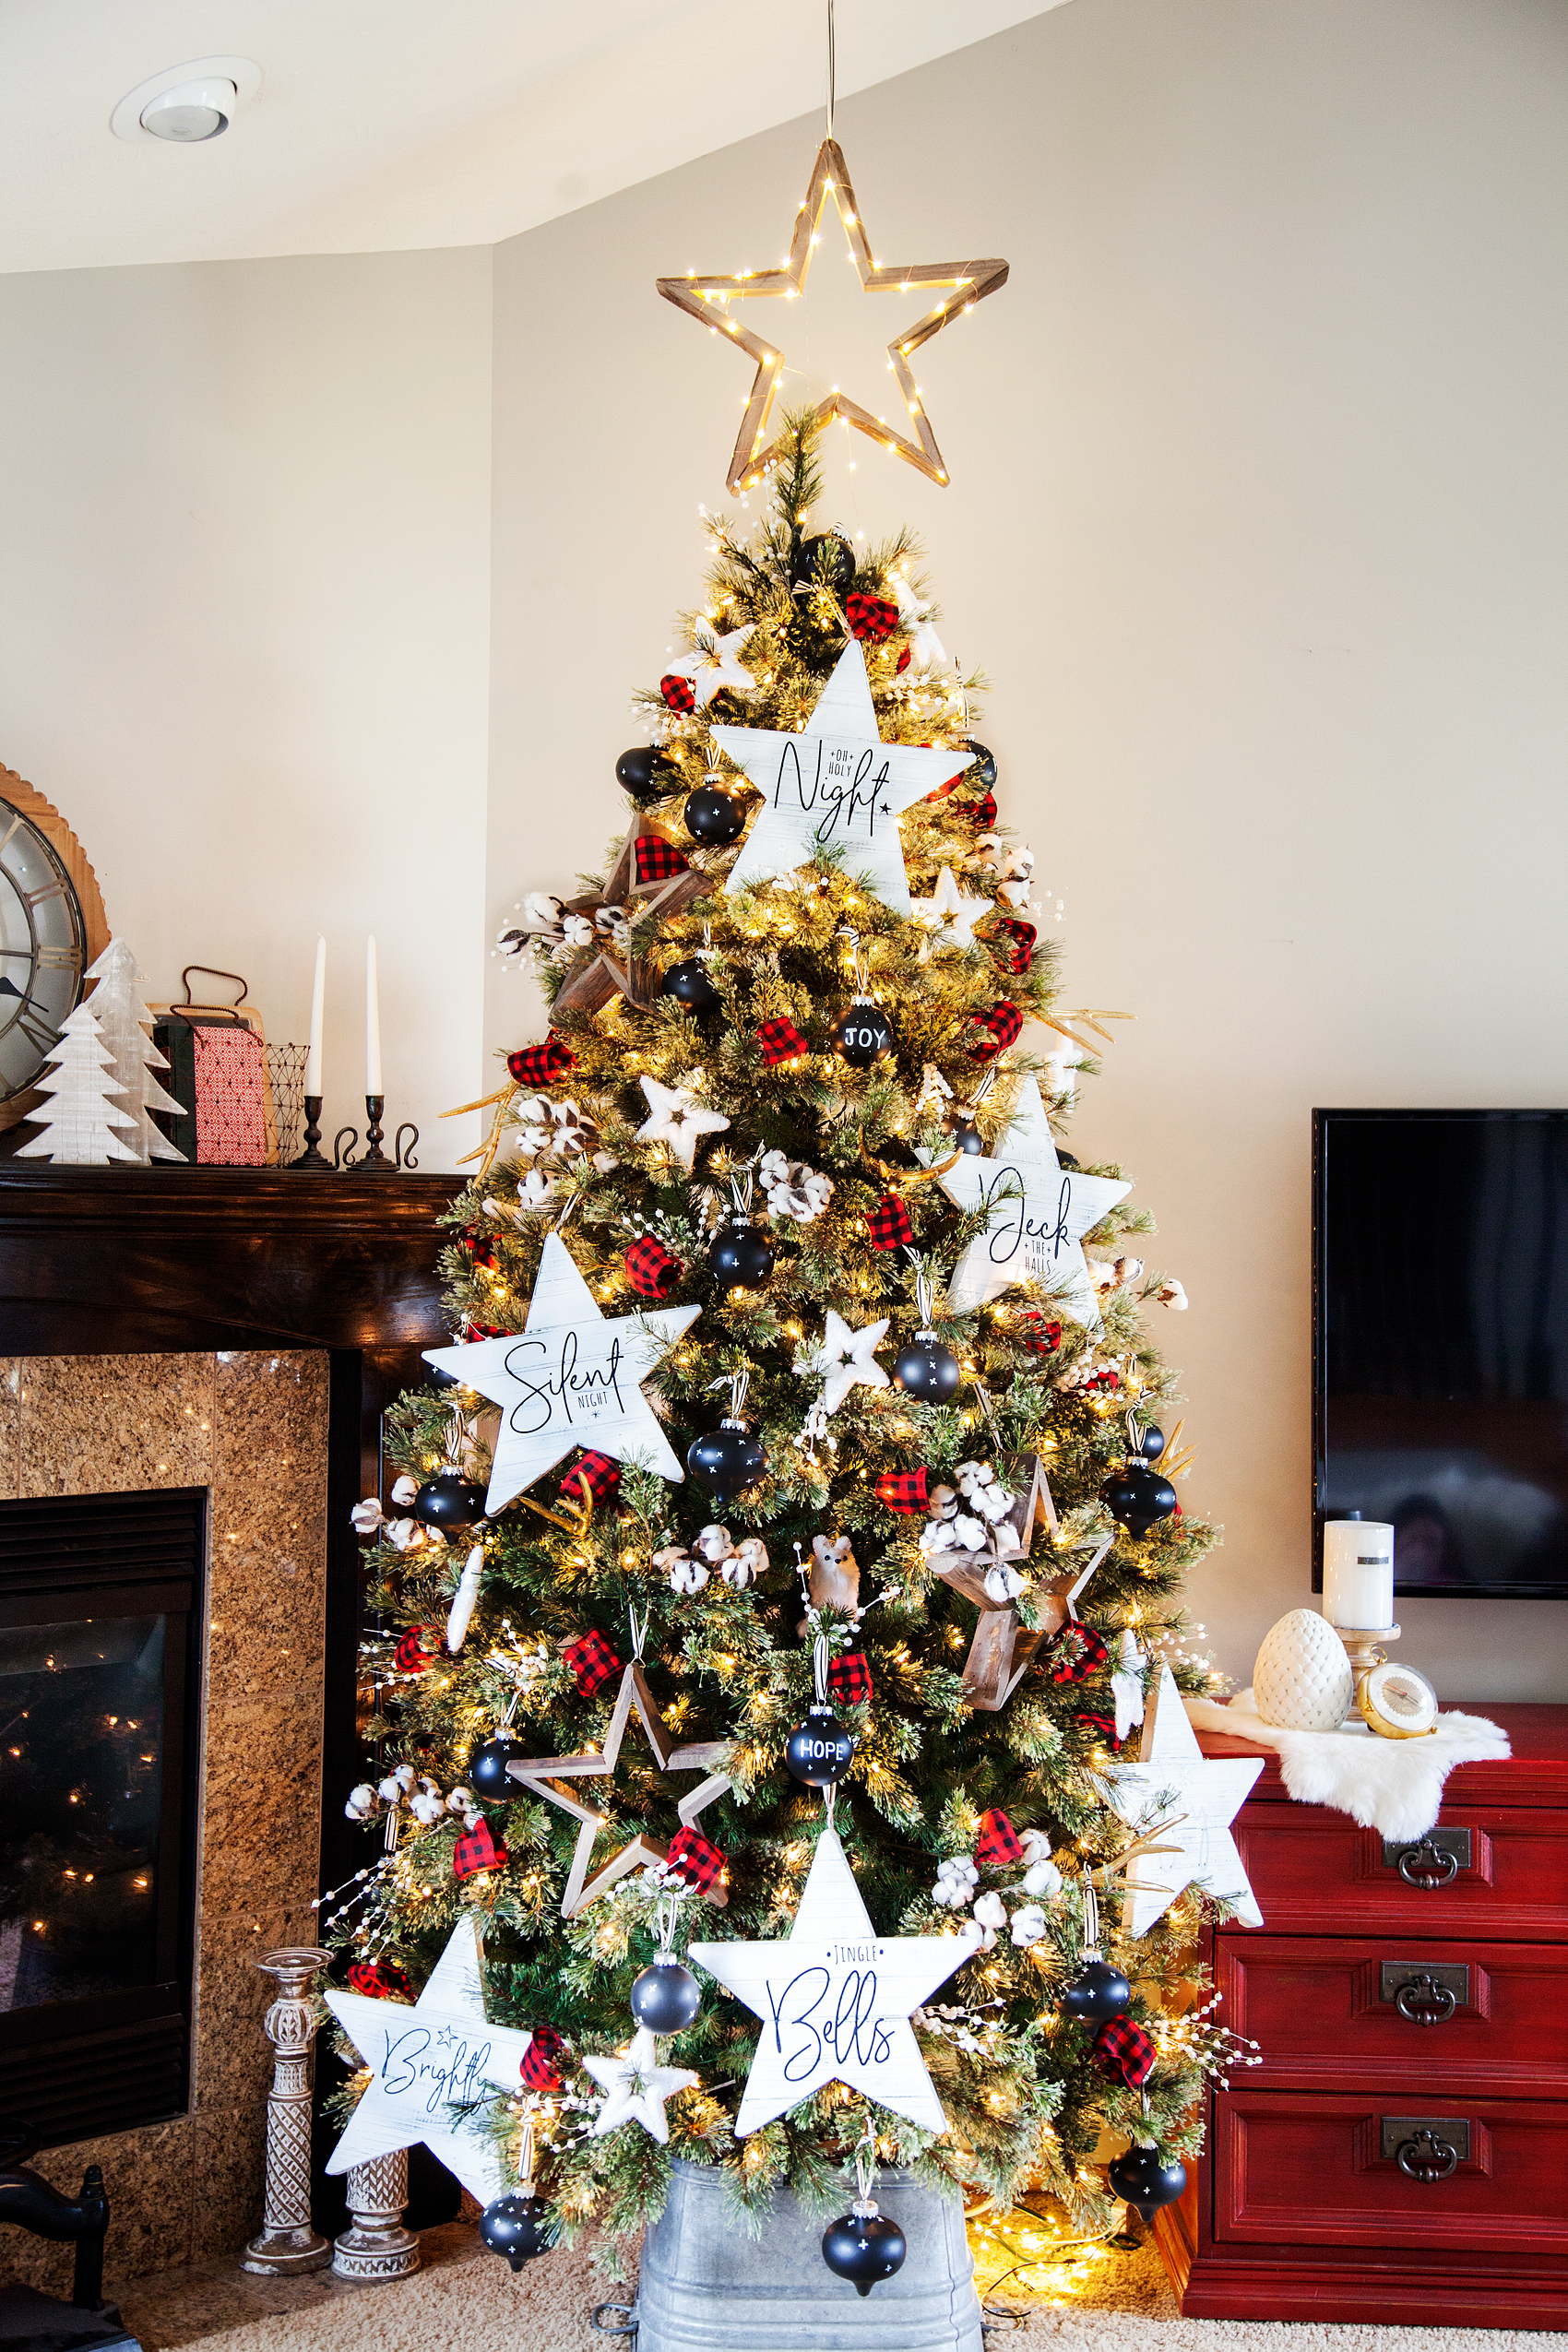
We decided to go with the star of Christmas theme, so… I thought it would be fun to chalk paint some large wood stars and then put titles of Christmas Carols on them. They turned out so cute… Come learn how to make them for yourself.
A few years ago, one of my good friends had the most beautiful Christmas trees. She had large stars all over the tree and I just adored it.
I asked her where the stars were from and I was devastated to learn that they were given to her from a friend who found them discarded from a department store after the holidays. DANG! There was no way of finding a set of my own.
This year, I decided it was time to make some large stars of my own. The timing couldn’t be more perfect! DecoArt and Cricut have teamed up this year to create all kinds of fabulous fun this Holiday season…
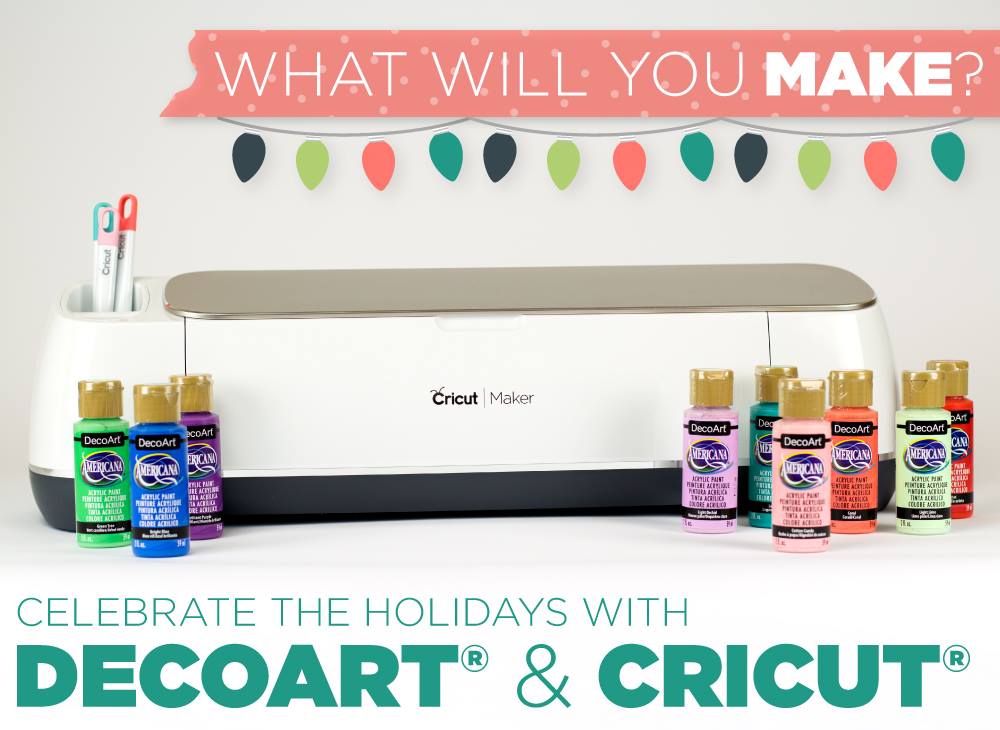
I love it when to amazing companies come together to inspire all of us to bring a little bit of our personalities into our home. These two are perfect for that. I’m sure that this will tickle your fancy… You’ll want to visit the DecoArt Blog to check out the GIVEAWAYS DecoArt & Cricut have up their sleeves this year!
Christmas Carol Stars Supply List
- raw wood stars from Amazon
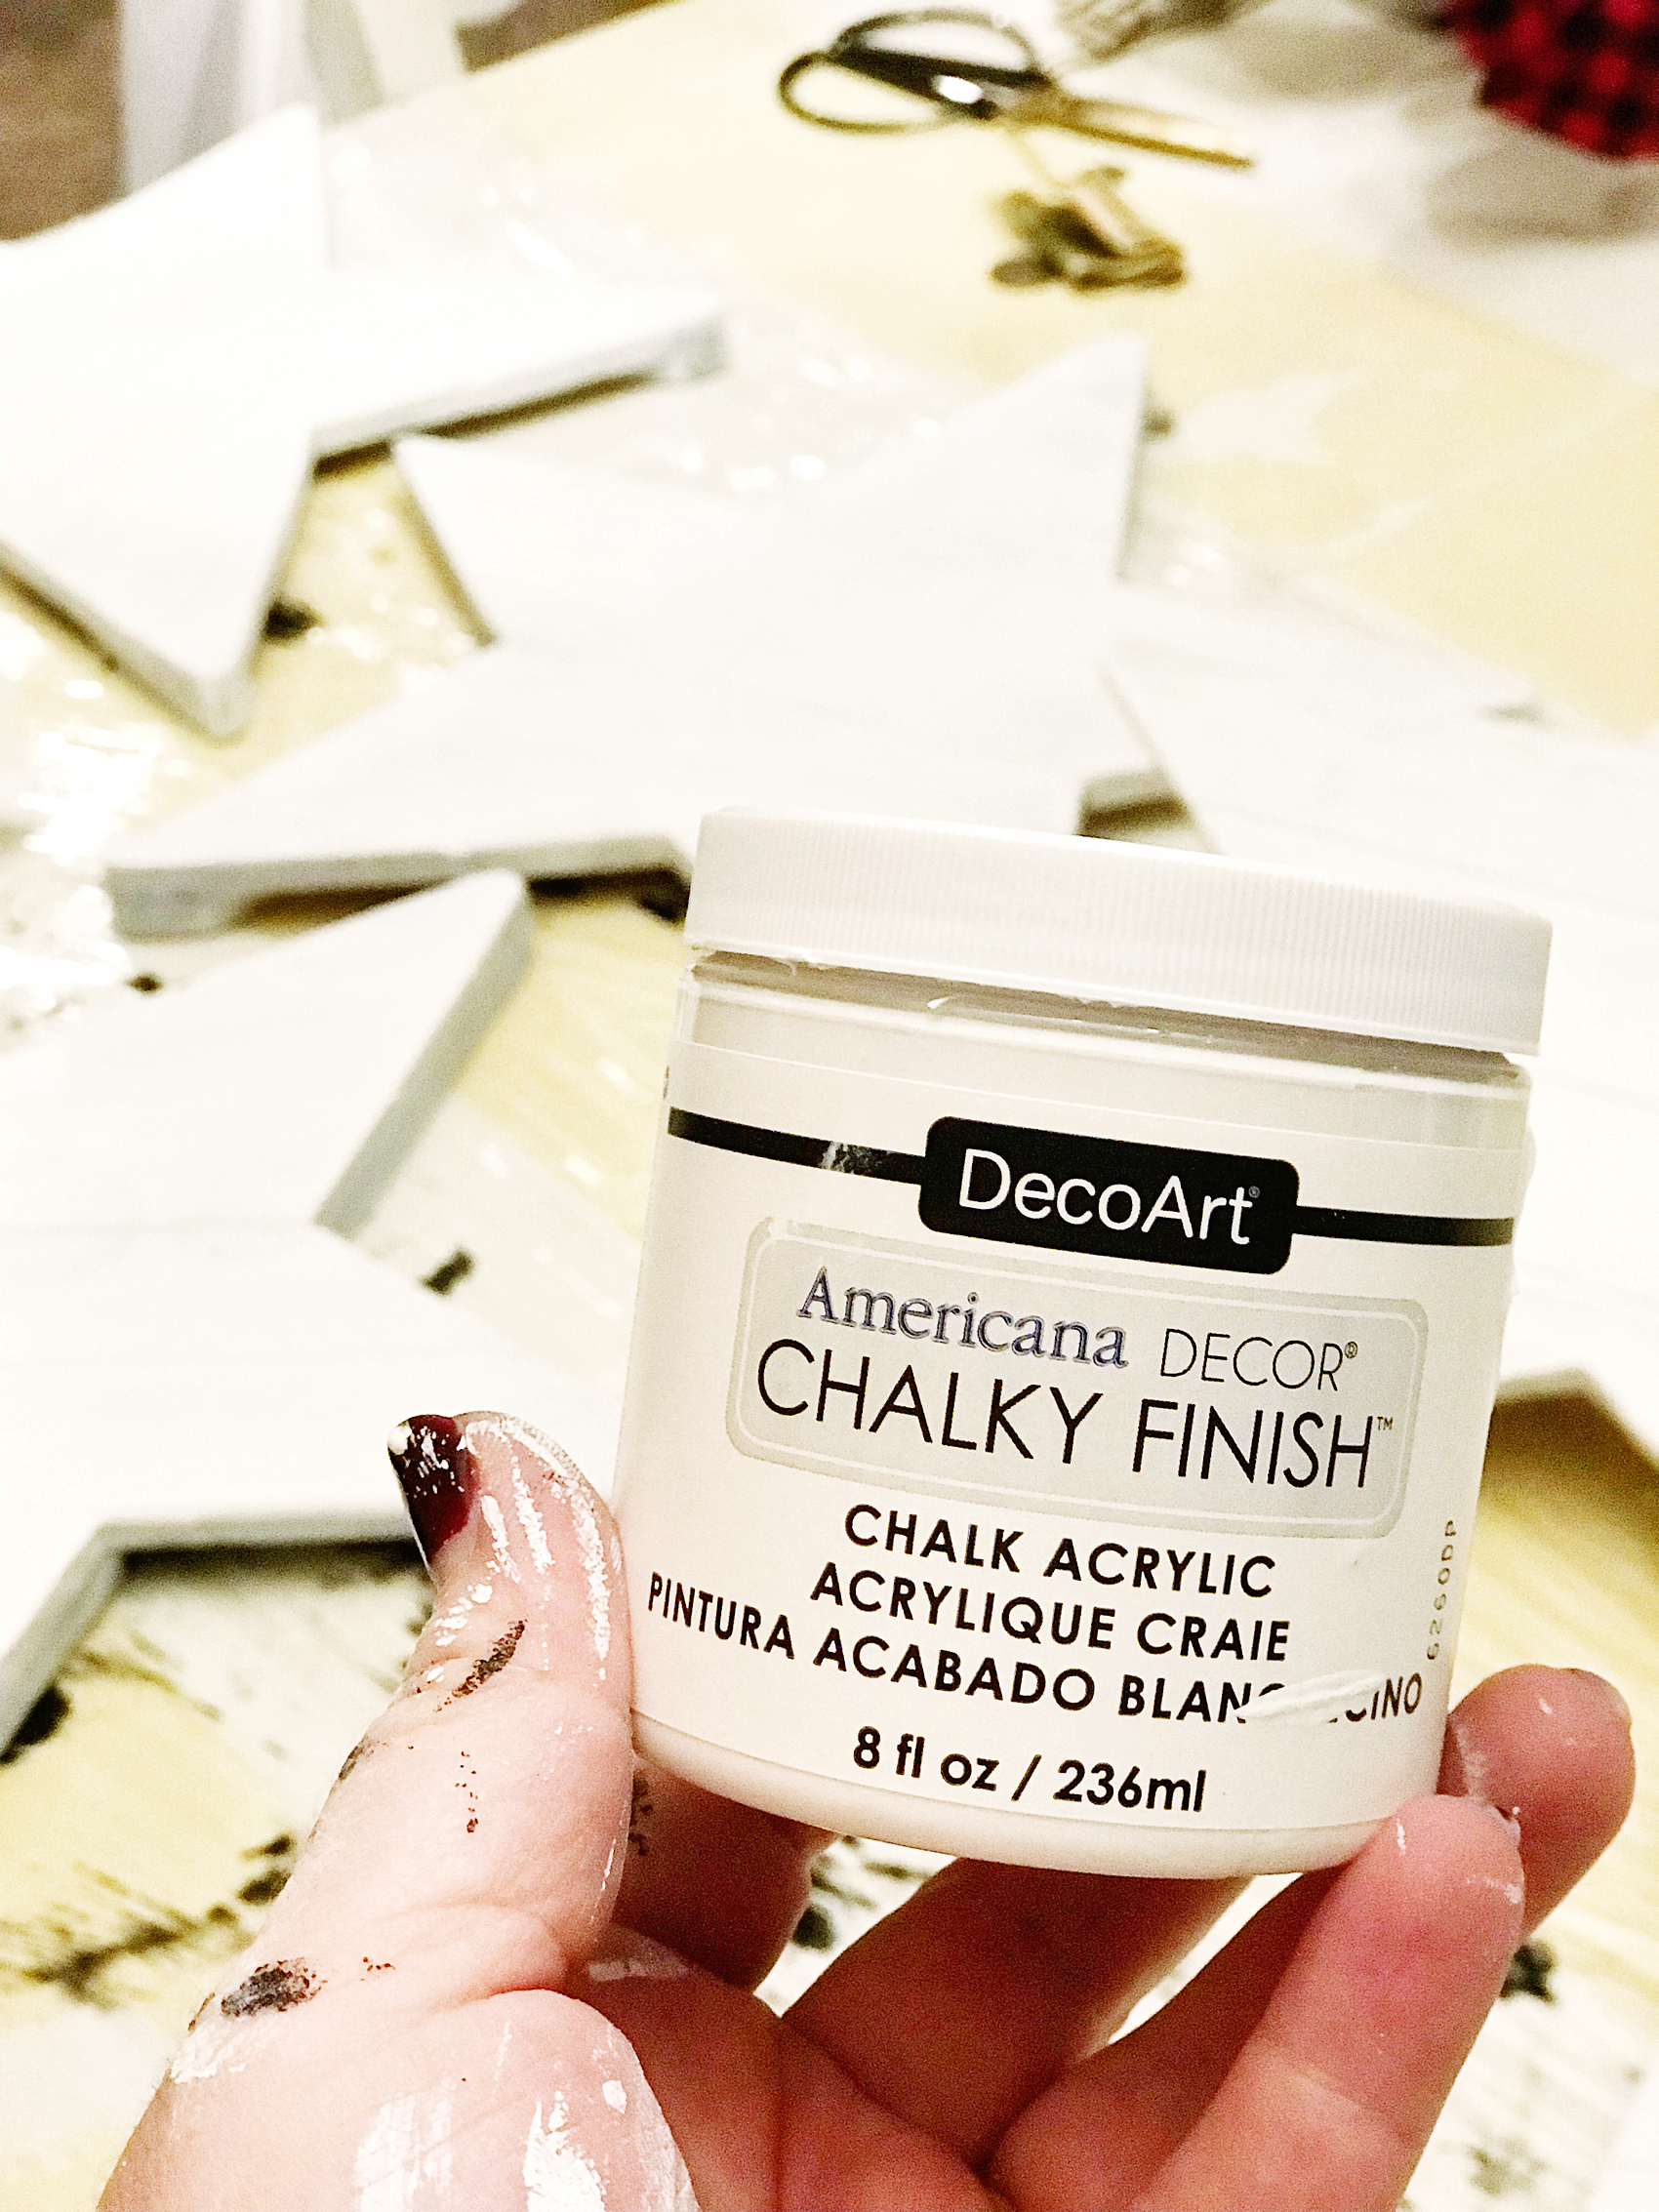
- Americana Decor Curb Appeal – Black
- Americana Decor Chalky Finish – Everlasting
- paint brush
- 250 grit sandpaper
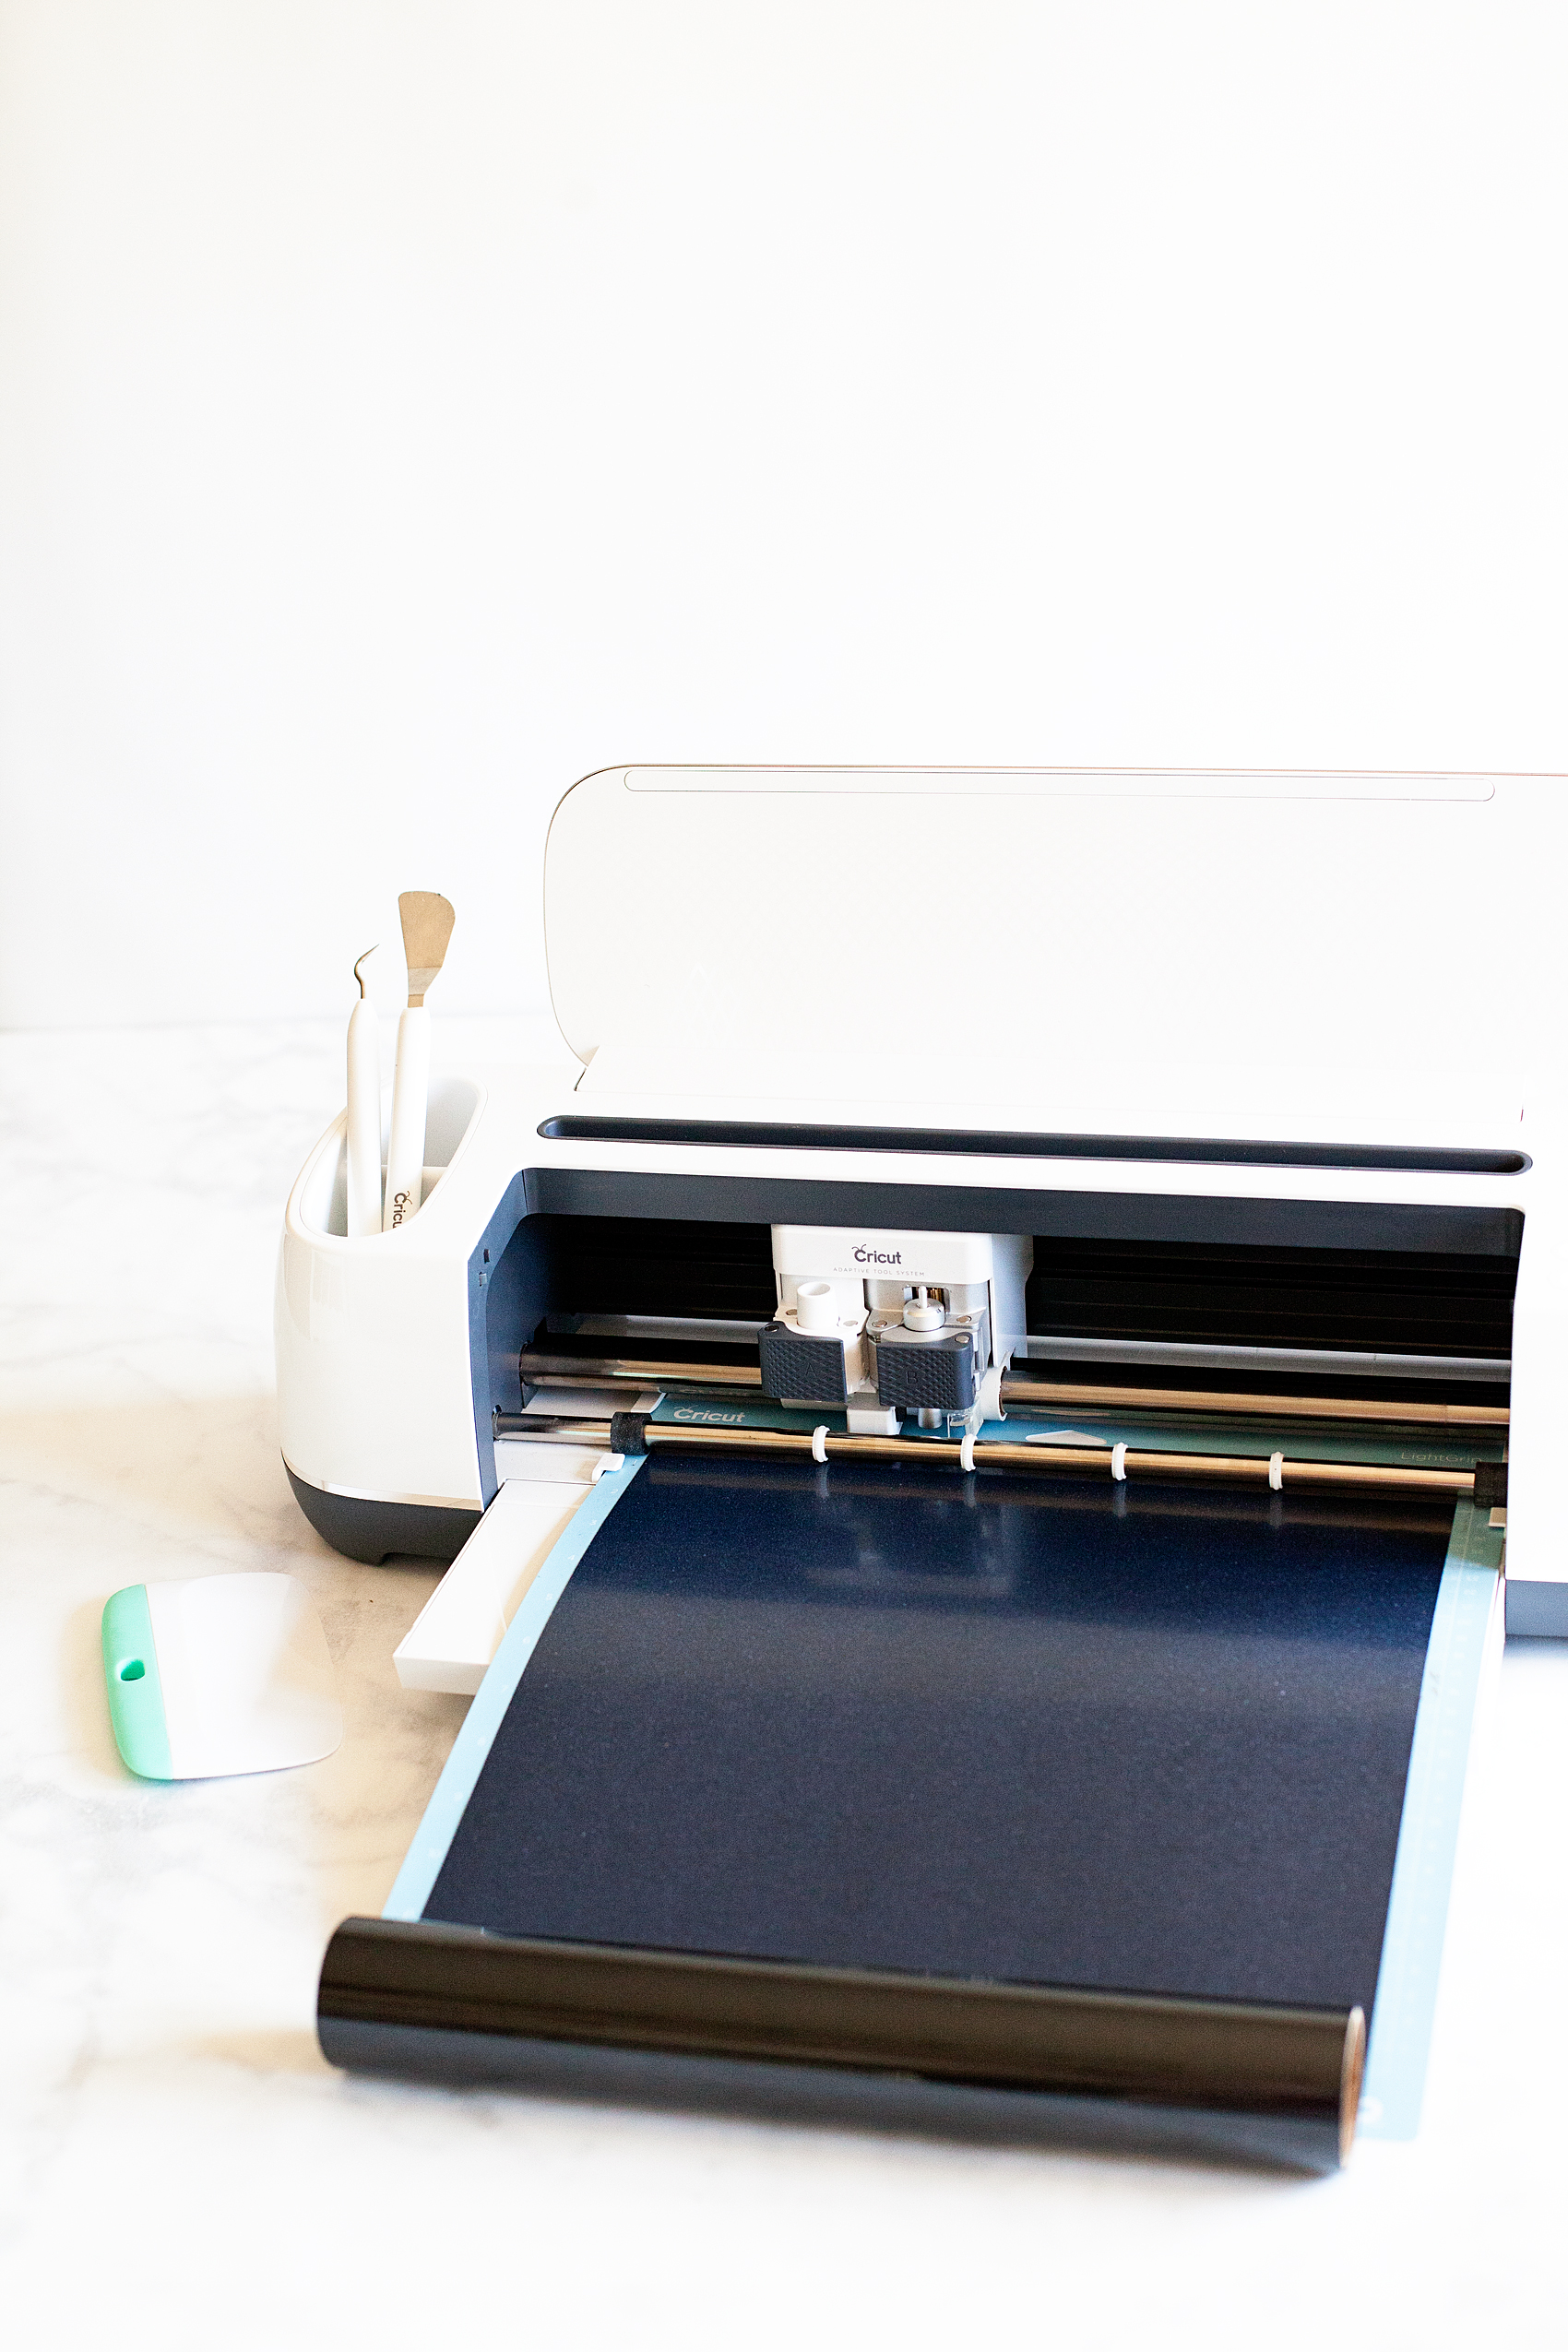
- Cricut vinyl – midnight
- Cricut transfer tape
- Cricut cutting machine like the Cricut Maker
Instructions for Christmas Carol Stars
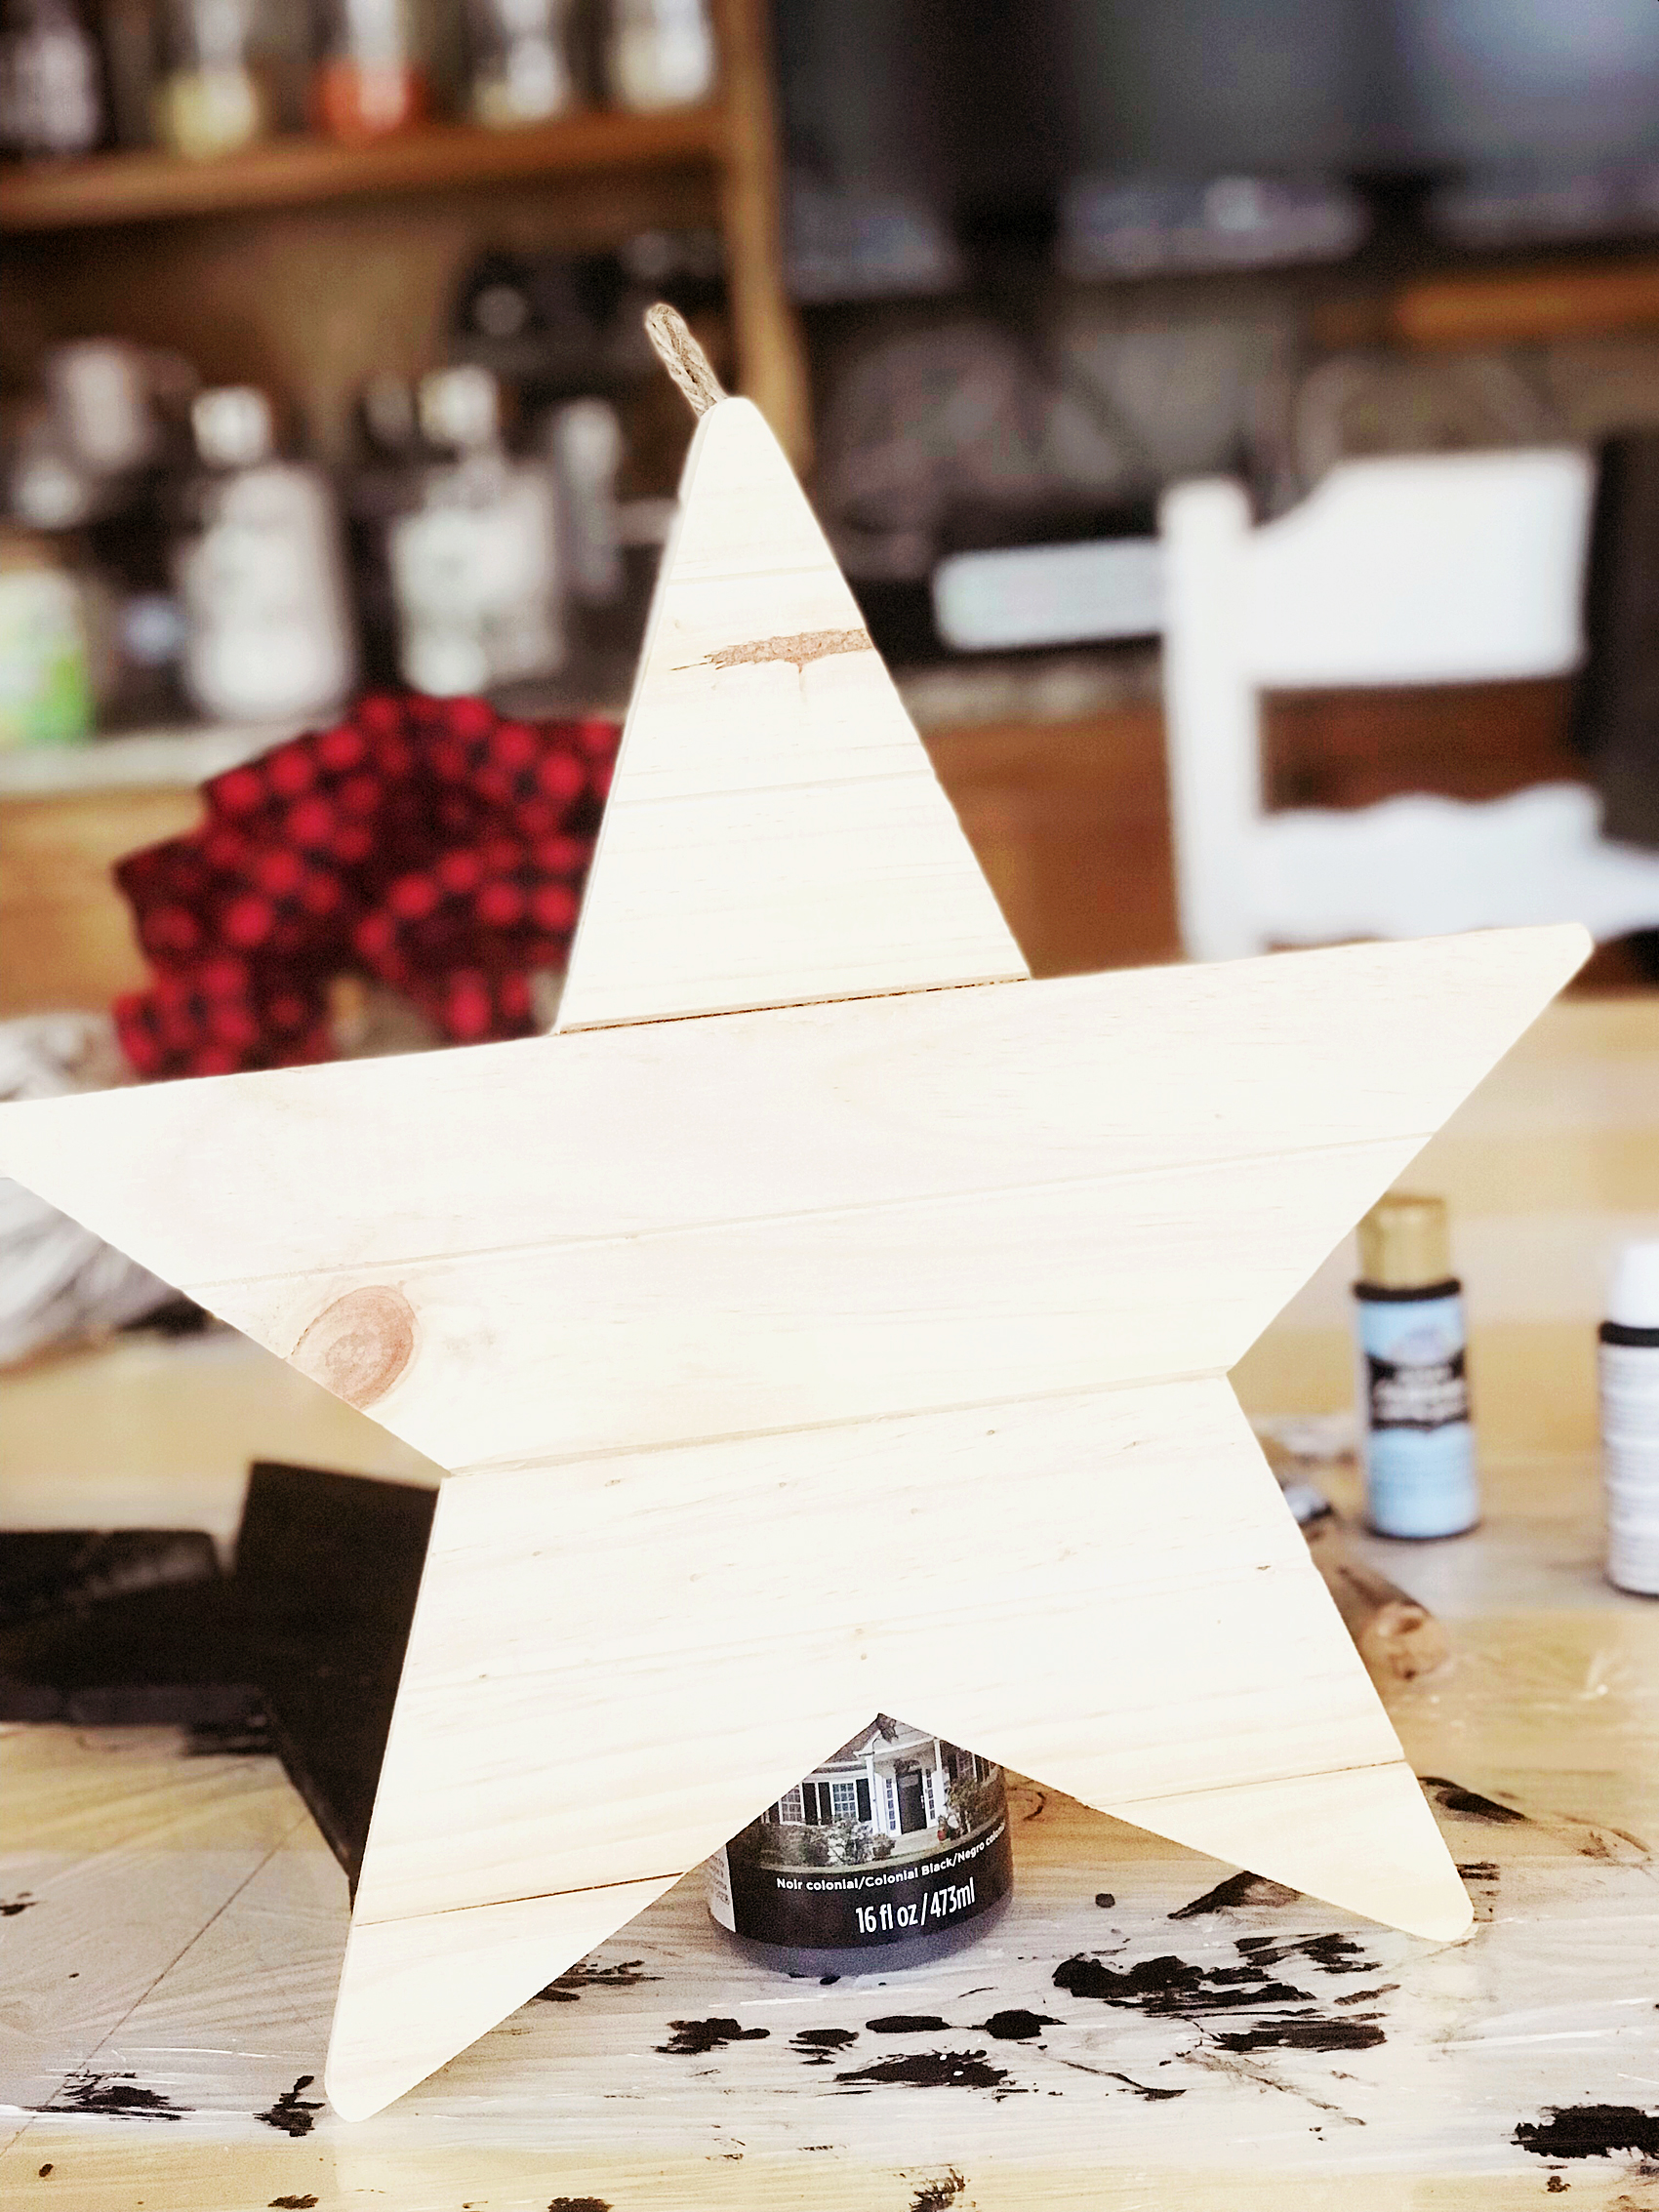
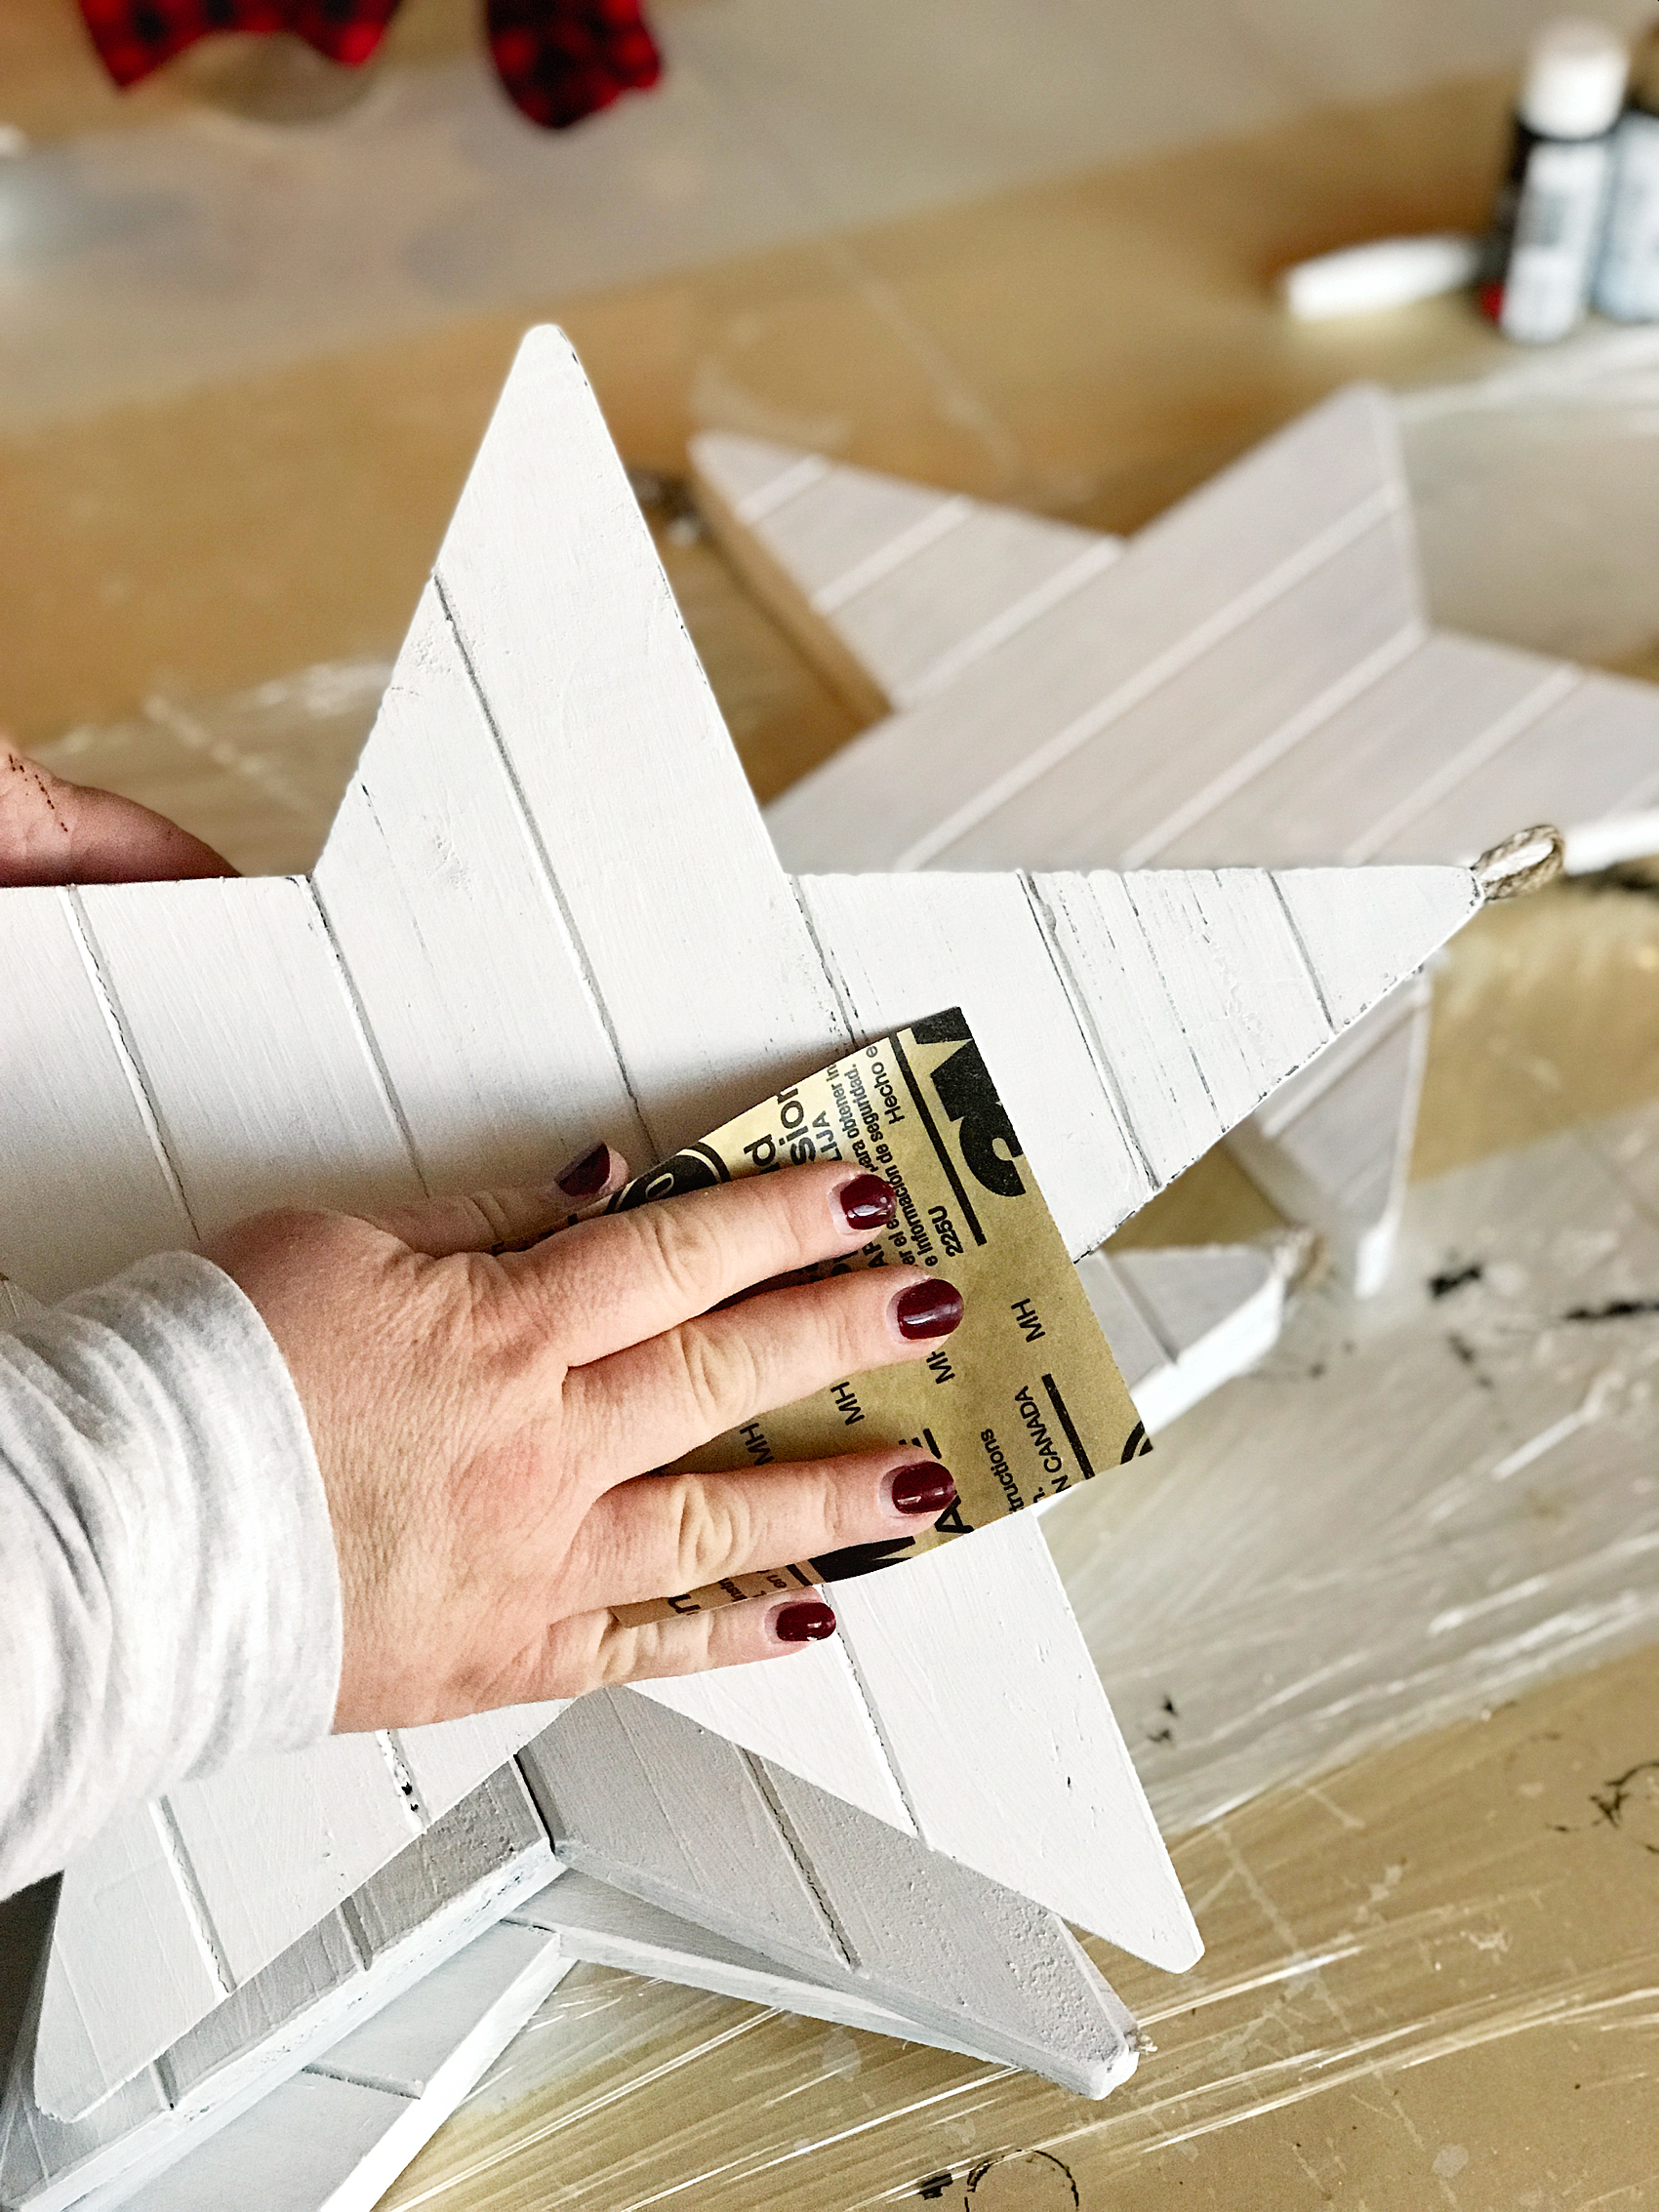
First, grab your raw wood stars and wipe them down with a damp cloth to make sure they are dust and dirt free. Then paint your base coat with the Americana Decor Curb Appeal paint.
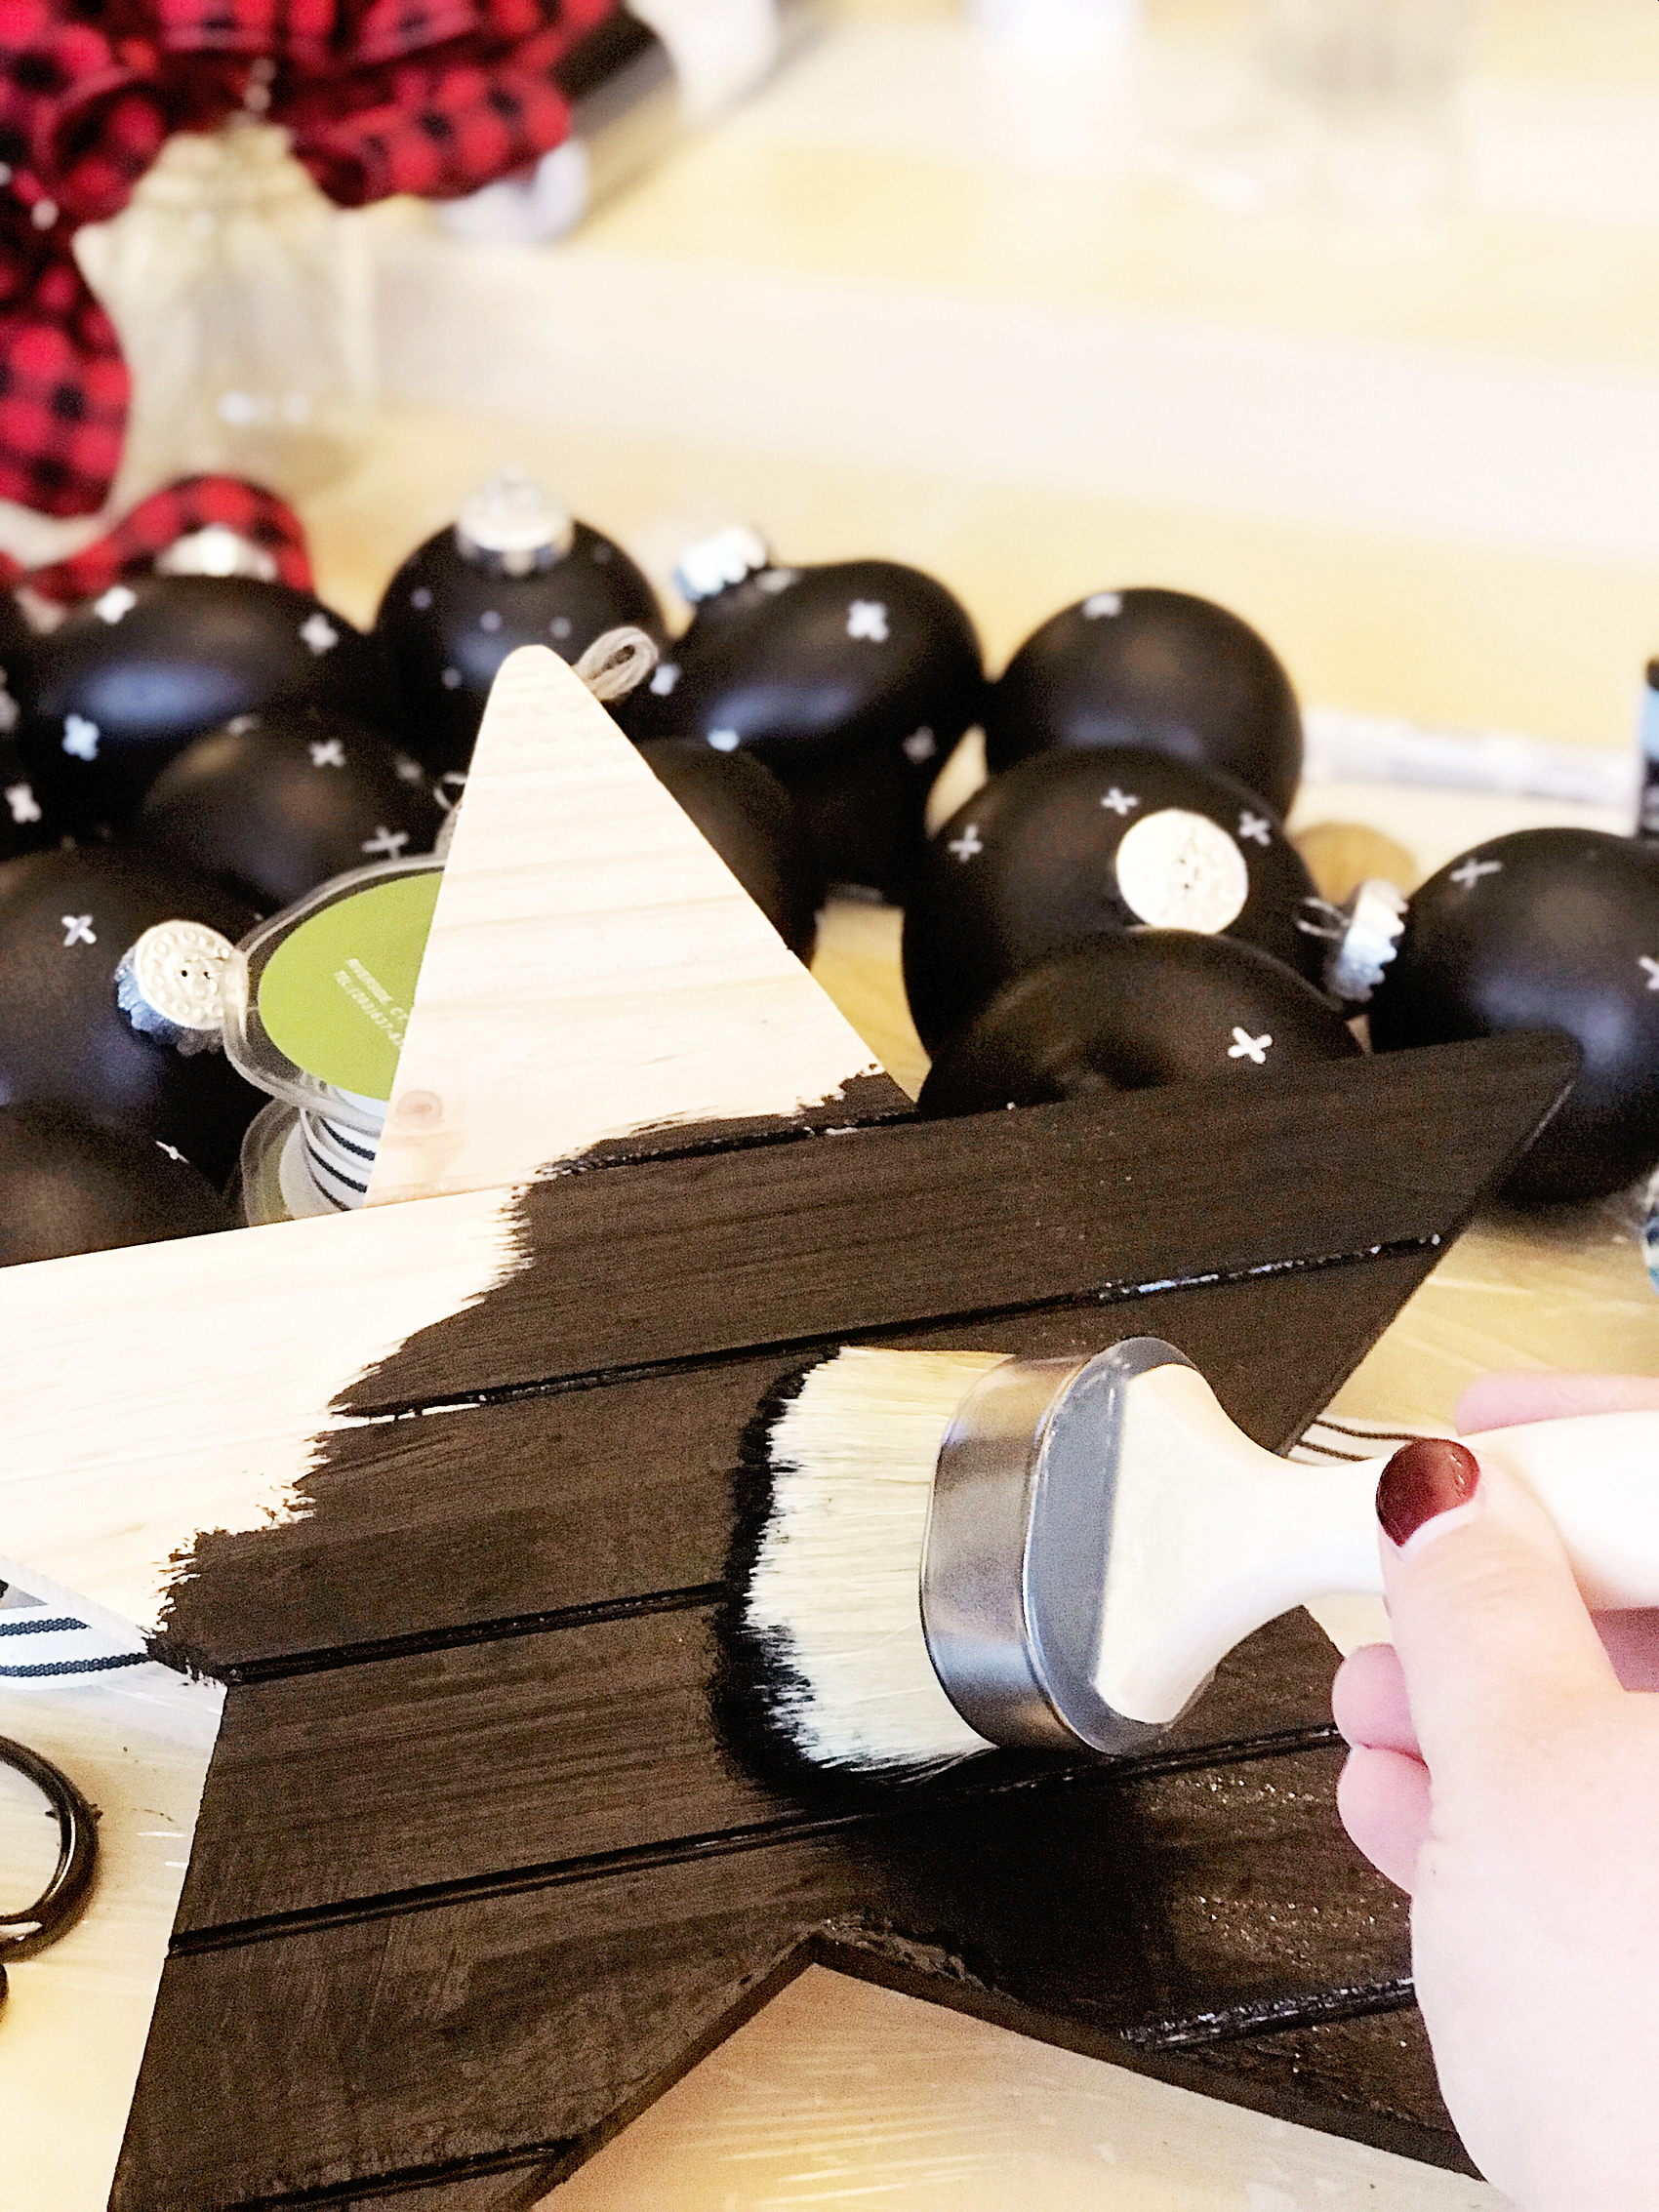
The reason why I used the Curb Appeal paint is… One, it’s a durable paint and will stand up to the distressing of the chalk paint. Two, I just happened to have some left over after I painted my front door. I wanted to have a black base because I wanted it to show through when I distressed the white (Everlast) paint.
PRO TIP + When using chalk paint, you will typically distress your paint to create the look that is typical with chalk paint. You’ll need to keep in mind what color you want to show through once distressed. You’ll need to use that color as your base color then paint your finishing color on top. Then make sure when you are distressing your piece, you don’t use too much pressure. You don’t want to accidentally distress down through your base coat.
Once your base coat is dry, paint your top coat with the Americana Decor Chalky Finish paint in Everlasting.
Pro Tip + Don’t worry about making your top coat look PERFECT with multiple layers of paint. You will be distressing them, no need for perfection. The heavier your layer of paint, the harder your piece will be to distress. No need to make extra work for yourself.
To distress, use a 250 grit sandpaper and lightly sand the raised edges of the stars.
Christmas Carol Graphics
Now, it’s time to break out your Cricut machine. I’ve used the Cricut Explore machines and the Cricut Maker and I LOVE them both. For this project, I used my Cricut Maker but, either one is fine.

To begin, I created these designs to put on the chalk painted stars…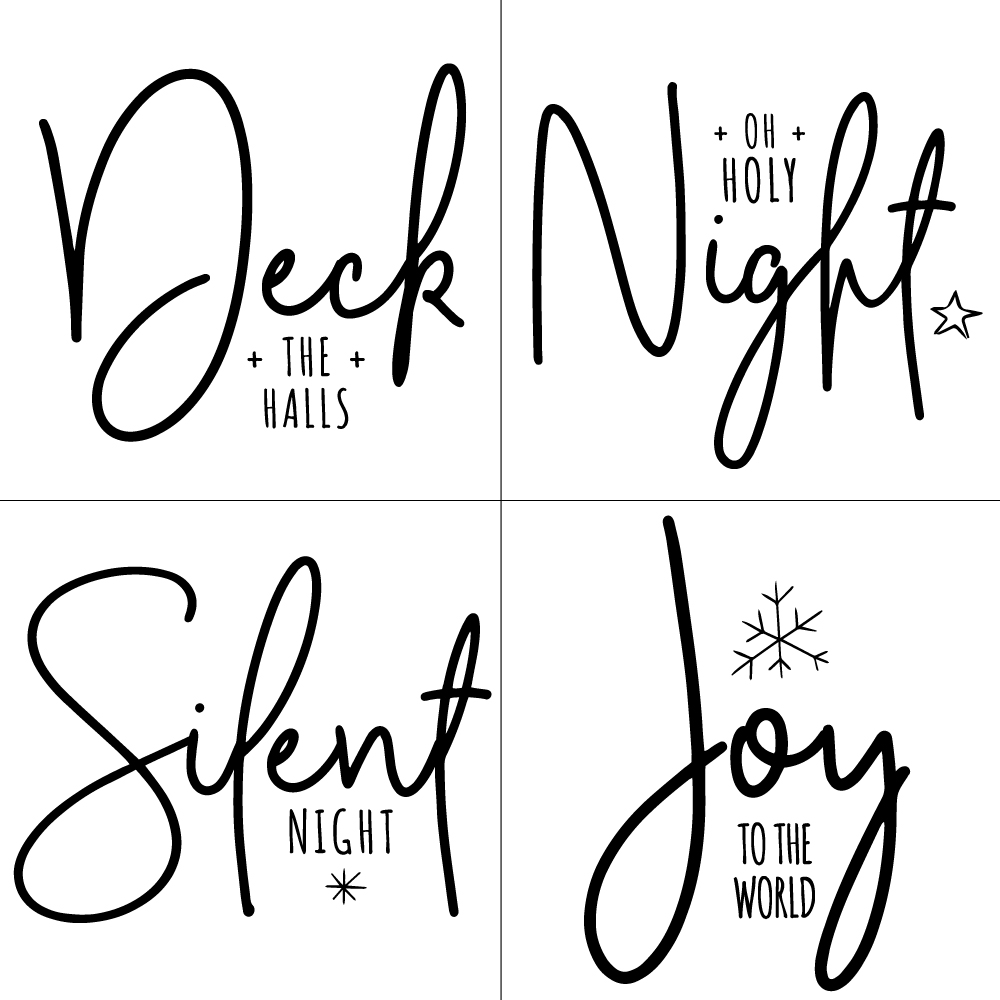
I love how they help to usher in the spirit of the season. They remind us of seasons past and they also help to remember the true meaning of the season… The birth of our Savior Jesus Christ.
You can download these Christmas Carol designs HERE
Then all you need to do is to upload the SVG files to the Cricut Design Space. You can check out this post on how to upload a design in the Cricut Design Space to learn how to do that.
Then you’ll cut your designs on your Cricut machine and then apply the vinyl to your stars. To learn how to apply vinyl, visit this post… How to Apply Vinyl Tutorial that I created.
It’s really not hard if you follow a few simple steps. It truly is one of my favorite ways to create for my home.
Pro Tip + Make sure you wipe down your stars with a damp cloth to remove any remaining paint dust. It will make applying the vinyl much easier.
Now your stars are ready to add to your tree!
I can’t wait to see what you guys create this Holiday Season! Make sure to tag me on your social media posts. You can follow me on Facebook, Instagram & Pinterest.
111
What font did you use? Thank you for sharing
I was looking for the link for the Christmas Carole design and I don’t find it, is it possible that you can help me?
Same question what font? I love it!!
Awesome stars! Can you tell us what font you used?
Would you mind sharing what font you used for the decoration? I love love love it and willing to purchase the font for future projects, if I only had a name or two.