Door hardware often gets overlooked, yet it plays a crucial role in both the appearance and feel of a home. The right handles, hinges, and locks don’t just serve a function; they complete a design narrative. A well-chosen doorknob or lever can subtly modernize a traditional home or reinforce the clean minimalism of a contemporary one.
In home makeovers, small details have big visual power. Changing out outdated or mismatched hardware is one of the simplest ways to update interiors without the need for renovation. It’s an affordable transformation that refreshes doors, trims, and even the mood of each space.
Exploring the Main Types of Door Hardware
Before diving into style, it helps to understand the range of door hardware used throughout the home. Each serves a unique purpose, and knowing how they function can make shopping more straightforward.
1. Passage hardware is used on interior doors that don’t need locking, such as hallways, closets, or laundry rooms. These are typically lever or knob sets without keys.
2. Privacy hardware works best for bedrooms and bathrooms, featuring a locking mechanism operated from inside. Most models include an emergency release on the exterior for safety.
3. Keyed entry sets are common for front and back doors. They combine security and design, often featuring deadbolts or smart lock options.
4. Dummy knobs or levers provide symmetry on doors that don’t latch, such as double closet doors or decorative panels.
By exploring a thoughtfully curated selection of door hardware components, homeowners can easily find durable and stylish parts for residential doors that perfectly balance lasting quality with cohesive design throughout their home.
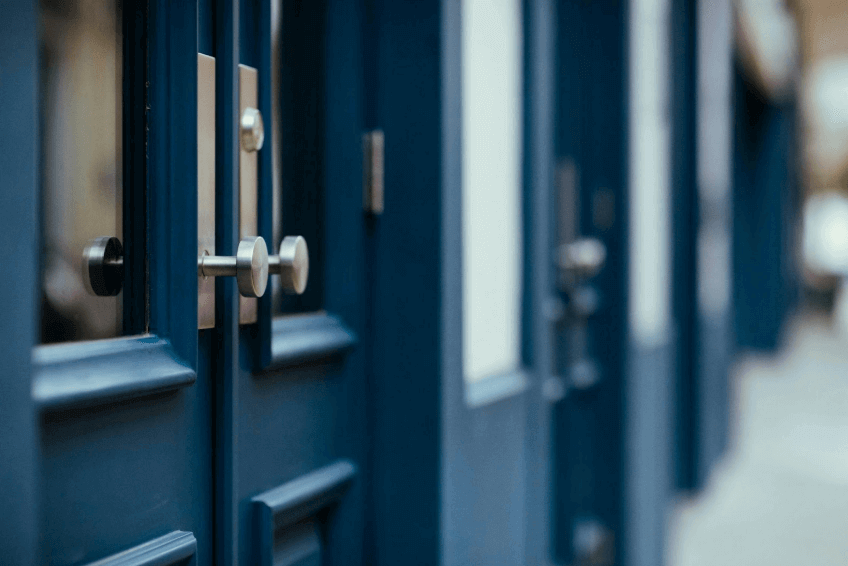
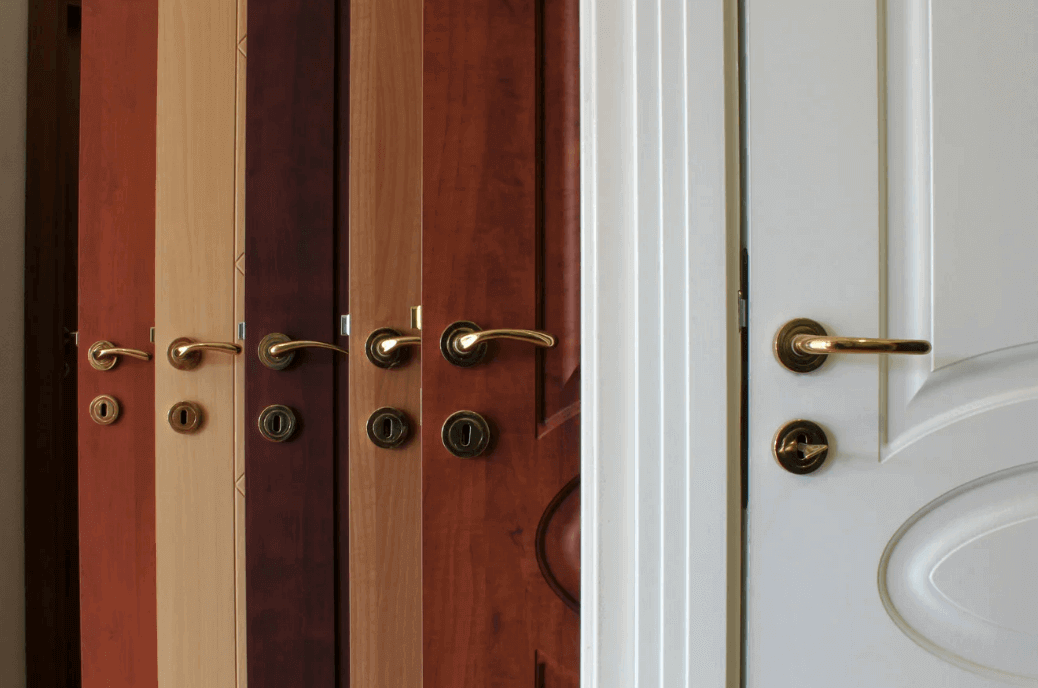
Finishes That Define the Mood
Finish isn’t just about color; it shapes how light interacts with the surface. A glossy chrome finish bounces light and feels crisp, while a matte finish absorbs it for a softer impression. The key is consistency. Using one or two finishes throughout the home ties the design together without feeling repetitive.
Common finish options include:
- Polished chrome for a sleek, reflective look that suits contemporary bathrooms and kitchens
- Brushed nickel for a subdued, versatile tone that hides fingerprints well
- Matte black for bold contrast, particularly effective against white or light-colored doors.
- Satin brass for understated luxury with a soft golden hue that warms neutral spaces
- Oil-rubbed bronze for depth and a vintage patina that evolves over time.
Mixing finishes intentionally can work when it follows a clear theme, such as pairing matte black door levers with brass lighting in a modern-industrial space. But for most homeowners, continuity creates a polished, unified feel.
Matching Hardware Style to Your Home Design
Every architectural style has a language, and hardware should speak it fluently. SSelecting hardware that matches your home’s personality
maintains visual flow and prevents design clashes, added ukoakdoors.co.uk, who are crafting superior-quality interior and external oak doors.
For modern interiors, sleek levers with square or rounded edges in matte black or polished chrome keep lines clean and purposeful. These finishes pair well with luxurious materials often seen in modern spaces.
For farmhouse or rustic styles, oil-rubbed bronze and antique brass add warmth. Hardware with visible screws or textured grips gives a handcrafted feel that complements wood beams and reclaimed materials.
For classic or transitional homes, brushed nickel and satin brass deliver timeless appeal. Rounded knobs and subtly detailed rosettes strike a balance between traditional and updated aesthetics.
For coastal or minimalist themes, white, brushed stainless, or unlacquered brass provide a light, effortless tone that works well with natural light and airy color palettes.
Adding Smart and Secure Features
Homeowners increasingly blend design with technology to improve convenience and security. Modern door hardware now integrates digital features that stay stylish.
- Smart locks can be unlocked with mobile apps, keypads, or fingerprints while keeping traditional key access as backup
- Rekeyable systems allow quick reconfiguration without replacing the lock entirely
- Door sensors and alarms can connect with home security systems, offering extra assurance when away
- High-grade deadbolts enhance front and back door protection while maintaining aesthetic appeal
Integrating smart home systems discreetly preserves a home’s visual character while supporting safety and ease of use.
Internal Harmony With a Design Plan
Interior designers often advise treating hardware selection as part of a broader design plan rather than an afterthought. Start by identifying the look and mood you want each space to convey, then narrow down options by finish, shape, and function.
When renovating multiple rooms, consider the sightlines between spaces. The hardware seen from one room to another should complement each other, creating visual continuity. Repetition reinforces style, while subtle variation adds personality.
Bringing It All Together With Door Hardware
Choosing door hardware goes beyond aesthetics; it is about crafting an experience. Each handle and hinge should complement your home’s personality while performing flawlessly over time. With thoughtful coordination of finish, style, and function, you can achieve a consistent and inviting look that ties every room together.


