• Skip to primary navigation
  • Skip to main content
  • Skip to primary sidebar
  • Skip to footer

Whipperberry

WhipperBerry • Your Home For Creative Inspiration

  • Home
  • Recipes
    • Starters
    • Easy Weeknight Dinners
    • Main Dish
    • Salads
    • Side Dish
    • Soups & Stews
    • Desserts
    • Breakfast
    • Miscellaneous
  • Tutorials
    • Creative Crafts
    • DIY Decor
    • Fabric Crafts
    • Food How-To
    • Jewlery
    • Paint Projects
    • Paper Art
    • Party Styling
    • Photography and Graphic Design
    • Silhouette
  • Holidays
    • Easter
    • Mother’s Day
    • Father’s Day
    • 4th of July
    • Halloween
    • Thanksgiving
    • Christmas
    • Valentine’s Day
  • Gift Ideas
    • Gifts For Everyone
    • Gifts for Dad
    • Mother’s day
    • For The Girls
    • For The Kids
    • Teacher Gift Ideas
    • Christmas
  • Printables
    • Holiday
    • Gift Idea
    • LDS Primary
  • Travel
  • About
    • Terms
  • Contact
  • Nav Social Menu

    • Facebook
    • Instagram
    • Pinterest
    • RSS
    • Twitter

Baking Supplies

The Perfect Strawberry Cupcake Recipe

6 · Aug 18, 2013 · 20 Comments

Strawberry Cupcake Recipe by Creative Team Member Jesseca from One Sweet Appetite // I have been on the hunt for the perfect fresh strawberry cupcake for years. It seems like almost every one I try has turned out dense, sunken, or dry. Luckily I never gave up and found a recipe that was intriguing enough for me to give it another try! These little cakes are to DIE for amazing. Light, moist, and full of strawberry flavor. I think the secret is keeping your berries diced nice and small. It spreads them out and keeps t hem from sinking to the bottom of the cake. strawberry-cupcakes-baked Strawberry Cupcakes 2-3/4 C. flour 1 Tbsp. cornstarch 1 Tbsp. baking powder 1 tsp. salt 1 C. butter, at room temperature 2-1/4 C. sugar 1-1/2 tsp. pure vanilla extract 3 large eggs plus 1 large egg white 1 cup buttermilk 2½ cups finely diced strawberries Preheat your oven to 350 degrees. Line two muffin tins with paper liners and set aside. Whisk together the flour, cornstarch, baking powder, and salt in a small bowl. Set aside. Cream together the butter and sugar. Add your vanilla and eggs + white, one at a time. Mix until fully incorporated. Slowly stir in the flour mixture and buttermilk. Fold in the strawberries. Fill each cup 3/4 full with batter. Bake for 25 minutes, or until a toothpick comes out clean. Cool completely then top with your favorite frosting! strawberr-cupcakes-unfrosted Super simple, and delicious! I topped mine with a Strawberry Swiss Meringue Buttercream that is out of this world amazing! The flavor of the cake combined with the silky frosting is perfection. Great for a sweet snack on these warm summer nights. cupcakes-strawberries The great thing about this recipe is how easily you can change the flavor! Substitute the strawberries for blueberries, raspberries, or blackberries!

Here are some more fabulous recipes created by Jesseca…

one sweet appetite

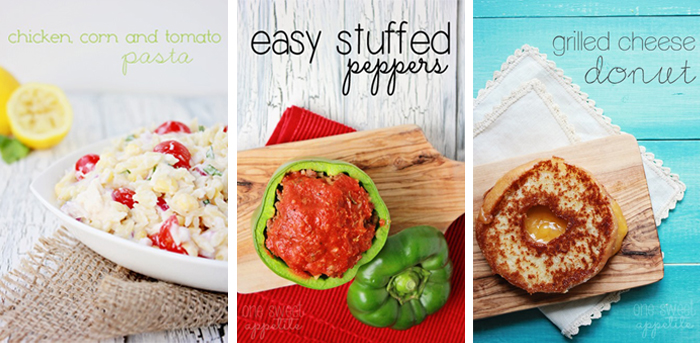
chicken, corn tomato pasta salad, easy stuffed peppers, tom + chee inpsired grilled cheese

Vanilla Salted Chocolate Chip Cookies

8 · Jan 10, 2013 · 17 Comments

Vanilla salted chocolate chip cookie recipe // I don't know anyone who doesn't go weak in the knees when served a nice warm chocolate chip cookie… They are truly mom's love right on a plate. Now, there are many different recipes for this beloved cookie but I have stumbled across THE PERFECT chocolate chip cookies recipe…

vanilla salted chocolate chip cookies

I grew up with the classic Toll House cookie recipe that my Mom has made for decades and I'm a fan, but I also felt like there was something missing with this recipe. I stumbled across a chocolate chip recipe on Tidy Mom that challenged my idea of a good chocolate chip cookie. Cheryl's recipe is the New York Times chocolate chip cookie recipe adapted from the original recipe from Jacques Torres. This recipe calls for slightly different ingredients than your traditional cookie, like the addition of baking powder and for the dough to be chilled no-less than 24 hours before baking. The big new ingredient for this recipe is the addition of a sprinkle of course sea salt on top of the cookie before baking. It's kind of like the popular salted caramel concept. I decided to take the addition of sea salt to the next level… Have you ever heard of Vanilla Sea Salt?

I discovered Vanilla Sea Salt or Vanilla Fleur de Sel,  last year when I was doing research for my homemade Vanilla Extract. I ordered a bottle because I thought it would be perfect for caramels, little did I know that it would also be wonderful with these cookies. I do believe we can make our own vanilla sea salt, I'm going to work on that and see what I come up with. 

Vanilla Sea Salt Chocolate Chip Cookies

Here is my adaptation of this famous New York Times recipe…

2  (minus 2 tablespoons) cups cake flour

1 2/3 cups of All-Purpose Flour

1 1/4 teaspoon baking soda

1 1/2 teaspoon baking powder

1 1/2 teaspoon salt salt

2 1/2 sticks unsalted butter (room temp)

1 1/4 cups of brown sugar

1 cup of sugar

2 large eggs

2 teaspoons of vanilla extract

1 1/4 pounds of bittersweet chocolate 

vanilla sea salt

Directions

In a large bowl mix sift the the dry ingredients together starting with the flours then adding baking soda, baking powder and salt. Set aside. In the bowl of an electric mixer cream the butter and sugars together. Mix on high for 5 minutes until the mixer is really light and fluffy. Add the eggs and vanilla and mix on high for 1 more minute. Slowly combine the butter and sugar mixer with the dry ingredients and mix just until combined. Add the chocolate and place in a large storage container. Cover the dough with plastic wrap and then place the lid on the storage container. Place in the refrigerator for at least 24 hours, 72 would be best.

When you are ready to bake the cookies, pre-heat the oven to 350 degree. Prepare your baking sheet with parchment paper or a non-stick cooking mat. Scoop six 2 1/2 ounce dough balls. I used this one ounce scoop and placed two generous scoops together to create one large ball and then sprinkle a pinch of the vanilla sea salt on top of the dough.

how to prepare your chocolate chip cookies

Place in the oven and bake for 18-20 minutes, just until it starts to brown. When you take the cookie out of the oven it will look slightly underdone. You want them that way. That's what makes these cookies magical…

chocolate chip cookies

Let the cookies cool. You will find that after they have cooled a bit, these cookies have a crisp texture on the outside and are still soft and chewy on the inside.When you bite into one you will have that sweet taste of the cookie and every once in a while you will have a lovely burst of salt from that vanilla sea salt and you will be in heaven. Quite honestly this is the perfect chocolate chip cookie in my book! 

the world best chocolate chip cookie

What's your favorite cookie recipe? Have you found "the perfect" cookie recipe for your taste? Let us know, we would love to try some more idea!

I'm linking up with…

Today's Creative Blog

Homemade Chocolate Pudding with Chantilly Cream | Recipe in a Jar

6 · Feb 28, 2012 · 20 Comments

I have no idea when it happened, I know it was pretty early on in my life… my love affair with chocolate pudding began. The day my Mom made… HOMEMADE chocolate pudding it was earth shattering.  I had no idea you could make your own pudding from scratch without the box of the infamous big J and little-O.

It's so easy to make and tastes so much better than the box stuff.  Pair it with some real Chantilly cream and dress it up in a jar and it's the perfect little dessert to serve at your next get together.

Chocolate Pudding

1 cup sugar

1/2 cup baking cocoa

1/4 cup cornstarch

1/2 teaspoon salt

4 cups milk

2 tablespoons butter

2 teaspoons vanilla extract

In a heavy saucepan, combine sugar, cocoa, cornstarch and salt.  Place over medium heat and slowly whisk in the milk. Bring to a boil stirring frequently.  Once it reaches a low boil, let it boil for 2 minutes stirring constantly. Remove from heat, stir in butter and vanilla. Bring to room temperature and then place in a container to chill in the refrigerator.  Place some plastic wrap on the top of the pudding to avoid developing a skin on the top. Chill for 2-4 hours before serving.

Serves 6-8

Chantilly Cream

1 pint whipping cream

1/4 cup powdered sugar

1 teaspoon vanilla extract

Ten minutes before you start your Chantilly cream, place your mixing bowl in the freezer.  Remove bowl from freezer and add whipping cream.  Mix on high speed for 2 minutes until it starts to stiffen. Add powdered sugar and vanilla and continue to mix on high until cream becomes stiff and hold is shape. 

Fill your jars with the chilled pudding and then pipe the Chantilly cream on top with a large closed star tip in a pastry bag {I ordered my from Sweet Baking Supply} and pipe the Chantilly cream on top of the pudding.

I dressed up the single serving pudding jars with some fun rope. Then I topped the jars with a simple piece of scrapbook paper cut in a circle to fit on top of the jar. Then I decorated some bamboo skewers with crocheted lace, ribbon and fabric to make little flags on top of the pudding.  I found that punching small holes in the paper worked better than trying to stab the skewers into the paper.

This will be the talk of the room at your next book club, baby shower or party.  Give it a try and let me know what you think!

What's your favorite party treat to share with friends and family?

Meyer Lemon Doughnuts | Recipe

5 · Feb 15, 2012 · 28 Comments

I have made no secret of the fact that I am falling in love with baked doughnuts. Last month I made Vanilla Bean Heart Doughnuts for Valentines Day. This month I am loving experimenting with the Meyer Lemons that my local grocery store has started to stock. This is my first lemon recipe this season. Last year we had Lemon Crinkle Cookies and Lemon Curd Cheesecake.  Believe me, I'm sure it won't be the last.  I love lemon!!

First off, what is a Meyer lemon? Well, since you asked so nicely… a Meyer Lemon is a cross between a lemon and a Mandarin Orange, thus taking the sweetness of the orange and the tart from the lemon and making a wonderful hybrid for us lemon lovers. It's perfect for baking with and for adding a little slice of one to your or Diet Coke.

For this doughnut I took the standard vanilla doughnut recipe added some zest from the lemons and then glazed them with a lemon infused glaze. Here is the recipe…

2 1/2 cups cake flour

1 cup sugar

2 1/2 teaspoon baking powder

1 teaspoon salt

1 cup buttermilk

2 teaspoons lemon zest

1 teaspoon vanilla extract

2 eggs slightly beaten

3 tablespoons melted butter

Preheat oven to 400 degrees and spray pan with non-stick cooking spray

In a large mixing bowl sift together the flour, sugar, baking powder and salt. In a separate bowl add buttermilk, vanilla, lemon zest, and eggs. Add wet mixture to the dry mixture and then add the melted butter. Mix just until combined. Fill each doughnut cup 1/2 full and bake accordingly.

I find the best way to fill the pan is to fill a pastery bag with the doughut batter and with a simple round tip gently add your batter to the pan.  Better yet, a pancake pen is PERFECT for the job!

large doughnut pan or heart shaped pan 10-12 minutes

mini doughnut pan 4-6 minutes

4 cups confectioners sugar

4 tablespoons Meyer Lemon juice

In a small bowl combine confectioners sugar with lemon juice. Add lemon juice slowly until you reach the desired consistancy.  The doughnuts in the pictures had a pretty thick glaze, but if you would like a light glaze add more lemon juice.

Let me know how your doughnut adventures go. Send over some pictures if you make some. I would LOVE to see them!!

  • « Go to Previous Page
  • Page 1
  • Interim pages omitted …
  • Page 5
  • Page 6
  • Page 7
  • Page 8
  • Go to Next Page »

Primary Sidebar

Heather from Whipperberry
Hello... my name is Heather and I'm the creator of WhipperBerry a creative lifestyle blog packed full of great recipes and creative ideas for your home and family. I find I am happiest when I'm living a creative life and I love to share what I've been up to along the way... Come explore, my hope is that you'll leave inspired!

Footer

  • Privacy Policy
  • Crafts
  • Food
  • Gifts
  • Holidays
  • Home
  • Mom Life
  • Recipes
  • Travel

Copyright © 2026 · Seasoned Pro