• Skip to primary navigation
  • Skip to main content
  • Skip to primary sidebar
  • Skip to footer

Whipperberry

WhipperBerry • Your Home For Creative Inspiration

  • Home
  • Recipes
    • Starters
    • Easy Weeknight Dinners
    • Main Dish
    • Salads
    • Side Dish
    • Soups & Stews
    • Desserts
    • Breakfast
    • Miscellaneous
  • Tutorials
    • Creative Crafts
    • DIY Decor
    • Fabric Crafts
    • Food How-To
    • Jewlery
    • Paint Projects
    • Paper Art
    • Party Styling
    • Photography and Graphic Design
    • Silhouette
  • Holidays
    • Easter
    • Mother’s Day
    • Father’s Day
    • 4th of July
    • Halloween
    • Thanksgiving
    • Christmas
    • Valentine’s Day
  • Gift Ideas
    • Gifts For Everyone
    • Gifts for Dad
    • Mother’s day
    • For The Girls
    • For The Kids
    • Teacher Gift Ideas
    • Christmas
  • Printables
    • Holiday
    • Gift Idea
    • LDS Primary
  • Travel
  • About
    • Terms
  • Contact
  • Nav Social Menu

    • Facebook
    • Instagram
    • Pinterest
    • RSS
    • Twitter

Spa

How to Style a Backyard Plunge Pool & Sun Shelf for the Ultimate Spa Vibe

0 · Oct 9, 2026 · Leave a Comment

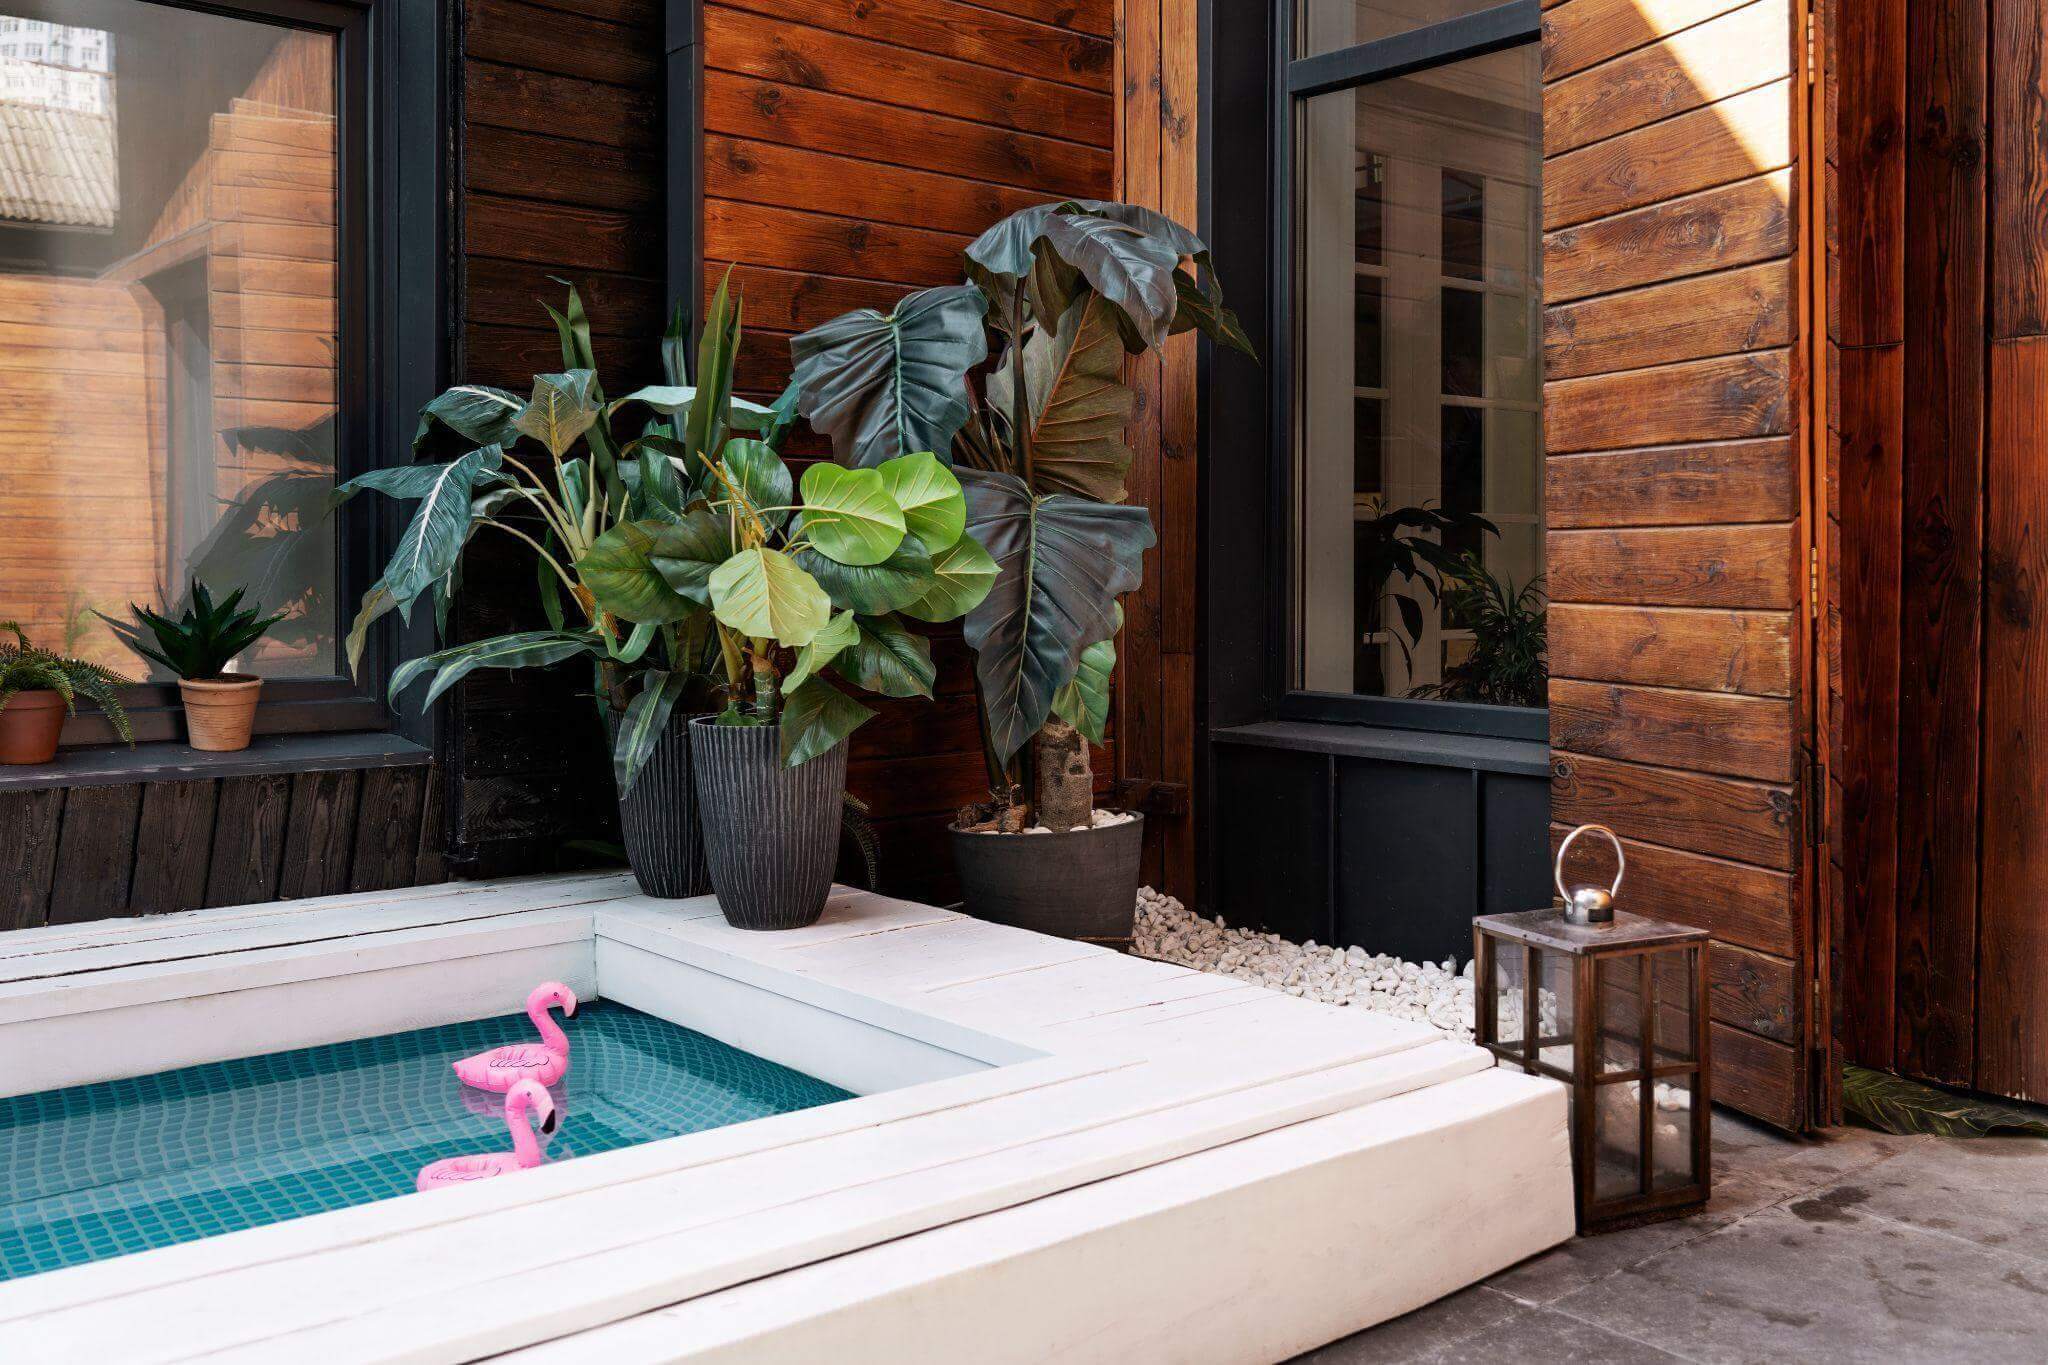
Small backyards used to mean giving up on the dream of having a swimming pool. But plunge pools have completely shifted how homeowners view compact outdoor spaces. These cozy, deep pools do not take up your entire yard, leaving plenty of room for landscaping, dining setups, and lounging zones. When you add a sun shelf, a shallow ledge usually between 4 and 8 inches deep, you turn a simple watering hole into a true resort-style retreat right outside your back door.

Creating a backyard that resembles a boutique hotel takes some planning. Every feature should be functional and aesthetic at the same time. Your aim should be to design an outdoor retreat where you can go out and relax, enjoying all the relaxation that surrounds you there.

So, keep reading to get started with styling your backyard plunge pool and sun shelf.
Potted plant on a window sill

Start With a Soothing, Cohesive Color Palette

When you walk into a luxury day spa, the first thing you notice is the calming atmosphere created by soft, earthy tones. Your backyard setup should follow the exact same visual cues. Bright, neon pool towels or clashing furniture colors disrupt the peaceful environment you are trying to build.

Rather, base your design on neutral colors that provide an anchor:

  • Warm Earth Tones: Think soft sand, warm beige, travertine, and natural terracotta. These tones soften the transition between your home’s patio and the water.
  • Cool Coastal Neutrals: Cool coastal neutrals include clean whites, gray slate, and seafoam greens, providing a resort-like environment.
  • Natural Wood Accents: Teak, ipe wood, or high-quality composite decking bring warmth and rich organic texture to stone surfaces.

When pool tiles match the patio pavers, the effect is one of continuity and expansion of the design. The moment the coping on the pool matches the surrounding deck area, the whole area is instantly made to feel bigger and much more purposeful.

Upgrade Your Sun Shelf with In-Pool Furniture

A sun shelf, sometimes called a baja shelf or tanning ledge, is easily the most popular feature in modern pool design. It gives you a place to submerge yourself just enough to stay cool without jumping all the way into the deep water. But to truly enjoy it, you need the right furniture designed specifically for water immersion.

Standard patio chairs will float away or rust inside a pool. High-density, UV-resistant resin loungers are built to sit directly in shallow water without fading, cracking, or floating. Ledge Lounger and SR Smith offer ergonomic in-pool chaise lounges that contour comfortably to your body while sitting in up to 10 inches of water.

Combining two loungers together on your sun deck, along with a side table to match, forms the perfect place for your iced coffee in the morning or your book in the afternoon. Complete the picture by having an umbrella that will shield you from the midday sunlight, ensuring you stay comfortable for hours on end.

Keep the Water Pristine Without the Visual Clutter

Nothing can put a damper on a resort feel more quickly than dirty water, drifting leaves, or large pieces of equipment lying around the deck. Maintaining the cleanliness of a plunge pool requires constant effort; however, the presence of lengthy hoses and large vacuum rods is not exactly conducive to relaxation and ruins the atmosphere you’ve worked so hard to create.

In order to ensure that your retreat is always spotless, modern pool cleaning technology is designed to make maintenance nearly invisible. Portable cleaning machines such as compact cable-free units built to eliminate sunken debris scour the bottom and sides automatically without necessitating heavy external hoses and booster pumps. All you have to do is clean the pool prior to the arrival of guests, and then hoist the machine out by means of its quick drain handle into a deck box. This keeps your water crystal clear and your poolside area completely free of unsightly maintenance clutter.

Layer the Environment With Soft Lighting and Fire Elements

A spa ambiance mustn’t diminish once the day turns into night. Indeed, it is during evening time that an atmosphere created by ambient lighting brings out the full potential of a plunge pool in your garden. Overhead flood lighting can seem too industrial, so stick to low-voltage lighting.

Consider blending these warm lighting features:

  1. In-Pool LED Accent Lights: Modern LED niche-less lights can be adjusted to give out light of soft white, amber, or blue color, thus illuminating the pool water without dazzling your eyes.
  2. Subtle Landscape Uplighting: Install soft directional lights at the bottom of tall grass, palm leaves, or hedge plants to cast silhouettes on your fence.
  3. Fire Features: Install either a tabletop fire pit or a fire pit along the plunge pool to provide you with an eye-catching combination of contrasting colors.

Creating a gentle glow around the perimeter makes your outdoor space feel cozy and intimate after dark, extending how late into the evening you can enjoy your pool.

Frame the Space with Lush, Non-Messy Landscaping

The presence of plants provides energy, beauty, and texture to the pool environment, but using the wrong plants will give you non-stop skimming chores. What you need is a plant that not only gives beauty and privacy but also does not drop any leaves or flowers into the pool.

Look for low-maintenance plants that thrive near pool deck environments:

  • Ornamental Grasses: Feather reed grass and blue fescue add soft movement and rustling sounds in the breeze without dropping heavy foliage.
  • Broad-Leaf Tropicals: Bird of paradise, banana palms, and elephant ears create a secluded tropical oasis vibe and feature large leaves that are easy to clean up if they drop.
  • Container Planters: Large ceramic or concrete planters placed at the corners of your pool add elevation and structure. They also allow you to move tender perennials indoors when colder weather arrives.

A private green backdrop shields your plunge pool from neighbors’ views, making your outdoor retreat feel like an exclusive, secluded escape.

Add High-End Finishing Touches

It is in the last-minute details that make your ordinary patio into an exceptional personal spa. Purchase thick, dense cotton pool towels, and place them neatly into a woven wicker basket right by the edge of the pool. Set up an outdoor wireless sound system using weatherproof speakers hidden within your garden beds to stream soothing instrumental playlists or ambient nature sounds at a gentle volume.

Final Thoughts

Plunge pools with sun shelves show you that you do not need an entire acre to live a luxurious lifestyle. You can achieve this by emphasizing the importance of coherent design, maintenance-free systems, and amenities. This way, you convert your ordinary backyard into a paradise-like place for yourself.

Mom’s Guide to Saunas and Steam Rooms: Finding the Best Fit for Your Self-Care Routine

0 · Sep 22, 2025 · Leave a Comment

There’s something incredibly soothing about stepping into warmth at the end of a long day. Whether it’s dry heat or steamy air, both saunas and steam rooms offer a peaceful pause—the kind that melts tension away and gives your mind room to breathe.

If you’ve been thinking about adding one of these relaxing rituals to your home routine, you’re not alone. Let’s take a closer look at the difference between saunas and steam rooms and how to choose the one that fits your lifestyle best—no spa membership required.

Guide to Saunas and Steam Rooms

Image Source: Pexels

Understanding the Heat Differences

In a sauna, you can expect to be greeted by a dry heat that can hit temperatures of up to 200°F.. The intensity of the heat may feel difficult to tolerate, though the absence of humidity can make breathing less laborious. When you’re using a sauna, plan on sweating a lot.

And know that you generally shouldn’t spend more than about 20 minutes in the space. If you’re a beginner, you might want to limit yourself to just five minutes. Individuals with respiratory issues or other health conditions should consult with a doctor, as well. Ultimately, though, the dry heat within a sauna promotes sweat evaporation that can feel refreshing. This has a cooling effect that can help you relax and de-stress after a day of work.

Steam rooms, by contrast, pack a punch with humidity levels that approach 100%. While the temperature is usually closer to a cooler 120°F, you’ll still feel like you’re in a hot environment thanks to the humidity.

Because of the saturated air, your sweat won’t evaporate. If you have seasonal allergies and just want a cleansing, spa-like experience, a steam room can feel peaceful. Or if you’re hoping to ease into the evening after throwing a big party, steam rooms offer a chance to reduce your stress levels.

If you’re not used to humid conditions, go easy on yourself and stick with a ten-minute session. You can gradually increase duration as you become more comfortable.

Finding a Setup That Fits Your Home

When you’re trying to find the right relaxation solution for your home, consider your space needs and limitations. Saunas occupy a bigger footprint. They can be powered by anything from electricity to wood or infrared technology, depending on the model. You’ll also need a waterproof floor, wood-lined enclosures, and a properly-wired heater.

The far infrared sauna advantages make it easier to add a sauna to your home. These units are simpler to maintain, use lower temperatures, and provide a healthy choice. You might even notice that you start sleeping better after regular use.

With a steam room, you’ll want a tiled enclosure that is sealed well with a steam-tight door. Otherwise, you run the risk of introducing mold into your environment. Make sure you have good ventilation and use non-porous materials around your walls and ceiling.

For those exploring compact and user-friendly options, the Dynamic Santiago sauna model is an example of an at-home infrared unit that blends modern features with straightforward installation.

Saunas and Steam Rooms

Assessing the Impact on Skin and Hair

When it comes to the impact on your skin and hair, saunas and steam rooms offer very different experiences. The dry heat of a sauna might make your skin feel dry, especially if you haven’t had enough water to drink before a session.

At the same time, though, saunas can contribute to healthier skin that’s free of oil and clogged pores. Plan on drinking ample water before and after a session to reap the most benefits.

Steam rooms offer the opposite effect, hydrating your skin so it feels like it’s glowing. You’ll have open pores, making steam rooms ideal where you’re seeking a skin refresh. The moisture can benefit brittle, dry hair, too. Just be aware that too much humidity can increase volume and the frizz factor.

Choose the Right Option for Your Routine

Both saunas and steam rooms offer a simple way to bring balance and calm into your week—whether you’re looking to relax sore muscles, clear your skin, or just create a little more “me time.”

It all comes down to how you like your heat: dry and invigorating, or steamy and soothing. Take a little time to explore both and see what feels right. With a few smart home updates, you can build a wellness routine that’s not only beautiful but beautifully easy to maintain.

Homemade Snowball Bath Bomb

16 · Nov 27, 2017 · 1 Comment

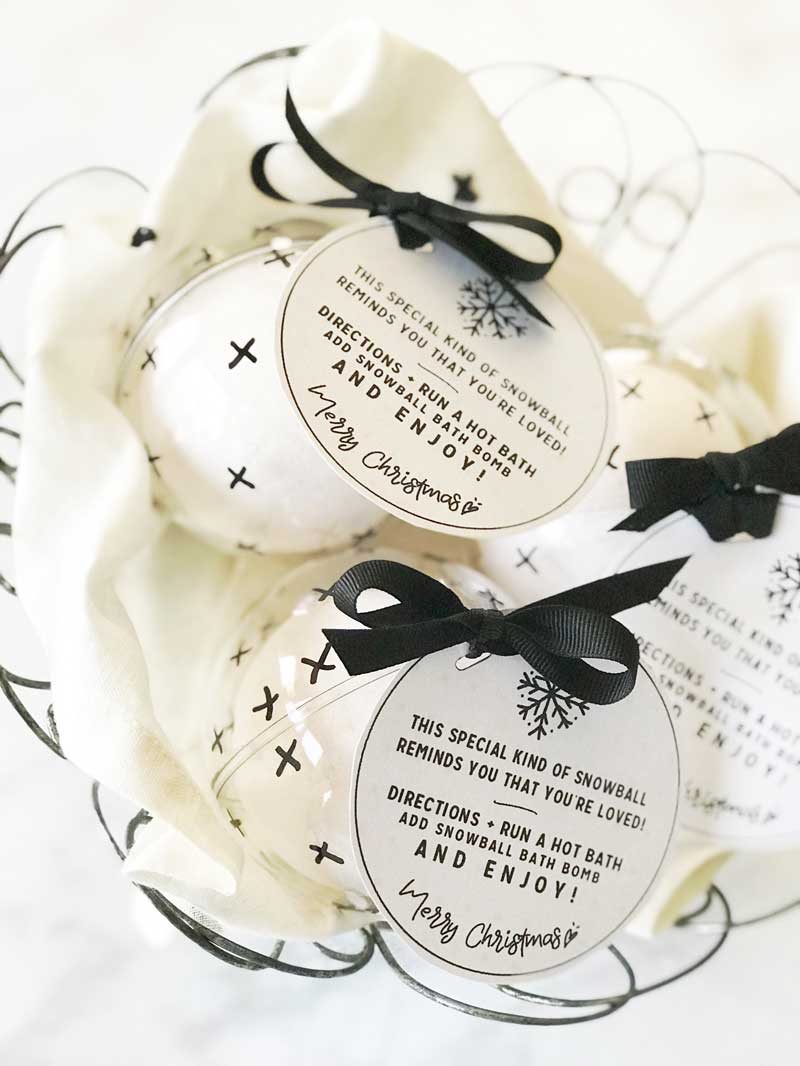
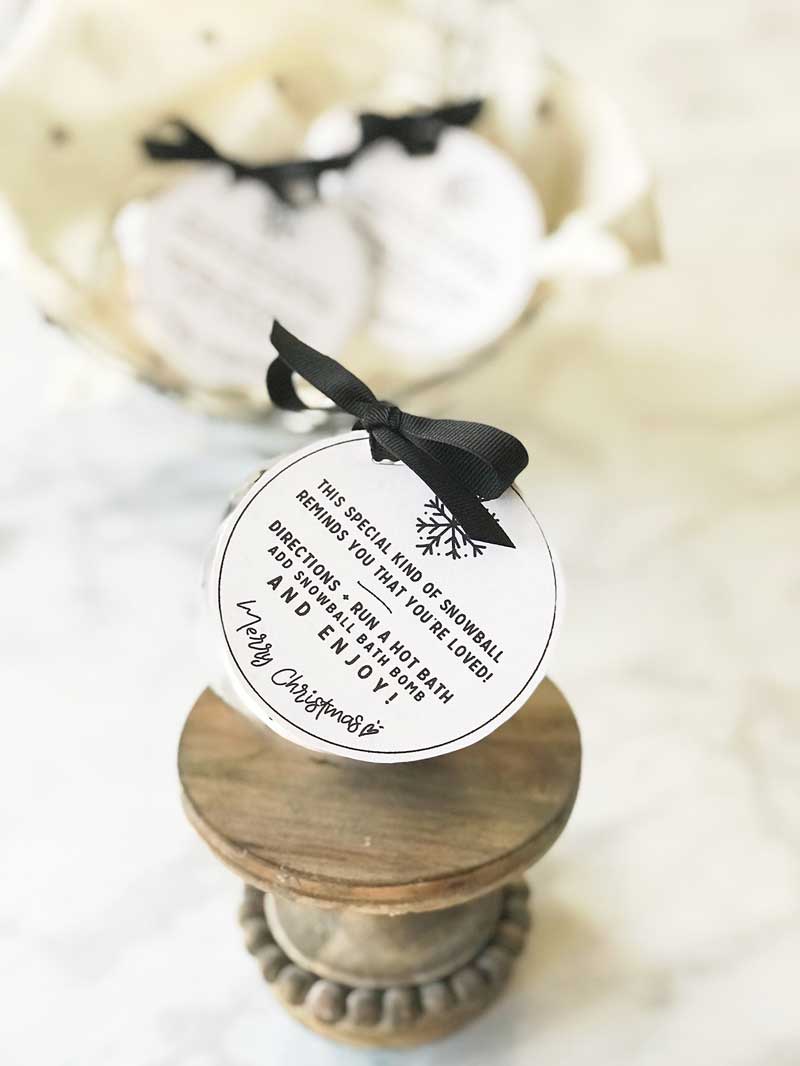
In a pinch and need a nice, simple and budget friendly Holiday gift for friends, neighbors, teachers and the list can go on and on. These bath bombs are a fabulous simple way to show your friends a little Holiday love this time of year. With the free printable gift tag, you can’t go wrong with this fun little gift.

snowball-bath-bombs-with-free-printable

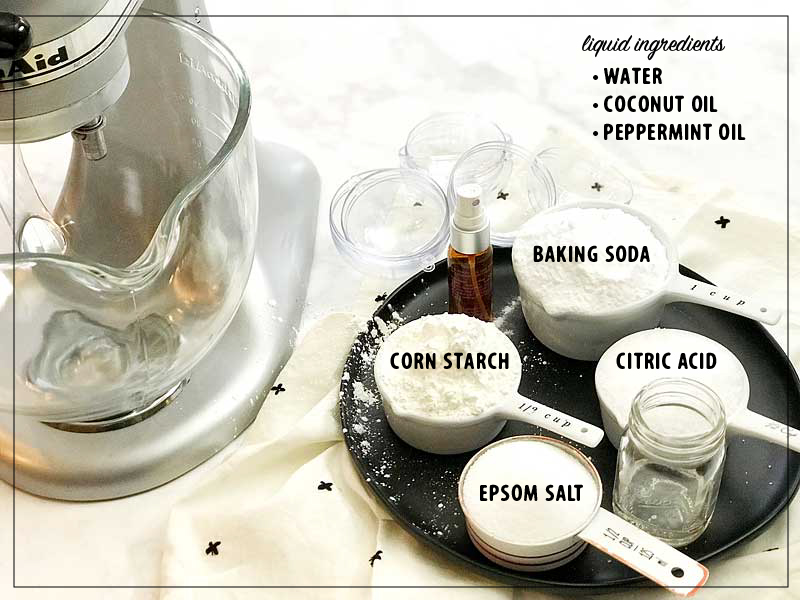
When it comes to neighbors, co-workers, teachers and friends, I always want to give them a little something around Christmas to show them how valued they are in my life. I however, don’t want to inundate them with all kinds of sugary treats all of the time. (Don’t get me wrong, I am no stranger to the classic goodie gift plate.) Sometimes it’s nice to receive something that isn’t sweet during the Holidays. With this easy to make Holiday de-stresser, it may quickly become their favorite Christmas goodie this year. All you need are a few simple ingredients…

Snowball Bath Bomb IngredientsSNOWBALL BATH BOMBS Looking for a simple Christmas gift for friends and neighbors? This simple to make snowball bath bomb will quickly become your favorite gift to give this holiday season!

  • 1 cup baking soda
  • 1/2 cup citric acid
  • 1/2 cup epsom salt
  • 1/2 cup corn starch
  • 4 tsp. water
  • 8 tsp. coconut oil
  • 2 tsp. peppermint essential oil
  • spray bottle
  • 3 fillable plastic Christmas ornaments 70 mm
  • 3 fillable plastic Christmas ornaments80 mm
  • black medium oil-based Sharpie
  • 3/8 inch black grosgrain ribbon
  • white card stock paper
  • hole punch
  • scissors
  • printable gift tag via WhipperBerry

Snowball Bath Bomb Instructions

This is one of those projects that is super fun to get the kiddos involved so, gather everyone around the mixer and let them dump away. Here is a quick little video that I put together to show how easy it is to make these little bath time gems.

Snowball Bath Bombs via WhipperBerry from Heather Thoming on Vimeo.

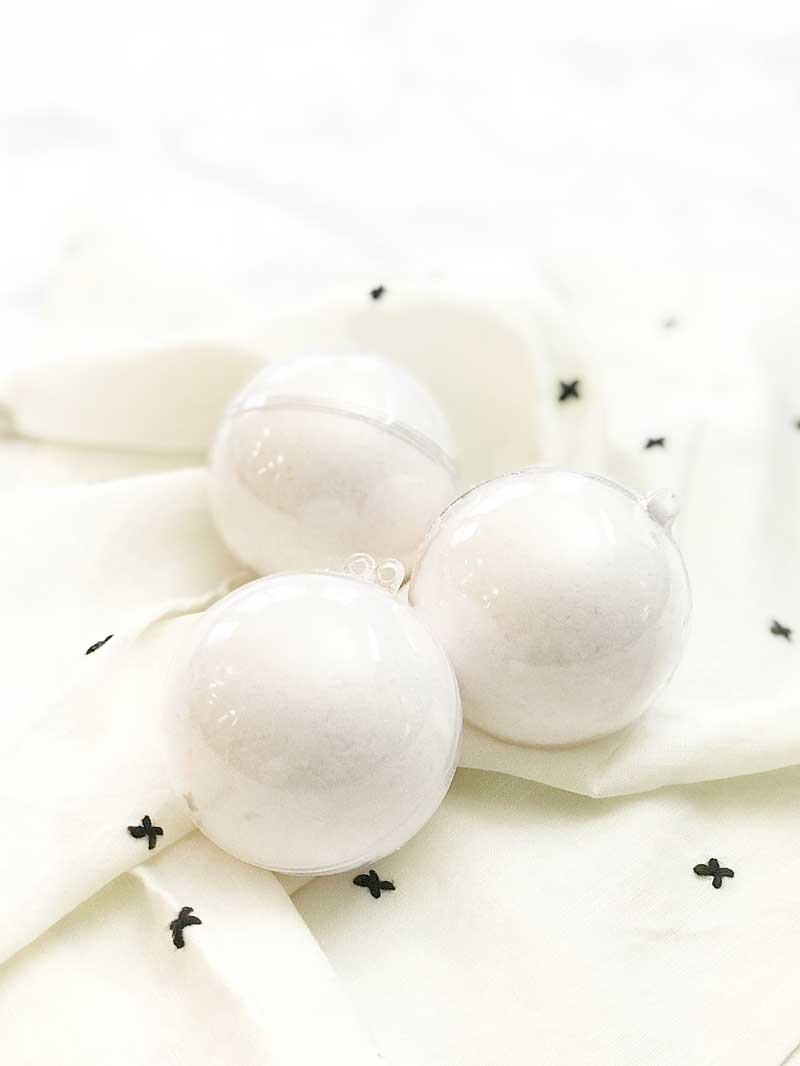
  • Use the 70 mm plastic ornament to mold the bath bomb.SNOWBALL BATH BOMBS Looking for a simple Christmas gift for friends and neighbors? This simple to make snowball bath bomb will quickly become your favorite gift to give this holiday season!
  • Keep spraying until your dry ingredients start to fee like nice wet sand.
  • Turn the mixer on low and spray the liquid ingredients into the bowl. The reason for the spray bottle is so that you add the liquid as slowly as possible. You don’t want to activate your ingredients until you or your friend is in their nice hot bath.
  • Add the liquid ingredients to the spray bottle and shake to mix.
  • It’s helpful to have a stand mixer for this project but, in a pinch, a whisk will do. Add all of the dry ingredients to the mixing bowl.
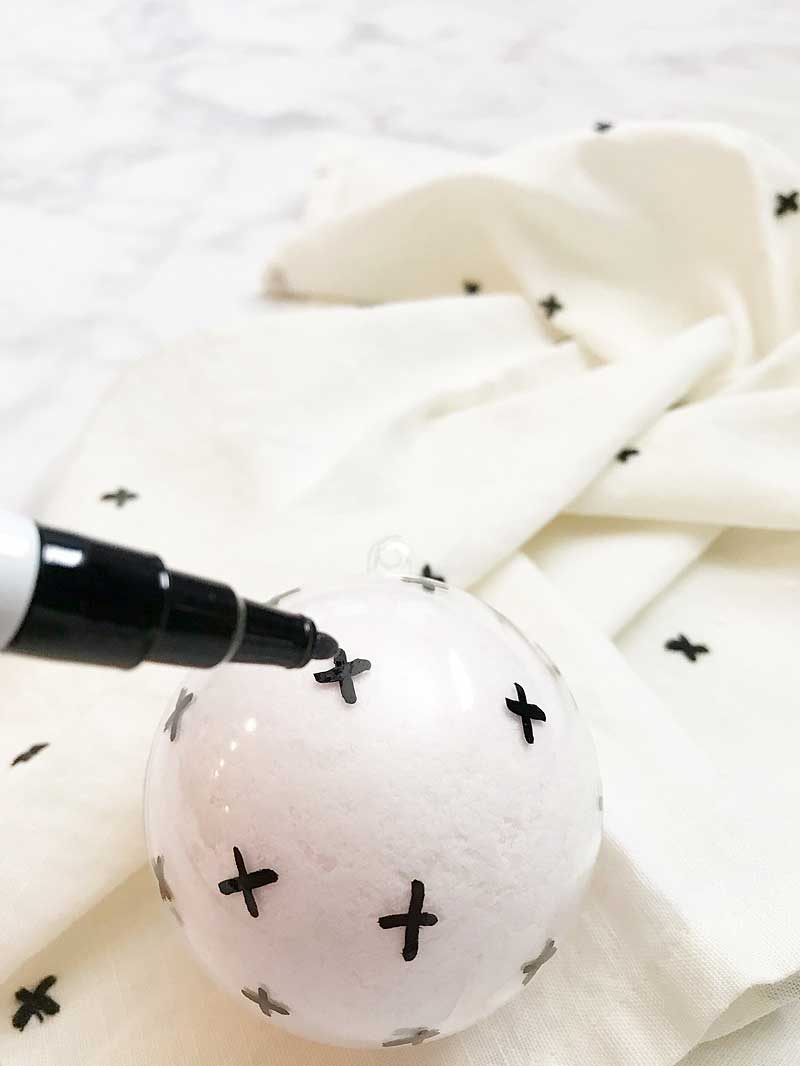
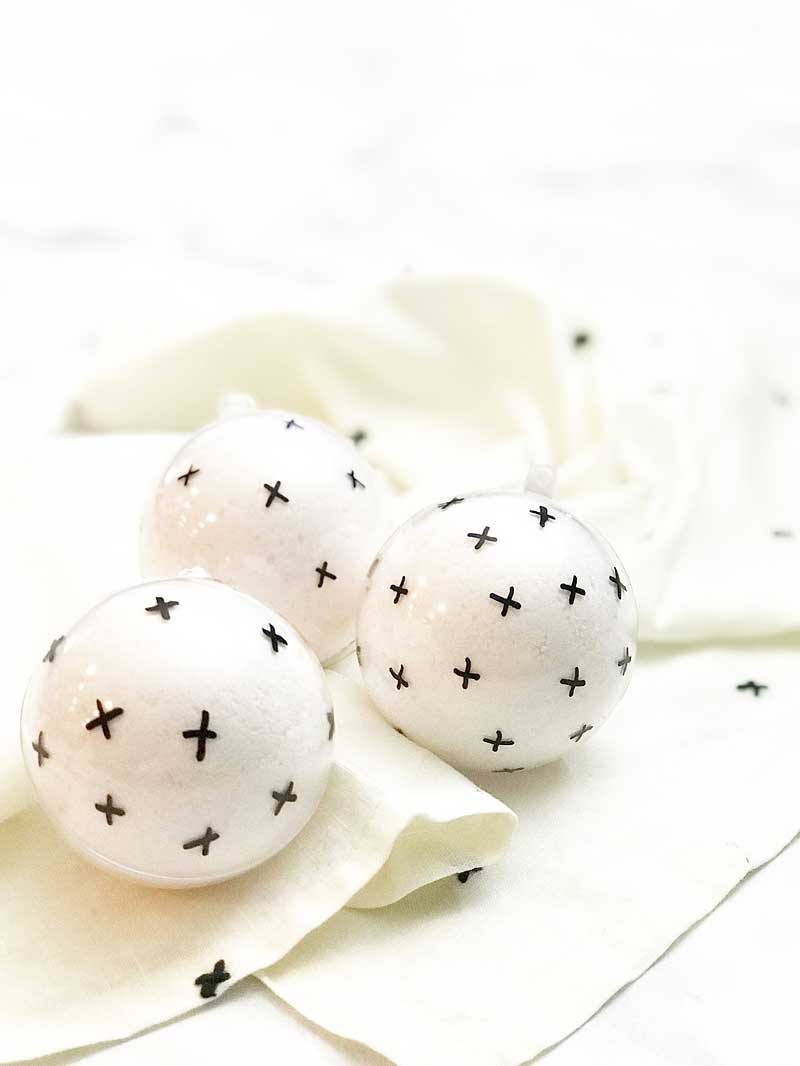
  • Using the oil-based sharpie, draw little crosses or “x” all over the ornaments.SNOWBALL BATH BOMBS Looking for a simple Christmas gift for friends and neighbors? This simple to make snowball bath bomb will quickly become your favorite gift to give this holiday season!

SNOWBALL BATH BOMBS Looking for a simple Christmas gift for friends and neighbors? This simple to make snowball bath bomb will quickly become your favorite gift to give this holiday season!

  • The following day, place your snowball bath bomb into the 80 mm fillable plastic ornament. It’s funny, they kind of expand a bit when they dry. That’s why you need the larger ornament to use as your gift box.
  • Leave in the mold for 5 minutes. Then remove the bath bomb from the mold and let dry overnight.
  • Let the black paint dry, it only takes a few minutes.
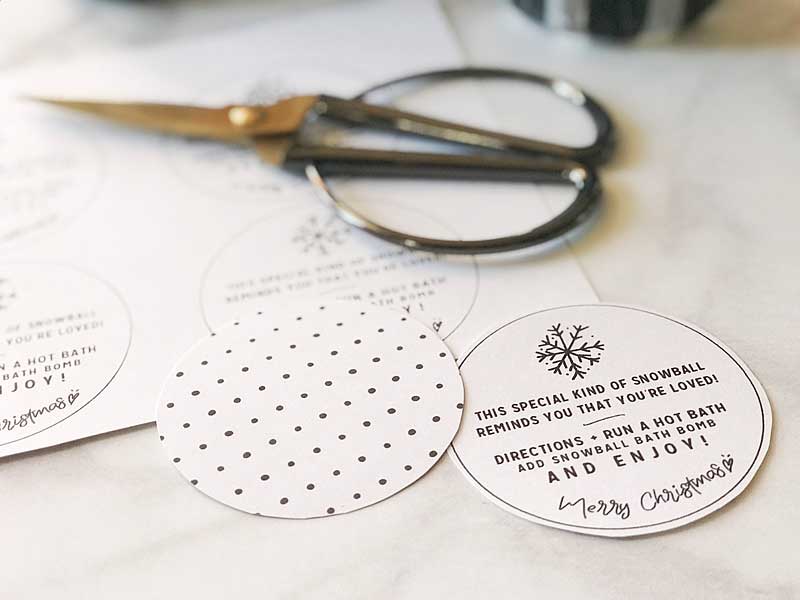
  • Print the free printable gift tag from WhipperBerry and cut out the circle.
    SNOWBALL BATH BOMBS Looking for a simple Christmas gift for friends and neighbors? This simple to make snowball bath bomb will quickly become your favorite gift to give this holiday season!
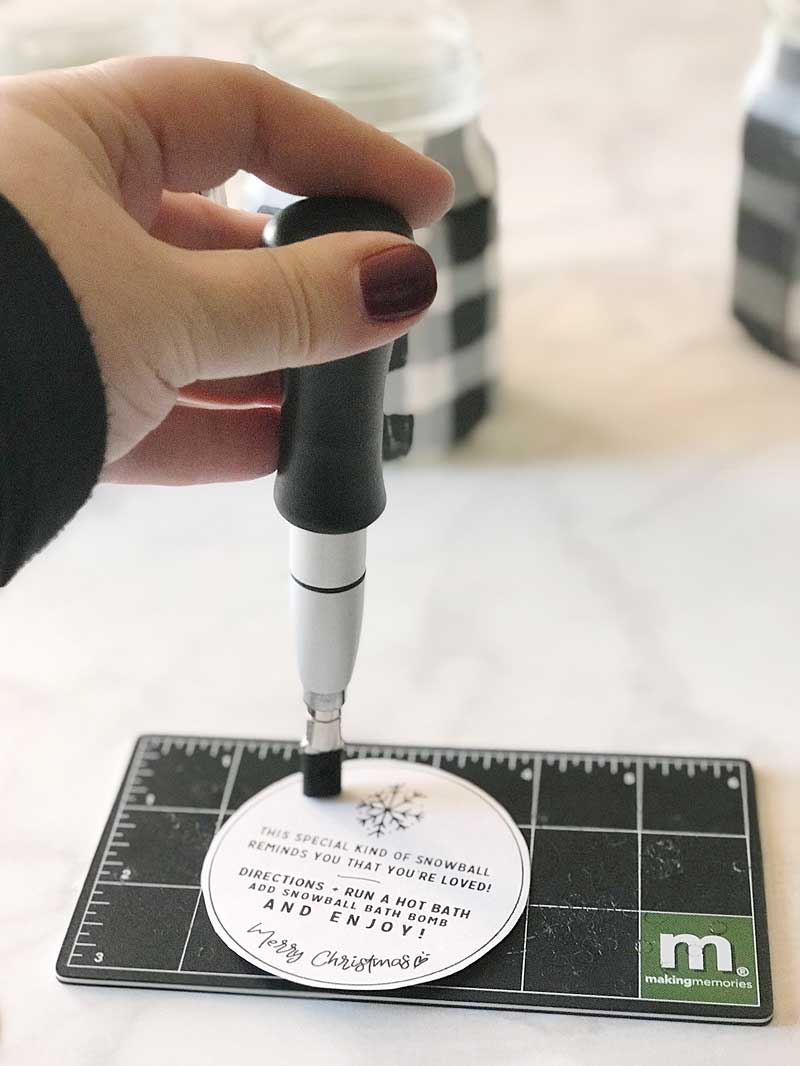
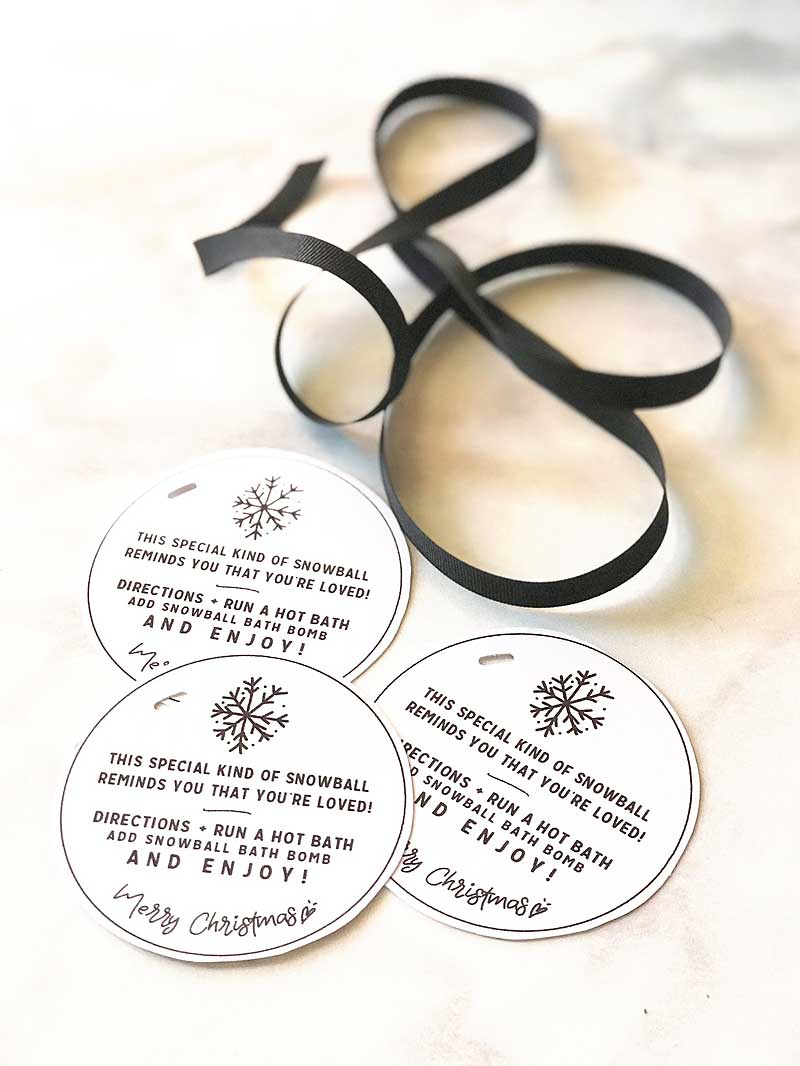
  • Using a hole punch punch a whole to the side of the snowflake on the tag.SNOWBALL BATH BOMBS Looking for a simple Christmas gift for friends and neighbors? This simple to make snowball bath bomb will quickly become your favorite gift to give this holiday season!
  • Then tie the tag on the ornament and you’re finished!

SNOWBALL BATH BOMBS Looking for a simple Christmas gift for friends and neighbors? This simple to make snowball bath bomb will quickly become your favorite gift to give this holiday season!

SNOWBALL BATH BOMBS Looking for a simple Christmas gift for friends and neighbors? This simple to make snowball bath bomb will quickly become your favorite gift to give this holiday season!

Check out the back…

SNOWBALL BATH BOMBS Looking for a simple Christmas gift for friends and neighbors? This simple to make snowball bath bomb will quickly become your favorite gift to give this holiday season!

Aren’t they cute! And… They are soooo nice in a hot bath sipping some peppermint hot chocolate. I may need to make a few batches to keep on hand for myself.

Here is a quick image that you can pin so you don’t forget the recipe.

SNOWBALL BATH BOMBS Looking for a simple Christmas gift for friends and neighbors? This simple to make snowball bath bomb will quickly become your favorite gift to give this holiday season!


Primary Sidebar

Heather from Whipperberry
Hello... my name is Heather and I'm the creator of WhipperBerry a creative lifestyle blog packed full of great recipes and creative ideas for your home and family. I find I am happiest when I'm living a creative life and I love to share what I've been up to along the way... Come explore, my hope is that you'll leave inspired!

Footer

  • Privacy Policy
  • Crafts
  • Food
  • Gifts
  • Holidays
  • Home
  • Mom Life
  • Recipes
  • Travel

Copyright © 2026 · Seasoned Pro