If you’ve be reading WhipperBerry for any time at all, you know I LOVE good packaging. I love those extra special embellishments that really say that you’ve taken the time and effort to make the gift or goodie something extra special. Not too long ago I saw a tutorial on how to make one of those generic bows out of burlap from For the Love, and it got me thinking… I wonder if you could make a fancy stacked bow out of fabric and have it still have a crisp form? I started to play around and sure enough, you can. Here is how to make a DIY fancy bow out of fabric…
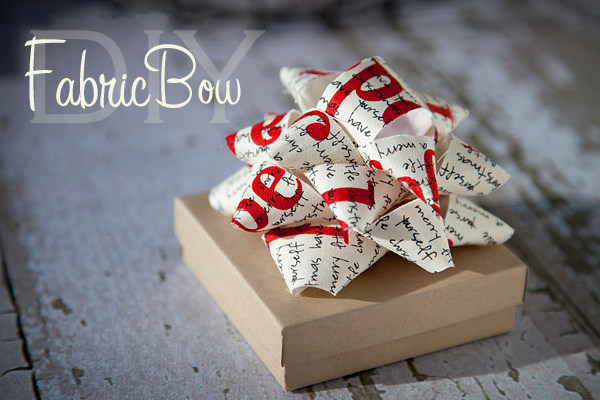
Here is Your Supply List to Make Your Own Fabric Bow
- Fabric ~ I used fat quarters and they work perfectly for this.
- Interfacing ~ I used Wonder Under
- Stapler & Staples
- Glue Gun & Glue Sticks
- Iron & Ironing Board
If you don’t have some of these supplies it’s quite easy to find them. You can get them at Amazon, your local craft store, or with a quick Google search online.
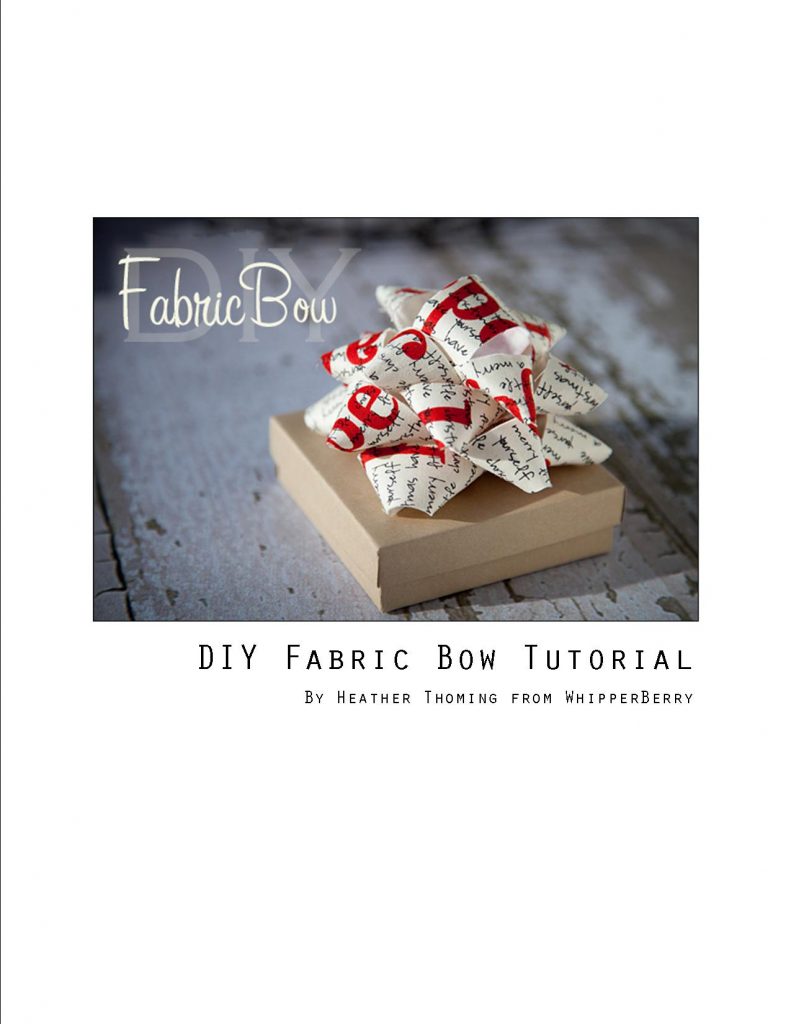
DIY Fabric Bow Tutorial
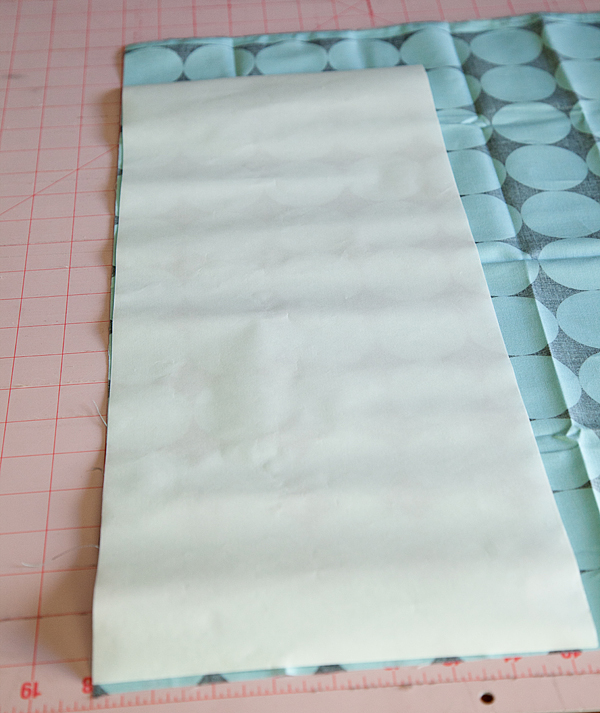
Cut fabric interfacing {Wonder Under} to 8×20 inches. Iron the “right” side of the interfacing to the wrong side of the fabric.
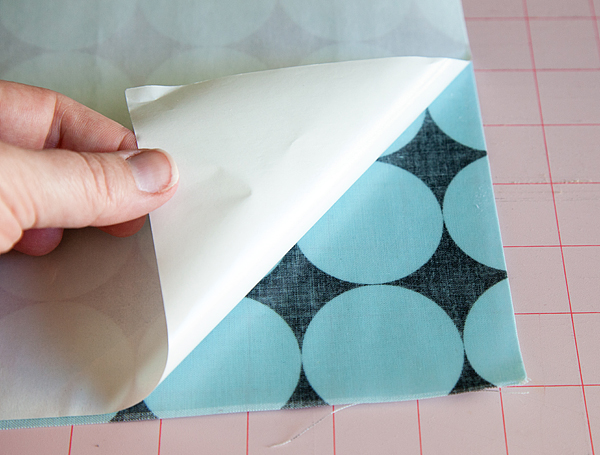
Let the fabric cool and then peel the paper from the interfacing that is now affixed to the fabric.
Place another piece of 8×20 fabric “right” side up on the top of the “wrong” side, with the interfacing sandwiched in the middle and then iron together.
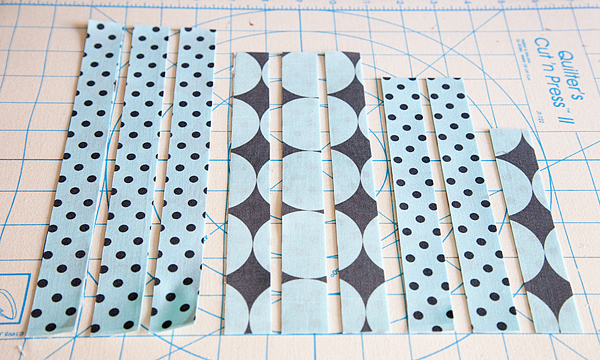
Cut fabric into 9 strips…
- Three 10 inches
- Three 9 inches
- Two 8 inches
- One 6 inches
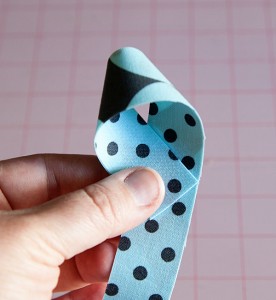
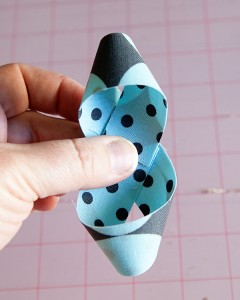
Starting with the first 10-inch strip of fabric, make a loop on one end with the tail meeting up in the middle. Flip the fabric over and do the same with the opposite end with the tails meeting in the middle and overlapping slightly.
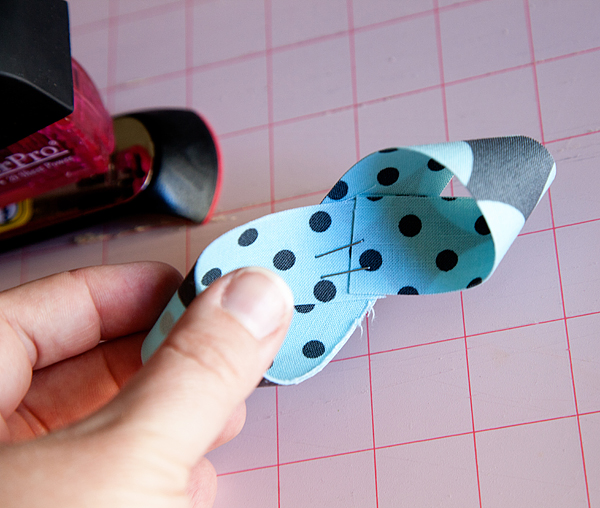
Place a staple or two to secure the two loops.
Repeat with the rest of the 10, 9 & 8-inch strips of fabric.
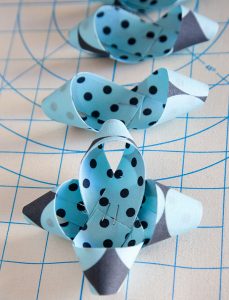
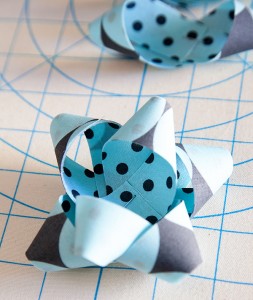
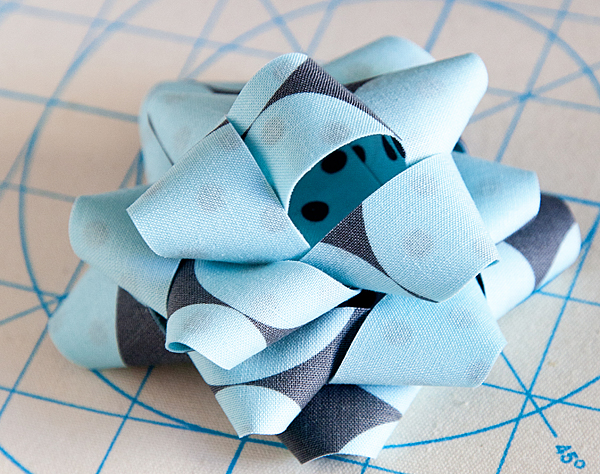
Start to layer each section starting with the largest {10 in.} loops crisscrossing them and adding a dab of hot glue in the middle to secure.
Continue Layering the largest to the smallest in the criss-cross pattern until you have used all of the 10, 9 & 8-inch loops. With the 6-inch strip of fabric, make a simple loop making sure to size it to bow. Secure with a staple or a dab of hot glue. Then place at the top of the bow with a dab of hot glue. Voila… You now have a stunning fabric bow!
If you would like to print the instructions for this tutorial click here for the PDF version…
This wraps up my fancy DIY fabric bow tutorial. Have any other questions or tips for how to make a fabric bow? Leave them down in the comments below. Or, if you want some more crafts to do when you’re bored make sure to check out that page.
14


Gorgeous!! So stylish and festive!
Jo-Anna
I adore this! They’re really beautiful!
This is a really easy to follow tutorial! Thanks for showing us how. The bow is absolutely beautiful!
great tutorial, I actually think I can pull it off 😉
what a pretty tutorial! love it 🙂 thanks for sharing!
You could totally get yourself a high paying job as a prop stylist/photographer!!
Vicki, you’ve totally made my day! I would love to do that someday. Right now I work on my skills while talking care of my four kiddos. Maybe when they are older and I can work on that dream. Thanks again!
kisses
heather
I love this super cute !!!!
Make sure to visit my blog !
Very pretty bow, you always know the right colors to use for your projects. Thank you for sharing the tutorial.
I am totally doing this! The bows are the perfect touch to pretty up the present! Love it! xoxo
Wow, I love these bows! And what a great way to use up some of those fabric scraps piling up in my closet… 🙂
Beautiful! I want to try this!
Such an amazing pictures! You’re very talented… and that tutorial is awesome! I think I might try it!
Found you on Stumbleupon
Cute Tut for bows, thanks for sharing! 😀
Smiles,
Suzanne in NW IL
What a smart lady! Thank you so much. I’m trying my bows tomorrow!!
Oh, yeah, the tutorial is perfect too!
Ok, maybe I’m just tired and missed it. I see the length of the strips to cut but what width do I cut?
Sorry.
3/4 inch”
3/4 inch?
Oh Peggy, that would be a good detail! Sorry I left that out. They are 1 inch wide strips.
kisses
heather
Visiting from the Letter 4. You are so talented! Can’t wait to live vicariously through your creativity (and maybe try a few things along the way).
8 x 10 fabric, 9 strips 1 inch wide? Wouldn’t we need a 9 x 10 piece of fabric? So sorry. I’m just making sure. I have a great idea for a bow. I drew my nieces name for Christmas. I was going to print a photo of her son on fabric printer sheets. I know he will be a little ‘chopped up’ but I think it’ll be cute.
Maybe will have to do ‘fussy cuts’ so she can tell who it is! Not sure if the Wonder Under would affect the photo. I guess I’ll find out!
This is great! Except the material that fixes fabric to fabric and acts like glue isn’t called interfacing…It’s called heat and bond or vliesofix – depending on the company…I work at a fabric shop and nearly everyone asks for the wrong thing, or can’t explain properly what it does!
Oh Sammy, that is good to know! Thanks so much for helping us out!!
kisses
heather
This is g8.. I am going to try it !I could add it to my decor …!
Out of curiosity, have you ever given a present with a DIY bow like this where the person’s reaction was more on the negative?
By which I mean, perhaps someone could tell it was made rather than bought and they viewed the DIY one as inferior.
hehe sorry, just questions running over my head while looking through your beautiful photos.
Or maybe a better question, can people sense when something is made rather than bought?
Okay, now THAT is brilliant!! Thanks for the tip!
love this thanks alot
Love this heather!
These are so beautiful! Love it!
Your bows are fabulous! If you wanted to stiffen fabric to make one-sided bows, mix water and modge podge, run your pre-cut strips of cloth through your mix, hang to dry and form bows as you would with continuous ribbon. You can also do this with Elmer’s and water.
Lovely tutorial, thank you for sharing:)
YOu make it look so easy! Beautiful!
Oh I love this . thanks for sharing
How wide do the strips need to be?
Great tutorial! I am certainly going to try this!
I love this! So simple, and so gorgeous!
I immediately fell in love w/your bows but thought they were going to be too difficult to make to be shared on my “EZ Craft” Pinterest board, But thanks to your excellent instructions, Heather, even I can make them! Your clearly written directions and photos are a tremendous help to visual learners like me! You really do take the simple things in life and make them beautiful. Thank you for making me feel creative by sharing your special projects!
Lil, That’s the sweetest comment I have had in a long time. Thank you so much!! Happy Crafting!!
kisses
heather
Hi there! This is such a great tutorial. I have been saving it since last year! I haven’t made any yet, but I was thinking, if you’re interested, we’re doing a Christmas linky party right now, kicking off the season with inspiration from year’s past. I’d love it if you wanted to link up! Let me know!
~Angela~
I am so with you on packaging! I love looking at a gift and see how well packaged it is. The attention to details from the paper to the bow is absolutely what I love about it. In my mind, it doesn't matter what's inside as I'm receiving this fabulous wrapped gift and I love it! Thanks for sharing!
Bought a can of blueberry biscuits with no idea what to do with them. Now I know!! Thanks!!!
I have a baby shower coming up. I am going to try this. Thank you!
Very useful, thanks!!!
Very useful, thanks
Great tutorial.Love it!!!