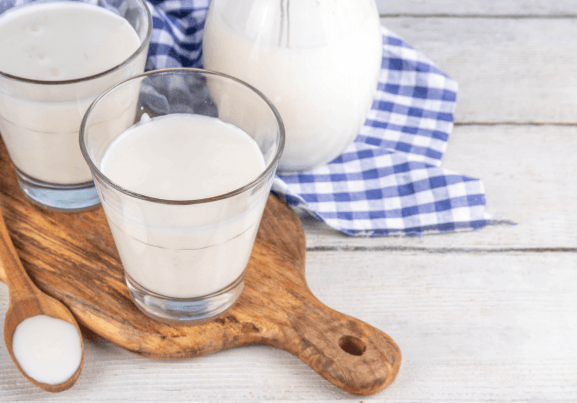
Fresh raw milk from a local farm has a rich taste that many people prefer over store-bought varieties. While raw milk offers natural flavor and freshness, it can also contain harmful bacteria that make it unsafe to drink without proper treatment. According to the U.S. Food and Drug Administration, raw milk may contain harmful bacteria such as Salmonella, E. coli, and Listeria, which can cause serious illness if the milk is not properly treated. Pasteurization helps reduce these risks by heating milk to a temperature that kills harmful microbes. Learning how to pasteurize raw milk at home is a simple way to make fresh milk safer while still keeping the creamy flavor people enjoy.
The key to pasteurization without losing flavor is gentle heating. By warming milk to 145°F and holding it at that temperature for 30 minutes, harmful bacteria are destroyed while the milk keeps much of its natural taste. This process is known as batch pasteurization and is widely used when flavor and quality are important.
With the right equipment and careful temperature control, it is easy to pasteurize raw milk at home safely and effectively. This guide explains the process step by step, along with helpful tips that make it easier to preserve the fresh taste and texture that make farm milk so appealing.
Fresh raw milk from a local farm has a rich taste that many people prefer over store bought varieties. While raw milk offers natural flavor and freshness, it can also contain harmful bacteria that make it unsafe to drink without proper treatment. Pasteurizing milk at home is a simple way to make it safer while still keeping the creamy flavor people enjoy.
The key to pasteurization without losing flavor is gentle heating. By warming milk to 145°F and holding it at that temperature for 30 minutes, harmful bacteria are destroyed while the milk keeps much of its natural taste. This process is known as batch pasteurization and is widely used when flavor and quality are important.
With the right equipment and careful temperature control, pasteurizing milk at home can be easy and effective. This guide explains the process step by step, along with helpful tips that make it easier to preserve the fresh taste and texture that make farm milk so appealing.
Quick Steps to Pasteurize Raw Milk at Home
If you want a quick overview before reading the full guide, here are the basic steps:
- Pour raw milk into a heavy bottomed pot.
- Heat slowly to 145°F while stirring gently.
- Hold the milk at 145°F for 30 minutes.
- Transfer the pot to an ice bath immediately after heating.
- Cool the milk to 40°F or lower within 30 minutes.
- Store the milk in clean glass containers in the refrigerator.
These steps follow the low temperature pasteurization method, which helps keep the milk safe while preserving its natural flavor.
Essential Steps for Pasteurizing Raw Milk at Home Without Losing Flavor
The right equipment and proper technique make the difference between safe milk that tastes fresh and overcooked milk that loses its natural flavor. Temperature control and quick cooling preserve the delicate taste while eliminating harmful bacteria.
Choosing the Right Equipment
A reliable thermometer stands as the most important tool for home milk pasteurization. Digital thermometers with probe attachments provide accurate readings within seconds and prevent temperature guessing. Most kitchen thermometers work fine, but dairy specific models offer faster response times.
A heavy bottomed stainless steel pot distributes heat evenly and prevents hot spots that can scorch milk. Double boiler setups work well because they heat milk gently through indirect contact with hot water. Some people prefer a milk pasteurizer machine for dairy products by MilkyDay that automates temperature control and timing for consistent results with batches up to several gallons.
An ice bath container large enough to hold the milk pot speeds up the cool down process. Fast cooling preserves flavor better than slow cooling at room temperature. A fine mesh strainer removes any particles that might have settled in the raw milk before heat treatment.
Sanitizing Tools and Workspaces
All equipment must be clean before contact with milk. Wash pots, thermometers, ladles, and storage containers with hot soapy water first. Rinse thoroughly to remove soap residue that can affect milk taste.
Sanitize tools with boiling water for at least one minute or use food safe sanitizer solutions. The workspace should be wiped down with diluted bleach solution (one tablespoon per gallon of water) or commercial food safe sanitizers. Air dry all items on clean towels rather than wiping them with cloths that might introduce bacteria.
Hands need proper washing with soap for at least 20 seconds before handling milk or equipment. Clean fingernails and avoid touching hair or face during the process.
Best Temperature and Time Practices
The low temperature long time method heats milk to 145°F and holds it there for 30 minutes. This approach preserves more natural flavor compounds and nutrients compared to higher temperatures. Stir the milk every few minutes to maintain even temperature throughout the batch.
The high temperature short time method brings milk to 161°F for just 15 seconds. This faster technique works well for smaller batches and reduces the risk of overheating. However, it requires constant attention and precise temperature monitoring.
Never let milk exceed 165°F, as higher temperatures create cooked flavors and break down proteins that give milk its smooth texture. Insert the thermometer into the center of the pot rather than near the sides or bottom, where readings can be misleading.
Methods to Retain Freshness and Taste
Cool milk rapidly after heat treatment to stop the cooking process and lock in fresh flavor. Transfer the pot immediately to a prepared ice bath and stir frequently. The temperature should drop to 40°F or below within 30 minutes.
Store pasteurized milk in glass containers rather than plastic because glass does not absorb odors or leach flavors. Fill containers to the top to minimize air exposure that can cause off flavors. Label each container with the pasteurization date, since homemade pasteurized milk stays fresh for about one week in the refrigerator.
Avoid repeated warming and cooling cycles that degrade taste quality. Pour only what you need and return the rest to cold storage right away. Keep milk away from strong smelling foods in the refrigerator because it absorbs odors easily through the container seal.

Advanced Tips for Maintaining Milk Quality Throughout Pasteurization
Success in home pasteurization depends on attention to detail at every step. Small errors in technique can affect both the safety and taste of the final product, while proper methods preserve the milk’s natural flavor and nutritional content.
Avoiding Common Mistakes
The most frequent error involves heat that rises too quickly. Rapid temperature increases can scorch milk proteins and create an unpleasant cooked taste. A person should use medium low heat and stir the milk constantly with a spoon or whisk. This distributes warmth evenly throughout the liquid.
Another mistake occurs with inaccurate temperature measurement. Standard kitchen thermometers often lack precision for pasteurization work. A dairy thermometer or instant read digital thermometer provides reliable readings. The probe must sit in the milk’s center, not touch the pot’s bottom or sides.
People sometimes skip the holding period or cut it short. For the low temperature method, milk needs to stay at 145°F for exactly 30 minutes. The high temperature method requires 161°F for just 15 seconds. Either approach works, but a person must follow the time requirements exactly to eliminate harmful bacteria.
Contamination after pasteurization defeats the entire purpose. All storage containers must be sterilized with boiling water before use. Hands should be washed thoroughly, and clean utensils prevent the introduction of new bacteria into treated milk.
Proper Cooling and Storage Techniques
Rapid cooling stops the heat treatment at the right moment and prevents flavor changes. As soon as the holding period ends, the pot should move to an ice bath. Fill a large bowl or sink with ice water, then place the pot inside it. Stir the milk frequently to speed the process.
The goal is to reduce the temperature to 40°F or below within 30 minutes. This temperature guideline follows the low-temperature long-time pasteurization standard used in dairy processing. The method is widely recognized by food safety agencies as an effective way to reduce harmful bacteria in milk while maintaining quality. Some people place sterilized ice packs directly into the milk to accelerate cooling, though this dilutes the product slightly.
Transfer the cooled milk into clean glass jars or food grade plastic containers. Glass works best because it does not absorb odors or flavors. Leave about an inch of space at the top for expansion if freezing. Label each container with the pasteurization date.
Store milk on a refrigerator shelf rather than the door. Temperature fluctuations in the door can reduce shelf life. Properly pasteurized and stored milk stays fresh for 7 to 10 days. Never leave it at room temperature for more than two hours.
Monitoring Milk Consistency and Aroma
Fresh raw milk has a slightly sweet smell and smooth texture. These qualities should remain after correct pasteurization. Any sour or off odor indicates spoilage or contamination. A person should discard milk that smells wrong regardless of the date.
The texture provides another quality indicator. Pasteurized milk should pour smoothly without lumps or separation beyond normal cream rise. Excessive foam or unusual thickness suggests overheating during treatment. Slightly less foam than raw milk is normal and expected.
Color offers visual clues about treatment success. Milk should maintain its natural white or cream appearance. A yellowish tint may indicate temperatures that rose too high. However, milk from certain breeds naturally has a more yellow color due to higher beta carotene content.
Taste tests confirm quality after the milk fully cools. Properly pasteurized milk tastes clean and fresh, similar to store bought versions but often richer. A cooked or caramelized flavor means the temperature exceeded safe levels. The next batch requires more careful heat control and constant attention throughout the process.
Food safety experts recommend keeping milk refrigerated after pasteurization and avoiding extended exposure to room temperature. Proper storage helps slow bacterial growth and preserves freshness.
Using Pasteurized Milk in Homemade Recipes
Once you pasteurize raw milk at home, it can be used just like store bought milk in many kitchen recipes. Fresh pasteurized milk works especially well in desserts, baked goods, and homemade dairy treats because it keeps much of its natural flavor and richness. For example, freshly pasteurized milk can be used to make creamy desserts such as this homemade vanilla ice cream recipe.
Using fresh milk often gives homemade ice cream a richer taste and smoother texture compared to many store bought versions. Pasteurizing the milk first helps ensure the milk is safe while still preserving the flavor that makes homemade recipes stand out.
Conclusion
Pasteurizing raw milk at home is a practical way to make fresh farm milk safer while still keeping its natural flavor. By using the low temperature method and carefully monitoring time and heat, it is possible to eliminate harmful bacteria without giving the milk a cooked taste.
With a thermometer, a sturdy pot, and proper cooling techniques, most home kitchens have everything needed to handle the process successfully. A little attention to temperature and cleanliness helps ensure the milk stays both safe and enjoyable to drink.
When done correctly, home pasteurization allows you to enjoy the rich taste of fresh milk while adding an extra layer of safety for you and your family.
0
Leave a Reply