• Skip to primary navigation
  • Skip to main content
  • Skip to primary sidebar
  • Skip to footer

Whipperberry

WhipperBerry • Your Home For Creative Inspiration

  • Home
  • Recipes
    • Starters
    • Easy Weeknight Dinners
    • Main Dish
    • Salads
    • Side Dish
    • Soups & Stews
    • Desserts
    • Breakfast
    • Miscellaneous
  • Tutorials
    • Creative Crafts
    • DIY Decor
    • Fabric Crafts
    • Food How-To
    • Jewlery
    • Paint Projects
    • Paper Art
    • Party Styling
    • Photography and Graphic Design
    • Silhouette
  • Holidays
    • Easter
    • Mother’s Day
    • Father’s Day
    • 4th of July
    • Halloween
    • Thanksgiving
    • Christmas
    • Valentine’s Day
  • Gift Ideas
    • Gifts For Everyone
    • Gifts for Dad
    • Mother’s day
    • For The Girls
    • For The Kids
    • Teacher Gift Ideas
    • Christmas
  • Printables
    • Holiday
    • Gift Idea
    • LDS Primary
  • Travel
  • About
    • Terms
  • Contact
  • Nav Social Menu

    • Facebook
    • Instagram
    • Pinterest
    • RSS
    • Twitter

DIY Chalk Paint

Can You Spray Chalk Paint? A How to Guide

9 · Nov 18, 2023 · Leave a Comment

Yes, you can spray chalk paint to apply it but there are few things you can mess up. In this post, I’m going to get into everything you need to know about spraying chalk paint.

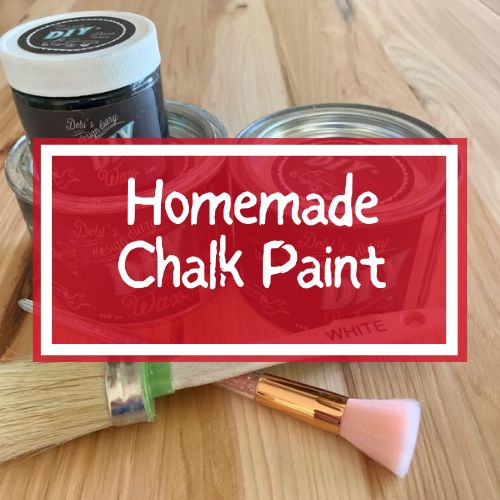
What is Chalk Paint and Why Use It?

Chalk paint is amazing, especially if you like doing DIY projects or making old things look new and trendy. Imagine you have an old chair or a table that looks kind of boring.

With chalk paint, you can give it a whole new look that’s stylish. It’s kind of like giving your furniture a fun makeover!

So, what exactly is chalk paint? It’s a special kind of paint that has a velvety, matte finish. This means it’s not shiny like some paints, but has a more smooth and chalky look (that’s why it’s called chalk paint!).

What’s great about chalk paint is that you don’t have to do a lot of prep work before you start painting.

Usually, when you paint something, you have to spend a lot of time sanding and priming, but chalk paint sticks to most surfaces without all that extra work.

And now, I’ll share with all of you the most common questions about spray chalk paint, such as “How long does it last?”, “Can we wash spray chalk paint off?”, “Is it permanent?”, and other questions. So, let’s get into it!

Also if you’re curious about the best chalk paint for furniture and other projects to use or how to use chalk paint on a glass click here to get more information.

Can You Spray Chalk Paint? Here’s What You Need to Know

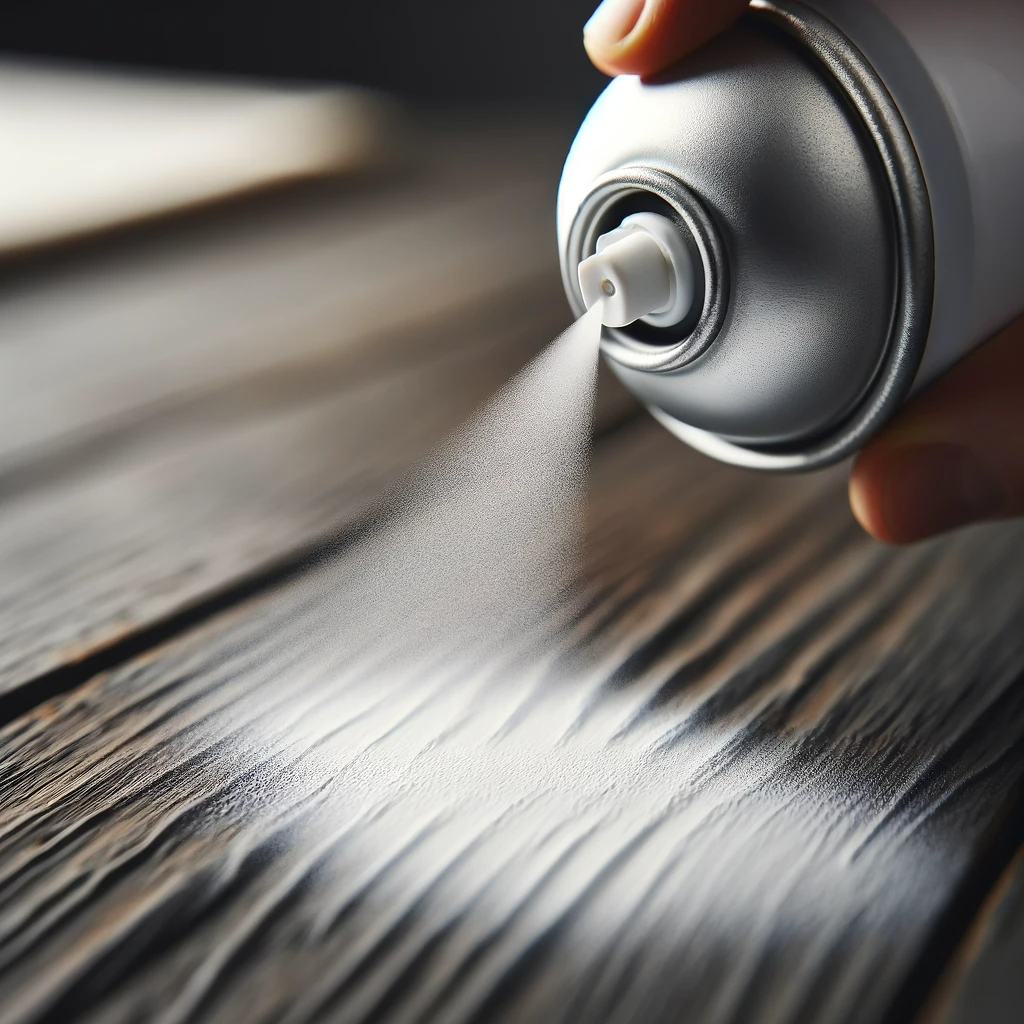
Can chalk paint be sprayed? Yes you can totally spray in chalk paint! In fact, it’s one of the best ways to apply it.

I remember the first time I tried it. I was a bit nervous because I was used to brushing on the paint, but I was curious to see if spraying could make the job easier and faster.

And guess what? It did! There are a couple of ways you can do it. You can get chalk paint in super convenient aerosol cans.

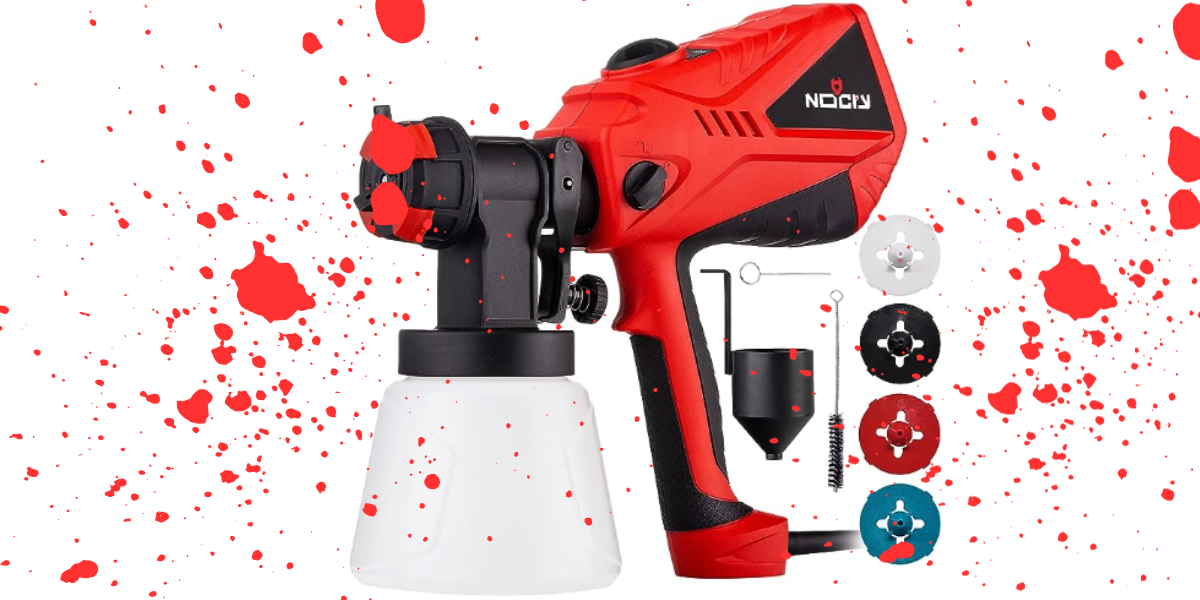
Or, if you’re like me and want more control over the project, you can use a paint sprayer. I went with the paint sprayer method because it does a better job.

Now, using a paint sprayer isn’t exactly like using a can of spray paint from the hardware store. It’s a bit more of a science but don’t worry, you can do it!

There’s a main difference between spraying chalk paint and brushing it that you don’t want to mess up.

The key is getting the chalk paint to the right consistency. It needs to be thinner than if you were using a brush. The first time I tried, I didn’t thin the paint enough, and it clogged the sprayer – oops! But, live and learn, right?

Once I got the hang of it, it was like opening a door to a whole new world of painting.

How Long Does Chalk Spray Paint Last?

Chalk spray paint lasts for several years but there are a few important factors to consider like the surface type, quality of paint, and environment.

  1. Surface Type: It adheres differently to various surfaces. On smooth, non-porous surfaces like glass or metal, it may last longer compared to porous surfaces like concrete or wood.
  2. Environmental Conditions: Exposure to rain, wind, and sunlight can significantly affect its durability. In mild weather conditions without much rain or wind, it can last longer, often several days to a few weeks.
  3. Foot Traffic: On surfaces with high foot traffic, like sidewalks, it will wear away more quickly.
  4. Quality of Paint: Higher quality spray chalk paints may offer better adherence and longer-lasting results.


What Equipment Do You Need to Spray Chalk Paint?

Alright, let’s talk about the gear you need to spray chalk paint. It’s kind of like gearing up for a mini adventure in your backyard or garage!

When I first decided to spray chalk paint, I realized it’s not just about having the paint – you need the right tools to make the magic happen. So, let me walk you through what you’ll need.

1. Paint Sprayer: This is your main tool. There are lots of types, but I like handheld ones because they’re easy to handle, especially for beginners. They’re perfect for spraying chairs, frames, and all sorts of cool stuff.

2. Protective Gear: Safety is key! You’ll need a mask to avoid breathing in paint particles (learned that the hard way!), gloves to keep your hands clean, and goggles to protect your eyes. It’s like your DIY armor.

3. Thinning Agent: Chalk paint is thick, so you need to thin it out. Water usually does the trick. Aim for a thin milkshake consistency – not too runny, not too thick.

4. Cleaning Supplies: After the fun, clean your sprayer with warm soapy water, maybe some vinegar. It’s a bit boring but super important to keep your gear ready for your next project.

And that’s it! With this gear, you’re all set to transform something old into your next masterpiece.

Is Chalk Spray Paint Permanent?

Yes, chalk spray paint is permanent. Well, kind of. It’s just a permanent as all other chalk paints but there is a process you can use to remove it. It doesn’t just wash off with water. You have to manually remove it but it can fade a bit or get chipped over time if you don’t apply a chalk paint wax or sealant.

I go into more detail about that here.

How Do You Spray Chalk Paint Without Messing Up?

To spray chalk paint without messing up you have to make sure the paint is thin enough, the surface is prepped, avoid wind, and make sure to let it dry properly. Chalk paint has a tendency to drip and run a lot if you don’t spray it consistently. You have to make sure you are spraying from the same distance without getting too close or too far away at any time.

  1. Prep the Surface: Clean your item, like a chair or a table, so it’s ready for paint. Imagine you’re bathing it before its big makeover.
  2. Thin the Paint: Mix your chalk paint with water until it’s like a smoothie – not too thick, not too watery.
  3. Start Spraying: Hold the sprayer like a superhero’s gadget and spray the paint in smooth, even strokes. It’s like drawing with a big marker that sprays paint!
  4. Let It Dry: After you’re done, let your masterpiece dry. It’s hard to wait, but it’s worth it!

Remember, if you make a little mess or it’s not perfect, it’s okay. It’s all about having fun and creating something cool!

How Can You Remove Chalk Spray Paint?

To remove chalk spray paint from furniture, first clean the surface. Use a suitable paint remover, gently scrub or sand if necessary, and then wipe clean. Test the method on a small area first and consider a professional for valuable or antique pieces. Always follow safety guidelines.

I wrote a more detailed post about removing chalk paint that goes into detail.

Good Luck With Your Chalk Spray Paint Project!

If you have any questions about anything related to spraying chalk paint make sure to leave a comment below. I love hearing from you!


Chalk Paint Recipes – How to Make Homemade Chalk Paint

178 · Sep 29, 2022 · Leave a Comment

Chalk paint is a wonderful medium to transform old furniture into new and stylish pieces. It’s also great for painting small home accent pieces and holiday decorations. Even though there are many manufacturers of chalk paint, with a wide variety of colors, sometimes it can be a challenge to find just the right color you want. It’s also hard to know which are the best chalk paints. One option is to make your own chalk paint.

Lately, TikTok has become a hotspot for chalk paint makeovers, with quick flips and creative recipes inspiring thousands of DIYers. It’s a great place to see real-time results, get new ideas, and even share your own homemade chalk paint projects with a community that loves creativity. This post has three homemade chalk paint recipes for you.

There is also a “commercial” way to make chalk paint. You can use BB Frosch paint transformer powder to mix with normal acrylic paints. This is by far my favorite type of chalk, too. It lets you choose your own color and it’s just as high quality as the commercial chalk paints.

Jump to Recipe

Making your own homemade chalk paint is easier than you might think. In fact, you can transform many household paints into chalk paint simply by mixing them with some common household ingredients.

It can be a fun activity to do with your kids, too. Many crafters even share their DIY projects through videos on platforms like YouTube or Instagram, sometimes using helpful tools like Buzzoid to boost their content’s visibility.

What Ingredients Are In Chalk Paint?

Depending on the brand of commercially sold chalk paint, ingredients can vary a little bit. However, one constant for all brands is the addition of some kind of mineral. Mineral additives are what give chalk-style paint that distinctive chalky matte finish. Additives vary, but they are often quartz, silica, talc, or more commonly, calcium carbonate. In fact, calcium carbonate is a key ingredient if you want to make your own chalk-style paint. Do you know what the more common name for calcium carbonate is? It’s chalk; just ordinary chalk!

Ingredients for homemade chalk-style paints will vary slightly, but in most basic recipes you’ll need your chosen paint, a little bit of water, and an additive of some kind to give the paint the distinctly chalky texture.

For recipes that call for using calcium carbonate (chalk), you have a couple of choices on how to add it to your paint. Calcium carbonate powder is readily available from grocery stores, health food stores, and online. It’s commonly sold as a nutritional supplement to help with bone health. The advantage to using already powdered calcium carbonate is that it will be a very fine, consistent texture that will be easier to mix into your paint.

If you have ordinary white chalk at home and want to try that for your chalky paint recipe, you’ll need to crush it into as fine a powder as possible. The best way is to place several pieces of chalk in a zippered plastic bag and smash it into a powder with a small hammer or rolling pin. After you have it smashed into as small pieces as possible, it is helpful to take an additional step of grinding those pieces into powder in a food processor or even a spice grinder. The finer you can get the powder, the easier it will be to mix into your paint, and you’ll have more professional-looking results. When grinding or crushing chalk pieces, you might want to wear a mask to cover your nose and mouth so you don’t breathe in the chalk dust.

How To Make DIY Chalk Paint

For making your own chalky paint, you should be aware that some recipes are better suited to work with latex paint, while you’ll get better results using acrylic paints with other recipes. No matter if you choose a recipe that uses latex or acrylic paint as the base, be sure your paint has a matte or flat finish. You definitely don’t want to try this with any paint that has a gloss finish.

Other than the ingredients for specific recipes, you’ll need measuring cups and spoons, paint stirring sticks, and bowls or cups to mix your paint. Because homemade chalk-style paint might get lumpy or thicken up if it’s stored for too long, try not to mix up more than you’ll need for your project. It’s better to mix smaller quantities than to have too much leftover paint. 

Chalk Paint Recipes

Here are a few easy recipes to make your own chalk-style paint. Let’s start with one of the easiest recipes, that also gives some of the best results:

Calcium Carbonate DIY Chalk Paint

Just two simple ingredients are needed. Pour your paint into a container, then mix the calcium carbonate powder in. Mixing it a little at a time will be easier. It will take a lot of stirring to get the paint to a nice smooth consistency. This recipe should apply just as nicely and even as commercial brand chalk paints. If the paint seems too thick, you can add a little bit of water to thin it out. This chalk paint recipe dries very quickly. If you want to sand it for a “distressed” finish, it will take a little more sanding effort than you’ll need when using commercial paints. This recipe will last a bit longer than other recipes, as long as any leftover paint is stored in an airtight container.

For this recipe, you will need:

  • 2 parts latex or acrylic paint
  • 1 part calcium carbonate powder

That’s it!

Plaster of Paris DIY Chalk Paint

Sealing chalk paint
Print Pin

DIY Homemade Chalk Paint

This chalk paint recipe is perfect for you to make at home. It's safe, easy, and effective!

Ingredients

  • 3 Tablespoons Cornstarch
  • 1/4 Cup Water
  • 1 ¾ Cup Acrylic paint

Instructions

  • In a plastic container or bowl (preferably one with a lid so you can store any leftover paint),  measure 3 tablespoons of cornstarch, then add 1/4 cup of water. Stir this together until it’s completely smooth. Now add your acrylic paint; stirring as you pour it into the container.  Mix this together for a few minutes, and you’re ready to paint! This paint might be a little thinner than other chalk paints, and sometimes it doesn’t seem to “stick” as well. If you’re painting a larger item, a little bit of light sanding beforehand will help the paint go on easier. 


Pour your latex paint into a container that has enough room for you to stir the ingredients together. In a separate small container, stir together the cold water and Plaster of Paris. It’s important to use cold water for this, so the plaster doesn’t immediately begin to harden! Once the mixture is a smooth consistency, pour the plaster and water mixture into the paint and stir it together. It might take quite a bit of stirring for it to all mix together.  Make sure there are no lumps! When it’s all mixed, the paint won’t look much different than before you added the Plaster of Paris. However, once the paint begins to dry the results are impressive. This recipe will create paint with a very “chalky” finish, although it can have a noticeably more grainy texture than other chalk-style paints.

This recipe probably isn’t the best choice if you want to sand your project for a “distressed” appearance. Sanding for this recipe is more likely to just scuff and dull the paint instead of highlighting fine details and texture. If distressing your project isn’t what you intended, the Plaster of Paris in this recipe makes this a very durable paint. Don’t mix more of this recipe than you think you might need; this won’t store well. After a day or two, the Plaster of Paris will begin to solidify.

Cornstarch DIY Chalk Paint

In a plastic container or bowl (preferably one with a lid so you can store any leftover paint),  measure 3 tablespoons of cornstarch, then add 1/4 cup of water. Stir this together until it’s completely smooth. Now add your acrylic paint; stirring as you pour it into the container.  Mix this together for a few minutes, and you’re ready to paint! This paint might be a little thinner than other chalk paints, and sometimes it doesn’t seem to “stick” as well. If you’re painting a larger item, a little bit of light sanding beforehand will help the paint go on easier. 

For this recipe, you will need:

  • 3 Tablespoons cornstarch
  • 1/4 Cup water
  • 1 ¾ Cup acrylic paint

Unsanded Grout DIY Chalk Paint

Unsanded grout is readily available in most hardware and home improvement stores. It’s best to use white or off-white colored grout for this paint recipe, so it won’t noticeably affect the color of your paint. If you use “sanded” grout, the paint will turn out with a texture that looks similar to wet sand or dirt.

For this recipe, you will need:

  • 2 Tablespoons of unsanded grout (be sure the label says “unsanded” or  “non-sanded”)
  • 1 teaspoon of water
  • 1 Cup acrylic or latex paint

In a disposable plastic container, stir together the two tablespoons of unsanded grout and one teaspoon of water. Be sure to break up any clumps of the unsanded grout mixture. Pour in one cup of acrylic paint, and stir until smooth. This recipe takes a lot of stirring to get it smooth. The end result is very durable chalk paint. It will feel dry in about a day, but it takes two to three days for it to fully dry. This paint doesn’t work well for distressed finished projects. It’s better for items that you want to have a smooth, even coat of paint.

It’s crucial to take the time to mix the grout and paint together really well. If not, your painted project could have a rough, bumpy texture once it’s fully dried. For this recipe, you shouldn’t mix up more than you plan to use at one time. Unfortunately, the paint doesn’t keep and after just a day it will become lumpy and impossible to use.

Can You Use Baking Soda To Make Chalk Paint?

If you’ve searched online for chalk paint recipes, you probably found one or two that use baking soda as the main additive. You can absolutely use baking soda to create your own chalk paint, but the results will be very grainy in appearance. It’s not necessarily a bad look, but you probably won’t get velvety smooth finishes with baking soda chalk paint.

To use baking soda for DIY chalk paint, simply mix together ½ cup of baking soda with three tablespoons of cold water. Stir this together with one cup of latex paint. The result will look and feel very grainy. This method is a good choice if you want something to look very “distressed” or “antiqued”, without having to do a lot of sanding.

Is Homemade Chalk Paint As Good As Buying It?

Making your own chalk paint can be fun, and economical if you’re planning to paint a smaller object. It’s a great creative activity to try with kids, or if you are just curious to see how it turns out for yourself. The methods in this article will give you custom chalk paint that is perfectly good to use and will be in whatever color you want it to be. But, how does homemade chalk paint really compare to the commercially available brands?

Both homemade and commercial chalk paints require little to no prep before painting, and they can all be sealed with a nice wax finish. Some of the homemade paint recipes are easy to achieve the popular distressed look on a piece of furniture.

I actually prefer to use BB Frosch, even over the actual chalk paint brands. BB Frosch is a powder that you mix with any kind of acrylic paint and it makes the perfect chalk paint.

Besides BB Frosch, I’d say commercial brands have a distinct advantage in several key areas. When you buy chalk paint from a trusted brand, you will always have a consistently smooth paint that has a long shelf life if properly stored. Commercial chalk paints also clean up easily with just soap and water. While it’s fun to try to create your own chalky paint, there is a bit of trial and error to get it just the way you want it to look. You can be confident you’ll always have a good product as soon as you open a can of brand name chalk style paint.

Primary Sidebar

Heather from Whipperberry
Hello... my name is Heather and I'm the creator of WhipperBerry a creative lifestyle blog packed full of great recipes and creative ideas for your home and family. I find I am happiest when I'm living a creative life and I love to share what I've been up to along the way... Come explore, my hope is that you'll leave inspired!

Footer

  • Privacy Policy
  • Crafts
  • Food
  • Gifts
  • Holidays
  • Home
  • Mom Life
  • Recipes
  • Travel

Copyright © 2026 · Seasoned Pro