• Skip to primary navigation
  • Skip to main content
  • Skip to primary sidebar
  • Skip to footer

Whipperberry

WhipperBerry • Your Home For Creative Inspiration

  • Home
  • Recipes
    • Starters
    • Easy Weeknight Dinners
    • Main Dish
    • Salads
    • Side Dish
    • Soups & Stews
    • Desserts
    • Breakfast
    • Miscellaneous
  • Tutorials
    • Creative Crafts
    • DIY Decor
    • Fabric Crafts
    • Food How-To
    • Jewlery
    • Paint Projects
    • Paper Art
    • Party Styling
    • Photography and Graphic Design
    • Silhouette
  • Holidays
    • Easter
    • Mother’s Day
    • Father’s Day
    • 4th of July
    • Halloween
    • Thanksgiving
    • Christmas
    • Valentine’s Day
  • Gift Ideas
    • Gifts For Everyone
    • Gifts for Dad
    • Mother’s day
    • For The Girls
    • For The Kids
    • Teacher Gift Ideas
    • Christmas
  • Printables
    • Holiday
    • Gift Idea
    • LDS Primary
  • Travel
  • About
    • Terms
  • Contact
  • Nav Social Menu

    • Facebook
    • Instagram
    • Pinterest
    • RSS
    • Twitter

graphic design

DIY T-Shirt Design + Salty but Super Sweet with Cricut Rose Gold IRON-ON Foil

14 · Mar 7, 2017 · Leave a Comment

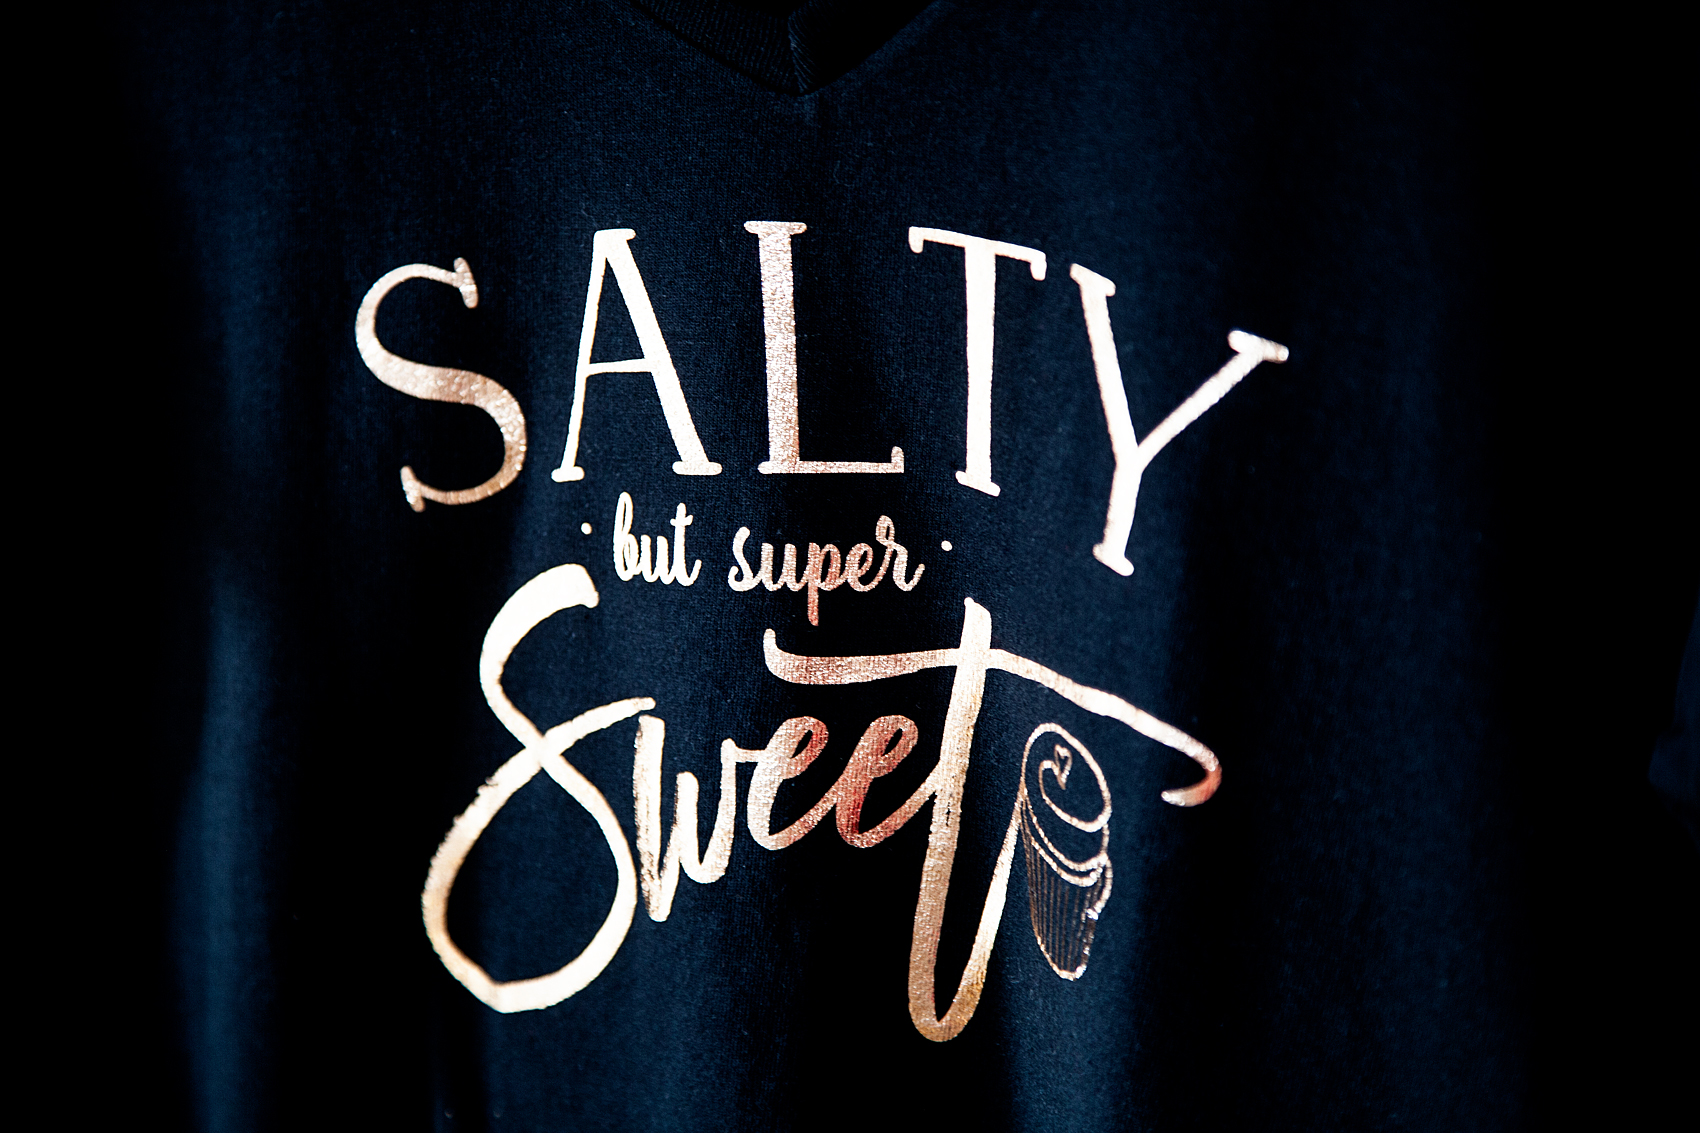
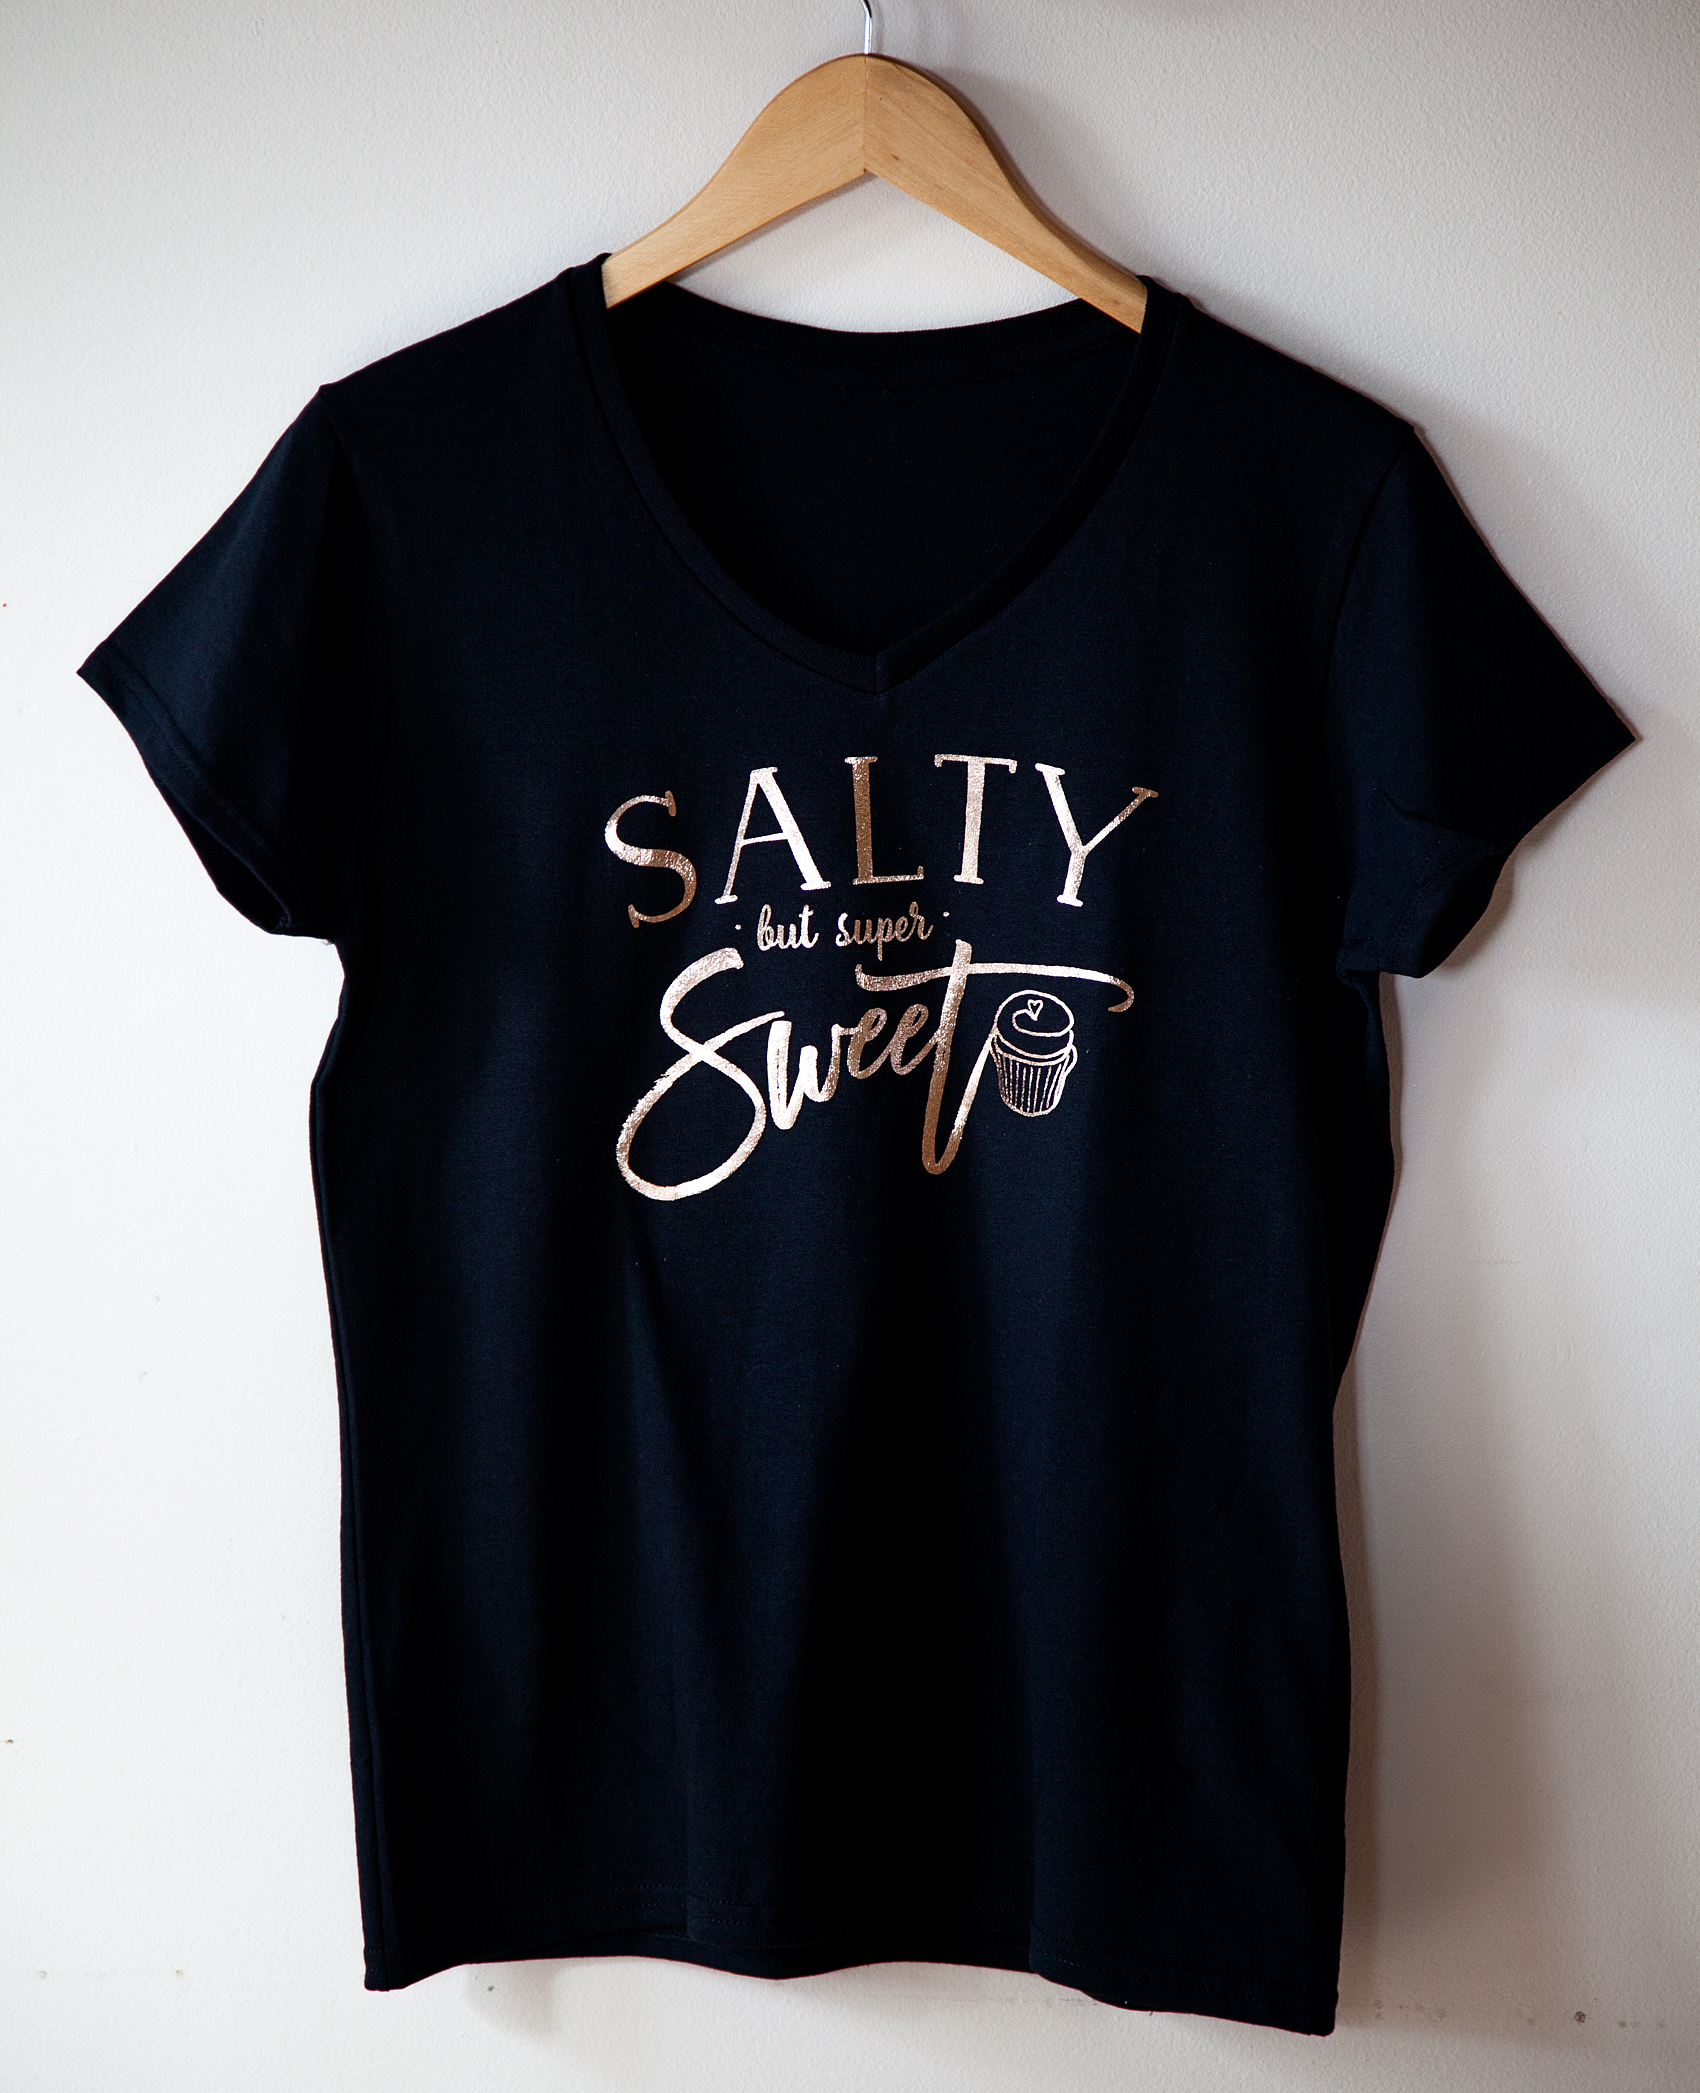
Anyone out there have a middle school girl, a sassy friend or teenagers at all? I have ALL THREE!! The level of sass in my life is epic. I have three girls all in the teen years and there is a new term floating around our house these days… “ohhhh, SALTY!” OR, “You’re being soooo SALTY!” Isn’t it funny when the newer generation comes up with their new slang or vernacular? If you haven’t heard the term before, think of it in terms of a person who has the same kind of savory bite like salt.  It basically means that, you are upset and throwing a bunch of sass. I decided that with three teenage girls and a truck load of sassy friends they all needed a special tee that describes them to a “T.” After a particularly rough afternoon with one of my girls the perfect saying popped into my head, “Salty but Super Sweet.” That’s exactly how I felt in the moment. She was being so hard to deal with, yet under it all, I know that she is, and will always be SUPER SWEET. That’s when I set to work to design a perfect DIY t-shirt for her and all of the other “SALTY” ladies in my life using my Cricut Explore Air 2 and my FAVORITE Rose Gold Iron-On Foil!

Salty by Super Sweet DIY T-Shirt by WhipperBerryMaterials for the DIY T-Shirt

I ran over to my local Michaels and grabbed some of their black v-neck t-shirts in their fabulous t-shirt section. Have you checked that out yet? You can get all kinds of sizes, colors, youth, adult and even v-neck tees. The v-neck that I bought was $5.99 AND…  If you keep and eye-out, they usually have some crazy awesome sales on the t-shirts that make them an even better deal.

Black V-Neck T-shirt from Michaels

I decided that with a “SALTY” kind of tee, I needed to use a material for the graphics that REALLY stood-out. I combed through Cricut’s vast array of iron-on materials and selected the metallic Rose Gold Iron-On Foil. I’ve become a HUGE fan of all of their foils and this one REALLY does not disappoint. It adheres to the t-shirt fabric beautifully and looks fabulous against the black tee.

Salty but Still Super Sweet DIY Tee with Cricut Iron-On Rose Gold Foil

I’ve used other iron-on materials from other brands and sadly, the materials are peeling off by the end of the day. Incredibly frustrating after spending time & money to create something special just for it to peel off the first time you wear it.
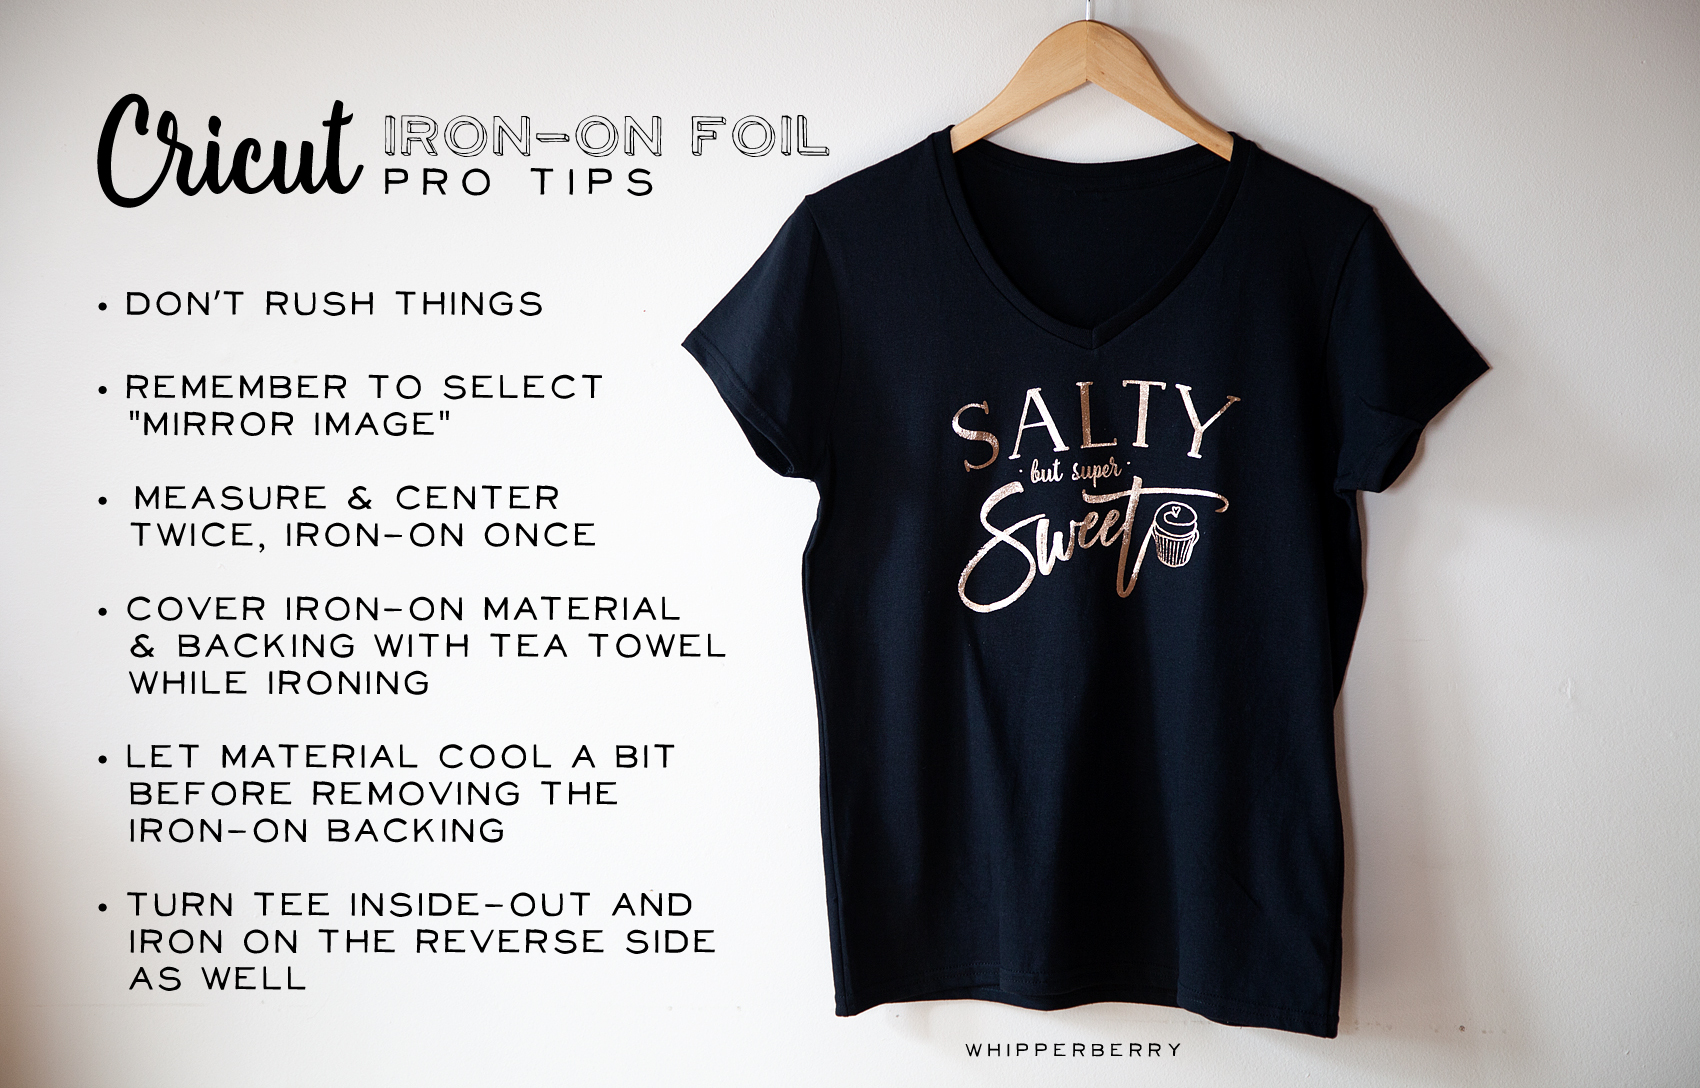
• PRO TIP •

Iron-on PRO Tips for Cricut Cutting Machines via WhipperBerry

 Creating the DIY T-Shirt Design

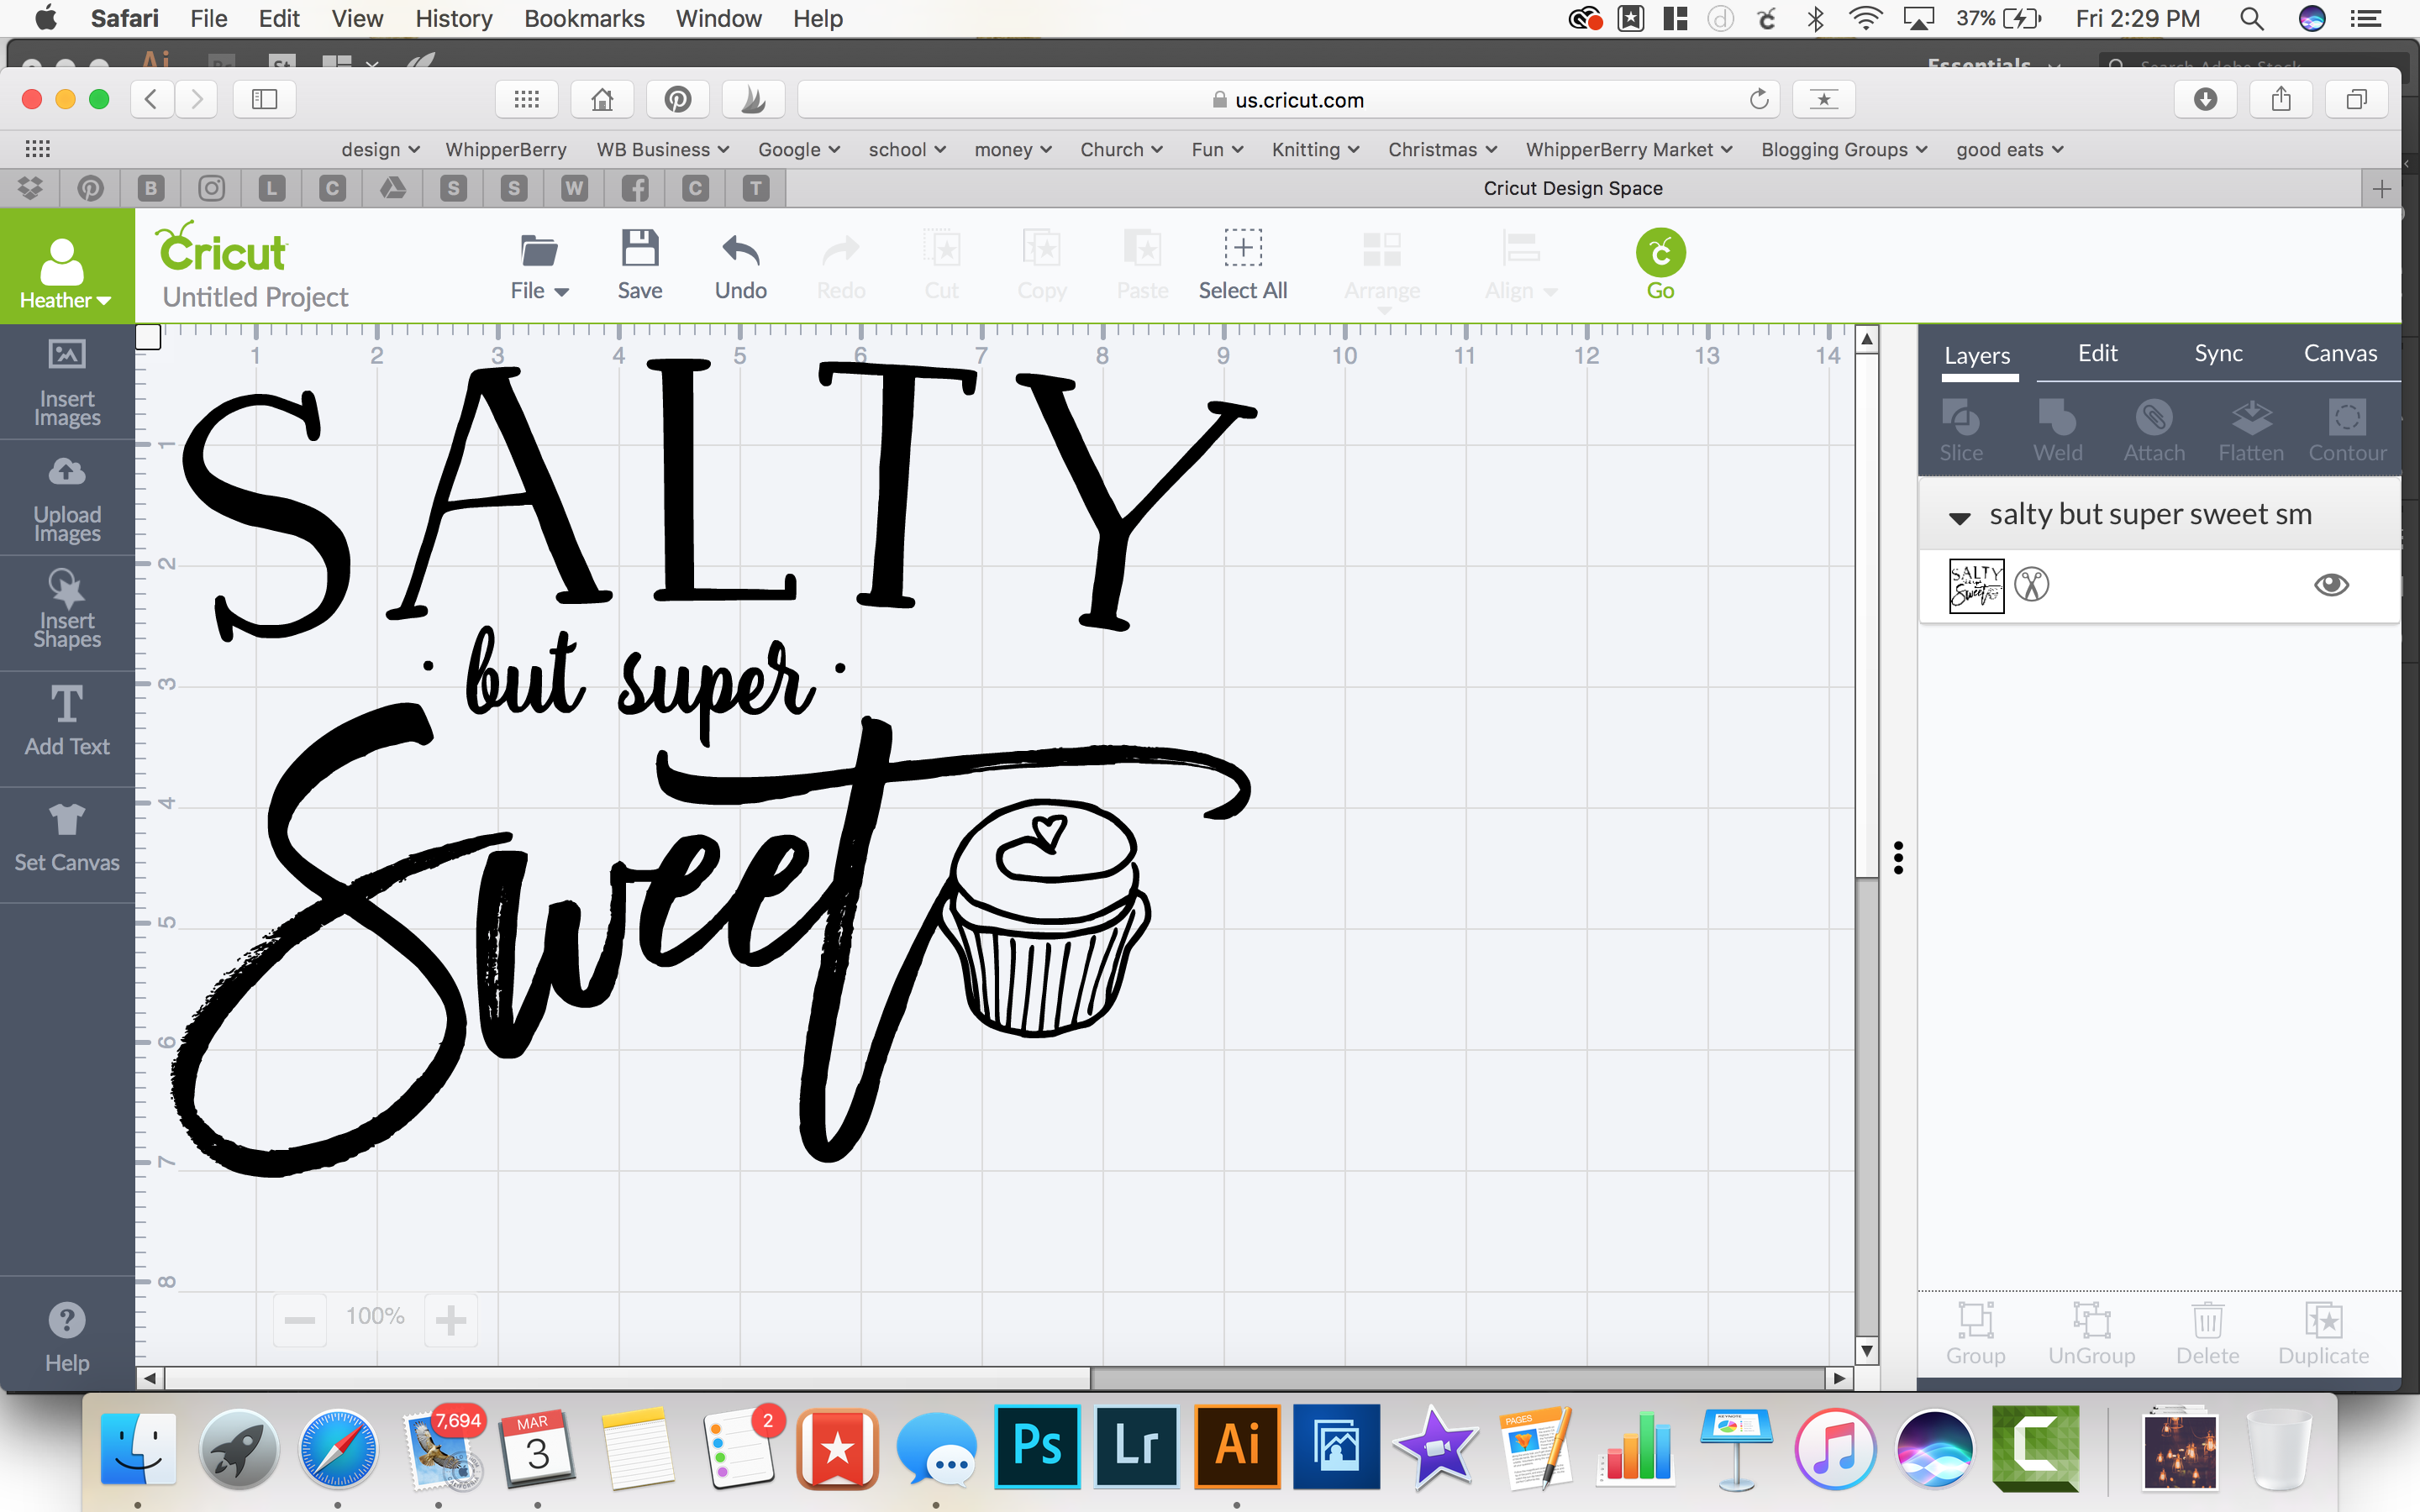
This is where things get super exciting!! Did you know that you have a couple of different options when it comes to creating designs to use with your Cricut when creating your own shirts or, anything really!

First off, you DON’T have to be a mad designer in order to utilize your Cricut machine. Cricut has made it so easy to browse through a whole library of projects in the Cricut Design Space. If you want to do the whole DIY t-shirt thing and you don’t know where to start, go into Design Space and search the whole Fashion section and you’ll find all kinds of fun ideas.

It’s also easy to create your own designs within Design Space. If you’ve already done some basic design work in other programs like Adobe Elements you’ll feel right at home within Design Space.

Screen Shot 2017-03-03 at 2.29.04 PM

If you are more of an advanced designer, you can create designs within programs like Adobe Illustrator and Photoshop, save them as .jpg, .gif, .png, .bmp, .svg, or .dxf files and upload them right into design space.

Designing in Illustrator for Cricut cutting machine

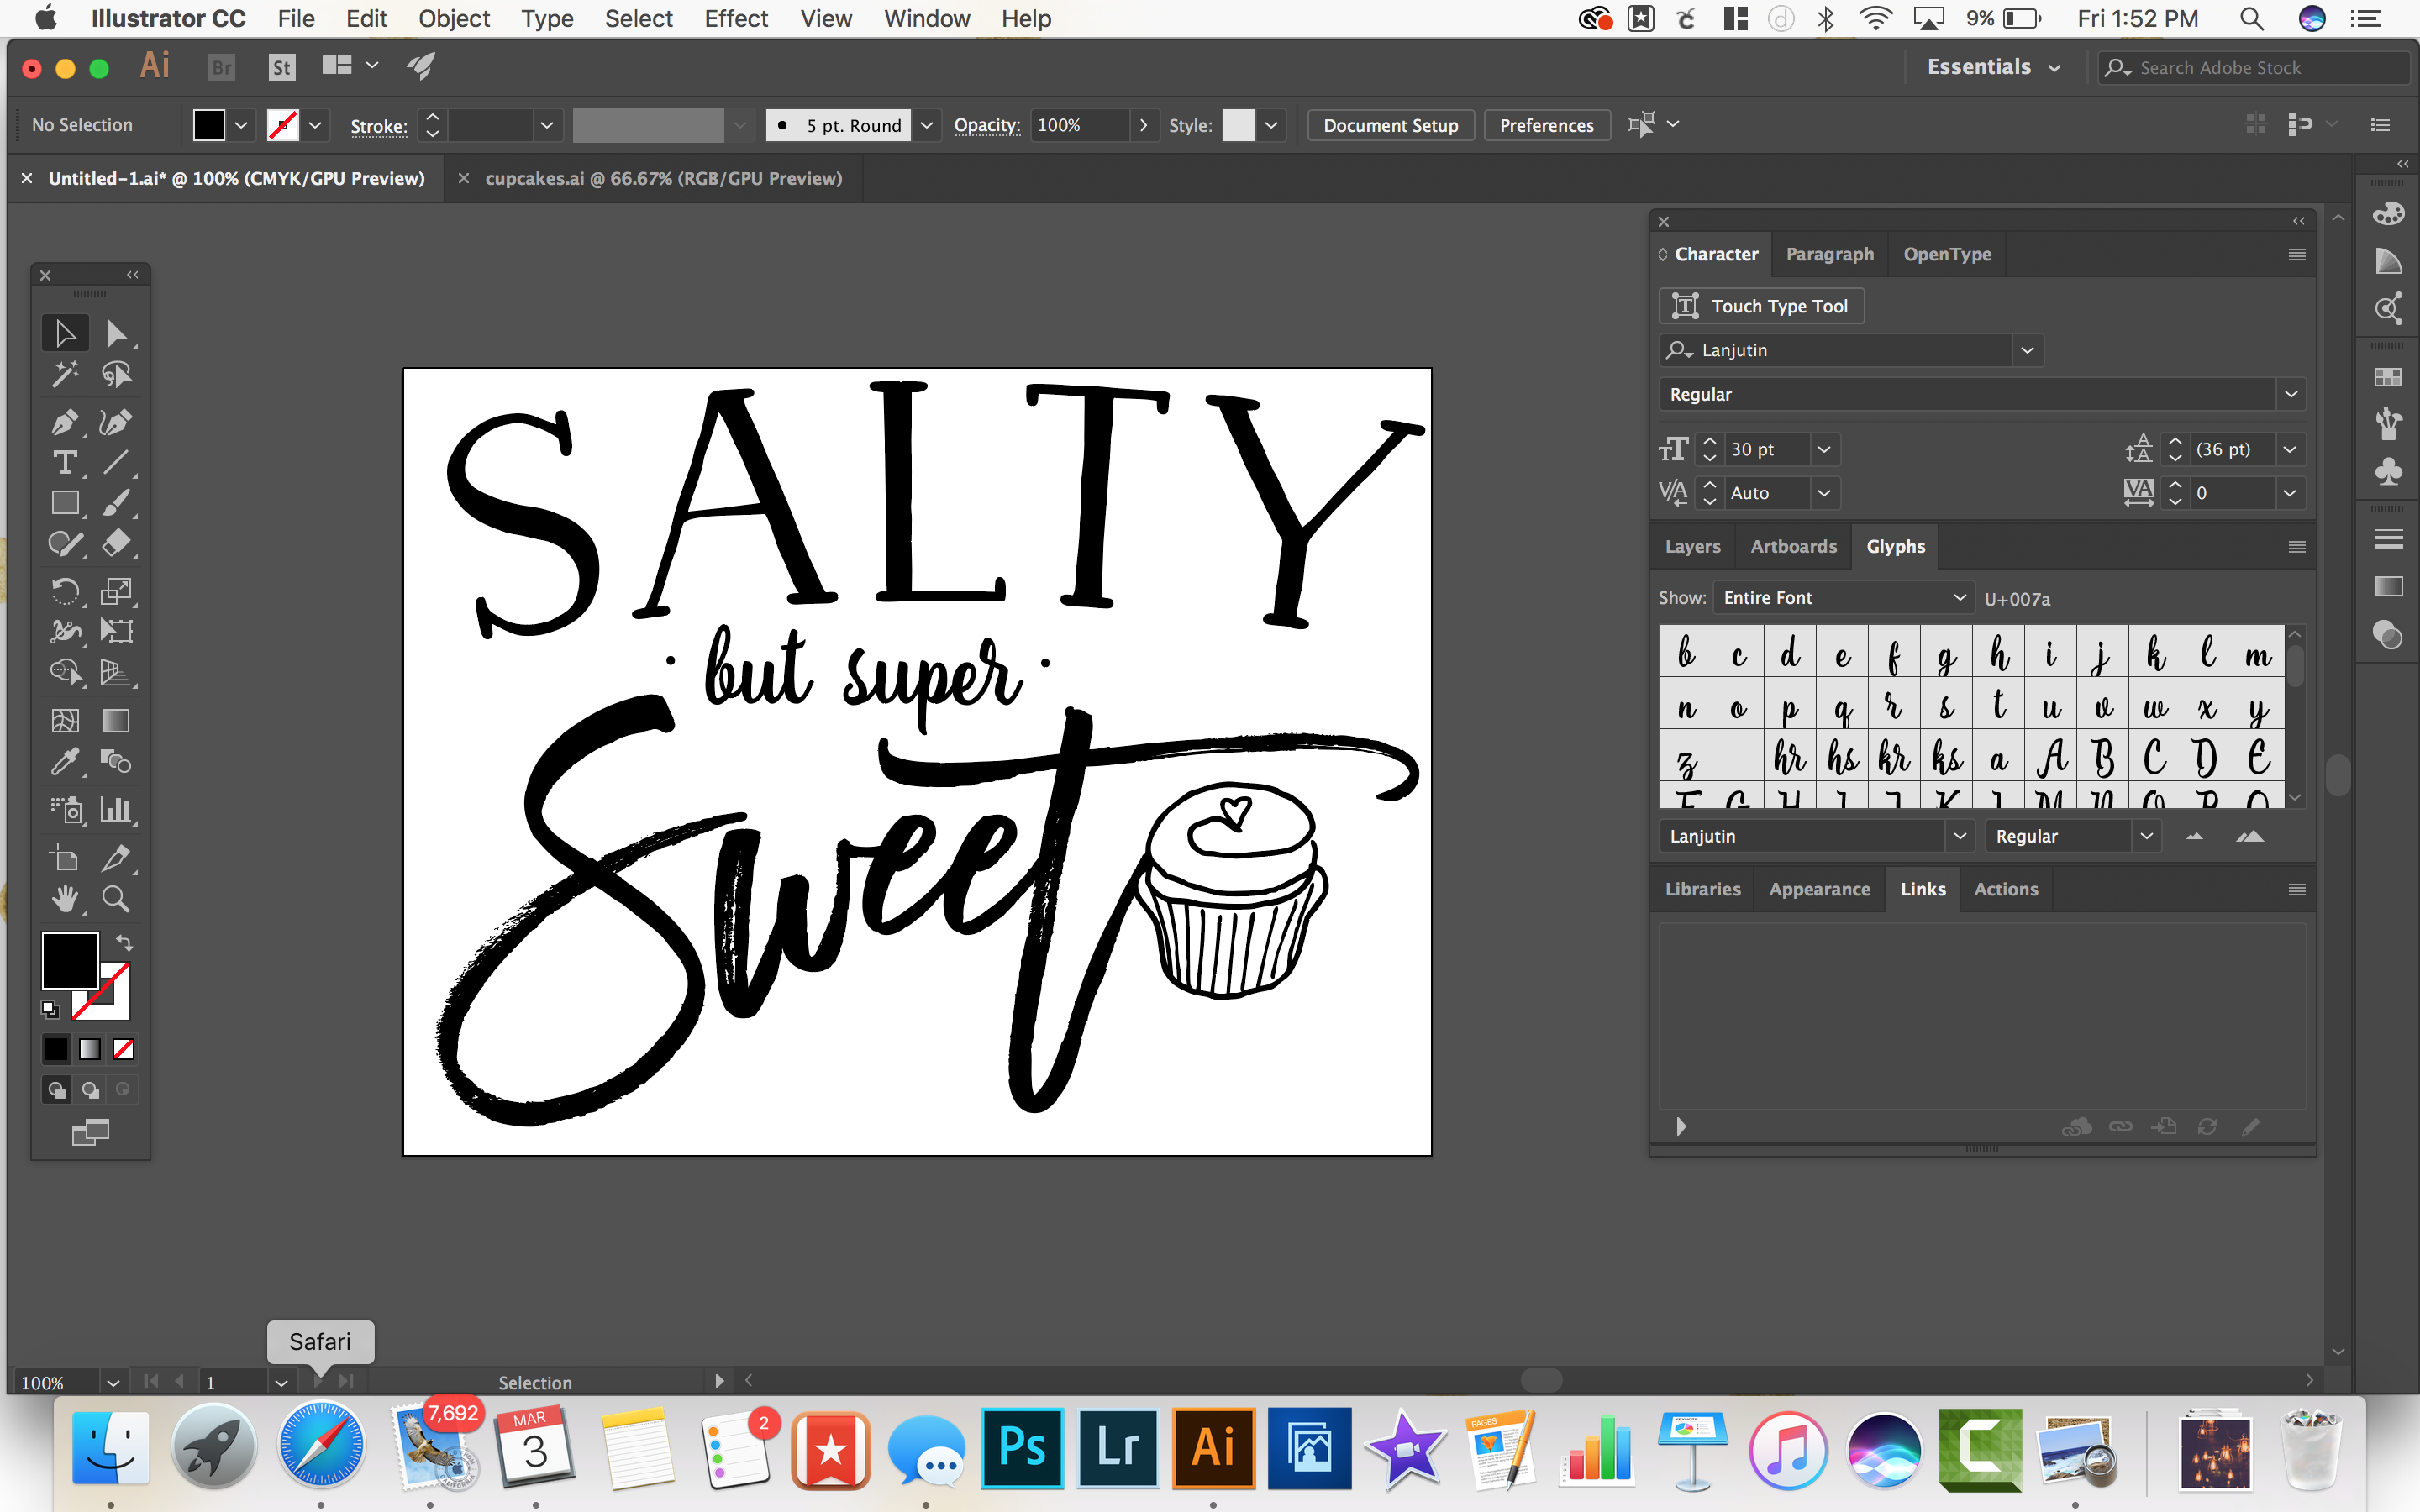
That is one of my favorite ways to create. I’ll be creating and sharing some fun files with you a few times a month so you’ll want to make sure you stop by often to see what the new designs are. I’ll also be creating tutorials to teach you how to create with your Cricut cutting machine along with all kinds of handy PRO TIPS.

Don’t forget, here is the PNG file that you may download to create your own DIY T-shirt with my Salty but Super Sweet design… Here is the download file for the Salty but Super Sweet tee. This is for personal use only please.

It’s time to get creating, go grab your Cricut and let’s get our creative juices flowing!

Salty but Still Super Sweet DIY Tee with Cricut Iron-On Rose Gold Foil

Disclaimer – I am a proud member of the Cricut team and look forward to sharing my experiences with you every month. As always, I will never share with you a product that I don’t absolutely LOVE and use often in my everyday life. This post does contain affiliate links and I am paid to cover my time and materials when creating these posts.

How to Add Text to an Image // ViDEO Tutorial

2 · Mar 7, 2013 · 17 Comments

How to add text to an image // Last week, I asked if anyone would be interested in learning more photo tips and tricks… You all answered with an astounding YES!! The number one question was… How do I add images to my text? With this Pinterest world we live in, knowing some basic graphic design really couldn't hurt, so I put together this meaty post to shed a little light on how to add text to your images. There's a lot to cover so I'm just going to jump right in…

how to add text to your images

Why Add Text to Images

When I'm beginning to craft a post, I think of it as pulling together a layout for a magazine article. I don't want it to look just like a blog post, I want it to catch the readers eye and pull them in. I want tickle their visual fancy along with providing some valuable information as well. Think about it… We eat and live with our eyes. If your images aren't appetizing, no one is going to partake of what you have to offer.  With the explosion of Pinterest having visual appetizing images in your posts is even more important these days. You need to grab your readers with your best photo at the top of your post with a headline right on the images telling your reader exactly what that post is about. That means we all need to be not only photographer, writer, editor, creative director and now graphic designer on all of our work.  

How to Add Text to Images with Photoshop Elements

Now you've realized the importance of adding text to your images, but how do you accomplish that? What program will you use? There are many different options at every price point. You can invest in Adobe Illustrator or Photoshop at the high end. Both amazing products that are super powerful, but with a high learning curve. You can go for the free option with online program like PicMonkey. They work alright, but are pretty basic. I tend to go with the middle of the road with Adobe Photoshop Elements.  It's a very affordable program with many of the bells and whistles of Photoshop, but without the $700 Photoshop price tag. You can get Photoshop Elements for $100 so it's not too bad. Plus you are getting a pretty decent photo editor for beginning photographers.

I've made a video for you guys on how I add text to my photos using Photoshop Elements…

What Fonts to Use

Now, that you've learned how to add text and other design elements to your images, what fonts should you use? Your font choices are more important that you know. Using old and out of date fonts is like installing an avocado green toilet in your fancy newly remodeled cottage white bathroom. It's just a bad design idea. Pay attention to current trends. Remember, the way you style your photos are a big part of your brand. Take the time to make good font and design element selections. 

Here are a few of my favorite fonts right now. I tend to stay pretty simple and stick to just a few standard fonts. That way when people see my photos, they know… "that photo is from WhipperBerry."

WhipperBerry's Favorite Fonts

ostrich sans // learning curve // amatic // doris day // league gothic // modern no.20 // helvetica neue ultra light // reklame script // thirsty rough

Most of these fonts are free. You can download a free demo of Reklame Script that can get you by, and Thirsty Rough is $5, not too bad. 

Where to Find Good Brushes

My go to gal for graphic elements is Rhonna Farrer the creator of Rhonna Designs. I have been a HUGE fan of her for some time. She has some amazing kits that you can purchase and then use to your hearts content. They come in a couple of different formats, so if brushes intimidate you, you can use the  png format. Here is the kit that I used for this post… InstaPop!

POPPREVIEWINSTA-400x400

Rhonna has a ton of fun kits, so you should go check them out. 

There you have it… How I add text and graphics to my images. If you have any questions, let me know. I would be happy to help! Leave a comment or email me, heather (at) whipperberry (dot) com and I can see what I can do.

Primary Sidebar

Heather from Whipperberry
Hello... my name is Heather and I'm the creator of WhipperBerry a creative lifestyle blog packed full of great recipes and creative ideas for your home and family. I find I am happiest when I'm living a creative life and I love to share what I've been up to along the way... Come explore, my hope is that you'll leave inspired!

Footer

  • Privacy Policy
  • Crafts
  • Food
  • Gifts
  • Holidays
  • Home
  • Mom Life
  • Recipes
  • Travel

Copyright © 2026 · Seasoned Pro